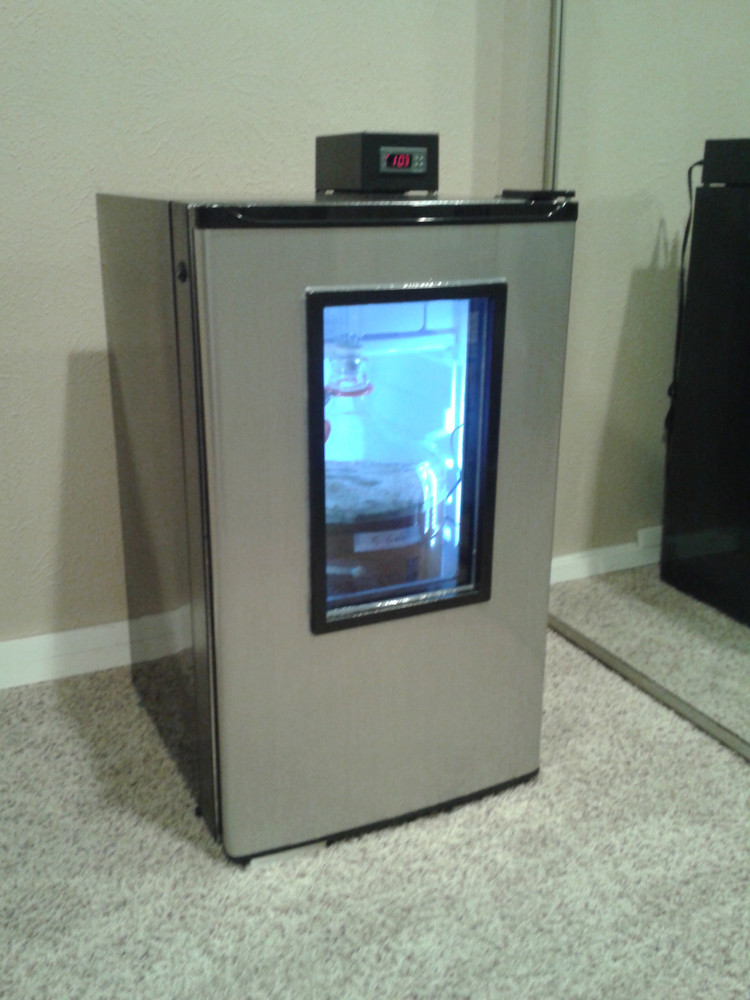
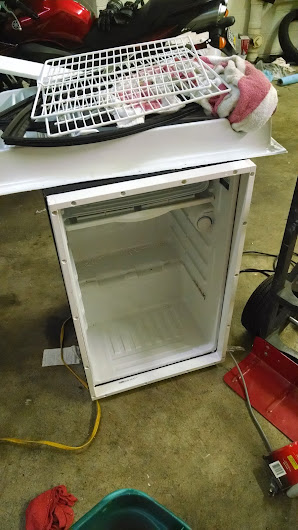
My Fermentation Chamber Build

Homebrew Talk - Beer, Wine, Mead, & Cider Brewing Discussion Forum

Help Support Homebrew Talk - Beer, Wine, Mead, & Cider Brewing Discussion Forum:

Dave_K

Well-Known Member
Joined
Oct 10, 2012
Messages
101
Reaction score
35
Location
Dallas
First off, let me introduce myself. My name is Dave and have been brewing for 5-6 years now. Still fairly new to this site, but I am always here using it as a resource for everything brewing.

I've been meaning to post this build as a way to give back to the members on homebrewtalk. I've learned so much from this community and this fermentation chamber was largely inspired by the DIY forums here.

Things I wanted in a fermentation chamber: It had to be able to maintain cold enough temperatures to start making lagers, It needed to be a front opening chamber, and it needed to be cheap, but pretty.

After a lot of research and hunting, I found a Magic Chef 3.5 cu. ft. mini fridge on sale at Home Depot for $97. Had pretty good reviews compared to most of the more pricey mini fridges I researched, so I jumped on it.
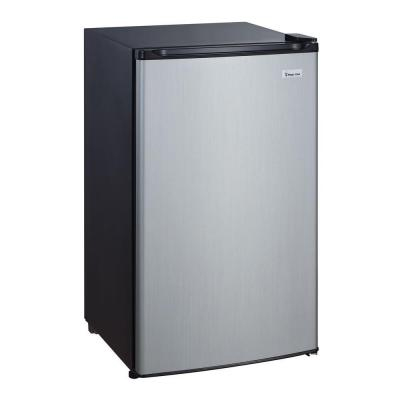
MzLGnGJ.jpg


Step 1: Get rid of the door shelving.
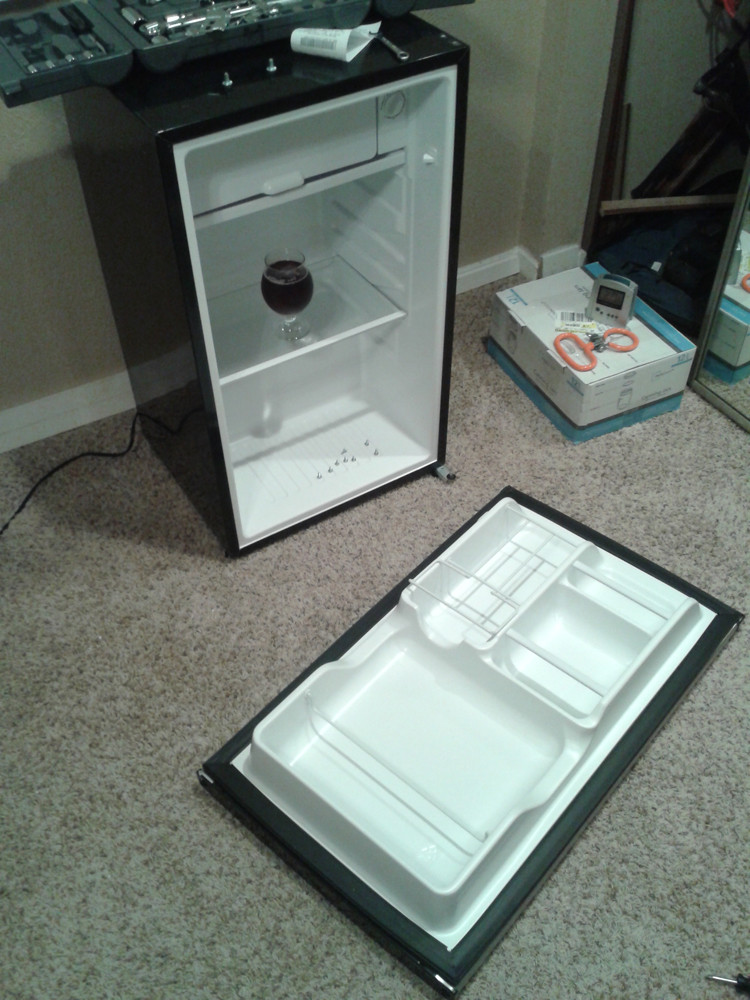
vTLAYeo.jpg

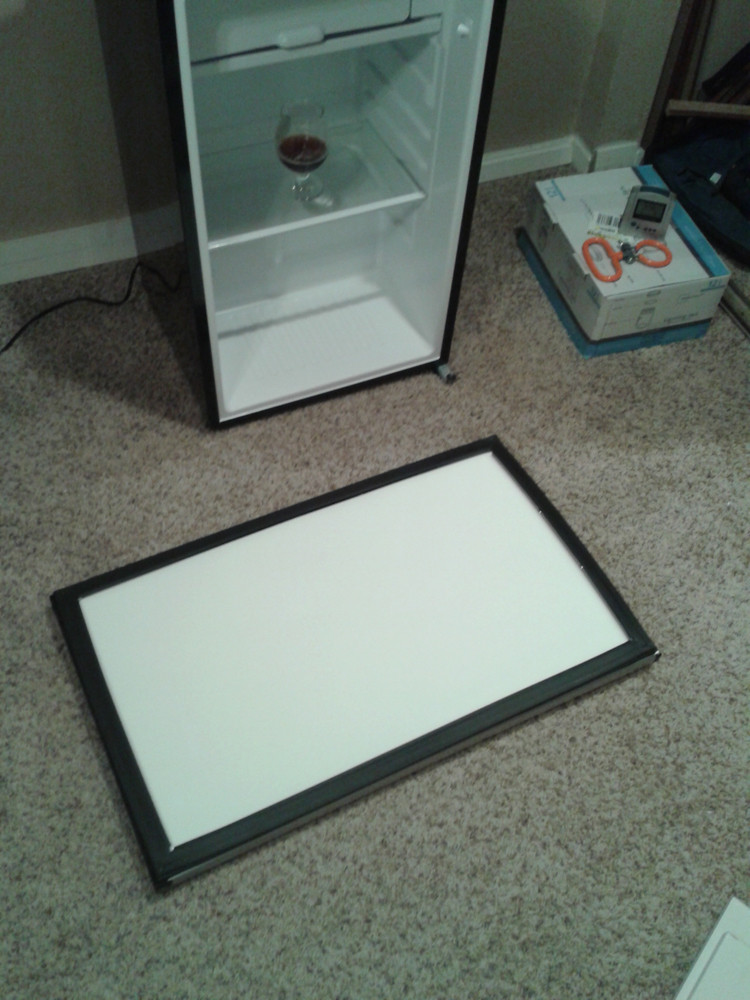
Found a 2'x4' piece of marker board to replace the shelving and cover the foam interior.
siicx0e.jpg


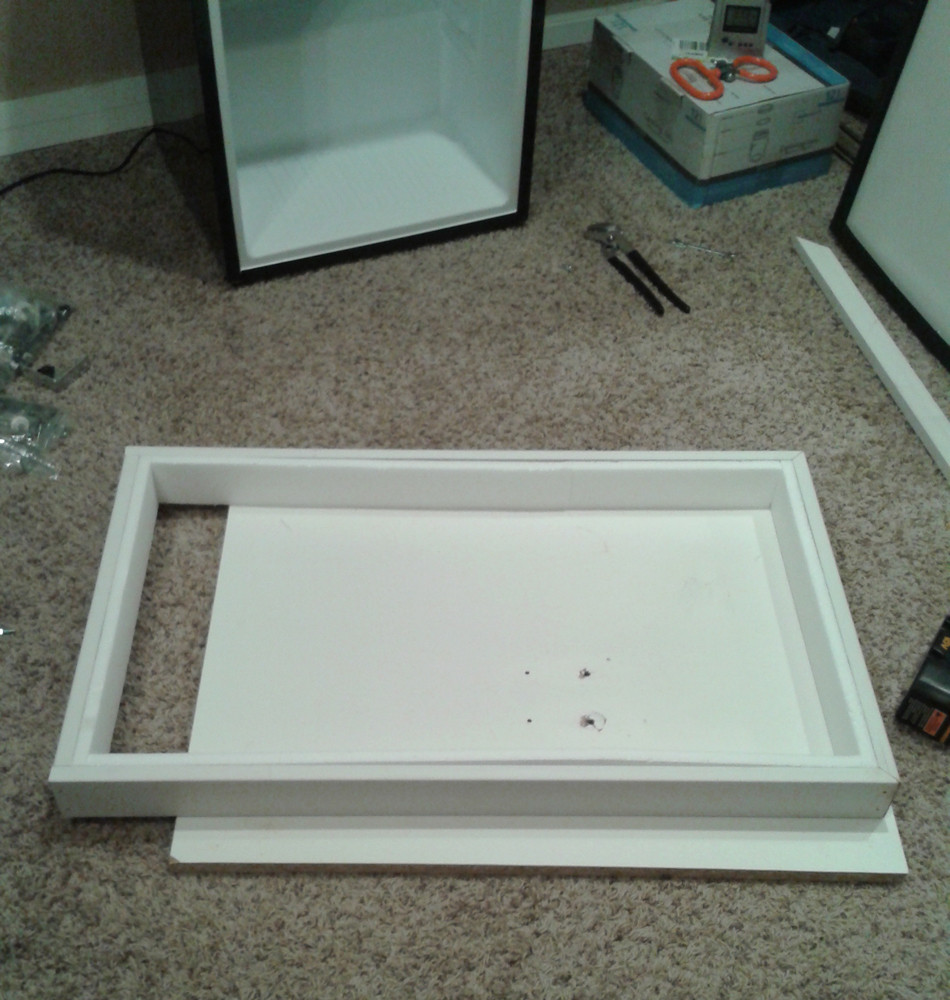
Step 2: Add a collar to the front of the fridge to increase it's depth to accommodate my carboy.
I framed it out with some cheap wood. Then, using the foam sheets from the fridge packaging I lined it along the inside edge as some impromptu insulating.
Knc2HHk.jpg

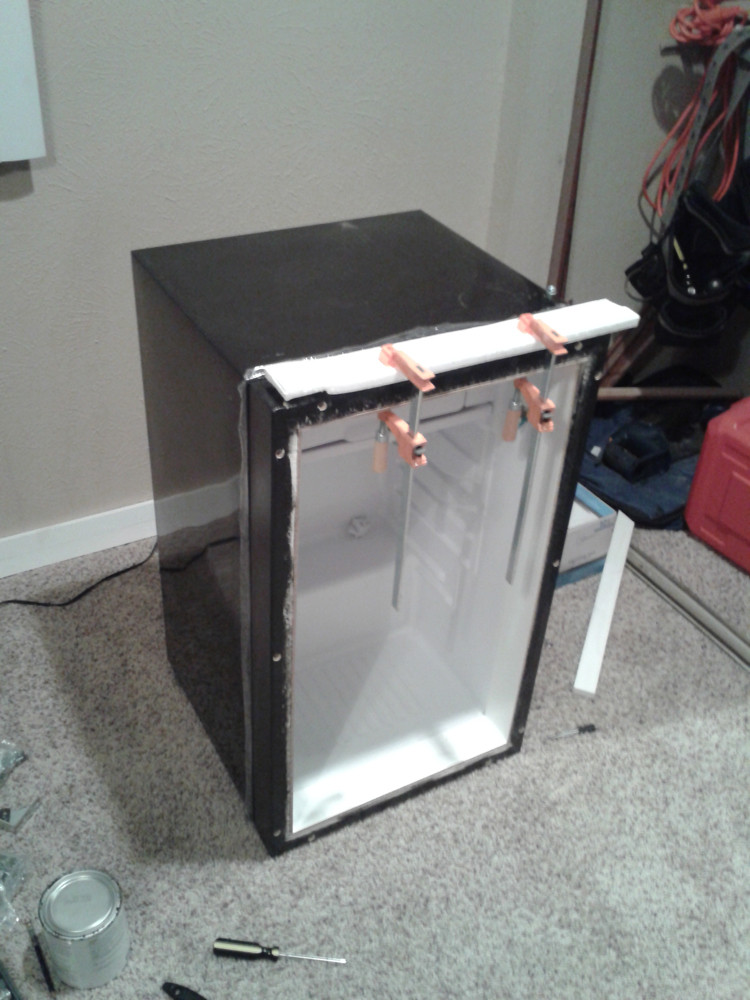
I mounted it with weather proof silicon caulk and some screws. (I knew I was taking a risk with the screws as I don't know the location of the lines in the fridge, but they were only penetrating the front metal paneling about a quarter inch and luckily didn't hit anything). I lined the collar interior with some marker board left over from the door and sealed it all up with more caulk.
slNk1YA.jpg

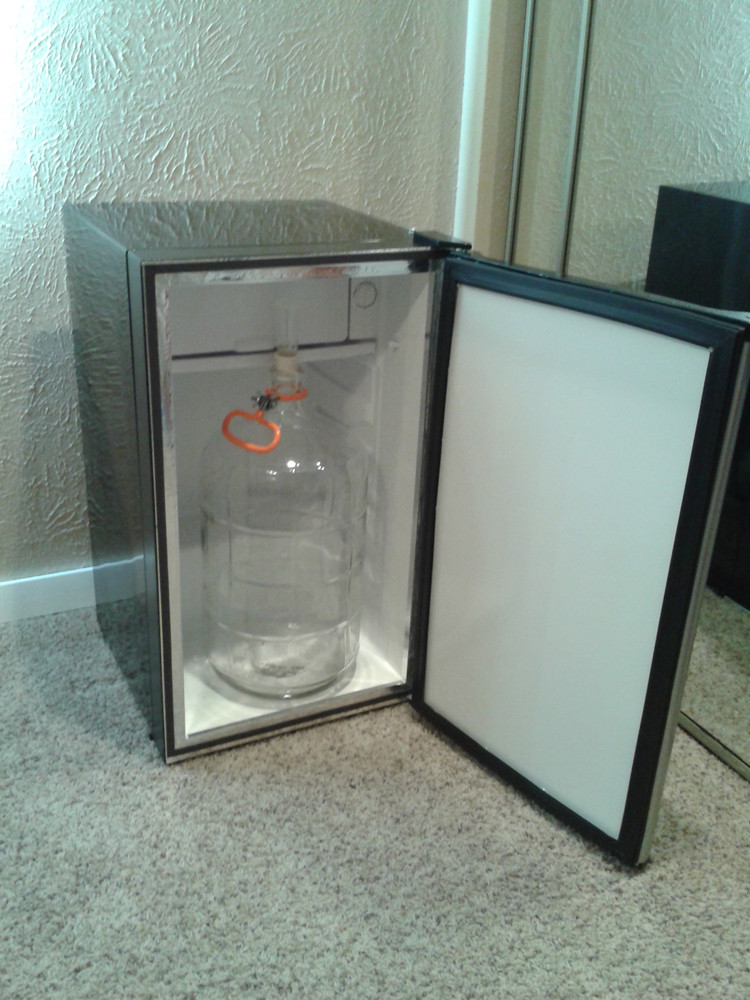
Further sealed the edge with some aluminum tape. Added some magnetic strip to hold the door. Remount the door, and test the perfect fit of my carboy.
vz1EALO.jpg

Add a STC-1000 controller and done... Right?
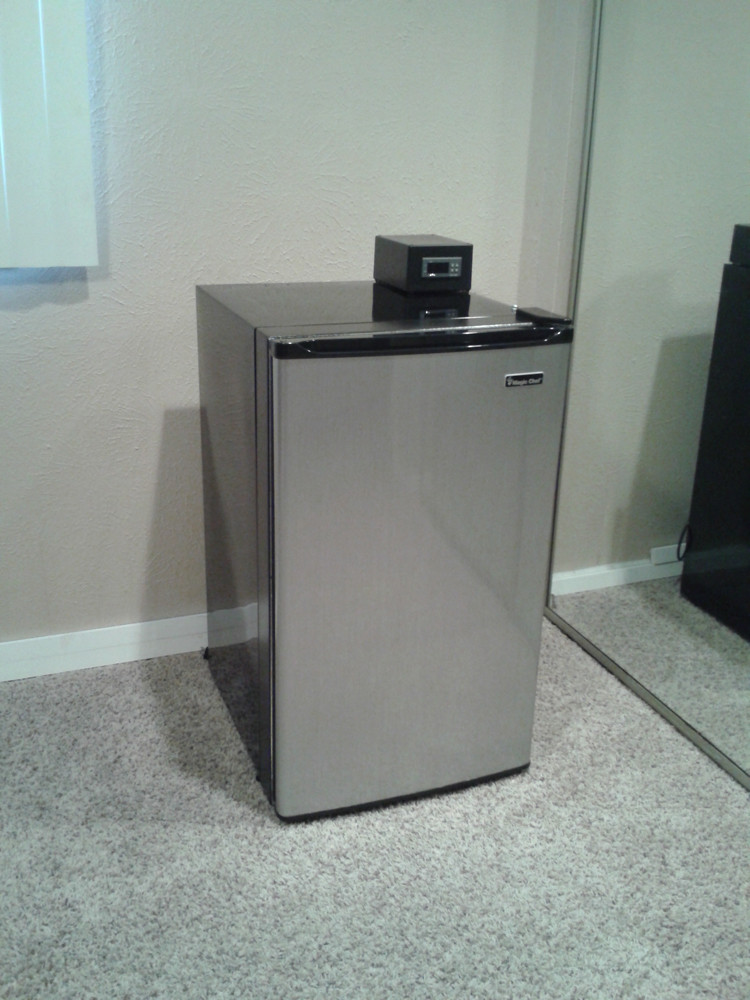
18MsWjG.jpg


...nope

Step 3: Window? I really like the idea if having a glass door like on those wine chiller fridges, but those fridges are expensive and won't hit lagering temps.
I had a crazy idea though. After everything was assembled, I was looking at the useless glass shelves that came in the fridge and thought, "I can make a window with that."
There was wood left over from the collar, so I made a frame for my double pane window.
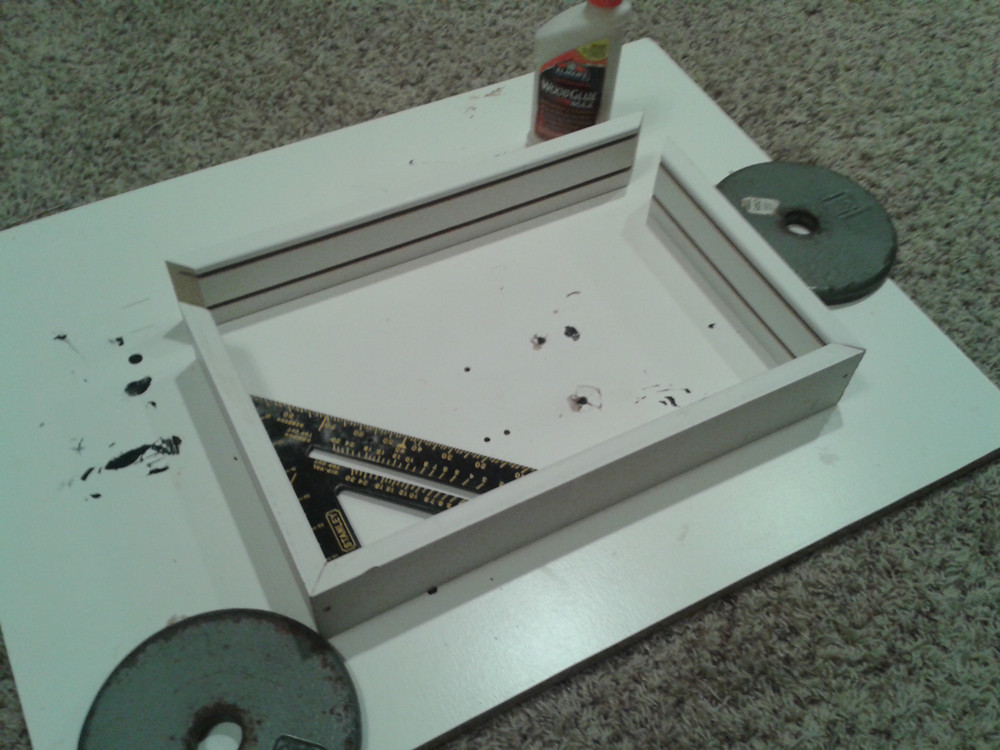
S5ws8j5.jpg

With some cheap headlight tint I coated the glass to help keep light out. I shoved them in my window frame and sealed it all up.
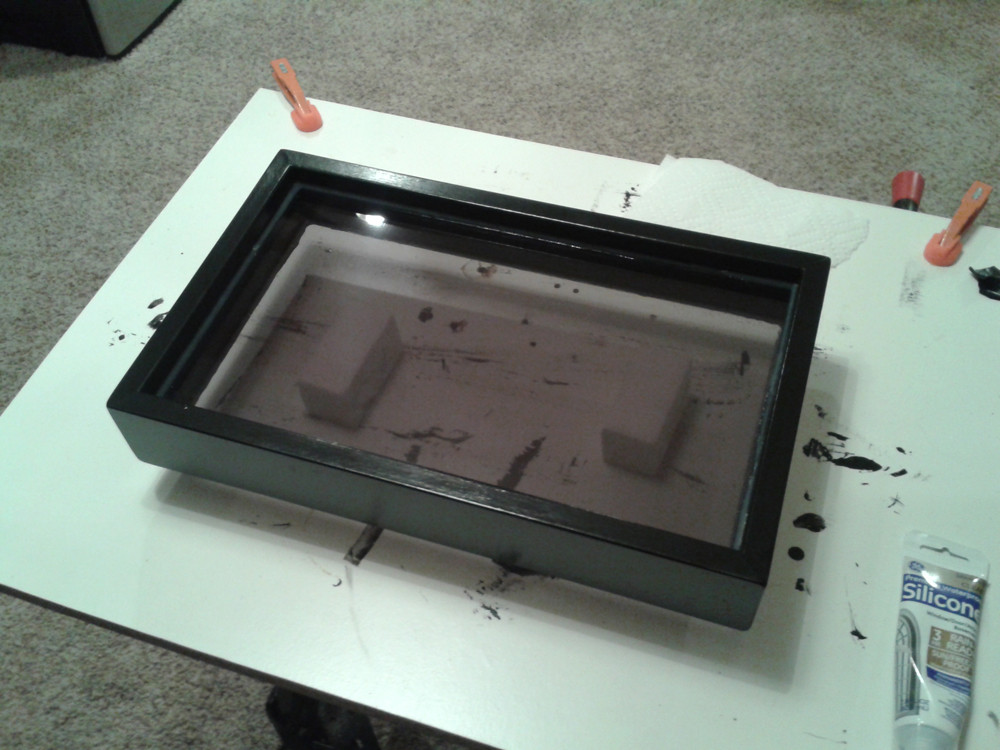
pXLuVUu.jpg

Next was to cut a BIG hole in my door. I only had one shot at this so it was pretty nerve wracking, but it ended up being easier than expected.
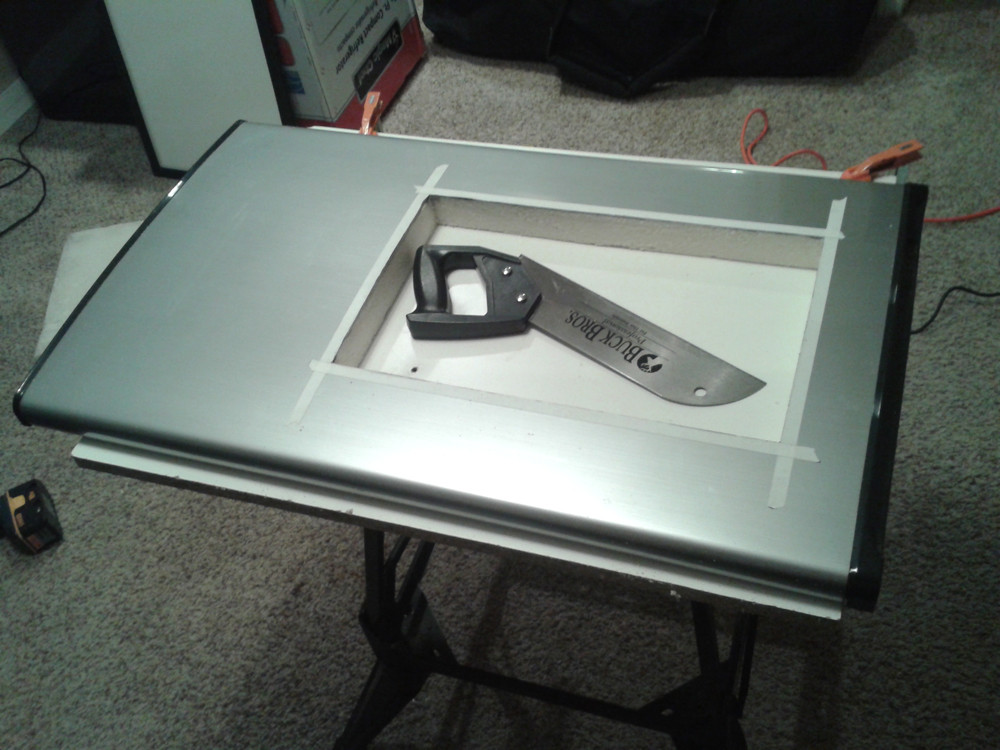
KWql0VG.jpg

Everything mounted and sealed with more silicon caulk.
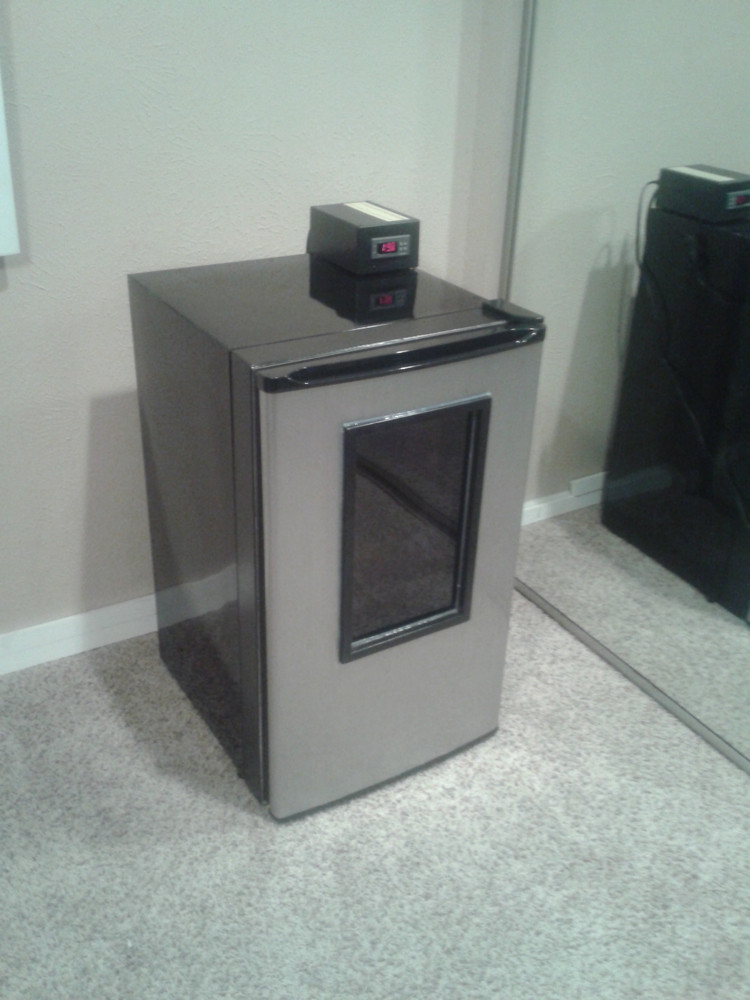
A1V5gOX.jpg


Not too shabby, but what good is a window you can't see through?

Step 4: Light.
I found some weather proof LED strips meant to "pimp your ride", and figured they were way better suited for my fermentation chamber.
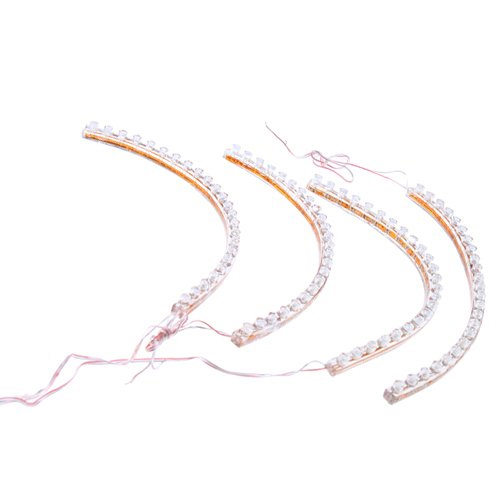
81jBUf9.jpg

Wired them up to an old 12v adapter I had and an on/off switch.
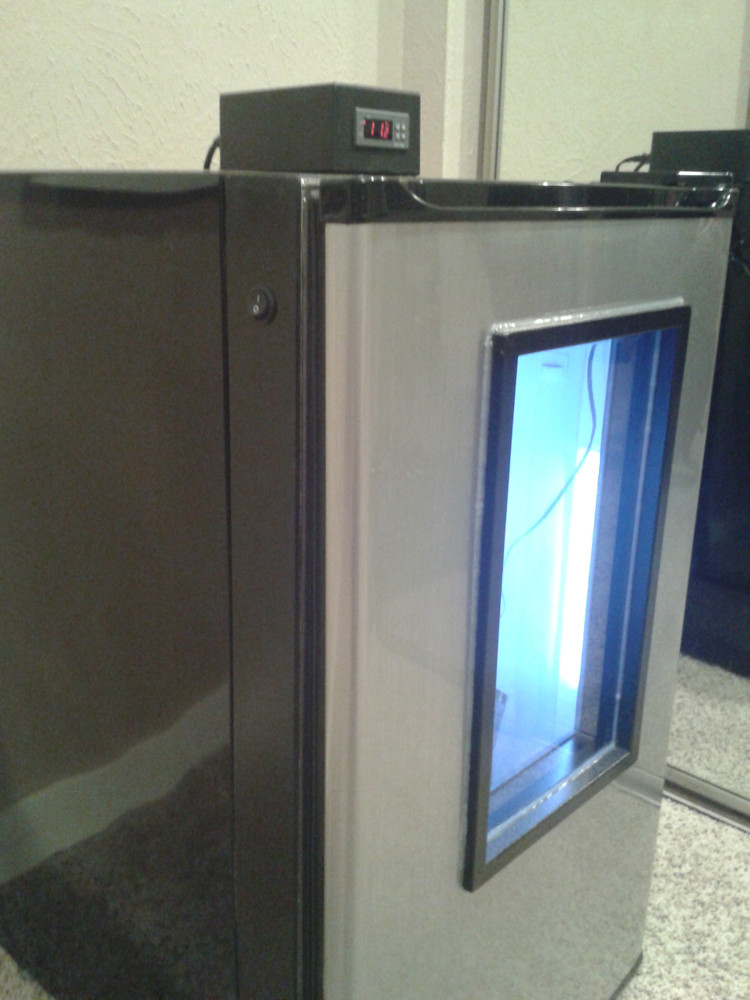
MxvArHE.jpg

And that's it!
eWGLKPn.jpg


The whole thing, including the STC-1000 temperature controller build cost me under $200. Holds temperature perfectly, and I'm very happy to say my first lager was a success.
I hope sharing this serves to inspire people as I have been by these forums.
 

nktsvls

Member
Joined
Jan 30, 2014
Messages
23
Reaction score
2
This is awesome, the re-purposed glass shelve windows are a brilliant idea. I might have to do this.
 

pogden

Well-Known Member
Joined
Dec 30, 2011
Messages
107
Reaction score
14
Location
Phoenix
Very nice, Dave. Your build is a fine example of "feature creep" gone right!
 
OP
OP
D

Dave_K

Well-Known Member
Joined
Oct 10, 2012
Messages
101
Reaction score
35
Location
Dallas
This is awesome, the re-purposed glass shelve windows are a brilliant idea. I might have to do this.

Thanks nktsvls! Feel free to steal the idea. It was definitely the trickiest part of the build, but it worked out great! I love being able to monitor my fermentation without having to open the door and lose the cold air each time.
 
OP
OP
D

Dave_K

Well-Known Member
Joined
Oct 10, 2012
Messages
101
Reaction score
35
Location
Dallas
Very nice, Dave. Your build is a fine example of "feature creep" gone right!

I had to look up "feature creep." I never heard that term before, but now that I know what it means I would have to agree. And I'll take that as a compliment!
Now you got me wondering if there's any other feature I can add to it... hmmm
 

fuxorfly

Active Member
Joined
Mar 19, 2014
Messages
37
Reaction score
7
Really nice work. I've got the same fridge (purchased several years ago, before I was brewing) and was wondering what to do with it since nothing useful will fit into it stock. How wide of a collar did you have to add to it to get the carboy to fit in? How big is the carboy as well?
 

beernbourbon

Supporting Member
HBT Supporter
Joined
Jan 30, 2013
Messages
1,779
Reaction score
439
Location
Loveland
Quite Nice!! :rockin:
I'm not afraid to tackle 'pert near any DIY project around the house, but most of the ones here seem a tad intimidating for some reason. Then I see this, step by step narrative and pics..... I think I might be able to do this one!!
I can see it now, purchasing agents at HD are gonna be like "what the hell is with the sudden run on MC mini fridges?"
Thanks, Dave!!!
 
OP
OP
D

Dave_K

Well-Known Member
Joined
Oct 10, 2012
Messages
101
Reaction score
35
Location
Dallas
Really nice work. I've got the same fridge (purchased several years ago, before I was brewing) and was wondering what to do with it since nothing useful will fit into it stock. How wide of a collar did you have to add to it to get the carboy to fit in? How big is the carboy as well?

That's reassuring to know this fridge has some longevity.
The collar is 2 1/2 inches and the carboy is 6 gallons. There's some extra room in there so I bet a 6 1/2 carboy would fit as well. It would definitely fit if you move the freezer coils.
 
OP
OP
D

Dave_K

Well-Known Member
Joined
Oct 10, 2012
Messages
101
Reaction score
35
Location
Dallas
Quite Nice!! :rockin:
I'm not afraid to tackle 'pert near any DIY project around the house, but most of the ones here seem a tad intimidating for some reason. Then I see this, step by step narrative and pics..... I think I might be able to do this one!!
I can see it now, purchasing agents at HD are gonna be like "what the hell is with the sudden run on MC mini fridges?"
Thanks, Dave!!!

If you're moderately handy with some tools this isn't too challenging. I'm by no means an advanced DIYer, but I like to fake it every now and then
 

NewBrewB

Supporting Member
HBT Supporter
Joined
Dec 26, 2009
Messages
807
Reaction score
47
Location
Pace
This is a great build. If I use this as a guide, I would have to fit at least 2 carboys.
Maybe the collar will be big enough to accommodate the window on the side though.
 
OP
OP
D

Dave_K

Well-Known Member
Joined
Oct 10, 2012
Messages
101
Reaction score
35
Location
Dallas
This is a great build. If I use this as a guide, I would have to fit at least 2 carboys.
Maybe the collar will be big enough to accommodate the window on the side though.

There are some other really cool builds on here where people have more than doubled the depth of mini fridges like this one. My concern with going that route was whether it would still be able to hit lager temps, and how much harder it would have to work to get there.
If you're just using it for ales i'm sure it'll work just fine.
 

30Bones

Well-Known Member
Joined
Aug 27, 2013
Messages
1,253
Reaction score
131
Location
Cedar Rapids
Great build, I am leaning on going this route over a keezer that takes up too much space. On the hunt for a mini fridge now and have a temp controller on the way. I won't build one this nice, just a frame to make a BMB fit inside. Looks like you used 1x3's or 1x4's for your frame?
 
OP
OP
D

Dave_K

Well-Known Member
Joined
Oct 10, 2012
Messages
101
Reaction score
35
Location
Dallas
Looks like you used 1x3's or 1x4's for your frame?

Thanks bones. The frame was made with 1x3's... Which is more like 5/8ths x 2-1/2, but that was all I needed for this particular fridge. Others may vary. Good luck on your build!
 

bberg

Well-Known Member
Joined
Jan 28, 2014
Messages
321
Reaction score
45
Location
New Orleans
Thanks bones. The frame was made with 1x3's... Which is more like 5/8ths x 2-1/2, but that was all I needed for this particular fridge. Others may vary. Good luck on your build!

I'm going to take measurements this weekend. Super stoked... And super jealous about the glass shelf! My fridge came with metal shelving.

Nice job mate!
 
OP
OP
D

Dave_K

Well-Known Member
Joined
Oct 10, 2012
Messages
101
Reaction score
35
Location
Dallas
I'm going to take measurements this weekend. Super stoked... And super jealous about the glass shelf! My fridge came with metal shelving.

Nice job mate!

Yeah... metal shelving wouldn't make a good window. I was actually thinking my fridge had some really cheaply made shelves until the window idea came to me.
I love having a window. It's a great feature, but you can ferment just fine without it.
 

bberg

Well-Known Member
Joined
Jan 28, 2014
Messages
321
Reaction score
45
Location
New Orleans
Yeah... metal shelving wouldn't make a good window. I was actually thinking my fridge had some really cheaply made shelves until the window idea came to me.
I love having a window. It's a great feature, but you can ferment just fine without it.

Alrighty,so i was in heaven running around the blue lumber store.... and I have some questions..

I obviously have a different fridge and have yet to take apart the door... but if I don't plan on replacing the shelves with a 2x4 piece of whatever... will it be fine? Did you have a table saw or was the foam easy enough to cut with a blade?
 

ClaudiusB

Well-Known Member
Joined
Dec 30, 2007
Messages
1,560
Reaction score
627
Location
El Paso
I'm going to take measurements this weekend. Super stoked... And super jealous about the glass shelf! My fridge came with metal shelving.
Make the window out of polycarbonate.
I turned a cube fridge into an incubator a few years ago, used two 1/4" polycarbonate panels.
The door shelfs I replaced with 1/8" textured ABS sheet.
The foam was cut with a hacksaw blade.

Cheers,
ClaudiusB

IncubatorFinished_View_SM.jpg


Controls.jpg


100_4394.jpg


ABS_&_Window_Installed.jpg


Incubator_Stir-Plates_SM.jpg


100_3091.jpg


Fridge_Convertion_1 (19).jpg
 

CarolynSowell

Member
Joined
Jun 3, 2014
Messages
11
Reaction score
0
First off, let me introduce myself. My name is Dave and have been brewing for 5-6 years now. Still fairly new to this site, but I am always here using it as a resource for everything brewing.

I've been meaning to post this build as a way to give back to the members on homebrewtalk. I've learned so much from this community and this fermentation chamber was largely inspired by the DIY forums here.

Things I wanted in a fermentation chamber: It had to be able to maintain cold enough temperatures to start making lagers, It needed to be a front opening chamber, and it needed to be cheap, but pretty.

After a lot of research and hunting, I found a Magic Chef 3.5 cu. ft. mini fridge on sale at Home Depot for $97. Had pretty good reviews compared to most of the more pricey mini fridges I researched, so I jumped on it.
MzLGnGJ.jpg


Step 1: Get rid of the door shelving.
vTLAYeo.jpg

Found a 2'x4' piece of marker board to replace the shelving and cover the foam interior.
siicx0e.jpg


Step 2: Add a collar to the front of the fridge to increase it's depth to accommodate my carboy.
I framed it out with some cheap wood. Then, using the foam sheets from the fridge packaging I lined it along the inside edge as some impromptu insulating.
Knc2HHk.jpg

I mounted it with weather proof silicon caulk and some screws. (I knew I was taking a risk with the screws as I don't know the location of the lines in the fridge, but they were only penetrating the front metal paneling about a quarter inch and luckily didn't hit anything). I lined the collar interior with some marker board left over from the door and sealed it all up with more caulk.
slNk1YA.jpg

Further sealed the edge with some aluminum tape. Added some magnetic strip to hold the door. Remount the door, and test the perfect fit of my carboy.
vz1EALO.jpg

Add a STC-1000 controller and done... Right?
18MsWjG.jpg


...nope

Step 3: Window? I really like the idea if having a glass door like on those wine chiller fridges, but those fridges are expensive and won't hit lagering temps.
I had a crazy idea though. After everything was assembled, I was looking at the useless glass shelves that came in the fridge and thought, "I can make a window with that."
There was wood left over from the collar, so I made a frame for my double pane window.
S5ws8j5.jpg

With some cheap headlight tint I coated the glass to help keep light out. I shoved them in my window frame and sealed it all up.
pXLuVUu.jpg

Next was to cut a BIG hole in my door. I only had one shot at this so it was pretty nerve wracking, but it ended up being easier than expected.
KWql0VG.jpg

Everything mounted and sealed with more silicon caulk.
A1V5gOX.jpg


Not too shabby, but what good is a window you can't see through?

Step 4: Light.
I found some weather proof LED strips meant to "pimp your ride", and figured they were way better suited for my fermentation chamber.
81jBUf9.jpg

Wired them up to an old 12v adapter I had and an on/off switch.
MxvArHE.jpg

And that's it!
eWGLKPn.jpg


The whole thing, including the STC-1000 temperature controller build cost me under $200. Holds temperature perfectly, and I'm very happy to say my first lager was a success.
I hope sharing this serves to inspire people as I have been by these forums.

Wow mind blowing job!!:ban:
 
OP
OP
D

Dave_K

Well-Known Member
Joined
Oct 10, 2012
Messages
101
Reaction score
35
Location
Dallas
Alrighty,so i was in heaven running around the blue lumber store.... and I have some questions..

I obviously have a different fridge and have yet to take apart the door... but if I don't plan on replacing the shelves with a 2x4 piece of whatever... will it be fine? Did you have a table saw or was the foam easy enough to cut with a blade?

On my door, the foam didn't extend into the shelving. The shelves were just a plastic shell screwed on to the door. Once it was removed the foam interior was already pretty flat. I was able to put the marker board directly over it without further modification. Some models do have foam throughout the shelving on the door, so you'll have to open it up and see what you have.

The foam is extremely easy to cut though. In my original post, in the image where I cut the hole for my window, you'll see the hand saw I used. That saw cut through the foam like butter and cut it really clean.

Leaving the foam exposed would probably be fine. I've seen lots of people do that on kegerator builds. You may get a little better insulation by covering, but probably very minimal difference. My concern with the exposed foam is moisture getting into it and possibly growing mold. Can't say if this is a legitimate concern from experience though.
 
OP
OP
D

Dave_K

Well-Known Member
Joined
Oct 10, 2012
Messages
101
Reaction score
35
Location
Dallas
Make the window out of polycarbonate.
I turned a cube fridge into an incubator a few years ago, used two 1/4" polycarbonate panels.
The door shelfs I replaced with 1/8" textured ABS sheet.
The foam was cut with a hacksaw blade.

Cheers,
ClaudiusB

Nice job on the incubator. Good alternative for the window if the shelving isn't an option. Thanks for sharing!
 

bberg

Well-Known Member
Joined
Jan 28, 2014
Messages
321
Reaction score
45
Location
New Orleans
Step one complete. I need to do some work to get the door remounted and I forgot to get magnetic strips at the store today... long day, time for a shower and bed. Thanks again for the idea! I love it so far.

IMG_20140610_232232758.jpg
 
OP
OP
D

Dave_K

Well-Known Member
Joined
Oct 10, 2012
Messages
101
Reaction score
35
Location
Dallas
Step one complete. I need to do some work to get the door remounted and I forgot to get magnetic strips at the store today... long day, time for a shower and bed. Thanks again for the idea! I love it so far.

Looking good! Glad you found this useful.

Fyi, in case you do intend to find something to add a window to the door, make sure the door is mounted really solid. My window added a lot of weight to the door which wasn't something I originally planned for. I reinforce the mount with some better screws as a precaution.
 

bberg

Well-Known Member
Joined
Jan 28, 2014
Messages
321
Reaction score
45
Location
New Orleans
Looking good! Glad you found this useful.

Fyi, in case you do intend to find something to add a window to the door, make sure the door is mounted really solid. My window added a lot of weight to the door which wasn't something I originally planned for. I reinforce the mount with some better screws as a precaution.

Thanks man. That's my next step... Not sure how I'll be mounting the door yet. Saturday night with some beers will do the job!
 

bberg

Well-Known Member
Joined
Jan 28, 2014
Messages
321
Reaction score
45
Location
New Orleans
Quick follow up! Been using the chamber for 2 brews down here in Louisiana, works like a champ! Need to look into how I can get a more accurate "beer temperature," but I am more than impressed with the improvement in my beers!

I hope this simple concept gets out there to some of the new guys! Thanks again Dave_K
 

NewBrewB

Supporting Member
HBT Supporter
Joined
Dec 26, 2009
Messages
807
Reaction score
47
Location
Pace
Quick follow up! Been using the chamber for 2 brews down here in Louisiana, works like a champ! Need to look into how I can get a more accurate "beer temperature," but I am more than impressed with the improvement in my beers!

I hope this simple concept gets out there to some of the new guys! Thanks again Dave_K

Have you tried submerging the temp probe in a pickle jar full of sanitizing solution?
 

bberg

Well-Known Member
Joined
Jan 28, 2014
Messages
321
Reaction score
45
Location
New Orleans
Have you tried submerging the temp probe in a pickle jar full of sanitizing solution?

Well, I'm more worried about the rise in temperature of the wort from the yeast activities. Currently, I just read the air temperature of the fridge.

Isn't there an issue with ruining the probe that way?

I probably would be better off just attaching my probe to my ferment bucket and insulating the outside of the probe (to separate the reading of the air), but i'm too "busy" (lazy).:cross:
 
OP
OP
D

Dave_K

Well-Known Member
Joined
Oct 10, 2012
Messages
101
Reaction score
35
Location
Dallas
Quick follow up! Been using the chamber for 2 brews down here in Louisiana, works like a champ! Need to look into how I can get a more accurate "beer temperature," but I am more than impressed with the improvement in my beers!

I hope this simple concept gets out there to some of the new guys! Thanks again Dave_K


Awesome! Glad it worked out for you. Any pictures of the final Build?
I kinda want to build another so I can have 2 side by side!

For mine, I just strap the probe to the side of the carboy with some insulation over it. That seems to work pretty good for me.
If you're using the stc1000, I'm fairly certain the probe can be submerged as it's intended use is for aquariums.
Submerging the probe in a jar as NewBrewB suggested would give you a more stable reading than just sitting it inside the fridge, but definitely not a good representation of the fermenter temperature.

You went through the trouble of building this thing and now you're too lazy to strap the probe to the side of your bucket?? lol
 

bberg

Well-Known Member
Joined
Jan 28, 2014
Messages
321
Reaction score
45
Location
New Orleans
Awesome! Glad it worked out for you. Any pictures of the final Build?
I kinda want to build another so I can have 2 side by side!

For mine, I just strap the probe to the side of the carboy with some insulation over it. That seems to work pretty good for me.
If you're using the stc1000, I'm fairly certain the probe can be submerged as it's intended use is for aquariums.
Submerging the probe in a jar as NewBrewB suggested would give you a more stable reading than just sitting it inside the fridge, but definitely not a good representation of the fermenter temperature.

You went through the trouble of building this thing and now you're too lazy to strap the probe to the side of your bucket?? lol

You win! I transferred my 2 gallons of I have apple cider and left over yeast... let's make cider! to the secondaries! As you can see, I even used insulation-ish! Thanks for all the help, super content with the outcome!

PS- Like the motorcycle safety sign as a moisture shield from the door? I know i do!:mug: Time to enjoy my beer!

IMG_20141021_213920.jpg


IMG_20141021_213311978.jpg


IMG_20141021_213325842.jpg


IMG_20141021_213710648.jpg


IMG_20141021_215821341.jpg
 
OP
OP
D

Dave_K

Well-Known Member
Joined
Oct 10, 2012
Messages
101
Reaction score
35
Location
Dallas

basisforaday

Well-Known Member
Joined
Oct 11, 2009
Messages
165
Reaction score
4
Location
Raleigh, NC
Nice. So far this fridge is working great for me. Are you planing to modify it? Let me know if you have any questions, or if you come up with something better definitely post about it here!

Yeah, I'm in the process of modifying it exactly like you did. It looks great and will hopefully turn out to be something i can keep out in my office rather that tucking away in a closet like my other fermentation chamber. I'm planning on using this one for at least the first week of any beer and then transferring to the other fermentation chamber, which is bigger, still temp controlled but only uses a fan and some buckets full of ice to bring down to temp, no heat. However, if I don't brew as much I'll just use this one full time on a brew. Also, love the idea of being able to lager as well! Great job again with the step by step instruction.

One question, where did you run your wires for your temp probes?
 

jbb3

Well-Known Member
Joined
Feb 1, 2014
Messages
1,162
Reaction score
311
Location
Atlanta
And that's it!
eWGLKPn.jpg


The whole thing, including the STC-1000 temperature controller build cost me under $200. Holds temperature perfectly, and I'm very happy to say my first lager was a success.
I hope sharing this serves to inspire people as I have been by these forums.

Very nice build! Clean sharp looking setup!! :mug:

I don't think I could put my chamber in the house you you did... ;)

Congrats!!
 

Latest posts

Top