• Please visit and share your knowledge at our sister communities:
  • If you have not, please join our official Homebrewing Facebook Group!

    Homebrewing Facebook Group

My eBIAB single-vessel build

Homebrew Talk

Help Support Homebrew Talk:

This site may earn a commission from merchant affiliate links, including eBay, Amazon, and others.

Ragtop232

Well-Known Member
Joined
Aug 19, 2012
Messages
102
Reaction score
21
Location
Charleston
I'll start this build thread out by saying I'm NOT a DIY'er and this system could probably be put together at half the price if you can or are willing to do all the work yourself. I had budgeted ~$2000.00 for the Braumeister 20L and really liked the concept of a single vessel brewery and the overall ease of the brew day with this unit. I was almost ready to pull the trigger, but I felt uncomfortable about the purchase. My number one concern was the proprietary parts and I was afraid if I experienced a malfunction, I would have to order the parts from Germany, if they were even available, at very high prices and long shipping delays. This was unacceptable to me.

So, I decided to use the money I had budgeted to put together a system similar to the Braumeister but with standardized parts that would be readily available if I needed to replace them. This will also be an eBIAB system, as I've formulated all my favorite recipes for this brewing style. Since I am not a DIY'er, everything must be sourced "ready to run". I only wanted to have to assemble the items to be ready to brew. I've done over 70 BIAB sessions and thought this style of brewing would fit nicely into my brewery plans.

Here are the goals I am trying to achieve with this build:
• Heavy Duty, all SS 15 Gal brew pot
• All Tri-Clamp SS fittings
• Wort Recirculation
• Automatic Temperature Control
• All Electric
• Single Vessel
• Adhere to the simplicity of BIAB

Updated 12/16/2012 Click Here for Latest Photos and Information
 
I have secured most of the components needed to complete my build and will try and itemize them with costs. Here's a brief rundown of the components used for the build. First was the kettle, after looking around, it was between Stout and Brewers Hardware. Both nice kettles, but I chose Brewers Hardware. The kettles are awesome and heavy duty, at 1.2mm thick. Derrin was very easy to work with and had no problems customizing my kettle. His welds are perfect with great service too. I highly recommend Brewers Hardware.

I wanted everything SS, so I purchased a SS convoluted counter flow chiller. I also purchased a SS two-shelf cart as my stand, its rated at ~700lbs. A chugger pump, 4500 ULWD foldback 240v heater element and 36 qt Bayou Classic SS perforated basket round out the kettle components. For temp control, I purchased from HighGravity their EBC II with 12ft cord and 4 prong GFCi plug as well as the Ranco FE610.

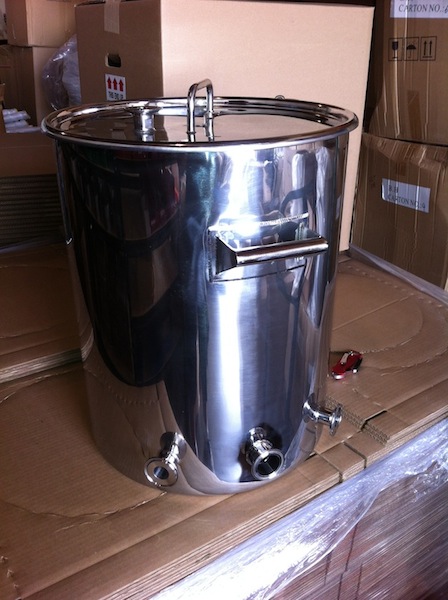
Here's a picture of the kettle just before shipping. As the build comes together, I'll post many more pictures.

Kettle.jpg
 
Itemized list of parts with costs:

Kettle:
1 Kettle $308.00
2 1" Ferrule $7.50
1 1.5" Ferrule $3.80
1 1.5" NPT $15.00
4 Custom Welds $100.00 (3 in the kettle, 1 in the lid @$25.00 ea)
10 1.5" Tri Clamps $60.00
2 1.5" Gasket $2.00
8 1" Gasket $8.00
2 1" Butterfly Valve $94.00
4 1.5" x 3/4 H-Barb $52.00
1 1.5" x 1/2 NPT $15.00
1 1" Pickup Tube $25.00
2 1.5" x 1/2 F NPT $30.00
1 6" Thermowell $29.00
25 FT Silicone Tubing $52.50
1 1.5" x 1" Elem Adpt $69.00
1 Shipping $46.52

Temperature Control:
1 EBC II $295.00
1 Addl 6' cord $12.00
1 FE610 Ranco $99.00 (prewired)
1 Shipping $9.99

Chugger Pump:
1 Chugger SS Center $145.00
1 Shipping $15.00

SS Counterflow Chiller
1 SS Convoluted CC $179.00
1 Shipping $14.00

Misc parts:
1 Camco 4500ULWD $20.79
1 Bayou CL SS Bskt $51.21
1 SS 2-shelf Cart $181.99

Grand Total for everything so far, including shipping is: $1940.30

If I have to add anything, I'll keep this list and prices updated.
 
Last edited by a moderator:
Here's how I anticipate brewing with my new system. First, all will be stationary on the SS cart, with the CCF chiller and chugger pump on the lower shelf. All components will be in line all the time. Coming from the brew kettle outlet to the CCF chiller to the chugger pump then to the top tri-clover in the kettle lid, recirculating constantly during the mash. Once mash out has been completed, the tri-clover will be taken off the lid and placed on the tangential inlet of the kettle. The bayou classic SS basket with bag/grains will be lifted and allowed to drain while turning up the electric element to boil. Recirculation will continue during the boil. Once the boil has completed and the electric element turned off, recirculation will continue into the tangential inlet while turning on cold tap water to the CCF chiller. Chilled wort will be recirculated back into the kettle constantly, creating a whirlpool until desired temp is reached in the kettle. Once ~70 degrees is achieved, let set for 15 minutes, then pump to SS Conical and pitch yeast.

These steps/plans are very much a rough draft and any input here would be very much welcomed.

Jim
 
Coming from the brew kettle outlet to the CCF chiller to the chugger pump ...
I'd suggest that you place the pump first in line so that there is less restriction on the pump input side. In other words, place the CFC after the pump.

Just saying.
 
Thanks P-J. I think you are right and I very much appreciate the input. Makes perfect sense and something I would not have thought of.

Jim
 
Here are some pictures of the components I've received so far:

Chugger SSC:

Chugger 1.jpg

Chugger SSC front:

Chugger 2.JPG

SS Convoluted CounterFlow Chiller:

CCFC.JPG

Ranco Temperature Controller:

Ranco.JPG

HighGravity EBC II

Temp Control.JPG

I will be adding more pictures as items arrive and as the build is completed.

Jim
 
I don't see how they do those custom welds for $25. What a deal. Almost makes me think I should sell my welder.
 
BrewHaas, I would say their margins are in the kettle and custom welding the ports in the kettle is @cost just as a customer (who bought the kettle from them) benefit.

Jim
 
Nice build, can't wait for the first brew day update. Cheers
 
Thanks for the link WroxBrew. I was talking with Derrin and Brewers Hardware, by the way this is where the kettle came from, and with the 3/4" barbs, he suggested just sliding the 1/2" ID silicone tubing, after heating up in hot water, over the barbs. I've ordered the 1/2 ID silicone tubing and if I find it to restrictive, I'll go the 3/4" ID route and use clamps on the barbs.

Jim

Interesting. I didn't think of that. I bought some 3/4 inch barbs, that tubing and have 2 of the same chuggers. I'll let you know how mine works out.
 
Here's how I anticipate brewing with my new system. First, all will be stationary on the SS cart, with the CCF chiller and chugger pump on the lower shelf. All components will be in line all the time. Coming from the brew kettle outlet to the CCF chiller to the chugger pump then to the top tri-clover in the kettle lid, recirculating constantly during the mash. Once mash out has been completed, the tri-clover will be taken off the lid and placed on the tangential inlet of the kettle. The bayou classic SS basket with bag/grains will be lifted and allowed to drain while turning up the electric element to boil. Recirculation will continue during the boil. Once the boil has completed and the electric element turned off, recirculation will continue into the tangential inlet while turning on cold tap water to the CCF chiller. Chilled wort will be recirculated back into the kettle constantly, creating a whirlpool until desired temp is reached in the kettle. Once ~70 degrees is achieved, let set for 15 minutes, then pump to SS Conical and pitch yeast.

These steps/plans are very much a rough draft and any input here would be very much welcomed.

Jim

Why would you recirculate during the entire boil?

Michael
 
I may need to reconsider that. All connections will be intact and with the single-vessel, removing the Tri-Clamp on the lid after mashing is complete and then putting it on the tangential inlet would be all that is required. My thinking here was if the recirculation wasn't continued during the boil, my lines would have unboiled wort, but thinking about that, turning off the pump during the boil and then starting the recirculation 15 minutes before flame-out would purge the lines of unboiled wort and be enough to sterilize the C-CFC. Any other thoughts on this? I'm just trying to stick with the KISS philosophy. :mug:

Jim
 
I'm going to post my problems and issues thread for my eBIAB system soon. One issue I ran into while recirculating during the mash was that at full open, the pump actually emptied the space under the basket and bag. I didn't notice and most likely dry fired the element for a while. Continued at a lower flow rate, basically a trickle.

Possible solutions are to use a coarser bag, or use the lower flow rate. Can't stop recirculating because I placed my temperature sensor inline after the kettle drain.

Just something to keep mind.

Edit: 9/11/2012 "recirculating during the boil" - mistake.
 
Notkevinc, I would be interested in the problems you've encountered so far. I've done some research and your issue with recirculation is the one thing that worry's me. I've got a few ideas, but will have to test once I get my system together. Here's what I think I'll try first. Inside the basket, I'll place the bag, but also place a coned SS false bottom in the bottom AFTER I put the bag in, this would not allow the bottom of the bag to clog and should aid in recirculation at better volumes by keeping the grain above the bag mesh. Again, this is just a theory right now and I'll have to wait to see if it actually works.

Jim
 
When you recirculate during your mash you don't want to be at WOT, I made that mistake as well and scorched a mash. (Ashtray Wit anyone?) Granted I was using HWD elements so I was probably asking for it. Now I recirculate pretty slowly and haven't had any issues, mash efficiency has stayed the same and I haven't run my kettle dry.
 
I'm going to post my problems and issues thread for my eBIAB system soon. One issue I ran into while recirculating during the boil was that at full open, the pump actually emptied the space under the basket and bag. I didn't notice and most likely dry fired the element for a while. Continued at a lower flow rate, basically a trickle.

Possible solutions are to use a coarser bag, or use the lower flow rate. Can't stop recirculating because I placed my temperature sensor inline after the kettle drain.

Just something to keep mind.

BTDT, got the t-shirt.

https://www.homebrewtalk.com/f170/single-vessel-biab-electric-build-275238/index3.html

My conclusion after months of testing?

"Update: I don't recirc any more once I have mashed in and stabilized temp; had a couple of burned batches. Best I can figure, the pump was drawing faster than the wort was flowing through the grain bed (even though it was cranked down to a mere trickle) causing some cavitation under the basket resulting in an air pocket around the element allowing the wort to scorch. Now I simply heat to strike temp, dough in, circulate until temp stabilizes, stick the lid on, throw a blanket over it, and come back in 90 minutes. Normally don't lose more that 2 degrees over the 90 minute mash and haven't had a burnt batch since switching to this method."

YMMV
 
thughes, recirculating constantly during the mash is a must for my system. I have a couple ideas if the bag/false-bottom do not work. I do think recirculating at 100% pump capacity is unrealistic, but if I can recirculate at about 1/2 gal per minute I think that would be perfect. A medium fine grind is what I'll be using as efficiency isn't my number one priority, so hopefully that will help in the recirculation.

Jim
 
Understood (being that your temp probe is external to the kettle). I have found that even very gentle recirculation will compact the grain bed (and create a very clear wort), it was suggested that I try adding rice hulls and using a coarser grind but I never got around to experimenting with that. Perhaps those ideas may work for you, keep us updated.

---Todd
 
I just received my Kettle and fittings today from Brewers Hardware. I'm really impressed with the Kettle, very heavy duty and well made.

First picture is the box, well packed and arrived from CA to WV without issue:

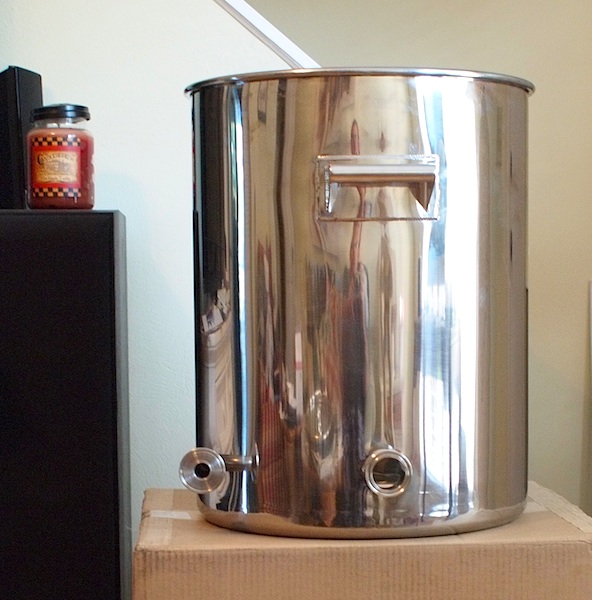
Second is the kettle Front, showing the main outlet and tangential inlet:

Last is the back of the kettle, middle is the where the 4500 element will go, on one side of the element will be the thermowell for the temp probe and the other side will be for the anode.

box.jpg


kettle front.jpg


kettle back.jpg
 
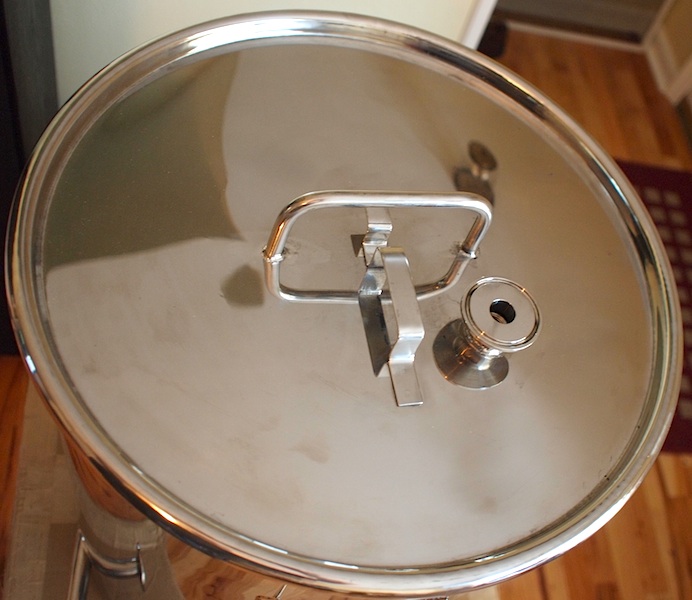
First photo here is the kettle lid with inlet for recirculation:

Second is the kettle lid holder in position:

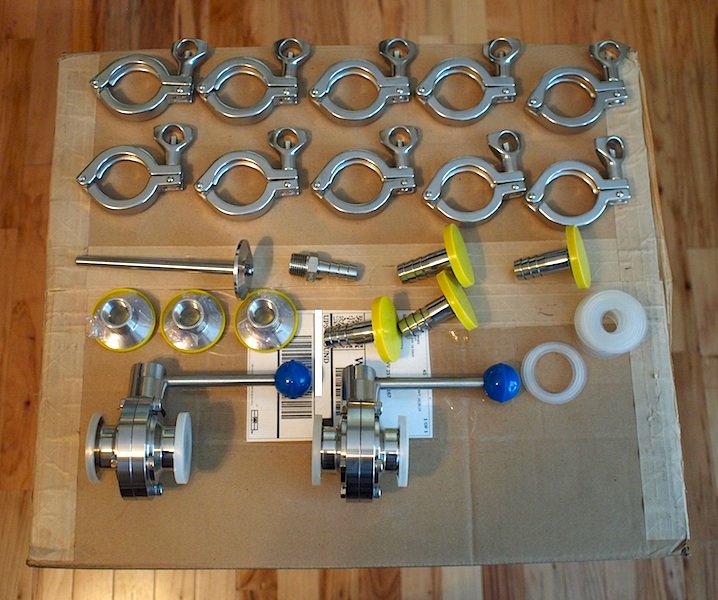
Last is the hardware and fittings to put the system together:

Kettle Lid.jpg


Kettle Lid Rest.jpg


Hardware.jpg
 
Really like the lid fitting. I don't quite understand the lid holder; seems like a tang on the inside is simpler and doesn't ever put your arms over the heat.
 
The clip is built on the outside of the lid, and I plan on hanging the lid on the side, keeping you from having to reach over a hot kettle. You are absolutely right, it would be better on the inside and wouldn't be as awkward to utilize. I'll see if the lighting is good enough to get the close ups.

Jim
 
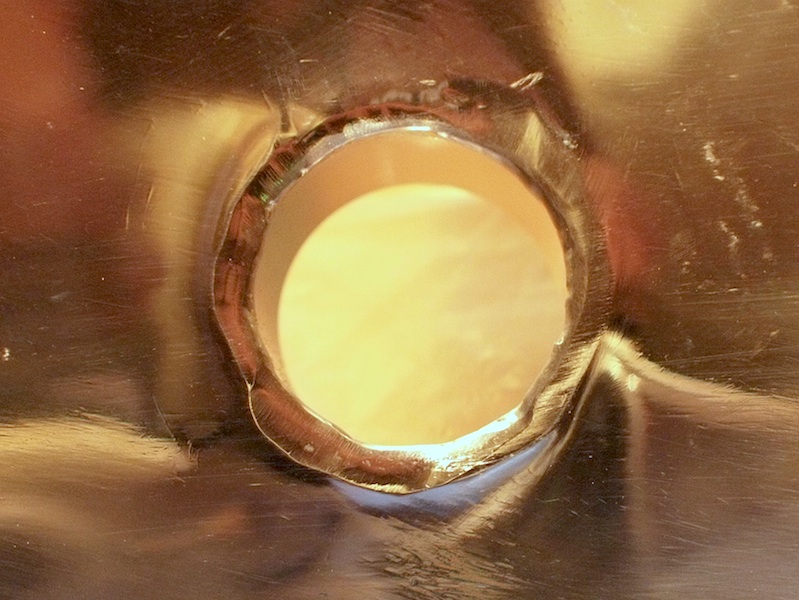
Here are the closeups of the welds. Remember, these are like looking at them with a magnifying glass. I've cropped and sized to fit the upload limits. First is the outside weld and second is the inside of the same fitting.

weld 1.jpg


weld 2.jpg
 
Any more updates? I'd love to see a pic of your setup all put together on your stand.

How have the brew days been going?

-Tim
 
Back
Top