My $30 hopback

Homebrew Talk - Beer, Wine, Mead, & Cider Brewing Discussion Forum

Help Support Homebrew Talk - Beer, Wine, Mead, & Cider Brewing Discussion Forum:

This site may earn a commission from merchant affiliate links, including eBay, Amazon, and others.

trigger

Well-Known Member
Joined
Aug 3, 2010
Messages
628
Reaction score
7
Location
portland
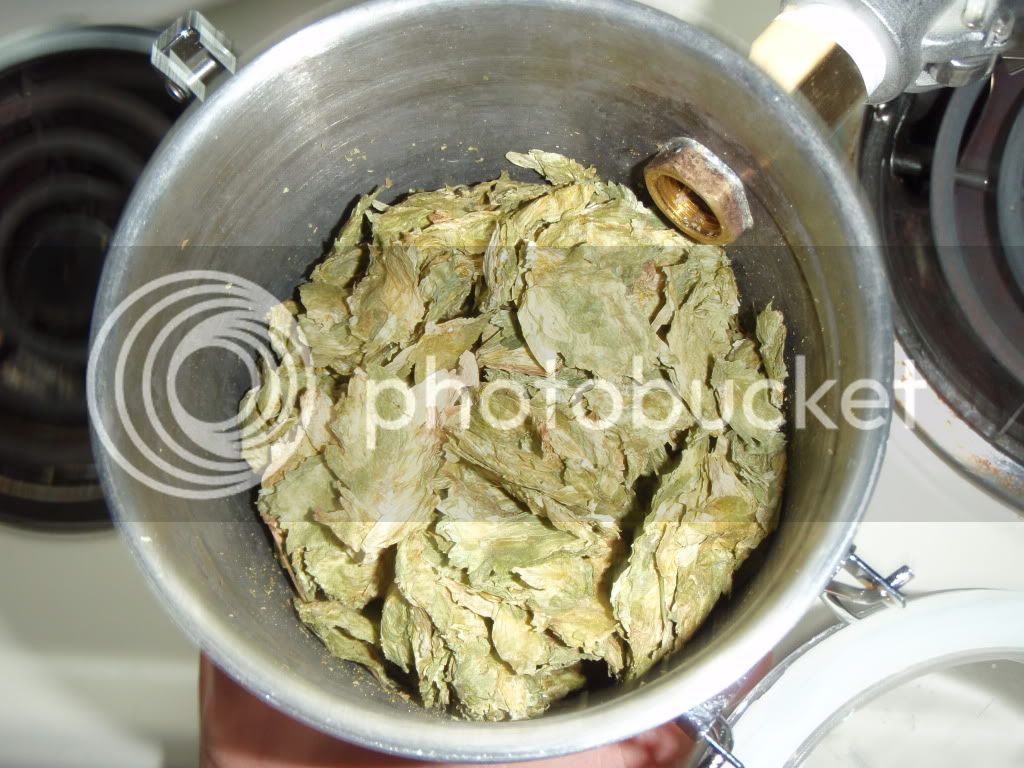
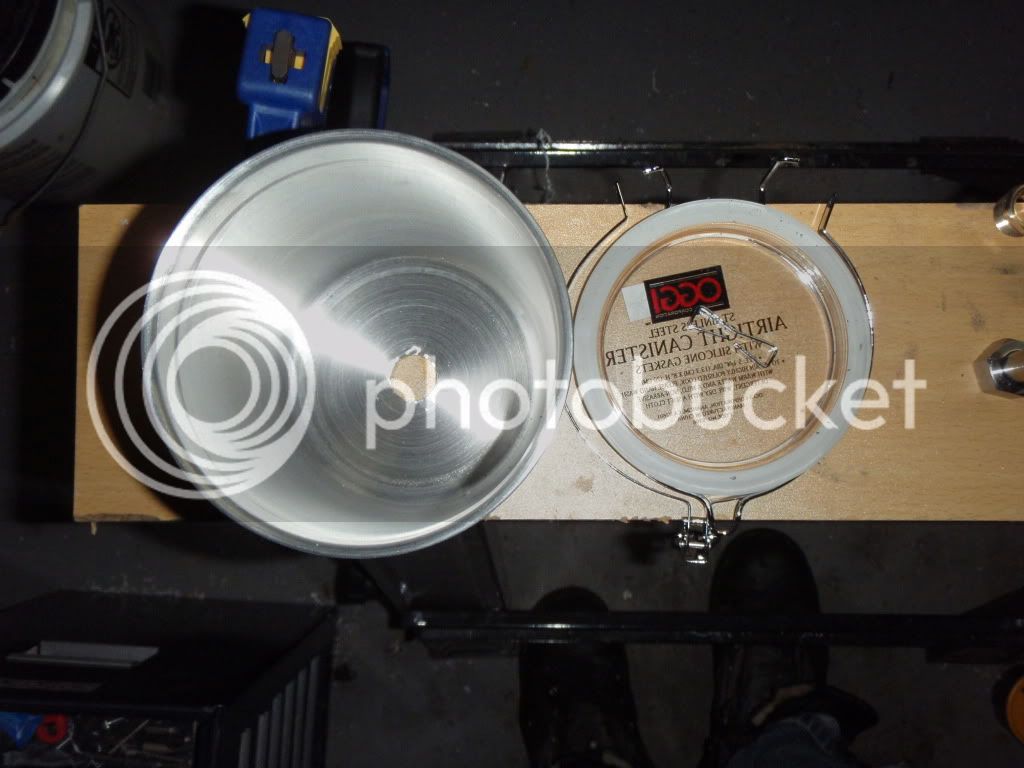
Today I was at Bed Bath and Beyond looking for sheets, which I didn't get. What I did get was this:

P5060224.jpg


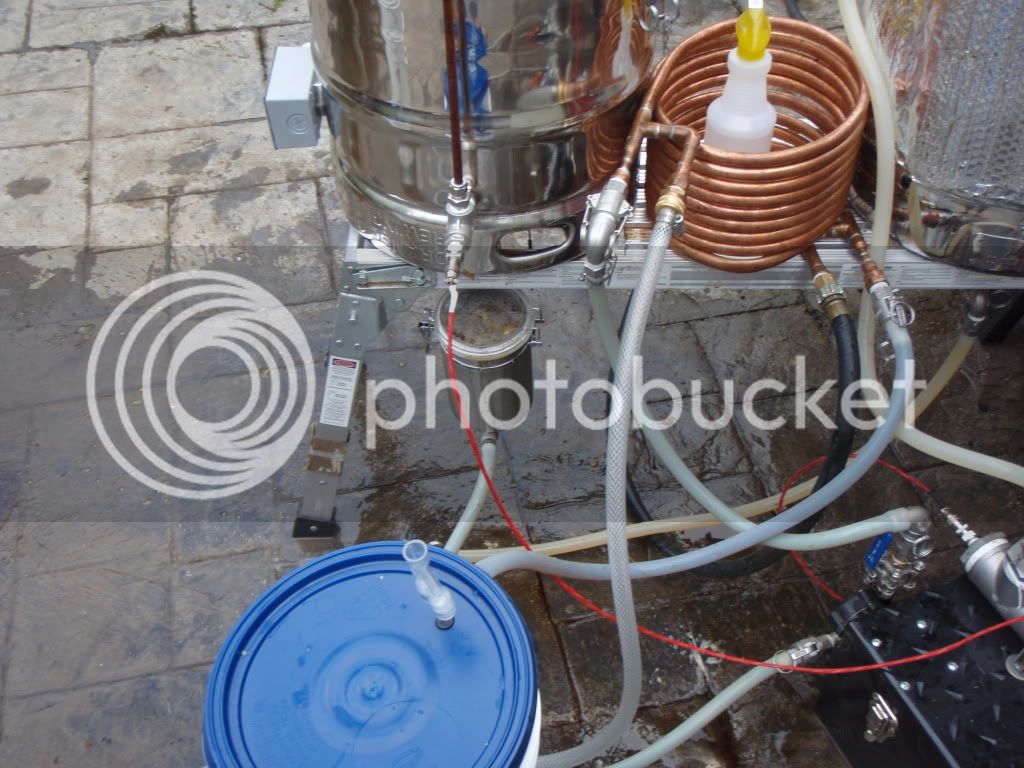
I know that there are several threads on hopbacks, but I didn't see a blow by blow how to, so here's how I did it. I won't include in and out fittings, since those will be dictated by your particular system. Also, I have not actually put this to use yet, but I will tomorrow at Big Brew, and will report back with the results.

Shopping list:
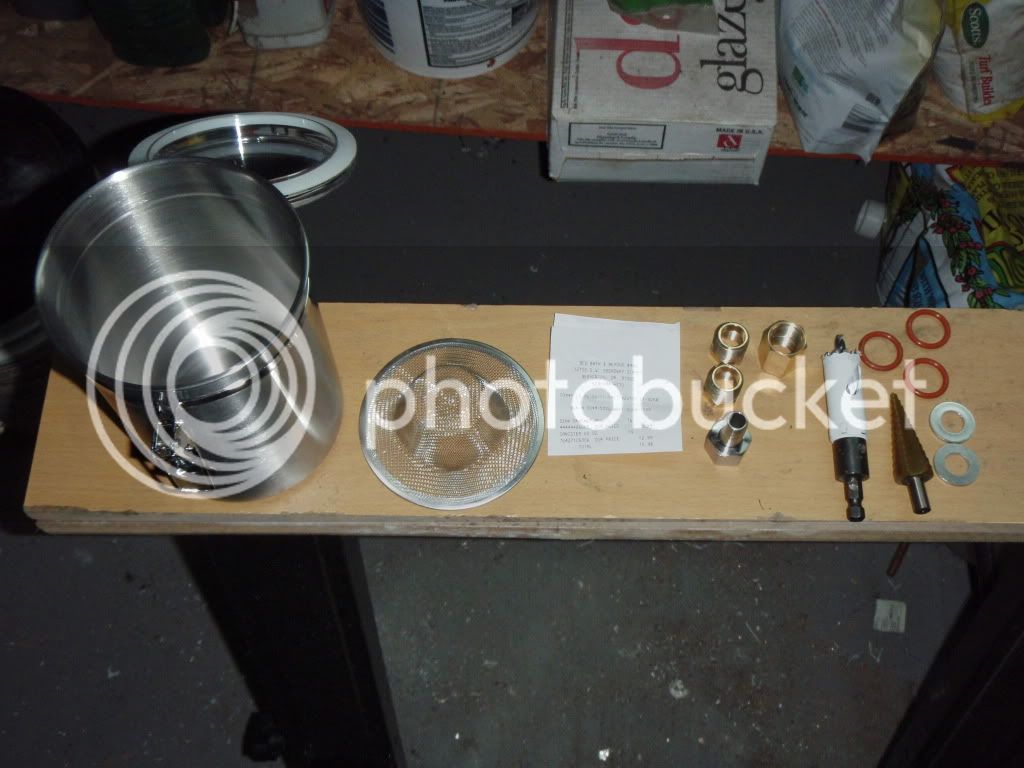
60 oz stainless canister - bedbathandbeyond - $13
Stainless sink strainer - bedbathandbeyond - $3 (I couldn't find this on the website, but it was in the store)
2 ea 1/2" x 3/8" npt bushing - homedepot - $5
1/2" fpt x 1/2" fpt coupler - homedepot - $5
Silver solder and flux (already had these)

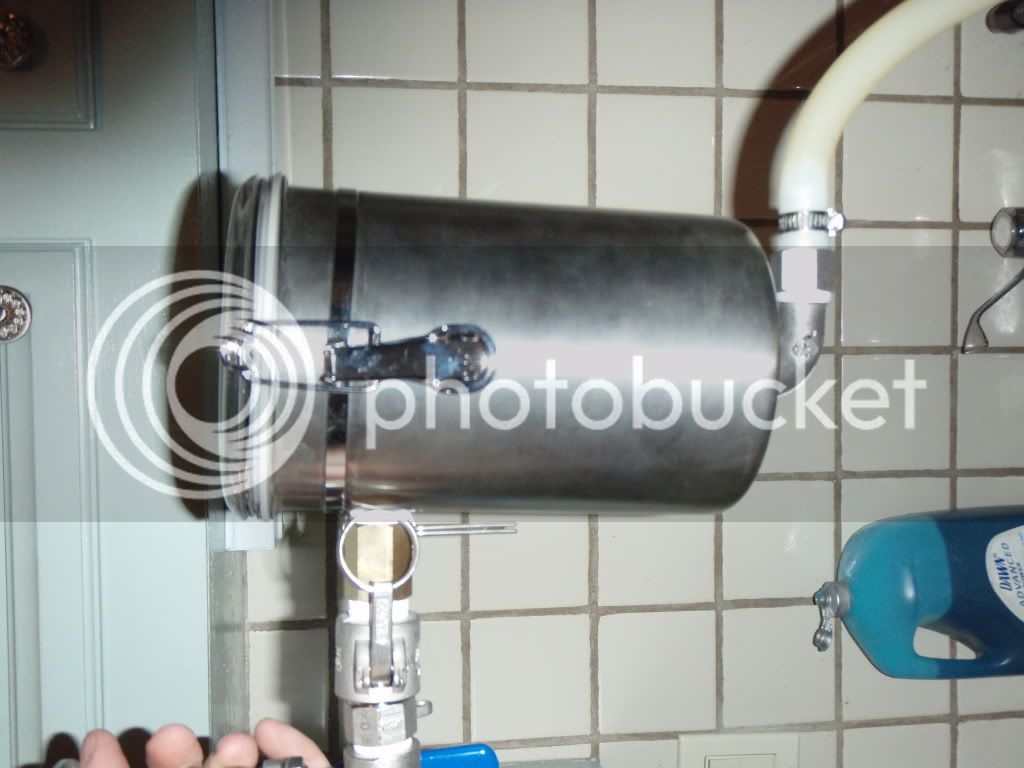
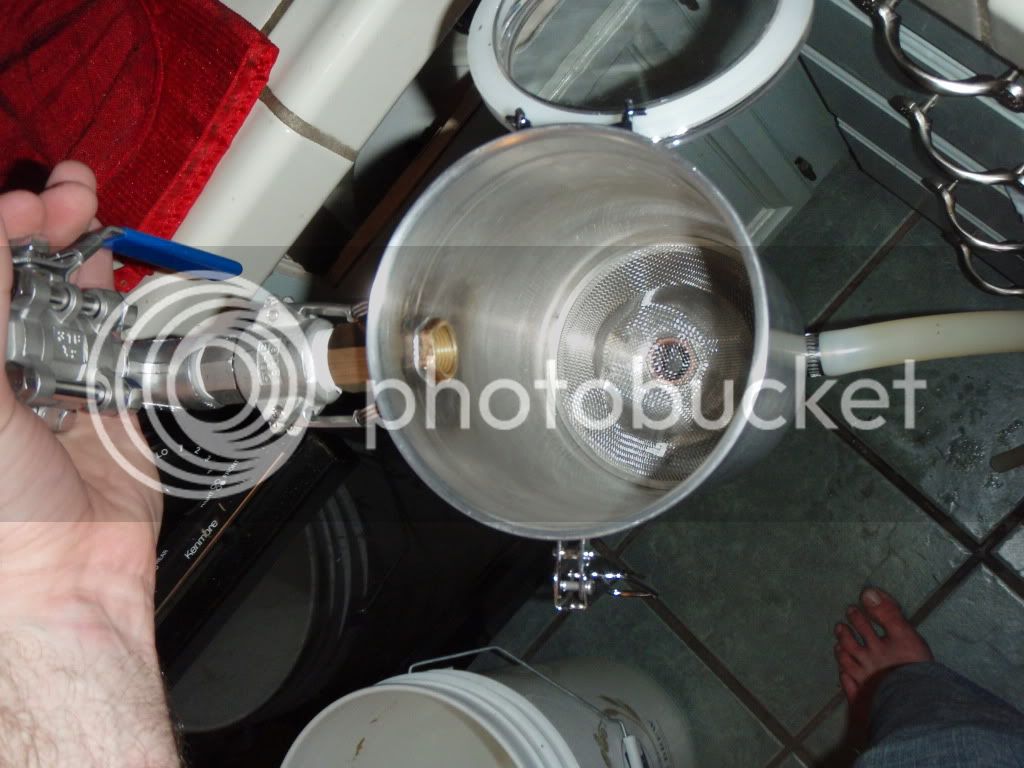
First up was to disassemble the canister by pinching the wire that wraps around the lid, followed by removing the bowtie shaped clamp that holds the band in place, and finally removing the band with latch. Set these aside.

P5060227.jpg


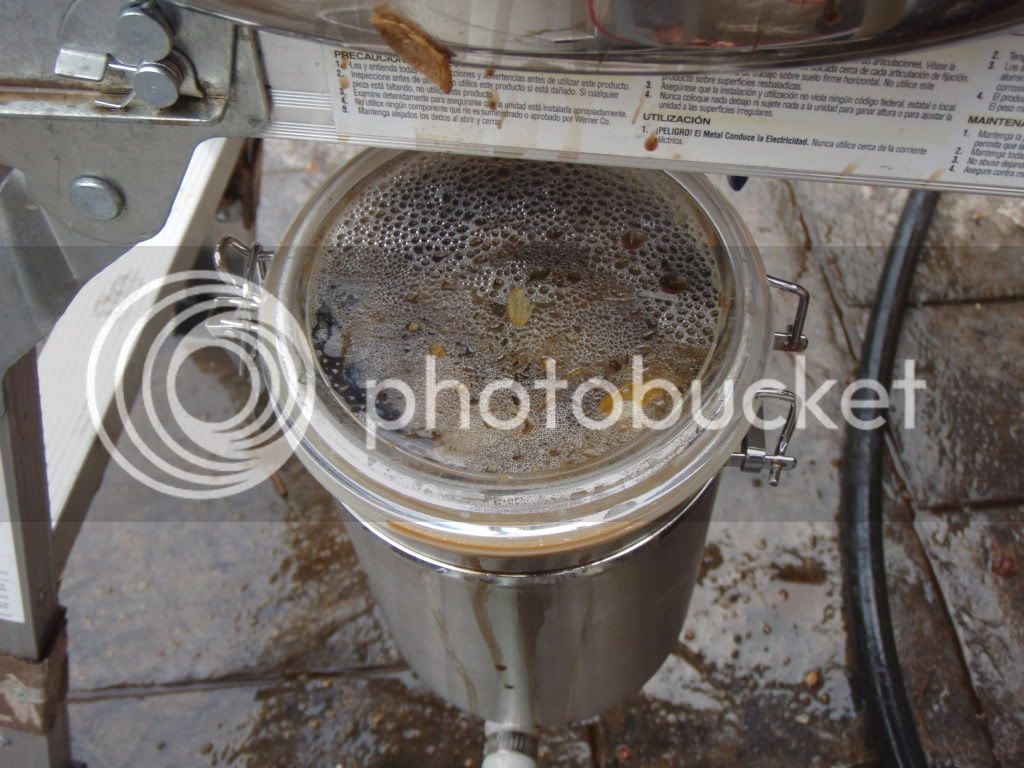
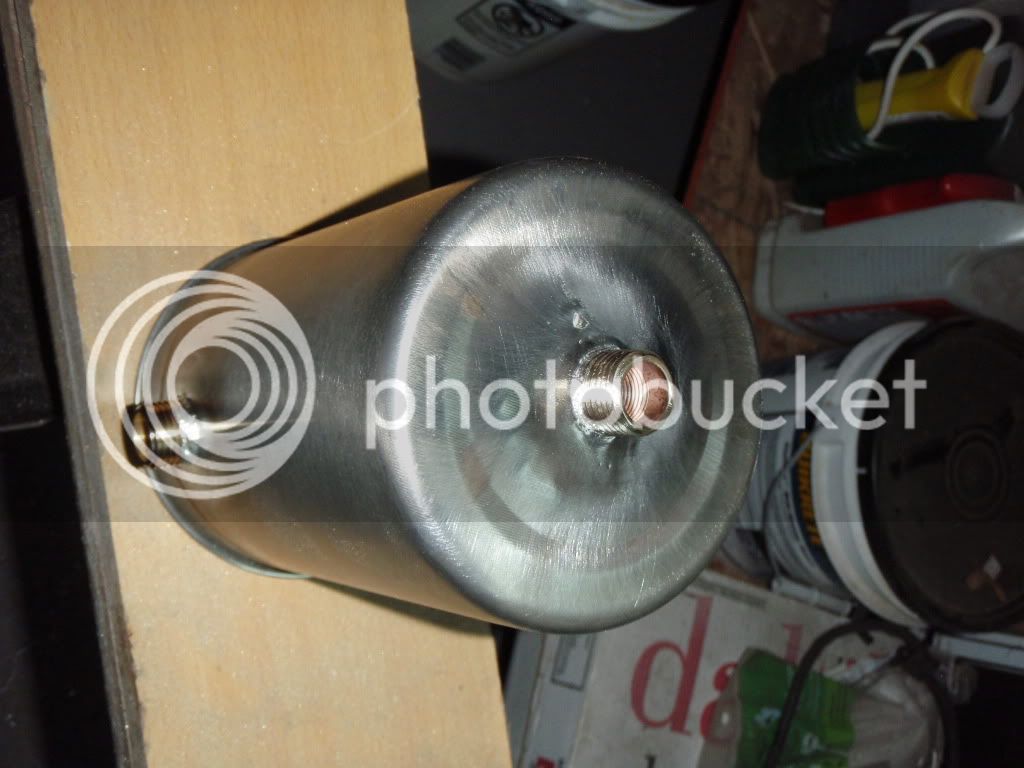
Next, mark the location for the in and out fittings. The in should go as close to the recess that the band sits in as possible without the fitting contacting the recess. The out will be centered in the bottom. Once these are marked hit them with a center punch carefully. The canister is made of very thin material, so not a lot of force is needed here. Once you have these marked drill them out to 13/16". For this I used a 1/8" drill, followed by a 3/8", followed by a step bit. You have to be very careful drilling these holes, as the thin material of the canister is easily mangled. I suggest using very light pressure and very slow drill speed. The goal in this step is to make a clean hole without mangling the material, so take you time. This is what you want when finished.

P5060228.jpg


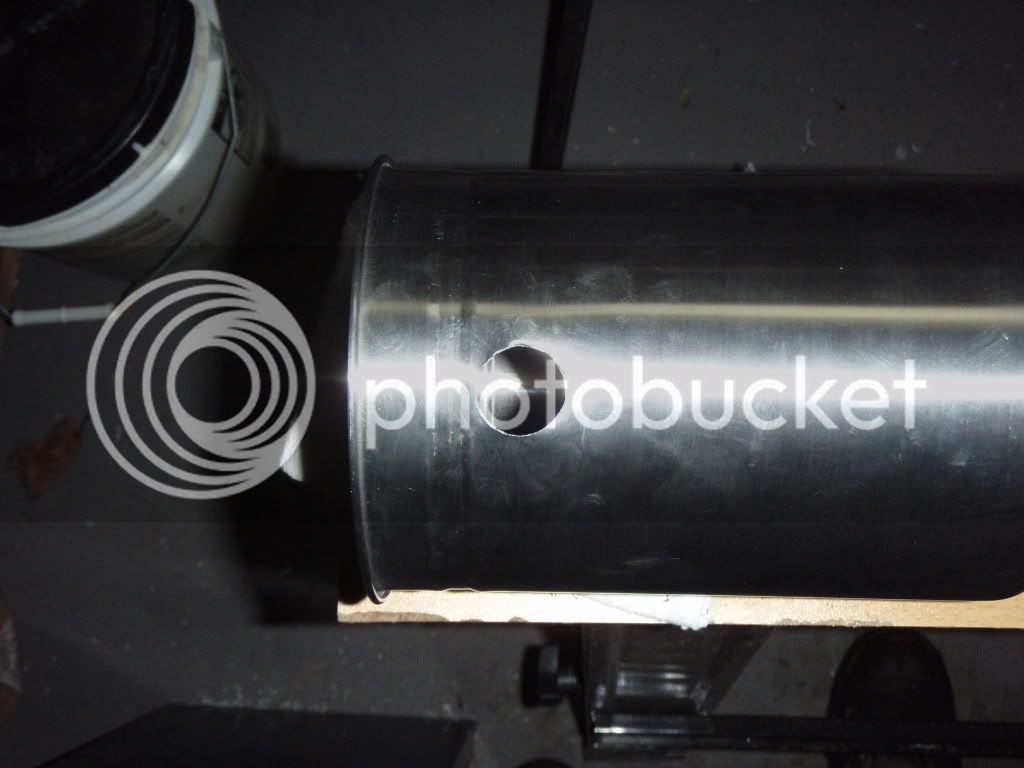
After you have two clean hole drilled clean them up with a rattail file followed by some 60 grit sandpaper.
 
When the holes are cleaned test fit the two bushings. They should thread in to the holes. If not, or if there is a lot of resistance carefully open the holes a bit at a time with a file. Go very slowly, as you can easily get them out of round. Make sure to follow any filing with the sandpaper to debur.

Once you have a nice snug but not tight fit, coat the outside of the bushings in a decent layer of flux along with the inside of the canister around the holes. Thread the fittings through from the inside, and turn them all the way down until the hex end contacts the canister material. Now heat the fitting with a propane torch. Keep the tip of the flame a couple inches from the fitting to avoid burning the flux and keep the flame moving. Don't worry about heating the canister, the material is thin enough that it'll be plenty hot. As soon as the solder flows take the flame off. I found that I had the best success clamping the canister to my sawhorse so that the fitting I was working on was facing downward and applying the solder around the hex portion of the bushing. If you used enough flux and didn't burn it the solder should flow around and seal the fitting. If you're like me and use way too much solder you can take it off easily with a stainless wire brush in a drill. I got mine from Harbor Freight. When you're done soldering the fittings in you should have something like this.

P5060230.jpg


Wipe you're joints with cold water when they're still hot but the solder has solidified. When everything is cool attach the female couler to the bushing in the side and reassemble the lid. Then go ahead and attach your in and out fittings. I have camlocks on my system, so I put the female camlock on the in port, which will allow the hopback to hang from the kettle out valve. For the out fitting I went with a street elbow with a nipple to which I hooked a length of silicone hose (and another female camlock to go to my pump). This part is up to you and your system design. Just drop the sink strainer inside and you're done. Here's the finished product

P5060231.jpg


P5060233.jpg


All in all this is a very easy project to complete. If you want you can go weldless, as I originally planned. I found that the curvature of the relatively small vessel was problematic in getting a good seal. Either the fitting would be tight enough and that would cause the canister to deform enough that the lid wouldn't get a tight seal or the fitting would be loose and leak. This doesn't matter for the bottom seal, since it's on a flat surface. Also, the weight of the full hopback torqued pretty hard on the weldless input, whereas the soldered fitting takes the weight just fine.

I'm excited to give this a try. I'll report back with results.
 
Nice build! Do you think it would more effective to switch the in/out ports if possible (I know that the pump makes that a little harder)? Seems like you would get more contact with the hops if you made the wort flow from the bottom.

How many oz of hops do you plan on using in this?
 
looks sweet!! Can't wait to see how it functions! let us know! Are you dispensing through kegs, i assume? did you have to up your PSI to push it through.
 
Ok. so I did an 11 gallon batch of my CDA yesterday at BigBrew and used this for the first time. Unfortunately I was distracted showing off my electric system and forgot to account for hop absorption, so I only wound up with a bit less than 10 gallons in the fermenters (18 oz of hops hold a LOT of wort).

First off I loaded the hopback with 2 oz amarillo and 1 oz glacier. The camlock fittings held it very securely in place, and there were no issues on that front. I started by recirculating through my CFC without the hopback in place to sanitize everything, then cut the pump and attached the hopback inline between the kettle an pump. I use a bottom drain on my keggle, so I'm not sure if there would be any siphon issues. I did learn, however, that the lid does not seal tightly under positive pressure. If I left the keg drain fully open the hopback would flood completely and leak around the lid gasket. By closing the valve about 1/3 and leaving the pump valve fully open the hopback was full to the level of the input fitting. The hot wort flow sucked the hops to the bottom after only a few seconds, so any fears of maintaining contact with the hops were put to rest quite quickly.

Once I had the flow rate issue sorted chilling and filling the buckets went off without a hitch. The hopback didn't appreciably slow my chilling process, and didn't clog at all, which were two other concerns I had. When everything was done I passed around the hydro sample and we compared it to a finished batch of the same beer that had been dry hopped with 2 oz. of amarillo. The fresh wort had an overpoweringly strong hop aroma and flavor, much more so than the finished beer.

All in all it seems to be a success. I am going to fiddle around with the wire that forms the hinge and latch to get a tighter seal. Hopefully that will eliminate the leaving issue from the lid. The clear plastic lid help up fine to the heat, and the hops formed quite a nice filter that removed a substantial amount of protein. They probably would have been even more effective if I hadn't forgot to add whirflock.

I did have one major failure, though. I totally failed to take any pictures of it in action! I blame it on the distractions. I'll get some pictures of the modifications I make and of the unit in action next time I brew. I plan on doing a simple APA and draining the first five gallons without the hopback, then the next five with it. I won't dryhop either batch so I can do a side by side to see how effective it is in "locking in" some extra aroma and flavor.
 
Well, here's pictures from last weekend's brew. I did another batch of CDA. The former batch suffered from some crush issues, so I'm renaming it an India Brown Ale. It tastes great, and the aroma without dryhopping is amazing. It's not quite the same as a freshly dryhopped beer, kind of more integrated but equally as intense.

I tightened up the lid but it still won't hold positive pressure. Better than before but it still leaks a bit if I leave the kettle dump fully open due to the restriction in the chiller. All in all though, I'm really happy with it.

P5150237.jpg

P5150238.jpg

P5150240.jpg
 
Good form in your build, congrats on your success. I wish to add to your design by the incorporation a pressure relief valve in the lid. As you mentioned the "positive pressure" issue, the light came on as to eliminate the little leak. A 5# vavle like in a prerssure cooker lid should aid in providing a "gas relief" and let the flow be more tunable. If I ever get around to building one, it would be your design.

Kudos Trigger !
 
Does it have to be hot wort for this to work or could you make one that hooked between the keg and the tap? and would it have the same affect?
 
Does it have to be hot wort for this to work or could you make one that hooked between the keg and the tap? and would it have the same affect?

What you're thinking of is called a "randal" and is meant to take serving pressures. This think would be a disaster in a pressurized system, the lid just won't take the pressure. There's a few threads here on building a randal, if you're interested.

As far as the hopback, I've used it a couple times since the last update. It does work quite well at adding a lot of aroma, but it's not really a substitute for dry hopping. I'm glad I built it, and will continue using it on hoppy American Ales. I will, however keep my eyes out for a sturdier cannister to replace the current one.
 
Have you tried using this for spices? I took a tour of Southern Tier Brewing and they said they use a hopback on all of their spiced beers, like Creme Brulee, Pumking, etc. Obviously they would use full spices, like cinnamon sticks as opposed to ground cinnamon. But I'm curious to know if you have tried anything similar.

Also, I am familiar with soldering copper, but I've never tried it with stainless. Is it the same materials/process?

Thanks a million for posting this! I am in the beginning stages of building my RIMS system, and will definitely plan to incorporate this!
 
I have not used it for spices, since I personally detest spiced beer. I imagine that it would work well though for whole spices as long as you get enough contact time. I'm not sure that you would be able to extract enough flavor/aroma, though, but like I said I really don't know since I'm not a spiced beer guy.

One bit of advice, the bail that comes with the container will not create a seal that can withstand the head of a full keg. I have used it like a grant with an open top, which works but requires a lot of valve fiddling to maintain the liquid level. You can also get two large band clamps and remove the bail entirely, which will create a nice tight seal that takes pressure. I put them so that they cross across the bottom and top of the vessel, kind of like a bow on a present. The one annoyance with this design is flooding the hopback. I leave one of the clamps loose and drain wort into the hopback until it's near the top, then shut the kettle valve and tighten the clamp. From there I open the valve and drain like normal.
 
This seems to be a great thing but I have a little problem with the acrylic lid. I don't like plastic around hot water/wort. Anyone found one similar that has a stainless steel lid ?
 
Back
Top