I just want to make sure this motor will work.
http://www.amazon.com/dp/B0000DD15G/?tag=skimlinks_replacement-20
1/3 hp reduced down to 172 rpms should be enough to power a two roller monster mill, right? Thanks.
I'll be sure to show it off once it is done next week if it will work. I already have the motor, so hopefully I can make it this weekend.
Not big enough. I would use the 3/4 HP (Grizzly G2530) or for $15.00 more the 1 HP one and future proof your setup (so if you step up to a 3 roller you can use the same motor). You are already spending over $100 - why stop just short of the most effective setup?
http://www.amazon.com/dp/B0000DD15I/?tag=skimlinks_replacement-20
This info is straight from Monster Mills website:
This is a very complicated answer.
We recommend you use at least a 1/2 HP motor for our small 1.5" diameter roller mills, and 1 HP for our larger 2" diameter roller mills. Use a capacitor start motor if possible. They have much higher starting torque and should be able to start milling after the hopper is loaded. If you don't have a capacitor start motor, you may just have to have the mill running when you load the hopper. Get the RPMs down as much as possible. To do this you will need to use as slow a motor as you can get, and put a very small pulley on it, and put as large a pulley as possible on the mill. The biggest problem with this approach is that the pulleys end up being very large.
Most AC motors run at the slowest speed of 1725RPMs. This means that you need to reduce the speed by a minimum factor of 10. So you will need a mill pulley that is 10 times the diameter of the pulley on the motor to get down to 172.5 RPMs assuming your motor runs 1725 RPMs. When using pulleys to drive the mill it may be preferable to widen one flat on your mill's drive shaft using a metal file. The flats are designed for drill driving, and will work better with a pulley setscrew if they're wider. This is easily accompished using a metal file with the drive roller held firmly in your bench vice.
Pulleys to complete a motorization project are readily available from several sources including Grainger, and McMaster Carr. Look for a small pulley with a diameter of 1.5" or less, and a large pulley to mount on the mill of at least 10" with 12-14" being preferable. Worth noting is that usually the pulleys will have different pitch diameters depending upon the width of belt you use. If you use a narrower belt, it will ride lower down in the pulley groove, and effectively reduce the diameter of the pulley.
There was a very informative article written in BYO a while back, that has all the specific information you will need to complete your project. We worked directly with the author to provide accurate information. Gear reduction motors are also an option but they are usually out of the price range of most home brewers. If you can find one used for a good price, I have heard of several folks using them sucessfully, but you must make sure you have enough torque to drive the mill, or it will stall while grinding.

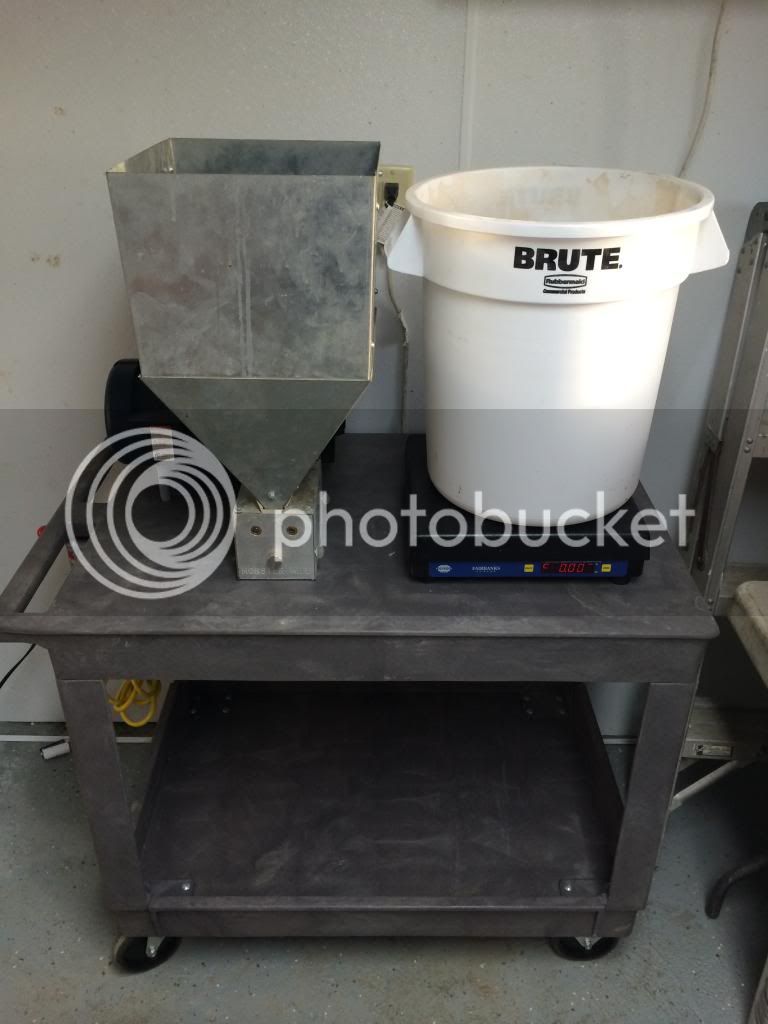
 I built mine for under a $150.00


![Craft A Brew - Safale S-04 Dry Yeast - Fermentis - English Ale Dry Yeast - For English and American Ales and Hard Apple Ciders - Ingredients for Home Brewing - Beer Making Supplies - [1 Pack]](https://m.media-amazon.com/images/I/41fVGNh6JfL._SL500_.jpg)