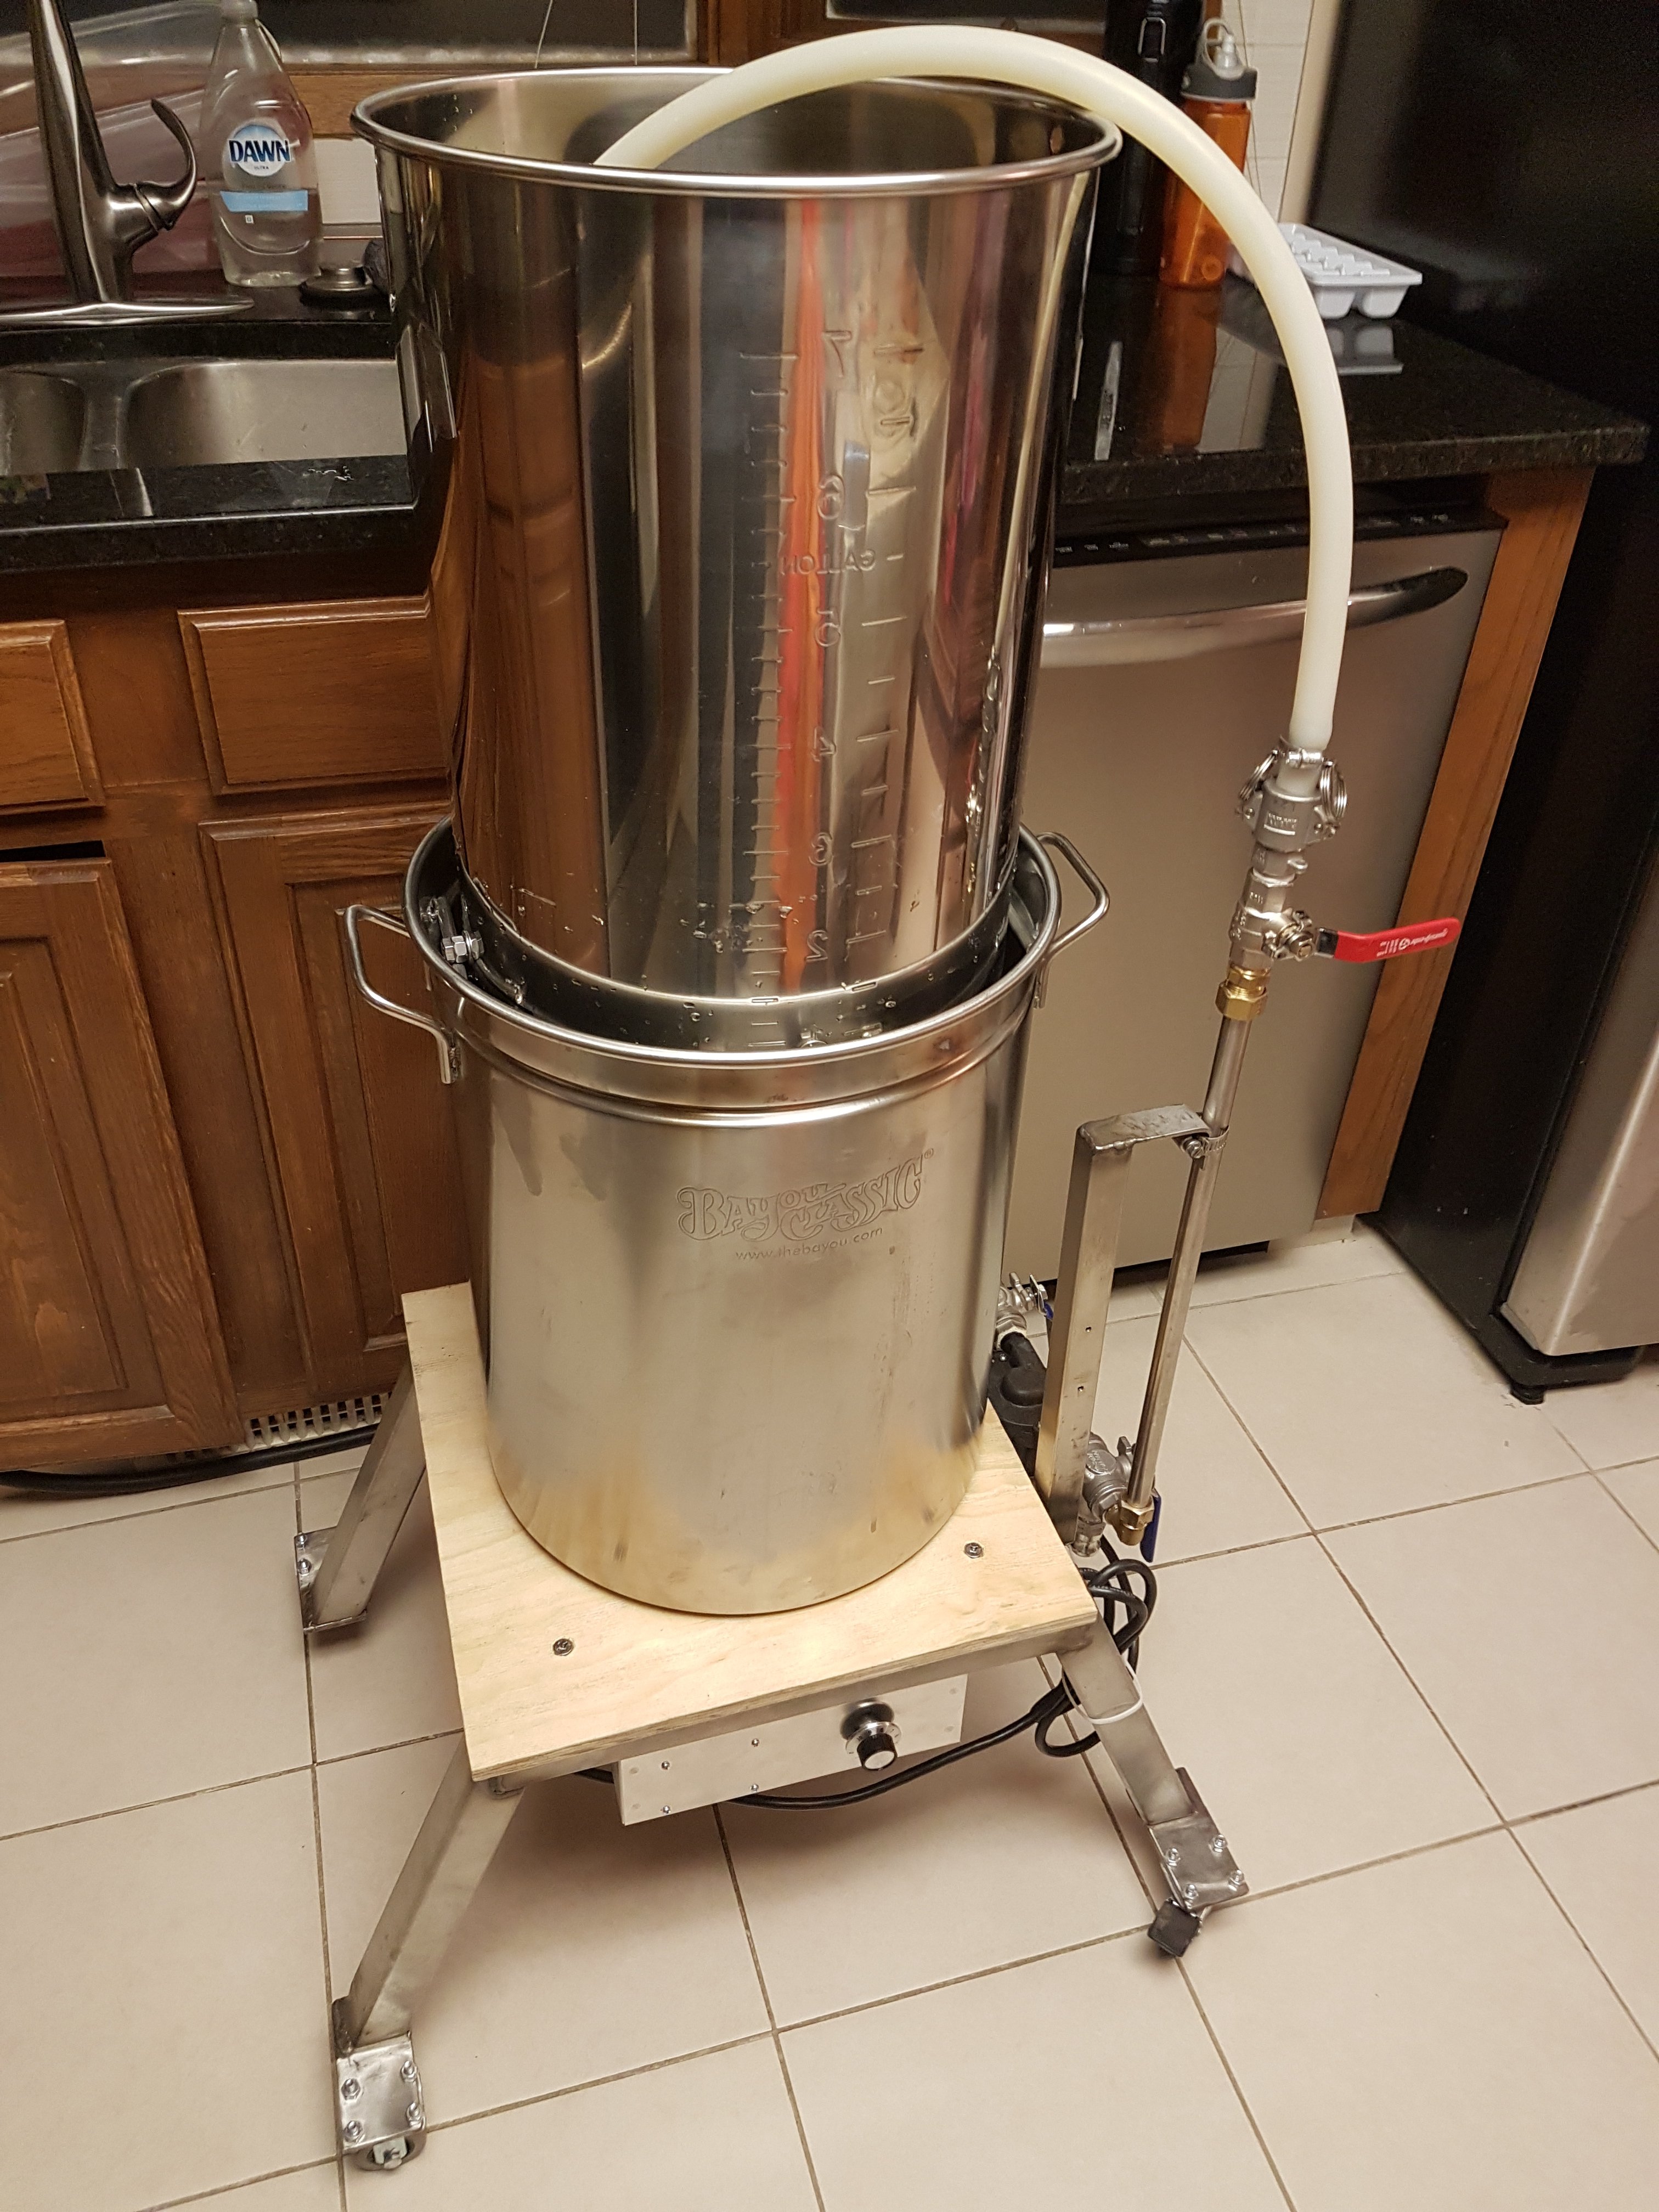
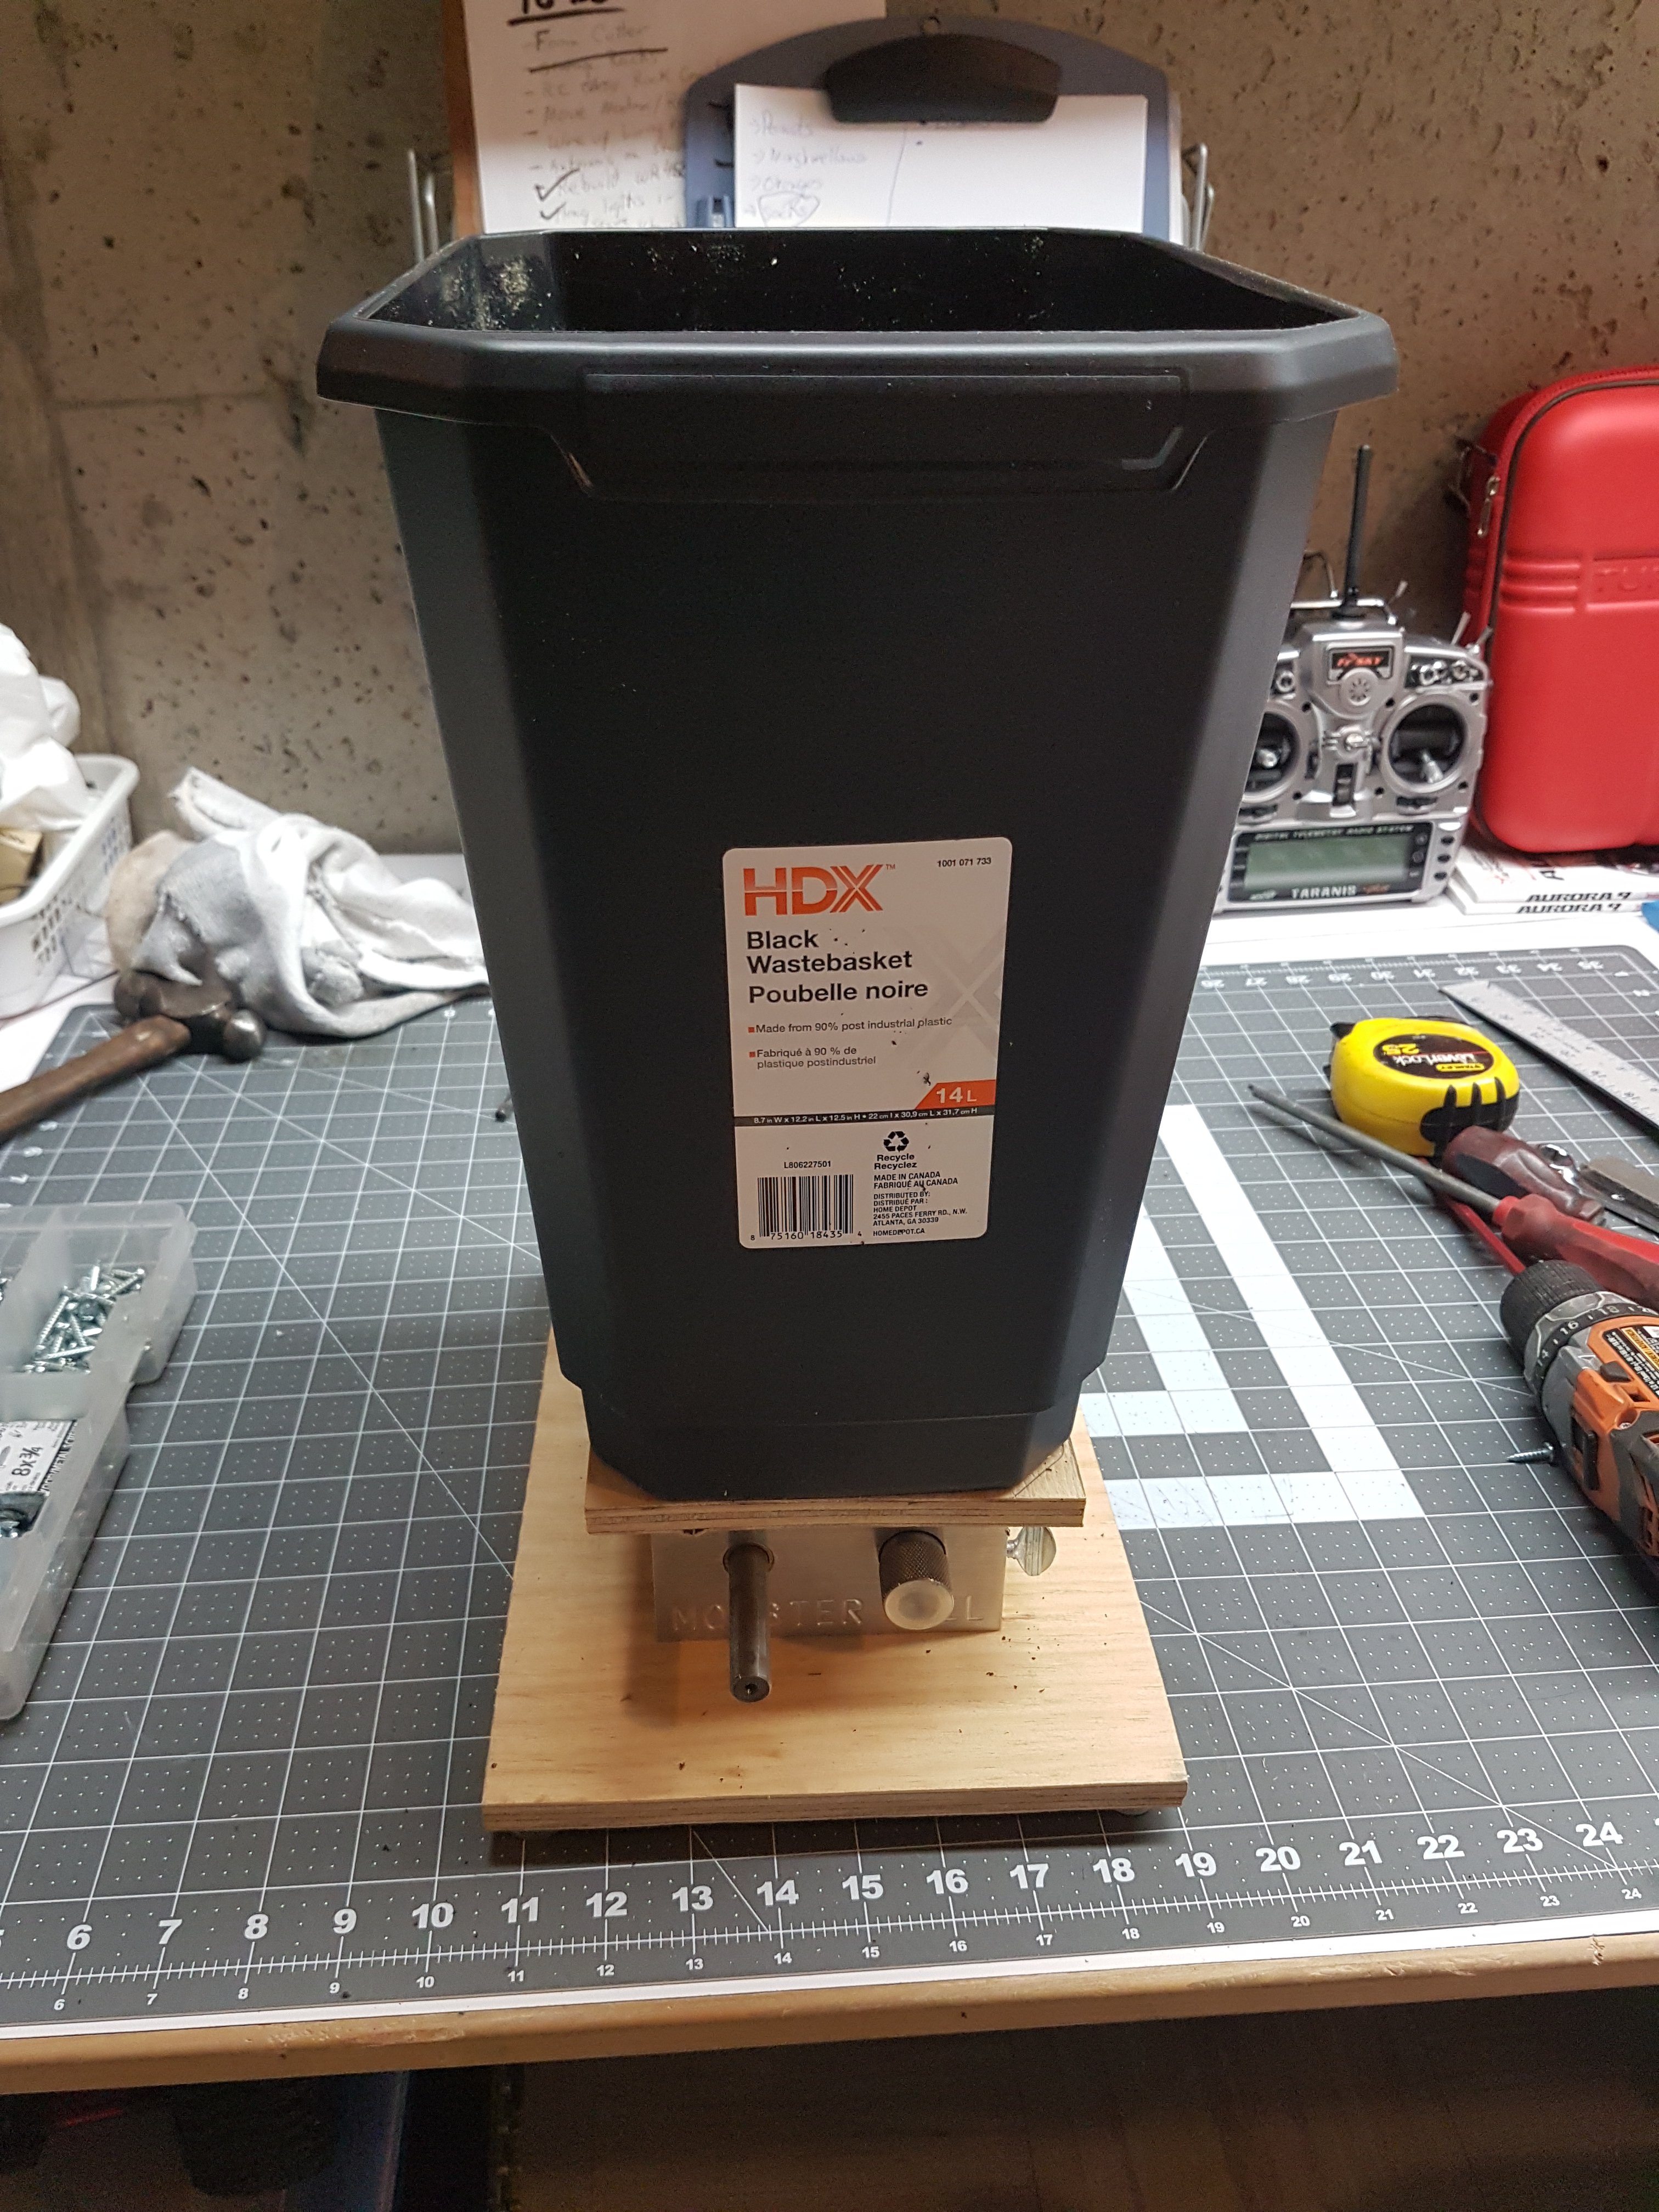
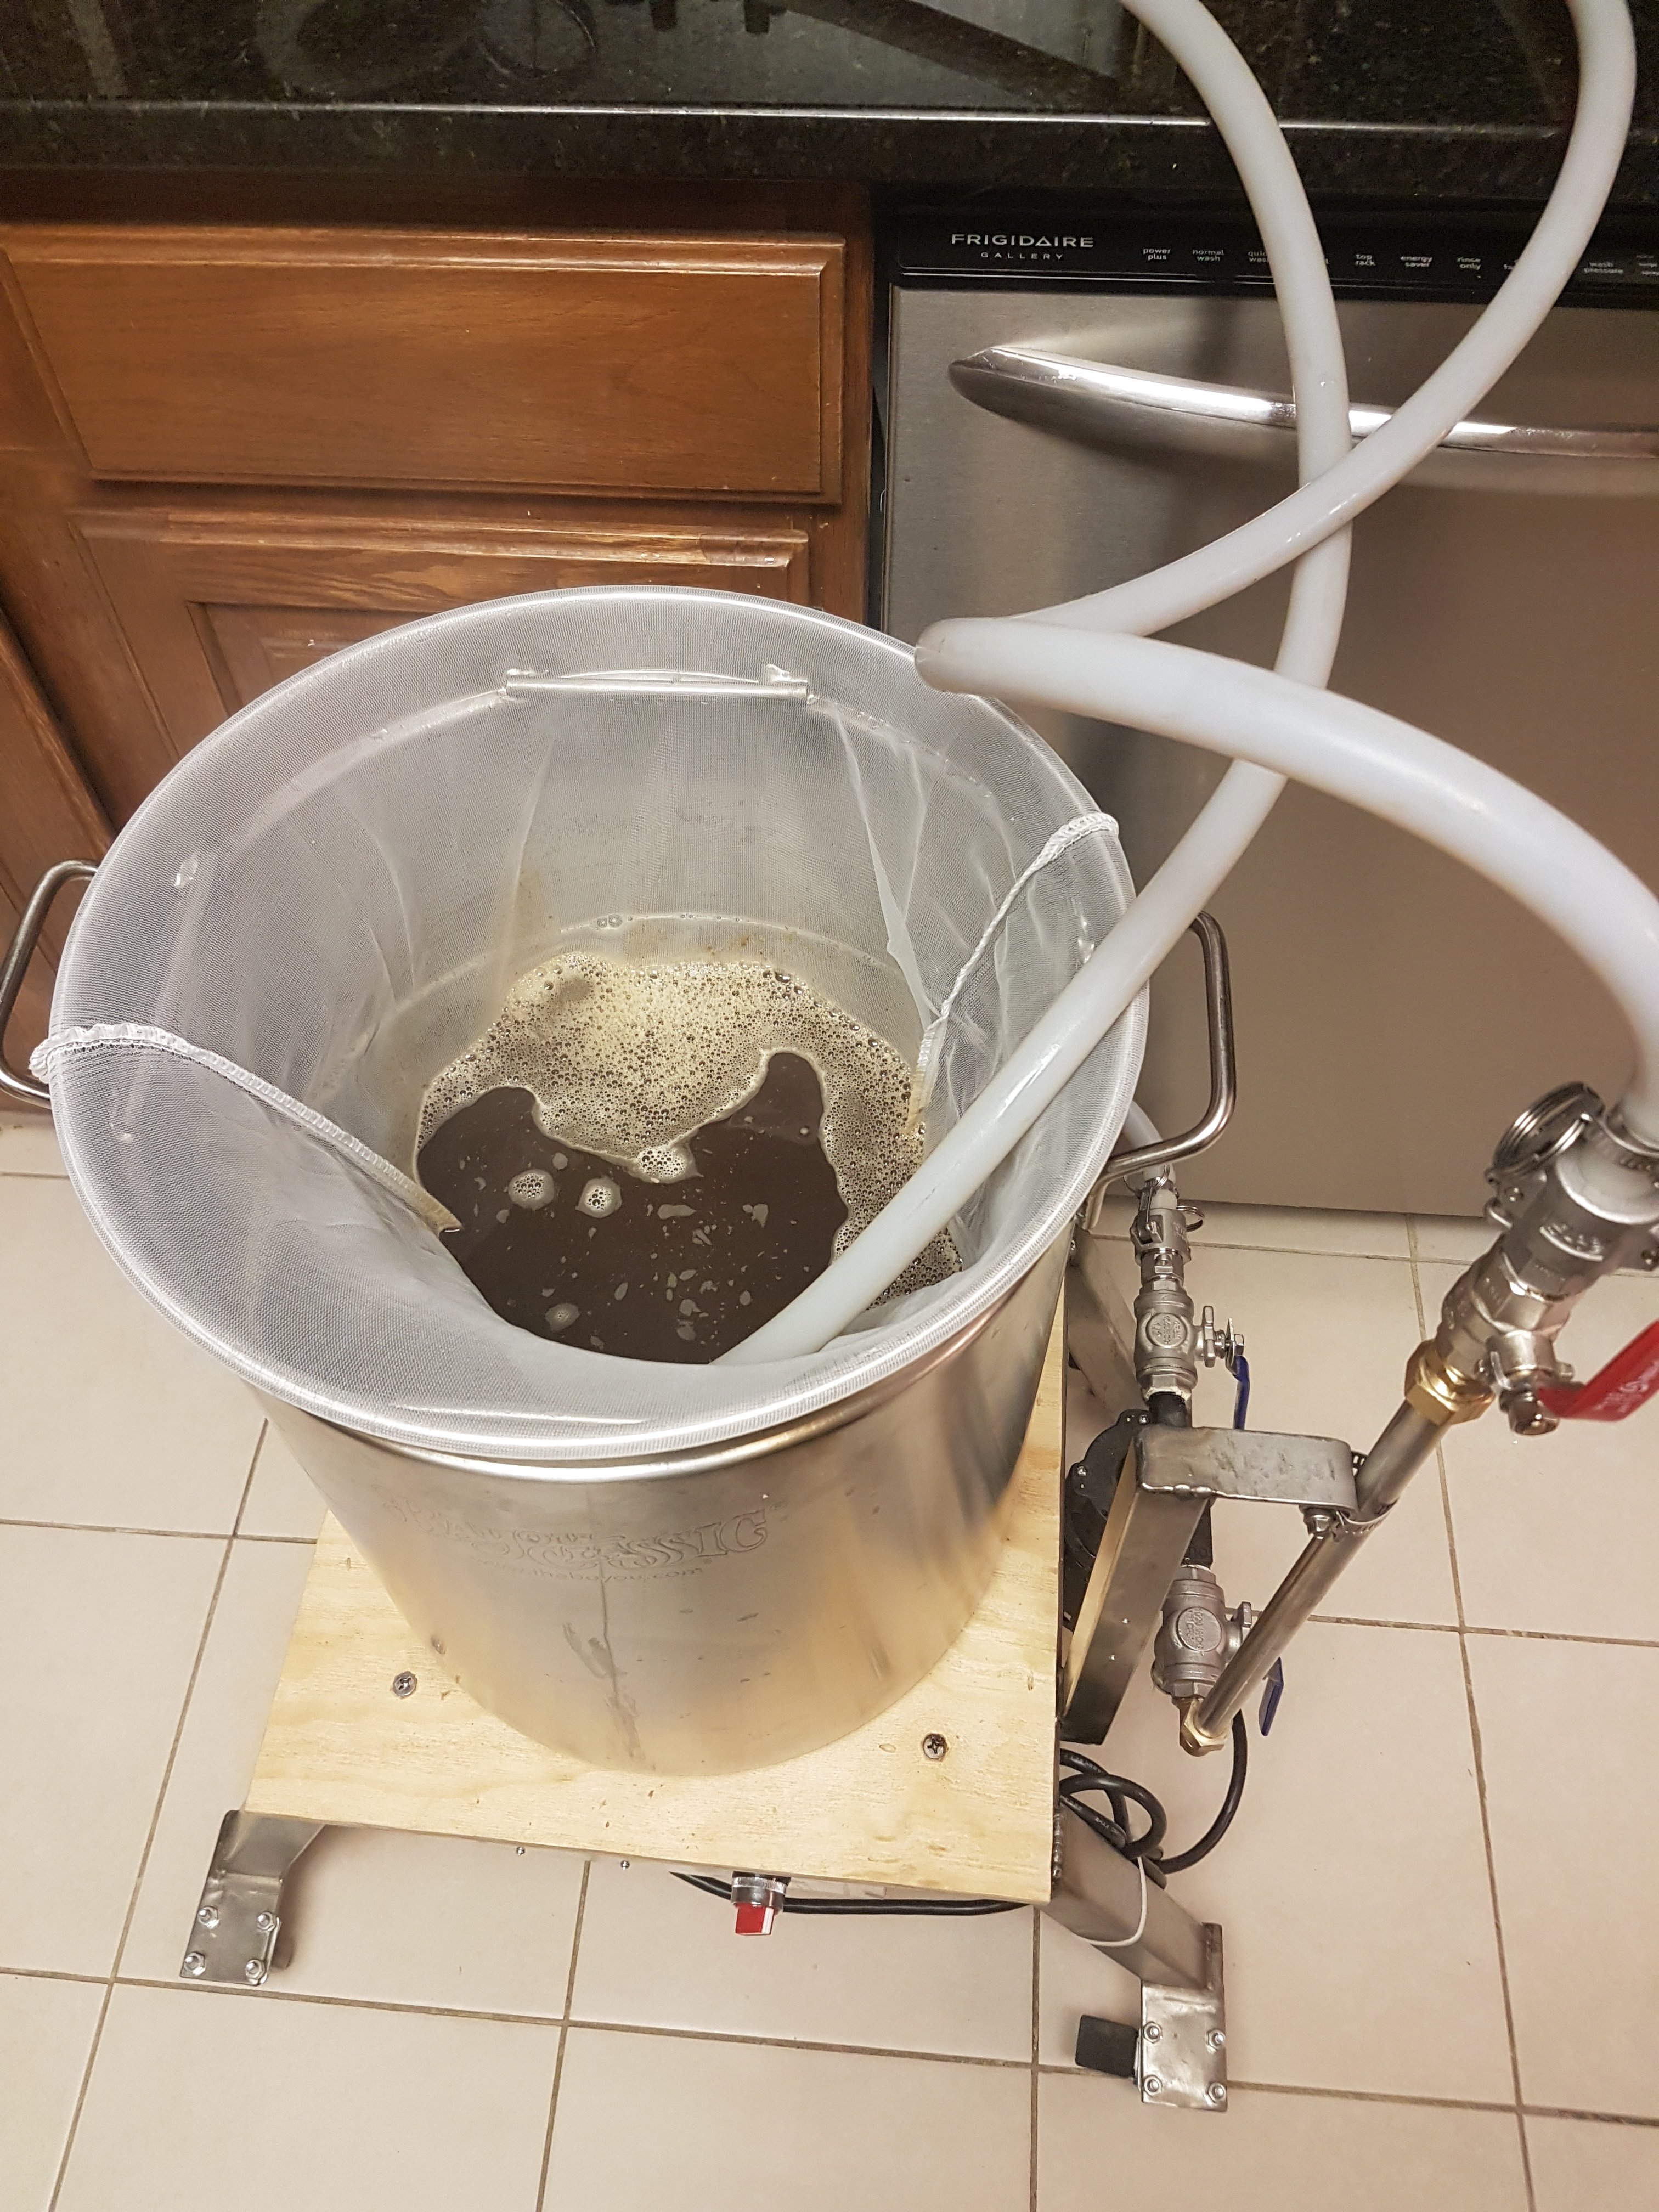
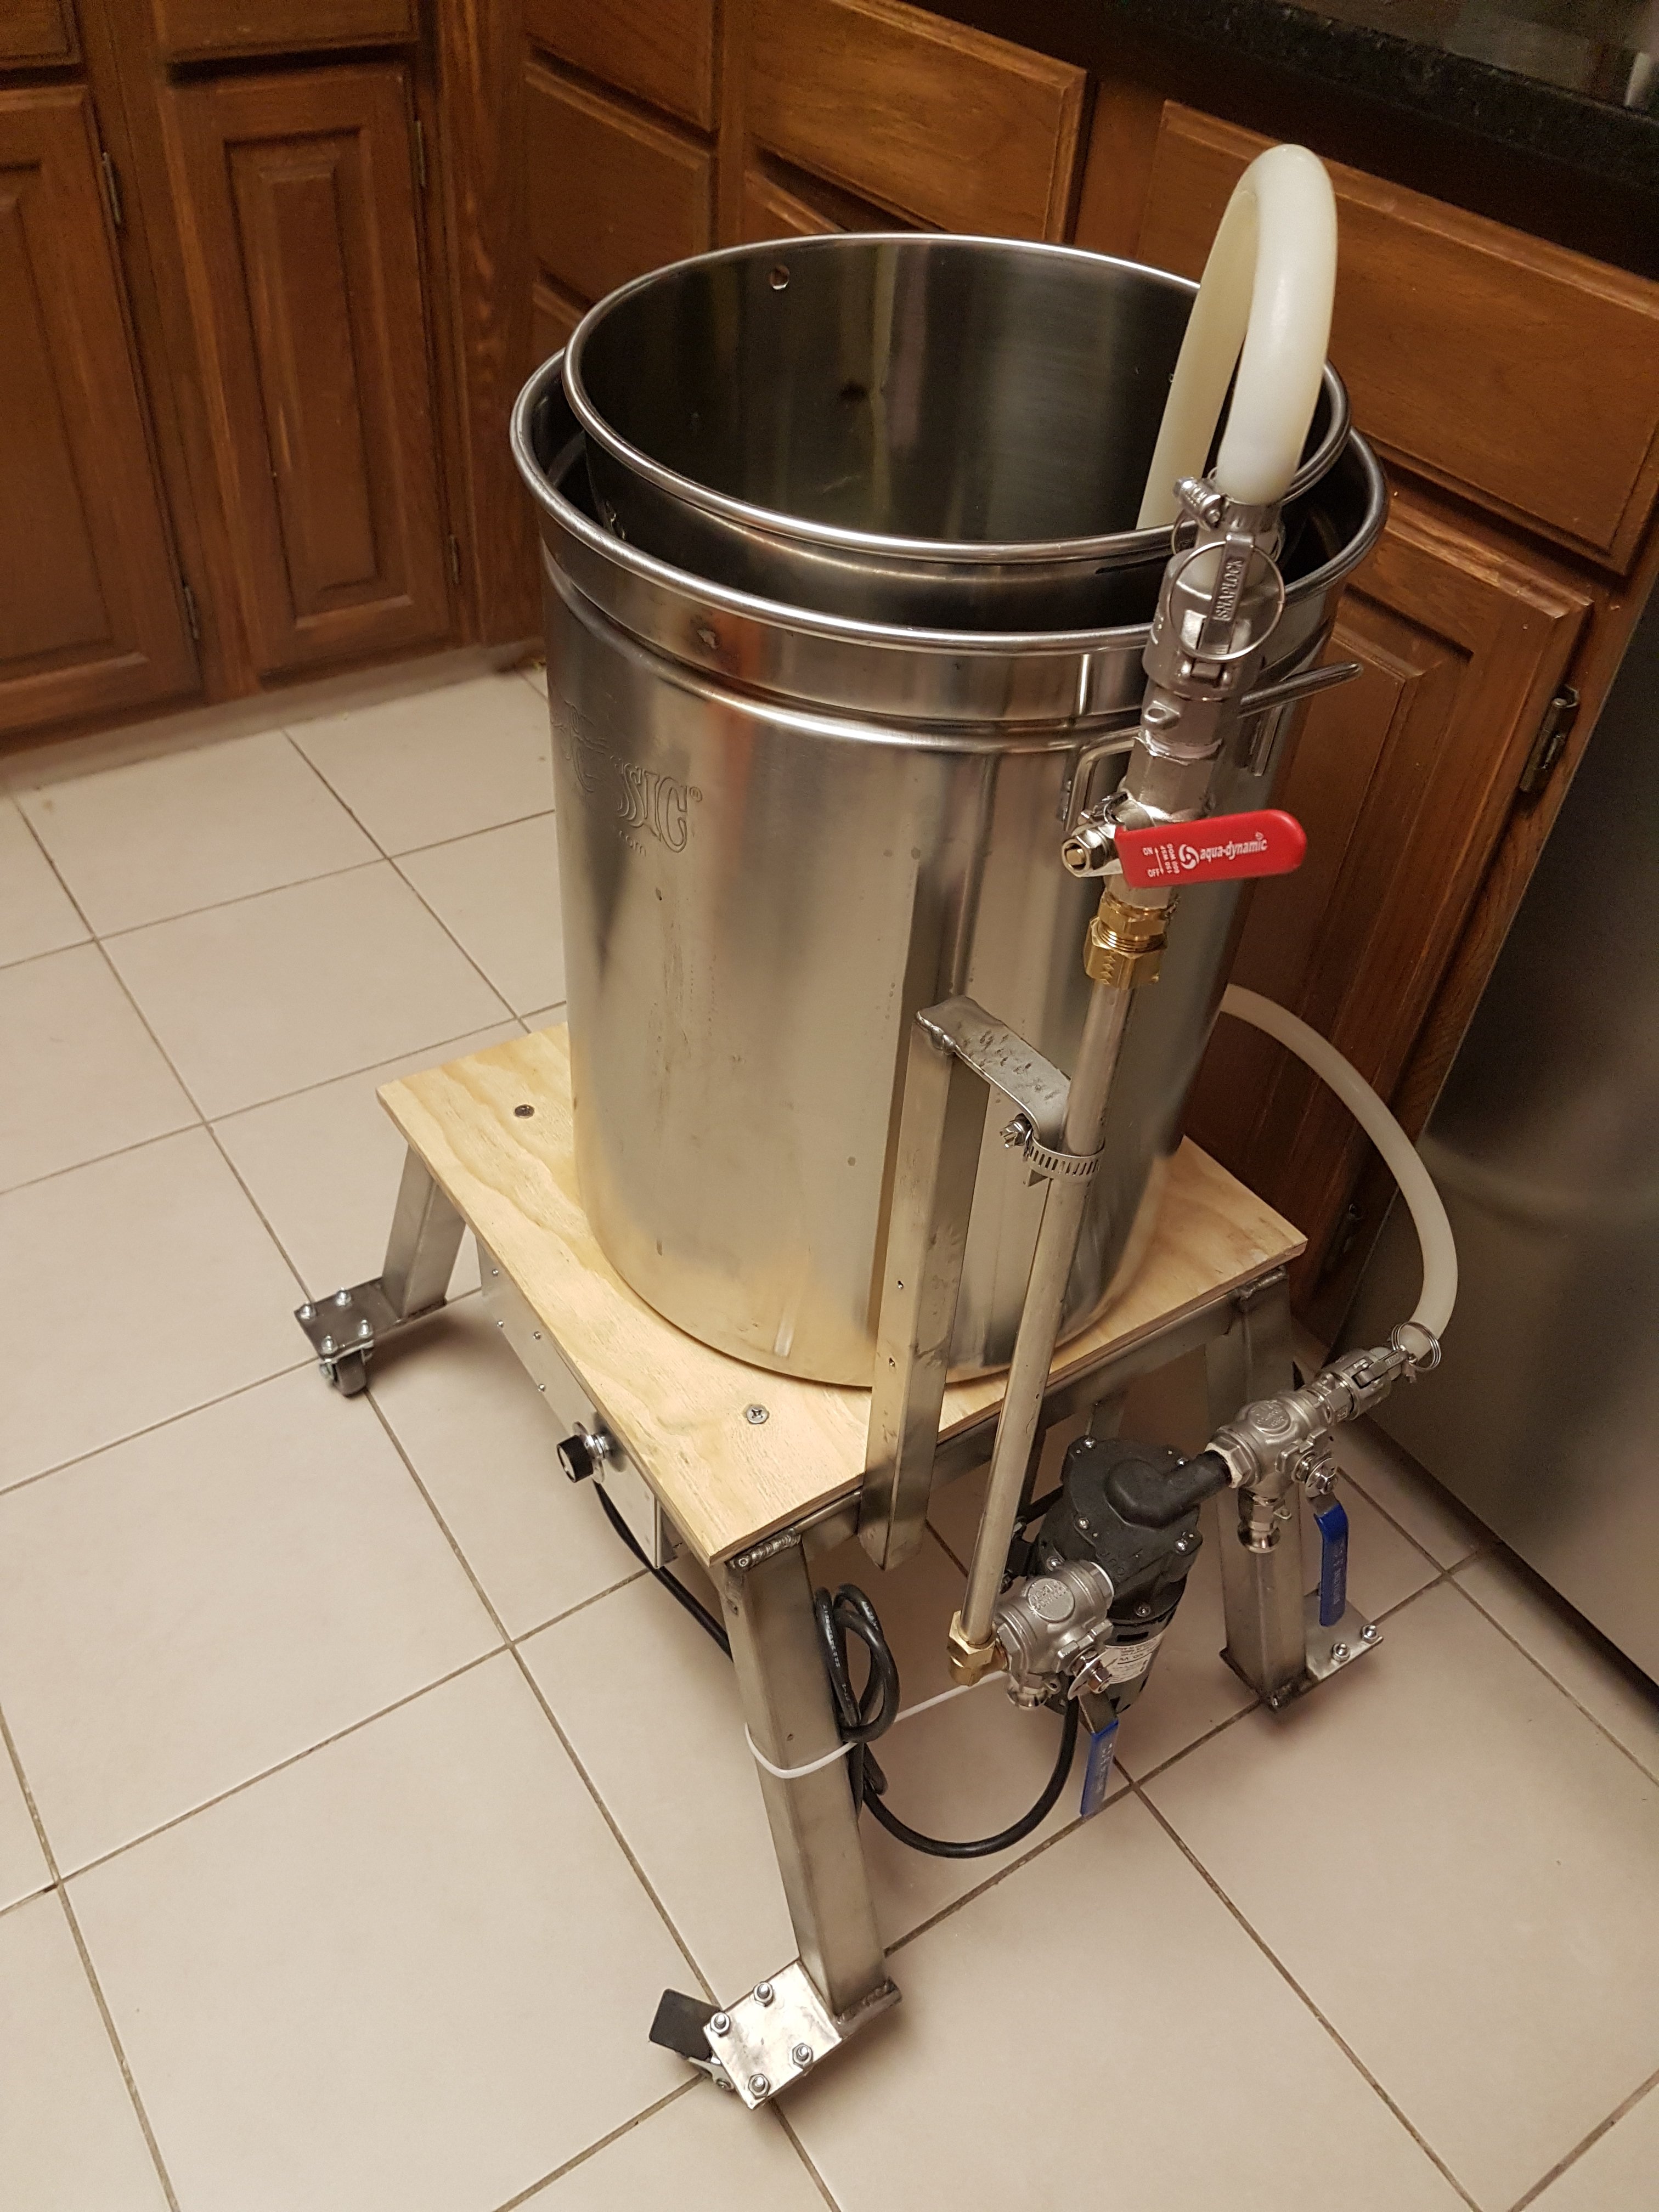
Meet Thing 1. A 5Kw Induction All In One...

Homebrew Talk - Beer, Wine, Mead, & Cider Brewing Discussion Forum

Help Support Homebrew Talk - Beer, Wine, Mead, & Cider Brewing Discussion Forum:

This site may earn a commission from merchant affiliate links, including eBay, Amazon, and others.
what about using aluminum plate for the induction top? would that cause a reaction of some sort with the stainless?

Everything within a couple inches of that coil forms part of a magnetic, electric and thermal circuit. It would need to be tested. Aluminum isnt ferromagnetic, but it is a conductor. There is a reason cooktops use glass and not aluminum.
 
Last edited:
What about a thin ceramic plate (or tile), or regular tempered glass? Both electrically and thermally insulating.
The tile is a candidate too. The base is 15x15". It needs mechanical strength to hold up the boil kettle.

Glass places tell me the tempered glass will crack or break.

The closest thing Ive found is the oversize, high temp glass cutting boards. But they arent cuttable.

For now the plywood works.
 
Last edited:
You actually twigged an idea for me. I could possibly reverse flow my mash bucket if I put the standpipe right through the bottom of it. Hmmmm...

Glad I could help spark a new tweak

Baby steps. Do what you can to get going and refine as resources allow. what about using a plastic bucket ? The Robobrew standpipe is available as spare aprts and it is inexpensive.

I'm currently using a 3v gravity cooler setup. I just got a pump for xmas so I don't have to lift heavy scalding containers of water, but it's trigger me to think how I could incorporate it more and smooth out or quicken the brew day. Just need to try it out and see where it will work before I start making more massive changes.

At least you are brewing. I stopped brewing for years and really, really missed it. I'll probably be brewing this weekend. I love brewing when it is cold and stormy in winter.

I've been lucky my wife has been very supportive. Even on leave after the first child, she all but kicked me out the door to brew... maybe she was just sick of me... Glad your back in the fold.
 
If the heat from a drill bit will cause ceramic tile to break, there is no way it will withstand the heat from the induction coil and boil kettle.


I might give it a try anyway, in the name of science. I think I found a piece of 18x18" ceramic tile for cheap. I need to drill 5 holes in the tile and bevel them ifor the bolts to secure the induction coil to the underside of the tile. I'm pretty sure it is going to fail.
 
As you know, when it comes to TY videos, the guy in front of the camera isn't necessarily an authoritative subject matter expert. I would definitely drill with a water stream, but I guarantee the drill bit selection matters... no mention in this vid.

If your tile fails it will be because part of it was bent / put in a state of tension (on the bottom surface), which ceramics don't do well with - not because you put a hole in it.
 
I'm probably going to ditch my Chugger pump because it is too loud when running in my kitchen for several hours. I'm thinking of replacing it with a Topsflo TD5.
 
Youtube is a garbage bin. Drilling tile that way won't work. You'll waste tile and time. But to each their own.
 
If your tile fails it will be because part of it was bent / put in a state of tension (on the bottom surface), which ceramics don't do well with - not because you put a hole in it.

Thing1's frame is made from 1.5" square stainless steel. The main strurcture is 15x15" on the outside, 12" x 12" on the inside. The Bayou Classic 1044 boil kettle is 13.5" diameter. If it isn't perfectly centered, the tile would carry some load. Even if it is perfectly centered, if the bottom of the boil kettle droops or the tile isn't flat and bows upward, the tile will be carrying some of the load. Tile isn't meant to carry load. It is designed to be supported everywhere.

Between the thermal issue and the lack of weight bearing capability, tile is a non starter.
 
Last edited:
I wasn’t suggesting the tile suspend the weight - the way I see it, your coil should be sandwiched and have the weight of the kettle down through the tile onto the coil etc. I don’t the size of the coil, but maybe that’s not practical.

Perhaps a garolite or plastic/fiberglass composite sheet could do the job, but it will come at a price.

I still think you should address the kettle - that one is not induction friendly. Test it against a legit clad or ferrous steel based vessel. Try a cast iron skillet if that’s all you have and see the difference heating a volume of water.

I noticed in one of his earlier posts he said his coil was hitting 300 degrees. The problem with fiberglass panels is that, depending on the resin used, they can combust when exposed to prolonged temperatures as low as 275 degrees. Plywood also starts to suffer permanent decomposition at prolonged temperatures over 200 degrees since the glues used in their manufacture break down and off gas which can lead to charring and in some cases spontaneous combustion in spite of wood normally having a combustion point of 450+ degrees.
Perhaps something like cement board, like what is used as tile backer and also often used to protect combustibles from the heat of stove pipes might work. It comes in various thicknesses and is cheap and easy to find at the big box stores like Home Depot or Lowes.
 
There is another reason why his coil gets hot. But you all are EEs, you'll figure it out.
 
I wasn’t suggesting the tile suspend the weight - the way I see it, your coil should be sandwiched and have the weight of the kettle down through the tile onto the coil etc. I don’t the size of the coil, but maybe that’s not practical.

The coil itself should not be weight bearing.

I still think you should address the kettle - that one is not induction friendly.

Actually the Bayou Classic pots are induction friendly. A strong magnet sticks to them and it also works on a high end induction cooktop.

The induction coil and the pot work together and have to be tuned together. I've done this and it works well.
 
In case some of you are thinking about copying my design... don't. Although Thing1 works (very) well, I have something much better in the works. Save your effort.
 
You have a patent?

You put photos on the internet, it's free range, boss.
 
Last edited:
You can't modulate the power of this board much. I'm still investigating. All you can do is turn the power output on and off with a relay contact. The board remains energized, it just stops driving the coil.

Temp control is not a big problem with a decent amount of liquid in the pot. Temp rise is ~4F per minute with 6 gallons. Turns off instantly, takes a second or so to turn on. It runs well with turn on hysteresis at 0 degrees and turn off at 0.5 degrees. That provides +/- 0.5 F control.

CraftBeerPi works excellent. Rpi + $2 isolated relay gets it done.
 
Last edited:
From what I remember, on and off control was exactly what was lacking with the off-the-shelf induction units.

Maybe I'm out of the loop but I didn't realize winding your own induction coil was an option. I'm glad I know that now.

Cool project!
 
Maybe I'm out of the loop but I didn't realize winding your own induction coil was an option.
It's just science and some DIY skills. 3rd time was a charm.

I suspect that the countertop hobs also use on/off control. In fact, the controller board is separate from the power board. I think they'd be fairly easy to hack. Some have done it. There is a module in CraftBrewPi to control one. I shared this in another thread.
 
Last edited:
General comment... pretty much anything near an induction coil needs to be non magnetic. Thing1's frame is 1.5 square SS, 0.100" wall. 318 IIRC. Thing1s frame is slightly magnetic and it does heat up a bit when it runs. Not a lot, but a bit.

If I had to build Thing1 again, I would make the frame from aluminum. SS is such a pain to drill, especially small holes. It is also hard to cut if you don't have a plasma cutter that does tubing. Cutoff wheels work, but it is a pain.

I find aluminum much nicer to work with. Easy to cut, easy to weld. And it shines up to look pretty much just like SS. It is softer and not quite as strong, but this project doesn't need a bunch of strength.
 
Here is the drawing and bending schedule for the ring that holds the mash bucket This fits a Bayou 1044 boil kettle.

I haven't built mine yet.

Edit: The bending schedule should be done for the inside of the rod as when you bend rod the inside does not compress, the outside stretches, generally. The diameter of the inside of the rod is 13.5" - 2 x 0.25 = 13", not 13.5 as I have used in the diagram.

I was able to bend a fairly decent ring using this method, but I wasn't happy that I could catch the studs on the side of the grain basket on the ring and lift it up and possibly out. So I cut off segments of SS rod and soldered them into the boil kettle. Easier to do and it works better.

Brewpot ring.png
 
Last edited:
Thing1 with the mash bucket in the sparge position.

20190211_212134.jpg


Thing1 with the mash bucket in the mashing position.

20190211_212021.jpg


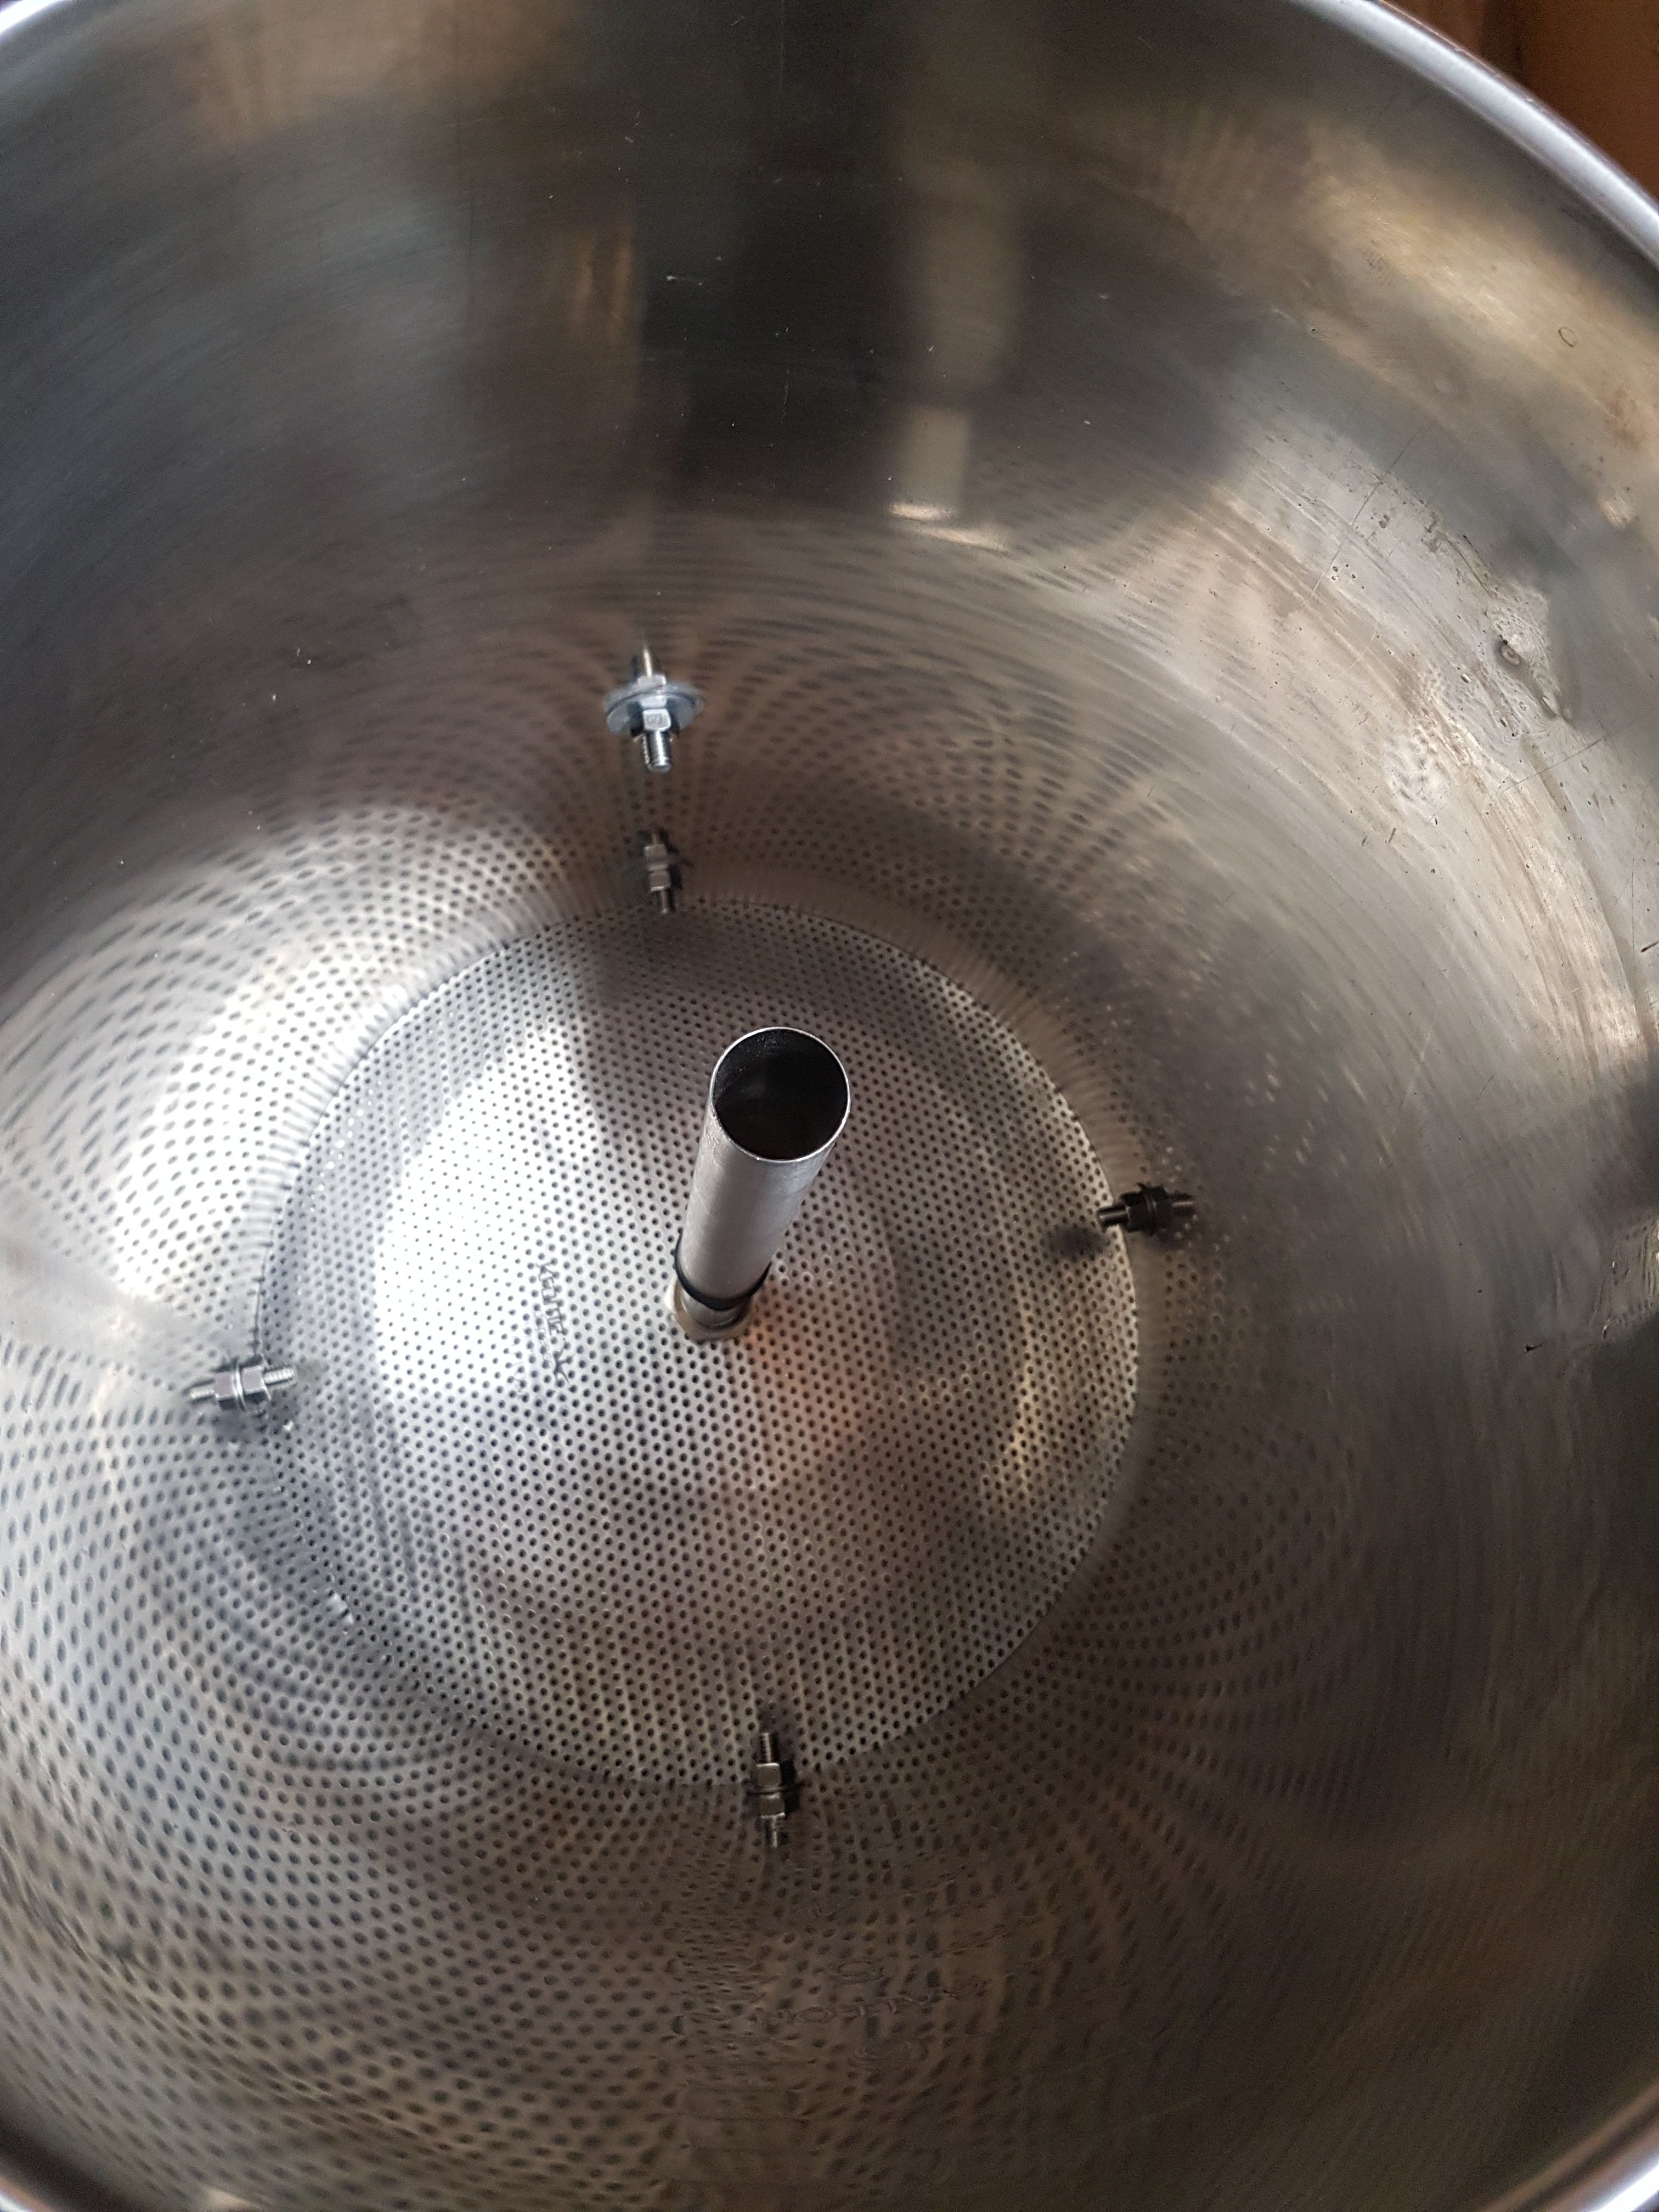
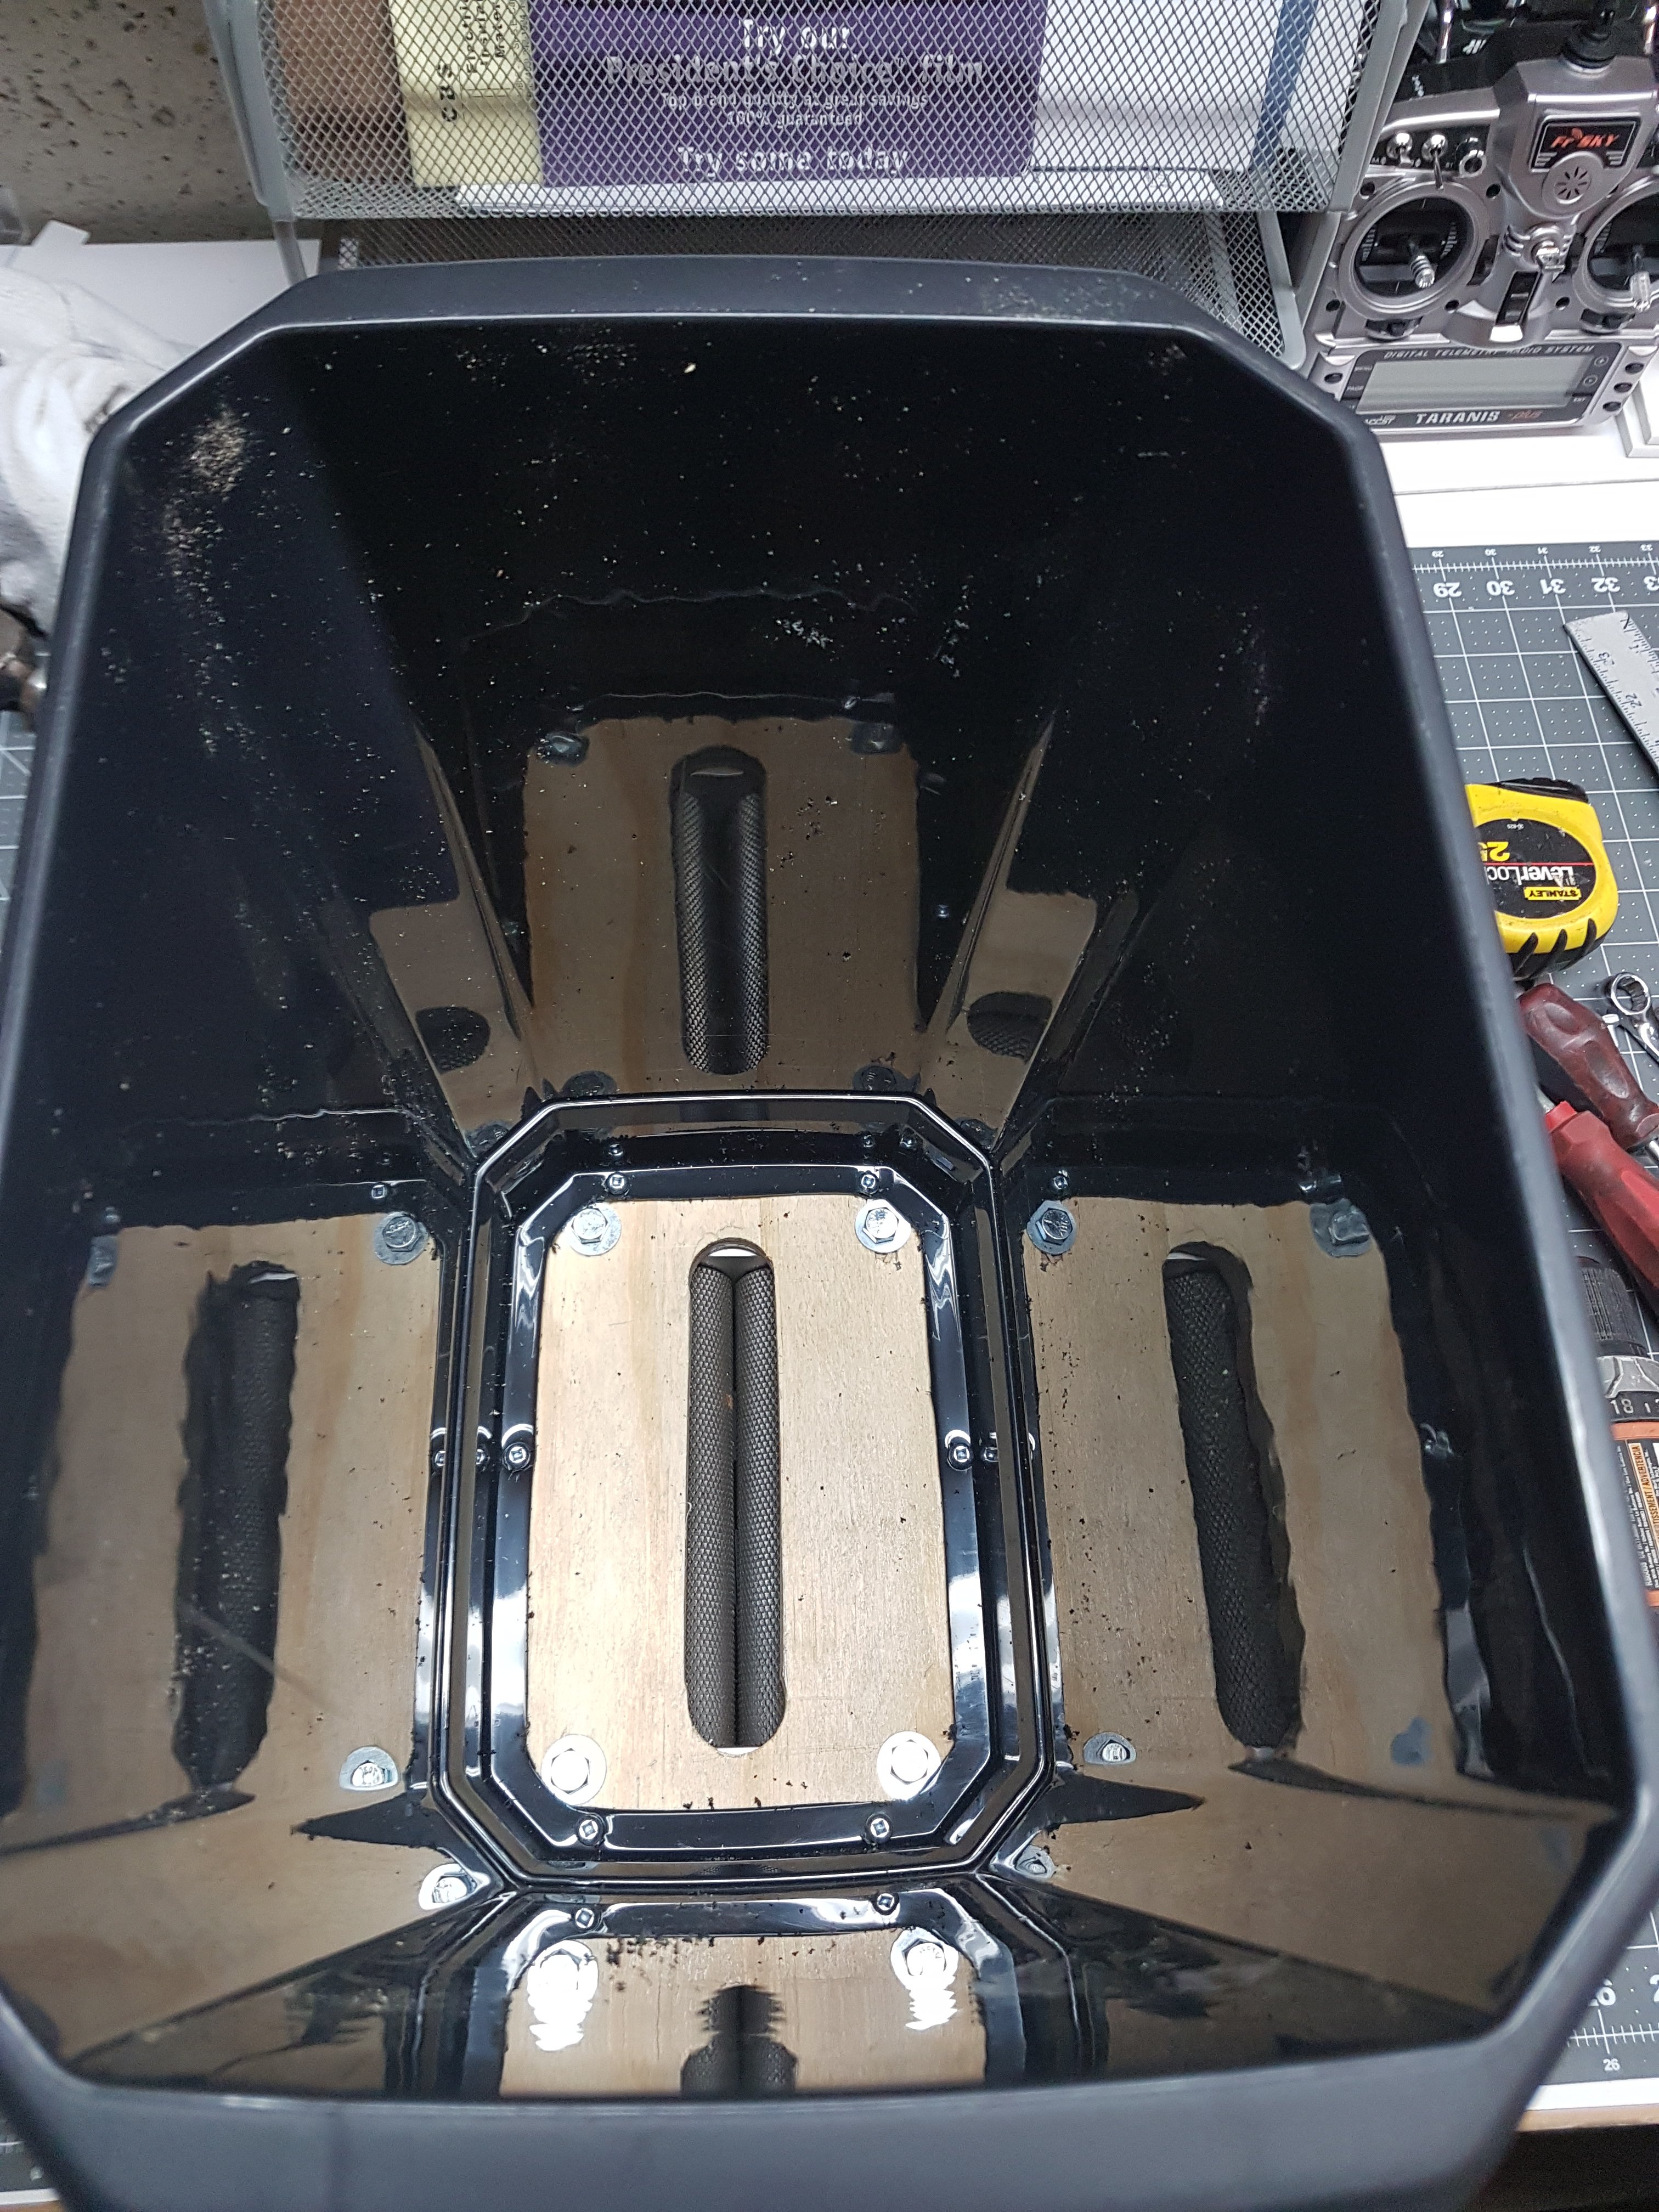
This is the inside of the mash bucket. The 4 bottom bolts are the studs that hold the bucket in the sparge position. The extra bolt further up covers a thermometer hole that was in the kettle from the factory. I'll solder a piece of SS over it someday.

20190211_205203.jpg


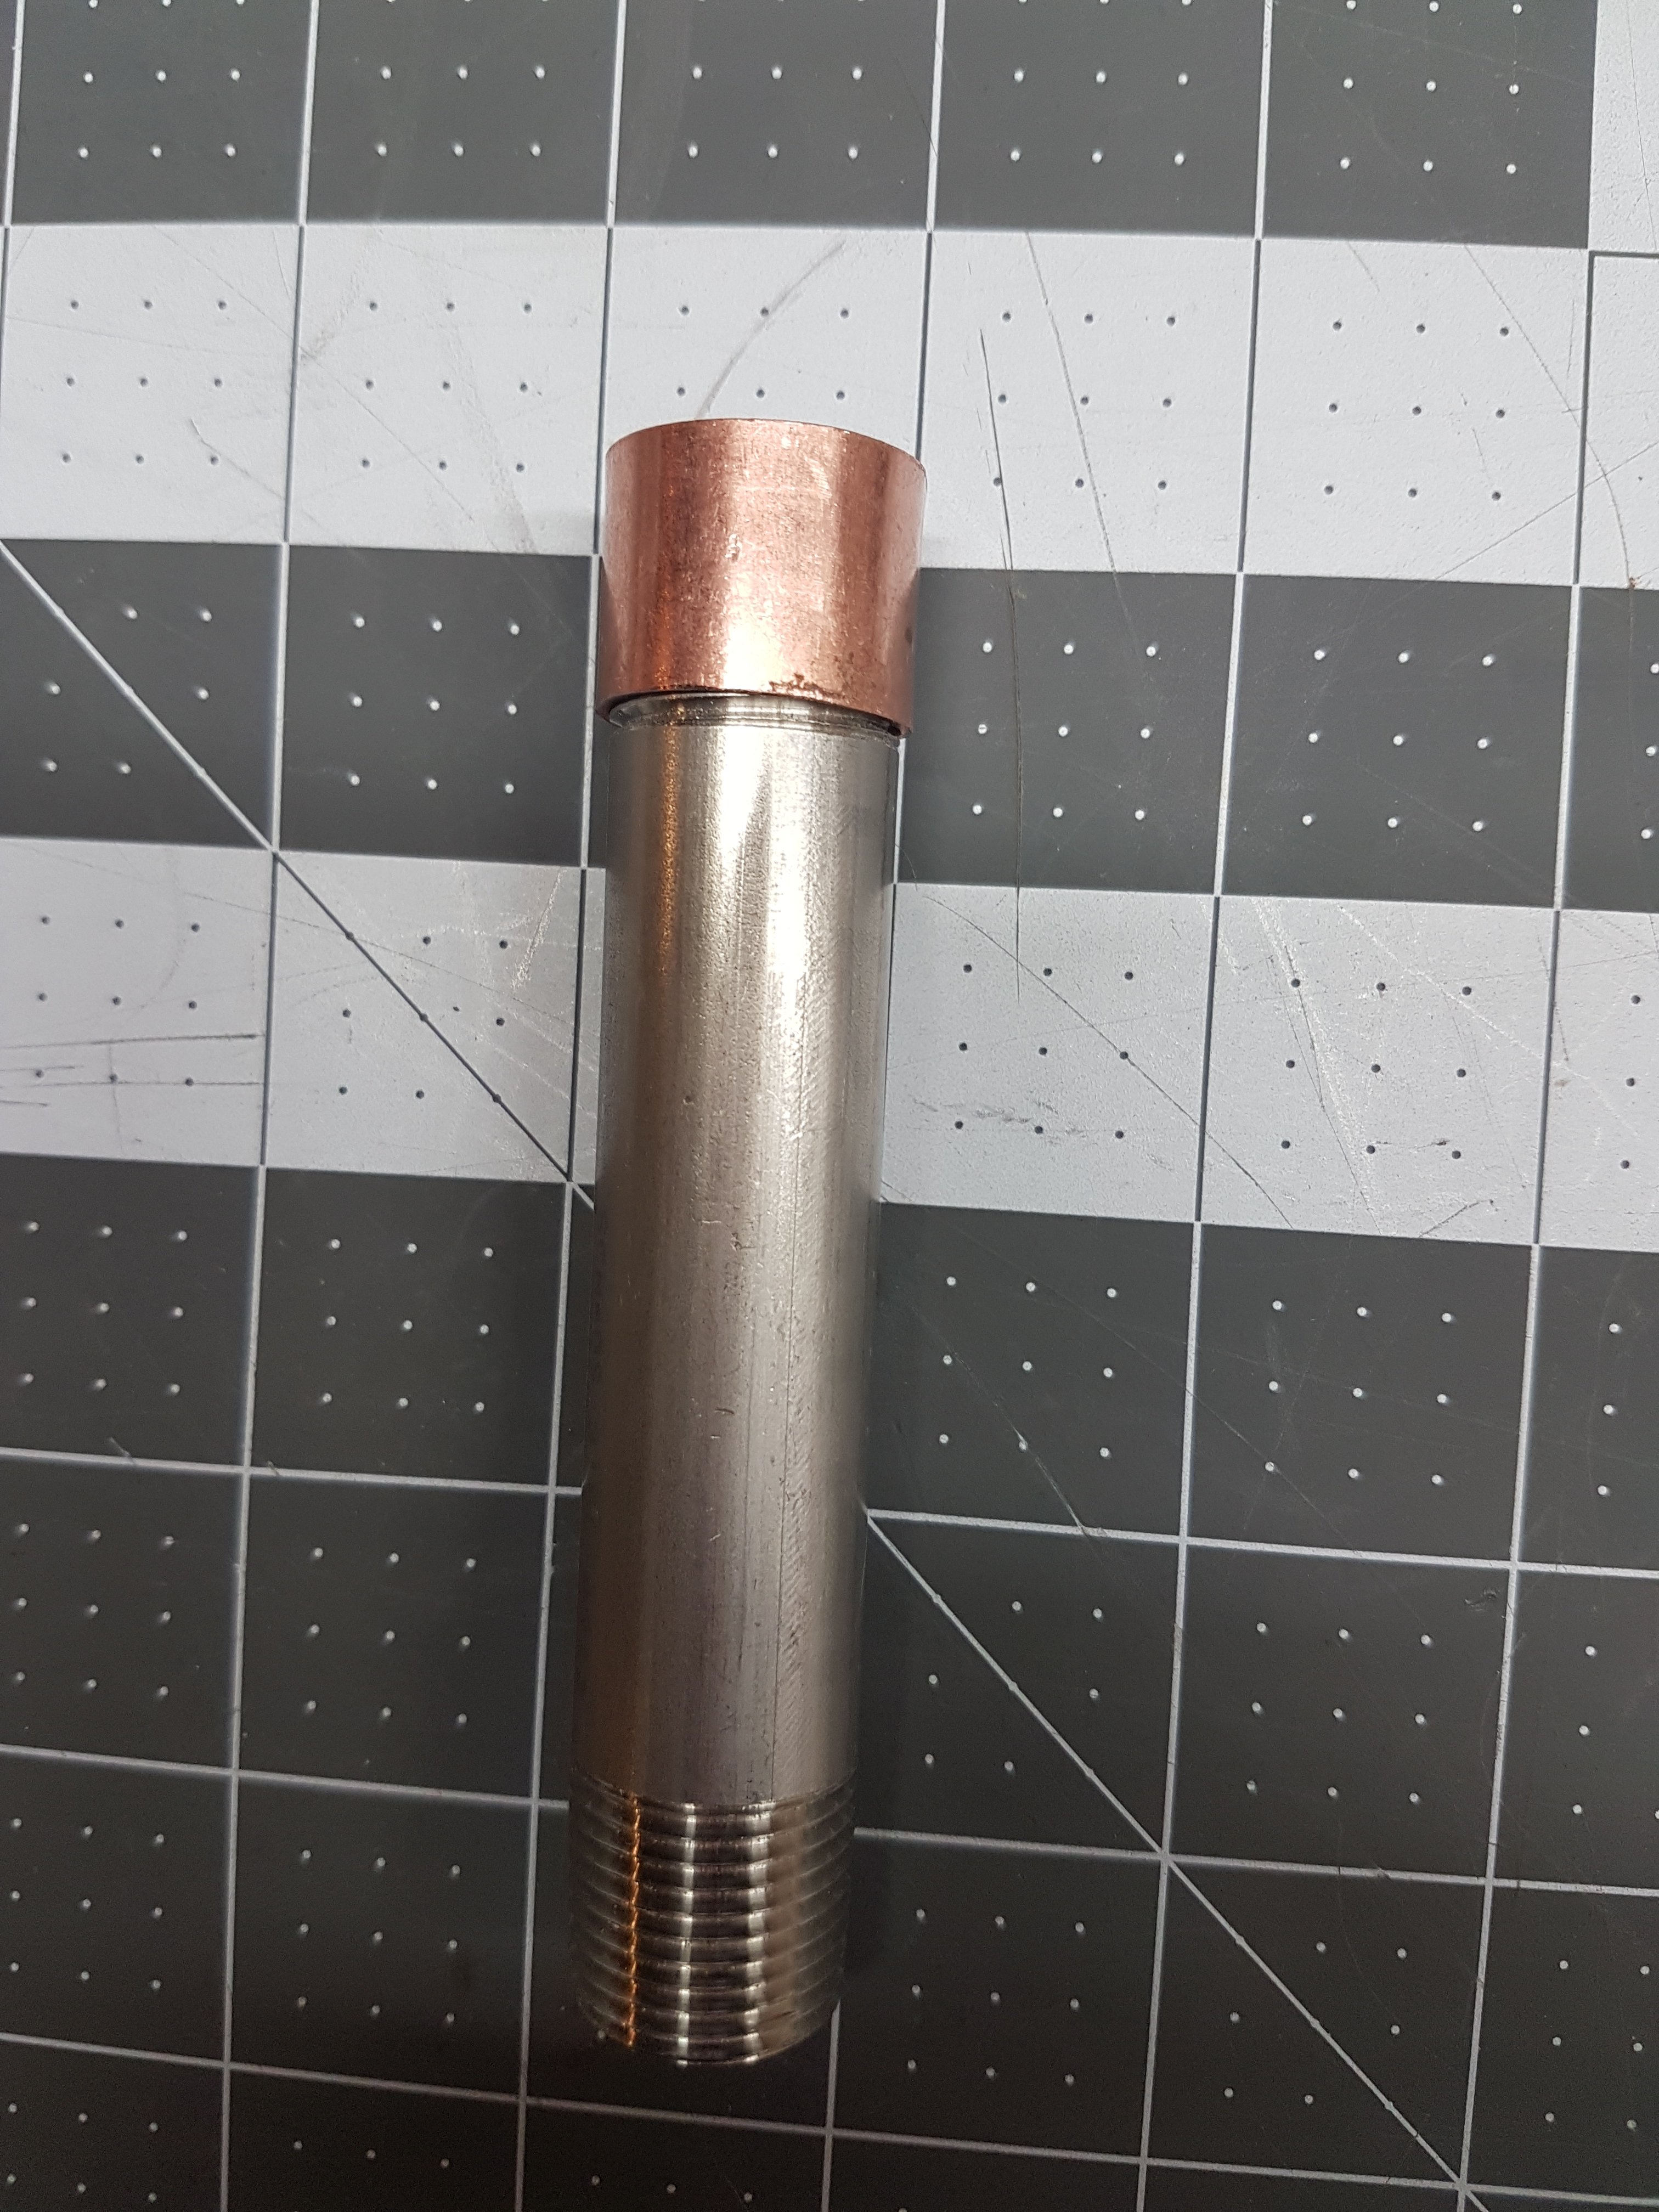
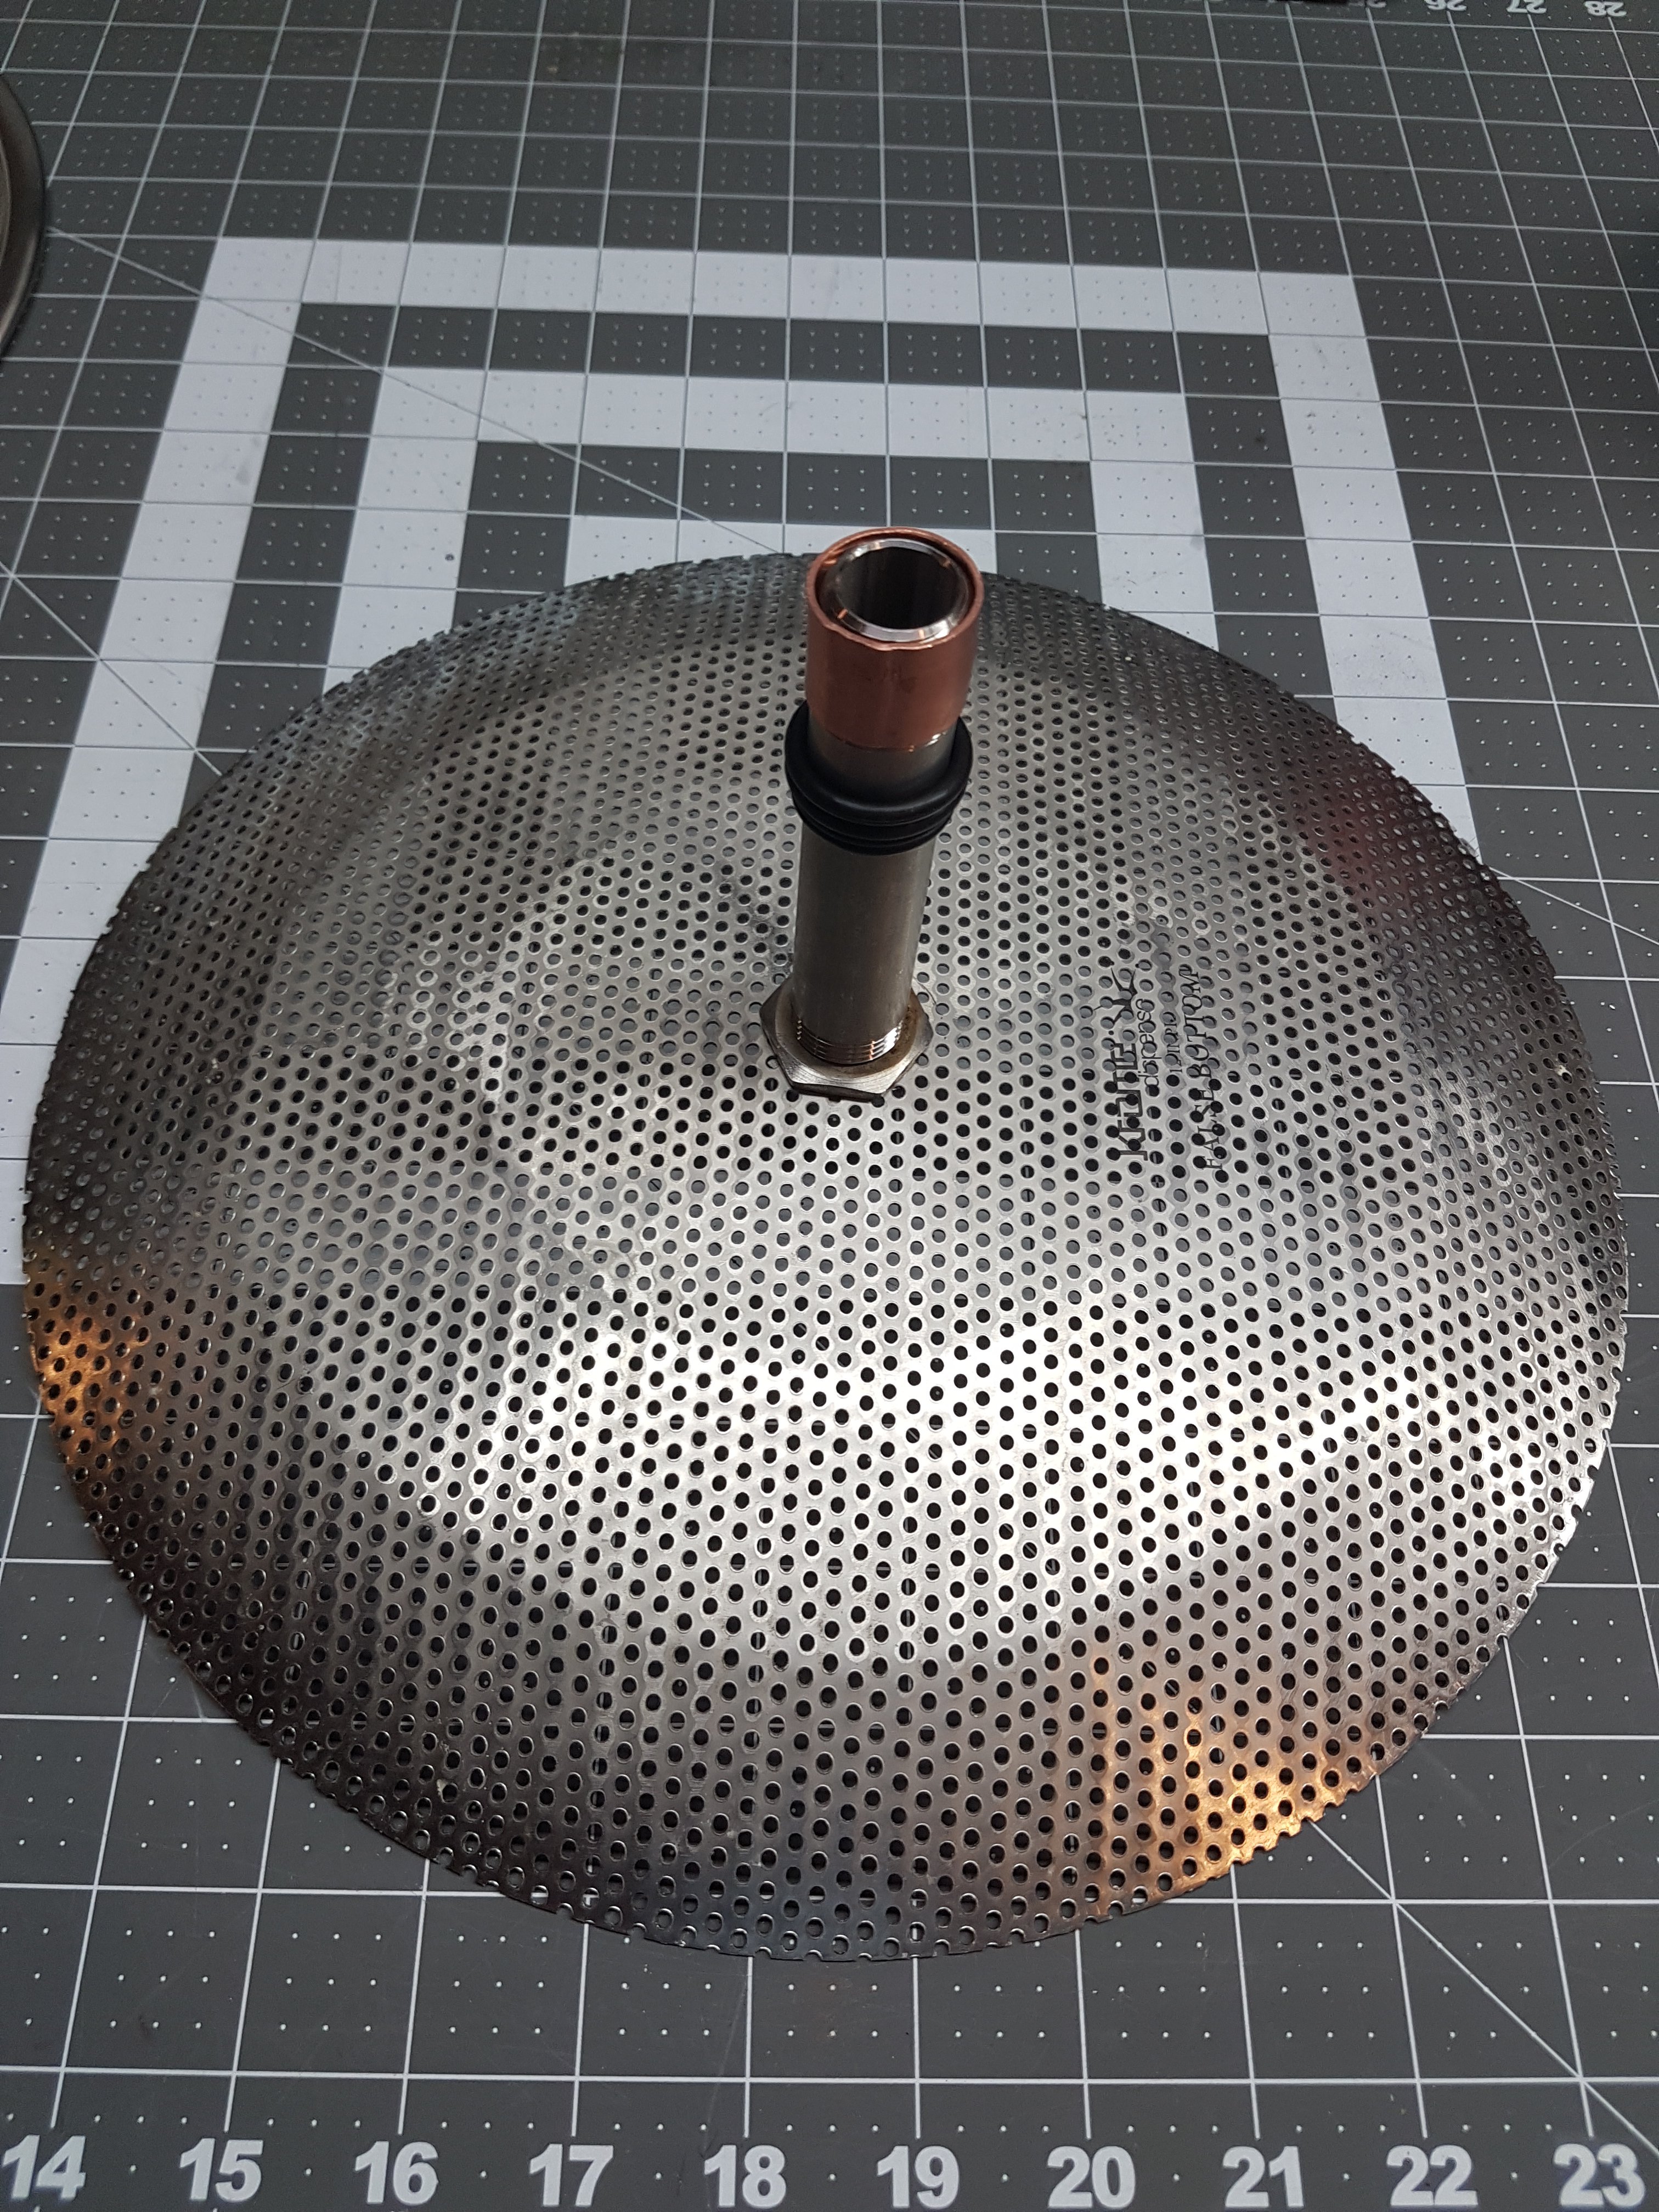
This is the inner standpipe I'm using right now. The copper is pressed onto the standpipe to take up the clearance with the outer standpipe, which is a Sanke keg dip tube.

The copper is a piece of a 3/4" copper pipe connector. I pressed it down to fit by using a 3.4" Pex crimp tool, which was just a bit too big. I wrapped the connector piece with paper and then crimped it and it works perfectly.


20190211_200449.jpg


I put some O Rings over the lower standpipe to hold the upper standpipe at the right height. I'll eventually use a clip.

20190211_201500.jpg


Test fitting the mash bucket onto the boil kettle. I was happy to find it is very stable.

20190211_204204.jpg


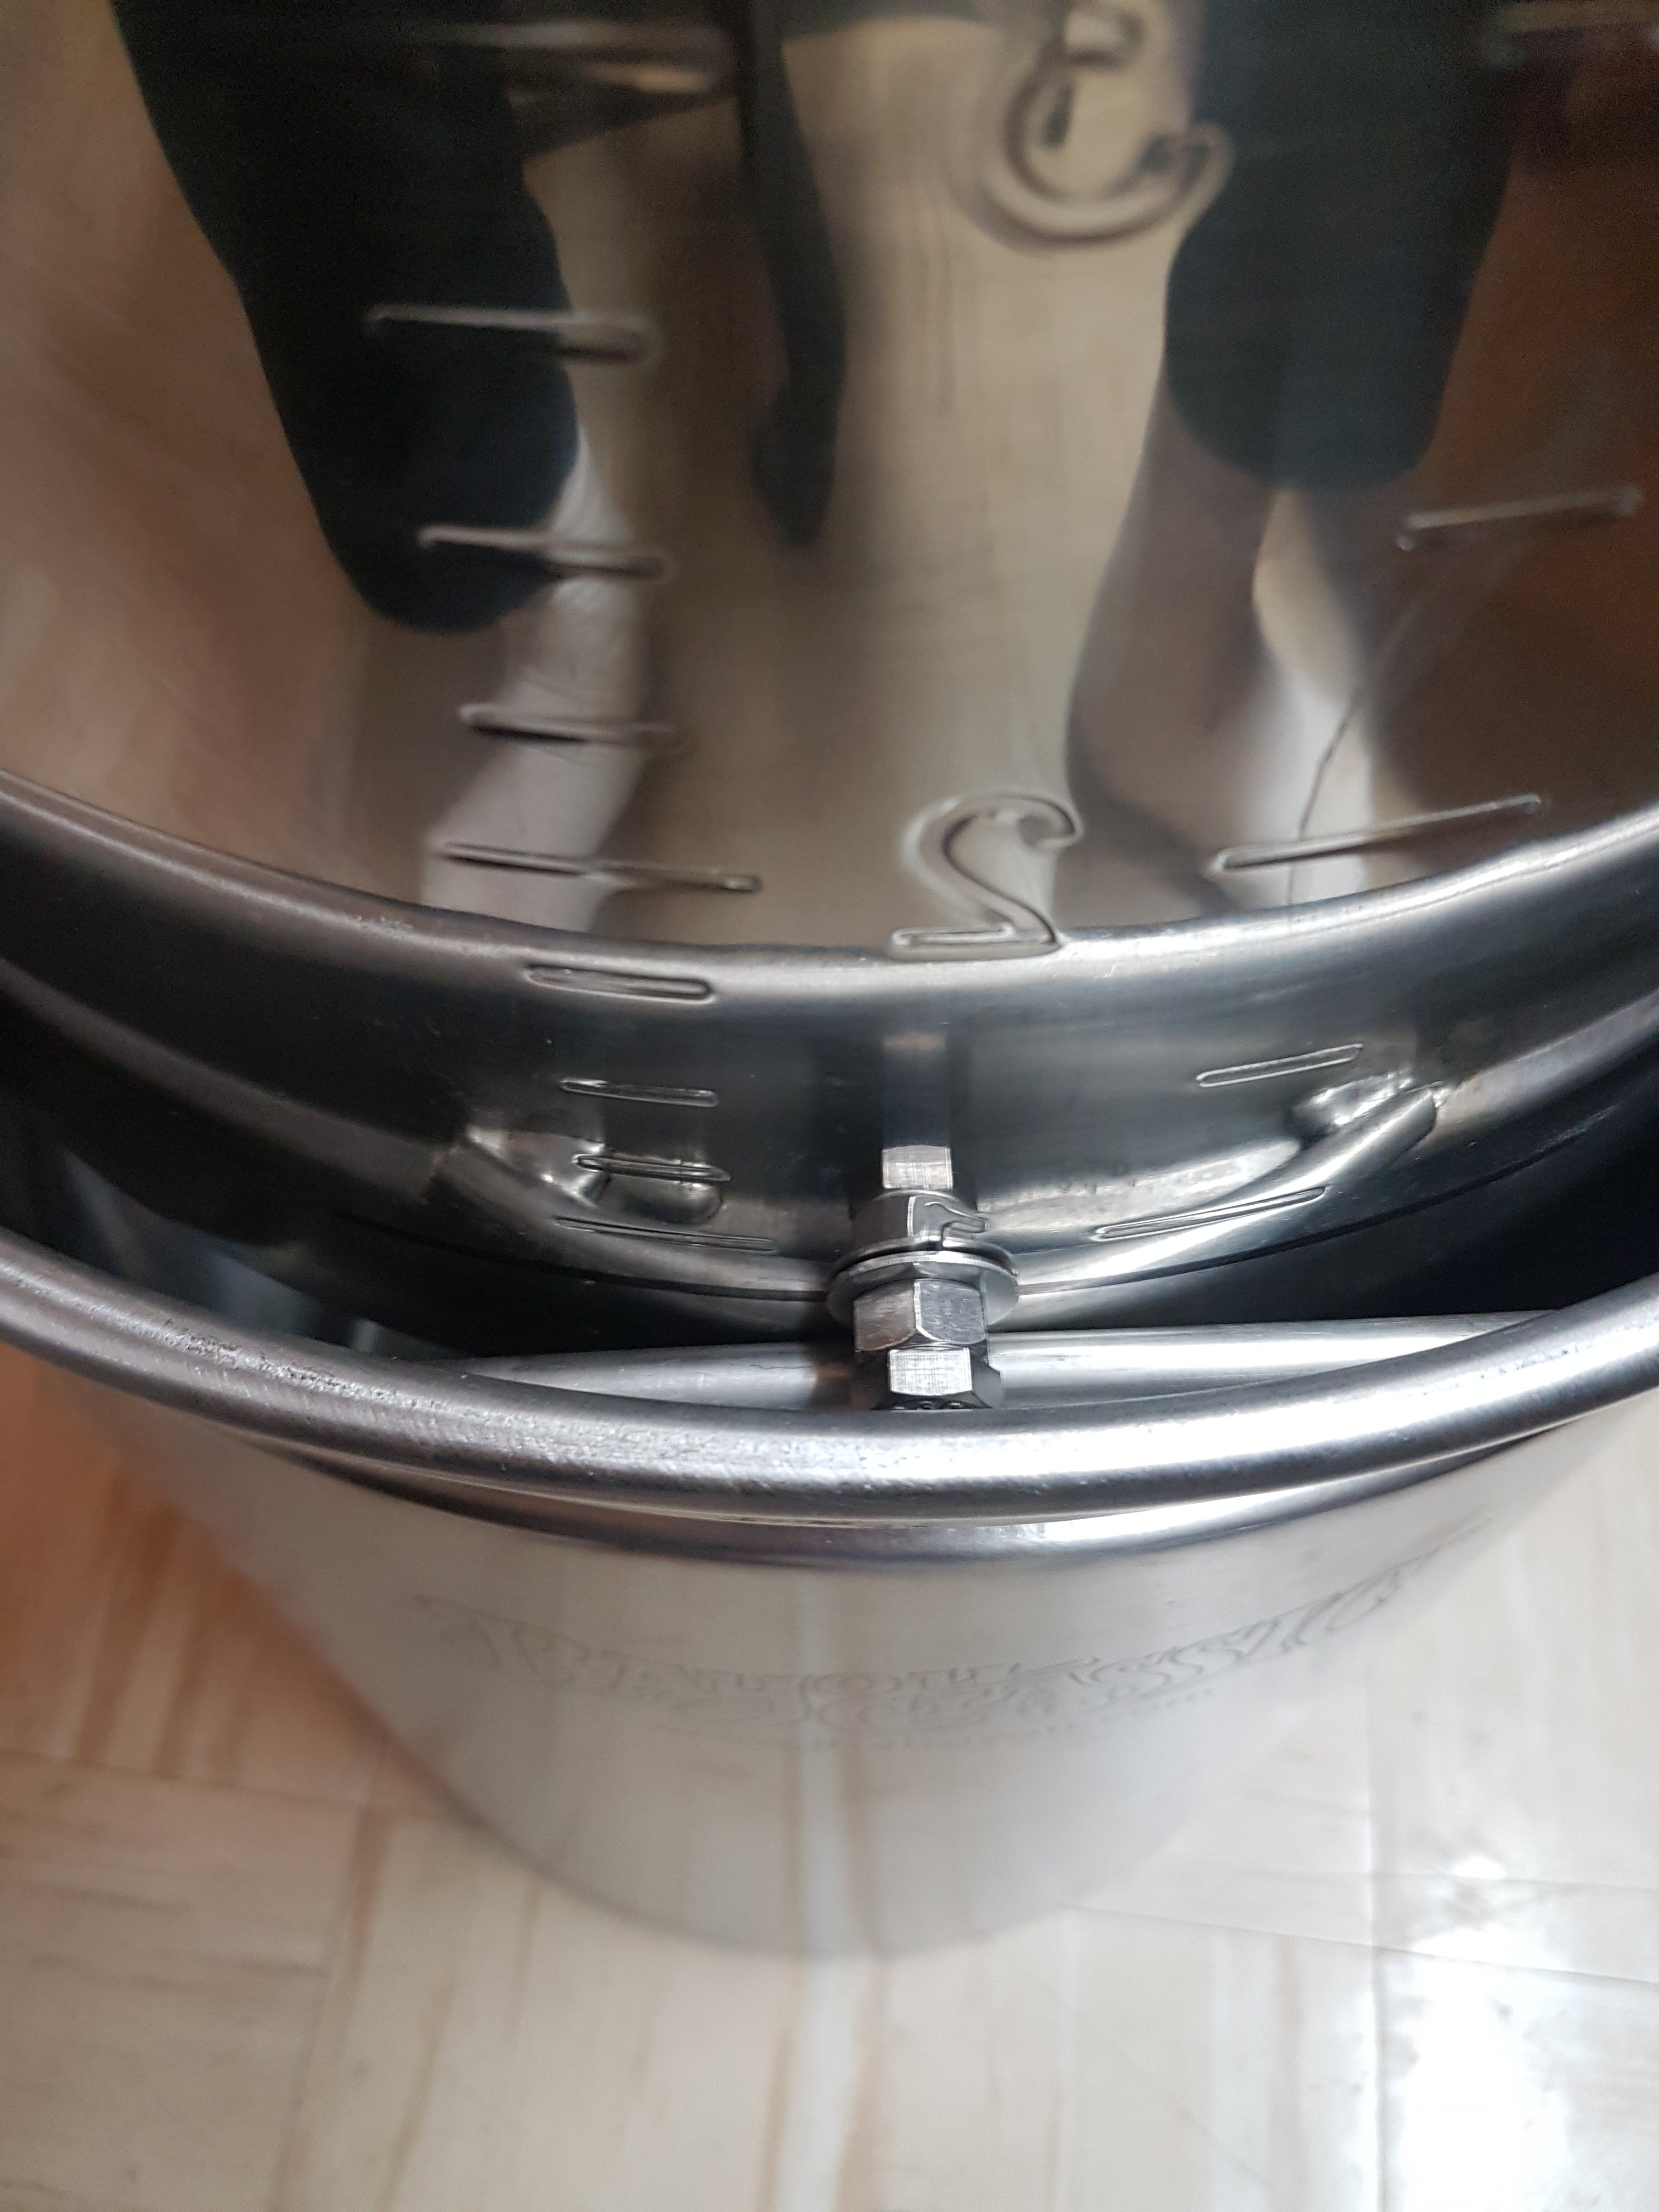
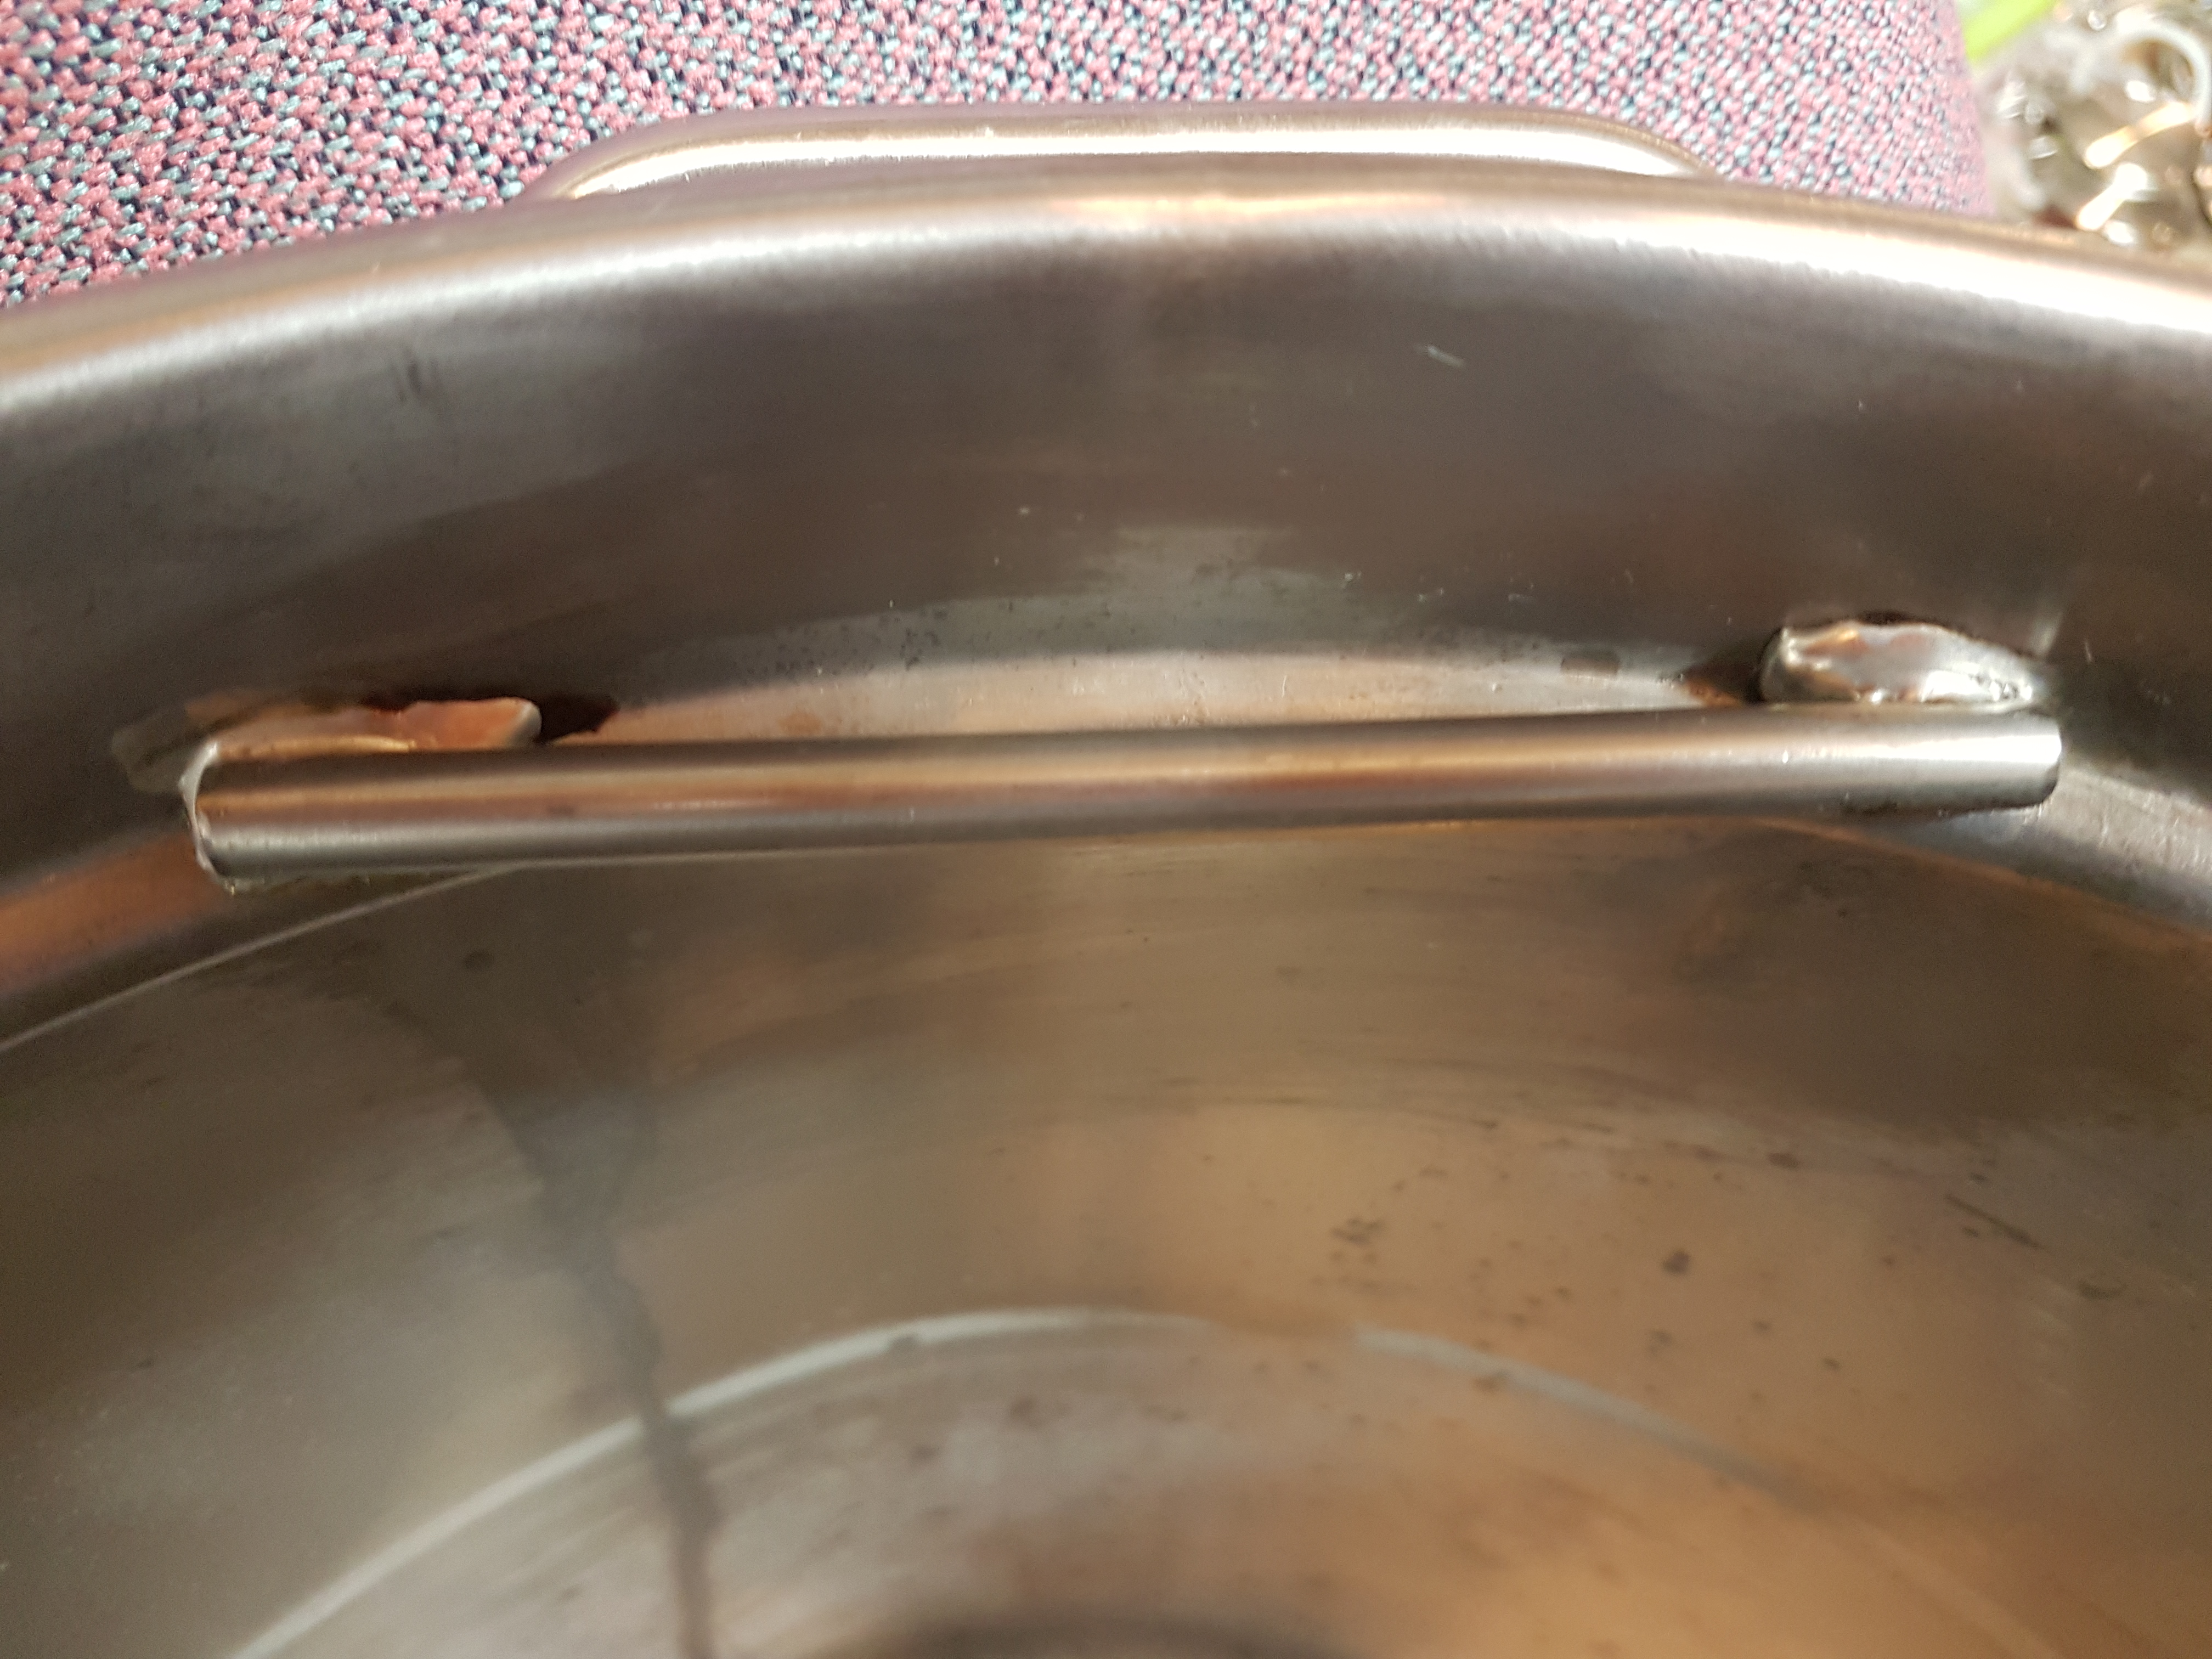
Here is the bolt sitting on the SS piece I soldered into the boil kettle. Explanation is in the next post.

20190211_204145.jpg


Standpipe mounted in the screen in the bottom of the mash bucket.

20190211_202432.jpg


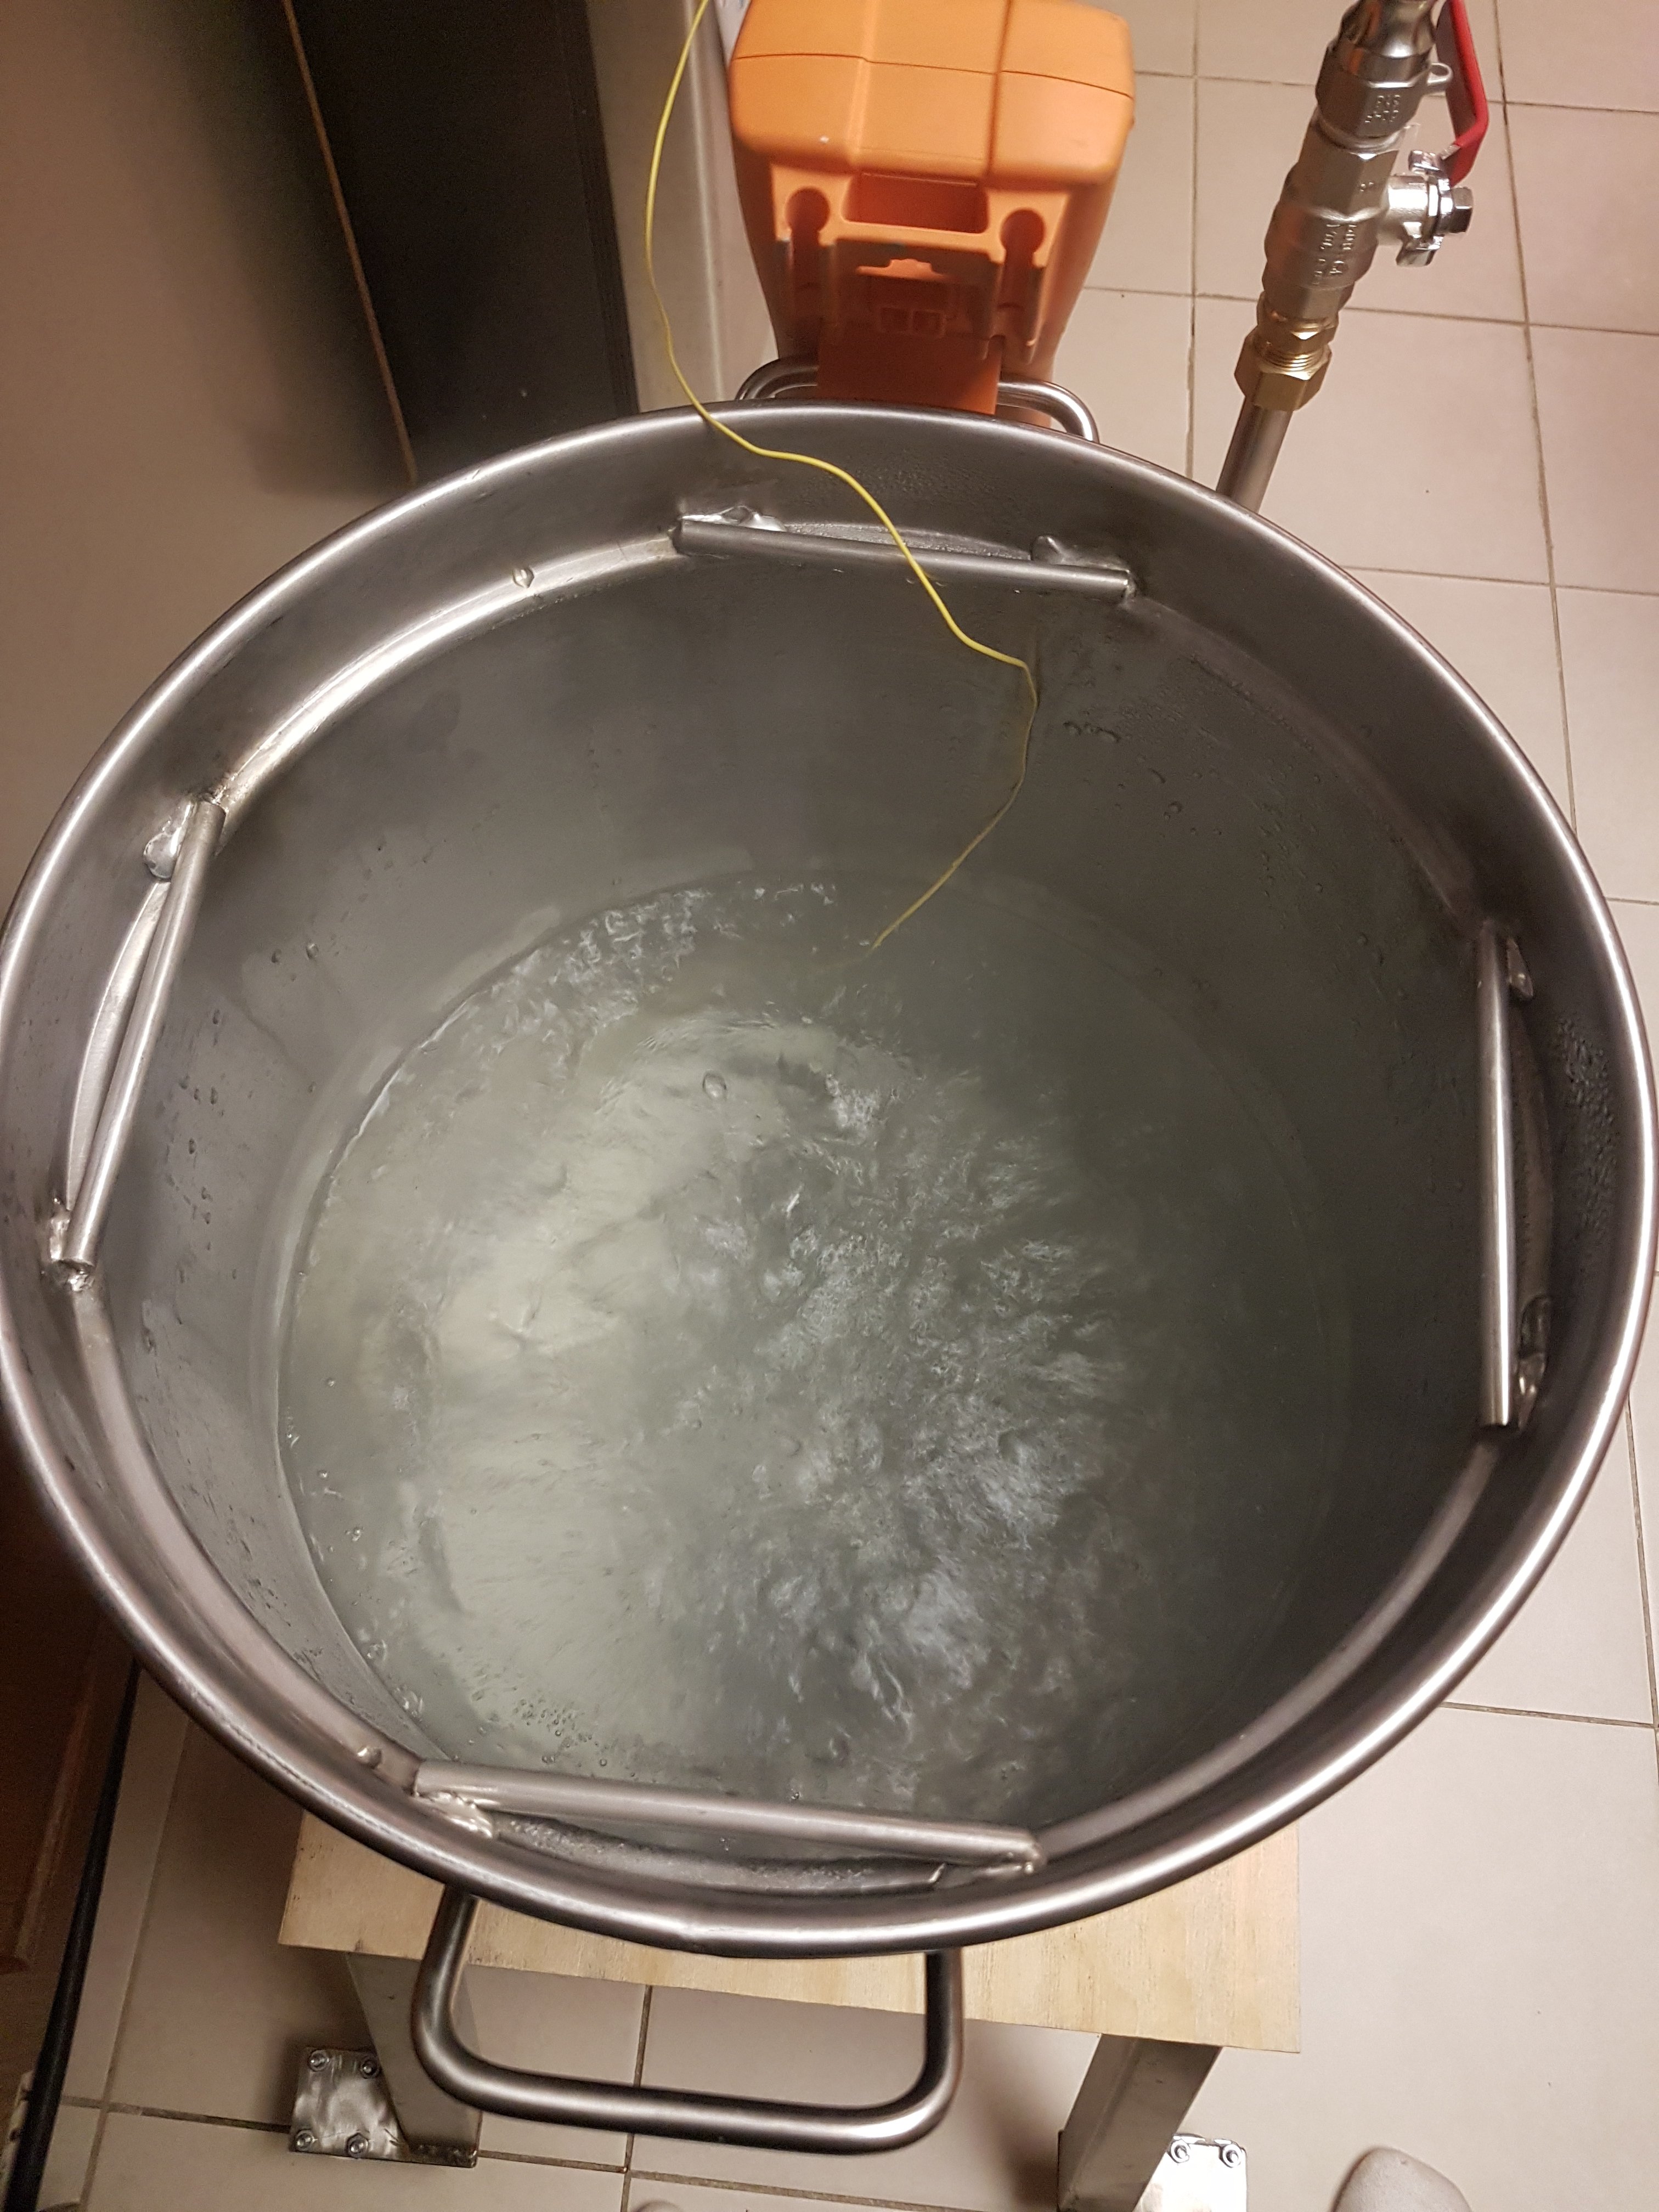
It boils with pretty good vigor. Not as good as propane, but still a good, rolling boil. Time to boil is very fast.

20190211_221036.jpg
 
Last edited:
Instead of bending the ring to hold the mash bucket while sparging, I cut some sections of 1/4" SS rod and soldered them to the inside of the boil pot. They work great.

20190211_202155.jpg


Thing1 is pretty much ready for a full on brewing session. I just need to encapsulate the temp sensors into copper tubes and double check my plate chiller and I'm ready to go.
 
Last edited:
Thing1 temp sensors.

20190215_142235.jpg


DS18b20 temp sensors embedded in 1/4" copper tubing, for maximum thermal conductivity. The ends are sealed with a high quality silicone.

There are 2 of them, one for the mash and the other for the return liquid temp and boil temp.

I'm going to try using a cascaded PID controller in CBPi3 that manages both the bottom of kettle temp (ie return temp) as well as the mash temp itself. The source for this controller is here:
https://github.com/jangevaare/cbpi-CascadePID
 
Last edited:
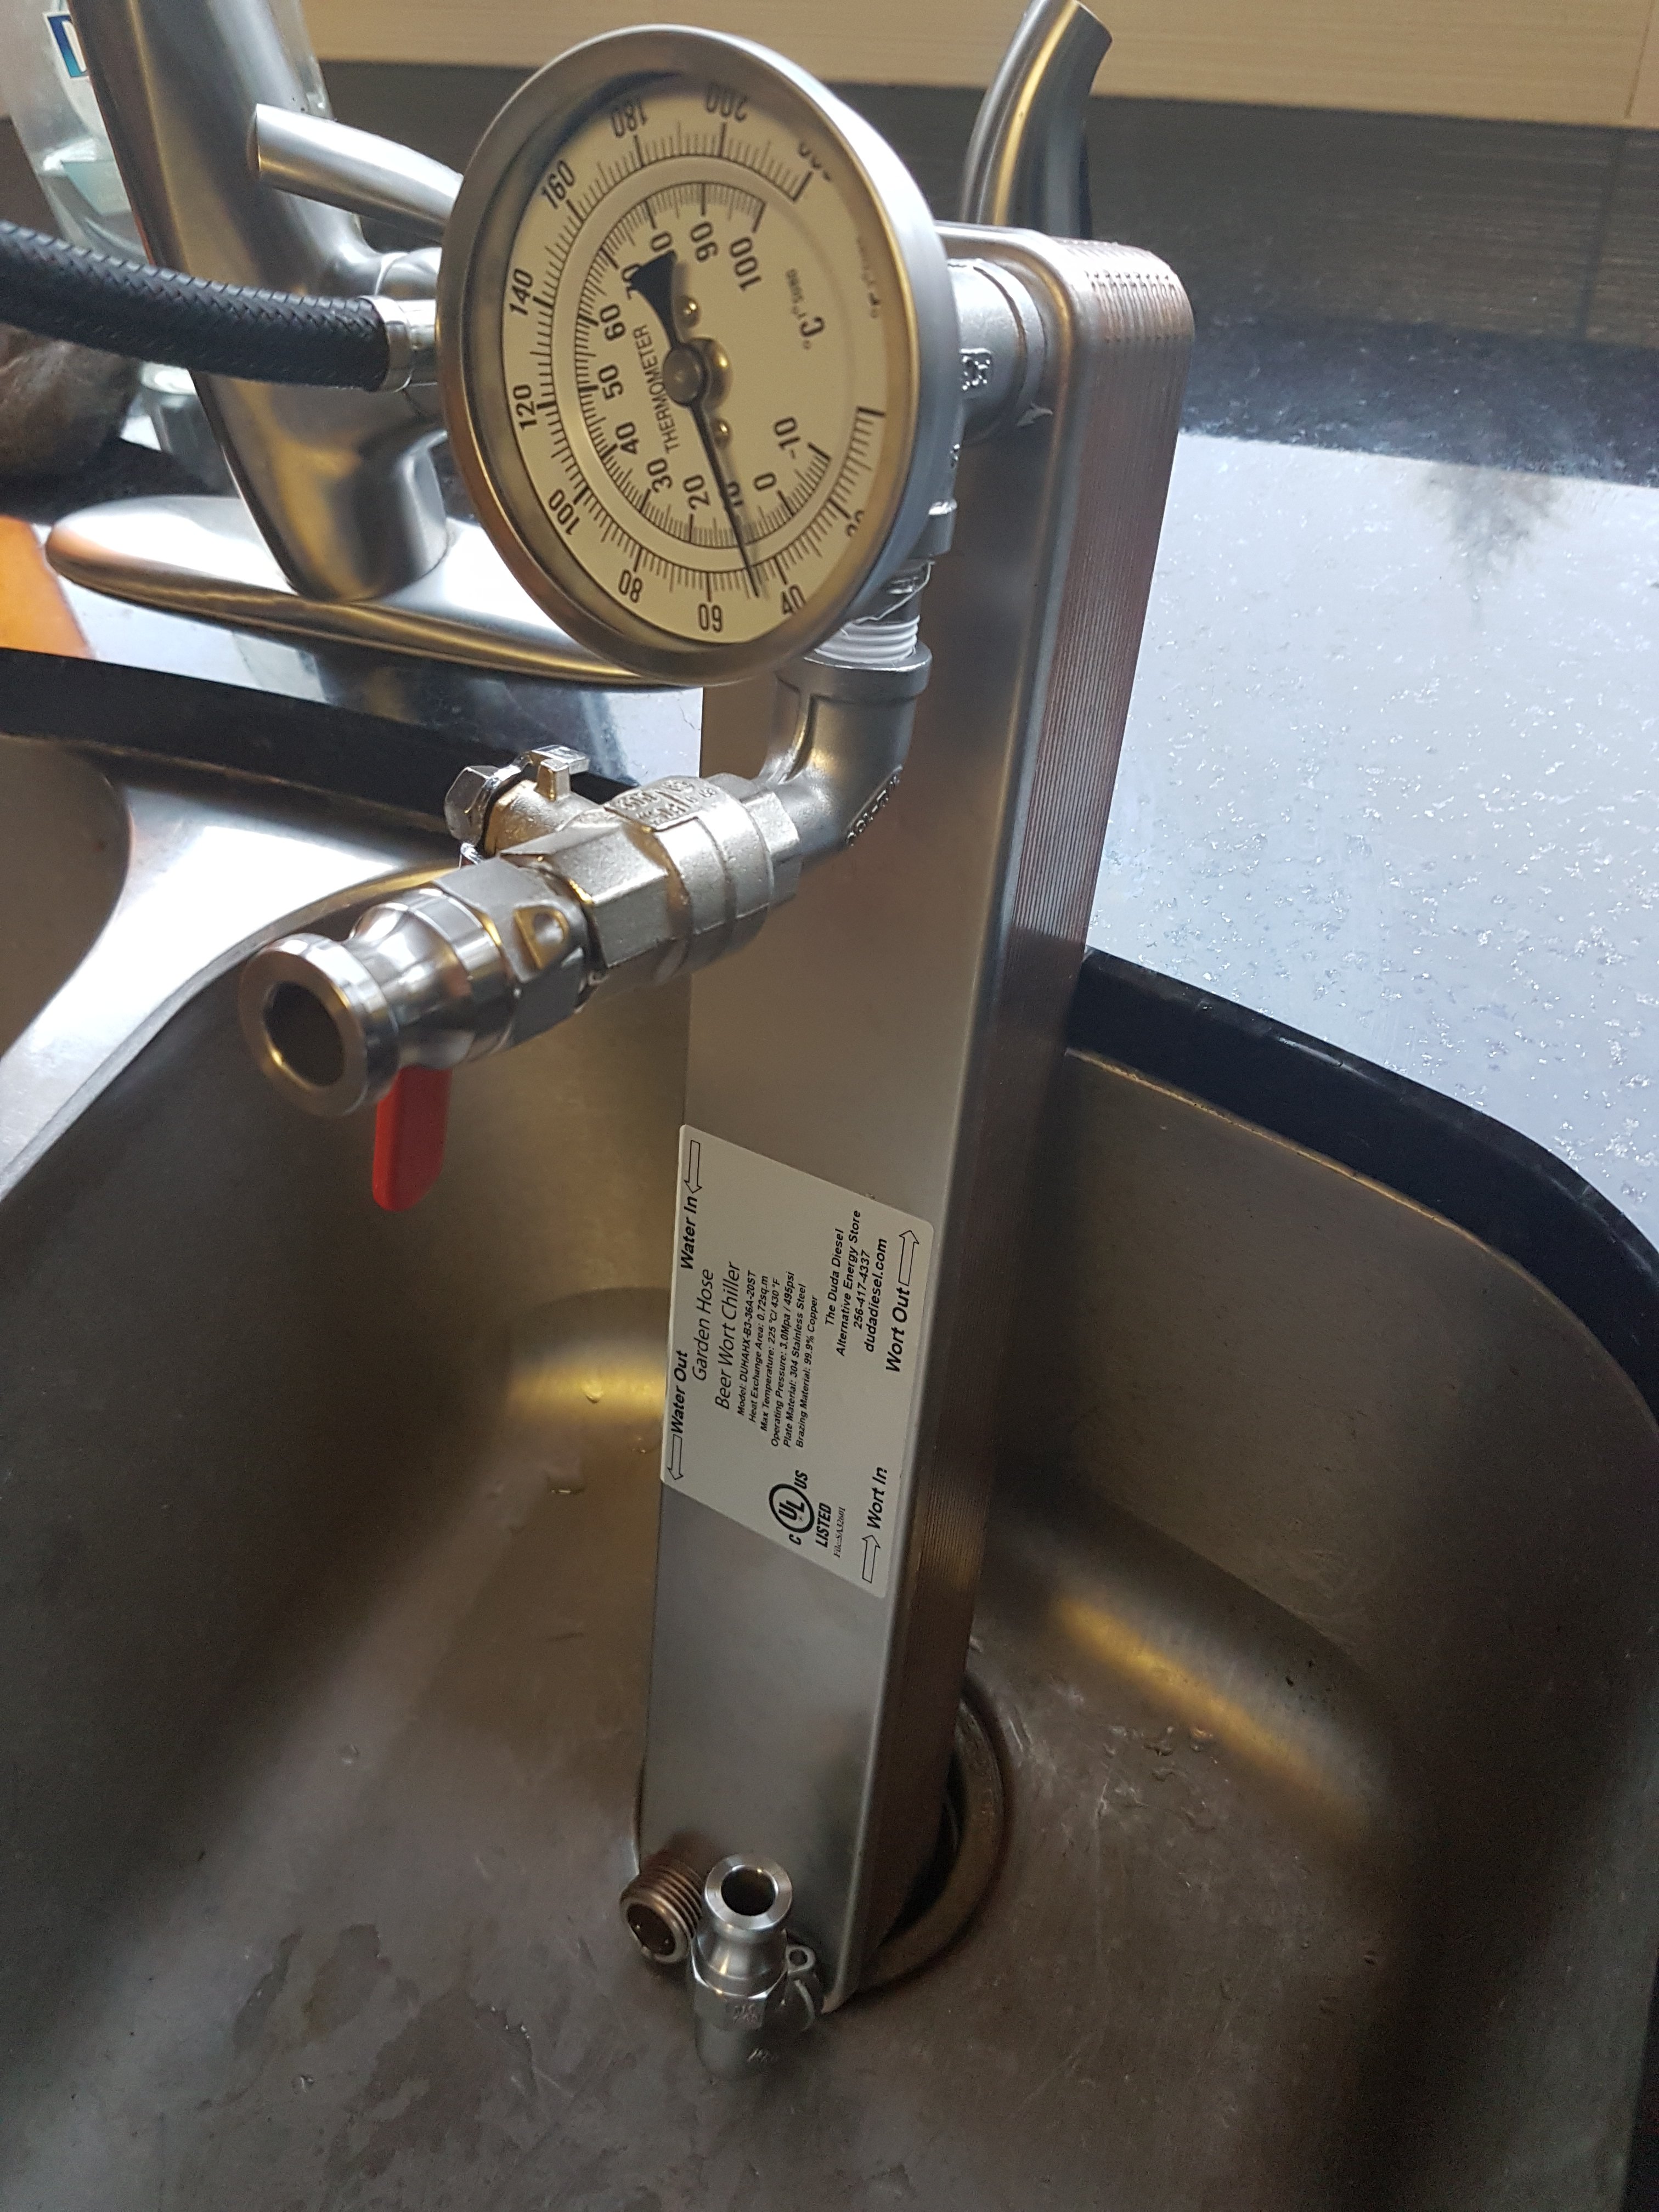
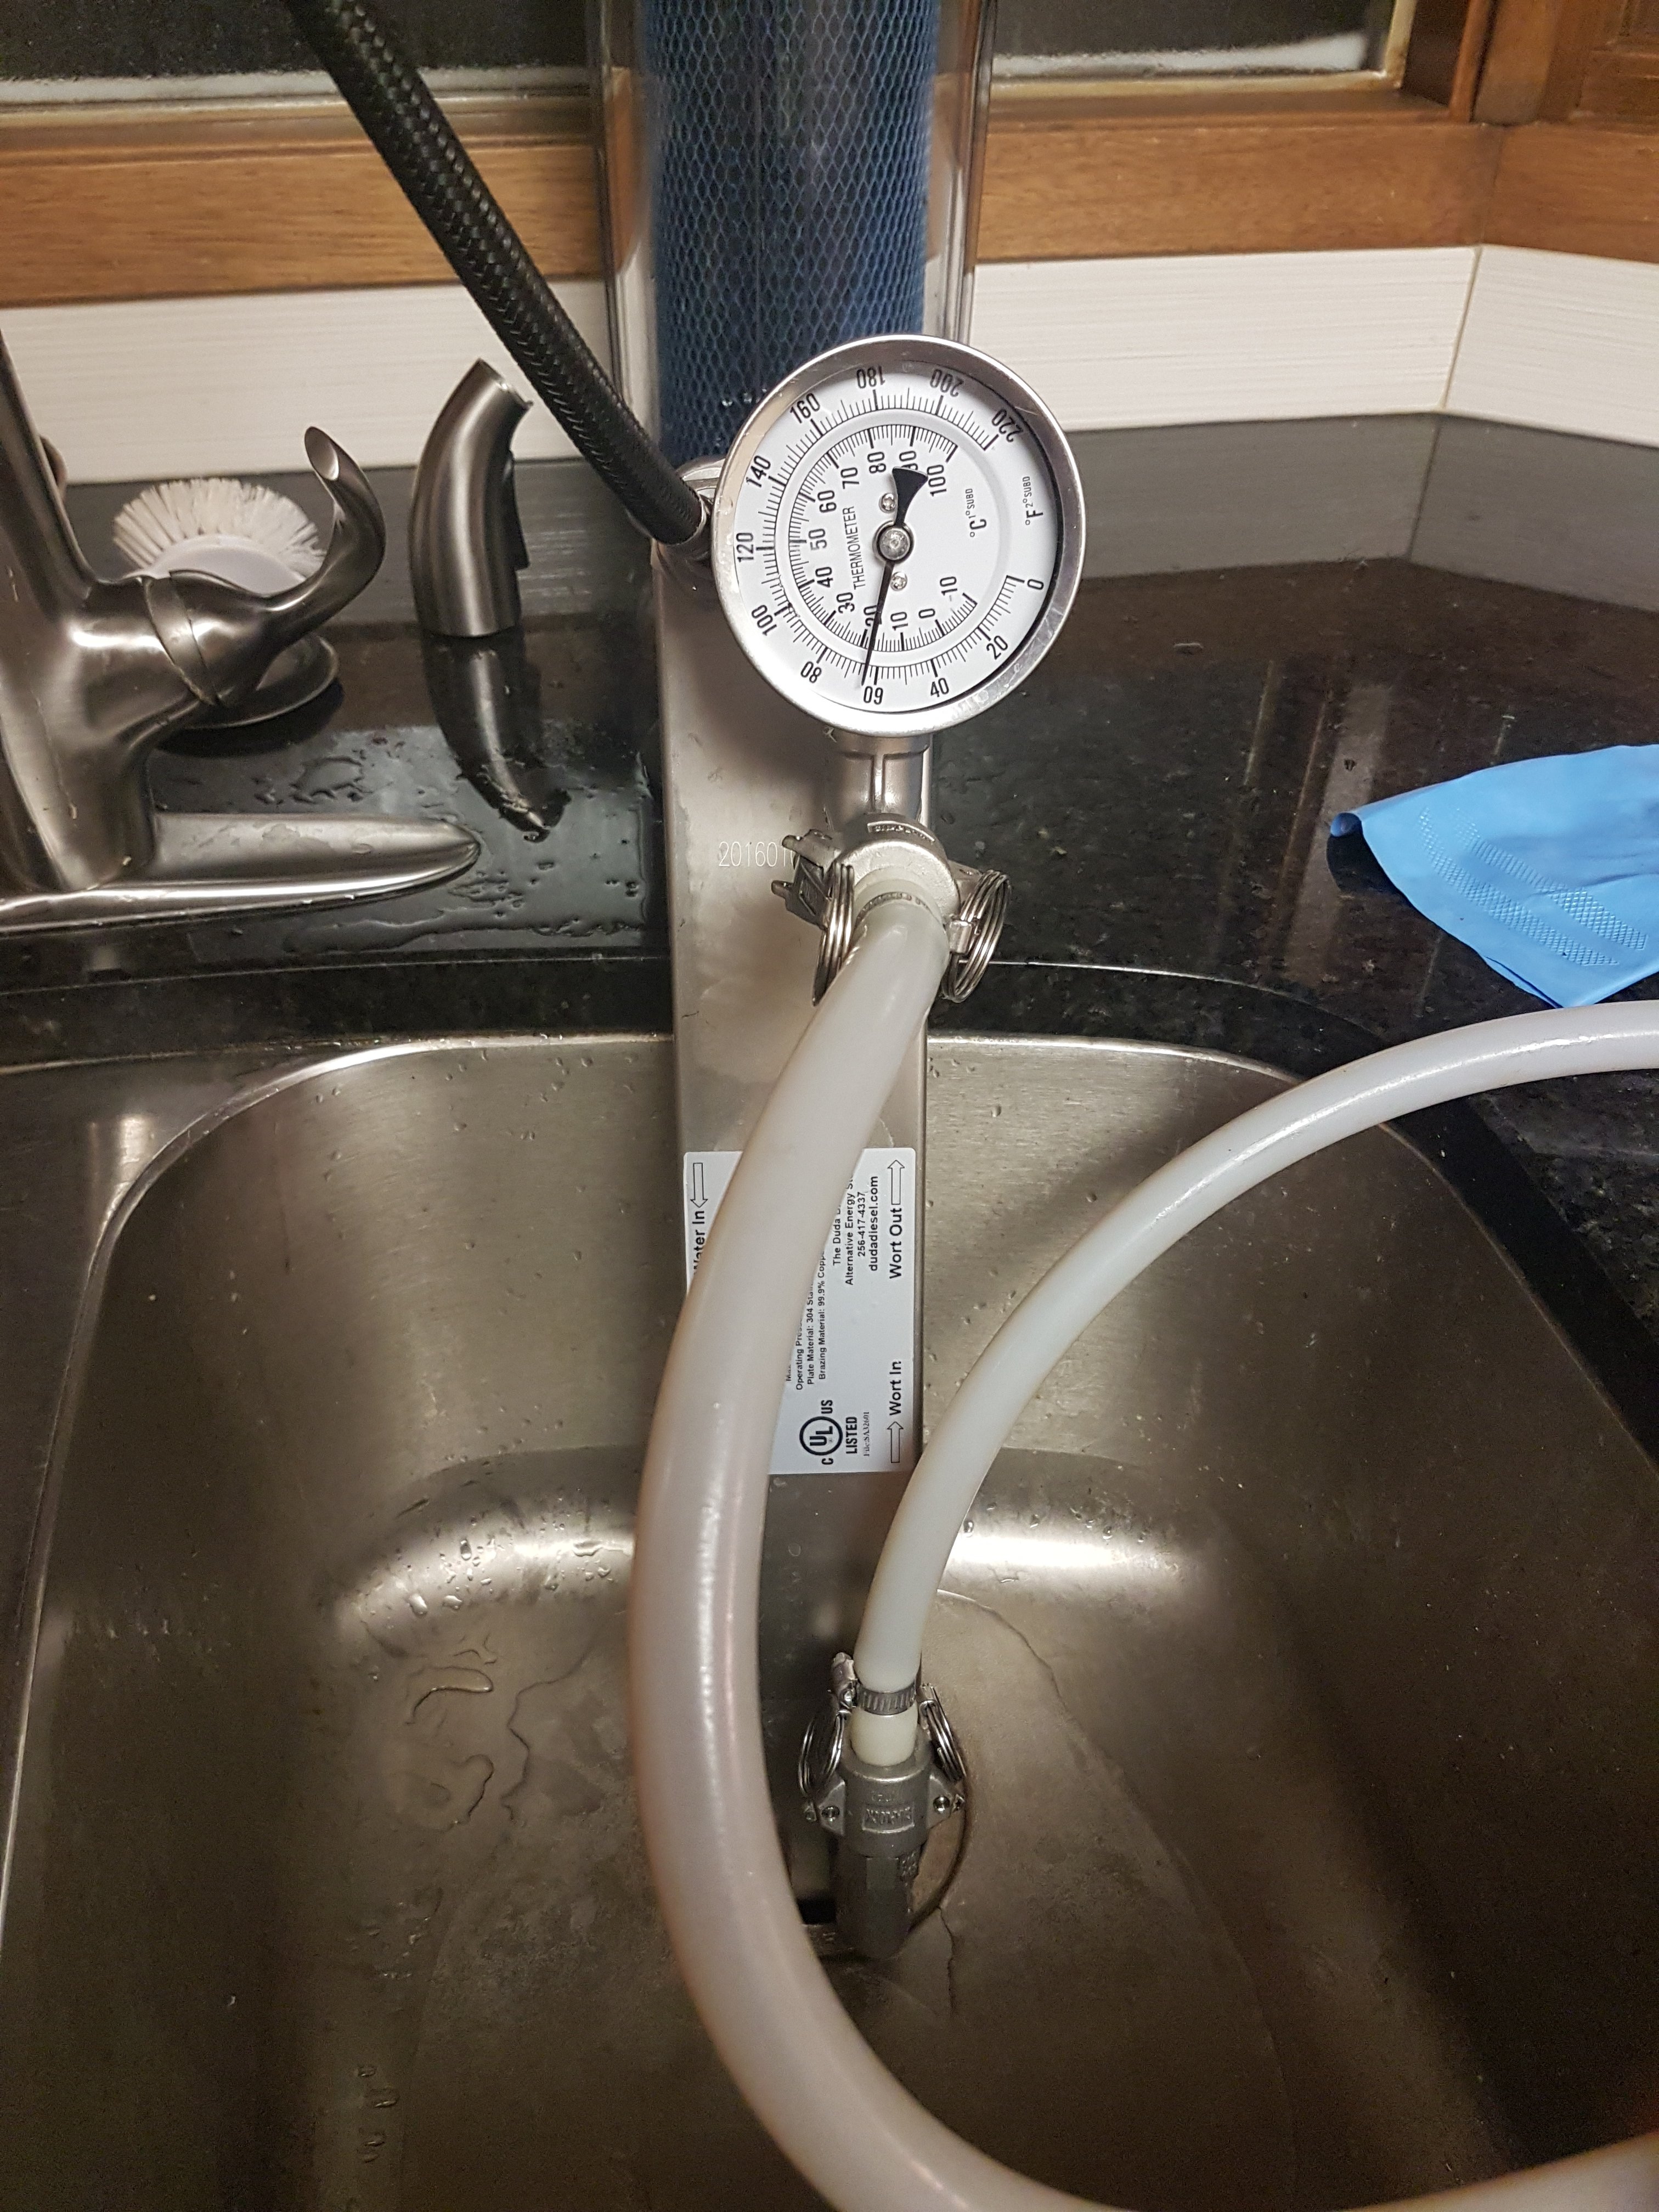
Chiller is ready to go.

It connects directly to the faucet head hose in my sink and rests in the sink itself. All the leakage when connecting and disconnecting is contained in the sink.

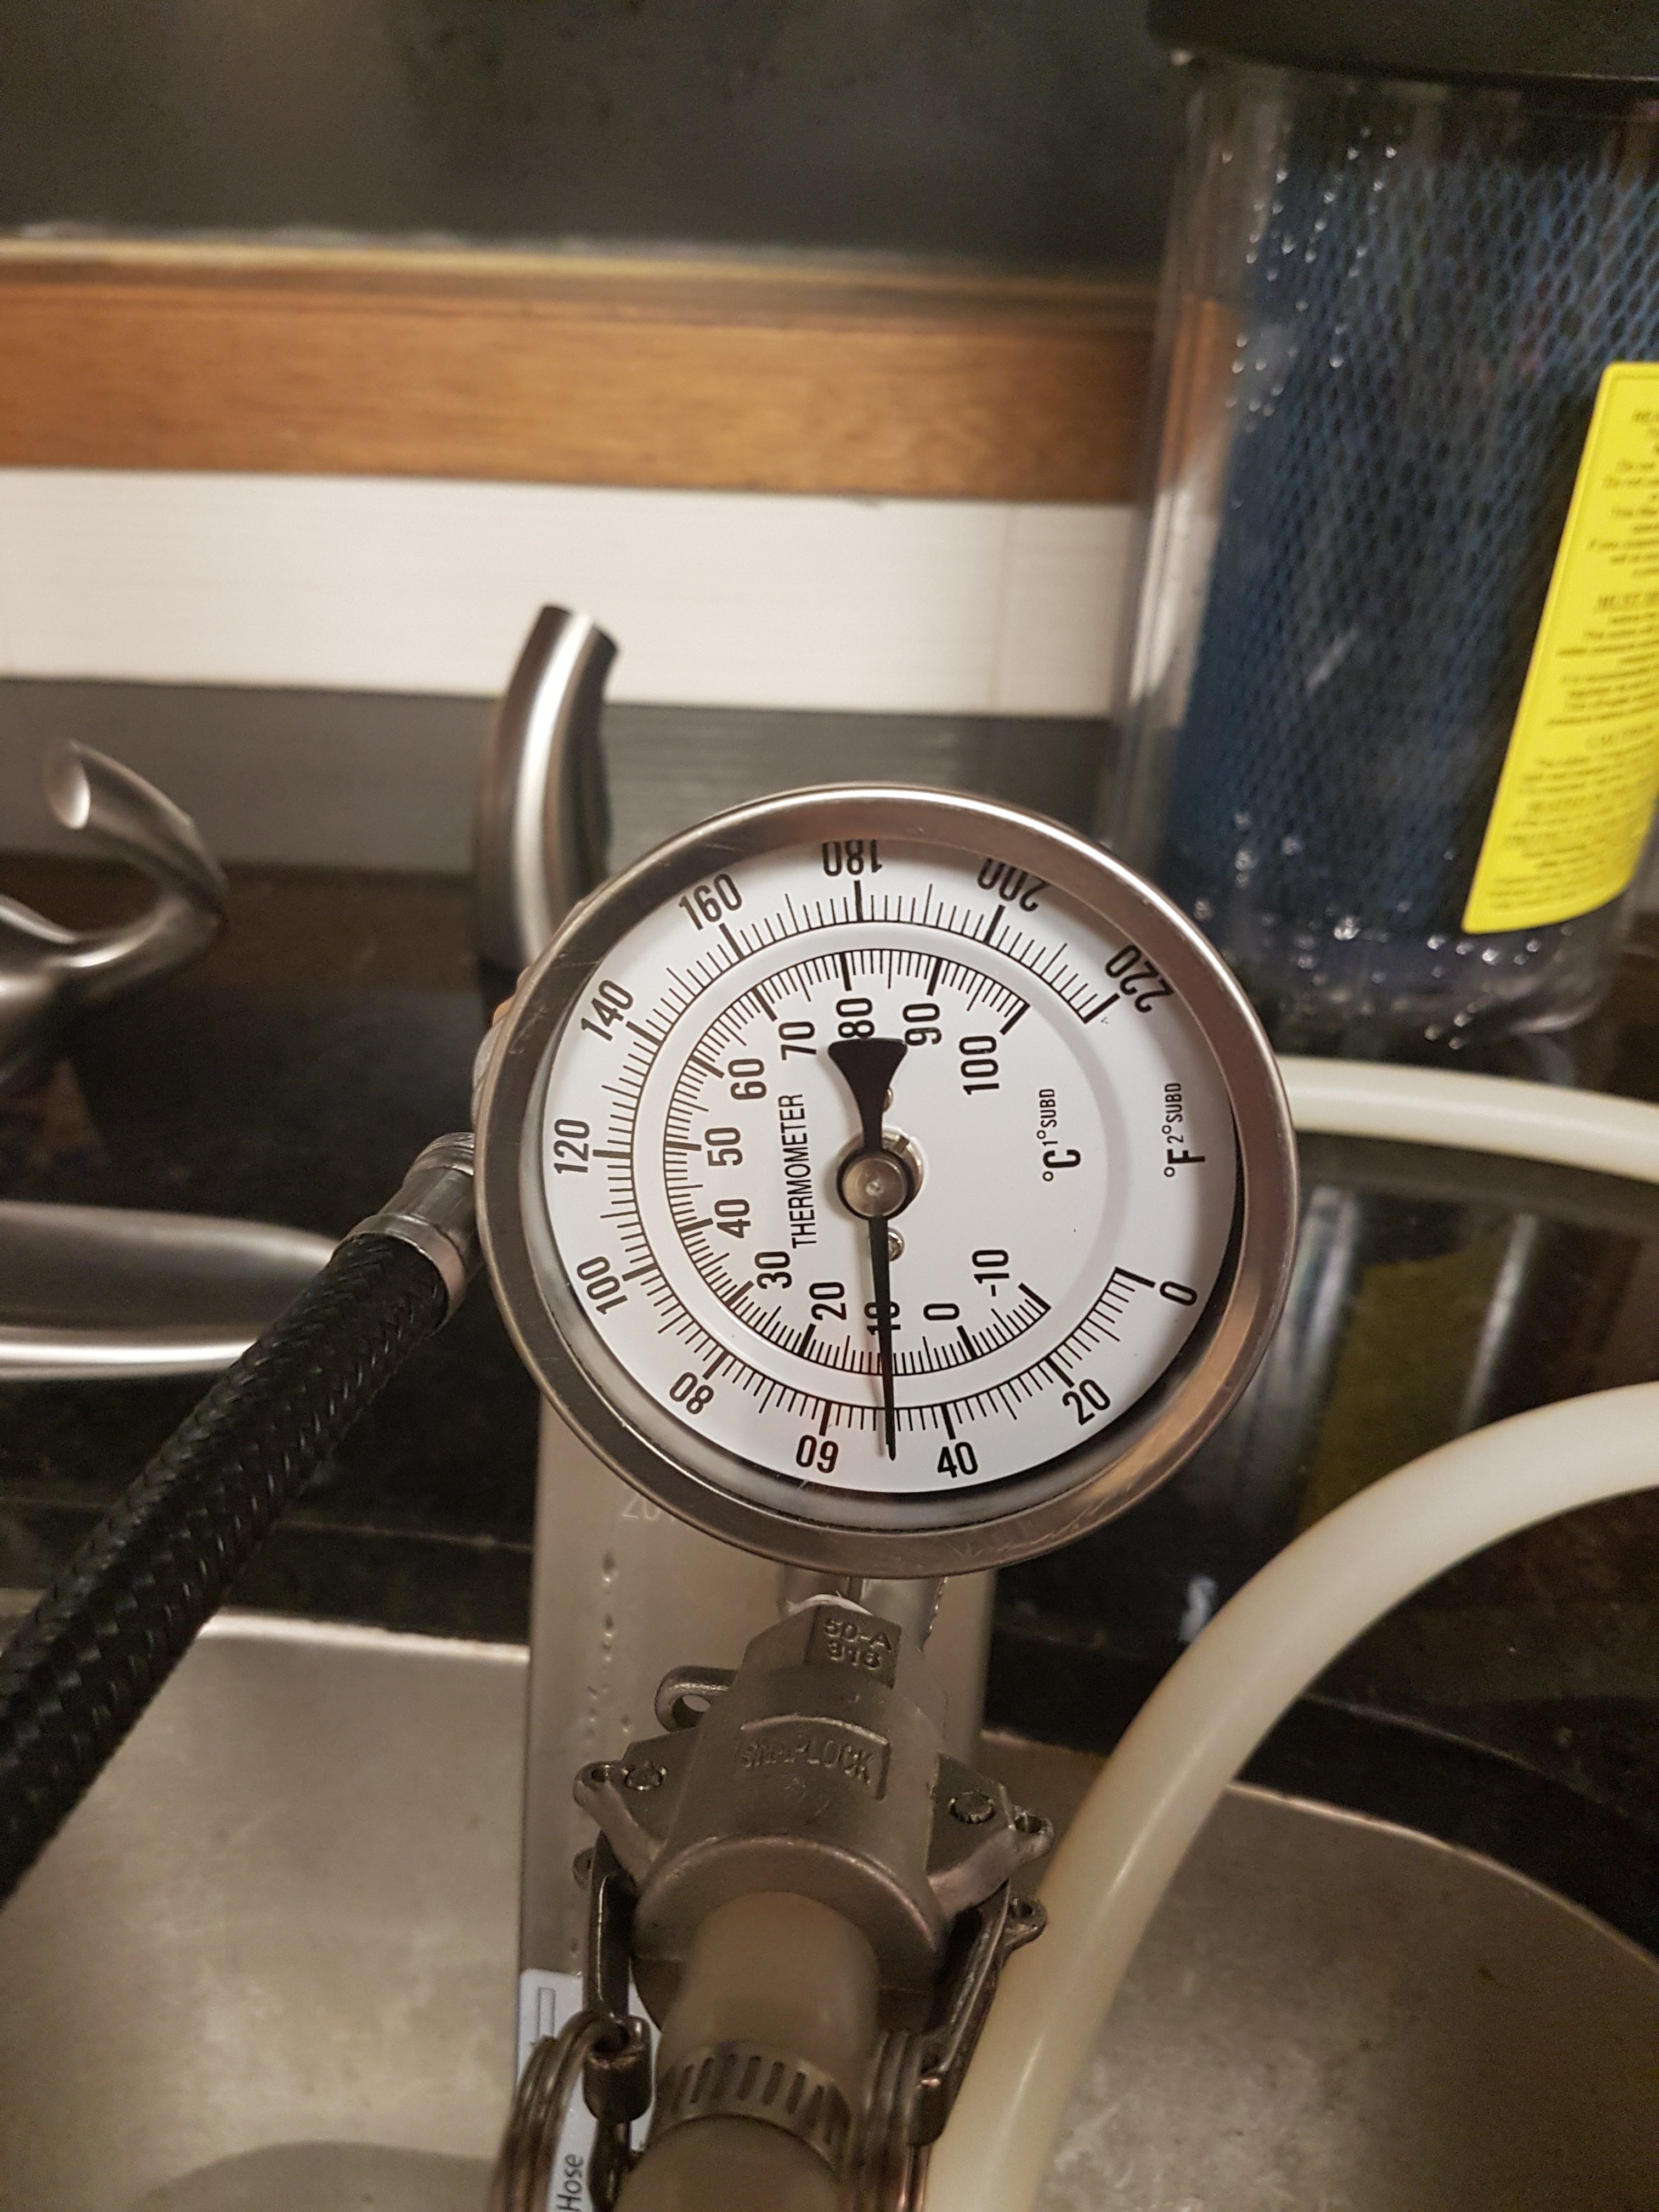
I mounted the thermometer and flow control valve right on the chiller so I can see the outlet temp and adjust the flow right in the same place.

The downside is that I have to remove the thermometer to get it totally clean and dry. Probably that valve too. The valve should actually be on the inlet, where the wort is still boiling hot.

I wish chillers came with tri clamp fittings. I might redo the plumbing on this thing to make it easier to clean, etc. Everything downstream of the chiller has to be sanitary. If there is one place that needs tri clamps, this is it. Ball valves are notorious for trapping small amounts of liquid in the space behind the ball, only to put that liquid in contact with the wort when you adjust the valve.

FWIW, all the outlets on my brewing system have male QCs. All my hoses have female QCs.

Edit: I remove the ball valve from the outlet of the chiller. I can control the flow with the ball valve on Thing1. Hot, near boiling wort will be going through it, so no chance of contamination. Anything living in it will be long dead from being killed by heat during the brewing process.

20190215_165516.jpg


20190215_165521.jpg
 
Last edited:
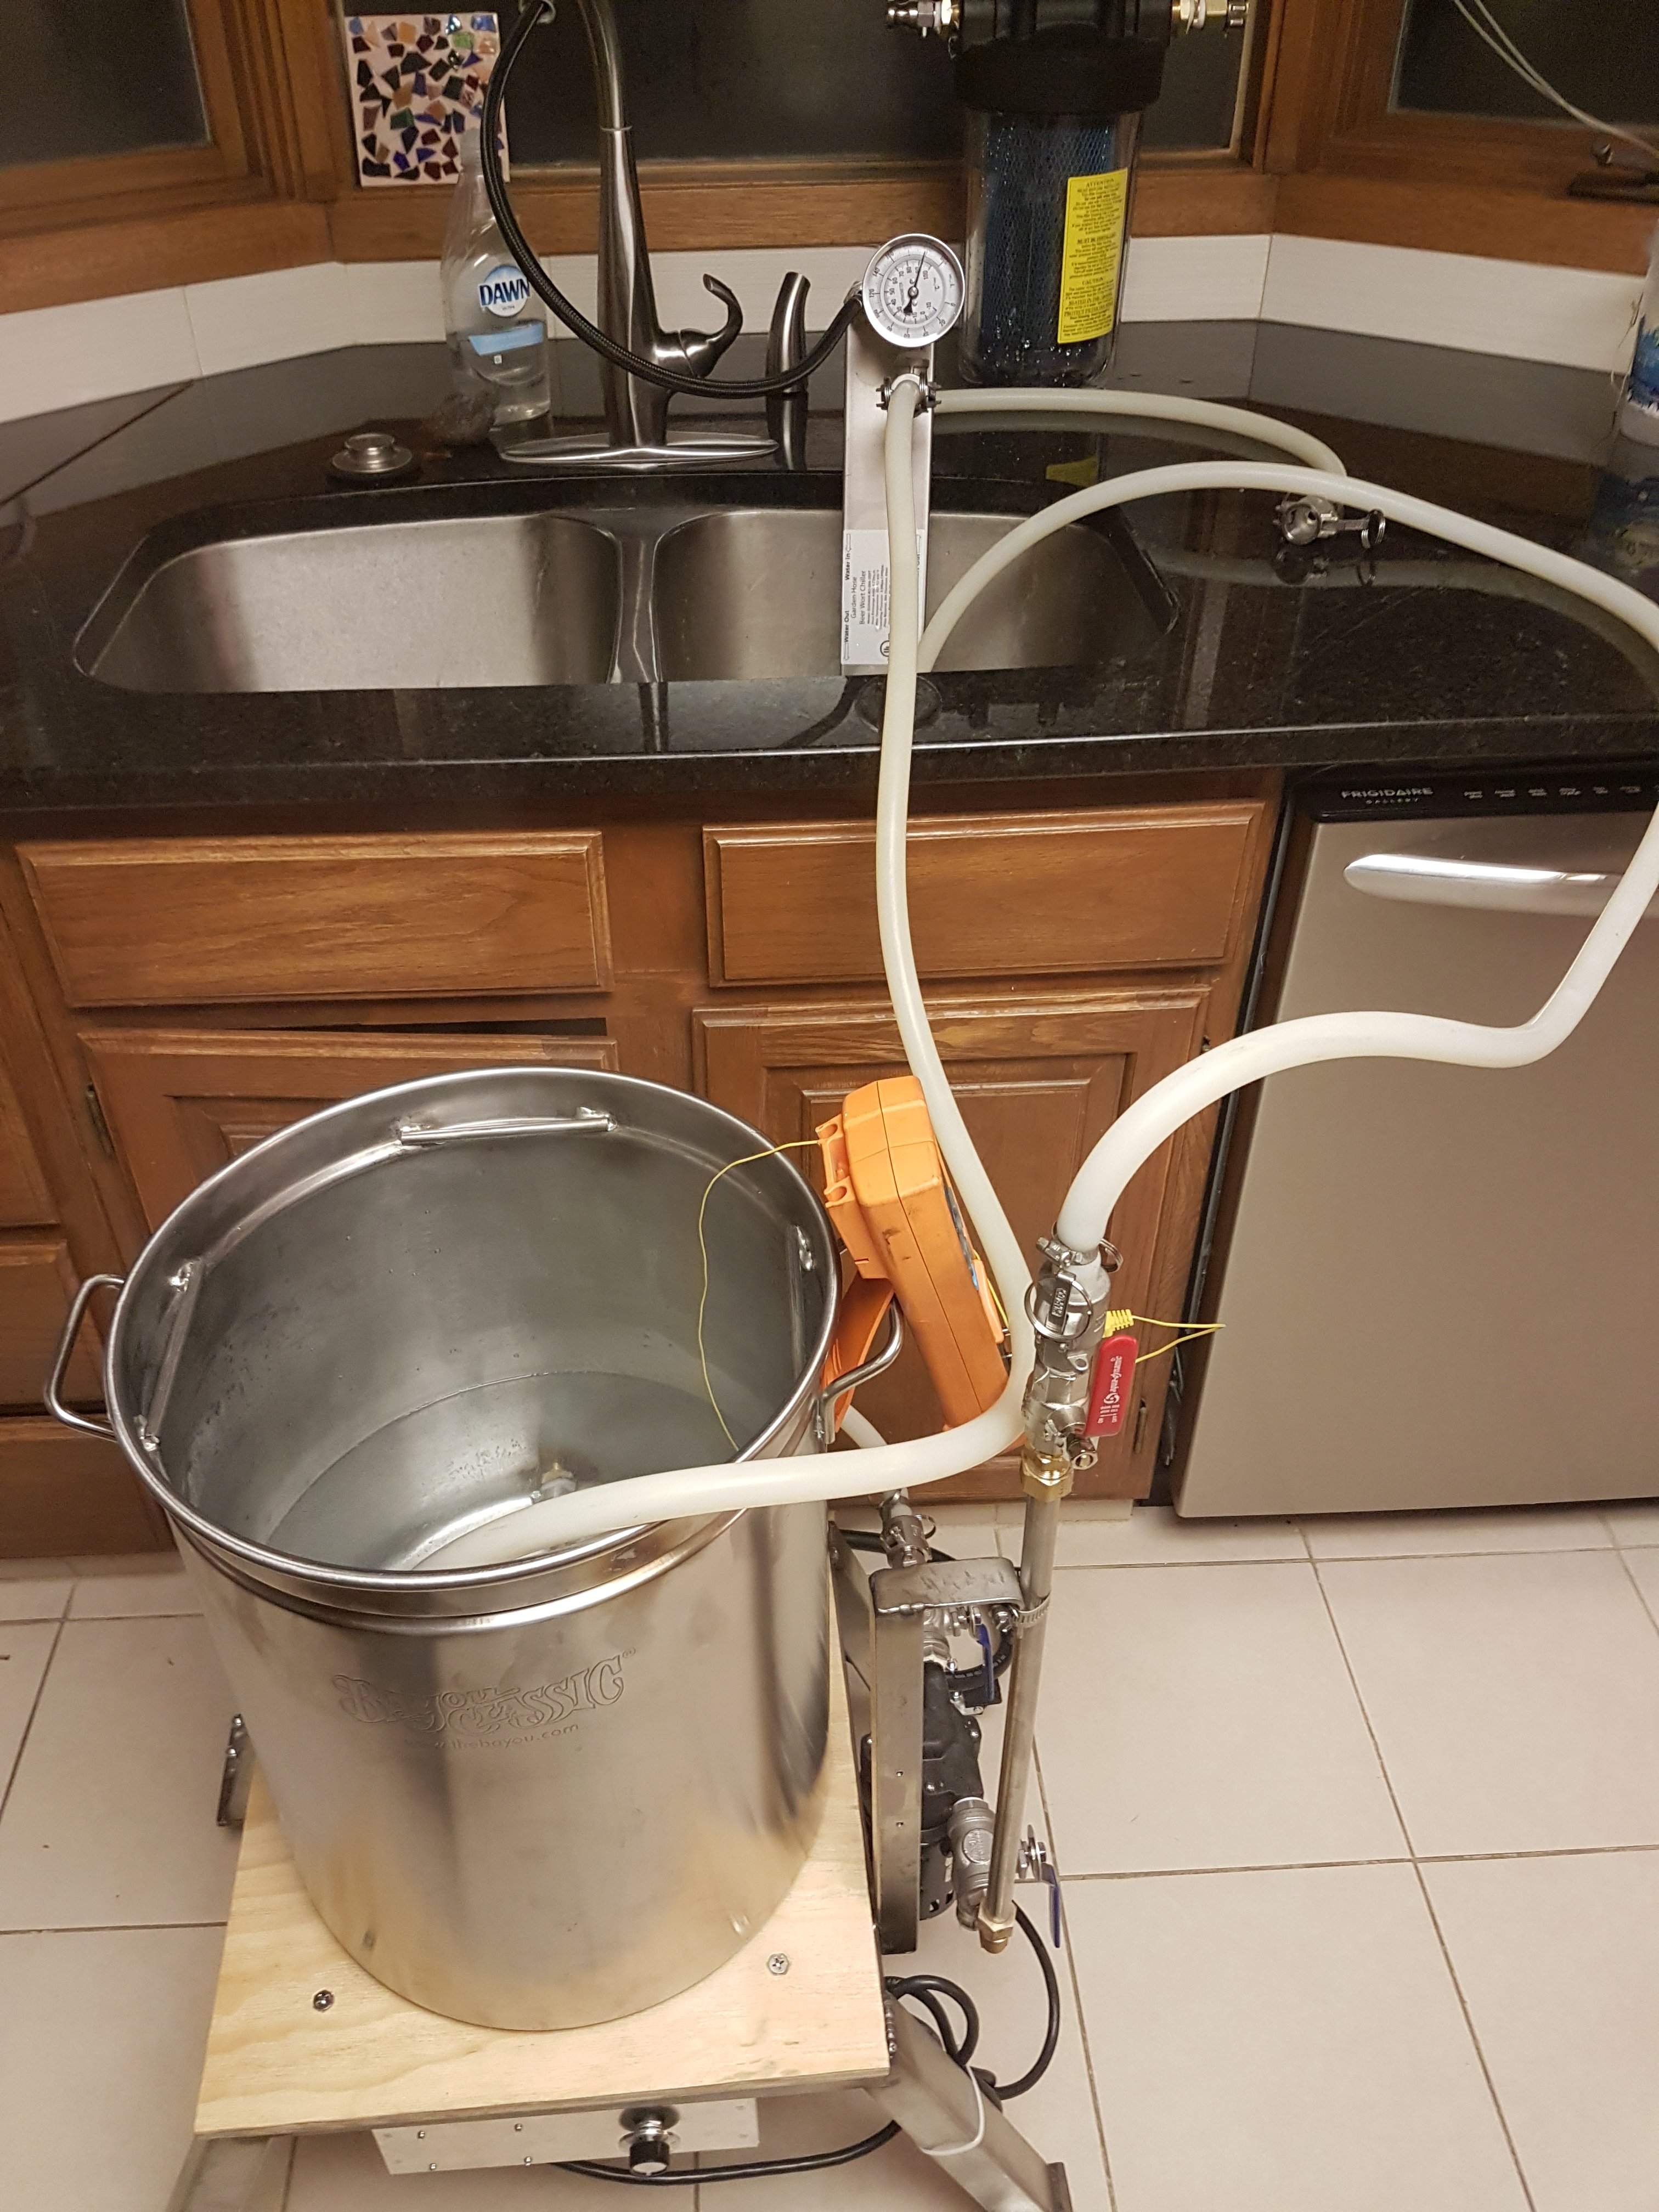
Chiller setup works really well. Here I am circulating hot water back into the kettle. My hoses could be shorter, especially the hose going from Thing1 to the chiller.

I love that this thing is on wheels and you can wheel it out of the way if you want to use the sink while brewing.

20190215_213139.jpg


This is what happens when I start cooling.

20190215_213510.jpg
 
Last edited:
I found a few little bugs doing a water run tonight. I'll fix them in the morning and brew a beer or two tomorrow.

I'm very happy with how this thing works. It is fantastic. I can't wait to see how it handles a real brew session.
 
Last edited:
golfindia said:
No heat sinks and no issues with the Pi getting too hot? I got overheat warnings continuously until I put a fan over the top of mine.

I'm running the SystemTempSensor addin on CraftBeerPi. It reports the internal temp of the RPi3. I added fans to the enclosure to remove the heat created by the induction coil. I'm seeing about 130F during the boil.

I'd check the current draw on your GPIO pins.
 
First batch is in the fermenter. I brewed Ed Wort's Pale Ale.

- Started heating water for mash in at 7 PM
- Mashed in at 7:40. Hit strike temp before that, but I was still getting things ready.
- Mashed for 2 hours because I was experimenting with various things. Measuring mash pH, taking refractometer and hydrometer readings, testing mash temp step changes, etc.
- lifted the grain basket at 9:45 and sparged about 2.5 gallons
- added first hops at 10:19 PM. Was boiling before this. I was testing things.
- done boil at 11:19 PM.
- chilled and in the fermentor at 11:40. Lot of issues chilling, read below.

Going into the boil pot I had 7 gallons @1.057 = 399 points. For 11.1 pounds of grain, that is nearly 36 points per pound. Must be a measurement error.

Going into the fermentor I have 5.75 gallons @ 1.062 = 356 points. For 11.1 pounds of grain, that is 32 points per pound. There is some liquid left in the boil kettle and I lost a bit trying to get the pump pumping the boiling wort... more on that later.

4.5 hour brew session with a 2 hour mash and pump problems when chilling, first time ever using it. I'll take that. It will only get faster from here.

Everything worked excellent except:

1) With such a powerful heating element, the DS18B20s don't react nearly fast enough, especially when they are stuck in the mash. Thing1 has a temp rise of about 4F per minute. If you need to bump the mash temp 1F, the induction coil only needs to run for 15 seconds. CraftBrewPi only senses the DS18B20s once every 5 seconds and they seem very laggy.

Outcome: I overshot mash temp several times, by a lot. This needs work. Caveat: I was using a simple hysteresis controller and I had the controlling temp sensor suck in the mash.

2) The pump would hardly pump the boiling wort through the plate chiller. Not sure why. Not only wouldn't it pump through the plate chiller, I disconnected the chiller and it wouldn't pump straight back into the kettle. I need to investigate some things.

(I found the culprit, see my post below.)

Overall I am very happy with Thing1. I'll tweak a few things, but overall it is everything I hoped for.
 
Last edited:
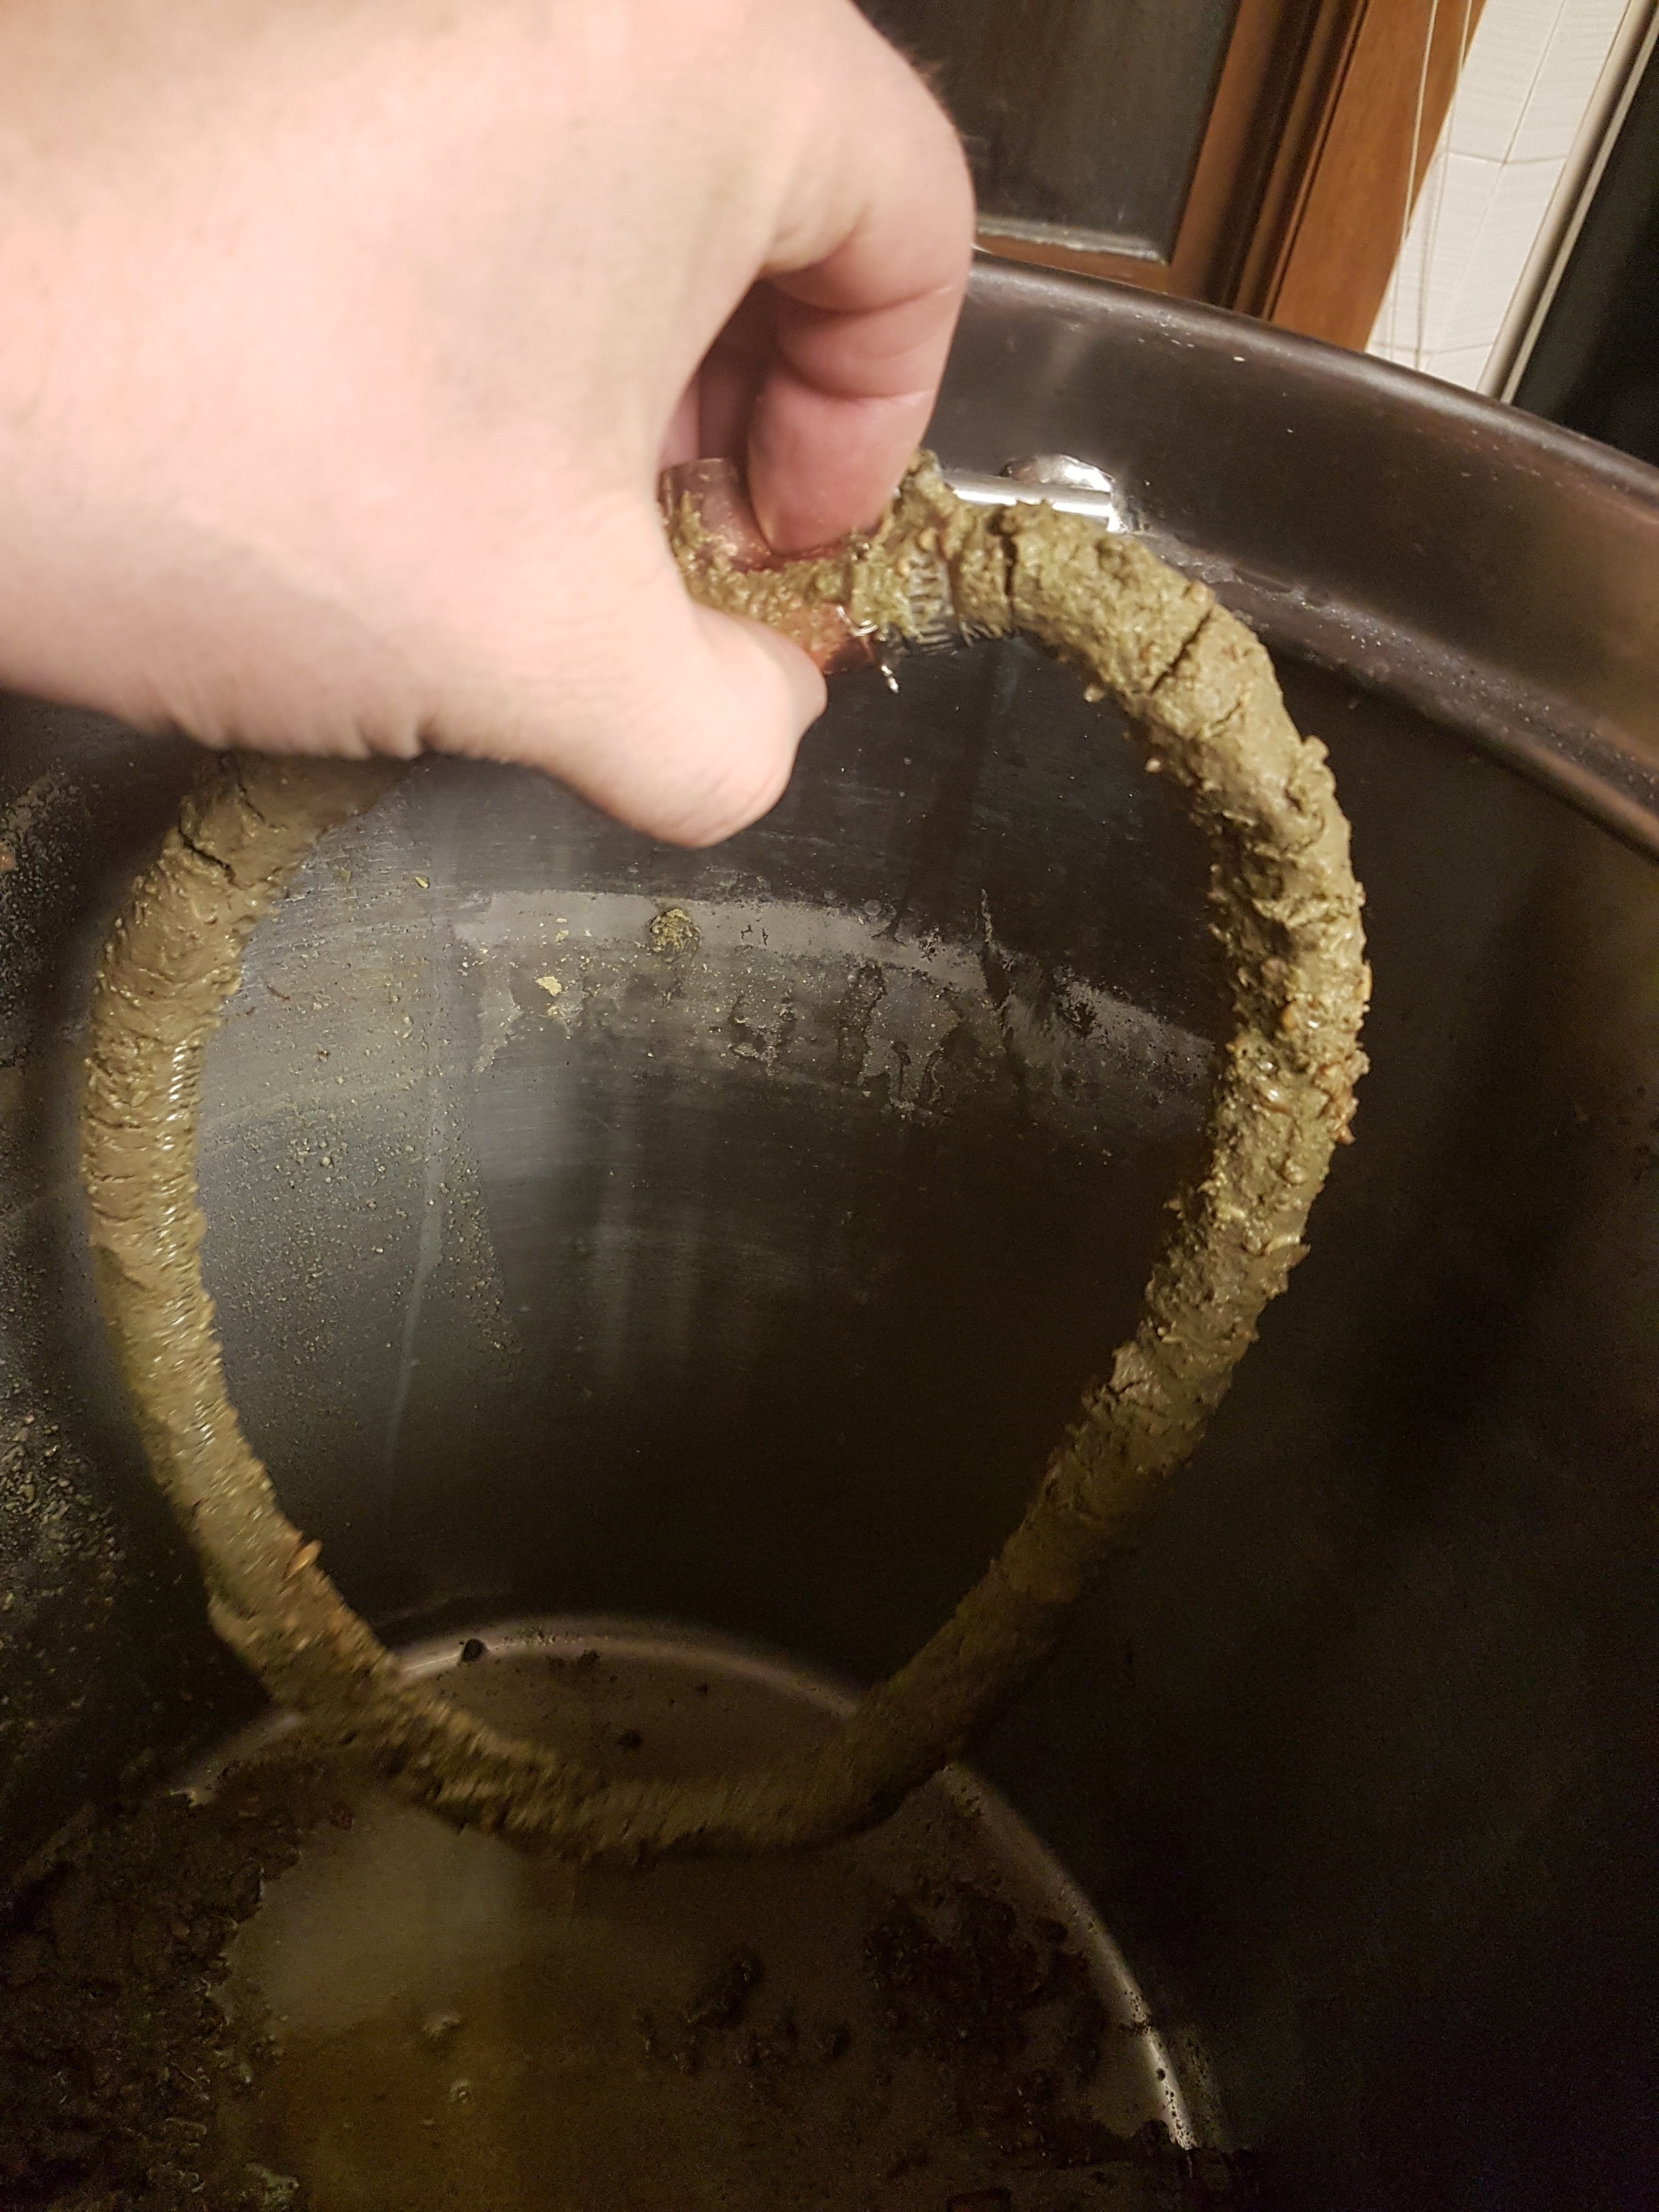
Here is why the pump wouldn't pump the hot wort. This is the pickup from the bottom of the boil kettle. I had a very hard time getting the kettle chilled. The flow was very, very slow.

At first I thought the plate chiller was plugged. So I reversed the hose connections and reversed flowed it. Same thing. So then I tried pumping straight into the boil kettle. No flow there either. I lost a lot of wort doing all this. Luckily I was able to get it chilled and emptied.

I just did a clean cycle on Thing1, without the pickup ring. It pumps near boiling water through the chiller with no problem and even boiling water.

This batch had 2 ounces of Chinook pellets in total. I did a 1 hour boil. It boils vigorously.

The bottom of the kettle wiped clean. Absolutely no scorching.

FWIW, people report warping the bottom of Bayou Classic pots on the 3500 watt induction plates. I think that is because the pot is larger than the plate and the coil is smaller. My coil is a full 12 inches in diameter. I've done a lot of boiling while testing and the bottom of my BC 1044 pot is like new.

20190217_001439.jpg
 
Last edited:
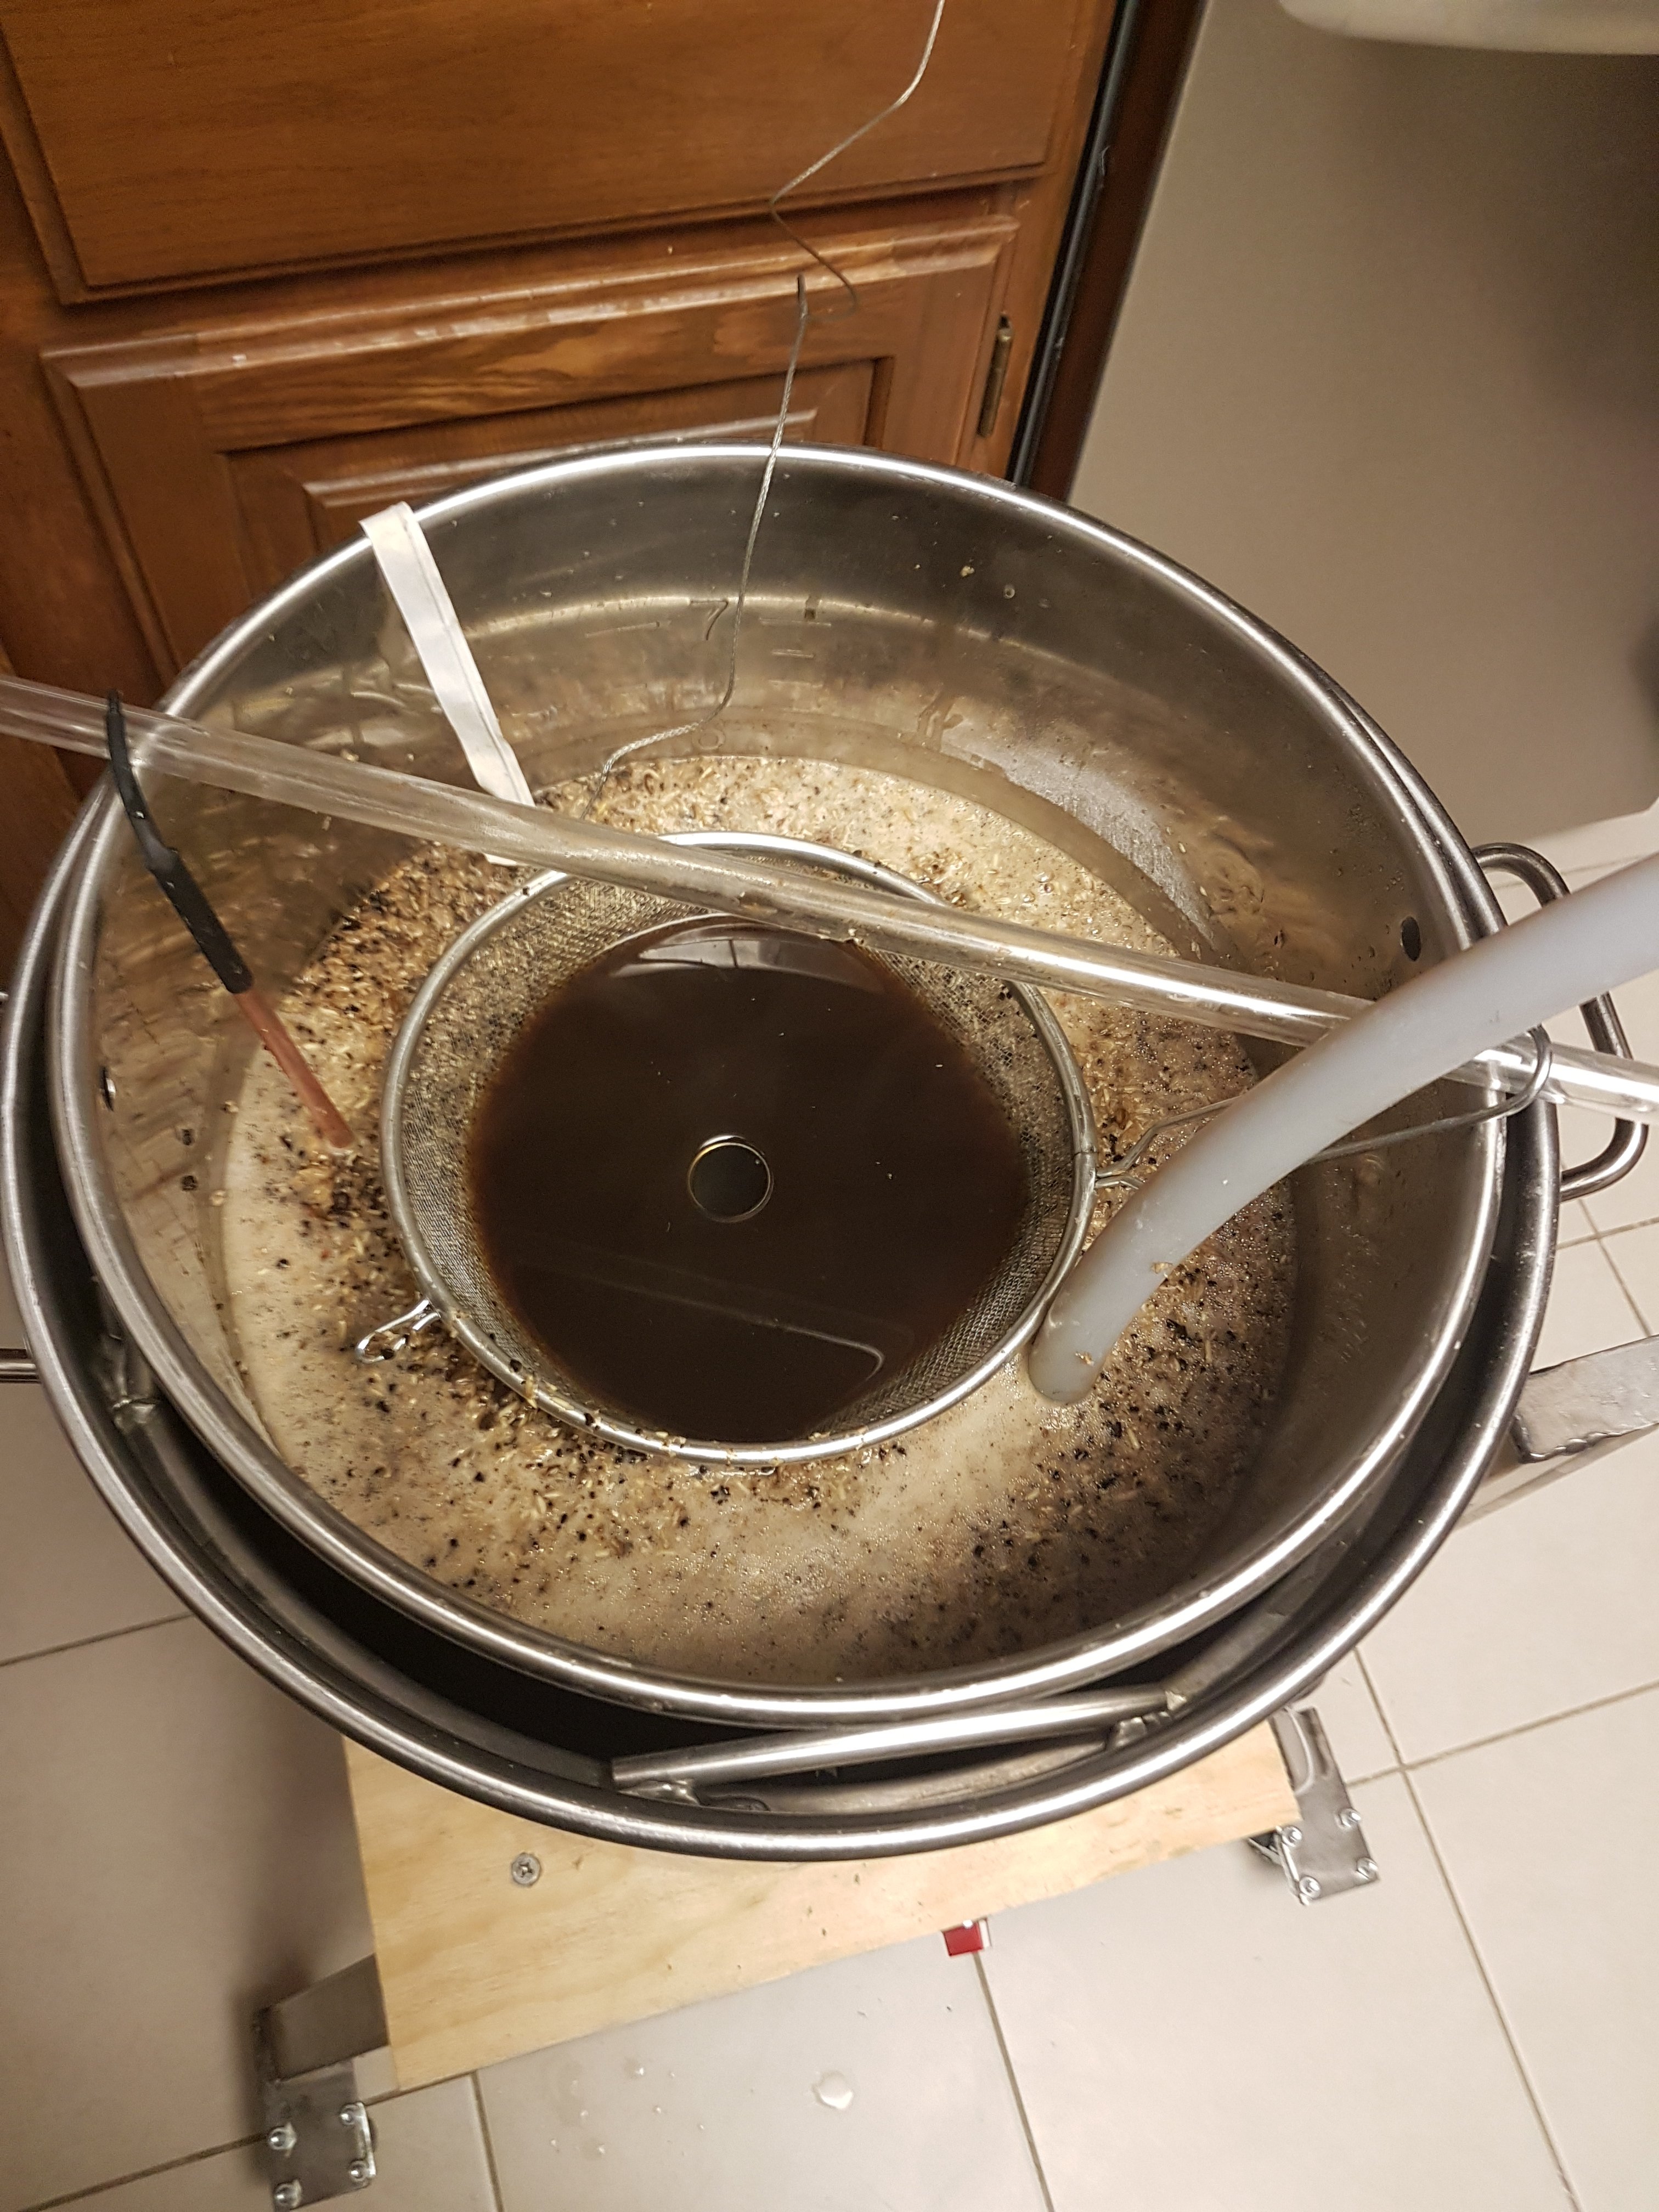
Standpipe and strainer in operation. The stand pipe was fantastic. Set and forget mashing, except for temp control...

I need to make a sparge ring.

20190216_200256.jpg


Boiling. Yes I have 3 different temp sensors in the pot.

20190216_221548.jpg
 
Last edited:
Back
Top