Making Traditional rice Wine. Cheap, Fun, and Different

Homebrew Talk - Beer, Wine, Mead, & Cider Brewing Discussion Forum

Help Support Homebrew Talk - Beer, Wine, Mead, & Cider Brewing Discussion Forum:

This site may earn a commission from merchant affiliate links, including eBay, Amazon, and others.
Woot! Batch #2 was a success!

8 cups of sweet rice yielded 4 750ml bottles of awesome wine! And this wine really is good stuff. It's great on it's own or mixed with orange juice. Actually, it makes a pretty good screwdriver :)

Slight taste of higher alcohols, but less than my mead when I sampled it on the 2nd racking. From the posts I have read, I was expecting a burn as if I were taking a shot of liquor. I guesstimate it at around 15-16% abv judging by the buzz that I have after 3 small glasses.

I recommend this to anybody looking for a nice easy project resulting in a good drinkable product. :tank:

Good yield, I usually get 8 cups of wine from 8 cups of dry rice, though I haven't used sweet rice for a while and got more from it IIRC.
You must have squeezed the heck out of it too. All the bottles cloudy, or have you let them clear and decanted?
 
Easy Rice Wine (No Straining)

Yield: Approximately 3+ gallons
Time: 10 to 14 days for excellent strength and flavor (or up to 1 month or longer for additional strength and clarity)

Note
I read several hundred comments on this thread before starting my own attempt at home brewing rice wine. Thank you all for sharing your experiences. They really helped me.

My very first brew was successful but it was also messy (all that straining) and time consuming (30 days to potability!). I loved the wine but not the process and the time it took so I tried to simplify the procedure and to make it quicker.

The key, I found, was to first place the cooked rice inside a mesh wort bag, and to then place this bag inside a brewing bucket. By doing so, the wine is filtered while it ferments. The sweet liquid drains through the mesh into the bucket, leaving the dregs behind. This eliminates almost all straining.

The steps below will deliver 3+ gallons of strong, tasty, and fairly clear rice wine within 14 days. If you're willing to wait another 2 weeks, your wine will be even clearer and more potent. This procedure has worked for me several times. I hope it will work for you.

Ingredients

Jasmine Rice 20 cups (or 10 pounds raw rice estimated @ 2 cups/pound)
Chinese Yeast Balls 6 each (generally 2 small packets)
Glutinous Rice Flour* 6 tablespoons
Tap Water 40 cups (2 cups water per cup of raw rice)
Distilled Water 1/2 Gallon (or boiled water at room temperature)

Utensils

1 Large Pot with Lid (5+ gallons)
2 Potholders (make sure they're dry)
1 Wood or Steel Spoon (Strong)
1 Nylon Mesh Wort Bag (Large)
1 12-inch length of butcher's twine (for tying off the wort bag)
1 6-gallon Bucket with Spigot Hole
1 Spigot
1 Bucket Lid with Grommet Hole
1 Airlock
1 Sterilizer (Star-san or bleach)
1 Coffee/Spice Grinder*
1 Rubber Mallet (or rolling pin, etc.)
1 Heavy-duty Plastic Bag
16 22-ounce Beer Bottles, with tops*
1 Rubber Gloves*

* - Optional

Directions

Day 1
1. Remove the oven racks, leaving one at the lower-most position. Make sure your large (5+ gallon) pot will fit in the oven. Otherwise, chose a smaller pot.
2. Pre-heat oven to 300º F.
3. Bring 40 cups of tap water to boil on the stove in the large pot. Rinse the rice under cold running water and allow it to drain. Note: I use jasmine rice since it is cheap. Glutinous (sweet) rice will probably work as well but I can't vouch for it.
4. When the water reaches a rolling boil, add the rice a couple cupfuls at a time. Stir with the spoon, so that the grains don't stick to the bottom of the pot, until all the rice is used up. Adding the rice will lower the temperature of the water below a boil but don't worry. This is OK.
5. Once all the rice is in the pot, turn off the heat. Cover the pot with the lid. Place the pot in the oven. Let it cook for 20 minutes. Then turn off the oven but don't take the rice out for another 30 minutes. It will finish cooking in retained heat.
Note 1: This procedure is an almost foolproof method to prevent scorching the rice.
Note 2: With such a large quantity of rice, some grains will be perfect and some (in the center) will be mushy. It doesn't matter. What's important is that every grain is cooked through without being burnt.
6. Let the rice cool in the covered pot to room temperature overnight. If you're in a hurry, you could scoop out the hot rice and let it cool on trays, but this is painful, messy work. Take it easy. Wait.

Day 2
1. When you're ready to brew, sterilize your equipment, including the wort bag and the butcher's twine. Bleach is probably fine, but I worry about what it might do to the Nylon wort bag, so I use Star-san.
2. Chinese yeast balls (which are sold as “rice cake” at my local Asian market, and which are really a mixture of yeast, mold, and rice) come 3 to a packet, about 10 packets per $5 bag. They are as hard as rock and must be pulverized since the balls are too tough for a grinder to handle whole. To do this, I take 6 balls and place them in a heavy-duty plastic bag (which prevents the bits from flying everywhere). I then crack them carefully (not too hard) with a rubber mallet into smaller pieces. Then I place the smaller pieces in the grinder and grind them into powder. You could just keep pounding them with the mallet but this, too, is hard and messy work. Use the grinder. Most likely you will have to do this in two batches.
3. Optional: Mix the pulverized yeast with the glutinous rice flour. Probably any flour (rice or wheat) would do, but I've only used glutinous rice flour, so that's all I can vouch for. Supposedly, the flour “super-charges” the yeast. Seems to work.
4. Screw the spigot into the hole in the bucket. Place the wort bag in the bucket, stretching the opening around the mouth of the bucket.
5. A handful at a time, scoop the rice into the wort bag. I use rubber surgical gloves but I suspect you could do this without gloves if you washed your hands well. When you realize the Chinese have been brewing rice wine at home for 3,000 years, under less than antiseptic conditions, you have to assume the procedure is essentially idiot-proof.
6. After a couple inches of rice cover the bottom of the bag, sprinkle on a pinch of the yeast/flour powder. Then add another couple inches of rice and then more yeast. Repeat until all the rice and yeast are in the bag.
7. By now the weight of the rice will be pulling the mouth of the wort bag away from the rim of the bucket. Carefully lift the mouth of the bag away from the rim, making sure that no rice spills out. Then draw the mouth closed, and tie it tight with a couple loops of butcher's twine. This will prevent any rice from escaping later on, when you agitate the bucket.
8. Pour a half gallon of room-temperature distilled or boiled water over the rice in the wort bag.
9. Put the lid on the bucket. I pound it tight with the rubber mallet.
10. I use a three-piece airlock since it is easy to clean but I suppose a serpentine airlock would do just as well. I fill mine with vodka and stick it into the grommet in the lid.
11. Put the bucket in an out of the way spot. The temperature should range between 65º and 75º F, although mine has brewed fine at as low as 60º F and as high as 80º F. The rule of thumb seems to be: The higher the temperature, the faster the fermentation. Note: Lighting doesn't seem to matter since my bucket is fairly opaque but to be safe you might want to keep yours in the dark.

Days 3 - 5
1. Forget about your brew for 3 days. Do nothing. The fermentation will begin without help. After the 2nd day, or the 3rd, you should see bubbles forming in the airlock.

Days 6 - 8
1. Help the fermentation along by agitating the bucket once a day. This allows oxygen to get into the rice/yeast/water inside the wort bag (I think! Maybe it's to break up the starch trapping C02 among the rice grains. But gently! agitating the mixture seems integral to the process.) Be gentle because you don't want the rice to come out of the bag. You don't have to open the bucket, either. Leave the lid on. What I do is first remove the airlock so the vodka doesn't spill from it. Next I tilt the bucket back and forth a couple times until I can hear the liquid sloshing inside. Then I replace the airlock and leave the brew alone for another day. During this time the bubbling should increase to about 15 bubbles/minute.

Day 9
1. Open the spigot and pour yourself a taste. Since the rice was trapped inside the wort bag, which automatically filtered the liquid, your wine should be clear and just a little milky. It should also be sweet and have a low alcohol content, about that of weak beer. It will be so delicious that you will want to drink it all but restrain yourself. If you wish, decant a bottle and place it in the refrigerator to drink for dessert that night. Do not cap the bottle. This brew is still very active.

Days 10 - 14
1. It is no longer necessary to agitate the wine. Bubbling in the airlock should peak at about 30 bubbles/minute and then die back to 2 or 4 per minute.
2. Taste the wine. Every day it will get drier and stronger. When it's to your taste, simply decant into bottles, chill, drink, and enjoy.
Note: I cap my bottles and store them in the fridge until I drink them. However, since the wine is still live, to prevent any explosions due to C02 build-up, I poke a hole in each cap with the tap of an awl. Thus, the bottles will remain essentially free from contamination and yet still be inert and not explode.
Note: Do not open the bucket after you've drained off the liquid. There's still more wine trapped inside the wort bag. Let it sit for another couple days. Then try tapping it again. You should get several more bottles of wine. Finally, take the bag out of the bucket and squeeze it gently by hand to wring out the last of the liquid. Then dispose of the rice husks, maybe 10% by volume of the rice that you originally put into the bag.

Days 15 - 28 (Optional)
1. For really strong, really dry, and really clear wine, instead of decanting the liquid into bottles, decant it into another sterilized bucket with a spigot. Cover the new bucket, put an airlock in the lid, and wait 2 weeks. The resulting brew will be so strong you might have to dilute it with water. You shouldn't worry about capping it, either, since no sugar will be left to generate C02.
 
Good yield, I usually get 8 cups of wine from 8 cups of dry rice, though I haven't used sweet rice for a while and got more from it IIRC.
You must have squeezed the heck out of it too. All the bottles cloudy, or have you let them clear and decanted?

The bottles cleared nicely and pretty quick too. Today there's about an inch of sediment at the bottom of the bottles and the rest is slightly yellowish clear liquid. I didn't bother decanting yet, I'll probably just pour the clear wine into glasses and then wash the bottles out as I drink them.

I did pasteurize my bottles, but today I checked on them and one of the bottles gave a little hiss of CO2. Nothing to worry about though. I'll check on them daily to make sure.

Yes, I did squeeze the wine pretty good. :p
 
Re: "This allows oxygen to get into the rice/yeast/water".

As a general rule, encouraging oxygen to mix into the mash is a good way to make rice wine vinegar, but not rice wine.

In most cases this shouldn't be a problem for the short term fermentation as in your instructions, but why try to encourage the wine to turn to vinegar, unless that is the goal?
 
Dwhill- Thanks for your instructions. I've made rice wine a few times, next time I will try your method. Sounds far easier.
 
Re: "This allows oxygen to get into the rice/yeast/water".

As a general rule, encouraging oxygen to mix into the mash is a good way to make rice wine vinegar, but not rice wine.

In most cases this shouldn't be a problem for the short term fermentation as in your instructions, but why try to encourage the wine to turn to vinegar, unless that is the goal?

Hi, brooklynkayak --

Could be. I don't know. I've read several dozen recipes for rice wine, and most of them suggest agitating the brew at some point. I assumed it was to oxygenate the mixture, since we are wanting to promote aerobic action, after all. Could be for some other reason, maybe to break up the starch that will cement the rice grains together if it's not broken up. Whatever the reason, agitating the brew for at least a couple days seems integral to the process. At the very least, it doesn't seem to hurt.
Best,
David H.
PS
I've made changes to the original quote based on your question. Thanx. Dh
 
Dwhill- Thanks for your instructions. I've made rice wine a few times, next time I will try your method. Sounds far easier.

Hi, hope it works for you. I've done this several times now, and the yield and quality is consistent. The secret is the wort mesh bag. Get the largest size that you can find as this will make your job easier. It should be at least big enough to stretch around the opening of the bucket.

Best,

David H.
 
I sort of agitate as well, but i keep the lid closed and just rotate jars in a fast twist motion to allow trapped co2 to escape and make the slurry more uniform
 
I sort of agitate as well, but i keep the lid closed and just rotate jars in a fast twist motion to allow trapped co2 to escape and make the slurry more uniform

Maybe that's the ticket. If not agitated, a crust forms upon the rice surface. Whatever the reason, agitating seems to be required.
 
I have talked to a few Chinese and one Korean who made rice wine the way they traditionally made rice wine in their family and they never stirred theirs.

Most don't know why, it's just the way it has always been done in their families.

One person felt that the crust at the top contained mold that you don't want to mix into the wine, but I suspect that is just an opinion.

I have tried batches with and without stirring and have found very little difference, but one batch that I stirred did have a little bit of an off taste, but still very drinkable.

So I tend to not stir/shake any more.
 
Easy Rice Wine (No Straining)

Wow, thanks for posting this, for some reason I never thought of doing it all in a bag. Straining everything is indeed pretty annoying and messy. I think when I make this again I'll do the secondary fermentation as well.
 
I've tried both agitation and no agitation as well, however, I never stir or even open the lid. I find that with the agitation the fermentation becomes more vigorous and it can be seen by the increased frequency of bubbles rising, even after the mixture has settled again.
 
Just started my first batch! 4 C Thai Jasmine rice, plus 8 C water, cooked. 2 yeast balls, smashed, mixed into rice in 1 Gal fermenter bucket (fills it about half way up). Airlock installed, off we go!
Update: pretty soupy when I stirred it today. I licked the spoon afterwards, quite sweet.
Update (4/28/2016): my house got cold, so it has slowed down, but there's much more alcohol flavor. Not bad, though: it's still sweet, and I was tempted to just pour myself a glass!! OP wasn't kidding about requiring some willpower to avoid consuming it all at once, haha.
 
If you want to use Jasmine and save money look for "broken" Jasmine at an Asian market. Its usually quite a bit cheaper and should be fine for rice wine. It also cooks quicker and water/rice ratio is usually 1 to 1.

600-0012_Broken_Jasmine_b5afc98d-374d-4326-b666-e42fce4e7cdf_grande.jpg
 
Here are the tasting notes. Interesting that they are so different.

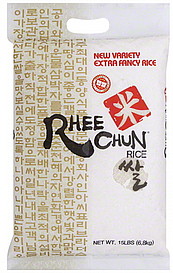
Basmati Rice: Moderately sweet, moderately tangy, nice mouth feel, not to thick, very stongly alcoholic. Not bad, but I think I would serve it chilled to take the edge off the tang and the alcohol.

Long Grain White Rice: Very sweet, kinda tangy, almost gravy thick. The texture makes this a little bit gross.

Jasmine Rice: Moderately sweet, slightly tangy, floral aroma, excellent mouth feel, not to thick. Not as strong as the basmati. Very Good.

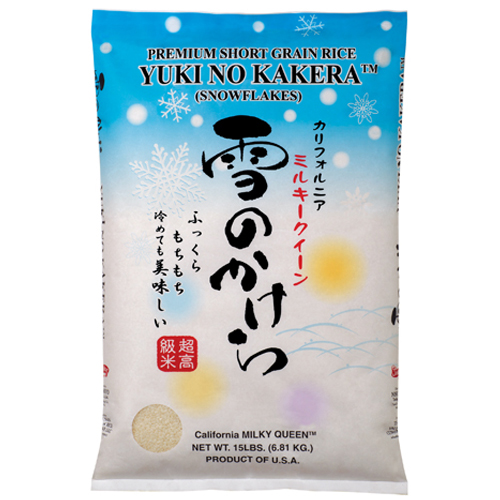
Japanese sweet rice: Mildly sweet, very mildly tangy, not overtly alcoholic, nice warmth though. Aroma is more fruity. Exceptionally smooth. This is my favorite.

Given the prices of the different kinds of rice, I think I will continue making rice wine with the originally recommended Jasmine rice. It's been an interesting experiment though.

Leadgolumn's experiment using different types of rice:
Initial post
Results
Tasting notes

I know I'm replying to an ancient message, but I wanted to say thank you for doing the experiment! Sadly, I have 2 batches using long grain rice that I started, one 3-4 days ago and one bigger one yesterday with some red yeast too. I read the first 50 pages of this thread (lots of great information!), and hadn't seen anyone say they tried long grain rice, so I figured it would be worth a shot. Then upon searching for it, I came across your experiment. Depressing results from the long grain! :( My first batch is just sitting there with a huge dome of white mold on top and the other one hasn't done anything yet. I guess I gotta go buy some jasmine or sticky rice if I want to do this. I was hoping I could just use the giant (and cheap) 25 lb bag of white rice I have sitting here. Ahh well. Live and learn.

Thanks again! :mug:

Edit: In an effort to save the bigger batch (4c dry), I've added quite a bit more red rice yeast (only used maybe 1tbl before) because I remember reading some posts describing much more complete liquefaction when using a combination of yeast balls and red rice yeast. I'm hoping the added RRY will provide more amylase to convert the long grain rice quicker so the yeast can do its work. (I'm theorizing that the monascus purpureus in the RRY will also create amylase.)
 
For an alternative cheap rice, rather than using regular old long grain white rice, I'm having some decent results using Botan Calrose Sushi Rice. It won't be ready to harvest until Monday, but it's created a decent amount of liquid. I used 10 cups of rice and 13 cups of water. I'll report back my total yield when I get around to harvesting.

This rice costs me 12$ for a fairly large bag (Canadian dollars). On the other hand, sweet rice costs me 3.50$-5.50$ for 2Kg depending on which store I get it from. (No local Asian markets, I live in a small town).
 
Botan is not really a sushi rice or a short grain. Its a hybrid developed in California many years ago. However it does work. Kokuho Rose also sells a cal rose rice. Pink label and yellow label. The Pink label is about the same price as Botan. The yellow label is cheaper.

A excellent cheap rice is Rhee Chun rice. Its a Korean variety hybrid from Cali. It too is almost a short grain but shorter than many medium grain rices.
00081652000303_full.jpg


If price isnt a problem look for:
HITOMEBORE
AKITAKOMACHI
KOSHIHIKARI
AKITA OTOME

These are not brands "per say" but a short grain variety. They are all true short grain rices and also used for making sushi. My next batch is with a short grain (Koshihikari) and sweet rice hybrid called Snow Flake or Milky Queen.

This should make an excellent rice wine but it may end up sweet. Its not super cheap but it is cheaper than good "sushi rice"
1327366419yukino_kakera.jpg
 
Wow, that SnowFlake rice would cost me 55$ for 6.8Kg on Amazon. That's 8$ per Kg of rice :( .

It looks like I might just have to run a little mission on my next trip to the local city to find an Asian market. I've found one on google but it's a small store.
 
If you want to use Jasmine and save money look for "broken" Jasmine at an Asian market. Its usually quite a bit cheaper and should be fine for rice wine. It also cooks quicker and water/rice ratio is usually 1 to 1.

Thanks for the tip! I just bought some Three Ladies Brand broken jasmine rice today (5 lb bag, not 50 :p). It was $3.99 in SF Chinatown. It says 1/1.5 on the rice/water ratio on the bag.

I also picked up a 5 lb bag of Apple Brand sweet rice for $4.50 -- I liked the small roundish grains better than the more common (and slightly cheaper - $3.99) thai sweet rice which looks pretty long-grain to me.

jqj29c.jpg


Also got a 1 lb bag of glutenous rice flour for $0.89 (one place had it for $0.79). I'm going to do some experiments with glutenous rice flour. I see no reason why rice flour couldn't work on its own, plus it's cheaper per pound than whole rice. At the very least, maybe adding some glutenous rice flour to the sweet/jasmine rice could give it a boost. I'm also planning to try a few mixed batches to see if adding glutenous rice or rice flour to normal long-grain rice might turn out more successful than long-grain rice alone (this would be cheaper if it worked).

1z2kks3.jpg


Oddly, none of the shops in Chinatown (I went in probably 20+ today) had the yeast balls which I found surprising. Only one had the red yeast rice. But I didn't need either because I had already bought some elsewhere.
 
It says 1/1.5 on the rice/water ratio on the bag.

That is most likely because of how broken rice is used and the types of dishes its used to make. It will come out like a gruel. Imagine Cream of Wheat or oatmeal consistency if you use the more common rice to water ratio. When cooked to come out like regular rice you can use less water and a shorter cook time.

Experiment and see what works best for you before doing a large batch.

The SnowFlake rice i just cooked has tiny and i mean tiny grains. Thai sweet rice is a longer grain variety, closer to Jasmine in size. Korean, Chinese and Japanese sweet rice varieties are fairly short.

I use glutenous rice flour when grinding RYR sometimes. Just a little added to the grinder. Mostly i use it for making a type of "porridge" used in Korean cuisine. Kimchi paste is my most common use.
 
That is most likely because of how broken rice is used and the types of dishes its used to make. It will come out like a gruel. Imagine Cream of Wheat or oatmeal consistency if you use the more common rice to water ratio. When cooked to come out like regular rice you can use less water and a shorter cook time.

Experiment and see what works best for you before doing a large batch.

I see. Good to know. I did make a rice cooker full yesterday before your response and I don't think it's soupy. It seemed about right, but maybe it would be more suitable with this recipe with less water. Dunno. I'll try drier if this batch doesn't come out. Edit: After having it in the fridge overnight, it did come out too sticky. Next time I'm doing 1/1 like you said.

The SnowFlake rice i just cooked has tiny and i mean tiny grains. Thai sweet rice is a longer grain variety, closer to Jasmine in size. Korean, Chinese and Japanese sweet rice varieties are fairly short.

Since so many are using jasmine here and getting great results, I guess then the grain length doesn't really matter that much, or at least it can't be relied upon as a guide. The common knowledge seemed to be short is better than long, but it really comes down to the content of easily converted starches. Based on leadgolumn's experiment and my own current batch using Blue Ribbon long grain rice (standard cheap stuff - $9 / 25 lb at Costco), clearly it's tougher for the mold to break it down in to fermentable sugars so you get a very small yield. And the "long grain" rice grains I have are physically shorter than any of the jasmine or Thai sweet rice I saw for sale. It definitely does not liquefy well -- 4 days in and its just barely wet with no liquid layer. Next time I'll buy some Thai sweet rice and compare it to the Apple Brand sweet rice.

I use glutenous rice flour when grinding RYR sometimes. Just a little added to the grinder. Mostly i use it for making a type of "porridge" used in Korean cuisine. Kimchi paste is my most common use.

I have seen people mention using a couple of tbs of it to "kick start" the yeast growth in rice wine. What I haven't seen is anyone trying to use a significant quantity in a batch. My first experiment is 100% raw glutenous rice flour and water. I don't really expect it to work, but we shall see. (I read somewhere that tests done between fermenting cooked and uncooked rice showed that cooking was not required for the starches to be broken down and that the quality of the finished product was better from the uncooked rice vs the cooked. I can't remember where I saw this and it may have been in reference to sake which is a longer, more involved process.) Edit: Here's where I saw it.

Kimchi paste sounds good. I need to try making kimchi sometime. I always loved the gochujang paste used for topokki/teokbokki, which also uses glutenous rice flour. And of course, there's mochi (green tea ice cream mochi is my fav!) Curous... does the "porridge" you mention use the RYR or just the glutenous rice flour?

Before reading about rice wine recently I had no idea the RYR I've had in my cabinet for 10 years contained live yeast/mold or that it could be used for anything but cooking. (No, I threw that out and bought a new bag for the wine.) The only thing I'd ever seen done with it before now a stir-fried red chicken and wine dish a friend from Malaysia made a couple of times ages ago. Even he didn't know the yeast could be used for making rice wine. :p
 
Rice has two main starches. Sticky or sweet rice has very little amylose and mostly amylopectin. The amylopectin is the one that easily converts to sugars. Any rice high on the glycemic index should work better than say basmatti which is very low on the GI.

Sticky rice (a.k.a., glutinous, waxy or sweet rice) is very sticky when cooked. It contains the highest amount of amylopectin and no amylose. It’s often used to make sweet dishes in Asia.

Amylose is a long, straight starch molecule that does not gelatinize during cooking. Grains with high amounts of amylose will be fully and separated once cooked. Long grain rice typically has high amounts of amylose (about 22%) and the least amount of amylopectin (ex., long grain varieties, Basmati and Jasmine).

Oddly Jasmine is fairly high on the glycemic index even though its a long grain and makes a really tasty rice wine too. The flavor is quite pleasant.


I rinse the hell out of short grain and sweet rice before cooking, especially when using it for rice wine. It will be far less sticky when done. I just give Jasmine fairly quick 3 rinse. Add enough water to cover the rice by no more than 1/2" and let it soak a few hours minimum before cooking. After soaking the water will just slightly cover the rice.

Let it rest about 15 minute after cooking then "fluffy it" so the rice on the bottom is now mostly on top and allow to cool. Keep your spoon wet and the rice will stick to it far less. Same thing goes for your hands, keep them wet when handling the rice.

I use a microwave cooker so cooking technique will vary a little vs a rice cooker.

No, there is no RYR in the kimchi paste. The "porridge" starts off as water. sugar and sweet rice flour. Its brought upto a soft boil until it thickens. Then when it reaches room temp you mix in your pepper flakes ect ect to make the paste. You don't really need to make the porridge to make kimchi but it is the traditional method.

A puree of little pear juice, fish sauce, water, onion and garlic works fine. Add your pepper flakes to that and mix it with your salted and rinsed cabbage. Pack it all down tight in a fermenter with a crock weight and wait till it smells sour then put it in the fridge for a couple weeks.

Even easier way. Make sauerkraut and toss in some Korean pepper flakes. Pack that all in a fermenting crock. I use Dole Cole Slaw mix when im feeling lazy and put it on hotdogs or sausages. It just taste like semi spicy sauerkraut this way. The HUGE key to kimchi is the Korean COARSE pepper flakes. The bag will usually have a picture of kimchi on it. They are milder than the fine grind powder. The fine powder is for making gochujang.
 
Oddly, none of the shops in Chinatown (I went in probably 20+ today) had the yeast balls which I found surprising. Only one had the red yeast rice. But I didn't need either because I had already bought some elsewhere.

Did you ask people who were somewhat fluent in English?

I have found it in the smallest of Asian stores, but had to twist arms to find out where it was.

I have seen it hidden in the candy section, behind the counter where they keep the expensive herbs, in the housewares section next to the cleansers, and many other odd places.

There is a a chain of Asian stores in Arizona called "Lee Lee". Very few of the employees speak English.
I looked all over trying to find them without luck. So I went from employee to employees. The only English speaker didn't know what I meant by yeast balls.
So then I asked for wine mother, make fermented rice, make rice wine, etc... and finally she understood and went to a back room and brought a package out.

Yeast balls are very common in Asian stores. They use them for making fermented rice, rice vinegar as well as rice wine. All common in Asian cultures.

The only store that I found that didn't carry them was a really small one that only carried the very basics. Most of their customers only bought beer and wine.

The owner new what yeast balls were and even made her own rice wine, but said she didn't stock them at this time, but was thinking of getting some.
 
Rice has two main starches. Sticky or sweet rice has very little amylose and mostly amylopectin. The amylopectin is the one that easily converts to sugars. Any rice high on the glycemic index should work better than say basmatti which is very low on the GI.

Very interesting information. I did a quick search and found this site:
Identification of a Major Genetic Determinant of Glycaemic Index in Rice

Which has a link to this XLS file:
https://static-content.springer.com/esm/art%3A10.1007%2Fs12284-011-9073-z/MediaObjects/12284_2011_9073_MOESM1_ESM.xls

The rice with the highest glycemic index they tested was "HNN Cooked" with GI of 91/92. Theoretically that should give a very good yield. Now if there were only a way to find out what type that is... :D

Edit: Found it: http://smta.irri.org/smta/listEntri...0&method=listEntriesData&smtaId=SMTA2008-0474

HOMNANGNOUANE (60-30-30) from Lao People's Democratic Republic.

I rinse the hell out of short grain and sweet rice before cooking...

Thanks for the tips! I didn't wash the long grain rice (interestingly, enriched rice shouldn't be washed to retain the added vitamins), but I did wash the sticky and jasmine.

No, there is no RYR in the kimchi paste. The "porridge" starts off as water. sugar and sweet rice flour. Its brought upto a soft boil until it thickens. Then when it reaches room temp you mix in your pepper flakes ect ect to make the paste. You don't really need to make the porridge to make kimchi but it is the traditional method.

A puree of little pear juice, fish sauce, water, onion and garlic works fine. Add your pepper flakes to that and mix it with your salted and rinsed cabbage. Pack it all down tight in a fermenter with a crock weight and wait till it smells sour then put it in the fridge for a couple weeks.

Even easier way. Make sauerkraut and toss in some Korean pepper flakes. Pack that all in a fermenting crock. I use Dole Cole Slaw mix when im feeling lazy and put it on hotdogs or sausages. It just taste like semi spicy sauerkraut this way. The HUGE key to kimchi is the Korean COARSE pepper flakes. The bag will usually have a picture of kimchi on it. They are milder than the fine grind powder. The fine powder is for making gochujang.

Ahh, I see. Thanks for the recipes! I will make a point to get the Korean pepper flakes next time I go to the Asian supermarket. If it's fermented, it has to be good! :mug:
 
Did you ask people who were somewhat fluent in English?

I have found it in the smallest of Asian stores, but had to twist arms to find out where it was.

No, I didn't ask anyone but I thoroughly looked over every visible shelf in the stores. (I was also just browsing -- it's been a while since I've been to Chinatown and I always like discovering new things.) If they had them out, I would most likely have seen them, but if they were behind a counter, that would make sense. I wasn't particularly looking to buy them, just compare prices. But if I go again I'll ask.
 
I harvested my 10 cup batch of Botan Calrose rice.

The total yield was 3 full 750ml bottles and 1 bottle filled 3/4 of the way up. On my last batch using sweet rice I only used 8 cups of rice and I had 4 full bottles and a little extra that made for about 4 glasses full.

I pasteurized it all at 160* for 10 minutes.

Not as good of a yield as with Sweet rice, but on the other hand this stuff does taste pretty darn good.

Tasting notes: The taste is sweeter than my last batch. It has more of a taste of higher alcohols than my batch with sweet rice, but the warmth that results is actually pretty nice on the way down. All in all I like it, but I think I'll stick with sweet/glutinous rice on future batches mostly due to yield and the cheap price of rice.

This wine is definitely better shaken up and drank cloudy. I like it sweet.
 
Yeah. I'm definitely going to start making this every week. I want some to share with friends. A 3 week wait is a looong time between batches :p
 
Im testing a batch made with koji and EC-1118 today. Pitching the yeast starter in another hour or so. Cooked rice and koji were mixed almost 48 hours ago.

200grams koji
5 cups (dry) Milky Queen aka Snow Flake rice (Sweet rice and Koshihikari hybrid)
8 cups spring water
1/4tsp FermaidK
EC-1118 yeast starter made with rice syrup and 4 of the cups of water
 
So how strong is this rice wine prepared the way you've shown in this thread?
 
I served a bottle of my wine from jasmine rice to a Japanese man I know. He said it was pretty good, but recommended I find the glutinous rice. I had chilled the wine but not filtered it, and it was still pretty sweet, less than two weeks old. I didn't pasteurize it; I added Campden tablet and sorbate, but I keep having to 'burp' the bottles in the refrigerator. Watch out for bottle bombs with this stuff!
 
Im testing a batch made with koji and EC-1118 today. Pitching the yeast starter in another hour or so. Cooked rice and koji were mixed almost 48 hours ago.

200grams koji
5 cups (dry) Milky Queen aka Snow Flake rice (Sweet rice and Koshihikari hybrid)
8 cups spring water
1/4tsp FermaidK
EC-1118 yeast starter made with rice syrup and 4 of the cups of water

I had no idea what 'koji' was so I had to look it up. Apparently it is "aspergillus oryzae" that gives rice fermented drinks their...particular sass. So my question is: why the EC-1118 if you are using koji? Are you looking for a snappier ferment time? OR, are you trying to develop two separate ferment profiles one from a yeast and one from a bacteria?
(BTW, EC-1118 is awesome yeast for making real fruit berry melomels. Just saying, that and K1V-1116)
 
Koji contains no yeast. It contains a fungus and only produces an enzyme which converts starch to sugar.

Yeast alone will do nothing with cooked rice because there are no fermentable sugars. A source of amylase enzyme/s is required for the conversion. Angel Rice Leaven, Nuruk, RYR or Koji can be used for the conversion. Koji is a bit more refined of the bunch and costs far more.

I am however looking for a quick ferment time too. When adding water to a rice wine mash it can sour easily. After the fermentation has started the "mash" was moved into a cooler and fermented cold. EC-1118 is fairly cold tolerant.
 
Back
Top