subliminalurge
Well-Known Member
Gotcha. Makes sense.

I bought 1/4" bev-seal a long time ago for this project (3/16" was not available anywhere, I called). Do you think that will give me too fast of a flow?


![Craft A Brew - Safale S-04 Dry Yeast - Fermentis - English Ale Dry Yeast - For English and American Ales and Hard Apple Ciders - Ingredients for Home Brewing - Beer Making Supplies - [1 Pack]](https://m.media-amazon.com/images/I/41fVGNh6JfL._SL500_.jpg)


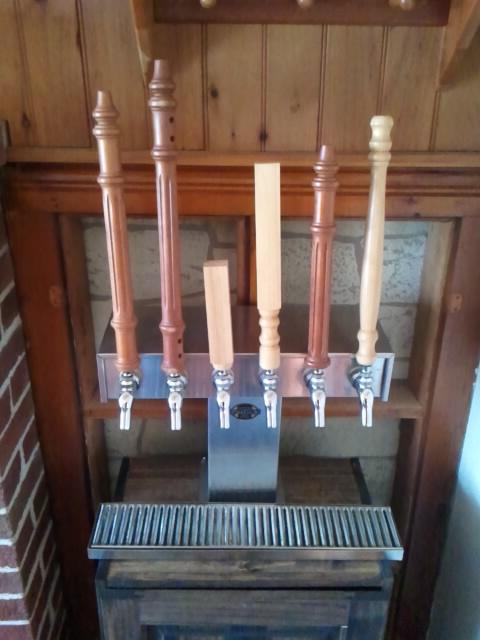
runningweird said:[...]My only problem is the drip tray, I don't have the metal working skills to cut it down to size without fear of screwing it up majorly so it sits on top and goes past the edges of the cabinet by about 1 inch on each side. [...]
runningweird said:I looked at pulling them out when I got my tower, but the amount of work to dig out the foam and cut the lines out was way beyond my laziness ethic.
The chilling lines are so nice, no overfoamed beer, unless I mess up and overcarb....
joftinac said:Excellent setup! I just started brewing a couple months ago and am still in the early stages of research for my kegging setup. This tap rig with the chilled lines is awesome. Thanks for the idea.")
My only problem is the drip tray, I don't have the metal working skills to cut it down to size without fear of screwing it up majorly so it sits on top and goes past the edges of the cabinet by about 1 inch on each side.
Are your beers flat for the first pour?
My only problem is the drip tray, I don't have the metal working skills to cut it down to size without fear of screwing it up majorly so it sits on top and goes past the edges of the cabinet by about 1 inch on each side.
RunningWeird,
I will be moving to a new house in a few months and I need to do the same thing. How is it working? Still keeping everything cold? What is the evaporation rate? Have you thought about sealing the salt water bucket to reduce the evaporation?


