Keezer collar for 7.0 cu. ft. Holiday chest freezer from Lowe's

Homebrew Talk - Beer, Wine, Mead, & Cider Brewing Discussion Forum

Help Support Homebrew Talk - Beer, Wine, Mead, & Cider Brewing Discussion Forum:

This site may earn a commission from merchant affiliate links, including eBay, Amazon, and others.

DangerRoss

Well-Known Member
Joined
Jun 29, 2011
Messages
337
Reaction score
24
Location
Minnetonka
Hello HBT,

This past weekend I build a collar for my 7.0 cu. ft. Holiday chest keezer from Lowe's. I picked up a couple piece of 1"x 6" Poplar boards, weather stripping, and some other various hardware. All the pictures can be seen on my website:

Fluke Brewing - Keezer Build

Cheers,

DangerRoss


Finished Product:

0318121543.jpg
 
Looks pretty sweet dude! This is going to be my summer project.....plan on going simple like yours.

Awesome man! The only thing I am missing is a drip tray. When I was at my LHBS, I didn't want to spend another $70 on one but now it's all done and put together, I definitely need one.
 
I seen a couple people on here construct a make shift one out a metal drywall/spackle tin that didn't look to bad.........
 
Tonight after work, I might go to Lowe's and pick up a smoked box and some 3m adhesive strips with the quick removal tabs for a drip tray. Similar to what olllllo did here
 
Finish the drip tray finally. Went and picked up a smoker box from Lowe's along with some 3m hangers.

3m deal cuttoff:
0319122043.jpg


Measuring out location:
0319122042a.jpg


Installed and tested:
0319122052.jpg
 
I'm interested in the way you installed your drip tray as I have a Holiday 5.0 keezer. Any pics of the back of the drip tray? How are the 3m strips holding up?
 
3m deal cuttoff:
0319122043.jpg

I wanted something I could take off and clean but also not damage my keezer by drilling holes or glues. So the way I installed my drip tray was by using 3 of these 3m holders. I measured and drilled 3 holes in the back of the smoker box to accommodate the 3m hangers. I also used some silicon to seal the corners so it's waterproof. The 3m hangers are holding up so far. I don't trust them supporting a full beer or even an empty glass. I just wanted something to catch the drips from the faucets so I didn't have to keep a towel of the floor. When I get home tonight I will snap a couple more pics detailing how I mounted my drip tray.
 
I'm interested in the way you installed your drip tray as I have a Holiday 5.0 keezer. Any pics of the back of the drip tray? How are the 3m strips holding up?

Here you go:

Back view:
0322120751.jpg


0322120750a.jpg


Clips:
0322120749.jpg


Hole Close up:
0322120750.jpg


Siliconed corner:
0322120750c.jpg
 
Good choice on the wood. I used poplar on the whole thing: base, collar, and coffin. Looks great!
 
Good choice on the wood. I used poplar on the whole thing: base, collar, and coffin. Looks great!

In a couple years I plan on upgrading this to something like Jester with a base, collar, and coffin. In my dream I will have glycol chiller as well.
 
Hey thyirishmen,

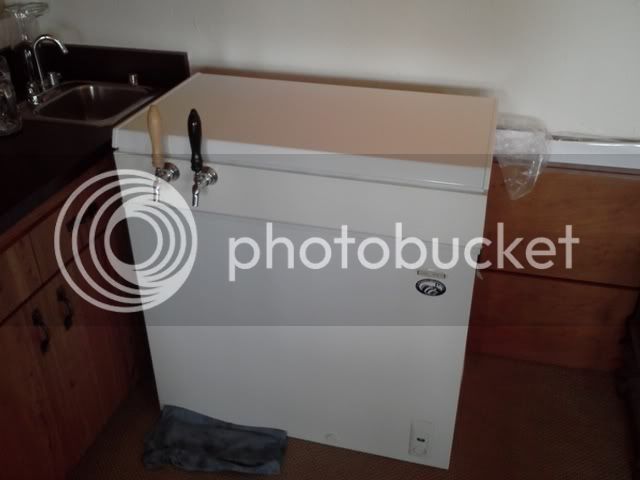
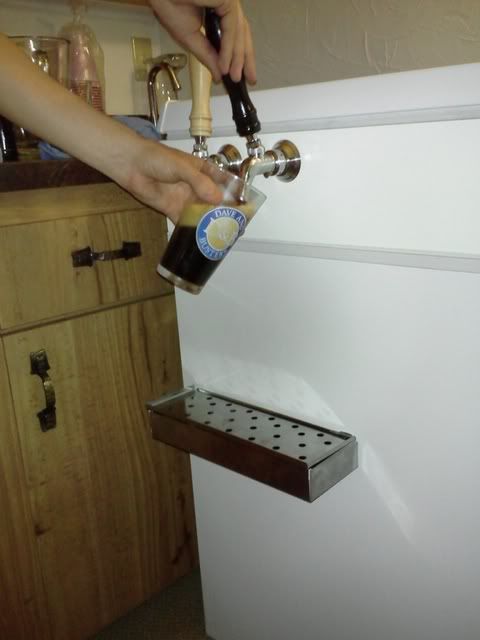
Sorry for the late response, I have been away from the computer all weekend. When making a collar for my keezer, I had one criterion, that it was easily be put back into it's original condition. I didn't want to use any glue, drill any holes, or cut anything off of the original freezer.


thyirishmen said:
Did you liquid nail the collar down to the freezer and then caulk around it to seal up nicely?

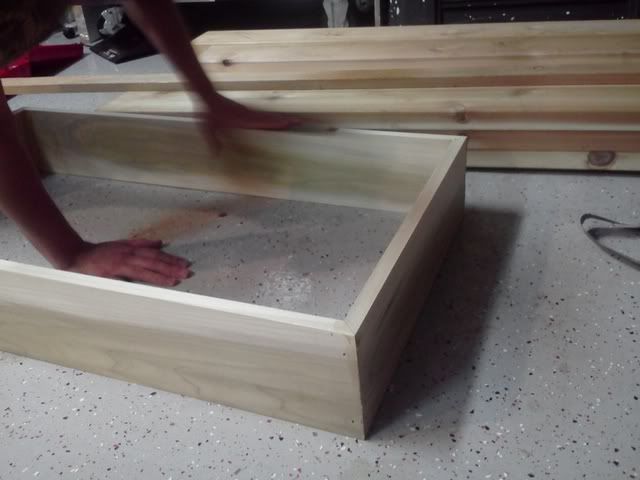
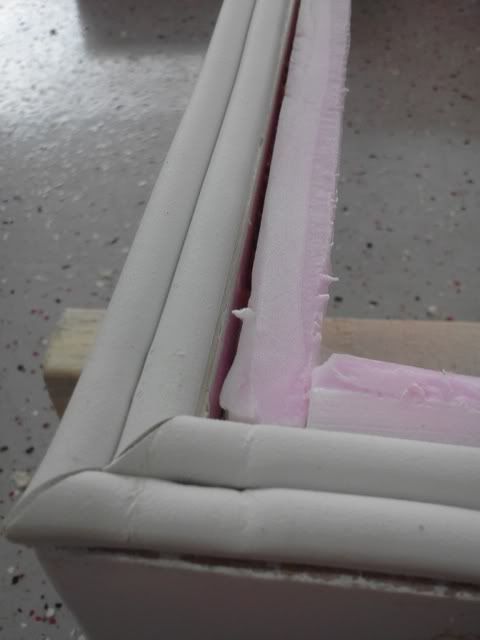
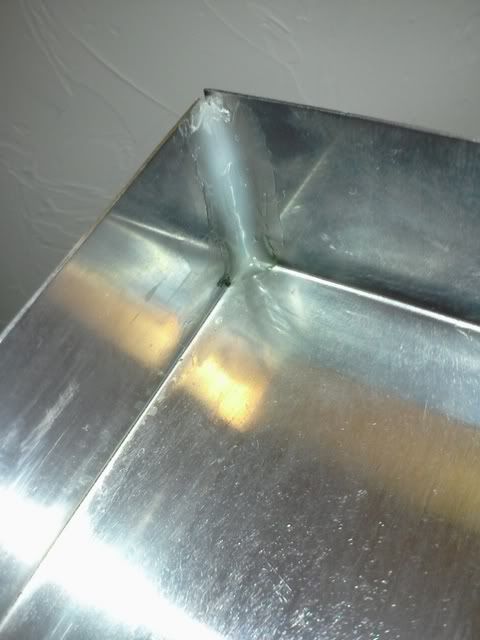
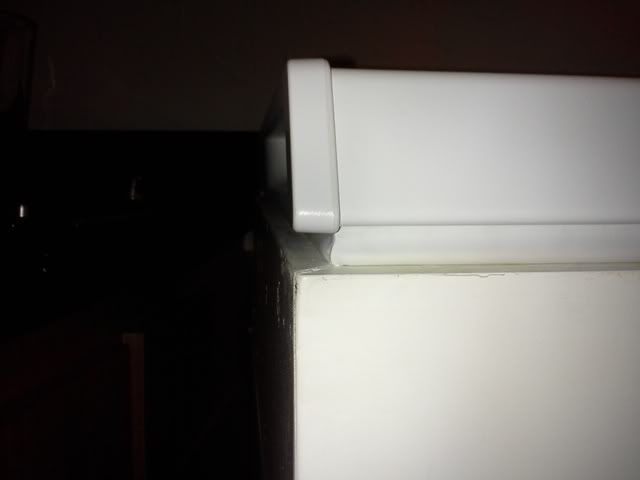
The only place I used liquid nails was on the miter joints and to glue the insulation inside the collar. After I cut the miter joints, I put a nice bead of liquid nails on the end and then used a finishing nailer to put a couple nails in it to rigid it up.

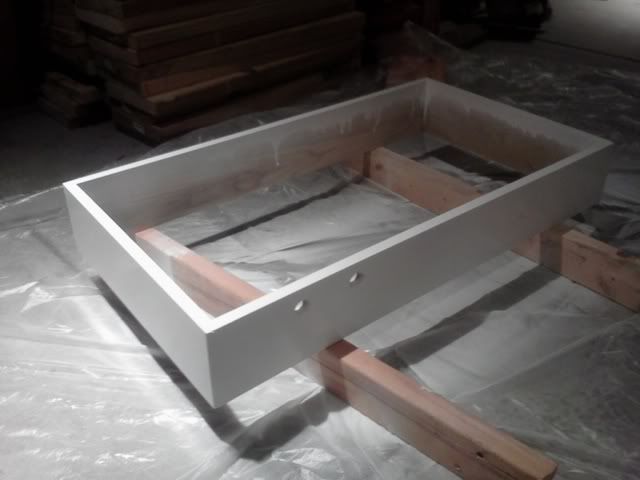
I did used some silicone caulking to seal the seals of the insulation but it is not needed. I had some laying around so figured why not.

thyirishmen said:
For the Lid did you just re use the weather strip and screw the hinge into the collar and it's like how it is stock just into the collar instead?

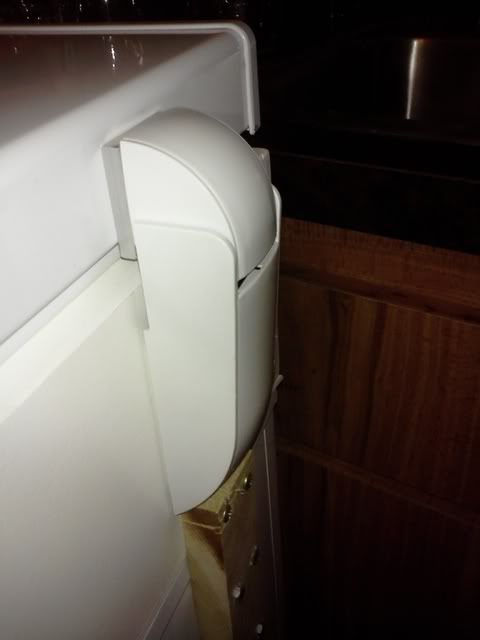
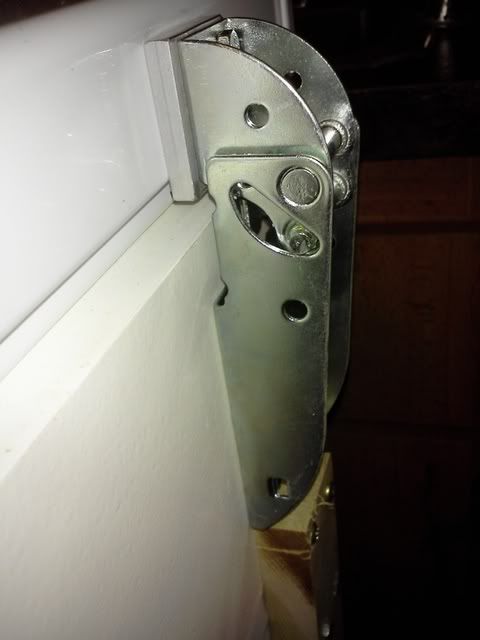
As for the lid, it is completely 100% in it's original condition. I just unscrewed the hinge from the base, leaving the lid attached to the hinges, put my collar on top the base, and then put the lid w/ hinges on top of the collar. I centered it and aligned everything, marked my holes, and screwed on the hinges.

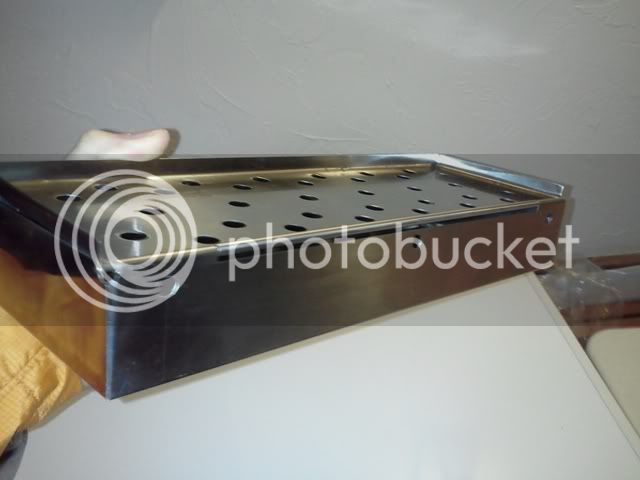
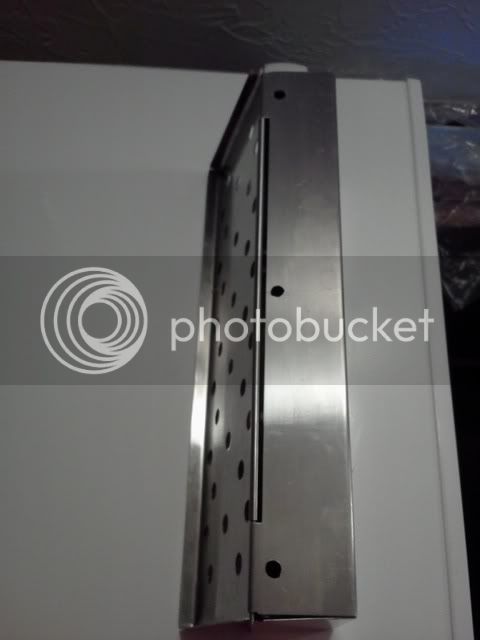
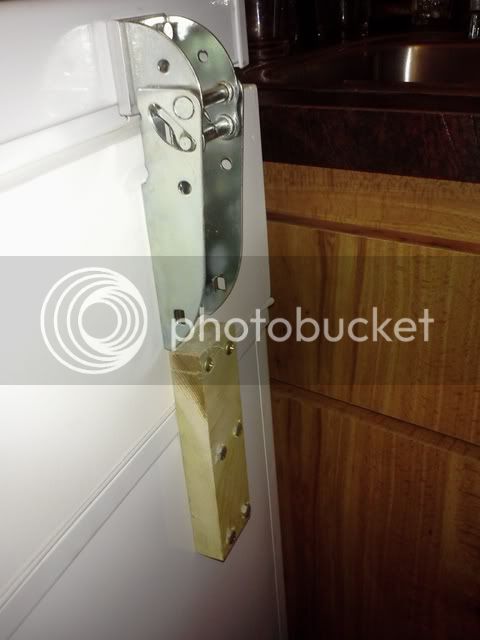
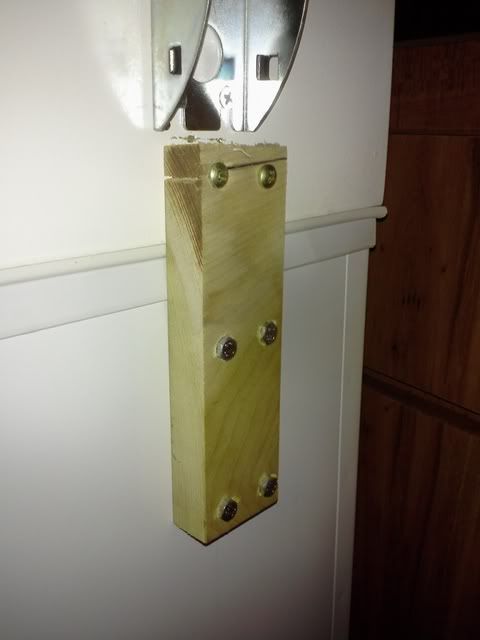
I did make a couple wood strips that screwed into the back of the collar and bolted into original bolt holes where the hinge was on the base. I did this so that the collar would not slide around. I do not have any pictures of this. I will snap a couple tonight when I get home and post them.


thyirishmen said:
By any chance you have the measurements you cut? Did you weather strip the bottom of the collar where it's attached to the freezer?

I do not remember off the top of my head but for some reason I keep wanting to say it is 37" x 20". Do not rely on my measurements. A simply rule to follow is measure twice, cut once.

thyirishmen said:
Did you weather strip the bottom of the collar where it's attached to the freezer?

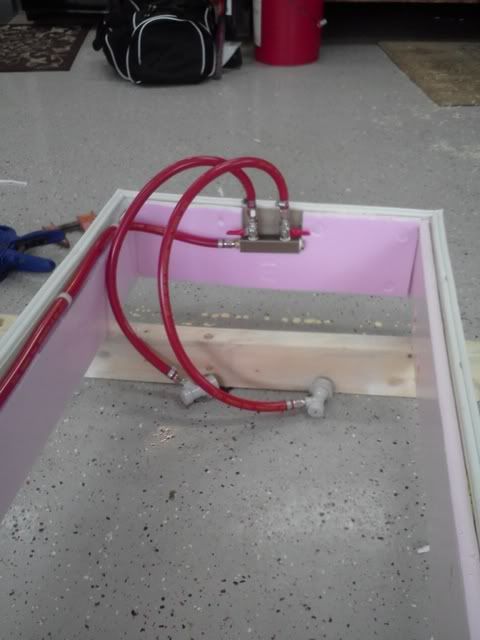
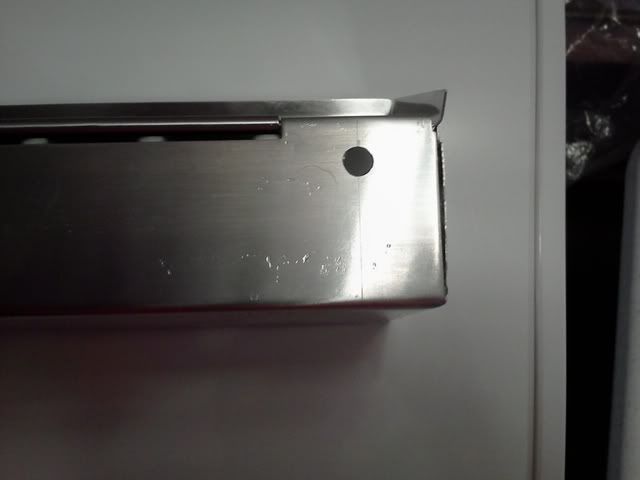
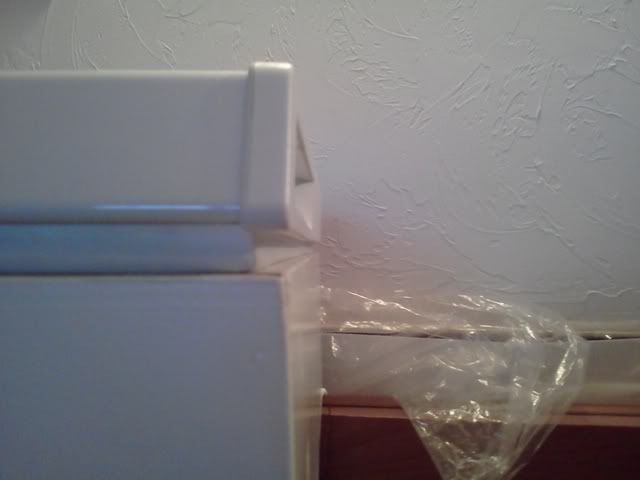
Yes, I used 2 packages of weather stripping. I used white D-Section 3/8"W EPDM Rubber weather stripping and stapled it to the underside of the collar. It comes in packs 17ft long. If you keep it doubled up the width is 3/4" which fits perfectly on the edge of the collar.
 
Back Hinge:
0326121840a.jpg


0326121840.jpg


Pre-drill your holes!
0326121839b.jpg


1/4" Spacer Top view:
0326121839a.jpg


Spacer Side view:
0326121839.jpg


Front Edge:
0326121841a.jpg


0326121841.jpg


Left Edge:
0326121842.jpg


Right Edge:
0326121842a.jpg
[/QUOTE]
 
You did a great job and it looks fantastic.

I hate to be "that guy", but I'm hoping by giving you some advice you avoid a catastrophe.

The wood blocks that you have in the back securing the collar to the base have the grain running in a horizontal direction. With the grain of the wood oriented in that direction, there is almost zero strength to that piece of wood. To illustrate my point, take that block of wood and bend it in your hands, you'll be able to easily snap it in two. I'd be concerned with the same thing happening when you open your lid or something similar.

Cut two more pieces with the grain running vertically and you should be good to go! (Gives you a chance to pre-drill those holes too. :) )

Thanks for the tip! I have been meaning to replace the broken piece but haven't been able to find the time. Hopefully this weekend I can pull out the saw and rip a couple more boards.
 
If this is still an issue, I can help. Tell me what size the blocks are and how many you need, and I'll send you some baltic birch ply replacements in 3/4". They won't split. I can throw them in your order. If you can come up with a quick drawing with hole placement and sizes, I can do that real quick too. Let me know.

I was poking around to see if I could figure out the spacing you have on your tap handles...

John
www.bestbrewtap.com
 
I have had a couple request and questions about all the materials I used for the build. So due to popular demand I assembled a BOM containing 98% of all the materials I used. The complete list (with links) can be seen on my blog: CLICK HERE


Kegging Equipment:
  • 2x Perlick Faucet - Perl 525
  • 2x Stainless Steel Faucet Shank 4 in.
  • 2x Stainless Steel Flange
  • 2x Neoprene Washer
  • 2x 1/4" Stainless Beer Tail Piece
  • 2x Hex Nut
  • 8x Stainless Steel Tubing Clamp
  • 20ft 3/16" ID Beer Line
  • 6x 1/4" Barbed Swivel Nut
  • 6x Swivel Nut Gasket
  • 2x Ball Lock Liquid Disconnect, Threaded
  • 1x 2 Way CO2 Distributor, 1/4" MFL with Shutoff
  • 2x 5/16" Gas Line Assembly - Ball Lock
  • 5ft 5/16" ID Gas Line
  • 8x Plastic Tubing Spacer

Other Materials Used:
  • 1x 1" x 6" x 8ft S4S Untreated Appearance Grade Poplar Board
  • 1x Hammered White Spray Paint
  • Rigid Insulation
  • Weather Stripping
  • Silicone Caulking
  • Liquid Nails
  • Various grits of sand paper
  • Random screws and hardware

Cheers,

DangerRoss
 
Danger,

I have been researching which keezer setup to build, and I've been eyeballing the holiday freezer at lowes, mostly because of price. Since you've had yours for quite sometime now, can you say for sure how many ball lock kegs it will hold? I really only need space for four kegs, but I'm hoping it will hold four comfortably. Thanks!

Hey MikeinOH,

It will hold 4 ball lock kegs just fine. That is the same reason I bought mine. I wanted to be able to expand up to a 4 keg setup. I hope this helps.

Cheers,

DR
 
Can you give a ballpark price for the collar and the kegging hardware (minus the keg, regulators and freezer)? I've really been eyeballing this freezer because of the price at Lowes. Also, what are you using for temperature control? I didn't see anything regarding that in your build. I may have missed it.
 
Payne, I just purchased an stc-1000 temp controller off amazon for $24, then had to buy a few other things to make it work, but overall I spent maybe $40 for it. I'm expecting about $50 for a collar and to spray paint it. Just be aware that I am unable to get four kegs in the freezer, it isn't wide enough to fit four. It is a great freezer for the price though.
 
Payne, I just purchased an stc-1000 temp controller off amazon for $24, then had to buy a few other things to make it work, but overall I spent maybe $40 for it. I'm expecting about $50 for a collar and to spray paint it. Just be aware that I am unable to get four kegs in the freezer, it isn't wide enough to fit four. It is a great freezer for the price though.

Do you have pin or ball lock kegs?

Ball Lock Kegs are normally 25" High x 8 1/2" Diameter

Pin Lock tanks have two basic sizes, 21” or 23” x 9" Diameter
 
Four ball locks fit snugly on the floor. It's a tight squeeze but it works, not for pin-locks though. You can only fit 3 pin locks. With a 9" collar you can fit a 5th ball (or 4th pin) lock on the compressor hump.
 
I've got two ball locks, and the depth of the freezer isn't enough to fit two, so if I stagger them, I may be able to fit three on the floor and maybe one on the hump (hanging off a little).
 
Payne, I just purchased an stc-1000 temp controller off amazon for $24, then had to buy a few other things to make it work, but overall I spent maybe $40 for it. I'm expecting about $50 for a collar and to spray paint it. Just be aware that I am unable to get four kegs in the freezer, it isn't wide enough to fit four. It is a great freezer for the price though.

+1 on the STC-1000, thanks for the info. I have an STC-1000 controlling my mini-fridge turned fermentation chamber, so I'm familiar with that unit and how it works. Kind of hard to beat for the price.

After looking at the chest-freezer spec page, it says you should be able to fit 4 ball lock kegs on the floor of the freezer. I'm curious to know why you can only fit 2?
 
The above link for the holiday freezer seems inaccurate. It says it will hold four ball locks, but clearly only shows three, staggered in the picture. Then the dimensions show 15 1/8" but then shows cornys are 8" diameter, which would be 16" for two of them. So how would it fit four? I don't know.
 
It does only show three in the picture, however, if you scroll down, it shows how 4 would work in a mock-up drawing. It's got SEVERAL different configurations of ball lock, pin lock, 6G fermentors, 6.5 ale pails and CO2 tanks....seems legit.
 
Here's the freezer, it's still in my garage from when lowes delivered it. Only three kegs will fit in the bottom, with maybe a fourth on the hump, as long as I build a big enough collar.

ForumRunner_20130507_150817.jpg
 
Back
Top