ICEMASTER MAX 2

Homebrew Talk - Beer, Wine, Mead, & Cider Brewing Discussion Forum

Help Support Homebrew Talk - Beer, Wine, Mead, & Cider Brewing Discussion Forum:

OP
OP
WesBrew

WesBrew

Supporting Member
HBT Supporter
Joined
Jun 28, 2018
Messages
834
Reaction score
1,045
Location
The Free South
First time with two vessels. 17 gallons. Its not having to work very hard to hold at 68 this time of year. But the coil is perfect so far
 

Attachments

  • C23757FE-921B-44DE-BEBE-3771C19B57D9.jpeg
    C23757FE-921B-44DE-BEBE-3771C19B57D9.jpeg
    2.7 MB · Views: 131
Last edited:

Nella

Member
Joined
Jan 14, 2021
Messages
17
Reaction score
4
I just ordered this from MoreBeer. It's not in stock at the moment, so I'm in no rush, but what accessories and such have you picked up for it? I see photos with people using insulated tubing.. where do you get the insulation? I haven't ordered tubing yet but excited to get things going.
 
OP
OP
WesBrew

WesBrew

Supporting Member
HBT Supporter
Joined
Jun 28, 2018
Messages
834
Reaction score
1,045
Location
The Free South
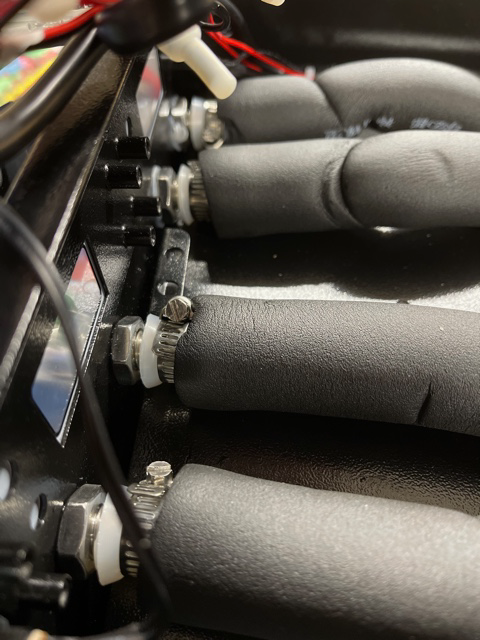
-I used two short pieces of hose to cover the four coolant barbs when not in use.
-other than that I got silicone tubing, 3/8id , to connect the machine to my fermenters. & four hose clamps.
-As for the insulation, I got it in 6ft. sections in the plumbing department at Home Depot. Only a few $ each.
 

Nella

Member
Joined
Jan 14, 2021
Messages
17
Reaction score
4
Thanks for the information. I looked online for the insulation and BOOM! Just as you said lol, so I'll probably swing by there at some point to pick it up in store.


I'm also wondering if anyone knows the approximate weight of it while full? I have a table I want to put it on. I know the top would hold it, but that's where I'm putting my fermenters. There's a shelf on the bottom and I'm trying to determine if it could hold the weight. It wouldn't be high off the ground, but still.


Thanks again! 🍻
 

Nella

Member
Joined
Jan 14, 2021
Messages
17
Reaction score
4
I appear to have gotten a free screwdriver...? I noticed it after putting water in to test for leaks and I can't pull it through the bottom.. maybe I'll attempt to get to it later.. or maybe I should just let it live? It wanted to stay with it's buddy.
PXL_20210425_181949439.jpg
 

TLaffey

Supporting Member
HBT Supporter
Joined
Nov 25, 2011
Messages
118
Reaction score
62
Location
Sacramento area, CA
Has anyone thought about replacing the cooling fan? As others have noted, the cooling fan is a bit noisy and it doesn't seem to move a lot of air. I'm facing summer heat here in the Sacramento area (forecast for Thursday is 113*F) so I'm expecting that keeping 2 fermenters cold might take a bit more efficiency in the chiller. The next few days will tell, though. For now, I have a nice insulation blanket over the fermenters.

20210615_201502.jpg
 

BrewAgain

Well-Known Member
Joined
Apr 3, 2020
Messages
88
Reaction score
47
That's an interesting idea. I have the max 2 also. I was looking at the stats between the 2 and 4. They both seem to have the same compressor. The glycol volume is the only mechanical different (forgetting about the controllers and pumps). I would think to increase the capacity, one could add a cooler and use one of the pumps and controller to create an additional reserve.
 

BrewAgain

Well-Known Member
Joined
Apr 3, 2020
Messages
88
Reaction score
47
One thing that would be interesting is to determine the duty cycle of the compressor with the different loading. Temp of fermentors, room temp, cold crashing, etc. I think the max 2 has much more capacity than just 2 7 gallon fermentors.
 

Golddiggie

Well-Known Member
Joined
Dec 14, 2010
Messages
13,771
Reaction score
1,912
Location
Living free in the 603
I've had my Max2 for a bit now. Few things I found about it..
Don't use the butterfly worm clamps MoreBeer sells to keep the tubing on the barbs. They WILL leak no matter how tight you go. Use Oetiker clamps for 100% sealing (zero leak chance) for your lines to the chiller itself.
Use a short piece of 3/8" OD stainless tubes to connect your lines instead of bridging at the chiller. I do this for the lines I got from Spike for my two CF10 fermenters. Since the chill coils are 3/8" OD stainless tubing, it works with the fittings provided. Also makes a closed loop where you don't need to drain the chiller tubing.
Be careful of how much water is in the 1 gallon jug of store bought distilled/RO water. The jugs I bought had more than a gallon in them (+8oz). I thought they were only one gallon in each, so I had added more than 4.5 gallons to the unit. Causing drips in the front (center and left corner). I removed 1/2 gallon (initially) and all leaks stopped. At some point I'll add a quart back in to get it closer to the full 4.5 gallon mark.
Since I have the lines connected permanently I simply removed the bridging piece and then turned on the unused feed to remove the amount needed. Pretty easy there.

Right now I have the chiller set a few degrees (F) below my target temperature of the fermenters. The glycol solution is running constant through the coils since the room is warmer than that (room is 72-75F, target for the fermenters is 70F). I plan to cold crash the first batch after I dry hop for a few days (hops go in later today, cold crash will probably start over the weekend). I'll be dropping it to ~35F in order to carbonate in CF10. The batch I started on last Saturday will probably be done fermenting about then as well. But it will rest for a week before I dump the yeast and cold crash it as well.

I'm going to be curious to see how setting the main controller to the lower temperature, but keeping the fermenter not being cold crashed at it's desired temperature will work. I'm hoping that it won't chill the center of the batch too far, causing problems. If I need to wait longer to do the cold crash/carbonate, I will. I'll probably message MoreBeer about this shortly to get their take on it.
 

TLaffey

Supporting Member
HBT Supporter
Joined
Nov 25, 2011
Messages
118
Reaction score
62
Location
Sacramento area, CA
I'm going to be curious to see how setting the main controller to the lower temperature, but keeping the fermenter not being cold crashed at it's desired temperature will work. I'm hoping that it won't chill the center of the batch too far, causing problems. If I need to wait longer to do the cold crash/carbonate, I will. I'll probably message MoreBeer about this shortly to get their take on it.

I've had my Max2 for about 6 months now and have good results with the glycol temp about 10*C below CF-10 fermenter temp. (30% glycol.) When the temps are too close, the pumps run for too long. More than 6-10*C difference and the compressor is running longer than needed. This is my first summer with this equipment, though, so still feeling my way.
 

Golddiggie

Well-Known Member
Joined
Dec 14, 2010
Messages
13,771
Reaction score
1,912
Location
Living free in the 603
I've had my Max2 for about 6 months now and have good results with the glycol temp about 10*C below CF-10 fermenter temp. (30% glycol.) When the temps are too close, the pumps run for too long. More than 6-10*C difference and the compressor is running longer than needed. This is my first summer with this equipment, though, so still feeling my way.
Luckily, I don't expect the room my CF10 fermenters are in to ever get to 80F. Part of living in NH and not out in CA. ;) Things should be even better with the next place I live. I think I've found why the room temp is higher than I had expected (or it was when I first moved in). I had relocated some home tech lab hardware from my office closet to the basement room. More due to eliminating the fan noise in the office. That hardware appears to generate enough heat to elevate the room temp above what it was when I moved in. Not going to move the gear back. I hope to have a room/area where I can put that gear that's not the same as where things will ferment in the next place.

I'll be looking to start the chill to carbonate over the weekend. That should give me enough extraction from the dry hops that will be going in tonight (3-4 days at 70F then 3-4 days at 35F).

Will see how this all works out at the end of things.
 

Golddiggie

Well-Known Member
Joined
Dec 14, 2010
Messages
13,771
Reaction score
1,912
Location
Living free in the 603
The basement room the chiller and fermenters are in is rather warm right now since we're in the middle of a heat wave (95F+ until Thursday). I set it to about 6C below the temperature for the fermenter (looking to chill it to carbonating temperatures) but it's not getting below 40F (35F is my target). I'll drop it to 10C lower than my target temp and see if it can bring it down those final few degrees. I really want to start it carbonating today, at the target temp (or within 1F of that). I did it with the other batch, but the room was 10F cooler at that time.

I did setup a floor fan to move cooler air into that room, from the rest of the place, hoping it will help drop the room temps at least a few degrees. I might flip the fan around to pull air out of the room shortly. Although the room is now about 2F lower than it was 1-1/2 hours ago, so maybe it's working.
 

Moorhead17

New Member
Joined
Jul 30, 2021
Messages
1
Reaction score
0
I just received my IceMaster Max 2 and I thought I'd provide some pictures of the actual power draw to see if anyone else has similar results. I filled mine up with 4 gallons of solution (3g water and 1g glycol) before turning it on. After a few minutes, the compressor turned on and here are the results...less than the 600 watts I was expecting.

The highest amp draw I could pull (with compressor and both pumps running) was just shy of 2.5 amps which would be about 300 watts. That's pretty far off from the 600 watts of cooling power I was expecting. Anyone else take measurements? Based on what I'm seeing, the actual wattage draw going towards cooling is about 200 watts.

I think I love this question!

For refrigeration cycles, there is a quantity known as "coefficient of performance", or COP. It is sort of like an efficiency, but not quite. A refrigeration cycle works by using a work input (i.e. electricity to the compressor) to transfer heat from a cool place (the glycol) to a hot place (the air).

COP (specifically for a refrigeration cycle) = (heat transfer rate from the cold place) / (electrical power input).

In this case, the expected (stated) maximum heat transfer rate is 600 W. The electrical input is 2.5 A x 120 V = 300 W. The COP in this case would be 600 W/300 W = 2.0.

This is the same reason why one might use a heat pump instead of an electrical (resistance) heater. A 1500 W electrical heater would "only" provide 1500 W of heat, whereas a heat pump with a COP of 3.0 would only use 500 W of electricity to produce the same amount of heat. It is, in essence, moving heat from the cold place to the hot place (against the direction it spontaneously flows).

Thermo is fun!
 

dwalsh27

Active Member
Joined
Dec 16, 2020
Messages
32
Reaction score
19
So will unit heat just like the G20.1 does as well? Noticed “Heat and Cool” writen on the pump controller.
 

Beerwildered

Finding my way to beer heaven
HBT Supporter
Joined
Jan 6, 2019
Messages
261
Reaction score
227
Location
New Hill, NC
The controllers are capable of controlling a heating element if you wanted to add one to each side and wire it to the controller

I did this with my Icemaster Max 4 - the controller will definitely do heat, but you need to upgrade the DC power supply to make it work.

check out my thread with directions.

 
OP
OP
WesBrew

WesBrew

Supporting Member
HBT Supporter
Joined
Jun 28, 2018
Messages
834
Reaction score
1,045
Location
The Free South
Anyone set up their Icemaster & fermenters up with quick disconnect of some sort? Id like to eliminate the worm drive clamps. I need to be able to detach the lines feom rhe machine easily for storage
 

Iowa Brewer

Supporting Member
HBT Supporter
Joined
Sep 14, 2018
Messages
456
Reaction score
188
Just ordered a IceMaster Max2, and learned a LOT from this thread (thanks!).

Eventually going to rewire it to control heat, but for now, what's the best way forward? The Max2's probe will be in my Spike CF10's thermowell, but where should I put my Inkbird's probe for the heating pad? Tuck it into the neoprene?

Any suggestions (or tales of woe) will be much appreciated!
 

jcav

Still Believing In God, Family &This Great Country
HBT Supporter
Joined
Jul 15, 2010
Messages
4,105
Reaction score
2,507
Location
Central Florida
Anyone set up their Icemaster & fermenters up with quick disconnect of some sort? Id like to eliminate the worm drive clamps. I need to be able to detach the lines feom rhe machine easily for storage

I use ordered these for my Bichmann chiller but they should work for yours too.

John
 

Golddiggie

Well-Known Member
Joined
Dec 14, 2010
Messages
13,771
Reaction score
1,912
Location
Living free in the 603
Just ordered a IceMaster Max2, and learned a LOT from this thread (thanks!).

Eventually going to rewire it to control heat, but for now, what's the best way forward? The Max2's probe will be in my Spike CF10's thermowell, but where should I put my Inkbird's probe for the heating pad? Tuck it into the neoprene?

Any suggestions (or tales of woe) will be much appreciated!
Just swap them out when you're either cooling or heating. Doubtful you'll need to do both at the same time.

Or cram both into the same hole. I use a small rubber stopper in the thermowell opening on my CF10.
 

Golddiggie

Well-Known Member
Joined
Dec 14, 2010
Messages
13,771
Reaction score
1,912
Location
Living free in the 603
I use the rubber stopper no matter which sensor is in the thermowell. I minimizes the outside air having an influence on what the sensor is picking up. Unless you're using a sensor that's completely sealed to the outside air, that's the best you can hope for.
 

dwalsh27

Active Member
Joined
Dec 16, 2020
Messages
32
Reaction score
19
Just ordered a IceMaster Max2, and learned a LOT from this thread (thanks!).

Eventually going to rewire it to control heat, but for now, what's the best way forward? The Max2's probe will be in my Spike CF10's thermowell, but where should I put my Inkbird's probe for the heating pad? Tuck it into the neoprene?

Any suggestions (or tales of woe) will be much appreciated!
Just wire in the heating pad to your Max2. Pretty straightforward, just cut your hot line and add 2 blade type connectors. Might need a bit of wire depending on your setup. Nice with just 1 controller.
 

dwalsh27

Active Member
Joined
Dec 16, 2020
Messages
32
Reaction score
19
Anyone set up their Icemaster & fermenters up with quick disconnect of some sort? Id like to eliminate the worm drive clamps. I need to be able to detach the lines feom rhe machine easily for storage
I got the ones from Brewtools (got an F80 coming) but hard on the chiller side. Looking at a Duotight fitting to go on the chiller barbs that go to 1/2” NTP. Then the Brewtools quick disconnects. I’m sure there are other disconnects available as well.
 
OP
OP
WesBrew

WesBrew

Supporting Member
HBT Supporter
Joined
Jun 28, 2018
Messages
834
Reaction score
1,045
Location
The Free South
Thanks…Will look into it. Maybe just set up the fermentor end. Haven’t had leak issues but butterfly worm clamps are kinda pita.

-on a side note for people looking into the machine, it’s been fantastic!! Definitely sized right for 1-2 fermenters, enough glycol volume that it never gets overwhelmed or need to run constantly. Not too loud and so much easier than doing the ice chest with pumps. I have mine on a rolling cart, just wheel it out when needed.
 
Last edited:

Thorrak

Supporting Member
HBT Supporter
Joined
Feb 7, 2016
Messages
3,542
Reaction score
2,335
Location
New York, NY
Anyone set up their Icemaster & fermenters up with quick disconnect of some sort? Id like to eliminate the worm drive clamps. I need to be able to detach the lines feom rhe machine easily for storage

Not Icemaster specifically, but back when I was experimenting with Glycol I invested in sets of these. They're valved, so when you disconnect the button you end up losing ~1 tsp of glycol. LOVE them.

Edit - just noticed these are the same ones as @jcav
 

Iowa Brewer

Supporting Member
HBT Supporter
Joined
Sep 14, 2018
Messages
456
Reaction score
188
Just wire in the heating pad to your Max2. Pretty straightforward, just cut your hot line and add 2 blade type connectors. Might need a bit of wire depending on your setup. Nice with just 1 controller.

That sounds great! Do you have any pictures of that? I'm really ignorant on that sort of thing. Thanks!
 

BoilerInSoCal

Well-Known Member
Joined
Mar 18, 2009
Messages
87
Reaction score
56
That sounds great! Do you have any pictures of that? I'm really ignorant on that sort of thing. Thanks!
A few of us describe it earlier in this thread. Take a look at the instruction manual in post 29, and then my brief description in post 77 (along with the other posts around there). Super easy. Cheers!
 

BoilerInSoCal

Well-Known Member
Joined
Mar 18, 2009
Messages
87
Reaction score
56
-on a side note for people looking into the machine, it’s been fantastic!! Definitely sized right for 1-2 fermenters, enough glycol volume that it never gets overwhelmed or need to run constantly. Not too loud and so much easier than doing the ice chest with pumps. I have mine on a rolling cart, just wheel it out when needed.
Totally agree. I've been running mine regularly for over a year and have had great performance (both cool and heat) with zero issues (other than forgetting to power off the temp control/pump prior to shutting down the main power...and then later turning on the main power when the lines were not connected to the coil...don't do that; the pump immediately turns on and glycol solution sprays everywhere! 😂)
 

Golddiggie

Well-Known Member
Joined
Dec 14, 2010
Messages
13,771
Reaction score
1,912
Location
Living free in the 603
Totally agree. I've been running mine regularly for over a year and have had great performance (both cool and heat) with zero issues (other than forgetting to power off the temp control/pump prior to shutting down the main power...and then later turning on the main power when the lines were not connected to the coil...don't do that; the pump immediately turns on and glycol solution sprays everywhere! 😂)
That's why I have a 'jumper' going between the lines when I remove it from a fermenter. No need to worry about remembering to turn off the controller for that fermenter.
 

NewJersey

Supporting Member
HBT Supporter
Joined
Oct 22, 2012
Messages
1,384
Reaction score
639
Location
Boonton
I use the rubber stopper no matter which sensor is in the thermowell. I minimizes the outside air having an influence on what the sensor is picking up. Unless you're using a sensor that's completely sealed to the outside air, that's the best you can hope for.
What size stopper?
Does a flex thermowell use the same size?
 

Golddiggie

Well-Known Member
Joined
Dec 14, 2010
Messages
13,771
Reaction score
1,912
Location
Living free in the 603
I'd be surprised if the thermowell was a different size opening. The stopper came with a set of several sizes. It's either the smallest one, or one step up from the smallest.

This set is what I got:
 

Unicorn_Platypus

Urine I Pee... Eh?
Joined
Oct 13, 2012
Messages
497
Reaction score
177
Location
NYC
I'm interested in using duotight connectors on the inlet/outlet of the unit.

It unfortunately comes with stepped barbs for 3/8 ID tubing. Is there any kind of adapter I can use to convert to duotight?

The temp twister coil uses duotight and I'd really like to have the convinience of a QD system especially when disassembling and cleaning the coil from the unit
 

Nella

Member
Joined
Jan 14, 2021
Messages
17
Reaction score
4
So I know this doesn't fix your issue, but I wanted to share as I bought these and it is pretty good on my set up.. maybe you'll find a use in the meantime while figuring out the Duotight thing, maybe not. It's more inline than at the connectors but 🤷🏾‍♂️


OP
OP
WesBrew

WesBrew

Supporting Member
HBT Supporter
Joined
Jun 28, 2018
Messages
834
Reaction score
1,045
Location
The Free South
I'm interested in using duotight connectors on the inlet/outlet of the unit.

It unfortunately comes with stepped barbs for 3/8 ID tubing. Is there any kind of adapter I can use to convert to duotight?

The temp twister coil uses duotight and I'd really like to have the convinience of a QD system especially when disassembling and cleaning the coil from the unit
i use the barbs at the machine and have duotight on my coil. the barbs are threaded in so maybe duotight has something that can be added. you can use a piece of silicone tubing on the barb, insert (cut off two pieces of an old steel racking cane) and attach that way.
 

Unicorn_Platypus

Urine I Pee... Eh?
Joined
Oct 13, 2012
Messages
497
Reaction score
177
Location
NYC
i use the barbs at the machine and have duotight on my coil. the barbs are threaded in so maybe duotight has something that can be added. you can use a piece of silicone tubing on the barb, insert (cut off two pieces of an old steel racking cane) and attach that way.

That's a great idea!

I'm going to have to trim the temp twister coil anyway! A short silicon jumper with oetiker clamps on both ends should get me there!
 

Unicorn_Platypus

Urine I Pee... Eh?
Joined
Oct 13, 2012
Messages
497
Reaction score
177
Location
NYC
So I know this doesn't fix your issue, but I wanted to share as I bought these and it is pretty good on my set up.. maybe you'll find a use in the meantime while figuring out the Duotight thing, maybe not. It's more inline than at the connectors but 🤷🏾‍♂️


This is definitely an option! Having QDs on both the temptwister and the glycol unit is what I'm looking to achieve. Not married to the eva barrier tubing. WES brew's suggestion should also work!

Thanks guys!
 

TLaffey

Supporting Member
HBT Supporter
Joined
Nov 25, 2011
Messages
118
Reaction score
62
Location
Sacramento area, CA
I stuck with PVC hose instead of going to the (smaller?) EVA barrier hose.

I'm using some QD's I got from Morebeer: Plastic QD. Mine have check valves on the male side, so female on the coil and male on the hose. Prevents glycol siphoning and allows me to change direction of flow in the coil. I used the barbed fittings on the chiller end of the hose.
 

Latest posts

Top