You are using an out of date browser. It may not display this or other websites correctly.
You should upgrade or use an alternative browser.
You should upgrade or use an alternative browser.
HOWTO - Make a BrewPi Fermentation Controller For Cheap
- Thread starter FuzzeWuzze
- Start date

Help Support Homebrew Talk:
This site may earn a commission from merchant affiliate
links, including eBay, Amazon, and others.
- Status
- Not open for further replies.
wbarber69
Well-Known Member
- Joined
- Oct 13, 2013
- Messages
- 2,191
- Reaction score
- 263
After starting on this project and realizing that I wanted to add the LCD screen and the bluetooth options that @day_trippr was so great to make How To's for, I decided that a PCB board build would be a good learning project for my 10 year old and I. With much help from day_trippr, we came up with this:
View attachment 342423
Kudos to day_trippr
View attachment 342424
Soldered up:
View attachment 342425
Mated to the UNO:
View attachment 342426
More pics to follow when I get the bluetooth hooked up and all put in a project box. I'm really pleased for our first attempt at a board. And the purple is kind of cool. I've already come up with a couple of changes if I go to version 1.1")
Nice piece of work. if you wouldn't mind sharing your files. I might like to get some printed myself. 1 Question though. did you just put all the capacitors in a row and run one trace across them, or are they traced to the components you intend to decouple?
OP
OP
FuzzeWuzze
I Love DIY
After starting on this project and realizing that I wanted to add the LCD screen and the bluetooth options that @day_trippr was so great to make How To's for, I decided that a PCB board build would be a good learning project for my 10 year old and I. With much help from day_trippr, we came up with this:
View attachment 342423
Kudos to day_trippr
View attachment 342424
Soldered up:
View attachment 342425
Mated to the UNO:
View attachment 342426
More pics to follow when I get the bluetooth hooked up and all put in a project box. I'm really pleased for our first attempt at a board. And the purple is kind of cool. I've already come up with a couple of changes if I go to version 1.1
As a engineer and father I approve of this message
If your open to putting the schematic and BOM info up on the Wiki for others that would be great
You might wanna dig a little deeper and look into the brewpi forum and legacy forum. because I believe there is a different I2c setup that actually uses pin 8 and 9 that would normally go to shift register for I2c instead of the analog pins. because I can tell you from experience that once you start messing with the one-wire stuff you'll open up a whole other can if worms
Tnx for this and saving me frustration later on.. I though I was home free when I could get a HEX file for brewpi working on the Uno with the now familiar text, but I found herrfrost:s implementation of software I2C on github since onewire pinout was hardcoded in several places and it will need me to compile new hex file for my setup using that repo.So I guess its actually easier to make a new "traditional" shift register knock off rev C pseudoshield and bring out the solder gun. The layout of above posting seems very nice, I hope he shares it with the world.
Thanks and cheers! / A
wbarber69
Well-Known Member
- Joined
- Oct 13, 2013
- Messages
- 2,191
- Reaction score
- 263
Tnx for this and saving me frustration later on.. I though I was home free when I could get a HEX file for brewpi working on the Uno with the now familiar text, but I found herrfrost:s implementation of software I2C on github since onewire pinout was hardcoded in several places and it will need me to compile new hex file for my setup using that repo.So I guess its actually easier to make a new "traditional" shift register knock off rev C pseudoshield and bring out the solder gun. The layout of above posting seems very nice, I hope he shares it with the world.
Thanks and cheers! / A
I found the updated I2c implementation. it uses pins 10 an 11 for I2c and even has some bug fix have if you are using cheapo Chinese knockoffs with the ch40 USB.
https://github.com/herrfrost/firmware/blob/feature/SoftwareI2C/readme.md
I found the updated I2c implementation. it uses pins 10 an 11 for I2c and even has some bug fix have if you are using cheapo Chinese knockoffs with the ch40 USB.
https://github.com/herrfrost/firmware/blob/feature/SoftwareI2C/readme.md
Thanks, got it and its working! pic from my cluttered desktop:


$22.00 ($623.23 / Ounce)
AMZLMPKNTW Ball Lock Sample Faucet 30cm Reinforced Silicone Hose Secondary Fermentation Homebrew Kegging joyful
无为中南商贸有限公司


$479.00
$559.00
EdgeStar KC1000SS Craft Brew Kegerator for 1/6 Barrel and Cornelius Kegs
Amazon.com


![Craft A Brew - Safale S-04 Dry Yeast - Fermentis - English Ale Dry Yeast - For English and American Ales and Hard Apple Ciders - Ingredients for Home Brewing - Beer Making Supplies - [1 Pack]](https://m.media-amazon.com/images/I/41fVGNh6JfL._SL500_.jpg)
$6.95 ($17.38 / Ounce)
$7.47 ($18.68 / Ounce)
Craft A Brew - Safale S-04 Dry Yeast - Fermentis - English Ale Dry Yeast - For English and American Ales and Hard Apple Ciders - Ingredients for Home Brewing - Beer Making Supplies - [1 Pack]
Hobby Homebrew


$76.92 ($2,179.04 / Ounce)
Brewing accessories 1.5" Tri Clamp to Ball Lock Post Liquid Gas Homebrew Kegging Fermentation Parts Brewer Hardware SUS304 Brewing accessories(Gas Hose Barb)
chuhanhandianzishangwu

$33.99 ($17.00 / Count)
$41.99 ($21.00 / Count)
2 Pack 1 Gallon Large Fermentation Jars with 3 Airlocks and 2 SCREW Lids(100% Airtight Heavy Duty Lid w Silicone) - Wide Mouth Glass Jars w Scale Mark - Pickle Jars for Sauerkraut, Sourdough Starter
Qianfenie Direct


$53.24
1pc Hose Barb/MFL 1.5" Tri Clamp to Ball Lock Post Liquid Gas Homebrew Kegging Fermentation Parts Brewer Hardware SUS304(Liquid Hose Barb)
yunchengshiyanhuqucuichendianzishangwuyouxiangongsi


$49.95 ($0.08 / Fl Oz)
$52.99 ($0.08 / Fl Oz)
Brewer's Best - 1073 - Home Brew Beer Ingredient Kit (5 gallon), (Blueberry Honey Ale) Golden
Amazon.com

$7.79 ($7.79 / Count)
Craft A Brew - LalBrew Voss™ - Kveik Ale Yeast - For Craft Lagers - Ingredients for Home Brewing - Beer Making Supplies - (1 Pack)
Craft a Brew


$44.99
$49.95
Craft A Brew - Mead Making Kit – Reusable Make Your Own Mead Kit – Yields 1 Gallon of Mead
Craft a Brew


$53.24
1pc Hose Barb/MFL 1.5" Tri Clamp to Ball Lock Post Liquid Gas Homebrew Kegging Fermentation Parts Brewer Hardware SUS304(Gas MFL)
Guangshui Weilu You Trading Co., Ltd


$58.16
HUIZHUGS Brewing Equipment Keg Ball Lock Faucet 30cm Reinforced Silicone Hose Secondary Fermentation Homebrew Kegging Brewing Equipment
xiangshuizhenzhanglingfengshop


$719.00
$799.00
EdgeStar KC2000TWIN Full Size Dual Tap Kegerator & Draft Beer Dispenser - Black
Amazon.com


$20.94
$29.99
The Brew Your Own Big Book of Clone Recipes: Featuring 300 Homebrew Recipes from Your Favorite Breweries
Amazon.com

$176.97
1pc Commercial Keg Manifold 2" Tri Clamp,Ball Lock Tapping Head,Pressure Gauge/Adjustable PRV for Kegging,Fermentation Control
hanhanbaihuoxiaoshoudian

CadiBrewer
Well-Known Member
Nice piece of work. if you wouldn't mind sharing your files. I might like to get some printed myself. 1 Question though. did you just put all the capacitors in a row and run one trace across them, or are they traced to the components you intend to decouple?
I am more than happy to share the files with the world. It would be nice to actually give something back after all of the help I've received here.
The capacitors are traced to the individual components that will be decoupled. I do intend to play with the layout a bit to get the capacitors closer to their point of use, though.
Let me play with it a bit and fix a couple of the labels and then I'll put the files up.
MrE_the_Great
Well-Known Member
- Joined
- Mar 13, 2015
- Messages
- 95
- Reaction score
- 20
I would like to print one of these too! Thanks and it looks great!!
AkBrew907
Well-Known Member
- Joined
- Jan 27, 2015
- Messages
- 621
- Reaction score
- 196
Man this thread is packed full of information.
I am looking to build a fermentation chamber out of wood and foam insulation sheets and mount the guts from my freezer that i have to the chamber I build. My goal is to have 3 (maybe more in the future) Fast Fermenter plastic conical's. I am thinking I will keep the chamber at a set temperature and then use a brew belt like this to bring the fermenter up to the temp desired.

Are the below items all I need to accomplish this?
SainSmart UNO R3 ATmega328-AU Development Board Compatible With Arduino UNO R3

RasberryPi 3

SainSmart 2/4/8/16-Channel Relay Module for Arduino & Raspberry Pi
Would go with 8 Channel.

Then multiple outlets to control the freezer and multiple heater belts.

Would also eventually have a keezer built and use it to control the temp for that.
Am i missing anything? Will I need multiple UNO boards or will one cover it?
Sorry for the simple questions, this is all slowly starting to make sense.
OP
OP
FuzzeWuzze
I Love DIY
Man this thread is packed full of information.
I am looking to build a fermentation chamber out of wood and foam insulation sheets and mount the guts from my freezer that i have to the chamber I build. My goal is to have 3 (maybe more in the future) Fast Fermenter plastic conical's. I am thinking I will keep the chamber at a set temperature and then use a brew belt like this to bring the fermenter up to the temp desired.
View attachment 342875
Are the below items all I need to accomplish this?
SainSmart UNO R3 ATmega328-AU Development Board Compatible With Arduino UNO R3
View attachment 342876
RasberryPi 3
View attachment 342877
SainSmart 2/4/8/16-Channel Relay Module for Arduino & Raspberry Pi
Would go with 8 Channel.
View attachment 342878
Then multiple outlets to control the freezer and multiple heater belts.
View attachment 342879
Would also eventually have a keezer built and use it to control the temp for that.
Am i missing anything? Will I need multiple UNO boards or will one cover it?
Sorry for the simple questions, this is all slowly starting to make sense.
You'd need multiple Arduino boards, but other than that your basically right excluding what you need for the RPI like power cable and SD card.
That said there is some pretty big news that i wont totally spill the beans on quite yet that will drastically cut the cost of building DIY BrewPi's for certain configurations and make them significantly cheaper, even cheaper than building a STC1000 and allow for multiple fermentation chamber control without all the fuss you need to go through now. So keep an eye out on this subforum over the coming weeks, when it does officially go public i'll likely start a fresh thread for that build.
Its up to you if you want to wait or just go with the traditional route that we have now.
AkBrew907
Well-Known Member
- Joined
- Jan 27, 2015
- Messages
- 621
- Reaction score
- 196
You'd need multiple Arduino boards, but other than that your basically right excluding what you need for the RPI like power cable and SD card.
That said there is some pretty big news that i wont totally spill the beans on quite yet that will drastically cut the cost of building DIY BrewPi's for certain configurations and make them significantly cheaper, even cheaper than building a STC1000 and allow for multiple fermentation chamber control without all the fuss you need to go through now. So keep an eye out on this subforum over the coming weeks, when it does officially go public i'll likely start a fresh thread for that build.
Its up to you if you want to wait or just go with the traditional route that we have now.
I haven't even built the fermentation chamber yet so not in a huge hurry. I have a stand up freezer that I am using one fast fermenter and a STC1000 in right now. I will wait around to see what new tech is coming out
I still need to figure out how to remove the cooling unit from the stand up freezer without destroying it....

AkBrew907
Well-Known Member
- Joined
- Jan 27, 2015
- Messages
- 621
- Reaction score
- 196

Man this thread is packed full of information... Am i missing anything?
In addition to the multiple arduino boards, I would recommend at least 2 DS18B20 temp sensors and a 4.7k sensor per Brewpi instance.
Oh, and lots of patience for the multiple instance setup.
Brewski_59
https://www.facebook.com/narcosisbrew/
Does anyone have any idea why I have these weird spikes ever 24 hours (approx)

- Joined
- Nov 26, 2013
- Messages
- 9,915
- Reaction score
- 24,067
Does anyone have any idea why I have these weird spikes ever 24 hours (approx)
Something is happening religiously every 26 hours. Fridge shutting off from running too much? Room temp is pretty darned warm. THat is indeed weird.
Could that be a defroster cycle?
Cheers!
Cheers!
Brewski_59
https://www.facebook.com/narcosisbrew/
Could that be a defroster cycle?
Cheers!
It could be, I haven't thought about that.
I was toying with the idea of trying to isolate the defrost heater to use for the fermenter heater. If this is a spike from that heater it looks like it might be a viable idea.
Brewski_59
https://www.facebook.com/narcosisbrew/
Something is happening religiously every 26 hours. Fridge shutting off from running too much? Room temp is pretty darned warm. THat is indeed weird.
Room temp is a garage in south Florida. Wait until you see the summer temps.
AkBrew907
Well-Known Member
- Joined
- Jan 27, 2015
- Messages
- 621
- Reaction score
- 196
In addition to the multiple arduino boards, I would recommend at least 2 DS18B20 temp sensors and a 4.7k sensor per Brewpi instance.
Oh, and lots of patience for the multiple instance setup.
Good point, forgot to mention those. Would have at least 4 to start with, probably 5. 1 in all 3 thermowells of the fast fermenters, 1 inside the chamber and one for the keezer.
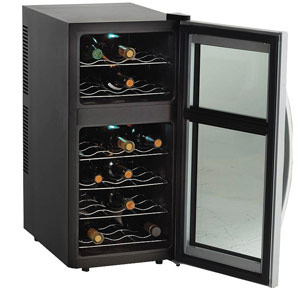
Still need to figure out how I want to cool the chamber. I have a wine cooler that looks similiar to this that I am wondering if I removed the door and added fan for circulation if it would be enough. This would leave the stand up freezer to be converted to a keezer.
AkBrew907
Well-Known Member
- Joined
- Jan 27, 2015
- Messages
- 621
- Reaction score
- 196
Ok one more random question.
In this wiring diagram both temp probes data wire goes to the same terminal then has one wire going to the Arduino Uno. I guess I don't understand how two signals are going into one wire and one input but it's able to recognize both probes.

In this wiring diagram both temp probes data wire goes to the same terminal then has one wire going to the Arduino Uno. I guess I don't understand how two signals are going into one wire and one input but it's able to recognize both probes.
GrogNerd
mean old man
it's called a 1-Wire bus, each probe has it's own address
forget how many bits it is (64?), but over 18 quintillion (2^64) or so possible unique addresses, but the Arduino can tell which one is which
forget how many bits it is (64?), but over 18 quintillion (2^64) or so possible unique addresses, but the Arduino can tell which one is which
AkBrew907
Well-Known Member
- Joined
- Jan 27, 2015
- Messages
- 621
- Reaction score
- 196
it's called a 1-Wire bus, each probe has it's own address
forget how many bits it is (64?), but over 18 quintillion (2^64) or so possible unique addresses, but the Arduino can tell which one is which
Thank you. That's pretty slick.
user 51917
Well-Known Member
- Joined
- Feb 11, 2010
- Messages
- 420
- Reaction score
- 22
"and allow for multiple fermentation chamber control without all the fuss you need to go through now. "
But why would you want less hassle and aggravation? I liked fighting with this blasted thing for 4 months.
But why would you want less hassle and aggravation? I liked fighting with this blasted thing for 4 months.
GrogNerd
mean old man
OP
OP
FuzzeWuzze
I Love DIY
Thank you. That's pretty slick.
Yes it is, and there are a very large amount of 1 wire protocol sensors, for humidity, temp, pressure all that stuff that you can all chain together onto one bus like that and communicate with each of them based on their internal programmed ID string. We have no use for those other sensors but its cool to think about dozens of different sensors all connected to 1 spot working like that.

That's been done - I think someone's done four via a USB hub.
I have four Unos talking to the same RPI, but only one of them uses USB.
Two use Bluetooth and the fourth uses WiFi...
Cheers!
[edit] Do not daisy chain the AC or neutral wires, use a "star" topology from your input power source.
I have four Unos talking to the same RPI, but only one of them uses USB.
Two use Bluetooth and the fourth uses WiFi...
Cheers!
[edit] Do not daisy chain the AC or neutral wires, use a "star" topology from your input power source.
AkBrew907
Well-Known Member
- Joined
- Jan 27, 2015
- Messages
- 621
- Reaction score
- 196
That's been done - I think someone's done four via a USB hub.
I have four Unos talking to the same RPI, but only one of them uses USB.
Two use Bluetooth and the fourth uses WiFi...
Cheers!
[edit] Do not daisy chain the AC or neutral wires, use a "star" topology from your input power source.
Gotcha. I got lazy in the end of my MS Paint adventure and didn't draw each line out.
This should be a fun build!
If it wasn't for brewing, I probably would not have gotten so totally into RPi's, Unos, and a metric crapton of programming languages.
So I can always blame the brewing
btw, you'll have to consider both the worst-case run time AC loading as well as the potential for multiple actuators clicking on at the same time when provisioning your AC.
There's a good chance you'll need to pull from multiple circuits through independent line cords to avoid the pathological case that brings stuff down back at the breaker box...
Cheers!
OP
OP
FuzzeWuzze
I Love DIY
That's been done - I think someone's done four via a USB hub.
I have four Unos talking to the same RPI, but only one of them uses USB.
Two use Bluetooth and the fourth uses WiFi...
Cheers!
[edit] Do not daisy chain the AC or neutral wires, use a "star" topology from your input power source.
Also i have not ever done a multi setup like this but i would assume he will want a externally powered USB hub to run so many power hungry devices?
AkBrew907
Well-Known Member
- Joined
- Jan 27, 2015
- Messages
- 621
- Reaction score
- 196
Also i have not ever done a multi setup like this but i would assume he will want a externally powered USB hub to run so many power hungry devices?
The random picture I pulled for the USB hub is externally powered I just grabbed the pic not showing the cord from the internet.
Also i have not ever done a multi setup like this but i would assume he will want a externally powered USB hub to run so many power hungry devices?
I'd want a powered hub regardless because the RPi USB power is generally lame, but I would not power an Uno via USB.
Aggro City...
Cheers!
Ah. Wrt "coming stuff", the light just went on.
It's a paradigm shift...that not all are going to want to sign up for...
Cheers!
It's a paradigm shift...that not all are going to want to sign up for...
Cheers!
cunnol
Active Member
- Joined
- Feb 16, 2016
- Messages
- 35
- Reaction score
- 2
I've ordered a few more arduinos but with this exciting new update I don't want the bother if doing a multi chamber set up on the pi that'll soon be out if date, is it possible to plug the arduino into the pi, set a temp, then unplug it from the pi and it'll keep regulating the temp once it has it's own power source? I know I won't get data but I don't mind that for the moment.
wbarber69
Well-Known Member
- Joined
- Oct 13, 2013
- Messages
- 2,191
- Reaction score
- 263
I've ordered a few more arduinos but with this exciting new update I don't want the bother if doing a multi chamber set up on the pi that'll soon be out if date, is it possible to plug the arduino into the pi, set a temp, then unplug it from the pi and it'll keep regulating the temp once it has it's own power source? I know I won't get data but I don't mind that for the moment.
Well, yes. but what do you mean by pi that is out of date. you can run brewpi on an original pi. it doesn't really need all the power of the pi 2 or pi 3.
cunnol
Active Member
- Joined
- Feb 16, 2016
- Messages
- 35
- Reaction score
- 2
Well, yes. but what do you mean by pi that is out of date. you can run brewpi on an original pi. it doesn't really need all the power of the pi 2 or pi 3.
I actually meant the multi chamber method being out of date, great to hear I can do it the lazy way for the moment, thanks!
wbarber69
Well-Known Member
- Joined
- Oct 13, 2013
- Messages
- 2,191
- Reaction score
- 263
If it wasn't for brewing, I probably would not have gotten so totally into RPi's, Unos, and a metric crapton of programming languages.
So I can always blame the brewing
btw, you'll have to consider both the worst-case run time AC loading as well as the potential for multiple actuators clicking on at the same time when provisioning your AC.
There's a good chance you'll need to pull from multiple circuits through independent line cords to avoid the pathological case that brings stuff down back at the breaker box...
Cheers!
This is kinda what I was working on before I shelved my build for a while. I remedied the multiple relay problem by using 1 universal ssr using diodes for discreet control from 4 arduinos. This way if 2 duinos want to run the cooler at the same time it just stays on until the last duino releases it.
Some notes for potential diy:ers:
Wall of text follows...
I struggled a bit following day_trippers excellent writeup on how to setup a bluetooth link, but it boills down to the "latest and greatest" illness of using raspberry pi3 as that had built in bluetooth as well as wifi. - I needed replace my old pi 1 anyway and also because the Hc05 module I got had a button to put it into AT mode. The gui bluetooth manager in raspbian is crap so I had to resort to using commands and also create the serial connection through commands.
After establishing a link I hooked it up to another arduino and - nothing. Turns out the knock off cheapo uno copy didnt work, whereas it worked fine with an original one, I guess its down to another serial module on that board. With a bit o tinkering it should probably be possible to make it work though.
So now Ill hookup an original Uno with the sensors and bench test that for a while before its going into enclosure. Then I think I have most of the new stuff in one package: c2i Lcd driver, rotary encoder and bluetooth. (I have not used a PNP transistor for auto dimming yet, and I guess a switch works fine anyway) But: now I found the writeup on using an esp module as a serial link, so that have to be tested..
With the new announcement I guess there will be something new to build...its been good fun, even though its holding off the actual brewing a bit.
Another cool thing that brewpi could benefit from would be to merge the stc1000+ devices to the logging and profile loading for example by writing a single wire communication driver into a wifi module like Esp and a translation / activaton mechanism for the scetches used in the stc. Then the stc could be the actuator and readybuilt with display and switces.
Regards and thanks for all the help and good ideas! /A
- Status
- Not open for further replies.
Similar threads
- Replies
- 10
- Views
- 2K
- Replies
- 3
- Views
- 2K
