You are using an out of date browser. It may not display this or other websites correctly.
You should upgrade or use an alternative browser.
You should upgrade or use an alternative browser.
HOWTO - Make a BrewPi Fermentation Controller For Cheap
- Thread starter FuzzeWuzze
- Start date

Help Support Homebrew Talk:
This site may earn a commission from merchant affiliate
links, including eBay, Amazon, and others.
- Status
- Not open for further replies.
aubiecat
Well-Known Member
For those of you running a fan. The computer fan and a 12 volt wall wart will do well. I ran them on my STC-1000 setup for years with good results.
This time around, when I built this BrewPi system, I decided to get rid of the wall wart and go with a 115 volt fan .
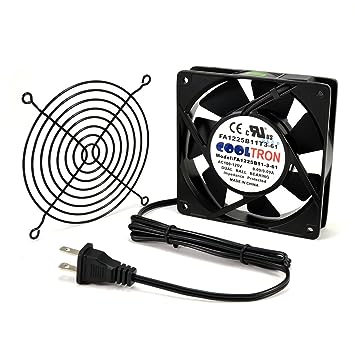
It is one solidly built fan and makes for a cleaner access to the outlets on the project box. The only drawback is the larger wire coming out of the freezer.
This time around, when I built this BrewPi system, I decided to get rid of the wall wart and go with a 115 volt fan .
It is one solidly built fan and makes for a cleaner access to the outlets on the project box. The only drawback is the larger wire coming out of the freezer.
Last edited by a moderator:
aubiecat
Well-Known Member
Hey, thanks. Are these the actual commands?
sudo apt-get update
sudo apt-get upgrade
Yes
Awesome. I'll give it a shot tonight. Thanks!

$44.99
$49.95
Craft A Brew - Mead Making Kit – Reusable Make Your Own Mead Kit – Yields 1 Gallon of Mead
Craft a Brew


$76.92 ($2,179.04 / Ounce)
Brewing accessories 1.5" Tri Clamp to Ball Lock Post Liquid Gas Homebrew Kegging Fermentation Parts Brewer Hardware SUS304 Brewing accessories(Gas Hose Barb)
chuhanhandianzishangwu


$58.16
HUIZHUGS Brewing Equipment Keg Ball Lock Faucet 30cm Reinforced Silicone Hose Secondary Fermentation Homebrew Kegging Brewing Equipment
xiangshuizhenzhanglingfengshop


$22.00 ($623.23 / Ounce)
AMZLMPKNTW Ball Lock Sample Faucet 30cm Reinforced Silicone Hose Secondary Fermentation Homebrew Kegging joyful
无为中南商贸有限公司


$176.97
1pc Commercial Keg Manifold 2" Tri Clamp,Ball Lock Tapping Head,Pressure Gauge/Adjustable PRV for Kegging,Fermentation Control
hanhanbaihuoxiaoshoudian

$20.94
$29.99
The Brew Your Own Big Book of Clone Recipes: Featuring 300 Homebrew Recipes from Your Favorite Breweries
Amazon.com


![Craft A Brew - Safale S-04 Dry Yeast - Fermentis - English Ale Dry Yeast - For English and American Ales and Hard Apple Ciders - Ingredients for Home Brewing - Beer Making Supplies - [1 Pack]](https://m.media-amazon.com/images/I/41fVGNh6JfL._SL500_.jpg)
$6.95 ($17.38 / Ounce)
$7.47 ($18.68 / Ounce)
Craft A Brew - Safale S-04 Dry Yeast - Fermentis - English Ale Dry Yeast - For English and American Ales and Hard Apple Ciders - Ingredients for Home Brewing - Beer Making Supplies - [1 Pack]
Hobby Homebrew


$49.95 ($0.08 / Fl Oz)
$52.99 ($0.08 / Fl Oz)
Brewer's Best - 1073 - Home Brew Beer Ingredient Kit (5 gallon), (Blueberry Honey Ale) Golden
Amazon.com


$53.24
1pc Hose Barb/MFL 1.5" Tri Clamp to Ball Lock Post Liquid Gas Homebrew Kegging Fermentation Parts Brewer Hardware SUS304(Liquid Hose Barb)
yunchengshiyanhuqucuichendianzishangwuyouxiangongsi


$33.99 ($17.00 / Count)
$41.99 ($21.00 / Count)
2 Pack 1 Gallon Large Fermentation Jars with 3 Airlocks and 2 SCREW Lids(100% Airtight Heavy Duty Lid w Silicone) - Wide Mouth Glass Jars w Scale Mark - Pickle Jars for Sauerkraut, Sourdough Starter
Qianfenie Direct


$7.79 ($7.79 / Count)
Craft A Brew - LalBrew Voss™ - Kveik Ale Yeast - For Craft Lagers - Ingredients for Home Brewing - Beer Making Supplies - (1 Pack)
Craft a Brew


$719.00
$799.00
EdgeStar KC2000TWIN Full Size Dual Tap Kegerator & Draft Beer Dispenser - Black
Amazon.com


$53.24
1pc Hose Barb/MFL 1.5" Tri Clamp to Ball Lock Post Liquid Gas Homebrew Kegging Fermentation Parts Brewer Hardware SUS304(Gas MFL)
Guangshui Weilu You Trading Co., Ltd


$479.00
$559.00
EdgeStar KC1000SS Craft Brew Kegerator for 1/6 Barrel and Cornelius Kegs
Amazon.com

aubiecat
Well-Known Member
My Rpi came with two little heatsinks for two of the chips, I suppose. Are you guys putting them on?
They put those in there in case you plan on overclocking the RPI. If you are only using the RPi for Brewpi you won't need to overclock.
If you were using it for XBMC or a browser you'd want to overclock.
You can still put them on there for a little extra bling. It certainly won't hurt anything.
wbarber69
Well-Known Member
- Joined
- Oct 13, 2013
- Messages
- 2,191
- Reaction score
- 263
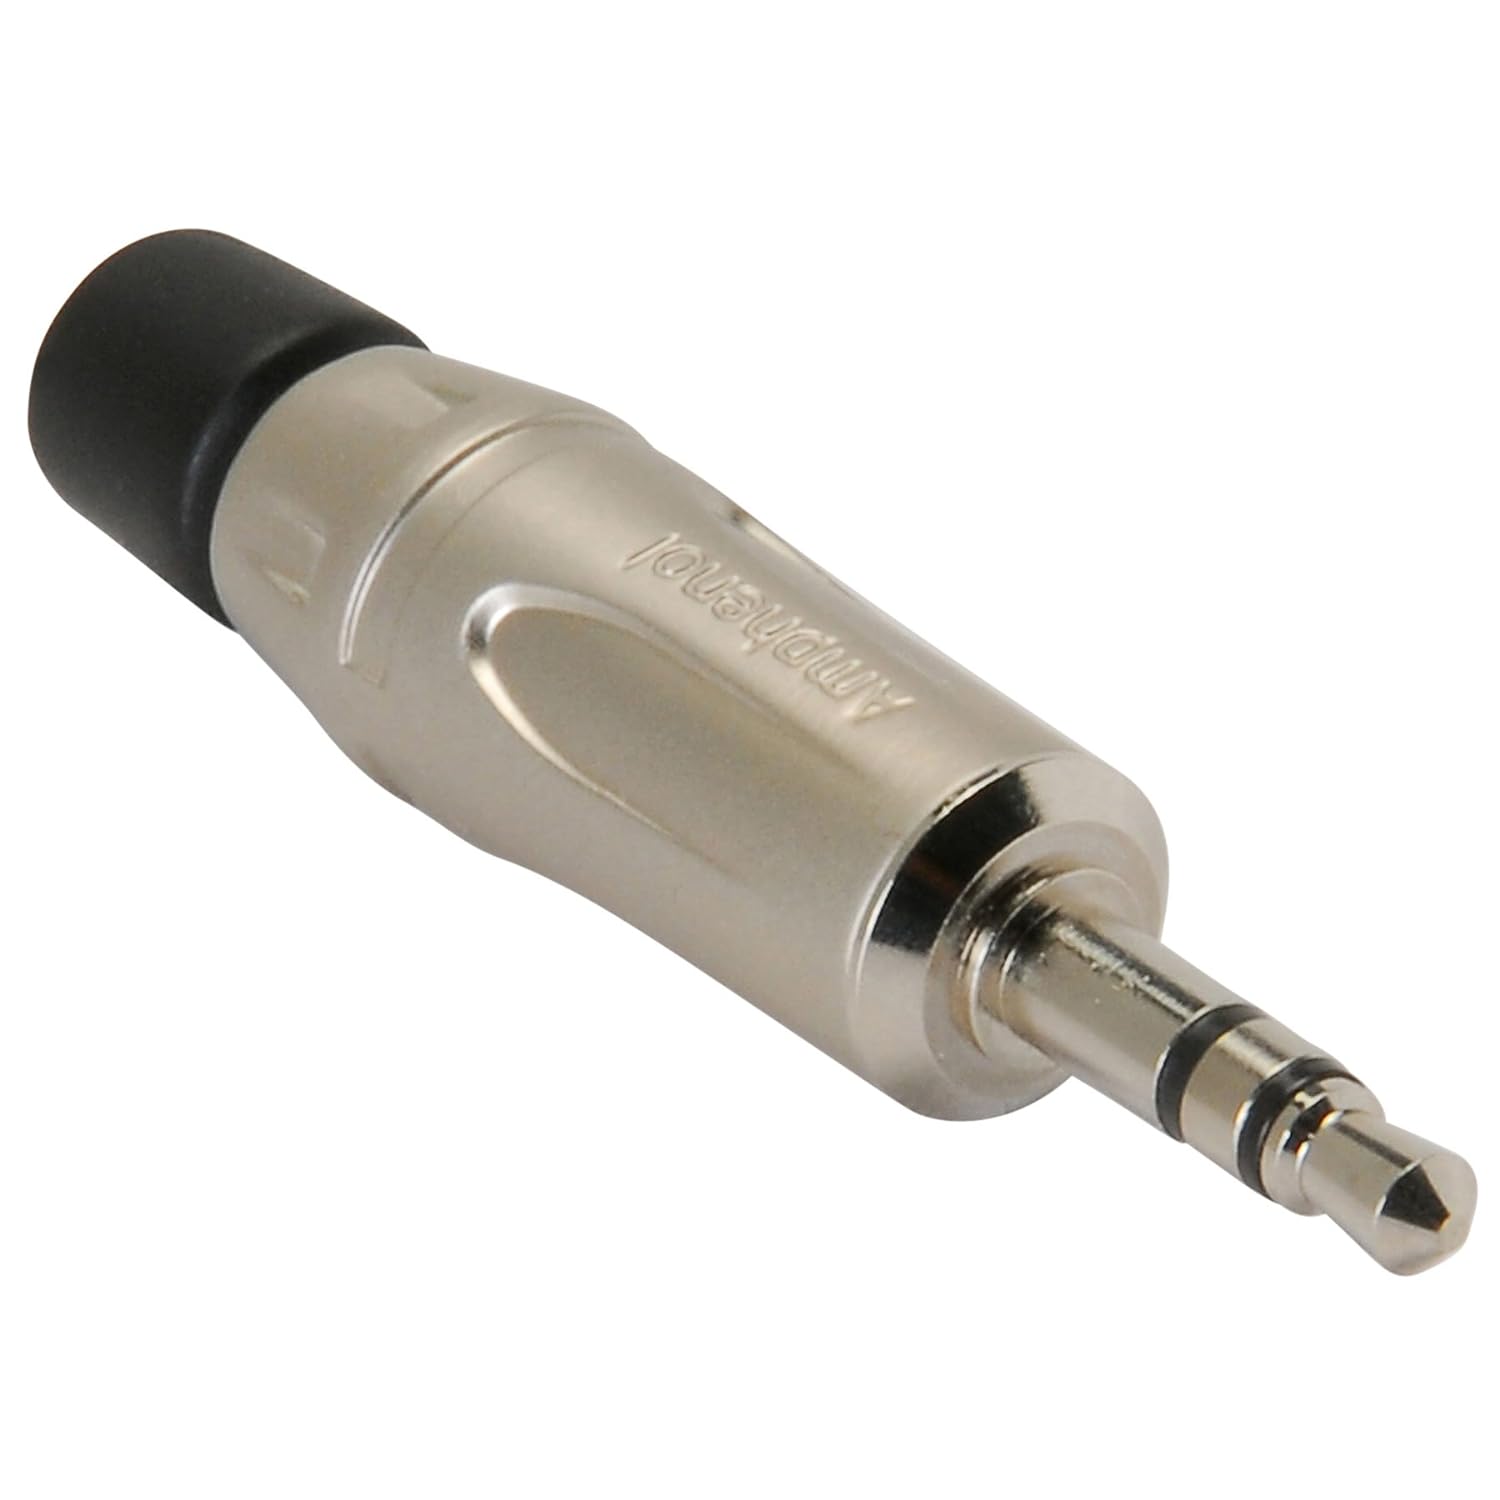
So disappointing. I bought a 10 pack of phono jacks to make up my temp probe connectors. They are literally the worst quality I've ever seen. 2 of them have stripped jackets and I just pulled them from the bubble wrap. Stupid Chinese crap!
Run sudo update the run sudo upgrade then try the install script again.
Well, this totally worked. Thank you very much!
wbarber69
Well-Known Member
- Joined
- Oct 13, 2013
- Messages
- 2,191
- Reaction score
- 263
On a good note though. I had to throw a brew in my not close to finished chamber. I'm using reptile tape as a fermwrap. My beer temp probe is in the thermowell and my fridge temp probe is just tucked into the fermwrap. This allows the probe to sense the fridge temp and it can read the temp of the reptile tape. So my heat source never gets too hot. And it's keeping my single hop citra ipa at a steady 68 degrees with no problem. I think my multi chamber will be a success when it's finally done. This brew has held its temp perfectly like this from day 1. And the temps haven't deviated more than .5 degrees in either direction.
On my BrewPi, connected via ssh, if I paste this into a text document named gettemp.py, save, exit and run:
python gettemp.py
it will return
["Mode Beer Profile ", "Beer 50.5 50.0 °F", "Fridge 41.8 39.9 °F", "Wait to Cool 00m31"]
Figured it out, I forgot that I changed the default port so using localhost goes 80. If anybody else decides to try this, don't be stupid like I was... add the port if you've changed it

Now to figure out how to parse it and grab what I need, always wanted to learn some simply python. For printing immediately, I just used print x[33:38], and it'll print the beer temp part of the string. Now to make sure it doesn't add more characters. It's dirty, but should work.
So disappointing. I bought a 10 pack of phono jacks to make up my temp probe connectors. They are literally the worst quality I've ever seen. 2 of them have stripped jackets and I just pulled them from the bubble wrap. Stupid Chinese crap!
Must have had the same supplier. Quite a few months ago I bought 10 for $2. Managed to salvage a couple. There Is some crap out there.
Sent from my iPhone using Home Brew
craigmw
Well-Known Member
So disappointing. I bought a 10 pack of phono jacks to make up my temp probe connectors. They are literally the worst quality I've ever seen. 2 of them have stripped jackets and I just pulled them from the bubble wrap. Stupid Chinese crap!
Bummer, man! The ones I picked up from Radio Shack were fine, but I do recommend avoiding the plastic 1/8" stereo plugs. Go for the nickel plated ones as they don't get fried from simply soldering them like the plastic ones do.
craigmw
Well-Known Member
I purchased most of the items in FuzzeWuzze's original post. I also purchased the rev c shield from BrewPi.com because I wanted a display. Everything seems to be working ok with the exception of the backlight on the display.
My understanding is that if you press or rotate the rotary encoder, the backlight will come on making the display easier to read. As it is now, the display is almost unreadable.
If I apply voltage to pin 15 on the display, the backlight works fine.
Is this a problem with the shield or a software problem? Any ideas?
I have the BrewPi shield and I don't recall a backlight pot. There is a contrast pot that needs to be adjusted, but not one for the backlight. Because the backlight eventually turns off (roughly after about ten minutes of inactivity from the encoder), I would guess that Elco has one of the Arduino pins driving the backlight. If you are not getting the backlight to work, there might be an issue with the connection between the shield and the display. If you have found that 5V to pin 15 is lighting up the backlight LED, there must be a problem with the connection on the shield to the Arduino pin that drives the backlight. The problem is either in the connection to the shield, or in the ribbon cable from the shield to the LCD display board. You could in theory test this by uploading your own sketch to the Arduino that turns that pin on the Arduino to high. If this works, then there is a software issue. I suspect it's likely a hardware problem. You might want to contact Elco about this since it is not an issue with the LCD itself.
Yeah I was totally looking forward to doing this for 5 bucks instead of 40
Go big or go home.
Chinese mini-XLRs FTW!
Cheers!
")
craigmw
Well-Known Member
Yeah I was totally looking forward to doing this for 5 bucks instead of 40
Wow, how many 1-wire connections do you need? Radio Shack sells them at about $3.50 for two:
http://www.radioshack.com/product/index.jsp?productId=2103452
These work fine in my hands.
You're new here. wbarber is building a four-plex BrewPi system.
Needs lots of connectors for probes and other stuff.
And if he ever gets into RaspberryPints there's all those flow meters to hook up...
Cheers!
Needs lots of connectors for probes and other stuff.
And if he ever gets into RaspberryPints there's all those flow meters to hook up...
Cheers!
wbarber69
Well-Known Member
- Joined
- Oct 13, 2013
- Messages
- 2,191
- Reaction score
- 263
Go big or go home.
Chinese mini-XLRs FTW!
Cheers!
Like I said before. The seller that had the good nickel plated connectors I was buying for my brewery doesn't exist anymore and I can't find the connectors like that online anymore. The ones with rubber and plastic boots are crap.
Does anyone know how to grab the brewpi chart into an iframe of a web page? My HTML skills are very dated...
aubiecat
Well-Known Member

craigmw
Well-Known Member
Those are great prices, especially on the Amphenol stereo plugs. I will need to get some of those. Thanks for the links! :rockin:
Last edited by a moderator:
I have the BrewPi shield and I don't recall a backlight pot. There is a contrast pot that needs to be adjusted, but not one for the backlight. Because the backlight eventually turns off (roughly after about ten minutes of inactivity from the encoder), I would guess that Elco has one of the Arduino pins driving the backlight. If you are not getting the backlight to work, there might be an issue with the connection between the shield and the display. If you have found that 5V to pin 15 is lighting up the backlight LED, there must be a problem with the connection on the shield to the Arduino pin that drives the backlight. The problem is either in the connection to the shield, or in the ribbon cable from the shield to the LCD display board. You could in theory test this by uploading your own sketch to the Arduino that turns that pin on the Arduino to high. If this works, then there is a software issue. I suspect it's likely a hardware problem. You might want to contact Elco about this since it is not an issue with the LCD itself.
You are correct, there is not a backlight pot. After working with Elco and sending some pictures back and forth, he discovered that the transistor that controls the backlight was missing from the board. He is sending me a replacement that should take care of the problem. Thanks to Elco.
aubiecat
Well-Known Member
I found these nice 12mm three pole aviation plugs on ebay that look like they are good quality for a great price.
As a matter of fact, while I was posting this I decided to purchase some. 10 sets for $10.16 delivered. I may not get them till December but I'll have them for future projects.

As a matter of fact, while I was posting this I decided to purchase some. 10 sets for $10.16 delivered. I may not get them till December but I'll have them for future projects.
craigmw
Well-Known Member
Here's my fermentation chamber controlled for a week now using my BrewPi. I just have one carboy fermenting a Dopplesticke Altbier that I brewed last Saturday. Yeast is WLP036, and I'm fermenting at 57F for 8 days before I kick it up to 68 for a 2 day diacetyl rest, and then cold crash it.
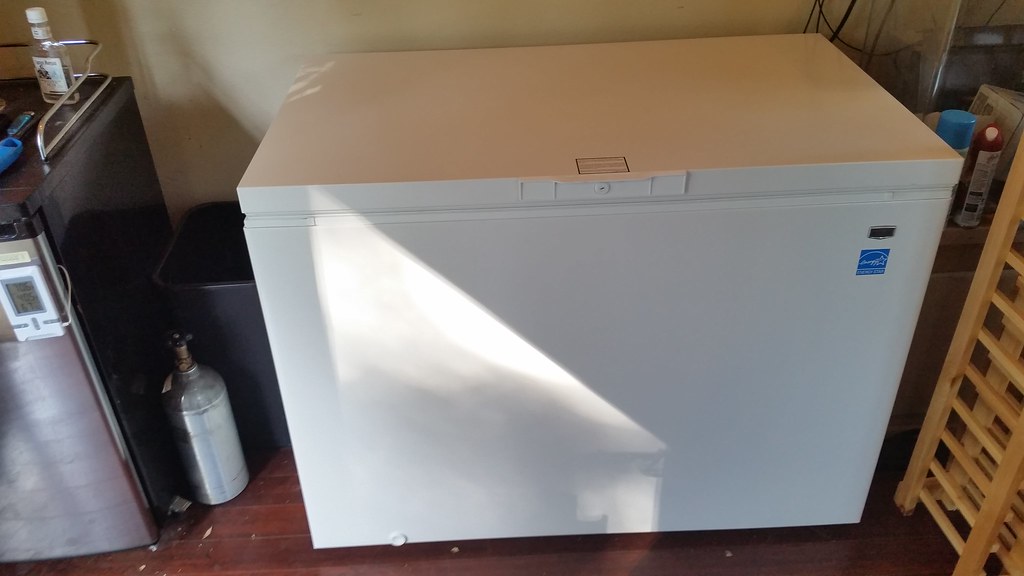
The fridge is a Maytag 14.8 cubic foot chest freezer that I had delivered from Home Depot. I'm not using any heating at this point, but I'm impressed by how well the temp in the carboy is controlled. At the beginning of the fermentation, I had the fridge down around 40F or so, and this was used to pull down the beer temp to about 58F in a few hours, and then it slowly ramped to 57F (for testing), where it has remained for the last few days. The fermenter has a very nice fragrance!
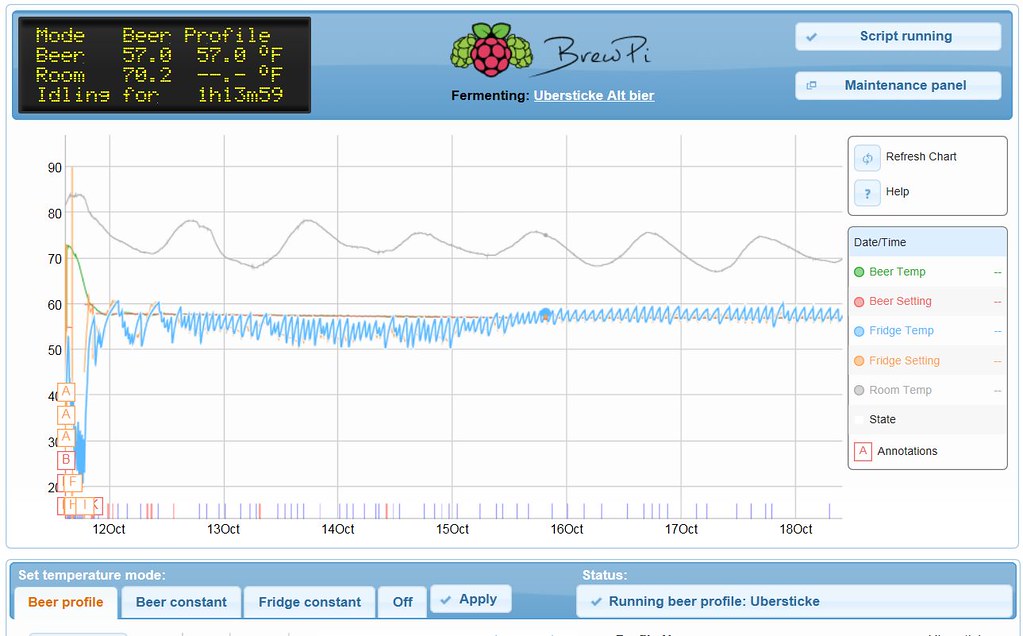
The "beer" temp probe is inserted into the carboy via a BrewersHardware.com SS thermowell (16").
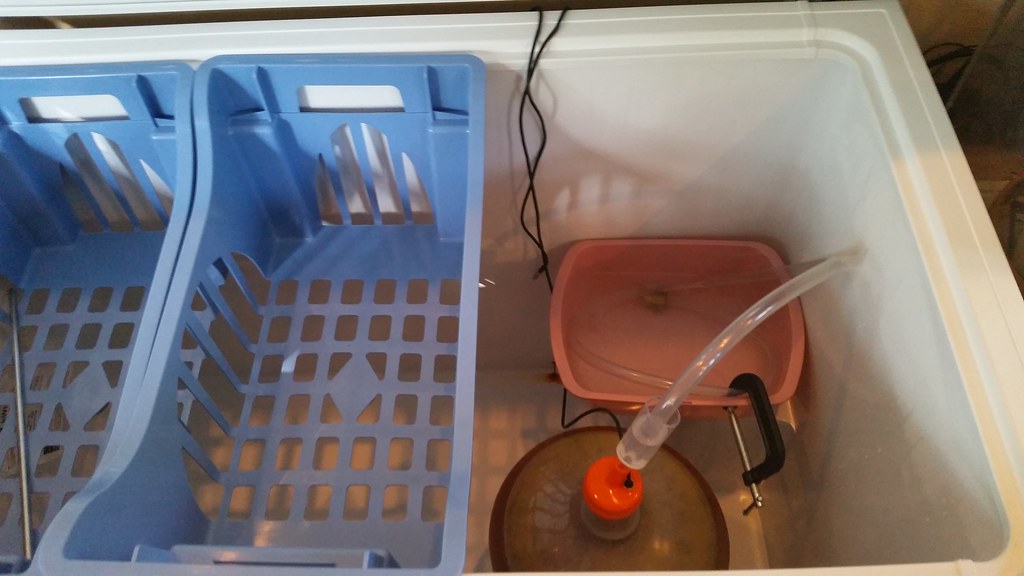
Overall, this looks to be working quite nicely. Great work, Elco!
The fridge is a Maytag 14.8 cubic foot chest freezer that I had delivered from Home Depot. I'm not using any heating at this point, but I'm impressed by how well the temp in the carboy is controlled. At the beginning of the fermentation, I had the fridge down around 40F or so, and this was used to pull down the beer temp to about 58F in a few hours, and then it slowly ramped to 57F (for testing), where it has remained for the last few days. The fermenter has a very nice fragrance!
The "beer" temp probe is inserted into the carboy via a BrewersHardware.com SS thermowell (16").
Overall, this looks to be working quite nicely. Great work, Elco!
Looking at the fridge temp sawtooth plot I thought it looked wicked active, but on closer examination it's averaging only ~13 cycles in a 24 hour period, so it's not actually working the compressor that hard at all.
Very encouraging. I'm in the midst of cobbling together my new keezer control/monitoring system and intend to have BrewPi run it, with an MH1210 as backup if things go pear shaped. My keezer cycles around 7 times per day and would like to keep it in the ballpark of that lazy level...
Cheers!
Very encouraging. I'm in the midst of cobbling together my new keezer control/monitoring system and intend to have BrewPi run it, with an MH1210 as backup if things go pear shaped. My keezer cycles around 7 times per day and would like to keep it in the ballpark of that lazy level...
Cheers!
[...]
Don't know from "aircraft connectors" (though intuitively, I doubt I'd find such a thing on ebay) but those look like the mini-xlr connectors I've bought by the dozen for small $$ and a slow boat ride...
Cheers!
Here's my fermentation chamber controlled for a week now using my BrewPi. I just have one carboy fermenting a Dopplesticke Altbier that I brewed last Saturday. Yeast is WLP036, and I'm fermenting at 57F for 8 days before I kick it up to 68 for a 2 day diacetyl rest, and then cold crash it.
Do you think the sawtooth might be able to be smoothed by moving the fridge probe away from the wall? It might stretch the peaks out over time. It would be an easy experiment. Is it necessary? Who knows. All it might do is keep the compressor from cycling as often as it's cycling now. Either way, your beer temp looks dead flat, which is what really matters. Nice work!
"hysteresis matters"
If the probe is tightly coupled to the fermenter and well-insulated from the effects of the freezer temperature, that will have a dramatic effect on compressor cycling. Using a thermowell for the beer probe is about the best one can do in both regards. And I'm not exactly sure what the "fridge" probe does given the goal for a Beer Constant or Profile is to keep the target in the zone...
Cheers!
craigmw
Well-Known Member
Looking at the fridge temp sawtooth plot I thought it looked wicked active, but on closer examination it's averaging only ~13 cycles in a 24 hour period, so it's not actually working the compressor that hard at all.
Very encouraging. I'm in the midst of cobbling together my new keezer control/monitoring system and intend to have BrewPi run it, with an MH1210 as backup if things go pear shaped. My keezer cycles around 7 times per day and would like to keep it in the ballpark of that lazy level...
Cheers!
Nah, the duty cycle on the fridge is really low. It is on maybe a total of an hour or two a day. In contrast, I have a 600 bottle wine cabinet that runs about 50% duty cycle, so a huge difference despite roughly the same temp range. I'm very impressed by how efficient this chest freezer is.
The other amazing thing is how flat the temp curve is. Granted, this is in 5 gallons of beer measured in a thermowell, but it is nearly rail flat. Not bad for cool only control. I'm very impressed by how well Elco's algorithm is working thus far.
Based on the plot, I also think that the active fermentation finished toward the end of the 15th. You can see how the fridge temp hovered below the beer temp until that time, and now is settling around the beer temp. This corresponds with what I have seen with respect to bubbling from the blow off tube. Pretty cool, though I do wish there was a simple (and cheap) way to plot fermentation activity (e.g. specific gravity, CO2 produced, bubbles in airlock, etc).
OP
OP
FuzzeWuzze
I Love DIY
Good to see this still rolling along without me, been busy out of state for work.
Still hoping to hear back from Elco on donations, i really want to write a front page HBT article to get even more people on the hype train but want to make sure Elco and team gets compensated, atleast by those people who feel like donating.
Still hoping to hear back from Elco on donations, i really want to write a front page HBT article to get even more people on the hype train but want to make sure Elco and team gets compensated, atleast by those people who feel like donating.
Floydsview
Active Member
I wanted to thank FuzzeWuzze and Elco. Great controller. I used and old external CD case I had laying around. Worked out well with little modification. It has a built in power supply which I was able to use.


wbarber69
Well-Known Member
- Joined
- Oct 13, 2013
- Messages
- 2,191
- Reaction score
- 263
I found these nice 12mm three pole aviation plugs on ebay that look like they are good quality for a great price.
As a matter of fact, while I was posting this I decided to purchase some. 10 sets for $10.16 delivered. I may not get them till December but I'll have them for future projects.
Found them in California for 8 bucks more
http://pages.ebay.com/link/?nav=item.view&alt=web&id=181544243826
- Status
- Not open for further replies.
Similar threads
- Replies
- 10
- Views
- 2K
- Replies
- 3
- Views
- 2K
