HOWTO - Make a BrewPi Fermentation Controller For Cheap

Homebrew Talk - Beer, Wine, Mead, & Cider Brewing Discussion Forum

Help Support Homebrew Talk - Beer, Wine, Mead, & Cider Brewing Discussion Forum:

This site may earn a commission from merchant affiliate links, including eBay, Amazon, and others.
Status
Not open for further replies.
Not really....I have 4 RPi's "sitting around" in various states of projects. Two older V2's and newer version-3. I had a Kolsch brewing away on Lee's LegacyPi and wanted to compare the Fermentrack to the BrewPi without screwing up something on the running SD card (and loose sleep over my out-of-control beer) So I brewed a Cream Ale next to it. (Kolsch WLP-029 yeast also, at 54 degrees!) Realized, I think..., that I needed 6 wires for two-RPi's and only had 5....and that's why I said "share the Negative", hell, it works for 110vac circuits!
This is for another yet to be started Thread, so I will not bore you with my Cons-V-Pros here.
I don't think you can have 2-BEER temps and 2-Chamber temperature probes on the same UNO...??
Now that Lee has a Multi-Chamber supported, I assume that each "Chamber" has it's own BEER, CHAMBER, and ROOM assigned probes and my crazy set up is not needed, other then having two separate SD cards chugging along.
 
I've been reading over the forums for awhile, and I'm about to go buy the hardware to get started on this. As far as hardware goes, is the Parts List on https://diybrewpi.fandom.com/wiki/DIYBrewPi_Wikia still the best way to go? I see you talking about doing legacy support; Is the Arduino Uno still the obvious choice?

Right now I just plan to follow that DIY very closely, thoughts?

Thanks!

The only "thing" I see often, as a "problem", is trying to get the Assignments absolutely correct for your Sensor probes. Otherwise, you have a BrewPi that just sits there in LA-LAA land not logging and controlling anything.
The Fermentrack does the Assignments automatically, so it has a big thumbs-up on this one compared to this Legacy BrewPi. I'm here cause I just love the BrewPi when all is on the table...
I think just wiring one up, is half the fun, and then seeing and drinking your beer fermenting is the other half!
 
@LBussy Thanks for the suggestions, I'll avoid the knock-offs. I was planning on getting a RPi 3 B+, and it looks like the DIY still points to known items that work. I'm glad to hear that so much of it is still relevant.

I have a Johnson's controller right now that runs my fermentation chamber (must be 7-8 years old by now), so I'm in no huge rush. The DIY is half the reason I want to do this.

All the guides I have looked at are really well done, but they are fragmented. Is there a guide that takes you from Items -> Build -> Raspbian -> BrewPi/Fermentrack ?

I didn't think to ask before, but is there a better guide than the DIY page from the original post?

@CadiBrewer I hadn't looked into the ESP8266, but I will now. That sounds like a really neat way to run things, and I'd be able to take the RPi out of my garage which is an attractive option.
 
I have a Johnson's controller right now that runs my fermentation chamber (must be 7-8 years old by now), so I'm in no huge rush. The DIY is half the reason I want to do this.
You will be amazed at the control this gives you. Your brew runs several degrees warmer at times than the fridge due to the fermentation. Getting a thermowell and a controller really makes a difference, especially with "picky" yeast.

All the guides I have looked at are really well done, but they are fragmented. Is there a guide that takes you from Items -> Build -> Raspbian -> BrewPi/Fermentrack ?
Not that I am aware of. I am writing some slowly but they are definitely not done. Here's a couple:
  • https://www.brewpiremix.com/headless-raspberry-pi/ - This will get you a running Raspberry Pi. It's written for using an RPi headless, but if you want to use a keyboard, mouse and monitor, you can skip the supplicant setup and stop when it gets time to talk about .ssh and VNC. I sincerely suggest however you give some thought to using SSH. It makes things a whole lot easier. You can connect from wherever without having to walk to wherever your Pi is. It also makes it easy for instance to take a screenshot on your PC and paste it here if you have issues. You can also cut and paste in the terminal window.
  • https://www.brewpiremix.com/brewpi-remix-install/ - This page describes the install, but it really is as easy as typing in:
    curl -L install.brewpiremix.com
If you use ANY of the DIY instructions on setting up the actual BrewPi hardware (relays, outlet, probes, etc) you will get where you are going.

https://www.brewpiremix.com/brewpi-remix-install/I
I didn't think to ask before, but is there a better guide than the DIY page from the original post?
Not for the hardware setup, no. The software setup is much improved now (IMHO).

I hadn't looked into the ESP8266, but I will now. That sounds like a really neat way to run things, and I'd be able to take the RPi out of my garage which is an attractive option.
I have one running here and it is very nice. It takes the DIY up a notch in my opinion by requiring a bit of PCB assembly but the through-hole version of the boards is do-able for a guy with patience and a steady hand.

Leaving the Pi in the garage with the cooler is what I do, and I access the Pi remotely with SSH and VNC if I need administrative access. Of course to just see the screen you use the web browser from anywhere on the network (with any of the solutions).

We talk about this a lot ... I'm gonna do a flowchart for new folks to decide on what to use. I'll bounce it past @Thorrak, @pocketmon and @ame to make sure it captures everything.
 
Not really....I have 4 RPi's "sitting around" in various states of projects. Two older V2's and newer version-3. I had a Kolsch brewing away on Lee's LegacyPi and wanted to compare the Fermentrack to the BrewPi without screwing up something on the running SD card (and loose sleep over my out-of-control beer) So I brewed a Cream Ale next to it. (Kolsch WLP-029 yeast also, at 54 degrees!) Realized, I think..., that I needed 6 wires for two-RPi's and only had 5....and that's why I said "share the Negative", hell, it works for 110vac circuits!
This is for another yet to be started Thread, so I will not bore you with my Cons-V-Pros here.
I don't think you can have 2-BEER temps and 2-Chamber temperature probes on the same UNO...??
Now that Lee has a Multi-Chamber supported, I assume that each "Chamber" has it's own BEER, CHAMBER, and ROOM assigned probes and my crazy set up is not needed, other then having two separate SD cards chugging along.
Nope, you're correct that you can't have multiple chamber probes on the same UNO. You'll need a separate UNO for each chamber that you want to control, with probes and relay connected to each. Then you can hook all of the UNOs up to one Raspberry Pi.
 
Hi all,

I found this post after wanting to start up brewing again, but keep things wife friendly and not having it fermenting in the kitchen to keep at a reasonable temperature.

Forllowed instructions and bar a few issues with cheap incompatible probes, all seems to be working :yes: My set up pretty much the same as listed at start of post with a tall fridge (should fit two fermenters in it in the future) and a 60w tube heater sitting at the bottom of the fridge.

Issue I have is when running some tests with water in the fermenter is that I cannot get the fridge temperature above 20c. Reading info on this site and others I thought the 60W tube heater is recommended so wondering whats wrong.

Is it something I need to change In Brewpi, the heater does heat up the fridge but perhaps is faulty? Or perhaps the airflow in the fridge needs sorting. At the moment I have the vessel siting on one of the glass shelves, while I can see creating a vented stand might mean the top of the fridge heats up quicker (and is something I was planing to do in the future anyway) I can't see why the temp would not rise over time?

I've got a Saison kit I want to brew first which I understand should ferment over 24 depending on the yeast that comes with the kit which I have yet to check.

Any suggestions would be appreciated, thanks in advance
 
So in case anyone else is a "parochial American" (like me), 20°C×9/5+32=68°F

I don't know what your weather is there, but I have a 60w lightbulb in a paint can as my heater. If you go through the calculations that's MORE than enough for a small keg fort in my part of the country in the garage. So, my questions to you would be:
  • What's the ambient temp where your chamber is?
  • What's the size of the chamber?
  • Do you have a fan circulating air inside the chamber?
  • Are there multiple chambers in play here?
 
Some happy news for you guys:

Release 0.5.2.0
lbussy released this 22 hours ago

Changes include:
  • BrewPi-Tools-Remix
    • Added banners/colors to begin/finish of script
    • Added logging back in
      • Added timestamps to logs
      • Significantly cleaner logs than a straight tee/redirect
    • Removed www-data from brewpi group (security)
    • Added a respawn with sudo when called without it
    • Further removed dependencies on actual 'pi' user
    • Typos, globbing errors, script display issues
    • Tools are now cloned as non-root user
    • Added in a diagnostic script for devices (probably short lived)
    • Improve final instruction output
    • Moved to curl from wget to shorten the command line
    • Created 301 redirect from domain to GitHub raw pages
      • Install: curl -L install.brewpiremix.com | sudo bash
      • Uninstall: curl -L uninstall.brewpiremix.com | sudo bash
    • Clone multi-chamber from existing local repo to maintain consistent versions on device
    • Add ability to uninstall one chamber
  • BrewPi-Script-Remix
    • Changed user brewpi to be passwordless (security)
    • Fixed a bug in working directory detection under some conditions
    • Fixed some arguments not getting passed to includes
    • Added a new known Arduino vid/pid
    • Initial support for networked controller (testing required, waiting on hardware from China)
    • doPerms now checks user accounts and groups
  • BrewPi-WWW-Remix
    • Added version display to web page footer
    • VASTLY improved multi-chamber index
    • Other code and file organization that end users will never see hopefully
To upgrade, execute:
Code:
/home/brewpi/utils/doUpdate.sh

The number of changes in each areas belies the fact that the basic system was very good before I started mucking with it. Tools do most of the work to do things like multi-chamber, some scripts, less web page stuff.

Hope some of you enjoy it.
 
Issue I have is when running some tests with water in the fermenter is that I cannot get the fridge temperature above 20c. Reading info on this site and others I thought the 60W tube heater is recommended so wondering whats wrong.

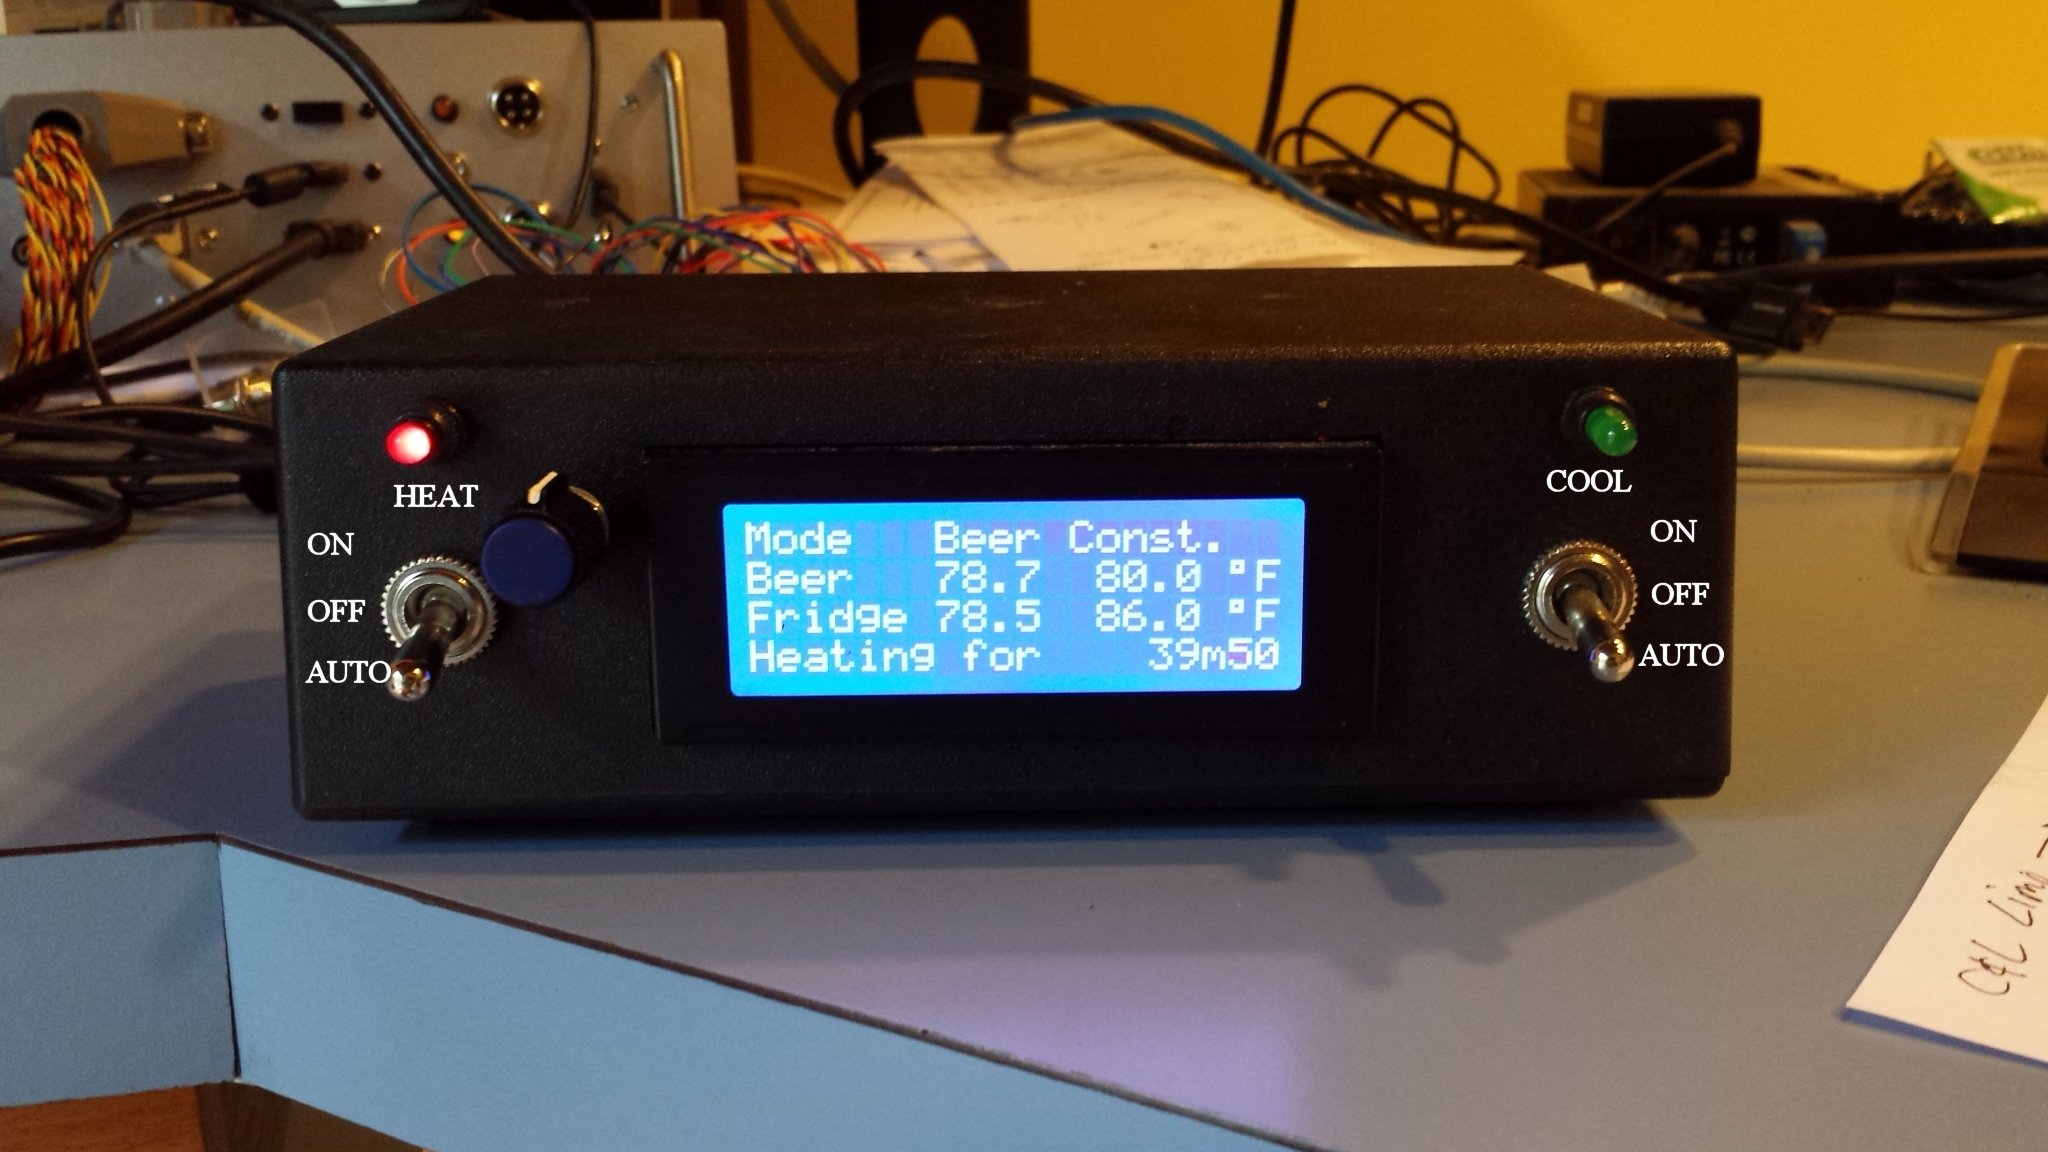
Is there a call for HEAT showing on your LCD display? It should keep calling for Heat unless you have your settings stopping it. Here is something I vaguely remember from this sort of situation I had -
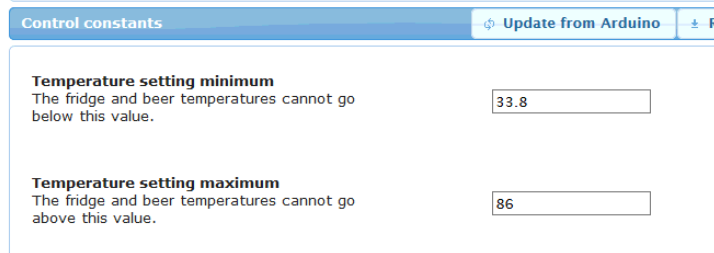
I ran across this "problem" a few years ago and found that the MIN and MAX setting were stopping the call for Cooling to stay on, (or it may have been a call for Heat?)..
Anyway, go check in Advanced Settings, and find what temperature your MIN/Max is set at.
I don't have the BPi fired up now, so sorry, I can't give you an exact place to go look under Advanced Settings. I do remember that my brew at the time stopped cooling, I believe, and I finally found the settings Min/Max stopping it.
 
Last edited:
On the advanced settings tab:

Capture.PNG


These are the defaults. That's Farenheit, that's like 30 C.
 
Yep! That's where it is! I need to get some more beer brewing and turn the machine back on. That's what we used to call computers way back in the early 1970's....lol
 
8BAEF982-4E4A-4560-B99D-FA3916721EA1.jpeg I need to do a little more of that myself. You don’t want to know how long it’s been since I’ve brewed.

I’m in DC this week and picked up a couple beers on the way back to the hotel though. I have a Mexican hot chocolate porter I’m gonna try.
 
Thanks for the replies all. Unfortunately I'm away for a few days so can't check any settings until Friday, but I do know it is calling for heat constantly but just hits 20c and then the graph levels out even though the beer constant is set to 24c (sorry about the wrong temperature format).

I've got no fan at the moment I can certainly get one if required. I will post more details about the set up later on the week.

Thanks again for the help
 
Is there a thermostat of some sort on the heating device? Perhaps it's limiting the output.

:no:Nope there was the option of getting the 60w tube heater with or without a thermostat, I choose the one without because I understood there was no need for brewpi
 
A fan is a good idea in general I’ve found, but if you are hitting a wall, I don’t think that’s it. Can you describe the physical layout? Fridge type? Size?
 
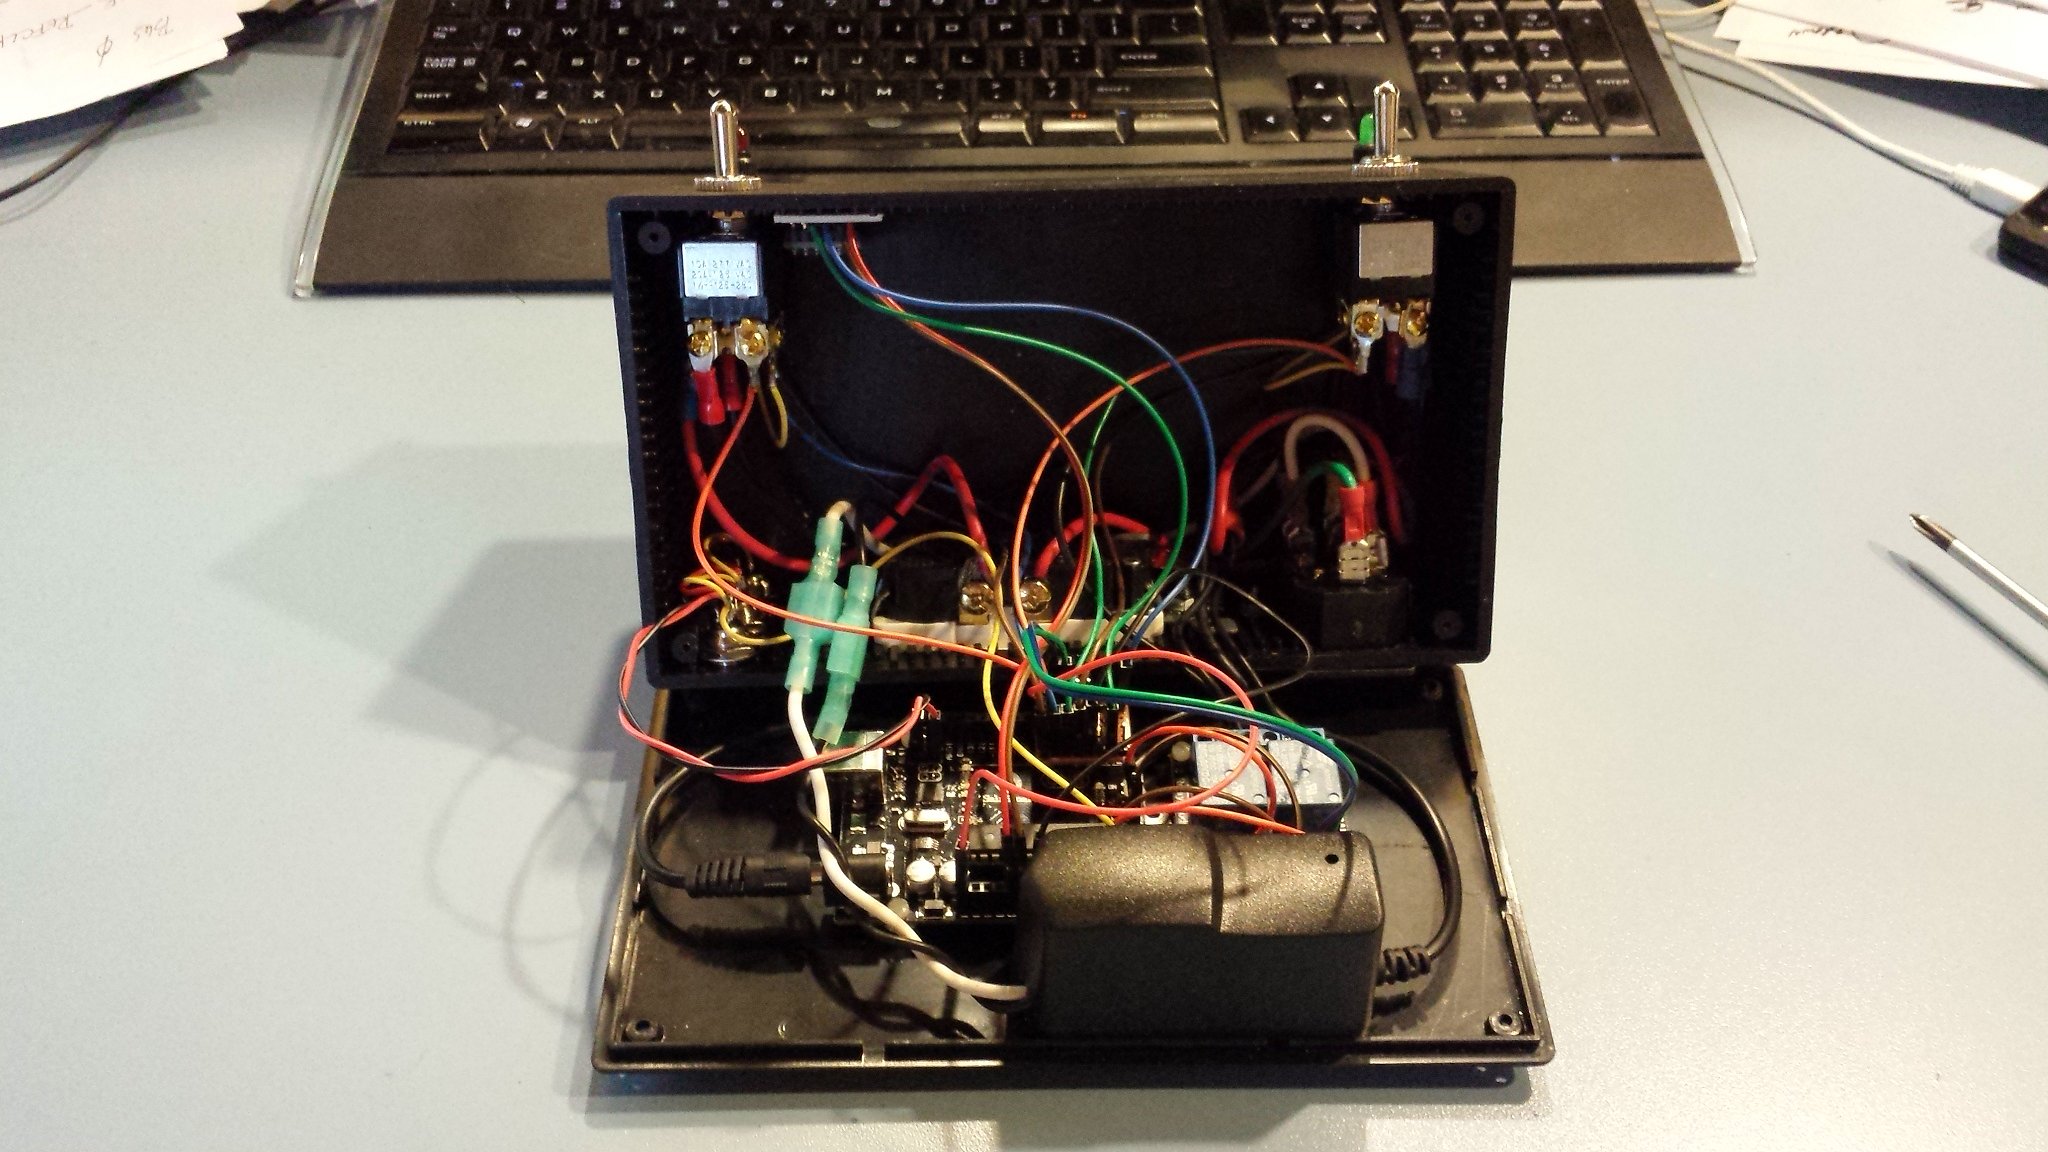
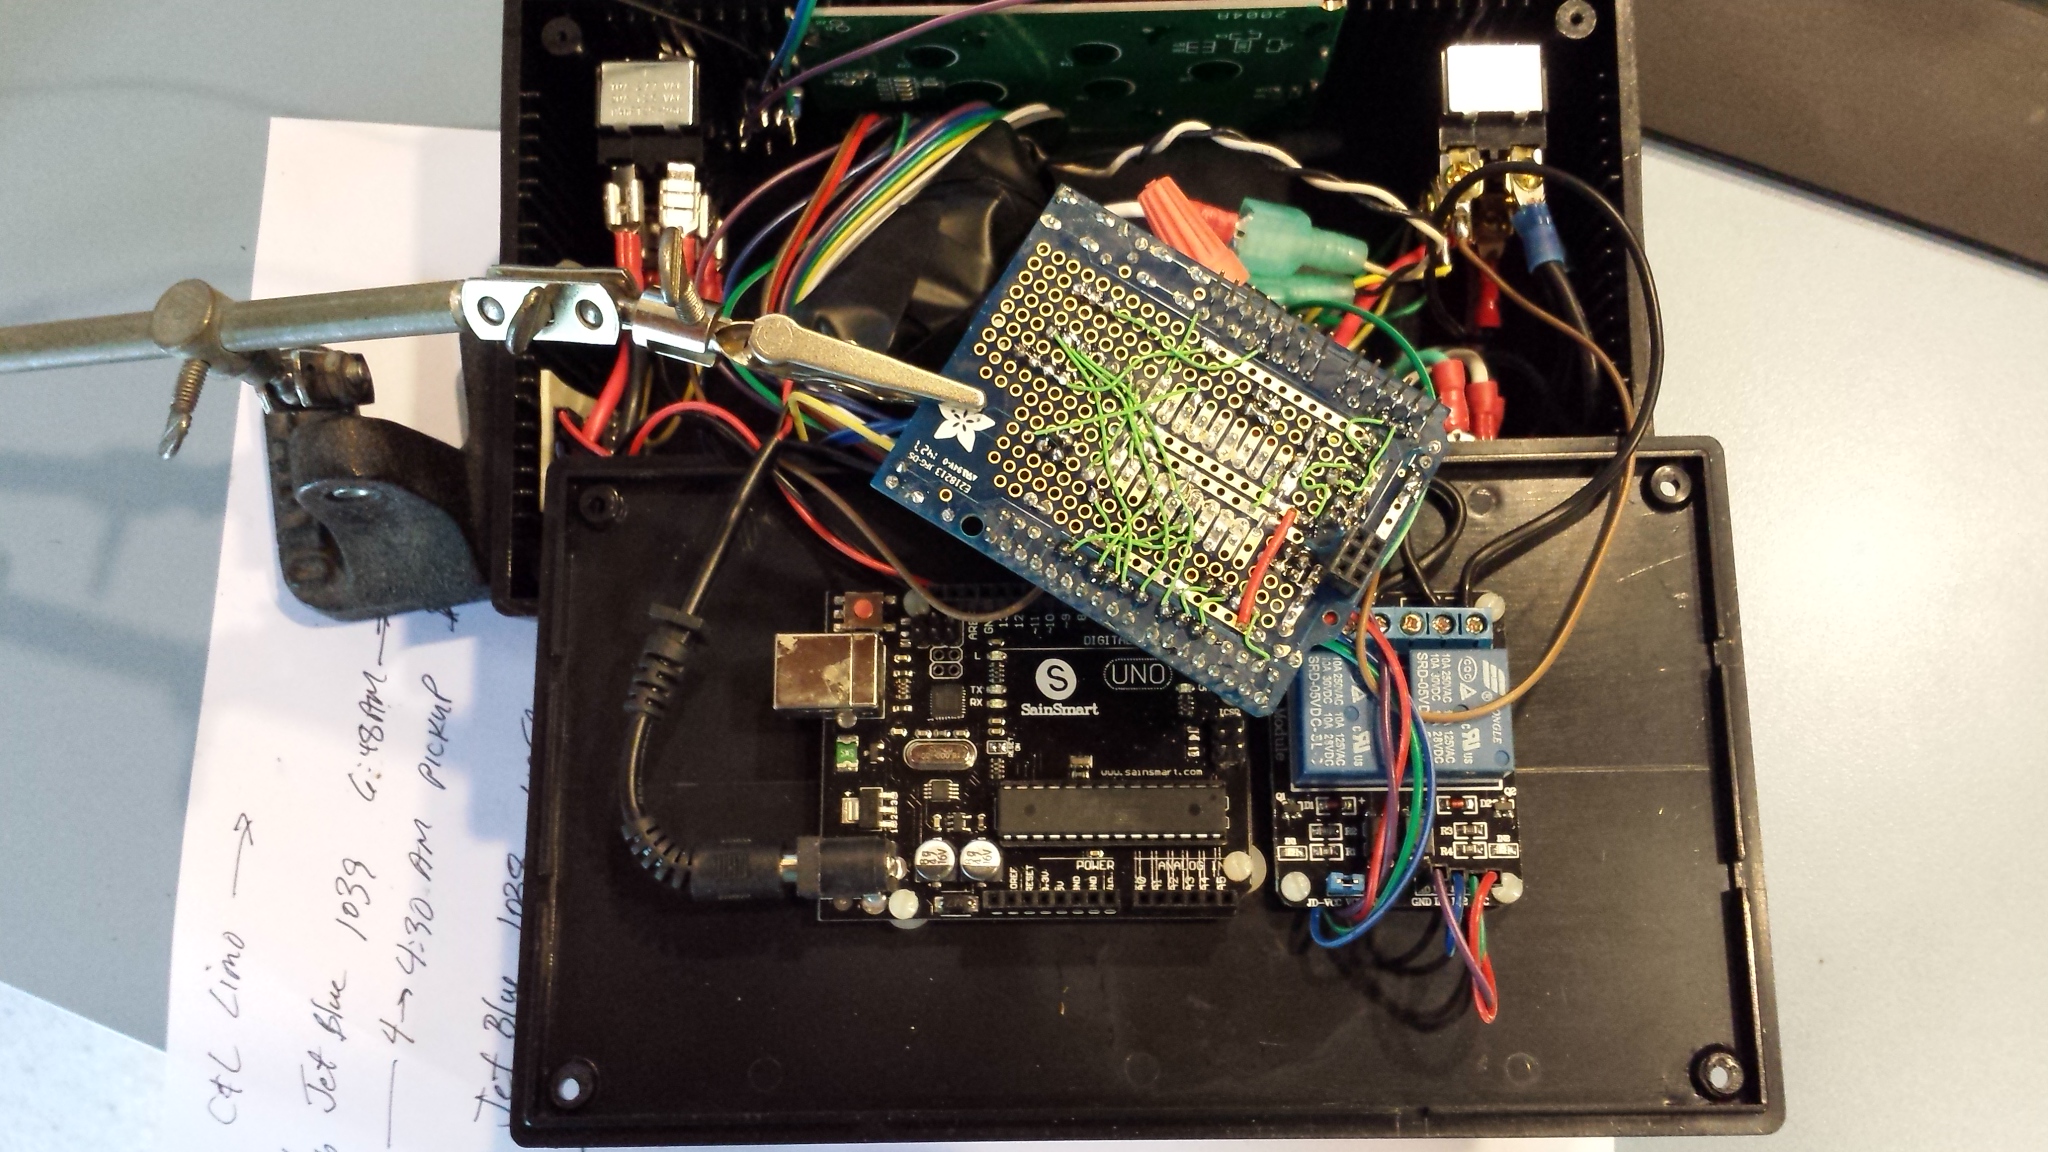
Does anyone have a photo of how you wired the wall wart to the power coming in? i havent taken mine apart yet, but im assuming you can take off the plug ends and connect wires that run to the hot and neutral terminals.
 
I don't have a comparable pic from my current minion builds but these will get you in the ballpark.
This was the original: I removed the plug from wart and added the black/white wires which connect to the switched/fused AC inlet.

brewpi_satellite_03.jpg


When I added the LCD I needed the room the wart shell occupied, so I stripped the shell and wrapped the wart guts in electrical tape (it's peeking out left of the old shield).

minion_upgrade_01.jpg


I upgraded all of my original minions to Cadibrewer shields with stripped warts to match my last builds...

minion_upgrade_02.jpg


brewpi_satellite_02.jpg


Cheers!
 
Thanks, yea i have those pics saved to go off of. I just wanted to get your/ or someone else thought on my assumptions, and it seems i was on the right path.
 
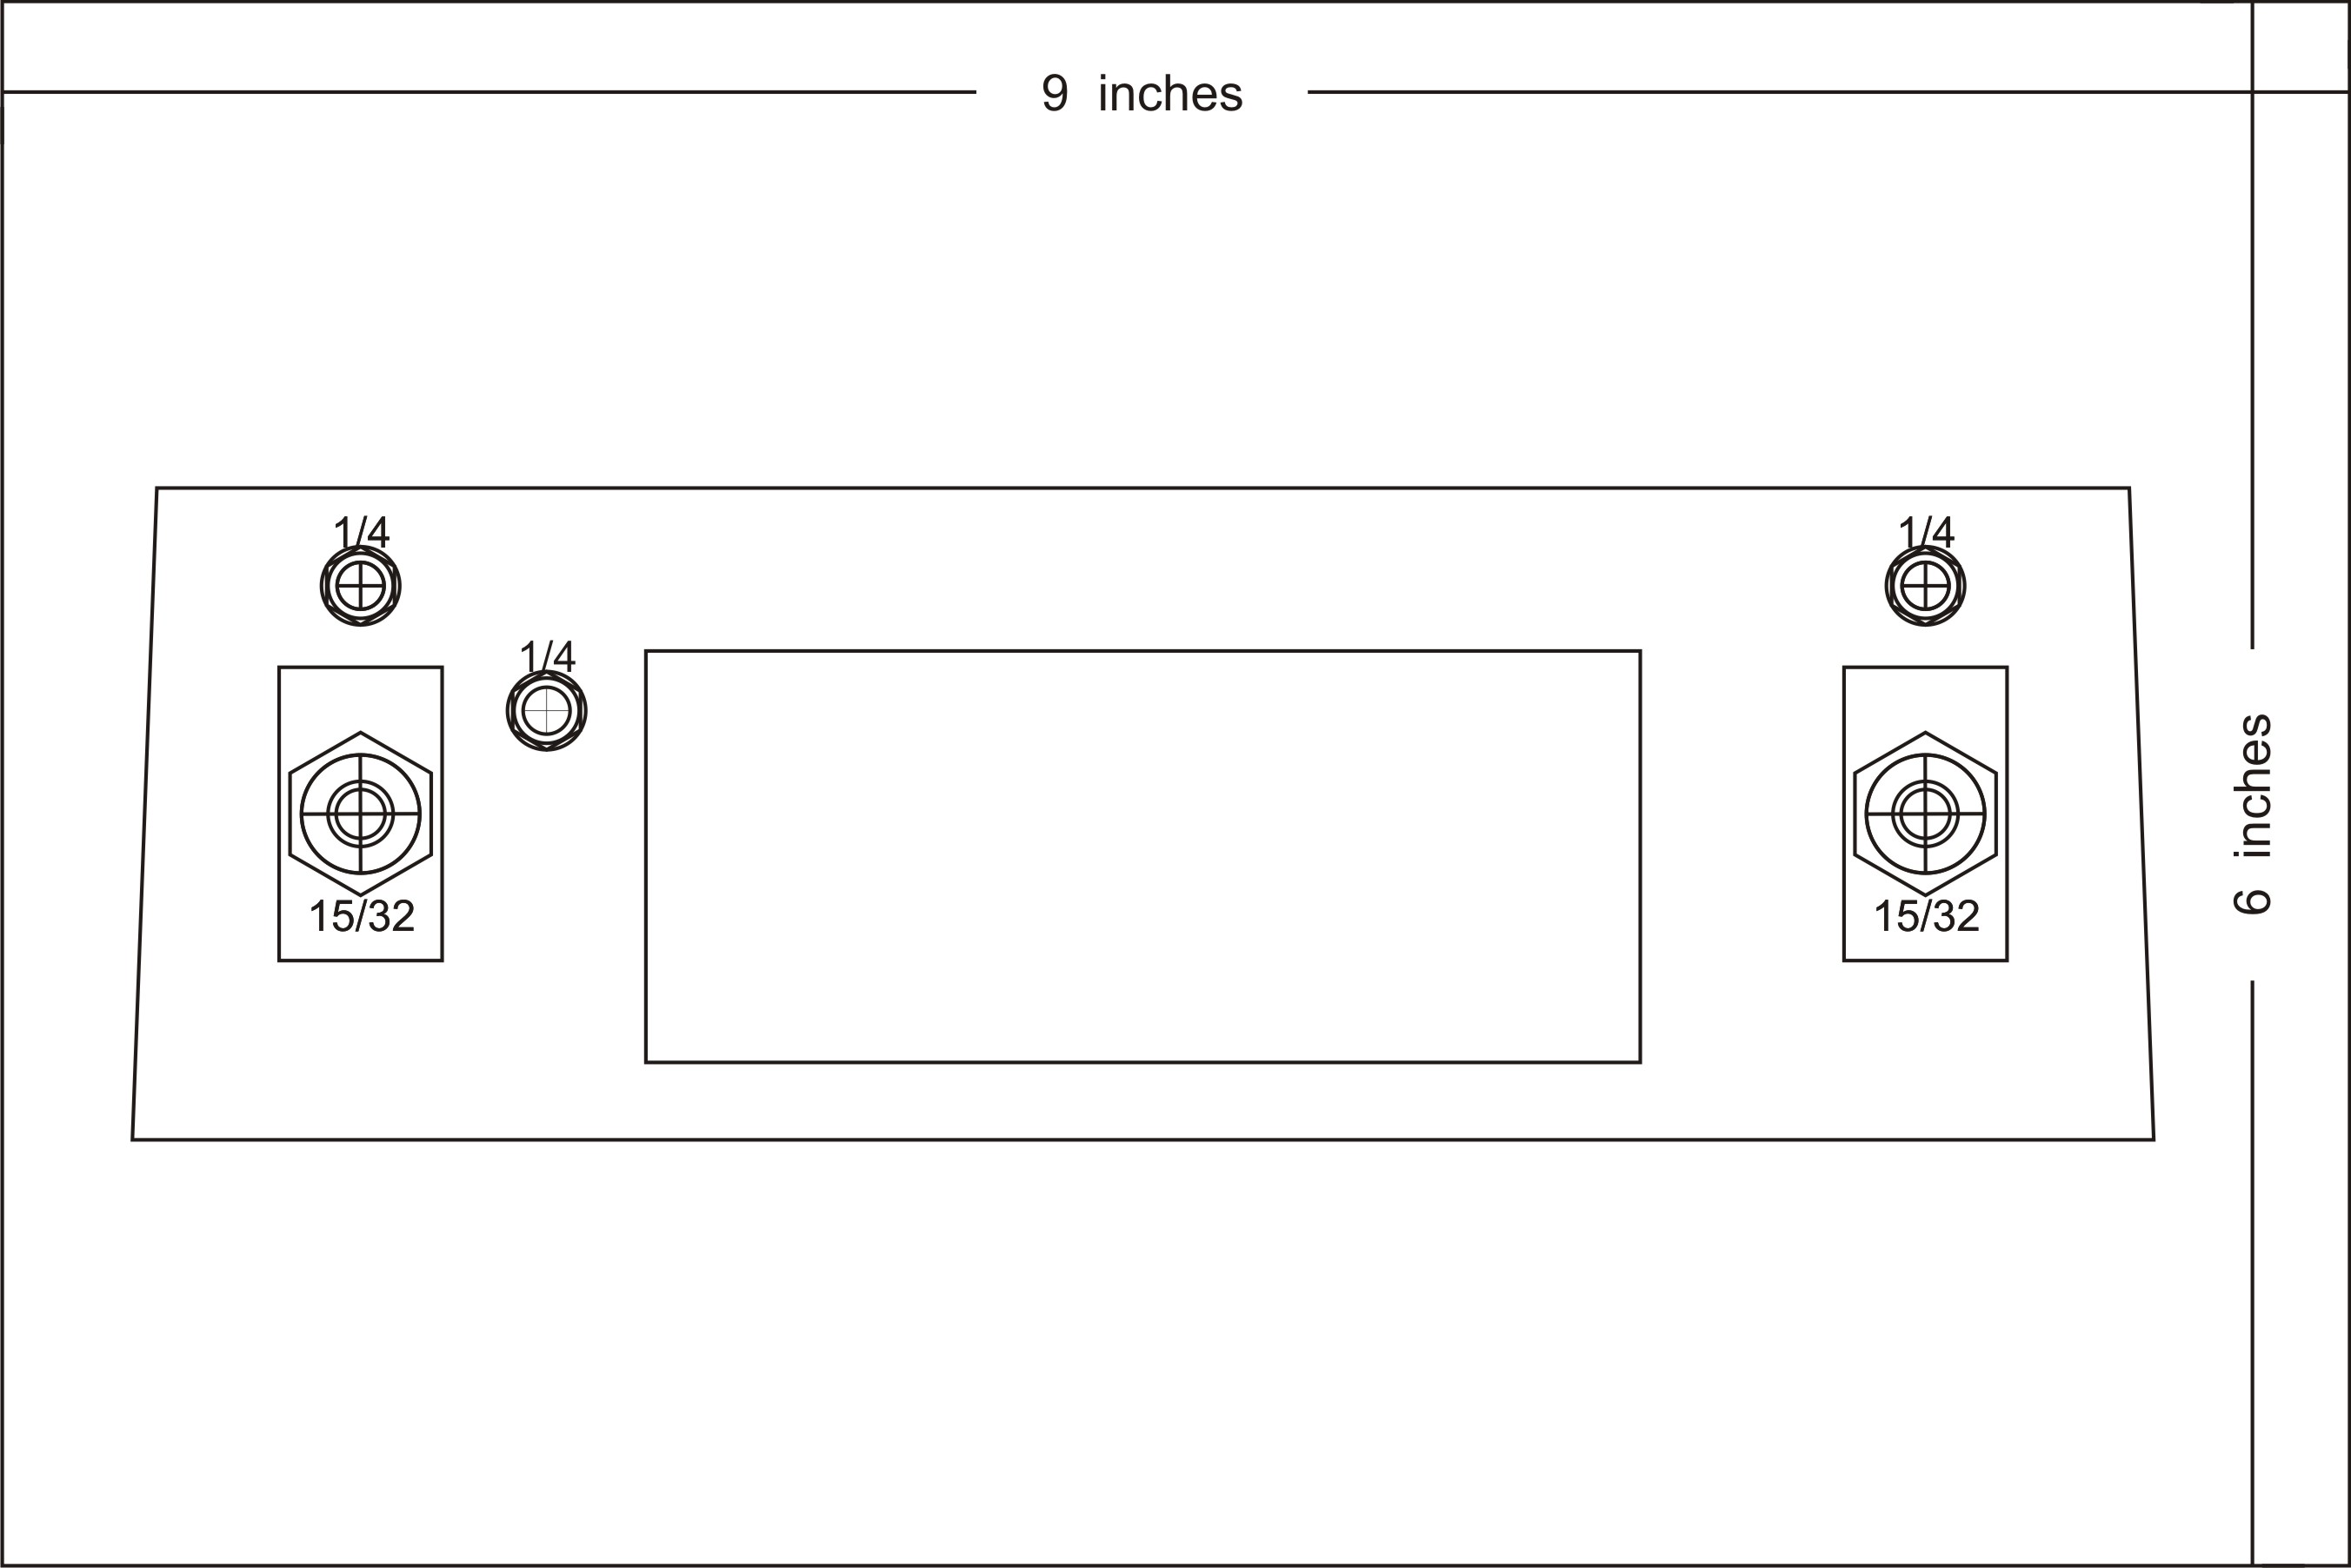
I printed out templates and taped them to the box to mark everything out with a wicked sharp awl. Then, for the LCD and AC ingress I drilled 1/4" holes just inside the corners of the rectangular openings then used a saber saw with a skinny 20 tpi blade and finished with files. The round holes were trivial, of course, though I found step bits are much less "grabby" than twist bits when making holes in thin plastic...

fwiw, here are the templates I used...

brewpi_bt_satellite_front.jpg


brewpi_bt_satellite_back.jpg


Cheers!
 
@day_trippr I may have asked before, but where did you get (or how did you make) those enclosures?

Or alternatively (since I know you have a 3D printer), you can use the case design that @LBussy and I worked on together. If I remember correctly, @day_trippr had to do some "customization" of the LCD circuit board to make it fit.

I believe day_trippr said that the dimensions of our box are almost as small as his cases are.
 
Did someone mention LCD "customization"? :D

lcd_mod.jpg


Yeah, it was a scoche too tall to fit the case. Nothing a belt grinder chucked up-side-down in a bench vise couldn't handle ;)

Cheers!
 
I had little to do with what @gromitdj ended up designing, other than being a PIA and having him change it a millimeter at a time. :). It is a handy box and there are models with and without switches.
 
I’ve got a 3D printer case design for the ESP boards, but it doesn’t look anywhere near as good as the one you guys put together. I vaguely recall seeing a multicolor BrewPi logo on one print which looked amazing. ;)

I’m looking for an easy-to-use non-3D printed (or perhaps “3D printed faceplate only”?) my “hand carving” skills lead to monstrosities like the dangling panel mount jacks you see below in my first STC1000 build. Not what one would call “safe”. :eek:
939A37D5-2E3A-4A59-B314-B016279269A5.jpeg
 
Yeah as popular as those displays are, one would think there would be an easy to use/modify solution for projects with them.
 
I’m looking for an easy-to-use non-3D printed (or perhaps “3D printed faceplate only”?) my “hand carving” skills lead to monstrosities like the dangling panel mount jacks you see below in my first STC1000 build. Not what one would call “safe”. :eek:

Let me know what you want, and I'll model it for you.
 
I’m looking for an easy-to-use non-3D printed (or perhaps “3D printed faceplate only”?) my “hand carving” skills lead to monstrosities like the dangling panel mount jacks you see below in my first STC1000 build. Not what one would call “safe”. :eek: [ATTACH said:
617566[/ATTACH]
What is the perfect size for the enclosure?I have the tools to make a few out of wood.
 
I’m set on enclosures personally, but I’m lucky enough to be able to 3D print them. What I’ve been searching for is an alternative to recommend for anyone who doesn’t have 3D printer access. I think I saw someone use a 2 gang junction box once, but that’s about the closest I’ve seen to a standardized solution yet.

As a side note, my girlfriend just called me to ask if I knew how she could wire a thermostat to control the temperature of a “greenhouse” she has on our patio. I laughed. I’ll post photos later this weekend. :D
 
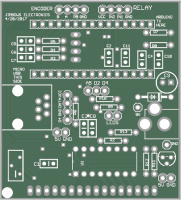
Does anybody want a free Cadibrewer BrewPi Sheild v2.01? I have one PCB that I won't use. The first person to quote this post and leave a reply gets it.
top.png
 
Status
Not open for further replies.
Back
Top