How to add permanent volume markings to a kettle (illustrated)

Homebrew Talk - Beer, Wine, Mead, & Cider Brewing Discussion Forum

Help Support Homebrew Talk - Beer, Wine, Mead, & Cider Brewing Discussion Forum:

This site may earn a commission from merchant affiliate links, including eBay, Amazon, and others.
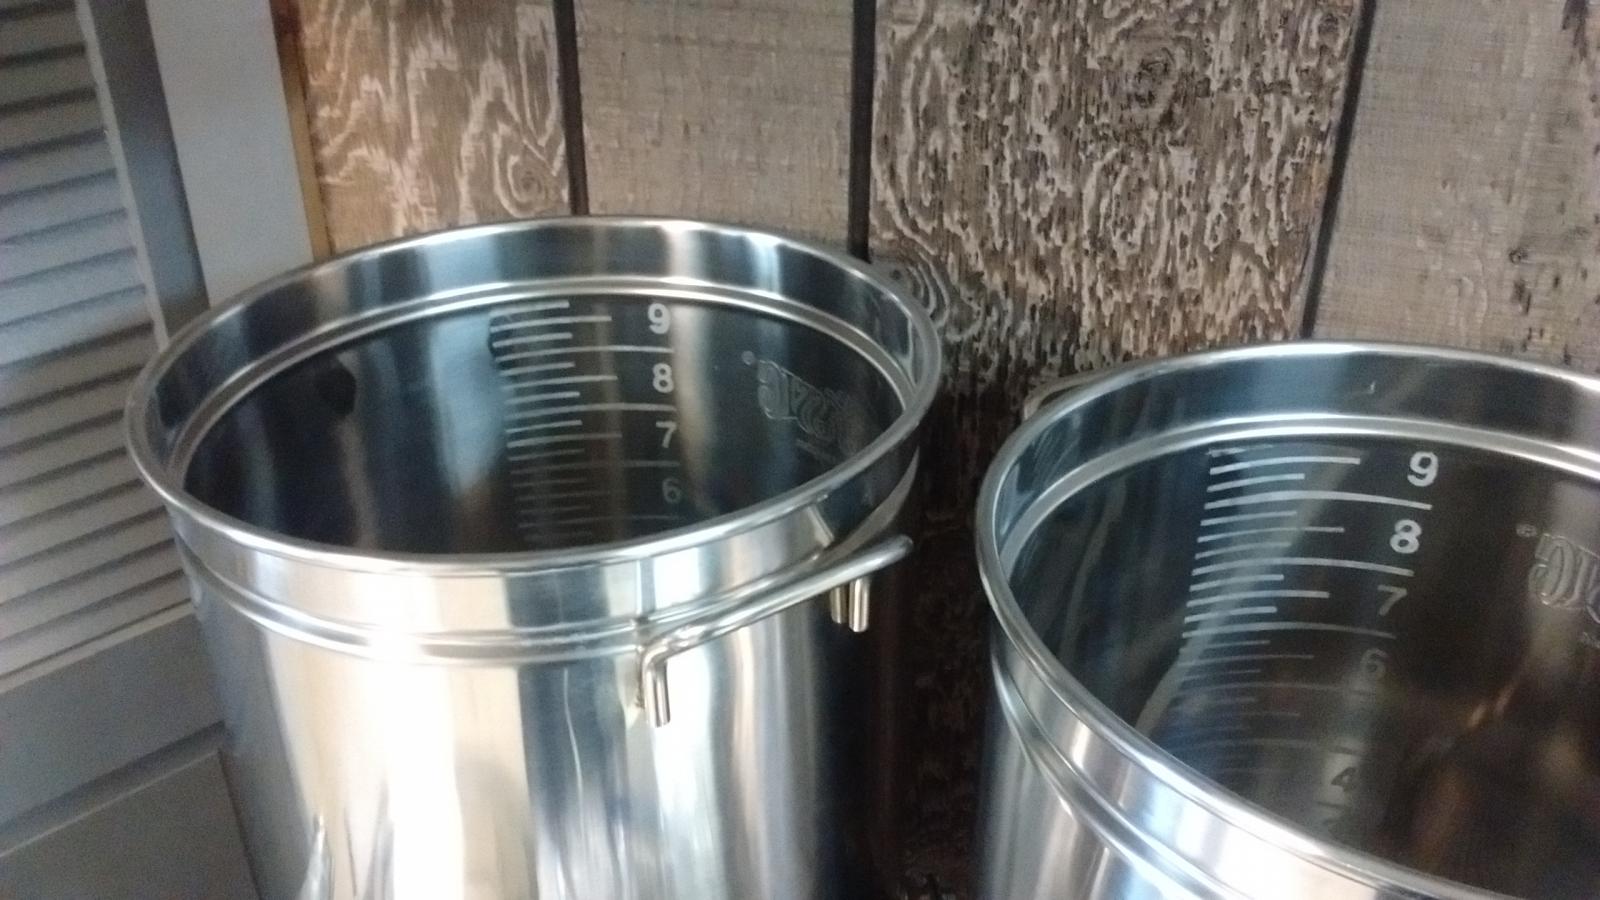
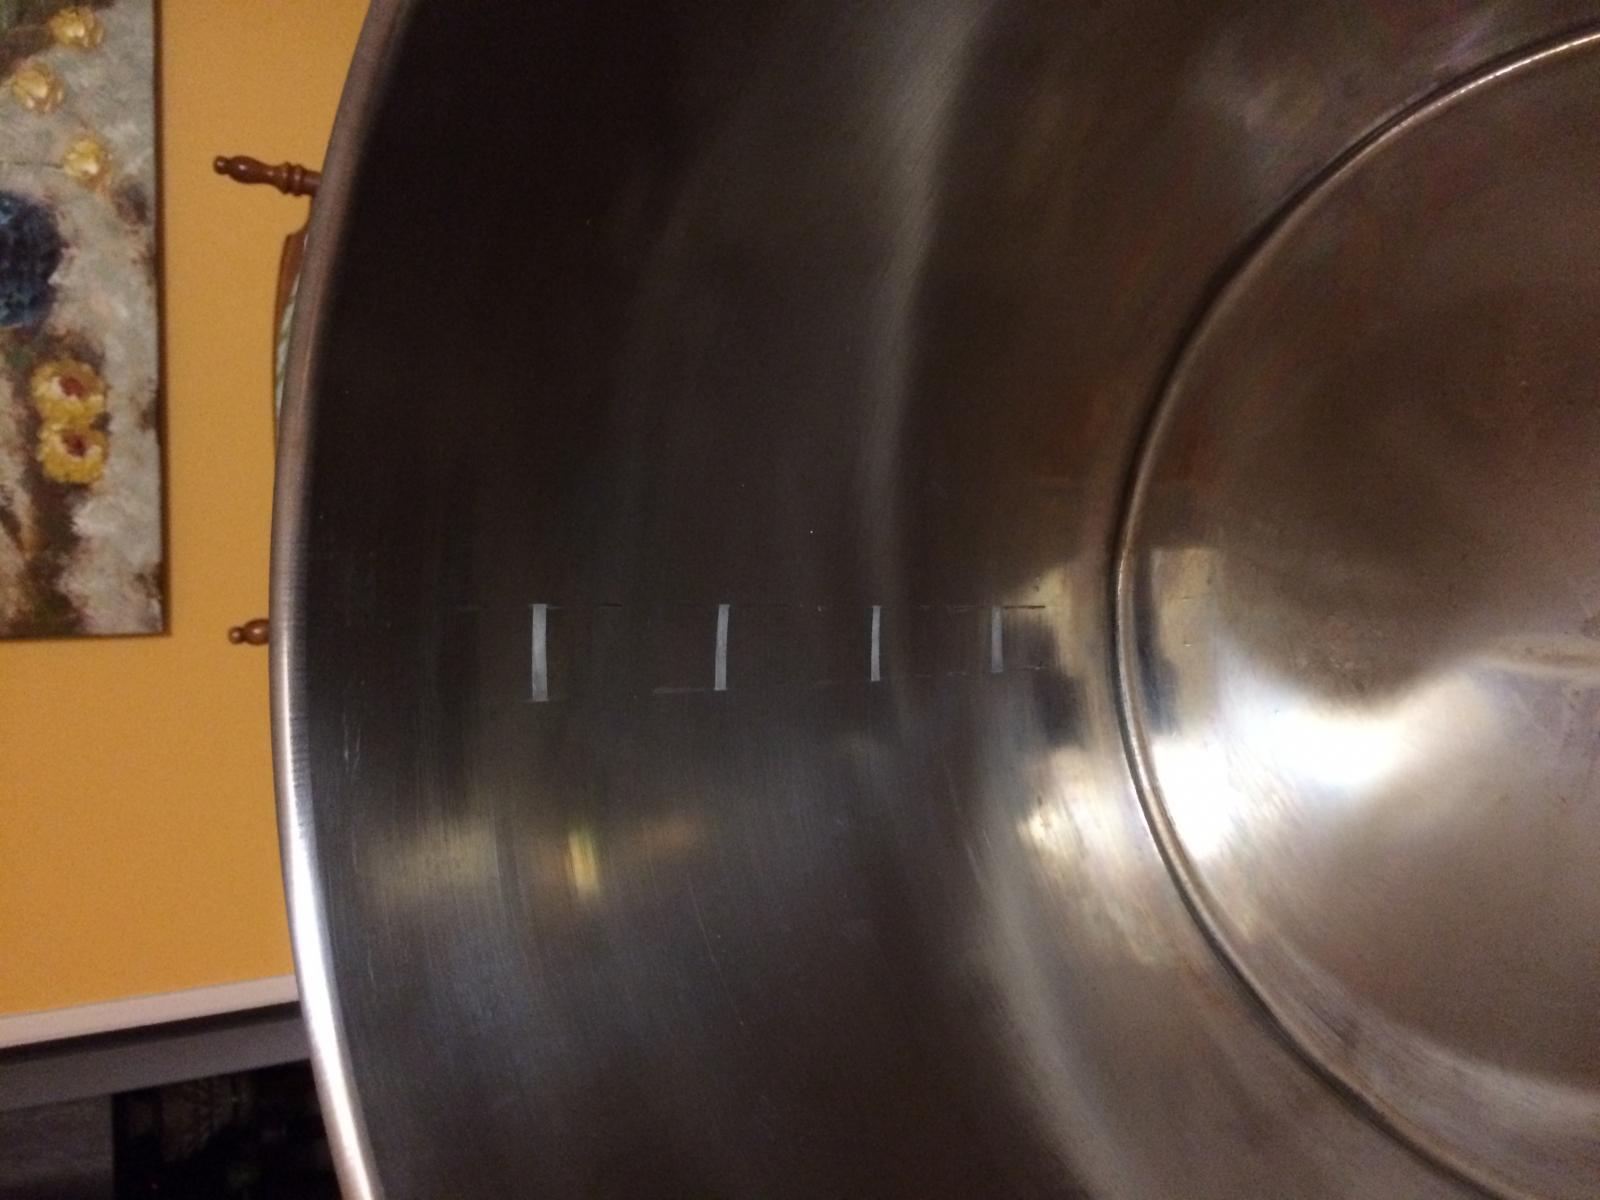
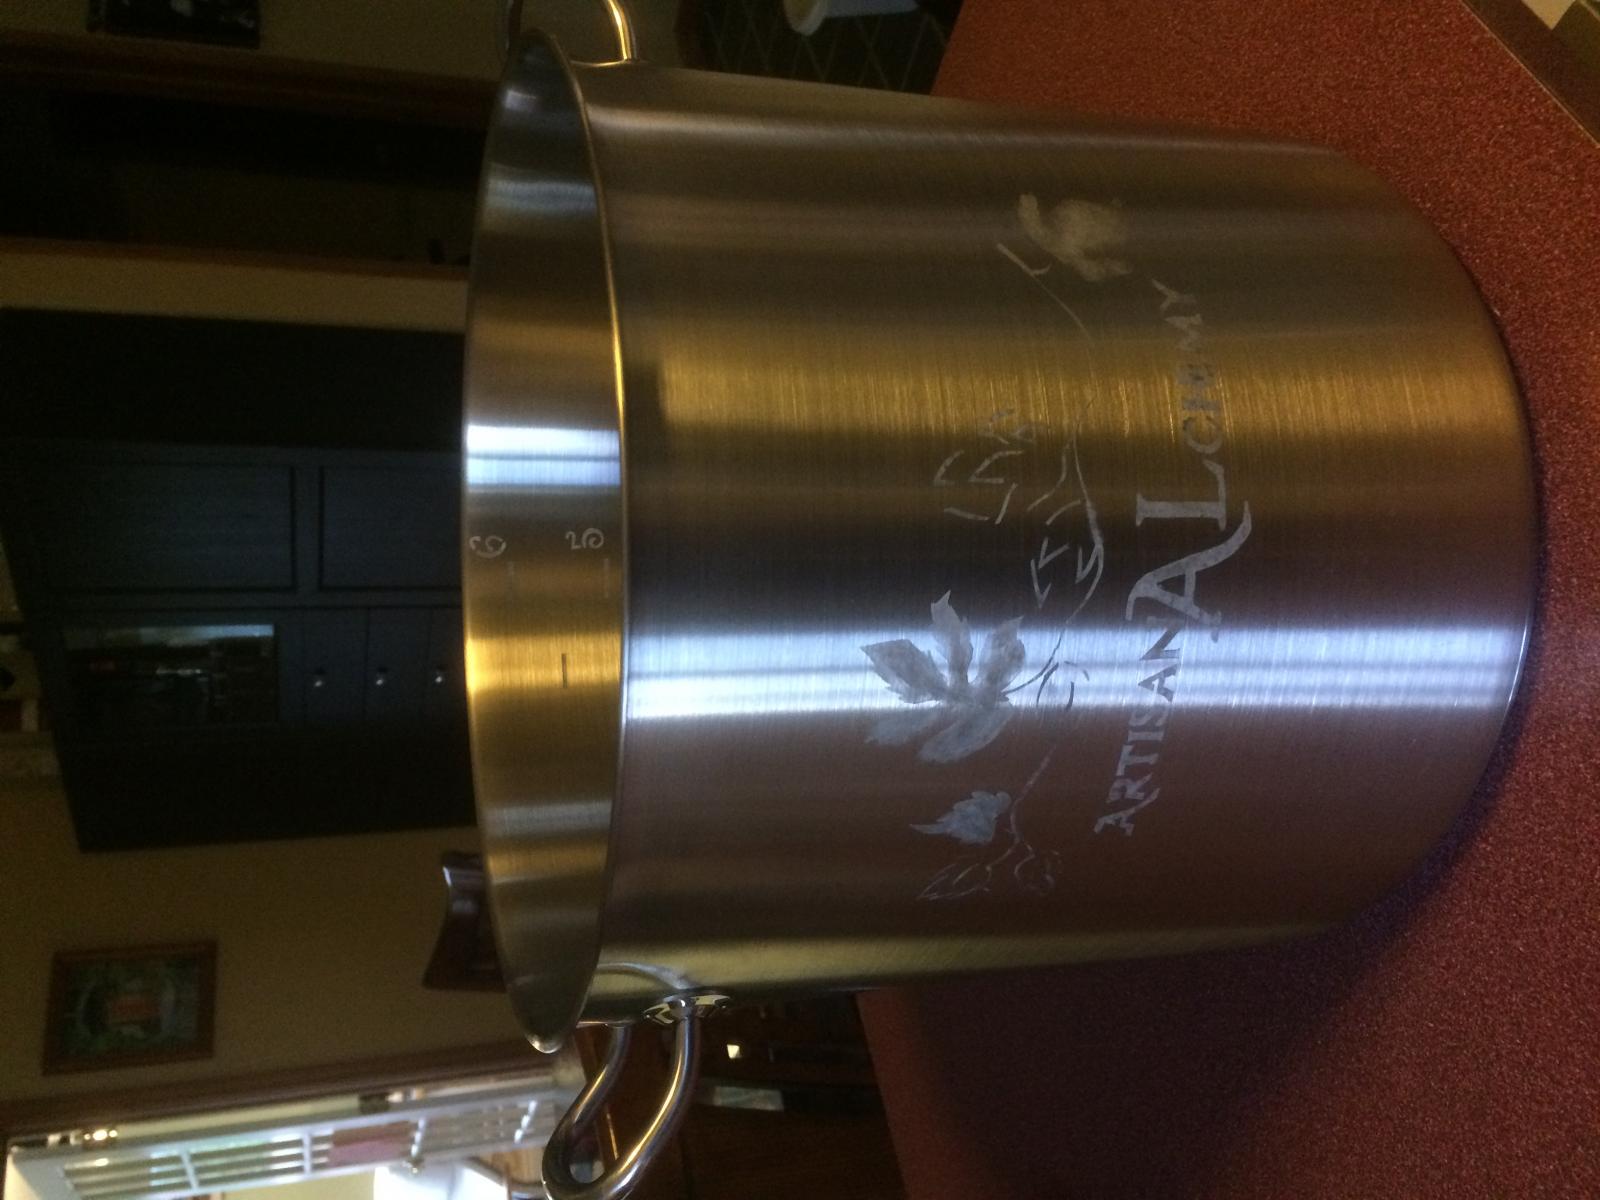
Just did a new thick-walled aluminum 10 gallon pot. The pot is obviously going to darken as it oxidizes, but hopefully the markings will still be clear.

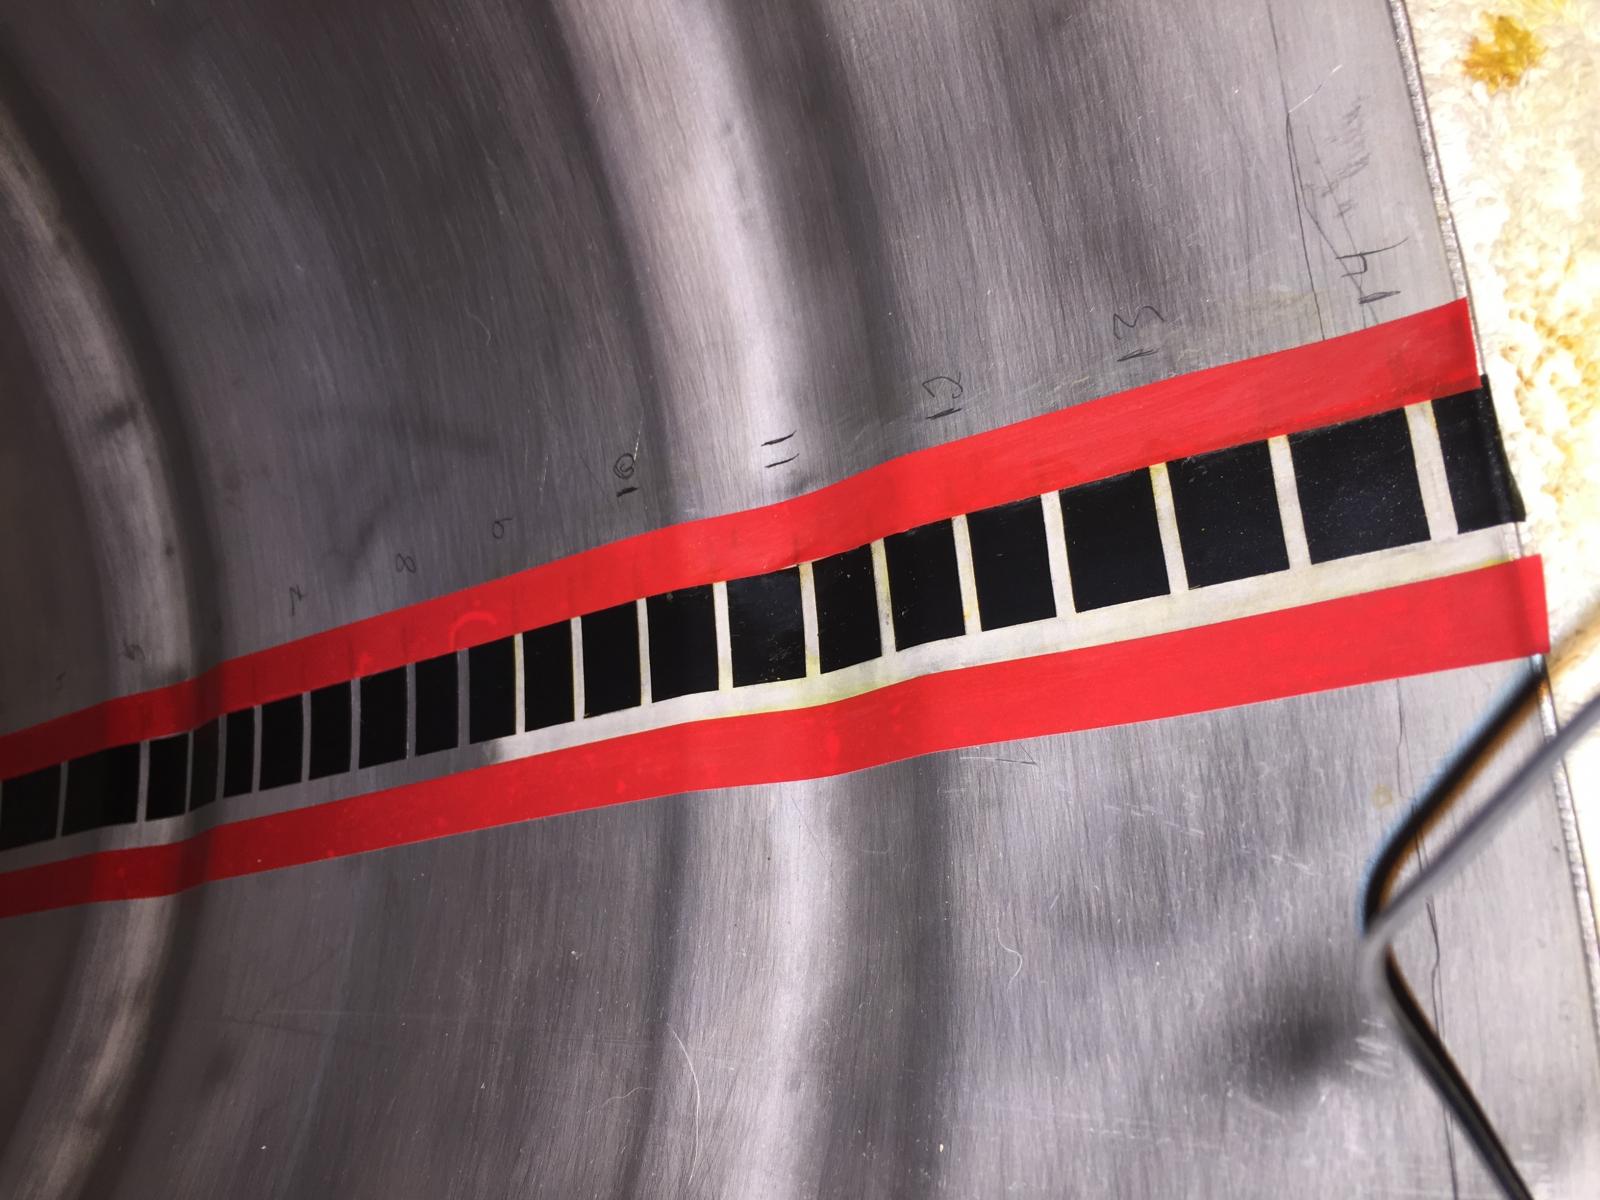
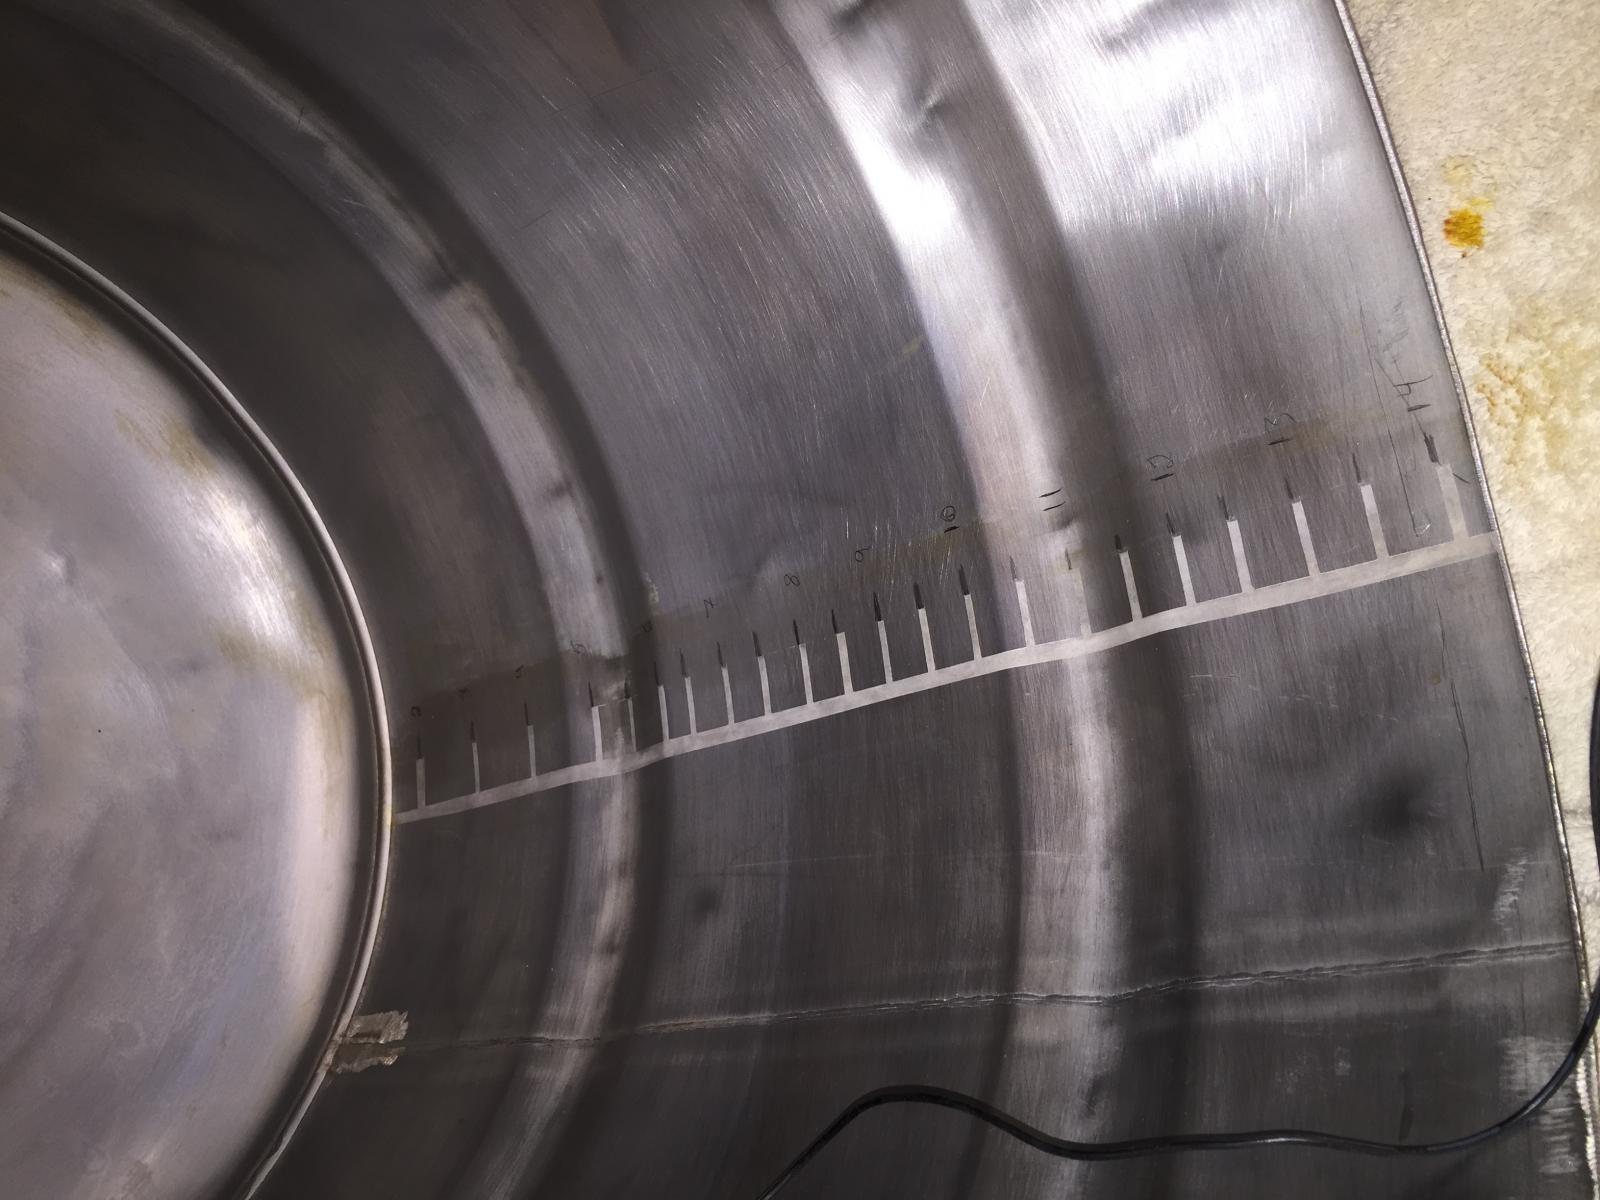
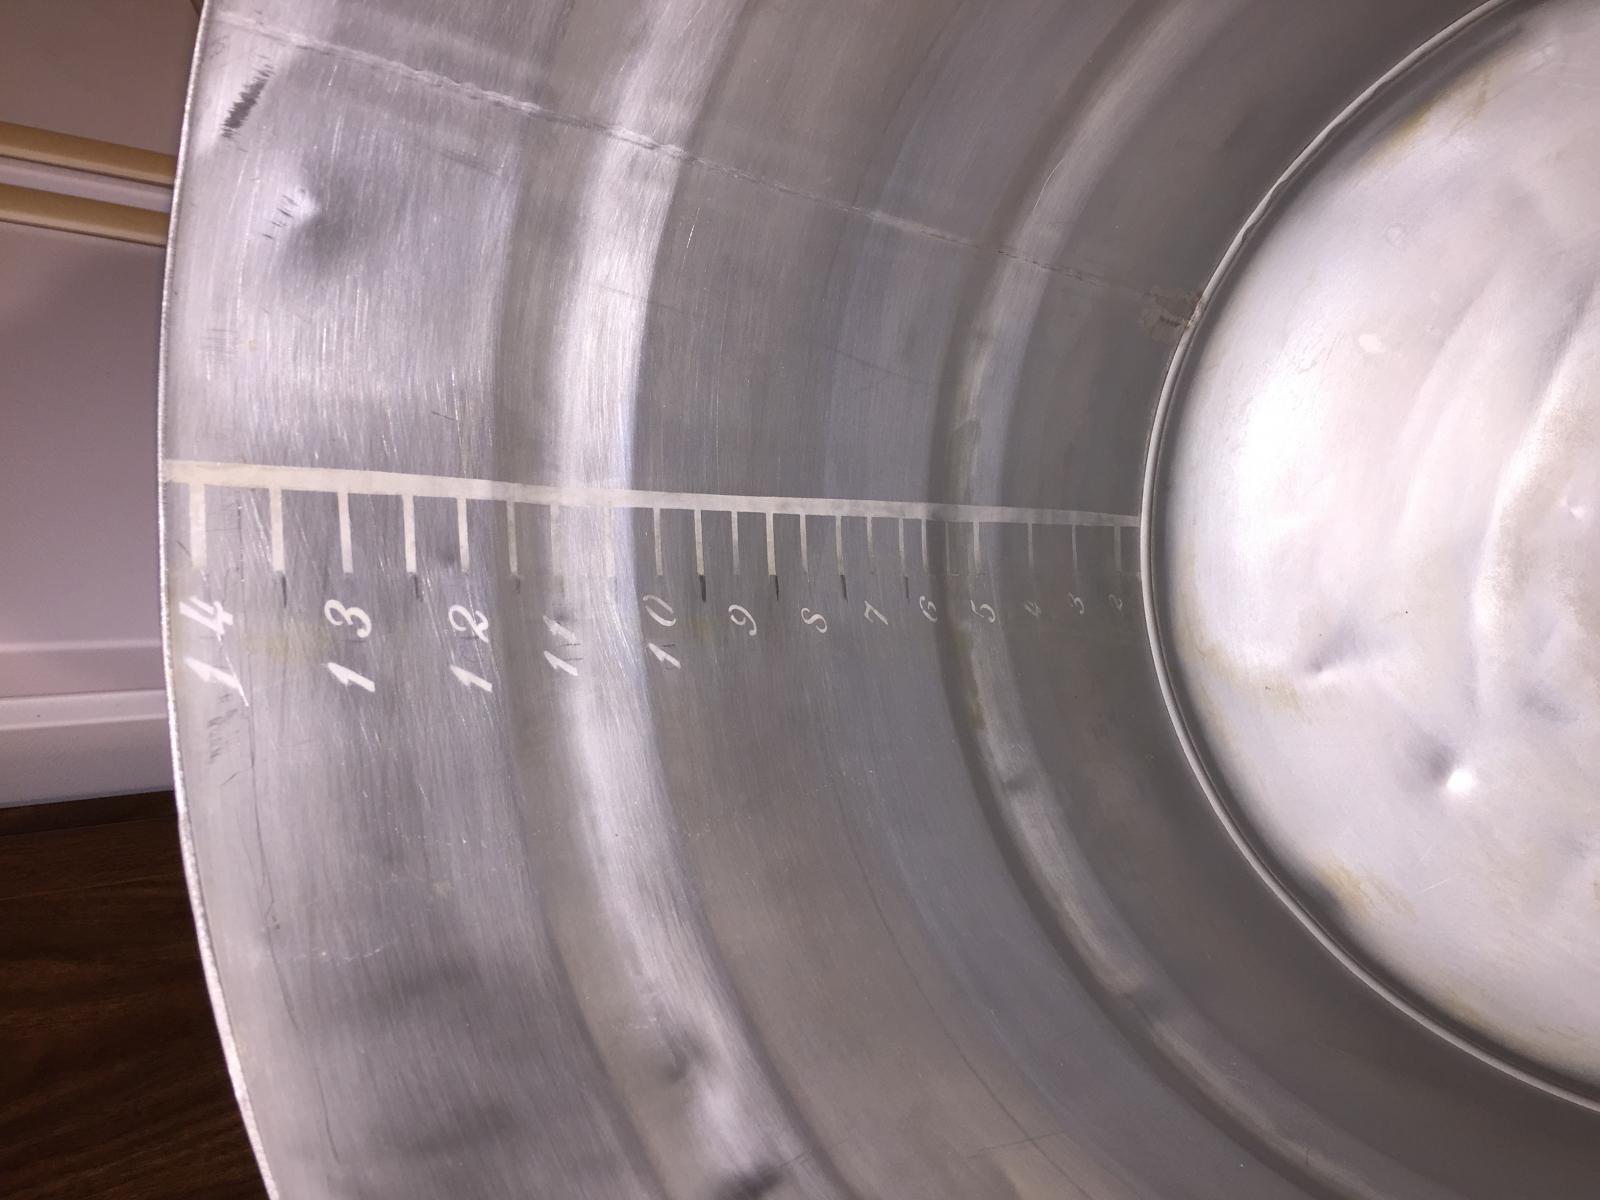
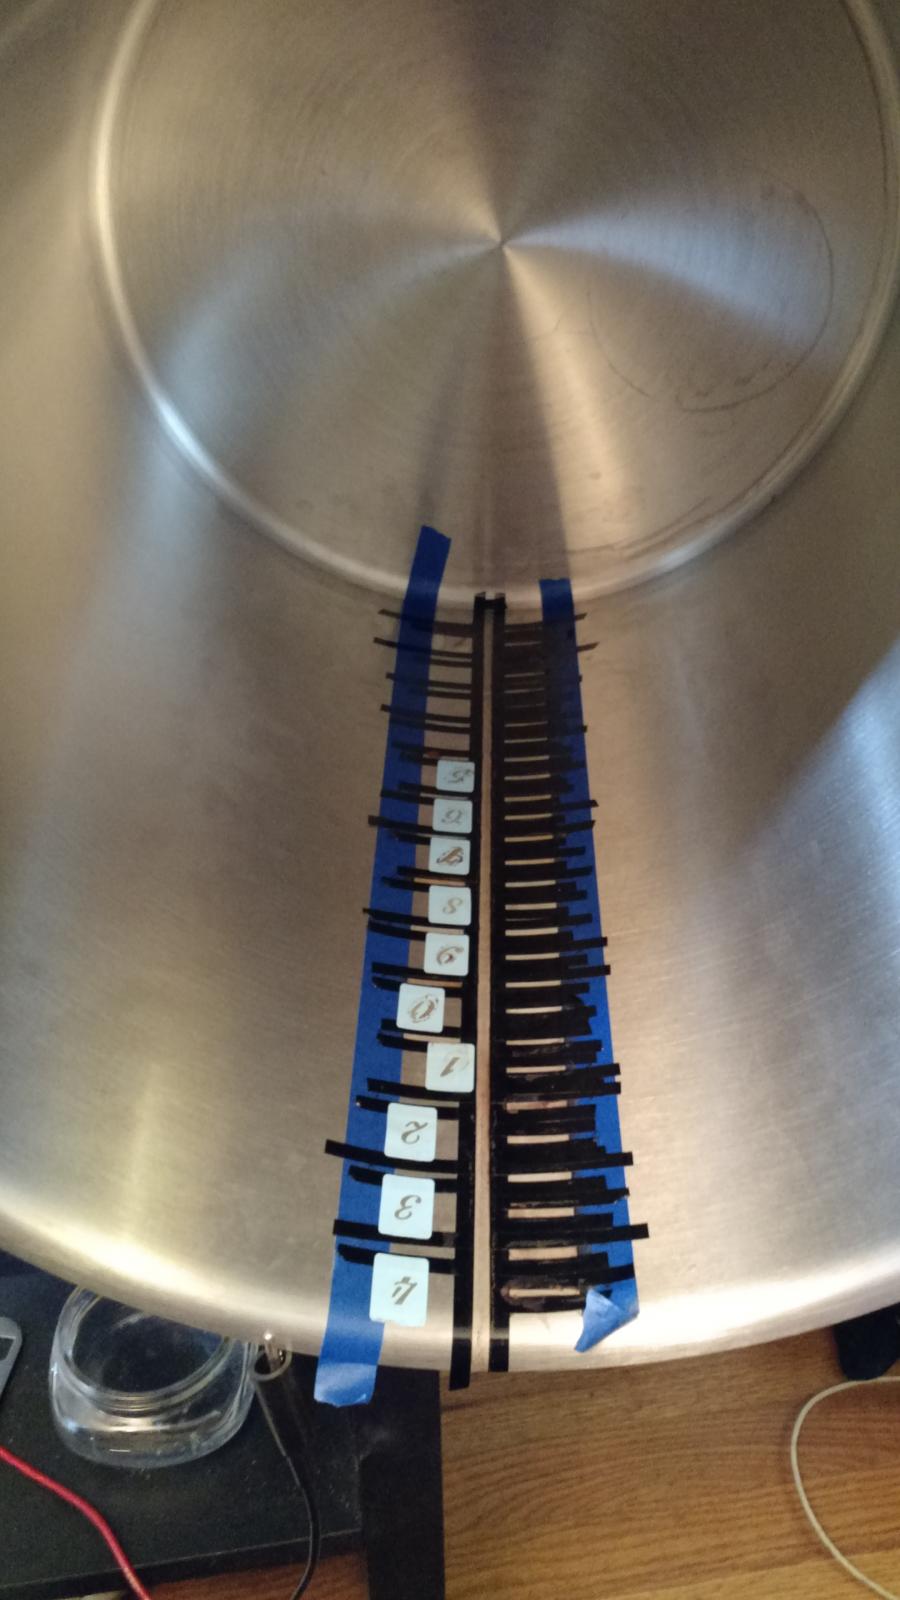
I used electrical tape to make the vertical line, etched it, then removed one of the tape strips and added water, 1 gallon at a time. I used a screwdriver to scratch the tape at each gallon level after each addition. Then I made the horizontal lines with electrical tape at each gallon marking, and etched those. I removed all the tape except for the first vertical piece, and marked the half-gallon lines using a ruler and a sharpie, marking the half-way point between the gallon lines. I then marked those off with tape, and etched them.

For the numbers I couldn't find stick-on stencils that had numbers, so I just bought stickers, and punched out the actual number, and used the surrounding sticker sheet as a stencil. When I was all done, I used rubbing alcohol to clean the sharpie marks off, and washed well with hot water and dye/fragrance free dish soap.

Big thanks to the OP for the idea, and everyone else who contributed to this thread with additional information. A home-brewing friend who has been doing it quite a bit longer than I was blown away by how it turned out.

Let us know if your marks stick around on that aluminum pot. I have one and haven't etched it because I was under the impression the marks would simply fade away because of oxidation.
 
Well done! Thank you for sharing this I can't wait to try it out. My Mega pot came with gallon markings but adding quart markings is brilliant. I would also like to make the numbers larger so they are easier to read through steam cloud.
 
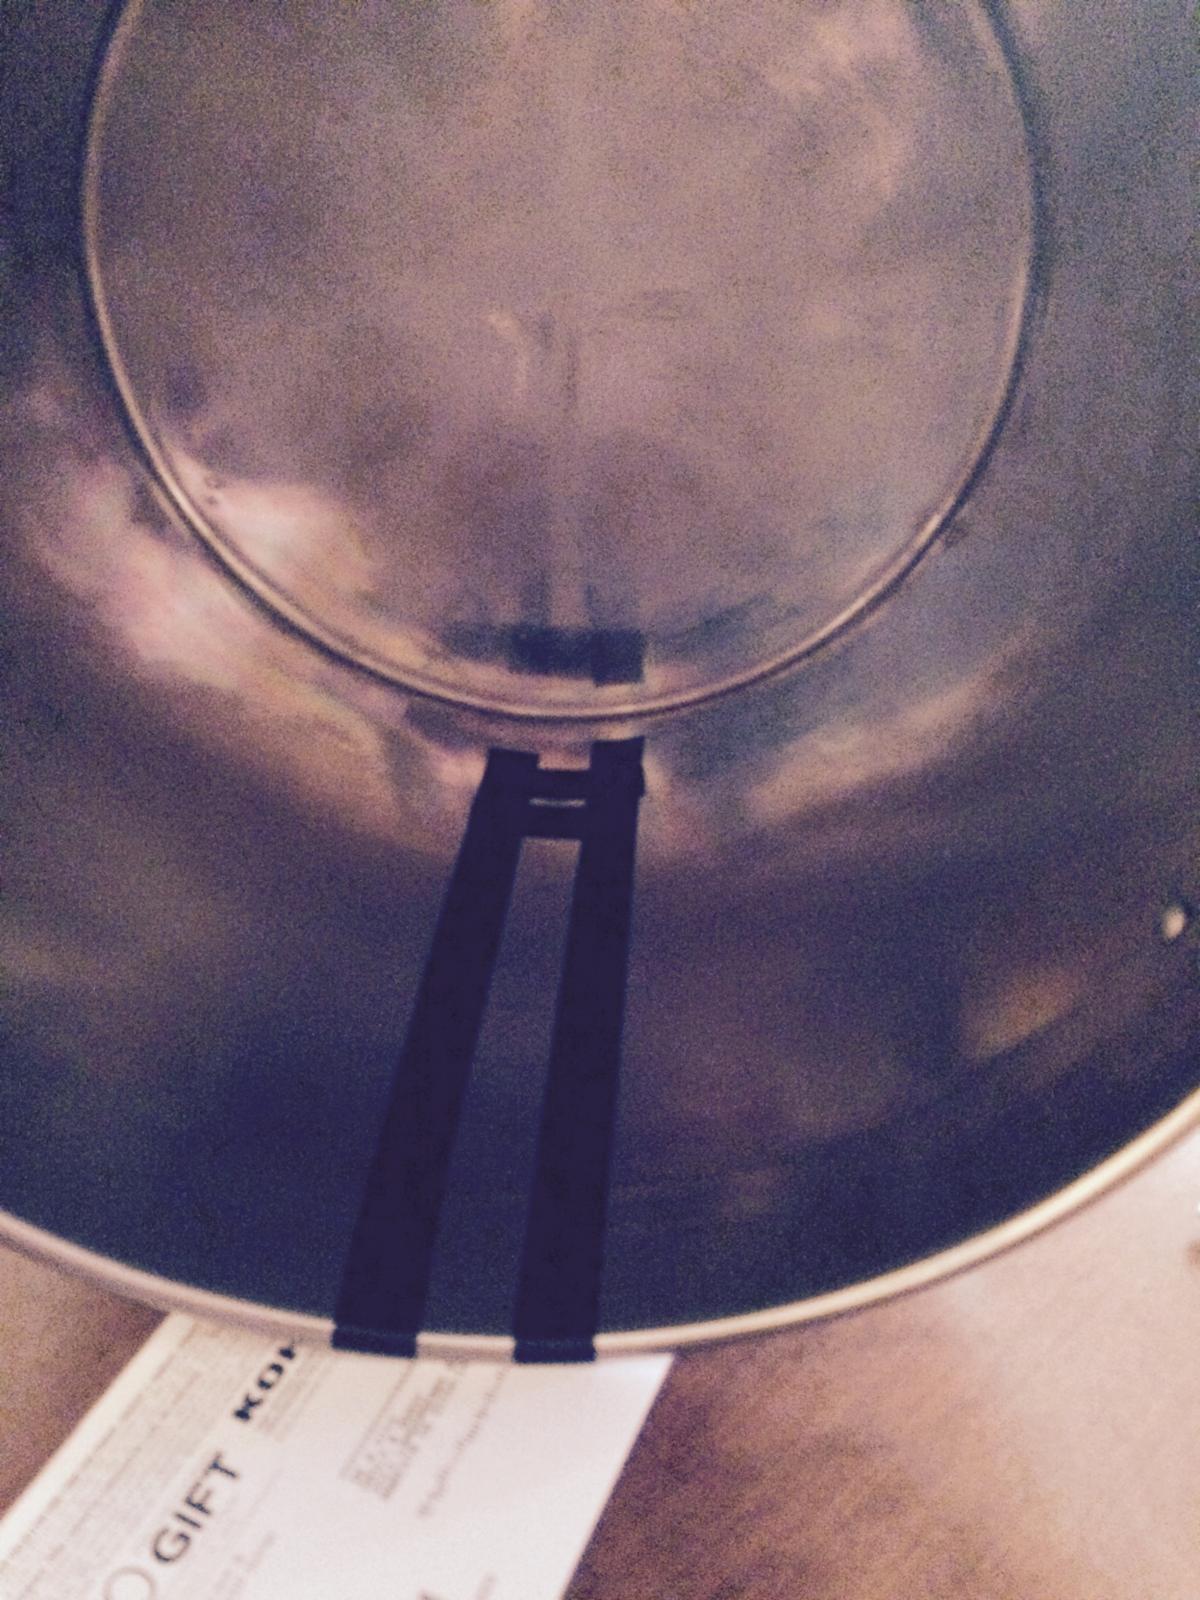
Here's mine. I cut a solid vinyl stencil, which was a pain to put on straight but worked well

IMG_20150524_102830741.jpg
 
It was a major pain in the ass trying to work inside of it. So I'm not sure just how accurate the lower marks ended up, but I'm pretty happy with the results. We'll see how they hold up to actual brew days.

I could NOT find decent vinyl stencils for the life of me. Visited 3 different hobby stores, and the best I could find were little 5/8" tall fancy script stuff. I'm probably gonna order some online for when I cut the next keg to work on.

Also, I found a new 9V battery worked a heck of a lot better than a wall wart for me. That seems strange, but oh well. :tank:

IMG_2345.jpg


IMG_2346.jpg


IMG_2353.jpg


IMG_2360.jpg
 
I've been wanting to use this technique to label my kegs. Finally got around to it. Got 8 unused kegs done up today. 4 more to go along with smaller numbers for the corny lids. I found that wrapping a cotton ball around the end of the q-tip helped for my thick numbers. I used a bench DC power supply. I ended up setting it to 12 volts, which got a good sizzle. With the increased surface area from the cotton ball I was drawing up to 4 amps. I am impressed with how much they stand out.

View attachment 1433736408068.jpg

View attachment 1433736420873.jpg

View attachment 1433736436316.jpg

View attachment 1433736452151.jpg
 
It was a major pain in the ass trying to work inside of it. So I'm not sure just how accurate the lower marks ended up, but I'm pretty happy with the results. We'll see how they hold up to actual brew days.

I could NOT find decent vinyl stencils for the life of me. Visited 3 different hobby stores, and the best I could find were little 5/8" tall fancy script stuff. I'm probably gonna order some online for when I cut the next keg to work on.

Also, I found a new 9V battery worked a heck of a lot better than a wall wart for me. That seems strange, but oh well. :tank:

This looks like you are using a keggle. how did you take your measurements to ensure everything is accurate?
 
I've been wanting to use this technique to label my kegs. Finally got around to it. Got 8 unused kegs done up today. 4 more to go along with smaller numbers for the corny lids. I found that wrapping a cotton ball around the end of the q-tip helped for my thick numbers. I used a bench DC power supply. I ended up setting it to 12 volts, which got a good sizzle. With the increased surface area from the cotton ball I was drawing up to 4 amps. I am impressed with how much they stand out.


Been wanting to do that for my kegs as well. Looks good man! :thumbs up:
 
This looks like you are using a keggle. how did you take your measurements to ensure everything is accurate?

I leveled the keg on my kitchen floor, and then used a 1 gallon measuring pitcher. I went by half-gallon increments, which was a lot of adding and marking, but will be worth it in the end. (This may not end up perfectly level compared to when its sitting on the burner in the garage, but it should be close enough.)

I have brewed with the keggle since adding the markings. They are much easier to use than having to measure out by pitcher to start. And it was nice to be able to see how much was left after removing the grain bag, and then keep track of how much was left during/after the boil.
 
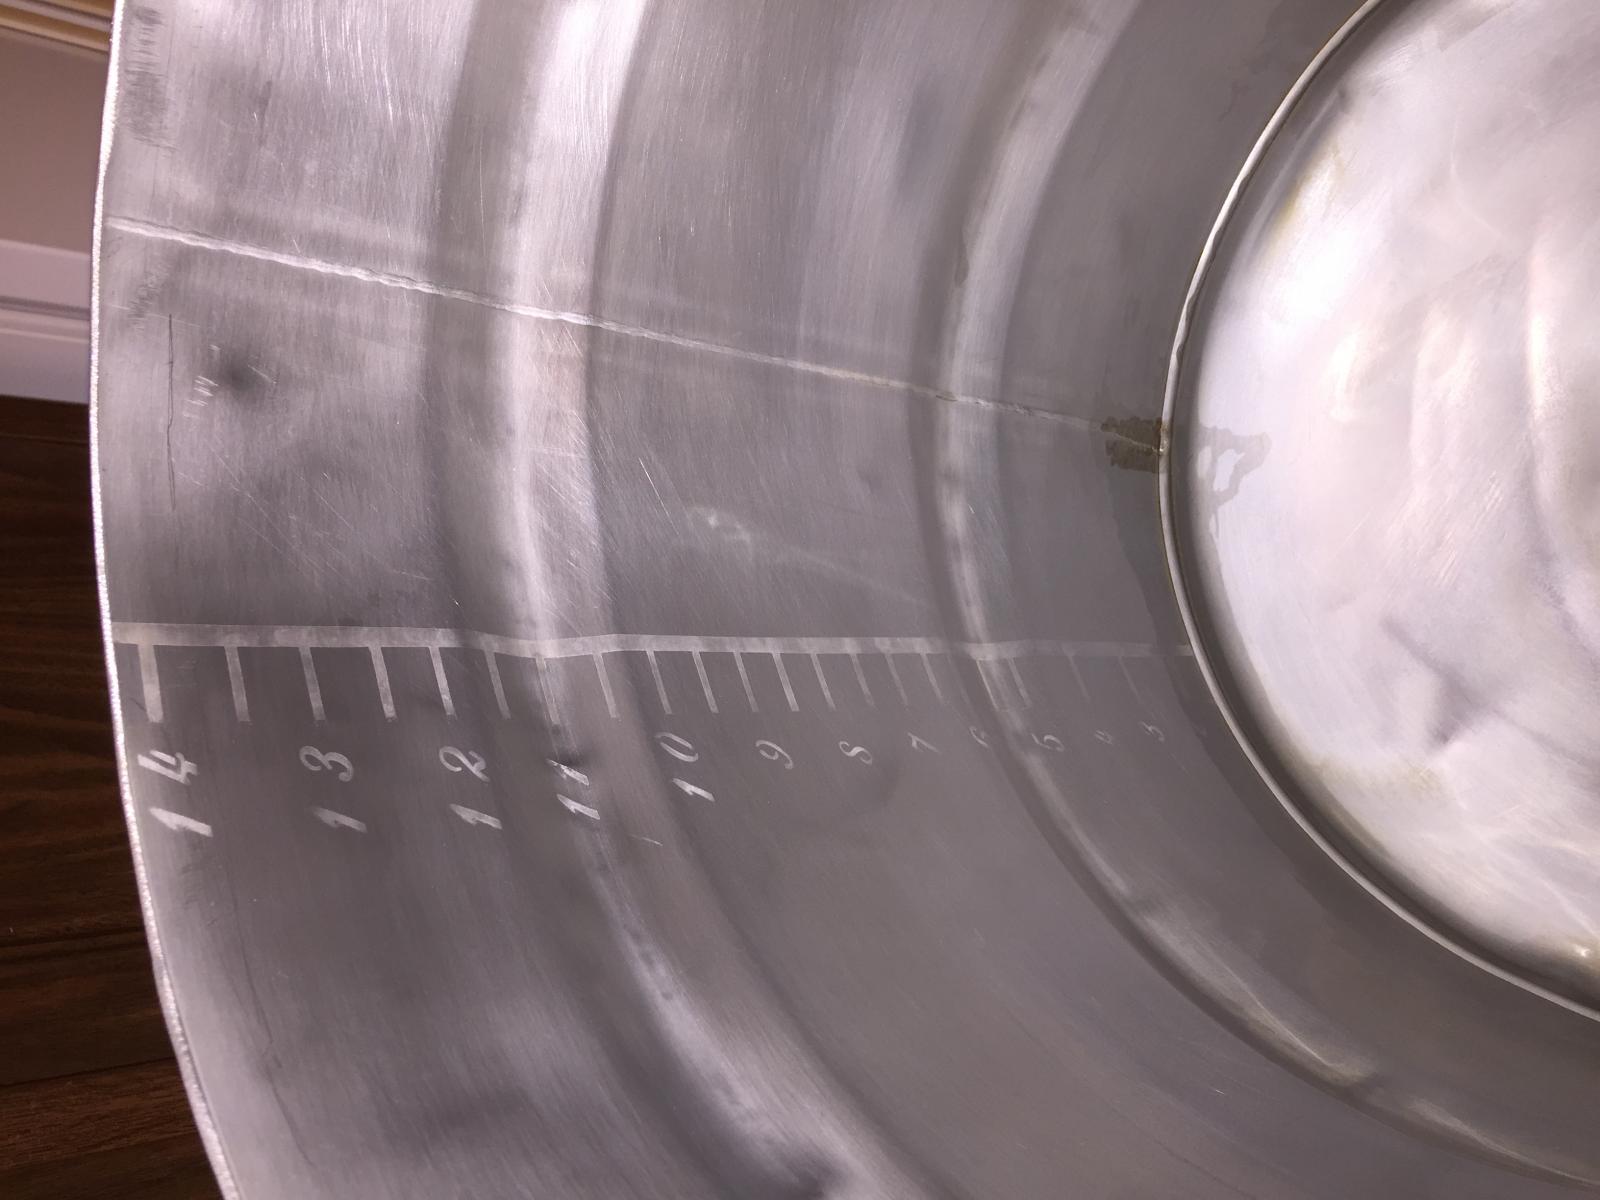
Finally got around to doing this to my new brew kettle and holy crap that took longer than I thought it would. 2.5 hours of layout, an hour of etching and I'm pleased enough with the outcome. It if close enough for me to know when to cut of the sparge.

IMG_20150630_163821432.jpg


IMG_20150701_132944521.jpg
 
How are you all marking your measuring? Basically are you using something like a China marker to mark your waterline as you add each addition ot are you just adding to a certain point and the guesstimating by conmparative measurement?
 
When I did my 10 gallon kettle, I just marked a gallon at a time, all the way to the top. I think with the 15 gallon kettles (I have two of them), I'll probably do about 4-5 gallons, note the distance between them, then make some sort of template to finish it and do the 2nd kettle to reduce the amount of water and the time involved marking the volumes.
 
Yes but with what? A china marker is the only thing I can think of aside from using something to physically scratch the pot at the water line. I know most tapes wont work.

And are you going with where the water levels off or the top of the minisculus?
 
Yes but with what? A china marker is the only thing I can think of aside from using something to physically scratch the pot at the water line. I know most tapes wont work.

And are you going with where the water levels off or the top of the minisculus?

If I remember correctly, I went with electrical tape (vertical stripes) and marked off the levels with a silver Sharpie. I marked where the water levels off, not the miniculus.
 
How are you all marking your measuring? Basically are you using something like a China marker to mark your waterline as you add each addition ot are you just adding to a certain point and the guesstimating by conmparative measurement?

I cut some corners with my markings. My 15 gal pot walls look perpendicular so I made a mark 2/3s the way up from the bottom as a plan B. I took the pot into work and started adding 1 gallon at a time (by weight) but there may have been a oil on the pot walls so the china marker didnt work. I went ahead and weighed 10 gallons of water in it and that matched up perfectly with my 2/3s mark. The masking tape has marks that are 1/30 the inner height of the pot.

I know my method is not as accurate as other ones but it took a lot less time and is close enough for me
 
Yes but with what? A china marker is the only thing I can think of aside from using something to physically scratch the pot at the water line. I know most tapes wont work.

I placed masking tape vertically from bottom to top of the BK. Then just used a regular black ink pen to mark each gallon as I filled it with water. Just make sure the surface the BK is sitting on is level. Don't ASSUME the kitchen counter is level... ;)

And are you going with where the water levels off or the top of the minisculus?

You're not going to be able to get that accurate with your marks. Just be consistent in how you mark all the way up.

:mug:
 
I use a wooden dipstick to measure brewing volumes. I marked my pot with tape while it was dry going by the notches on my dipstick. I still prefer the dipstick for all the reasons mentioned previously in this thread, but this method worked well to get the marks etched on.
 
This is a great idea, but I was being inpatient. I then hooked two (2) 9V batteries in series (18V total), and it worked like a charm. Who knew it was that easy to etch stainless steel.

Top hook the batteries in series, all you have to do is take a small jumper wire and hook the positive of one battery to the negative of the other. Then use the remaining + and - poles as described above.
 
Top hook the batteries in series, all you have to do is take a small jumper wire and hook the positive of one battery to the negative of the other. Then use the remaining + and - poles as described above.

Or just snap the positive on one battery directly to the negative on the other and use the remaining pos/neg as described.
 
I went a little different way. I purchased some stainless steel strap and polished it before etching. I marked it so that I could tell the volume with or without my chiller coils in the kettle. The left side of each level mark is without the chiller and the top of the mark at the right is with the chiller in the kettle.

IMG_1405.JPG


IMG_1407.JPG
 
I'm in shock - it worked!

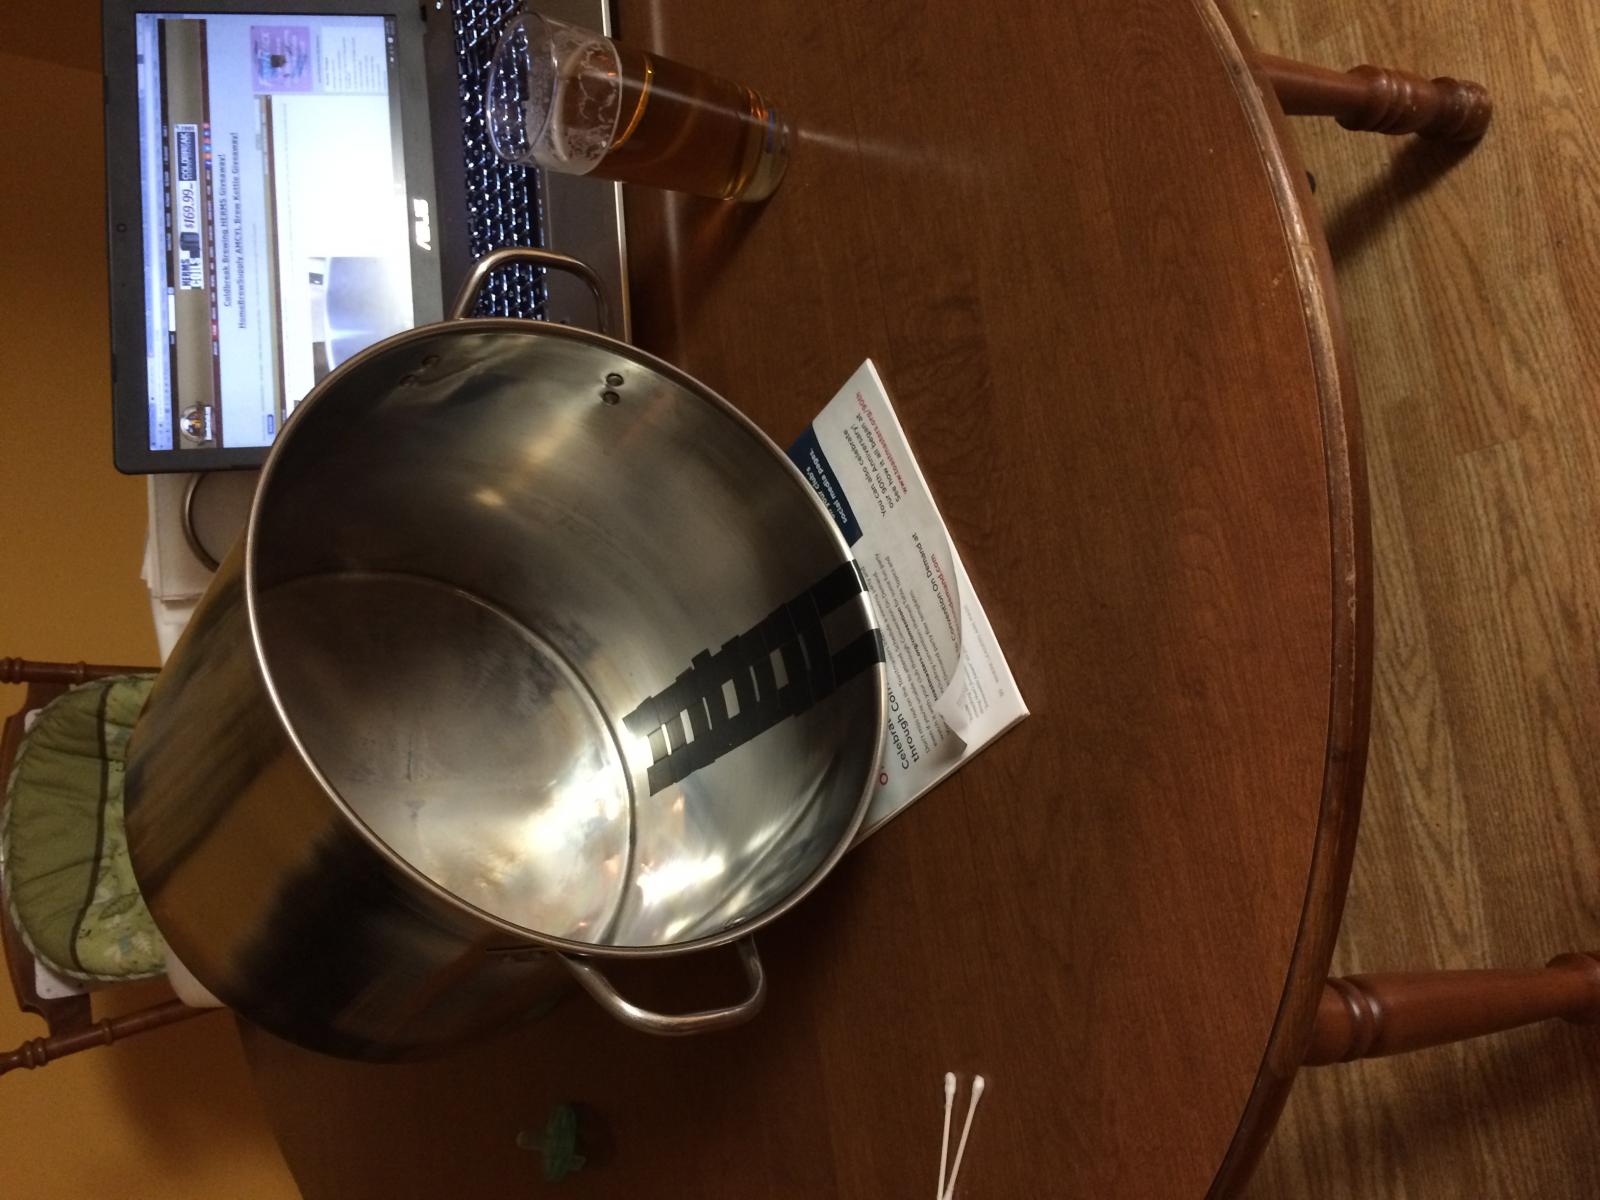
Here are a few photos of the set-up and execution. First two are the tape-up (hey there Leffe!) and the last are the 1-4 gallon measurements of my 5 gallon pot.

image1.jpg


image2.jpg


image3.jpg
 
I'm kinda OCD when it comes to things... This will be awesome!!!! Instead of adding gallons at a time and marking I calculated the height a gallon of liquid should be in the kettle.

1 gallon=231 cubic inches
I then used the equation for finding the volume of a cylinder

Volume/(pie X the radius of the kettle [in inches] squared)

So it looked like this
(231 X #of gallons)/(pi X kettle radius squared)

I wanted to make sure I had the measurements spot on before I marked my two kettles.


I love this approach! Will use on my next kettle:) thanks for sharing!
 
I love this approach! Will use on my next kettle:) thanks for sharing!


Keep in mind that this only works if the sides of your kettle are straight, ie, not a keggle. There will be substantial error for vessels with curved sides.
 
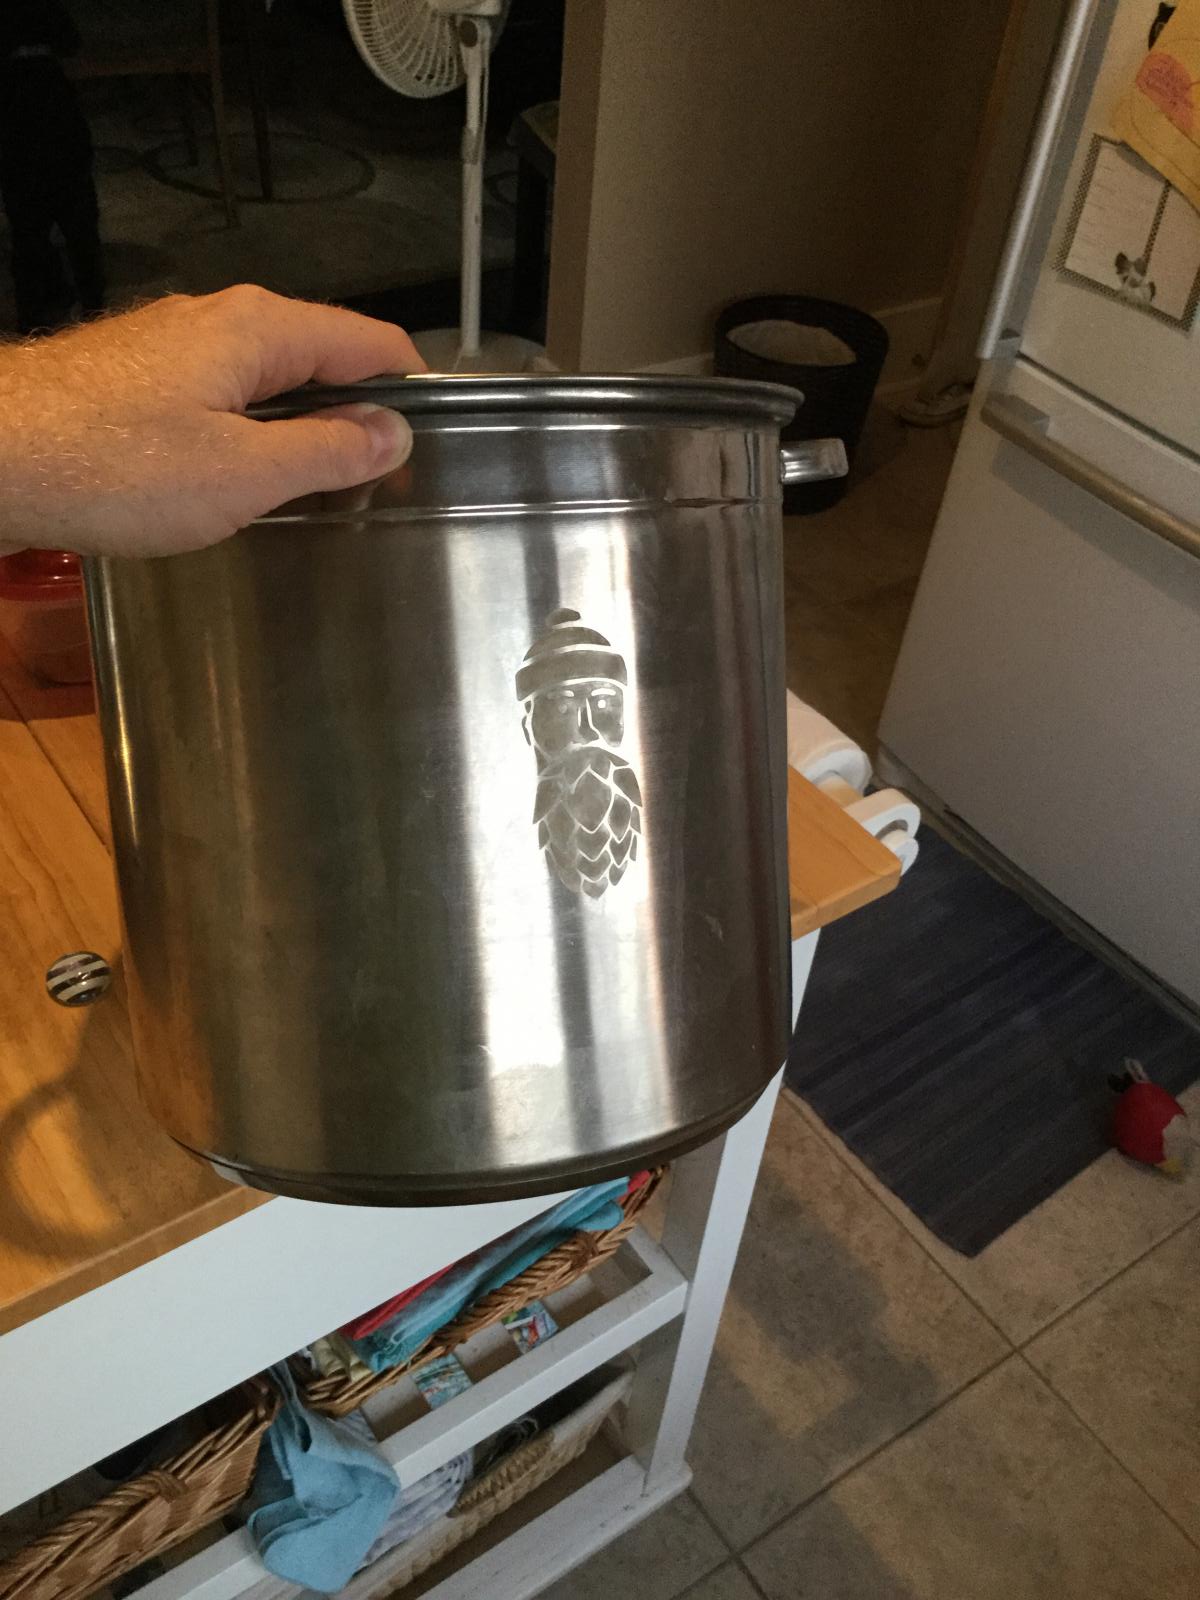
Just wanted to peak into this thread and say that I ran a test on my retired 4-gallon pot last night. The results were great and I'm looking forward to putting my logo on my main brew kettle (cut vinyl should be in the mail today). When I do that, I will also be adding volume markers.

Thanks for an awesome thread!

-Ben

IMG_1994.jpg
 
Also, the bottom probably isn't perfectly flat all across - rounded at the sides. I checked the level with a known volume and then used the volume formula from there.
 
Just wanted to peak into this thread and say that I ran a test on my retired 4-gallon pot last night. The results were great and I'm looking forward to putting my logo on my main brew kettle (cut vinyl should be in the mail today). When I do that, I will also be adding volume markers.

Thanks for an awesome thread!

-Ben

That looks freaking cool! Personally I've got sight glasses on everything and I don't think I would ever change that if I got new ones, but I am very intrigued about putting stuff on the outside and maybe on kegs. Where did you get your vinyl done?
 
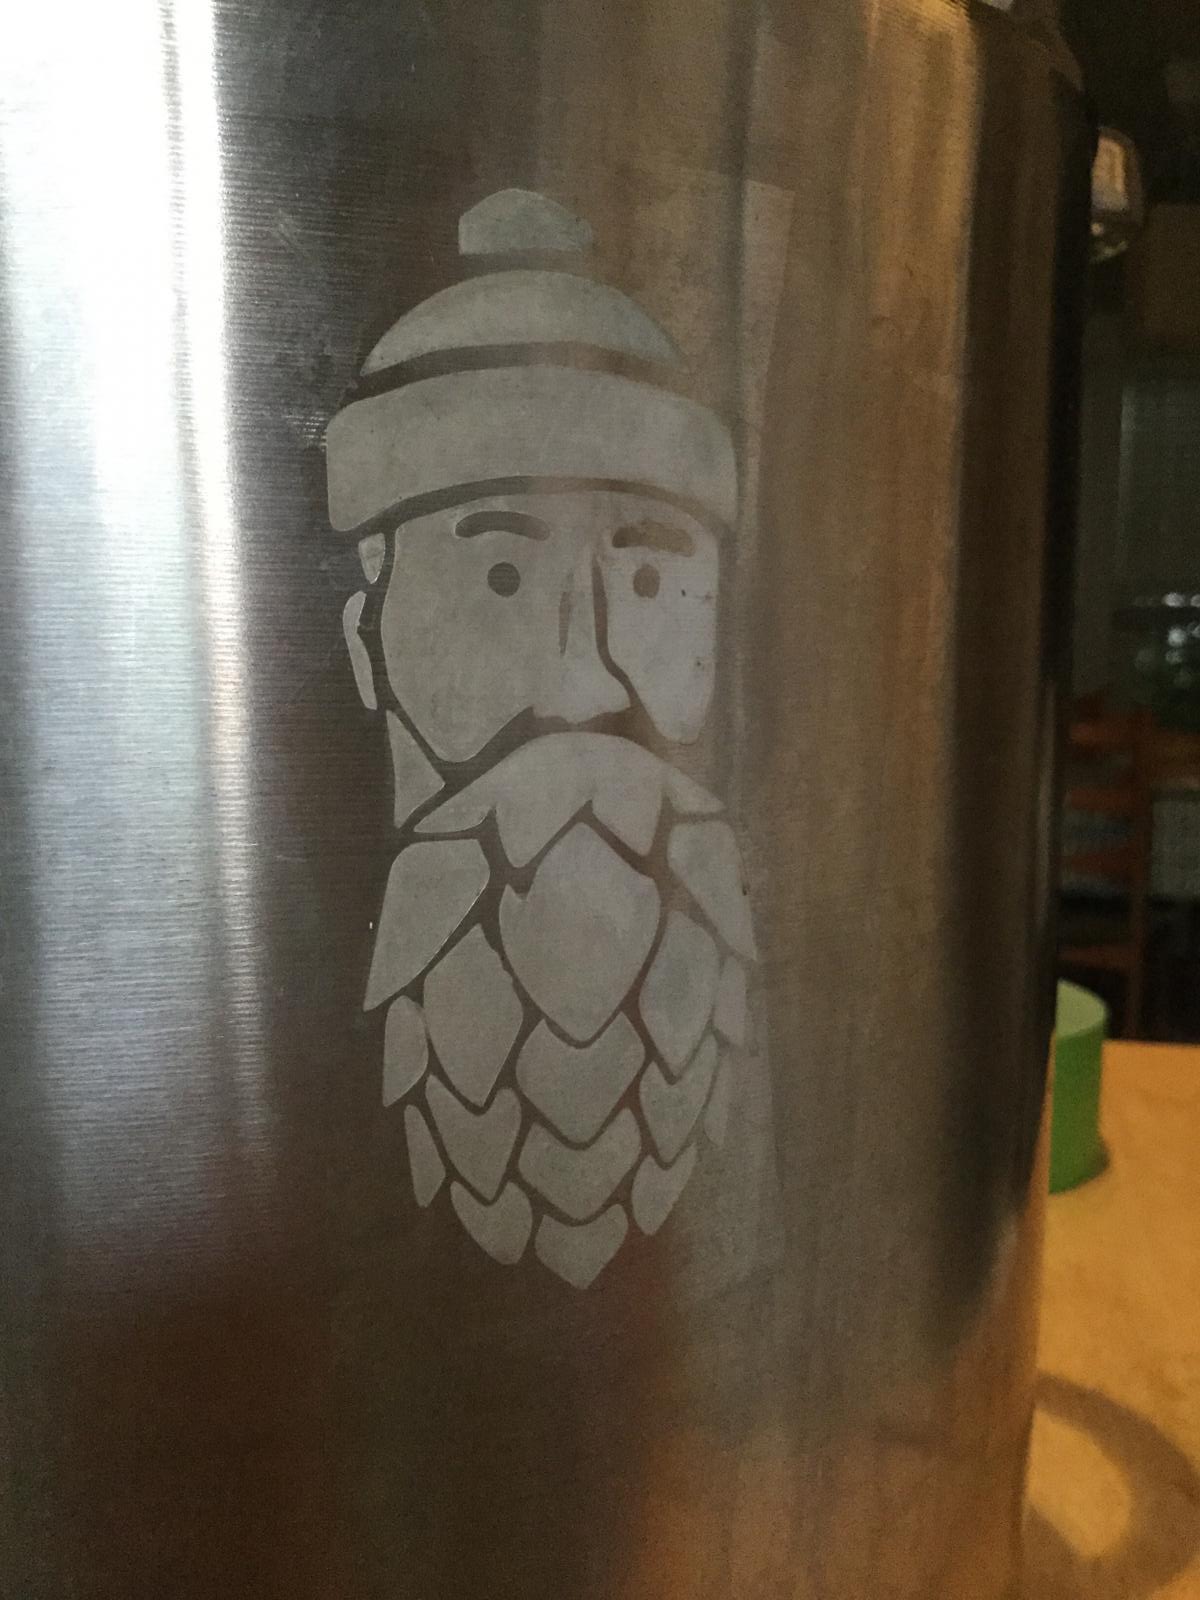
Here's mine, but with 2 questions:

How do you take pictures without so much glare?
How do you get the etching to be so uniformly white?

I've used the vinegar/salt solution and while I initially used a 9V battery, I switched over to a DC 12V/1A adapter.

IMG_0322.jpg
 
Here's mine, but with 2 questions:

How do you take pictures without so much glare?
How do you get the etching to be so uniformly white?

I've used the vinegar/salt solution and while I initially used a 9V battery, I switched over to a DC 12V/1A adapter.

Most of it is getting the lighting right. The pot has a lightly brushed finish, but you can get a pretty good picture with something dark in the foreground. If I hold it to the light the finish looks much worse.

As far as consistency, I took that pic to look as consistent as possible. (Vain) In truth there are spots that are a little less matte. I think they were areas that I held the q-tip stationary instead of keeping it slowly moving. I used a 9v battery and some old wire/alligator clips I had around. I had to step up the salt a bit to get it to sizzle nicely after a second or two of contact. Plus I clipped the wire on pretty close to the tip of the q-tip.

image.jpg
 

Latest posts

Back
Top