How the heck do I disassemble the Gigawort ball valve?

Homebrew Talk - Beer, Wine, Mead, & Cider Brewing Discussion Forum

Help Support Homebrew Talk - Beer, Wine, Mead, & Cider Brewing Discussion Forum:

This site may earn a commission from merchant affiliate links, including eBay, Amazon, and others.

IrondaleBrewing

Supporting Member
HBT Supporter
Joined
Jun 13, 2023
Messages
71
Reaction score
118
Location
Irondale, WA
I was going to take my Gigawort for its maiden voyage soon but after doing a leak test it's leaking where the main body/nipple screws into the ball valve (hope I'm using the correct terminology; see pic -- arrow pointing to where it's leaking).
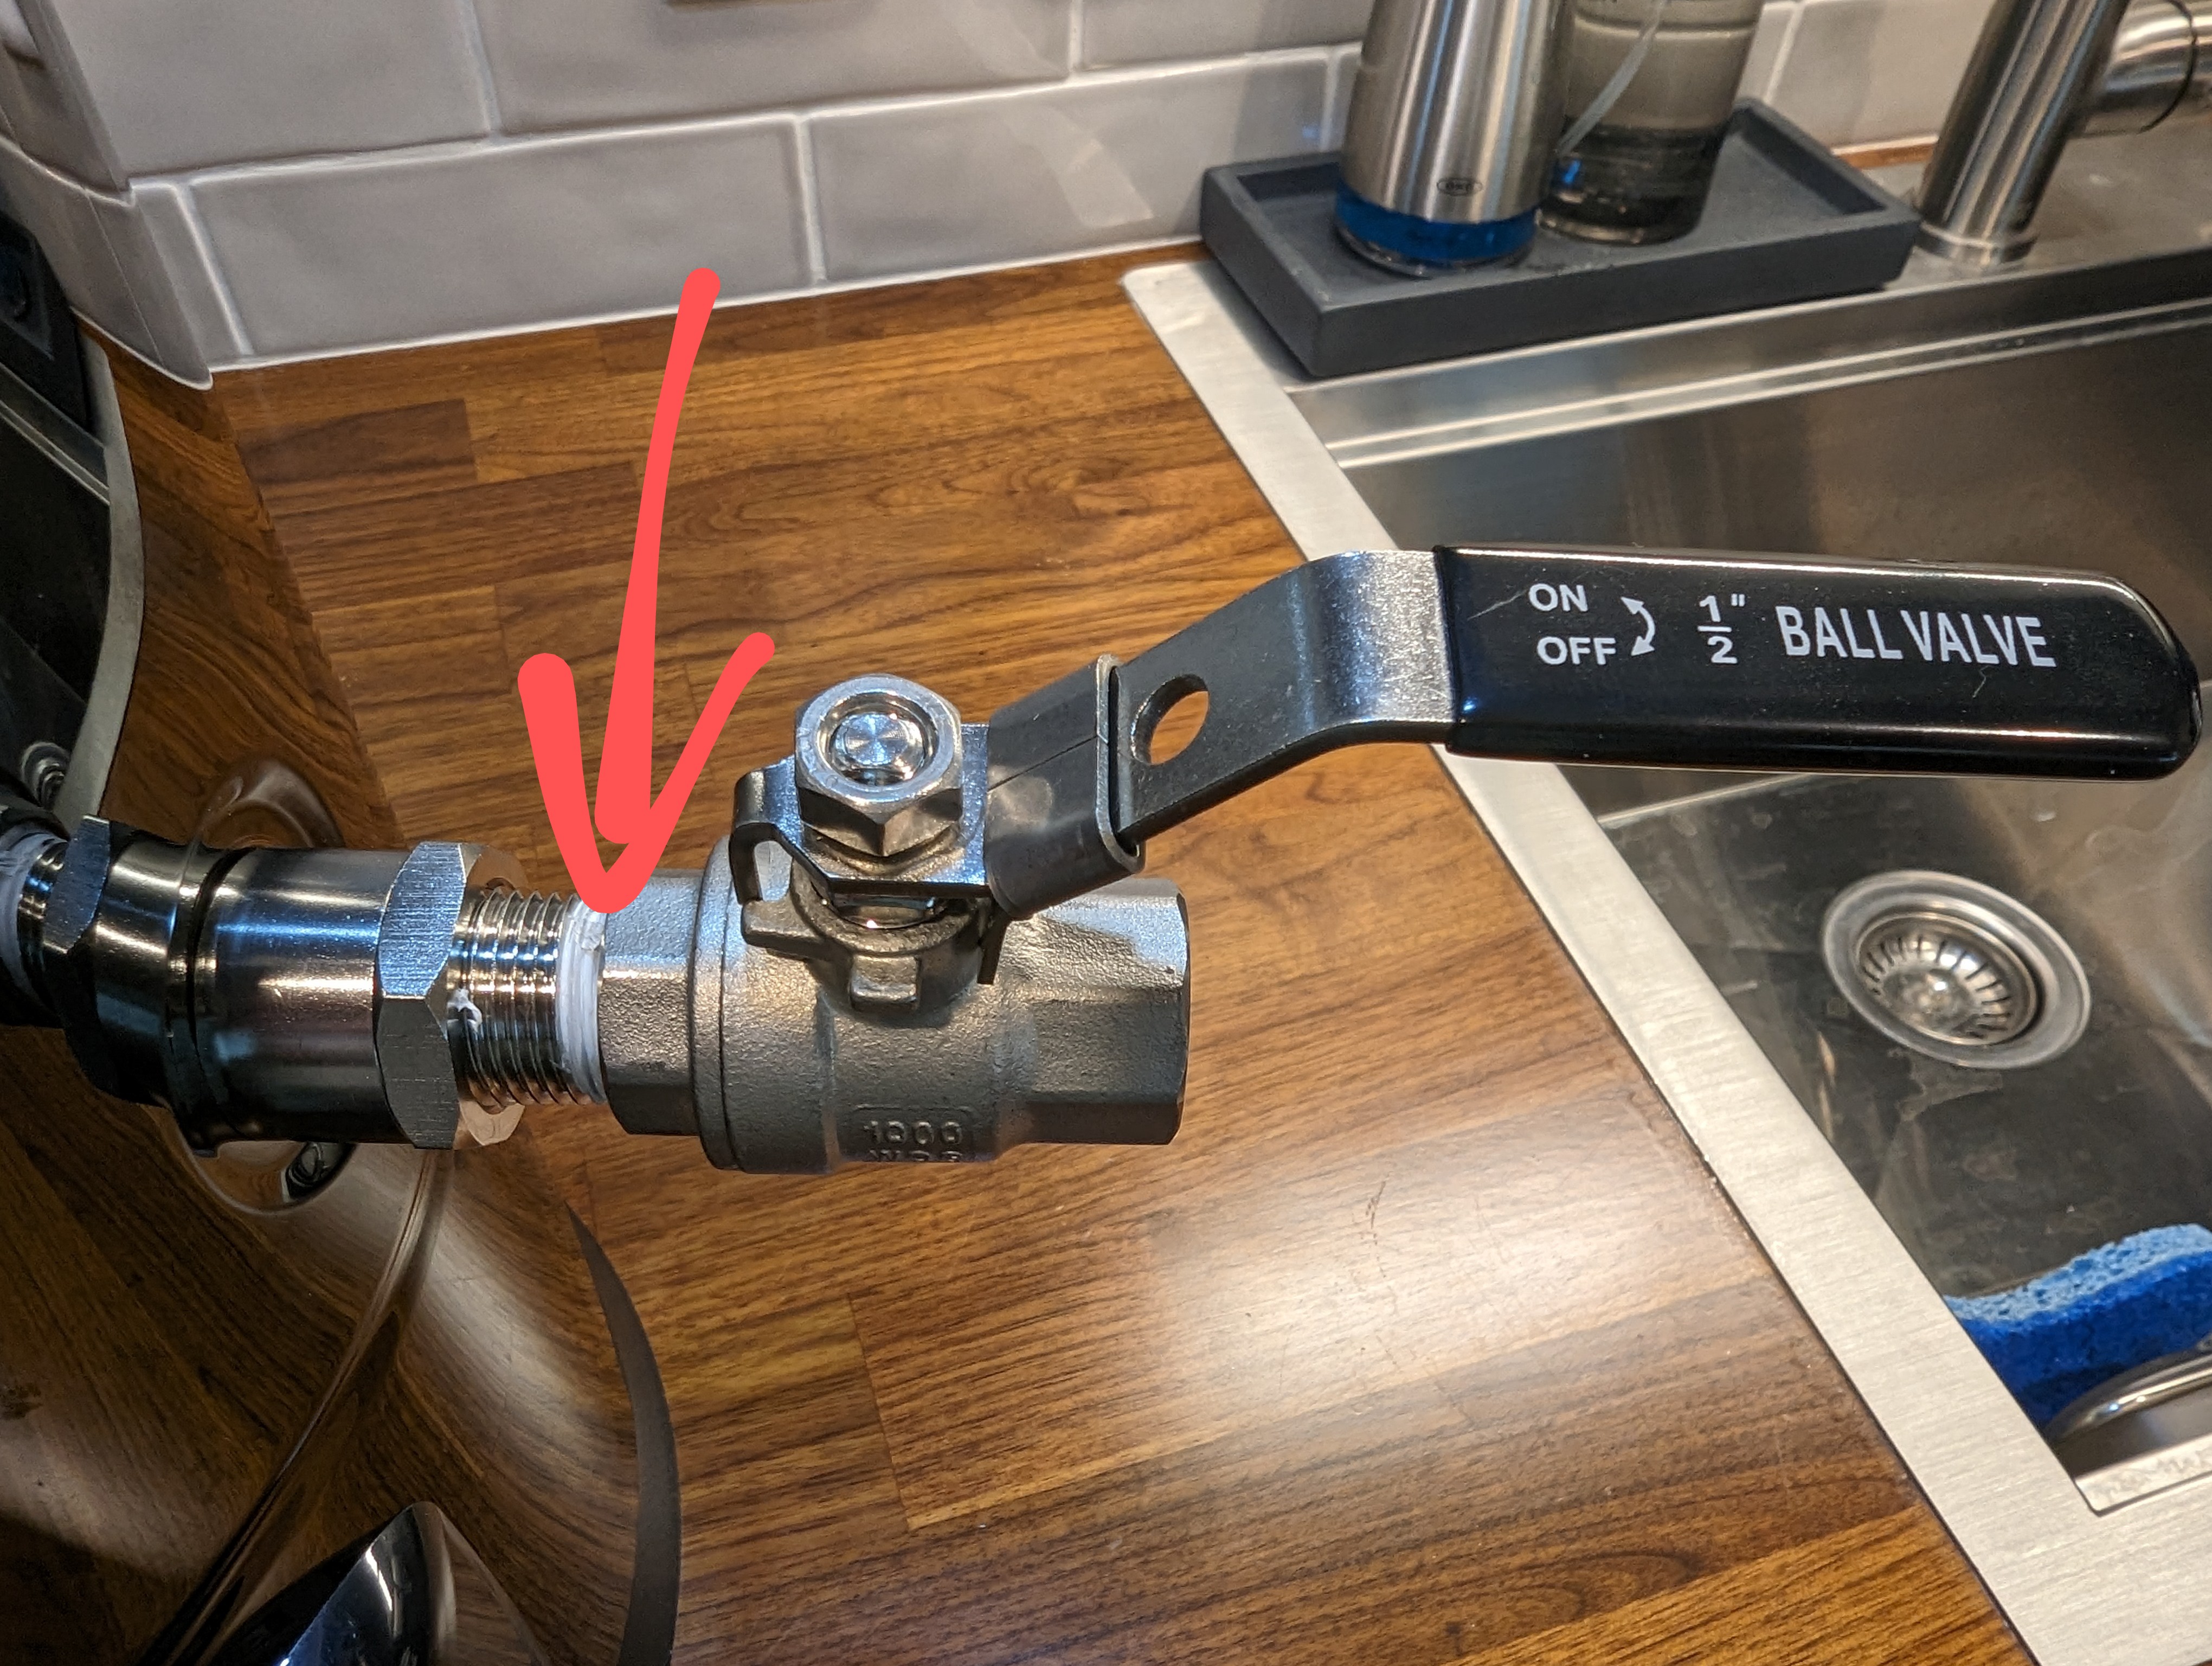
PXL_20230911_233752486~2.jpg

The problem is I can't screw the ball valve in tighter into the main body but I also can't take the thing apart and take another run at assembling the whole thing better from scratch.

Before explaining the problem here's a photo of the parts from the instructions so people know what the heck parts I'm talking about.

PXL_20230911_234836389.MP.jpg


To explain this as best I can, the issue is the the main body (the part with the visible threads that's sticking out of the Gigawort body) spins in the same direction as the ball valve and without resistance from the main body the ball valve can't be tightened or loosened.

I got a pipe thread wrench with plastic teeth since I don't want to damage the threads by just clamping the hell out of it with a pair or pliers or something, but unfortunately it doesn't hold tightly enough and the whole thing still spins.

Anyone have any tips or tricks to either tighten or loosen this thing? I don't mind buying the right tools to handle this since if it happened once it'll happen again, or maybe I'm just totally missing something here.

Thanks!
 
If you need to hold the nipple in place or tighten it, wrap it up in several layers of electrical tape, then carefully grab it with a pair of Channellocks and tighten it. Tighten the nipple until it's tight, then tighten the ball valve. If you need to tighten the valve against the nipple, you can hold the nipple with Channellocks too. I've done this a time or two.

The trick us make sure you protect the threads with something so they don't gall. You do not want to apply clamping force to them regularly but you can usually get away with it once in a while.

Otherwise the ball valve itself looks like you could tighten/loosen its halves with a Crescent wrench on either end?
 
Thanks! I'll give the electrical tape a a shot.

Unless I'm misunderstanding what you're saying the ball valve doesn't have two halves, it's one piece so I need to either tighten it into the main body/nipple or alternatively loosen it so I can take another run at it. And if I use a wrench at the far left of the ball valve, I also need to hold the main body by the threads so the whole assembly doesn't just spin as one unit.

I'll see where I can get with some electrical tape. Appreciate the suggestion!
 
The best thing is probably to hold the "main body" piece if possible, inside the kettle. I don't guess it's got any means built in to do that?

You could also replace the tape with liquid "pipe dope". It'll actually seal the nooks and crannies.
 
The best thing is probably to hold the "main body" piece if possible, inside the kettle. I don't guess it's got any means built in to do that?

You could also replace the tape with liquid "pipe dope". It'll actually seal the nooks and crannies.
Thanks! Inside the kettle there's just the flat end of the main body but that's a good thought, I might be able to get in there enough to grab the inside of the main body and the lip of the flat end to hold it while I attempt to tighten or loosen the ball valve. I'll give that a shot later and see how it goes. I appreciate the suggestion!
 
it looks like to me that the parts you put together on the main body aren't leaking - it's just the 1/2" npt valve leaking where it meets the nipple. I had this problem as well, and I used a combination of the teflon tape, and pipe dope. Be sure to clean off all of the old tape first before re-doing, and good luck

https://www.familyhandyman.com/project/prevent-leaks-with-pipe-dope/
 
Unless I'm misunderstanding what you're saying the ball valve doesn't have two halves, it's one piece
The ball valve is a 2-piece construction. It does come apart to thoroughly clean the inside, especially the 2 plastic chamber halves within which the ball turns.
The very first time it looks almost impossible to split the ball valve. First, remove the handle, then use a bench vise and a well fitting long wrench on the other side. Then give the wrench a good nudge, or even a solid tap with a hammer to break it loose.

After that first time it becomes much easier.
Thanks! Wasn't aware that it came apart in that way.
 
Success! After much messing around I held the nut up against the collar with a wrench and was able to crank the valve the other way and get it off. Now I just hope I didn't overdo it on the nut side and cause any leaks there. :) Thanks to everyone for all the great suggestions!
PXL_20230912_222332641.jpg
 
Back
Top