• Please visit and share your knowledge at our sister communities:
  • If you have not, please join our official Homebrewing Facebook Group!

    Homebrewing Facebook Group

Hoppo's Rustic Fermentation Chambers (Ale & Lager)

Homebrew Talk

Help Support Homebrew Talk:

This site may earn a commission from merchant affiliate links, including eBay, Amazon, and others.
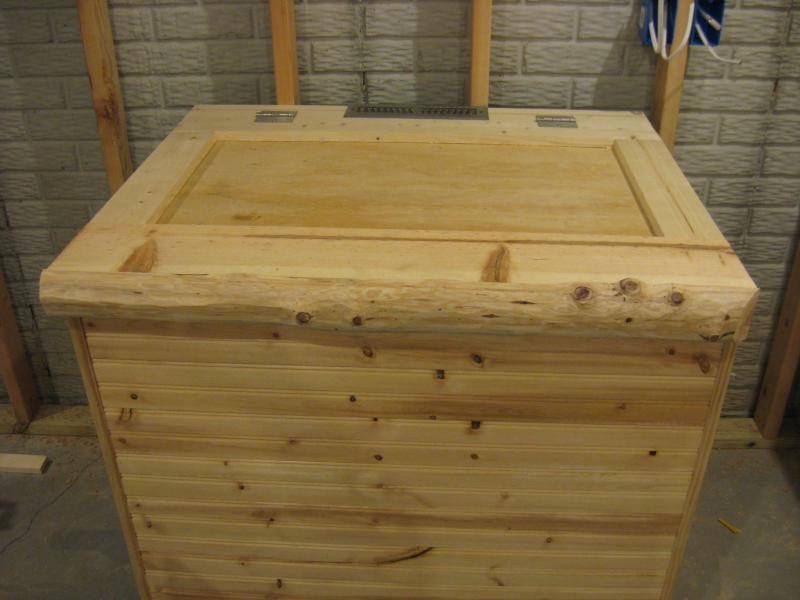
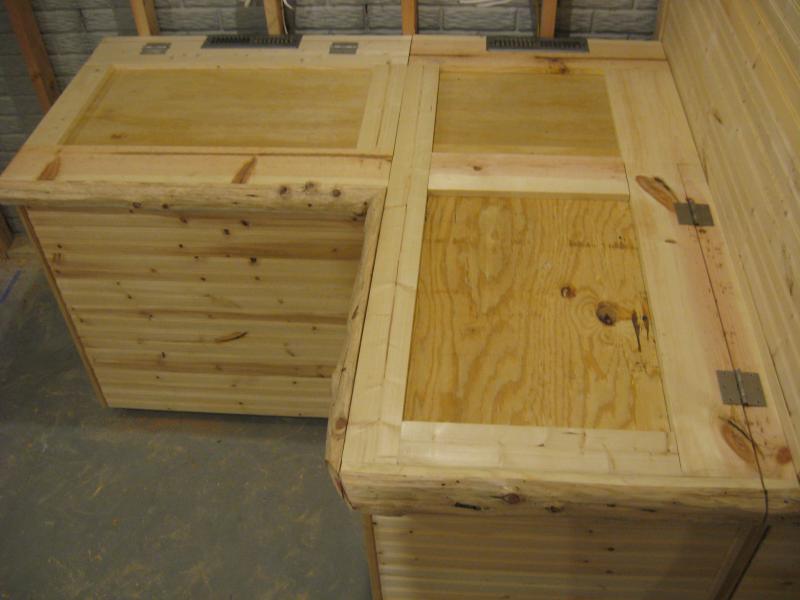
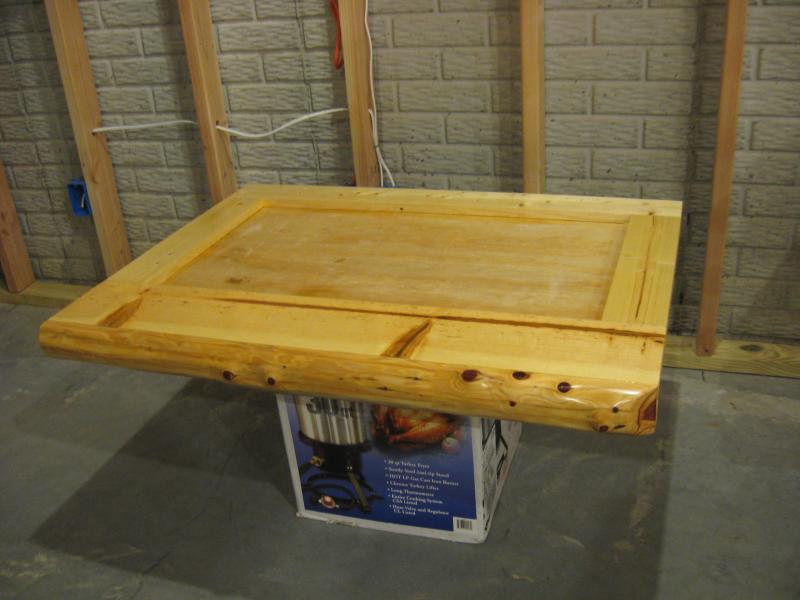
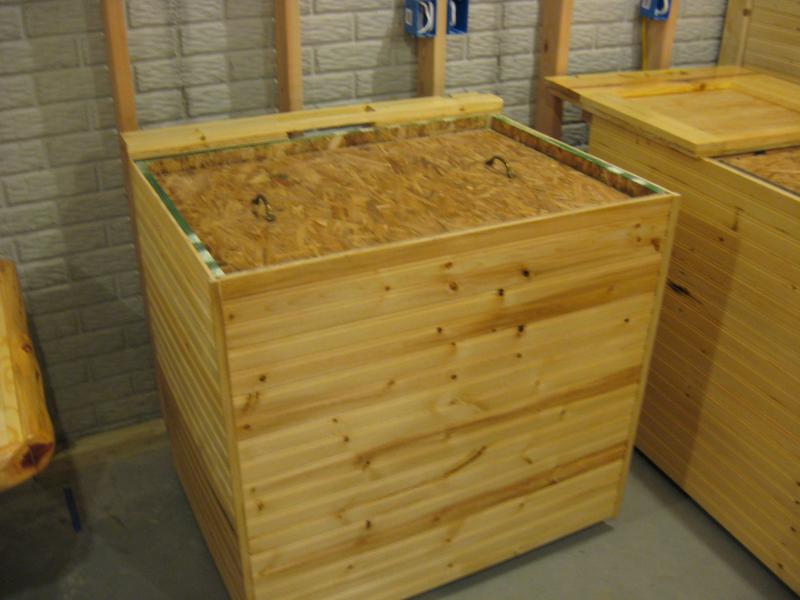
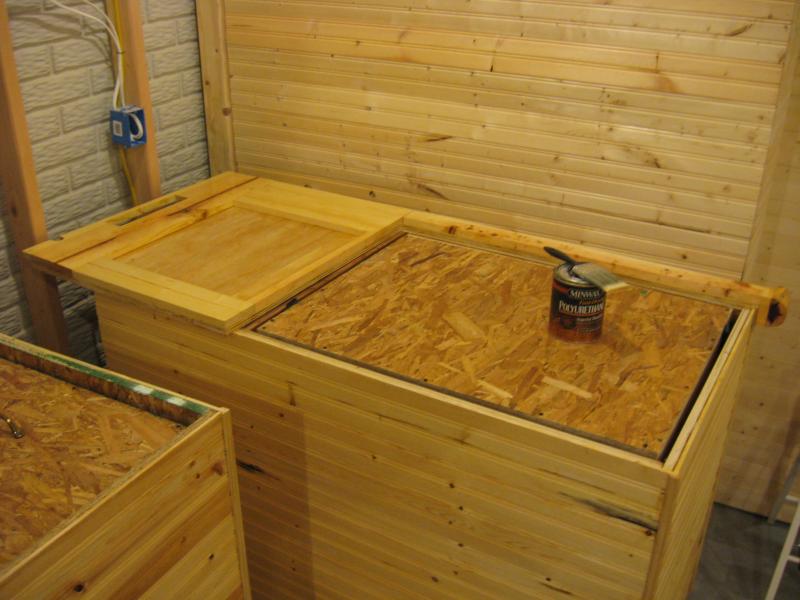
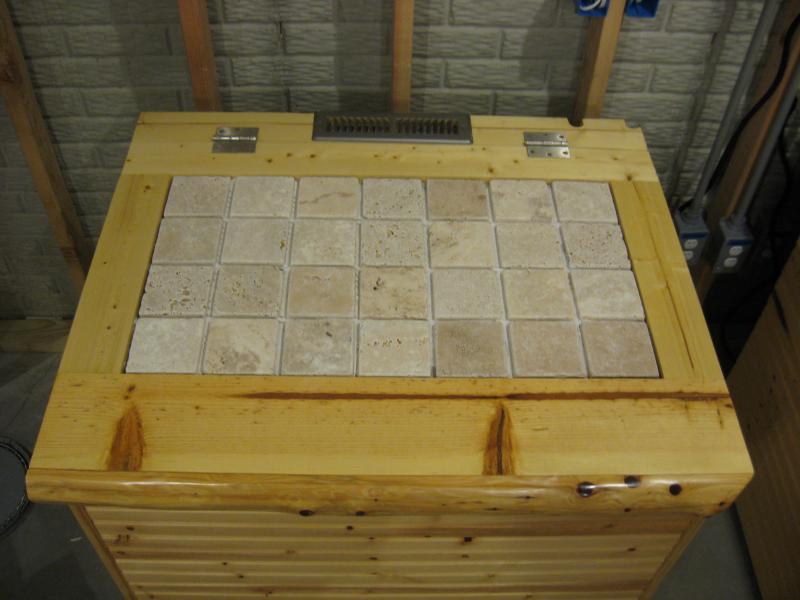
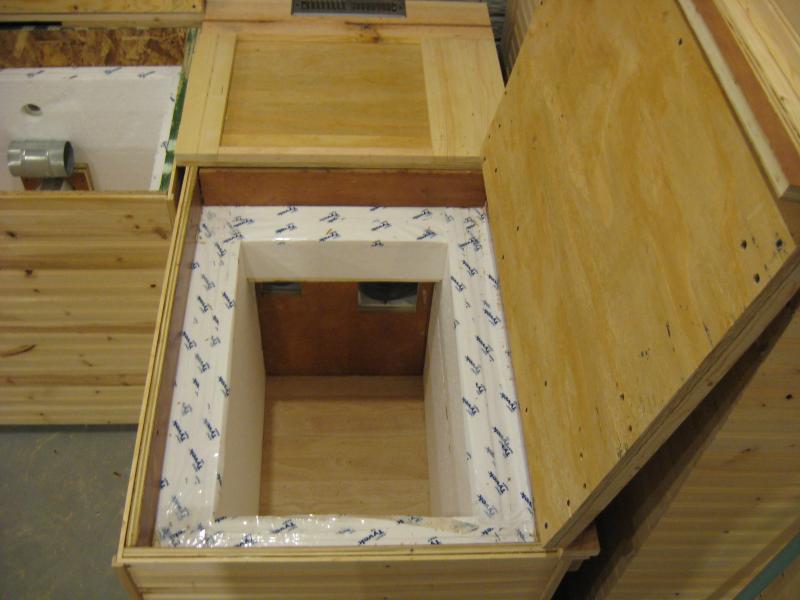
A couple of more pics. of the decorative lids open and the insulated tops removed. Still trying to figure out where I am going to place my temperature contoller with this configuration. I also just finshed all of the rough electrical in my brewery last week and will start plugging away on the plumbing, so I can start hanging drywall and cementboard.
IMG_2594.jpg


IMG_2596.jpg


IMG_2597.jpg
 
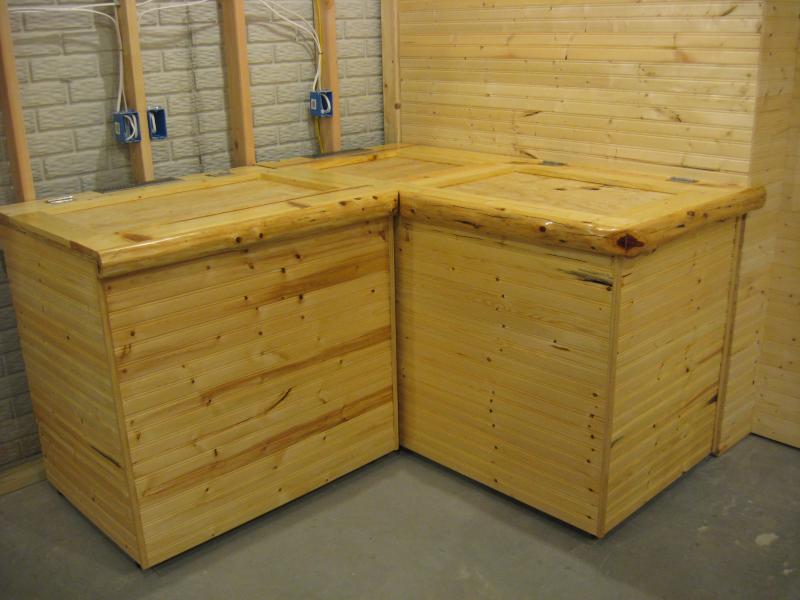
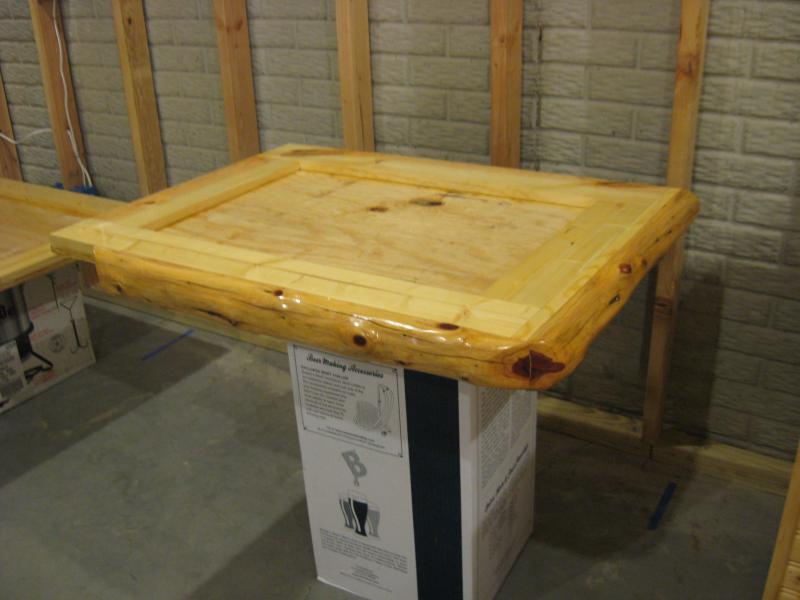
.......and finally, a few pics. ofthe knifed logs installed across the front faces of both chambers and one side of the lager chamber. I was dealing with logs of different diamters and was having a b*tch of a time trying to get an outside mitered corner to fit right. The inside corner isn't perfect, but it will do. I got so frustrated with it that I decided to not do a mitered corner at all and just a 30 degree outside bevel on both logs to create an angled corner and expose some of the heart wood. Looks a little funny, but I can't devote anymore time d*cking around with it. The logs are still in a rough knifed state, so now I have a ton of sand to do and also need to knife down the top surface of the logs flush to the trim boards. After that, I'll do the poly finish and then mortar down the cement board in the 3 open sections on the tops and install the tumbled travertine.

IMG_2599.jpg


IMG_2601.jpg


IMG_2603.jpg


IMG_2606.jpg
 
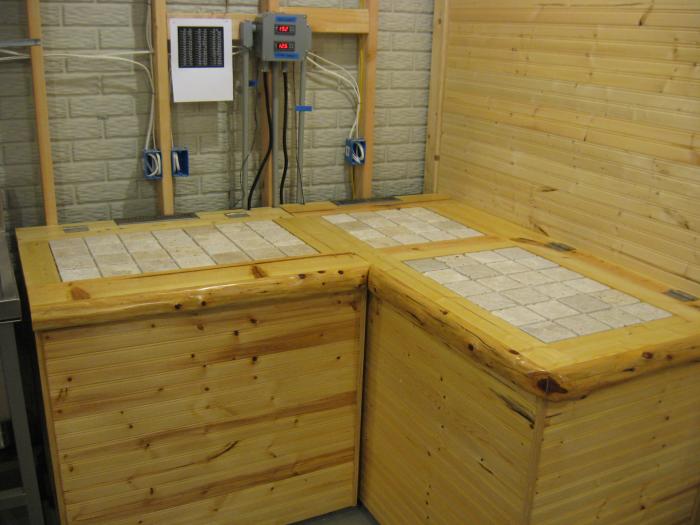
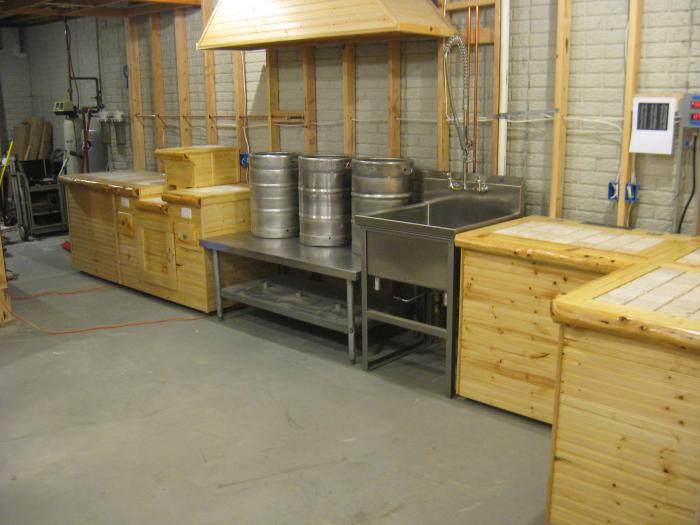
I appreciate it! :mug: I'm trying to maximize countertop space in my brewery, so I decided to go with this corner unit design with stone tops. Next to this corner unit to the left will be a commerial ss sink, then a 6 ft. heavy duty ss table that my 3 vessel e-HERMS system will be on, then to the left of that will be a grain milling and grain storage bin. The grain mill and grain storage boxes will be trimmed out exactly like the fermentaion chambers with stone tops to offer even more counter top space. I have another 5 ft. ss table that will serve as an island in the brewery. If you are interested, here is a link to my brewery build. No fancy google sketchup diagrams or anything, I tend to just build things on the fly. The beauty of going with a rustic decor is that any imperfections just give it more "character". :mug:
https://www.homebrewtalk.com/f170/hoppos-e-brewery-build-283510/
 
Alright, I finished knifing the logs down flush to the knotty pine top trim pieces last night and spent about 3 hours sanding the hell out of the woodwork. I then removed the decorative tops and put the first coat of polyurethane on last night. When I get out of work today, I plan on doing a light sanding and putting on the second coat.....then a third coat on Sunday. After that, on to the tile work! Almost there.....pics this weekend. :mug:
 
Final coats of polyurethane complete. Once it all dries, I will reassemble the tops, vents, hinges, etc. Tomorrow night I plan on installing the cement board in the recessed areas on the tops and then the tumbled travertine when I return from the holiday weekend on Monday. Tuesday will be grout and Thursday will be stone sealing.......then done! I'm going to harvest my 1st year hops crop and whip up a "home grown" IPA hop bomb. That one will occupy the the ale chamber. I will then piggy back another batch on the same day and try my hand at my first lager, which obviously will occupy the lager chamber. Hopefully my chambers will function as expected.....If not, I'll have plenty of countertop space and extra storage in my brewing room. :D

IMG_2611.jpg


IMG_2612.jpg


IMG_2613.jpg


IMG_2614.jpg
 
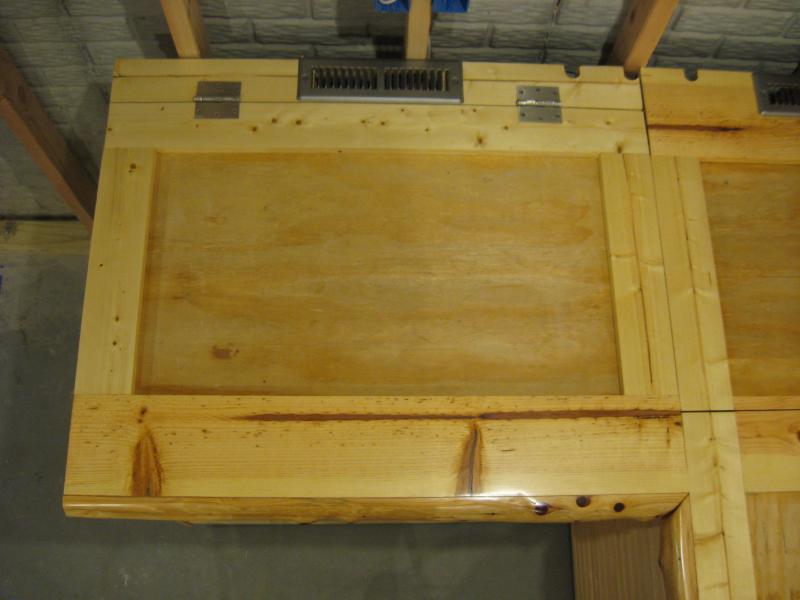
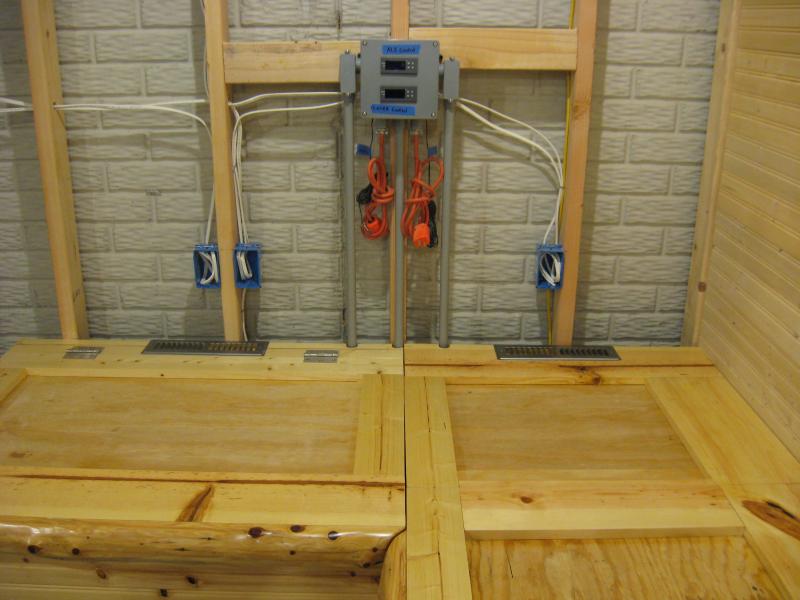
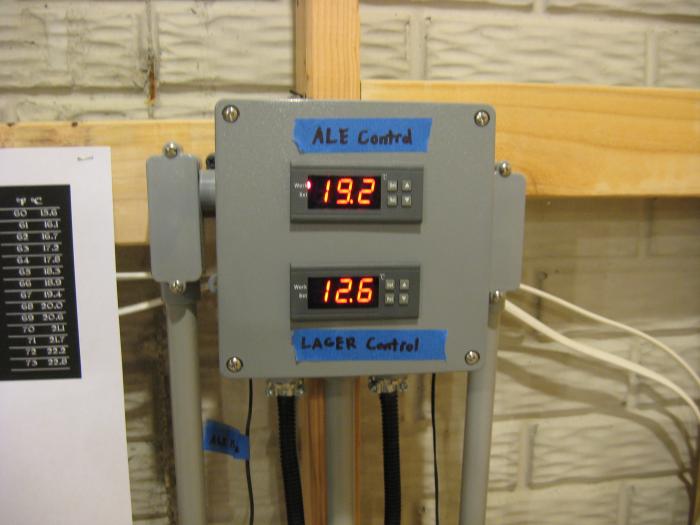
Just got back from my kids' soccer practice and the last coat of poly was completely dry, so I re-fastened the hinges and decorative tops and put the vents back in. I also nailed up some 2"x4" backing for behind the drywall where I'm hanging the temperature control module. Here are a few pics. reassembled with the temp. controller hanging in the position it will be in once dry wall is complete. Cement board and tumbled travertine to come.

IMG_2615.jpg


IMG_2619.jpg


IMG_2621.jpg


IMG_2625.jpg
 
Coming down the final stretch. Here's a couple pics of the cement board and tumbled travertine mortared down. I'll grout this weekend and do several coats of stone sealer once the grout is dry. I guess I getter get brewing to try these things out.

IMG_2635.jpg


IMG_2637.jpg


IMG_2639.jpg


IMG_2641.jpg
 
Still need to grout the travertine on the tops of the chambers, but I moved onto my motorized grain milling station and grain storage bin, which will compliment my chamber builds with the same materials and balance out the other side of my brewery. I am 80% complete with the milling cabinet and plan on starting the grain storage bin asap. I figured that I might a well knock these projects out first and then grout all of the tops at the same time. I do plan on brewing and testing out the fermentation chambers as soon as I get back from the Caribbean in 2 weeks. I plan on brewing a homegrown hops IPA and doing my first lager, so I should be able to test out both chambers and the temp. control system at the same time. Wish me luck! :mug:
 
I have been bogged down with so many damn brewing projects that I haven't brewed any beer in over 2 months. I am waiting to grout the stone work on the chambers until I do my stone back splash in my brewery. I just finishe my motorized grain mill, which has the same travertine stone, so once all of the projects are complete I will grout them all at the same time. I am however, brewing 3 batches this weekend......2 ales (home grown hop IPA/american amber ale) and my very first lager, so I will get to try out the chambers and temperature control module. Hopefully all goes well. I'll keep you posted! :mug:
 
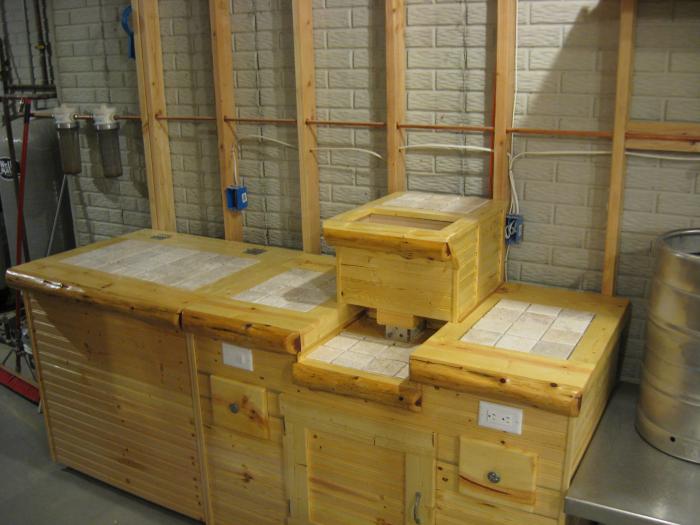
Fermentation chambers are up and running! I brewed a German Pilsner last night (Late!) and used Bohemian Lager Yeast, which is in the Lager Chamber. Then this morning I brewed two ales, a Home Grown Hop IPA and an American Amber Ale, both of which are in the Ale Chamber. The temp. controller are working flawlessly thus far and I was really shocked at how quickly my lager chamber got down to temp. Not sure how low I can take it, but it's having no problem hovering around 12 degrees C. I also attached an updated pic of the brewery and a pic of my motorized grain mill.

IMG_2940.jpg


IMG_2941.jpg


IMG_2942.jpg


IMG_2943.jpg
 
Just a quick update on the fermentation chambers. I couldn't be happier with the performance of these things.

Ale Chamber: The ambient temperature in the room is 64 degrees Fahrenheit (18 ish Celcius). I have never been concerned with my heat source (bulb in a can with an inductor fan) being able to keep it warm enough, but my cooling source is very simplistic and I wasn't sure if it would keep it cool enough during the initial primary fermentation. I'm basically pulling cool air off of the floor through the bottom of the chamber with a computer fan and exhausting higher out of the back with another computer fan. It is working much better than expected at keeping the temp. down. With the dual output temp. controller, I have been able to hold any ale temps. with really good precision.

Lager Chamber: I was concerned about the old Absocold mini fridge being able to control the cooling temps for my lagers. No problems holding the temps whatsoever. I guess the extra insulation really paid of because I was afraid that the compressor for the fridge would be cycling too frequently, but it doesn't. My first lager was fermented at 54 degrees Fahrenheit until FG, then I racked to a secondary and have been doing the step down method for lagering. I have been dropping the temp. by one degree per day until I get down into the upper 30's (4 C). I wasn't sure if the chamber would handle it, but so far so good. I'm currently at 44 degrees (7 C) and the chamber is holding the temp. well. When I get to the point that the compressor is cycling too often, I'll rack to a keg and pop it in the keezer, but for now I'm going to ride is out and see what it's capable of.

Overall, I'm very pleased with the performance thus far! :mug:
 
Every time I click your thread, I get more jealous of your brewing space... I wish I could get a set up like that in my basement! I do have a fermentation chamber that I finished last weekend, and put my first ever all-grain pale ale into last Sunday. Its working flawlessly with one of the same temp controllers.

Congrats on the beautiful brewing space!
 
Thanks man....much appreciated. :mug: I'm slowly making progress, but it's going to be a while before it's done. I plan on tackling the drywall, cement board, and tile work in the brewery next. I have a "keggle fund" that I have been filtering money into on a weekly basis to cover all of the fittings for my keg conversions, so I'm almost ready to place an order with Bobby. My biggest obstacle by far will be the control panel for the HERMS system. We are having a boiler installed to complete our hydronics radiant floor heating in the finished side of the basement, which is a large expense, so dropping $1500 on Kal's unassembled panel probably isn't going to happen for a while. I really wish I knew more about the Arduino controlled systems, but computers are not my thing. :confused:
 
An update on the chambers. The ale chamber is able to hold any temperature in the mid 60's to mid 70's very accurately, so it's great for ales and wine. The lager chamber can make it down to 41 degrees (5 degrees C), but when I attempt to take it down to 39.2 (4 degrees C), the compressor runs too much for my liking to maintain the temp, so at that point I'm going to have to move my lagers to the keezer to get them down into the mid to upper 30's. That or I may try to find another chest freezer to be used strictly for secondary lagering.

Regardless, both chambers have exceeded my expectations and I have 20 gallons of beer ready to be kegged tomorrow. Already kegged 5 gallons last week, so all set for the holidays. :ban:
 
This picture is just a thing of beauty:

82207d1351961121-hoppos-rustic-fermentation-chambers-ale-lager-img_2942.jpg


Well done on all your efforts, most of the brewing related stuff I build falls into the "ugly junk" category, fun to see stuff like this.
 
Thanks man....I appreciate it. I'm working a ton of hours right now, but want to get moving on the brewery again asap. I finally went down to visit my parents, so I went out to the cedar swamp and harvested a downed red cedar log to trim the front and sides of the exhaust hood. I need to get the drywall up asap in the brewing room, because I am having my high efficiency boiler installed for my hydronics floor heating system over the holidays. The boiler, and all of it's components hang on the wall on the other side of the room from the brewery. I at least need to have the drywall up, so that I can proceed with that project, plus it will put a spark under my a$$ to keep plowing forward with the brewery. Thanks again! :mug:
 
...most of the brewing related stuff I build falls into the "ugly junk" category, fun to see stuff like this.

This is exactly how I feel about my builds, and why I drool over the amazing builds on this forum, Hoppo's builds are definitely way up on the list! :fro:
 
As long as the equipment that you are using does the job and produces a good end product, that's all that is important. :mug: Asthetics really don't mean much of anything or do anything for the brewing process. Just because I like my brewing stuff to look a certain way, certainly doesn't make me a better brewer than someone else who may be doing extract batches in a canning pot on their stove top and fermenting in a hallway closet. Hell, at this point I'm still doing mostly 5 gallon PM's using a cooler MT, a ss Kettle on a turkey fryer burner, and cooling with an IC......no pumps, no controls, no plate chillers, etc. I'm a true believer that it's not the equipment your using, it's the brewing process that you are using that produces quality beer. I just like to build things and have projects to work on, so I tend to go a little overboard with this stuff. I currently am able to produce high quality beer the old fashioned way and am scared to death of screwing it up by getting too fancy. :eek: It's up to me to learn my new system as it grows and optimize it's potential by brewing well. Thanks again for the compliments.
 
Complete envy is what I feel right now. Not only do I love beer, and I'm just now getting into HB, I am also a wood nerd, the knotty pine all over your pictures has my blood flowing like a white water rapid. Beautiful construction through all of this, hope my basement looks this good one day.
 
Thank you very much! I'm very happy with how my projects are turning out. Thankfully, I have unlimited access to red cedar logs on my dad's property and knotty pine is pretty cheap, so most of these projects have been pretty cost effective for the most part. The cost for my keggle conversions and the control panel for the brewery on the other hand is adding up quickly. :eek:
 
Great post, but will all the work your doing what the hell do you need a running machine for:D
 
So once it gets warm up there, I hope you'll post some summer data.

I'm about to build one in my garage based on a 5000BTU window AC unit. I'm going to try it using the STC1000 controllers an Eva-Dry E500 or DampRid to keep condensation and AC coil freezing controlled. I may have to buy a CoolBot if I have coil freezing issues. I picked up a GE 5000BTU unit at BrandsMart for $99.

I found an online BTU calculator. Based on an 8' x 4' x 4' chamber, the 5000BTU will still reduce temp by 50F in a poorly insulated chamber. It only requires ~2500 BTU for normal insulation and 1500 BTU for good insulation (no leaks or windows). If I can keep it from freezing, I think it will work. The temp in my garage will definitely get over 90F in July/Aug.
 

Latest posts

Back
Top