Hoppo's E-Brewery Build

Homebrew Talk - Beer, Wine, Mead, & Cider Brewing Discussion Forum

Help Support Homebrew Talk - Beer, Wine, Mead, & Cider Brewing Discussion Forum:

This site may earn a commission from merchant affiliate links, including eBay, Amazon, and others.
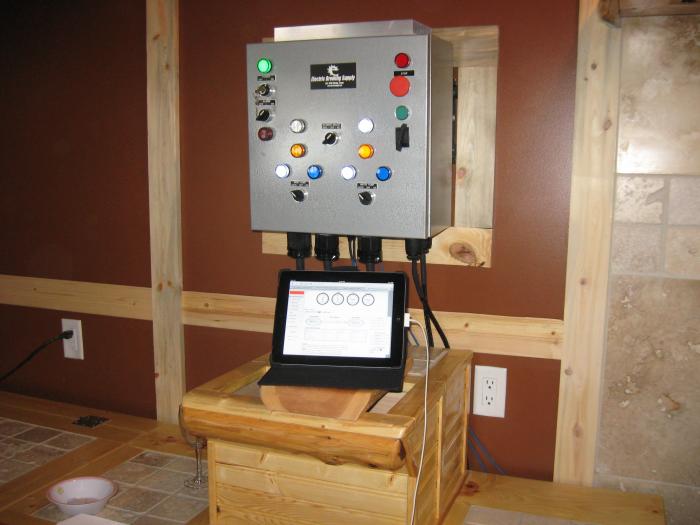
Clearly I haven't been diligent about keeping up on my thread here. I did not video the first brew day, but took a few pics along the way. I brewed an American Amber and an Amarillo Wheat IPA the first go around and have done a couple of batches since. The Amber was the first one through the new system and the pics are taken during that first brewing session. Here are a few pics of the first brew day. I had a couple of issues with BCS programming. My panel came with a brewing session pre-programmed in, which I tweaked to match my typical process. It appears as though the pre-programmed data had the BK temps. monitored by the HLT temperature probe. :smack: The program has the element firing until it gets to 108 degrees, then sounds and alarm and holds the temp just shy of boiling. You then hit the manual override button on the panel to take it to the next step of bringing it the rest of the way to boiling. The control panel was firing the element according to the temp. reading on the HLT probe. Well, I had my back turned measuring out hop additions on my prep table, waiting for the alarm to sound and had a massive boil over. What a mess! I figured out that it was reading the wrong probe, so I manually swapped them on the panel, until I could figure out the programming. I contacted ebrewsupply.com and asked them where the problem could be and Eric me find the problem buried in the programming. It's working fine now.

IMG_3404.jpg


IMG_3403.jpg


IMG_3402.jpg


IMG_3409.jpg
 
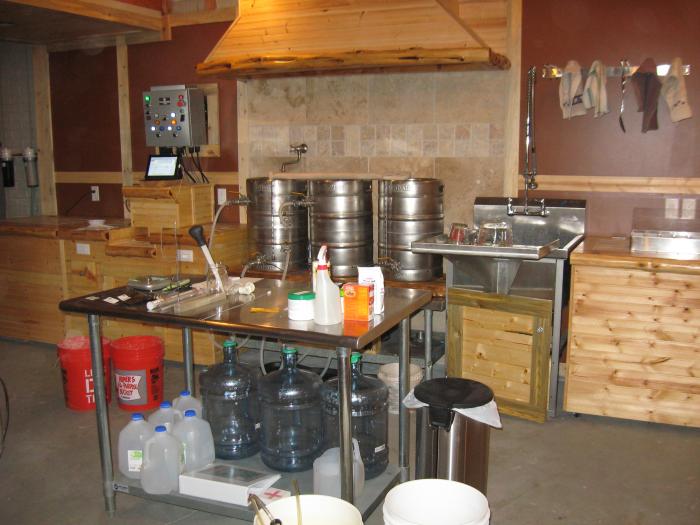
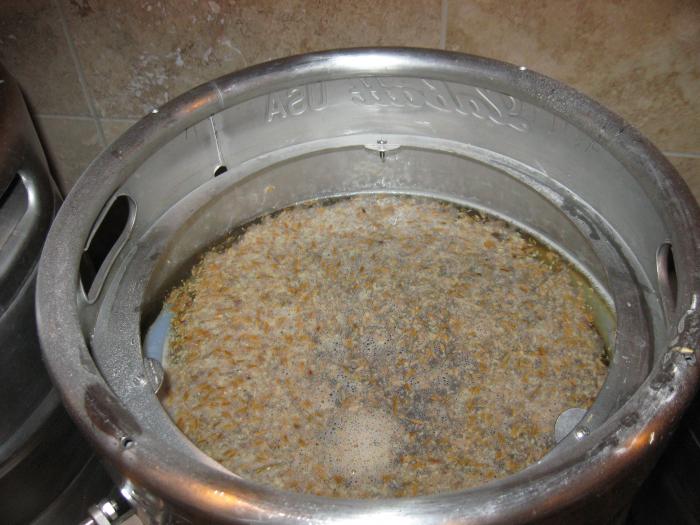
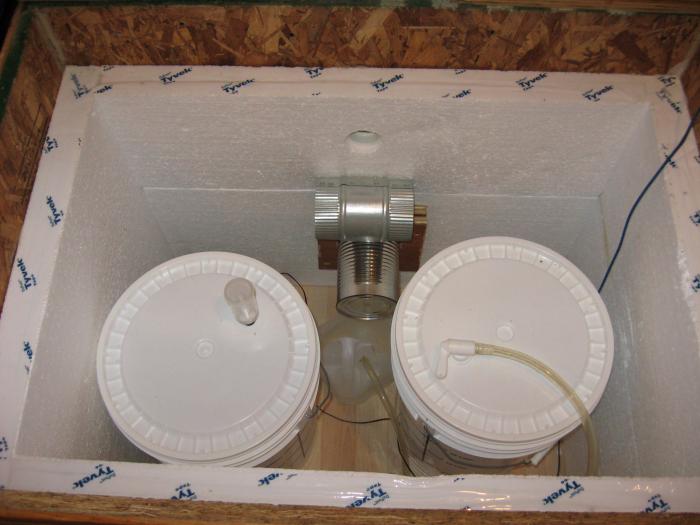
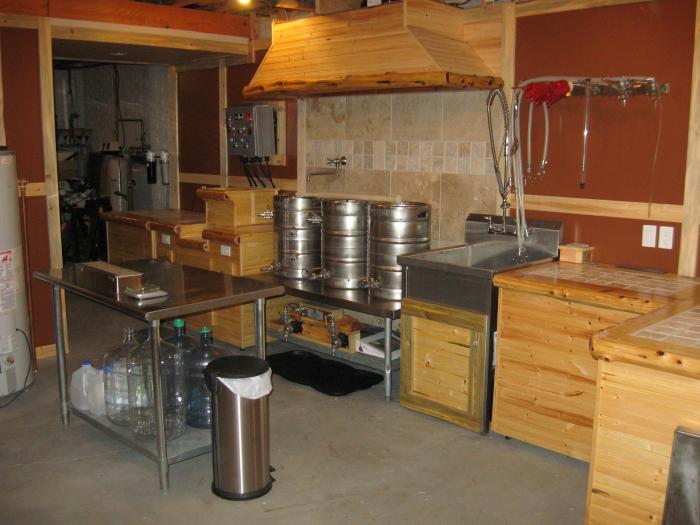
.....and the rest of the first brew day including the mash in action, fermenters lowered into the Ale Chamber upon completion, and the brewery after clean up. It's so nice to have all of my brewing equipment confined to one spot and a big sink with a pre-rinse faucet and drip pan to clean up. Brewing has gotten much, much easier. :mug:

IMG_3405.jpg


IMG_3411.jpg


IMG_3413.jpg


IMG_3414.jpg
 
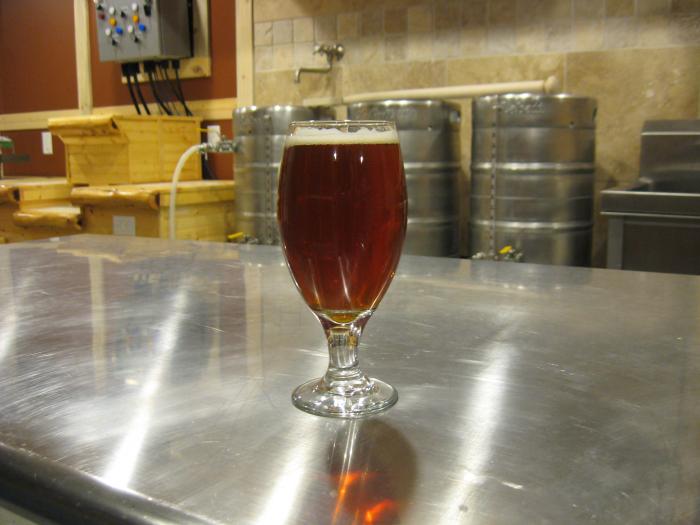
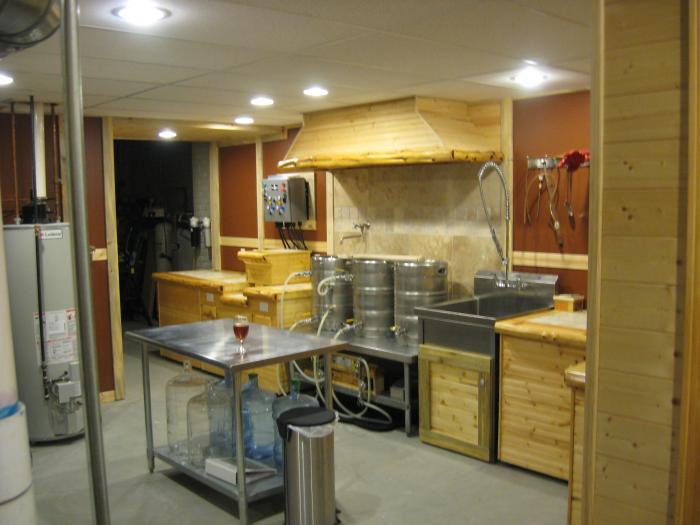
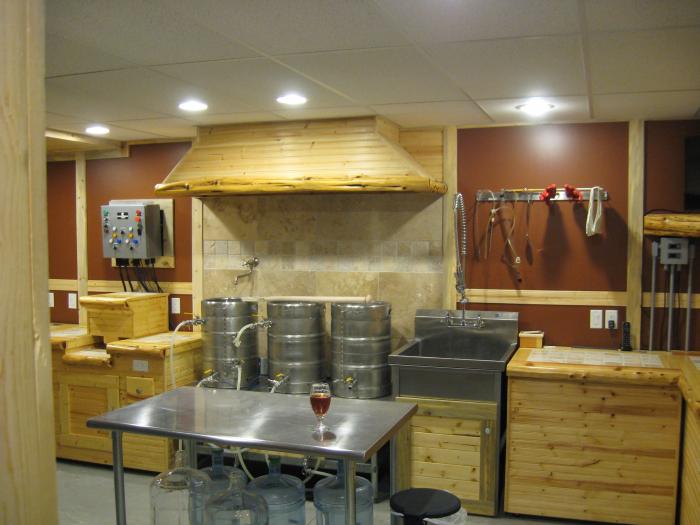
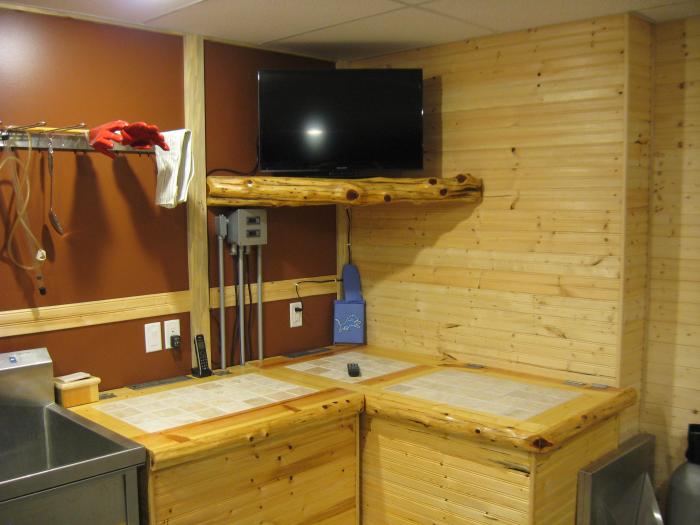
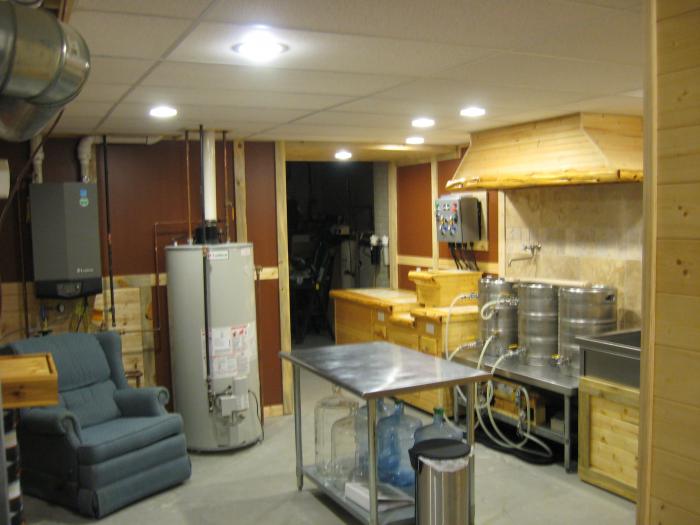
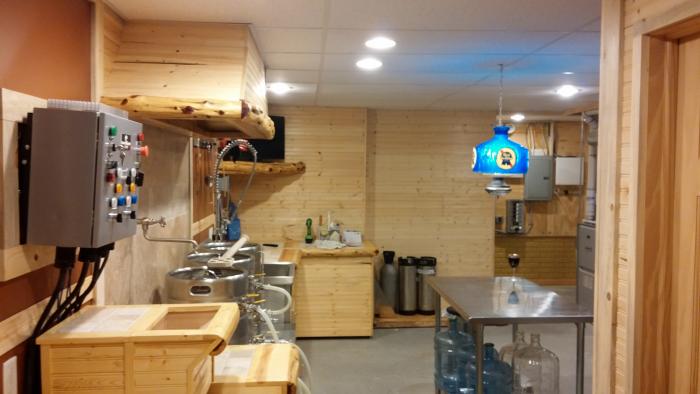
OK.....here's a pic. of a pint of my first batch on the prep table in the brewery and some miscellanous pics. of my brewery with the drop ceiling and recessed lighting installed. I also have a new flat screen in there, which I purchased a month or so ago. Sorry about the crappy picture quality. Every homebrewing related project that I have done has been photographed using this camera, but the picture quality has been steadily going down hill. I'll try to figure out how to upload pics from my phone. I had a hard time making it work with my last phone, so I'll give it a try using my new one. These will have to do for now.....sorry.

IMG_3426.jpg


IMG_3427.jpg


IMG_3428.jpg


IMG_3432.jpg
 
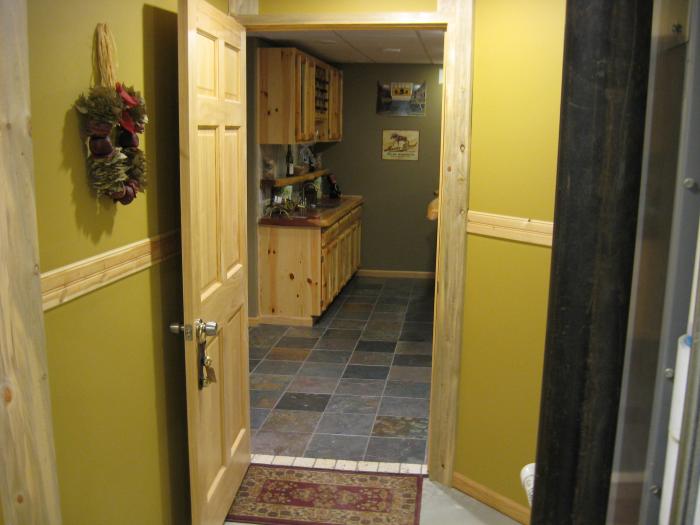
.....and a few more for good measure. One of the pics. it to give you an idea of how my brewery is configured in relation to the bar. Basically when you come down the stairs to my basement you come into the bar. If you take an immediate left at the base of the stairs you would enter my brewery through a door, which takes you to the wine/beer cellar and brewery. The one pic is taken standing in front of the wine/beer cellar back out to the bar. I'm not the most technologically advanced guy in the world, but I may shoot a video of the layout and maybe a brew day in the future. I have a buddy coming down to brew in 2 weeks, so maybe he can be my camera man during the process. Anyways, that's all I have for now. I have decided to bite the bullet and prep. the floor to do an acid stain finish with an epoxy clear coat finish. I'm going to try to tackle that project in 3 weeks, so I can call this entire thing done! Thanks for following.

IMG_3441.jpg


IMG_3433.jpg


IMG_3439.jpg


IMG_3434.jpg
 
Seriously nice work, pretty damn inspirational! Question is; do you need a roommate? ;)
 
Absolutely excellent. Love how you worked around the utilities in the space and still managed to get an armchair in there.

Great looking build, congrats!
 
Did you end up going wIth Legacy products or find someone else? Looks awesome btw. I usually hate T&G pine but you've done it so well I'm a full on convert!

Sent from my SGH-I747M using Home Brew mobile app
 
Thanks for all of the compliments. It has been a long process, but it's getting there. I wish I could devote more time to working on it, but my time is really tight nowadays. Hopefully I can knock out the flooring in the next few weeks and call it done. Thanks again for following along.

KPSquared.....thanks for the link. I checked it out and they have exactly what I'm looking for. I plan on giving them a shout to ask a few questions about prep work. I have a few lithium grease stains where I drilled my keggles and various spots of primer/paint around the perimeter. I also have a small crack in the concrete in one area. Hopefully they can give further insight as to the appropriate products to clean the concrete and fill the cracks before staining. I'll keep you posted. Thanks again for the link.
 
In my experience Legacy has been awesome to deal with. If you can't get solid answers, go creep around on garagejournal.com or become a member and fire a PM to Scotty at Legacy. He's on there all the time and there's a number of flooring experts who frequent as well. Try to do a bit of searching and reading because most of what you want to know has been answered multiple times! Good luck and keep us posted.

Sent from my SGH-I747M using Home Brew mobile app
 
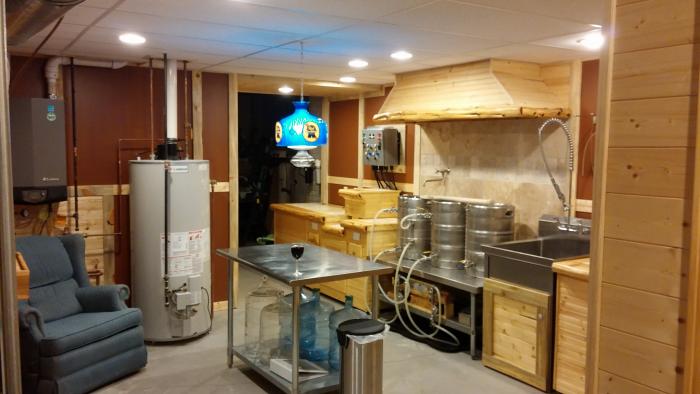
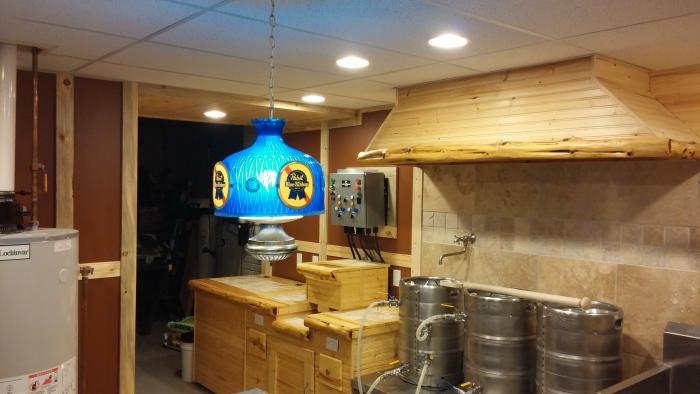
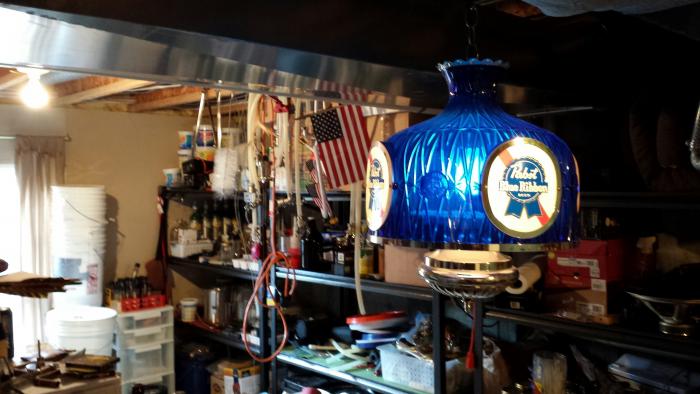
Went down to visit my folks this weekend and my dad gave me a bunch of items that were in my grandpa's bar many, many years ago. Included was this vintage PBR light fixture, boxes of collectible liquor decanters, and some antique license plates. I know that the PBR light doesn't fit in with the craft beer movement or my decor for that matter, but there is an awful lot of sentimental value with it. My grandpa passed away a long time ago, but this fixture brings back a lot of good memories. I rewired it this afternoon and cleaned it up a bit. I plan on building some slab shelving on the walls of the brewery to display the decanters, many of which have a nature theme to them. Pretty cool stuff. Hope this works, because I have never posted pics from my phone before.

0223142053c.jpg


0223142054.jpg


0223142054c.jpg
 
Man, the whole thing looks fantastic, the only thing out of place in that pic is the full glass.... it should be empty.


Sent from my iPad using Home Brew
 
Thanks. I have a buddy coming down to brew this weekend and then I plan on disassembling the entire brewery and putting everything over into my exercise room. Hopefully I can get the acid stain on the concrete floors done within the next few weeks, install the reverse osmosis system and put this project to bed.
 
Went down to visit my folks this weekend and my dad gave me a bunch of items that were in my grandpa's bar many, many years ago. Included was this vintage PBR light fixture, boxes of collectible liquor decanters, and some antique license plates. I know that the PBR light doesn't fit in with the craft beer movement or my decor for that matter, but there is an awful lot of sentimental value with it. My grandpa passed away a long time ago, but this fixture brings back a lot of good memories. I rewired it this afternoon and cleaned it up a bit. I plan on building some slab shelving on the walls of the brewery to display the decanters, many of which have a nature theme to them. Pretty cool stuff. Hope this works, because I have never posted pics from my phone before.

My grampa had the same PBR light up in his bar. I recently was given it after he passed away. I just moved so it not made it up yet but it will, soon. It will always remember him when I look at it.
 
So stoked to see the final project. I love the look of stained and sealed concrete.

Sent from my SGH-I747M using Home Brew mobile app
 
You gotta paint that water heater to look like R2D2 or something cool - it's the one 'sore thumb' in an otherwie AWESOME build. Congrats on sticking it out and finishing it the way you wanted and the RIGHT way, even when it may have been easier to try and cut corners at time. You've got a thing of beauty there.
-Kevin
 
You gotta paint that water heater to look like a big can of PBR
It will fit right in with the hanging light !

Beautifull Build Hoppo !!
I've been watching for some time.
Love the Lodge Pole Pine !

When can you start on my basment brewery ?!

:mug:
 
Get some thin stainless and wrap it. Add a cone and some other parts and makes it look like a big conical fermenter...

Sent from my SGH-I747M using Home Brew mobile app
 
Wow just read this whole thread. Awesome awesome awesome. I am in the process of planing a system. Would you give some updated reviews on the controller and the program for the ipad/ cell phone. Thanks again for an awesome documentation on your beautifully built system.
 
You gotta paint that water heater to look like R2D2 or something cool - it's the one 'sore thumb' in an otherwie AWESOME build. Congrats on sticking it out and finishing it the way you wanted and the RIGHT way, even when it may have been easier to try and cut corners at time. You've got a thing of beauty there.
-Kevin

Yeah, I know, it is an eys sore. This area of the basement was supposed to simply be the mechanical and storage side until my wife gave me the green light to steal some of the storage space for the brewery. I live in a somewhat rural area and am currntly on propane.....ouch! It got up to $4/gallon this year and we didn't pre-buy like we usually do, so we have been battling $1000 propane bills for the past 3 months. Thankfully natural gas is coming to my neighborhood next summer and we can ditch the propane. Unfortunatley the hot water heater cannont be converted to NG with a simple orifice change like many gas appliances. The entire burner assembly has to be replaced and isn't worth the expense since the unit is over 8 years old now. Fortunately, I have an 86,000 BTU boiler mounted on the wall in the corner beside it, which can be converted from LP to NG. When we convert to NG, this boiler will provide all of our domestic hot water needs, as well as heating the basement floor. We have to purchase an insulated SS holding tank to tie into the boiler system and then my plumber will plumb it in. Depending on how much I want to spend in re-plumbing the existing water lines, I could move the tank to the back wall of the brewery on the other side of the boiler and open up some additional floor space. It really comes down to how much it would cost to re-plumb it, but its certainly doable. We'll see what happens, but for now it is what it is, but I appreciate all of the suggestions to blend it into the brewery though! :mug:
 
You gotta paint that water heater to look like a big can of PBR
It will fit right in with the hanging light !

Beautifull Build Hoppo !!
I've been watching for some time.
Love the Lodge Pole Pine !

When can you start on my basment brewery ?!

:mug:


Thanks man, I appreciate it. The rest of my house is NOT rustic at all, but I have always liked the lodge/cabin decor. We live in a wooded area with lots of wildlife and a seculded back yard, so I pitched the idea of going rustic in the basement to my wife and she was fine with it. Thankfully I have good supply of cedar logs on my dad's property in southern MI and I was able to buy a trailer load of knotty pine for next to nothing from a lumber yard up in Midland where one of my businesses is located. The only major expenses in the entire basement and brewery were my redwood bar top, the cabinetry in my bar, my kegging equipment, and the control panel for the brewery. Everything else I purchased from contractors on CL, on clearance, or salvaged and reused old materials. If you check out some of my other builds like my grain mill, fermentation chambers, keezer, etc. you will see that the bones of all of my builds are done very inexpensively......mostly with recycled materials, then I just cover them with knotty pine, cedar, travertine, etc. to make them look decent.

I live up in Oxford, not terribly far from where you are at, so if you ever want to check it out, let me know. :mug:
 
Hoppo

I'll give you a shout next time I am out your neck of the woods !
I'd love to talk my wife into the "cabin' in the basement idea.

Thx
:mug:
 
Wow just read this whole thread. Awesome awesome awesome. I am in the process of planing a system. Would you give some updated reviews on the controller and the program for the ipad/ cell phone. Thanks again for an awesome documentation on your beautifully built system.

No problem.

I am not an IT guy whatsoever, so bear with my use of terminology. I went with the 30 amp. control panel with a built in BCS module, which I purchased from www.ebrewsupply.com. The owner's name is Ryan and he is great to work with both during the planning/ordering process, as well as after the fact with programming. The BCS (Brewery Control System) is a little micro-computer module that can be programmed to control all phases of the brewing process. With my system, there are some things that I have to do manually, such as open and close my valves during the different brewing steps, switch hoses, etc. The BCS is what controls my outputs.....pumps and heating elements, as well as my inputs.....temp. probes for HLT, MLT, BK, and plate chiller. The BCS is capable of doing much more than I use it for. For instance, it can control outputs for electronic valves for hard plumbed systems, as well inputs for float switches for volumetric control to name a few. Some guys use the BCS to control their fermentations chambers as well, but I already built my own control center for that long before I purchased this panel.

Essentially, I went with the 30 amp. system, because I do not plan on doing back to back batches, now that I can produce more than twice my prior volume. I don't have a need for 2 heating elements firing at the same time, so I went with the 30 amp. system to save a few bucks. The 50 amp system is capable of handling 2 elements simultaneously as well as providing power for the pumps. I spend a solid year planning and trying to decide what panel I wanted to go with. Essentially, like most of us on HBT, I started by exploring Kal's panel on www.theelectricbrewery.com, which is absolutely amazing. However, the cost of that panel was something like $2500 for the fully assembled version and I believe $1500 for the unassembled version. Then I came across the ebrew supply panel and it was $1500 fully assembled and ready to go. I simply didn't have 40 hrs. to devote to assembling my own panel and like I said, I'm not a tech. guy, so I went with Ryan's panel.

At the time, ebrew supply focused more on the automated panels, but were just started to produce panels with manual switches, PID's, etc. However, in speaking with Ryan, those panels were actually a little more expensive, as the BCS that handles a lot of these functions on a web based platform and is relatively inexpensive. I upgraded for $75 to have Ryan install a little wi-fi adapter, so that I didn't need to run an ethernet cable over to the panel and didn't have to tie it into my home network if I didn't want to. Ryan was nice enough to pre-load his brewing process into the BCS and had he not done that, it honestly would have been a train wreck for me.

The BCS based control panel takes a little time to get the hang of while programming the various processes, as well as the states and exit strategies within those processes that allow the program to transition from one process to the next. I supposed that if you have even a basic background in programming, it would be very simple, but for me there was a large learning curve. Thankfully, Ryan was great in assisting me with several programming glitches that I ran into over the phone and via email. Essentially, the brewing process that he loaded onto my BCS was a little different than my process, so I had to be tweaked a bit. I will say, however, once it is programmed it make the brewing process quite simple.

My only complaint with the BCS platform thus far is the fact that if you want to make small temperature adjustments on the fly, you have to transition out of the main page into the programming, select the process you are currently in, select the state within that process, then scroll down the make the change, then apply that change, then transition back to the main page. At times, I would prefer to just be able to push a damn button on the control panel to fine tune adjustments. Maybe there is still something that I don't know and maybe there is a simpler way to make subtle tweaks during the brewing process, but I'm not currently aware of them.

Also, since I do not have float switches to monitor volume levels within the vessels, there are some states within processes (like the fly sparging process) that I cannot enter an exit strategy to transition from one state to the next. For example, as I start my sparge both pumps are running and I manually adjust the valves to slowly pump wort out of the MLT over to the BK, while at the same time slowly pumping sparge water out of the HLT over to the top of the grain bed in the MLT. During this process, I have a state in which I have the HLT element firing to maintain the sparge water temp., then the next state is for all elements off, then the next state is BK element on. I have to monitor this closely to make sure that the volume isn't getting too low in the HLT to keep the element firing or that there is enough volume in the BK to start firing that element. In these instances, I have to either force jump to the next state on the main page or program the DIN button on the panel to serve as the exit condition for each state. For the longest time I had no idea what the hell the green button on the panel was for, so I called Ryan and he walked me through the process of programming exit strategies, so that when I push the Green button (DIN), it automatically transitions to the next state. This made life much simpler.

Like I said, I really like the panel and now that I have used it a handful of times and worked out the bugs, it has made my life easier. However, at times I wish that I could just manually push buttons and turn switches on the control panel itself, rather than having to use the IPad to access the programming for adjustments. The BCS is designed to fully automate a brewery. I tend to be more hands on in the brewing process, so I will not be adding float switches, electronic valves, or hard plumbing my system for complete automation. On the plus side, you can manually turn on the pumps without having to log onto the BCS, which is handy.

Hope this helps! :mug:
 
Thanks for that great in depth review. That's exactly what I was looking for. I too started my looking at kal design. Was all set to purchase it and then isaw your ssystem. I really like the controller that ryan puts out. As I have spoken to him as well. Thanks for the feedback. I'm about 8 weeks out from doing the brewery build. I also like the fact that bcs can go full auto if I decide to do that route.

cheers.
 
No problem and good luck. If there is anything that I can do to help you out through the process let me know. Also, when you start a thread and shoot me a PM, so I can follow along. I love to track these builds from start to finish. :mug:
 
No problem and good luck. If there is anything that I can do to help you out through the process let me know. Also, when you start a thread and shoot me a PM, so I can follow along. I love to track these builds from start to finish. :mug:

Yes will do. I don't know where to start it though. It's a big project that is going to go in many directions
 
You can tackle it with mulitple threads for each component like I did or just chronicle it in one big thread.

On a side note. I am going to be placing the order for a reverse osmosis system. I have decided to go with a light commerical unit. I plan on ordering it with a 14 gallon storage tank (11 gallon capacity), a booster pump, and either 150 or 300 gpd. I typically need about 20 gallons of water to brew 10.5 gallons of wort, so I figured that if I have a system with a somewhat high capacity of production I could fill my HLT most of the way early in the a.m. Then a little later top it off and fill my MLT with the appropriate volume of strike water, as I heat my strike water via the HERMs coil in the HLT. With this higher capacity unit, I'm going to add a 4 way manifold and run pex to a faucet in the brewery, one at the kitchen sink, and one to each of my 2 refrigerators for the ice/water dispensers. Not sure if I will need a distrubution pump or not, so I'm calling Titan a little later today. Also, I need to brew 2 more batches before tearing the system apart to finish the floor.
 
Then a little later top it off and fill my MLT with the appropriate volume of strike water, as I heat my strike water via the HERMs coil in the HLT.

So you fill your MLT with cold water, then heat it to strike via the HERMS? How long does that take?! Is this the way that others are doing it? I typically fill my HLT up, heat it to my strike temp, dump the appropriate volume into the MLT, and then refill the HLT and heat to my first mash step temp (which is lower than strike temp anyways). I can't imagine that the HERMS can heat the strike water as quickly as a submerged element can... Is there a reason you do it your way?

-Kevin
 
wow, you got a high eff. tank water heater, and a high eff. tankless w/h!?! im jealous
 
So you fill your MLT with cold water, then heat it to strike via the HERMS? How long does that take?! Is this the way that others are doing it? I typically fill my HLT up, heat it to my strike temp, dump the appropriate volume into the MLT, and then refill the HLT and heat to my first mash step temp (which is lower than strike temp anyways). I can't imagine that the HERMS can heat the strike water as quickly as a submerged element can... Is there a reason you do it your way?

-Kevin

Yes, that's how I do it. It takes about 45 minutes to do it this way. I've tried it both ways and it's six of one and a half dozen of the other for my set up. I'm using 15.5 gallon sanke's for my vessels and I'm using a PICO false bottom, which creates about 2.5 gallons of dead space under my grain bed. When I fill up the HLT to 15 gallons and bring it up to strike temp it takes about 20 minutes or so. I typically use between 20 and 24 lbs of grains for my mash depending on what I'm brewing, which requires 7 to 8 gallons of strike water. This combined with the dead space volume in my MLT exhausts 2/3 of the volume in my MLT. It takes 10 gallons of sparge water in my HLT for the HERMs coil to be fully submerged. With the time taken to transfer the strike over to the MLT, then refill the HLT with 5 to 6 more gallons of cold water to fully submerge the HERMs coil and then elevate the temperature back up to my mash temperature, it's really not too far off time wise. If I had bigger vessels, say 20 gallons, then it would make more sense to do it your way.

I find that if I fill the MLT up with enough water to account for my dead space below the false bottom and for my initial strike volume, it's somewhere between 9.5 to 10.5 gallons. It's just easier for me to fill the MLT with the volume I need, then fill my HLT up with 10 gallons and let it all start heating at once. The HLT gets up to temp. in about 30 minutes and the MLT catches up about 15 minutes later. I have an alarm that sounds when my MLT gets to temp., so usually start heating and then find something to keep me busy. I find that if I bring everything up to 160 to 165 degrees in both vessels, add the grains, and then wait a few minutes to start circulating through the HERMs, I typically equalize out to the low 152 to 154 range within a few minutes. Then I just tweak temps as needed. It may take a touch longer to go this route, but it's less transferring and hose swapping. I usually take the time to measure out salt additions, hop additions, start sanitizing fermenters, etc. I'll eventually upgrade to larger vessel, but for now this seems to be working out well.
 
.....P.S. I plan on setting up communication between my control panel and my wireless home network. That way, if I want to brew on a Friday night, I can fill my kettles up before I go to work, log onto my network from my office, and start heating up the system, so that it's ready when I get home. Ryan, the guy who I purchased the panel from does it this way as well. He explained that it works out well for people that like to brew in the morning as well. Just fill the kettles up the night before, set your alarm clock to wake up, pick up your smart phone, start the "Heat to Strike" process, and go back to sleep for a bit. Since you can monitor everything from your smart phone or tables, with this wifi enabled, BCS system, you can be out mowing your lawn and keeps tabs on the strike temps progress. Pretty slick.
 
wow, you got a high eff. tank water heater, and a high eff. tankless w/h!?! im jealous

Kind of.....I have a high eff. 75 gallon Lochinvar tank heater, which was installed when we built the house. We have a large jetted jacuzzi tub in our master bathroom, so we needed something that could heat enough water to fill that volume and to be able to re-heat to temp. quickly. Fortunately Consumers Energy is running natural gas to my neighborhood next summer. Unfortunately, this large water heater cannot be converted from LP to NG without replacing the entire burner assembly....not worth it for an 8 year old unit. What you see hanging on the wall next to it is a high eff. Lochinvar Knight, 85,000 BTU boiler that heats my basement floors and is convertible between LP and NG. Once we make the conversion from LP to NG, the 75 gallon unit will go bye, bye and will be replaced with a ss storage tank at which point the boiler system will provide all of our domestic hot water needs.
 
U have radiant heat in ur basement? Now I'm real jealous. Lol sorry for off topic, I'm in heating and plumbing. The brewing set up u got is one of the nicest I have seen. Only one that can compete is almost identical, but all stainless. I prefer the wood look though ;)
 
Hoppo,
A friend of mine does water treatment and has put/moved a ro system in three houses now. He had taught me a lot on how to set them up for brewing. One of the things you can do is to T off the line going to the tank and add a 4 gallon tank. If you put a shut off valve on each you can wait till evening to fill the big one and your consumption points, ice and drinking, will have plenty of water. I am adding a thirty gallon non pressure tank with a float switch because the water at my new house is horrible. If you use a non pressure tank and a pressure tank for drinking you have to put a check valve on the pressure tank line so it does not get emptied into the other tank.

Good luck with ro water, I hope that your beers come out even better than they are now.

Sent from my SAMSUNG-SGH-I337 using Home Brew mobile app
 
Nice!.....our grandpas would be proud. :mug:

I have been brewing quite a bit lately with 30 gallons fermenting right now and another 10 gallon batch that I plan to knock out sometime this week. :drunk: We installed a pool late last summer, so it's our first full season to use it, which means lots of weekend gatherings at the house. I'm one of those hosts that supplies all of the refreshments for my gatherings, so I'm getting stocked up now. My friends and neighbors know that when they come over, they need not bring anything.

With all of this brewing, I'm sick of hauling 20 gallons of R/O water home from Meijer every brew session, so I seriously need to get a new R/O system. I'll be picking your brain a little more since you have a better working knowledge of how to set these things up for home brewing, but don't have time to ask the questions now.
 
That is a lot of brewing, having your own RO system will help a lot. A side benefit is having really good drinking water, we can't drink beer all the time right?

Whatever I can do to help, I will.
 
Back
Top