Happiness is: Home malting

Homebrew Talk - Beer, Wine, Mead, & Cider Brewing Discussion Forum

Help Support Homebrew Talk - Beer, Wine, Mead, & Cider Brewing Discussion Forum:

This site may earn a commission from merchant affiliate links, including eBay, Amazon, and others.
Is the chimney on top of the kiln open? If so you could be loosing heat out of that as well or possibly drawing cold air in from outside.

The "Y" on top of the kiln. I presume you are using this just as an adapter to transition between the two line sizes? Is the un-used leg open? If not you could open that to draw after the kiln to reduce draw through the kiln to slow the air down and keep more heat inside.

Interesting project you have going there.

Dress warm.
 
this thread has me wondering where's fifelee?

Totally missed this thread for some reason.

The differences between malt and feed barley are plumpness and protein level. Maltsters typically want better than 75% plump and less than 13% protein. Higher plump means more starch and therefore more fermentable sugar. Lower protein also mean more fermentable sugar as protein can displace starch, but it also effects other parts of the malting/brewing process. For example high protein can mean inconsistent germination during malting and hazy beer during brewing.

As listed in an article previously posted there are other minor differences such as alpha amylase activity, diastatic power, beta glucan, and soluble/total protein, but I don't have any knowledge of these specifics. On a homebrew scale the main difference is just plump and protein, so if you have feed barley you may have poor efficiency and possibly cloudy beer. Not the end of the world and you still have beer when you are done. Great job COLObrewer


Info on barley varieties

Info on plump and protein %


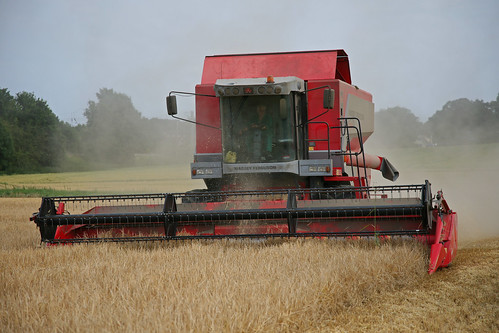
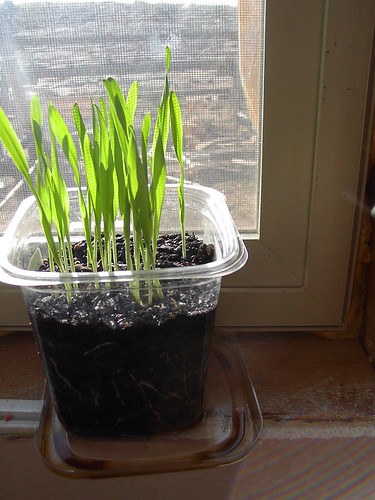
That IS very interesting, looks like it's cultivar 'Charles' for me, but then I would need one of these.
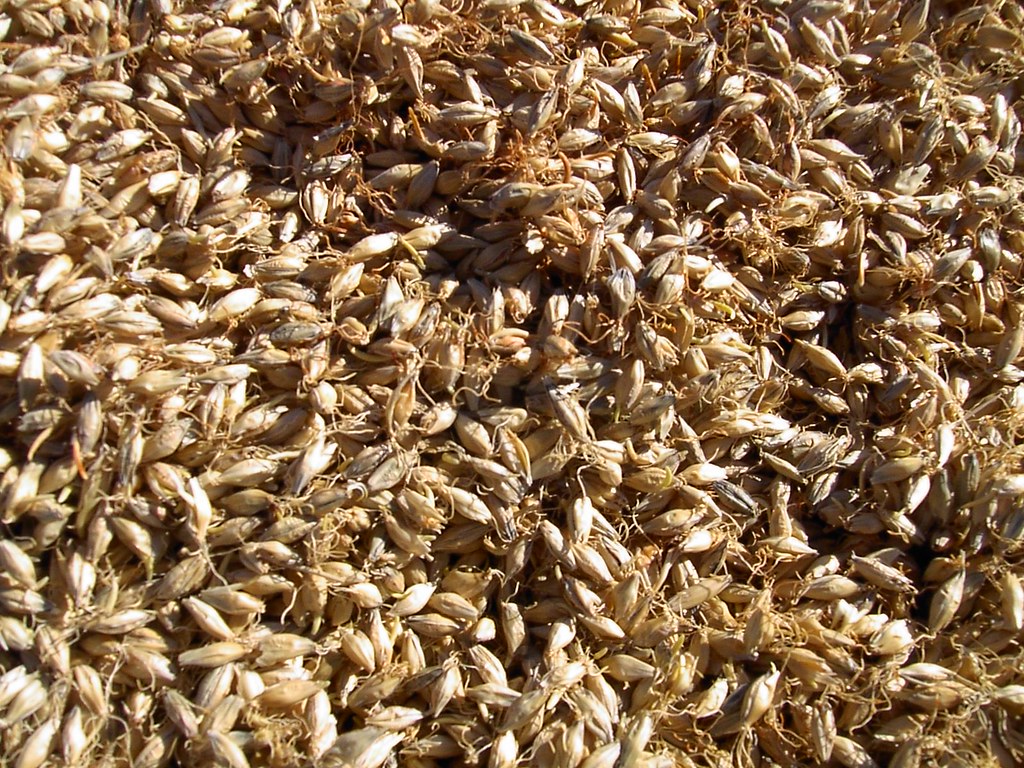
2705101592_5a9f748597.jpg
:p

You can borrow mine any time;)
Jim_s_pictures_017.jpg
 
Fifelee thanx for the info. And I'll have to pass on the combine as this is all I have planted so far:
3354410843_eb9d6e6f34.jpg


Here's an update, on 03-11 I got all the malt "cured" in the kiln, I was able to get the temperature up to the desired 170-212F so from the beginning to end of pale malt took me 10 days total (Should be able to reduce this time by at least one day once the system equipment is refined). The kiln needs major re-thinking as the temperature is drastically inconsistent from top to bottom, a difference of almost 100F. I believe some sort of mesh cage inside with a shaft through the walls to allow turning would be ideal, I'll also remove the shelf in the middle. A next step up from what I had would be rigid hoards that one can swap from top to bottom easily, mine were supported with bricks between each layer, quite inconvenient. Here is a close-up of the last run (The overmodified half) after kilning, all that is left is to remove the dried hairs and acrospires and waiting appx. 2 weeks for "mellowing".
3354410283_53e8500867_b.jpg


Some of the roots, etc came off during the mixing of the malts during kilning as seen in the bottom after removal of the hoards.
3355231310_bc60d37c36_b.jpg


Next post for more.
 
Just a couple more pics of the overmodified malts, the first shows the amount of overmodified kernels that came out of the shown sample size, probably 5% at most.
3355231164_10d5726efb_b.jpg

I am keeping this separate from the fully modified malt just to see what I can get from the best effort first.

And here is a closeup of only the overmodified malts, see the acrospires sticking out past the end of the kernels, very undesireable. I'll have the kiln process "up to snuff" before the next batch so this doesn't happen.
3354410389_2cbe760be0_b.jpg


I'll post some results of the first brew made with this (The correctly modified batch that is) in two or three weeks, let me know if there is something else you would like to see pic's of or more descriptions of, :mug: 
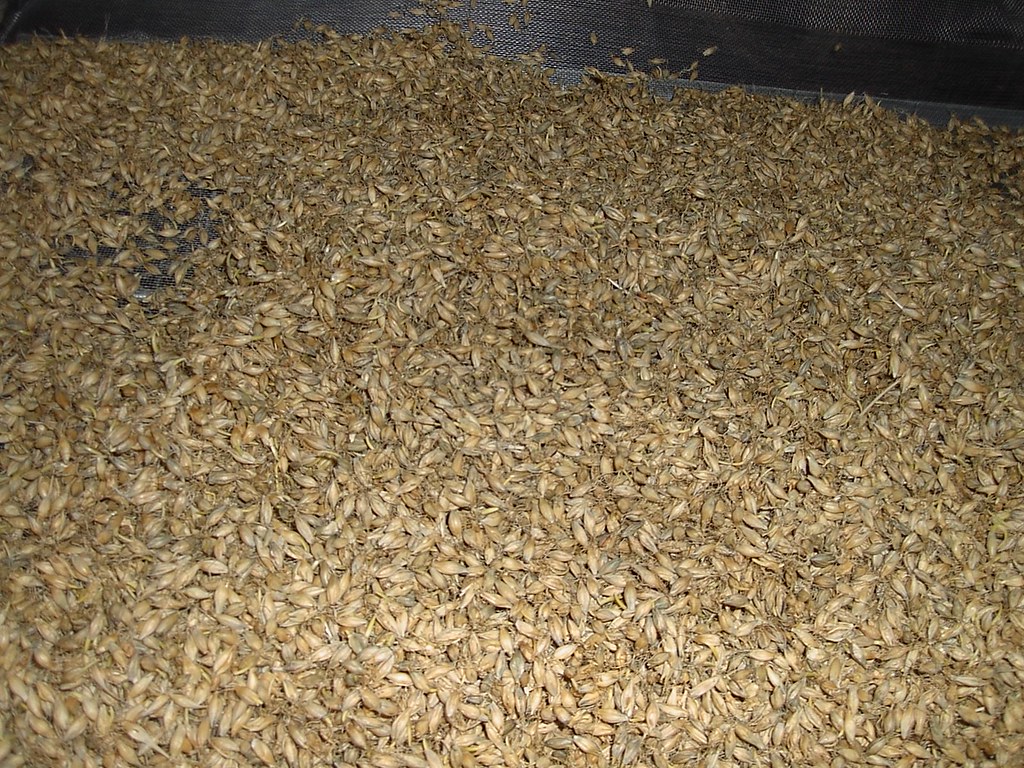
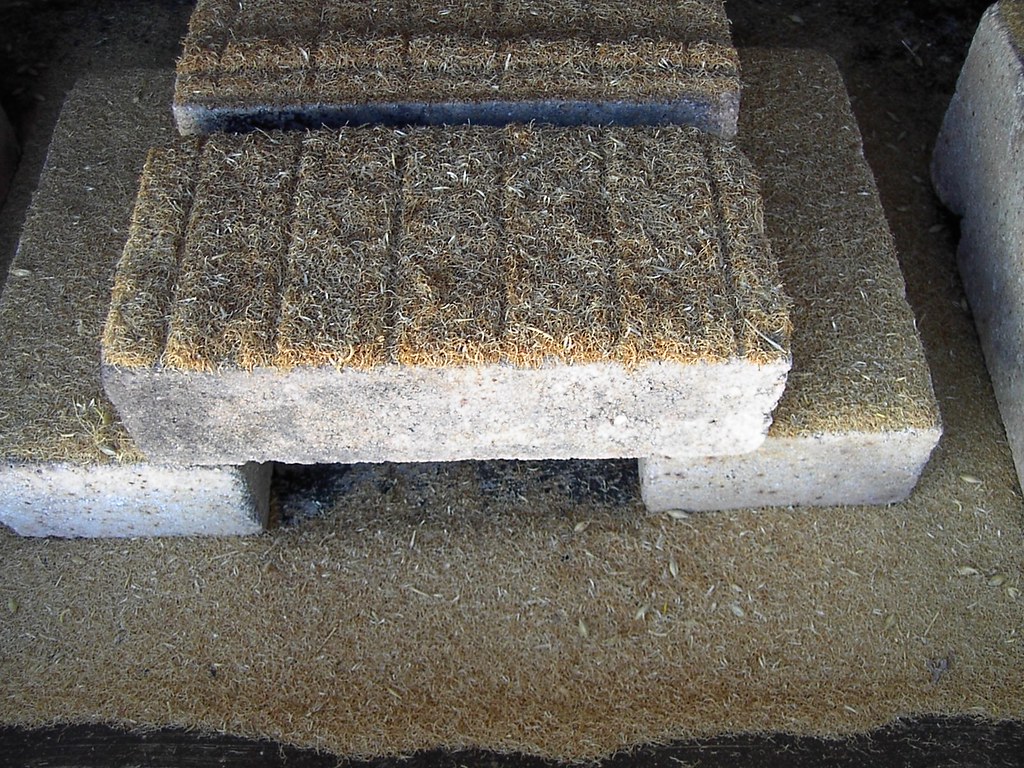
The next testing will probably be to make crystal and/or rauchmalt.
Vern.
 
Post pics of yopur next home malting go round as well if you would. Have followed this thread from start to end. I want to see your upgrades and changes on your next go round. I don't live on a farm or large property per se, but i could probably do home malting in my garage with a small investment. Your post has been a ton of info. Just goes to show how deep into this hobby one can go. Wherer bouts in CO are you?

Brew on !

Parker, CO
 
OK fellows (& Misses), I'll be testing the home malt next week and I'm looking for a simple recipe to test it with. A fellow HBTer that I work with suggested a SMASH. I think it is a good idea, I'll supply the malt and maybe he'll supply the centenial or cascade hops. I want him to make a batch as well because he has a "better" setup that he can keep track of the variables with, I have no idea what my system efficiency is. I was just going to post some basic info, (Recipe, OG, color, flavor, etc, etc). What are your thoughts? Should we make the same recipe or alter hops? Yeast? What are the minimum variables/readings we need to track in order to make an initial test of this malt for beer?
Thanx for your input, Vern.:mug:
 
What we need is a "control" to compare against. Since we're (... uhm, well you're) not trying to compare your setup vs another's setup. I'd suggest you both make some SMASH recipe with your home-malted grain and with some 2-row, whatever brand you normally use.

Then, you'll be comparing how your home malted grain tastes vs another grain done on the same system. Not how one setup/brewer makes beer vs another setup/brewer. Then, you could each make a separate recipe, twice and get two kinds of SMASH data.

That would be ideal, but whatever you do, this is a totally awesome thread, so if you make drinkable beer, consider it a success! Hell, even if you don't it's been fun, right?
 
What we need is a "control" to compare against. Since we're (... uhm, well you're) not trying to compare your setup vs another's setup. I'd suggest you both make some SMASH recipe with your home-malted grain and with some 2-row, whatever brand you normally use.

I plan to do this, with 2 row Rahr, any other suggestions or recommendations?
 
This is really cool , i have been planing to do this for a long time,
on friday i ordered 100lbs of barley from my buddy that owns a feed store.

its alot like your story, all i know for sure is that it is whole untreated barly from north dakota and it was harvisted last fall makeing it summer barley,,
i dont know how many rows it is but at 20$ for 100lbs i dont know how i can go wrong.

the hope to just make a butt ton of pale malt, anything over that will be gravy
 
It may be boring at first, but to really test the flavor of the malt, you could use a very neutral hop during the boil. Then after sampling, you could dry hop to round out the flavor to be what you want. Or blend the final product with another batch. Whatever you decide, let us know how it turns out! Very impressive!!
 
Greetings fellow brewers,
So I decided to brew some beer today, those are great words aren’t they? Anyway, before I use the home malted barley, I still have to finish it. This means taking off the remaining chits (rootlets), I did this by simply placing the malt on a hoard used for kilning in 5 lb increments, then “squashing” them against the screen with my hands and rubbing them between my hands etc.
3464826525_1d66e09aeb.jpg

3465642006_f2f99a4460.jpg


Here's a pic of what came off under the screen. Rootlets and Acrospires, this is the properly malted half of the batch, the acrospires are breaking off and falling out when the hulls break I suppose, some of them curled out of the hulls, these are not needed, they add protein and probably off flavors.
3464826453_99a8593427.jpg


This worked pretty good, however, while feeling quite exuberating at first on my hands, after 15 pounds it started feeling like rubbing sandpaper over a sunburn. I will have to make the rotating kiln chamber(s) for the rest of the 50 lbs. But 15 lbs is enough for my brew.
The screen it turns out is perfect size for sieving out the rootlets and acrospires, here is a picture of what I got out of the 15 lbs.
3464827003_b69d2f73e9.jpg

I believe these would all fall off in the kilning process if there were some rotating means of stirring it, etc. After this I took the malt to the lawn & threw it around on a bed sheet to let more of the rootlets and mainly empty hulls float away (winnowing I think it’s called? Usually done after harvest to separate the chaff?)
Note: I didn’t do this as well as I should have, there was very little wind, but I could have rigged up a fan, etc. It turns out this step in the process is cumbersome and time consuming, needs to be modified/automated.
More to come.
 
This is the basic recipe which is what I call a SMATH (Single Malt And Two (Or three) hops), there will be two brews today, one with home malts and another with 2 row Rahr, all other ingredients are identical, like this:

SMATH1
14.25 lbs of home malt. (Because that’s all the Rahr I have to match, might as well use it ALL, right?)
1 oz of Willamette 5.5%AA for 60 min’s. Pellets (Because that’s all I have)
½ oz of UK Kent Goldings 5.0%AA for 10 min’s. Pellets (You get the picture)
Secondary dry hop with Chinook? (hand picked loose leaf, unknown AA) (Again, that’s what I have)
Washed Lager yeast from 2-28-09, (Saflager)

1. Mash in at 170F, projecting a 150F mash for 60 min’s duration, using appx. 2-2.5 gals of water (CO tap).
2. Sparge at 185F with 4.5-5 gals. Probably double sparge. (Batch sparging)
3. Imersion Chiller, Funnel to carboy, aerate, pitch, pray to ninkasi.

Here's some pictures of the grind.
First is the home malt. There is noticeably more, or larger hulls in this than the rahr. Don't know if you can tell from the pics.
3464826957_b367c4889f.jpg


And the Rahr.
3465642804_9e2aebf33b.jpg


And the mash of home malt. The top thermometer says 150F and the floater inside says 154F after settling out.
3464826671_9859d8921d.jpg


Mmmmmm, wort.
3465644794_5b4a243d05.jpg


More to come. . . .
 
Boiling wort, Yay!
3464828541_f57d2cfee9.jpg


The only picture of the hydrometer that turned out, almost. I think this one was before boil on the home malt, I think it is 1.038, lowest reading I got.
3464828965_929693fc58.jpg


Here's some readings for yous guys:

Home malt, after boil:
Refractometer= 11.8
Hydrometer1 = 1.044
Hydrometer2 = 1.046
This is lower than I expected, should be around 1.07ish?

Rahr, after boil:
Refractometer= 13.8
Hydrometer1 = 1.054
Hydrometer2 = 1.056

Is this telling me my efficiency is like 40%? I've not tested it or looked into how to even do it yet.
Ah well, it smells like wort, tastes like wort, must be wort.

Here's a bottle o yeasties (2nd half for the Rahr), looks like it was 02/23/09 instead of what I said previously. I split this evenly between batches after I warmed it in my pocket, maybe it will work.
3464828763_55fe442c0b.jpg


More to come later . . .
 
Nicely done. When's the next round?

I have to regain fundage before the next round, I want to buy some stainless screen to fab into the rotating kiln cages to place inside the old "smoker/kiln" as well as work on the heating inlet ductwork to get more temperature into the kiln for crystal malting, maybe get set up to switch back and forth for smoked malt, etc. but I WILL be doing this again, assuming the final product is up to par/worthy. In other words, it may be a month or two.

I guess I should post some thoughts on the taste of the wort as compared to the Rahr, I could tell that it has a little less sweetness, but as far as the malt taste, I couldn't tell much difference (Hard to seperate malty taste from sweet taste for me). Both had a slight taste of tannins before the boil, but that is probably due to my process/stupidity.

As a side note, this was the first time we tried our new bayou classic, it worked great once I modified it:
3464826811_b925659dd2.jpg

As you can see I cut the pot supports and lowered them and turned them out then re-welded them, the new versions of these are higher than the old by about 2" I think. I turned the supports outward to support the pony keg better, also there is a 65 gallon tank we will be using for water storage/sparge water, not sure if we'll be using this to heat with but it'll work better this way for a test.
3465644934_8c6654d87a.jpg

Till next time, happy brewing, Vern.
 
What about using a pottery kiln? There is one by me on CL for $300 that has an internal space of 15x15x15in...

:/

g
 
Just as I thought I was as mad as the next guy, and proud of it, along comes someone who proves I have just been playing at it all along!!!

This is the best thread for pure maddness I have ever seen, and the best bit is, that while I only found it this evening, yesterday my workmate and I were calculating just for the fun of it how many square yards of his barley crop would be needed to make a gallon of beer!!! (It came out at 2 sq yards)(we think)

Tomorrow, I will be urgently finding out how many rows it has, whether it is plump and low in protein, when it will be ready, and sharpening a scythe!!

I cannot wait to hear how the beer turned out! If there is a God out there, he will surely make it turn out just how you like it.

Fantastic read, keep it up,

Rog
 
I would kill my shins with those spikes sticking out. Might want to put some idiot/drunk bumpers on them.

Hmmm, we didn't have any problem with it, but it usually is pretty hot around there so we stay away as much as possible, also I was only drinking "small" beers yesterday.:p Can't wait till the VANILLA GORILLA is carbonated!!:rockin:
 
What about using a pottery kiln? There is one by me on CL for $300 that has an internal space of 15x15x15in...

:/

g

I don't know? From what I remember of those, I think they are fed from the very top and I would still want some way to turn the malts easily. I think the sides of those are also real thick with refractory and would be hard to get something turning in it, horizontally anyway. Vertical turning would do nothing, maybe if it were some sort of auger design?, but I wouldn't have 300 to spend on it anyway.:p
 
I don't know? From what I remember of those, I think they are fed from the very top and I would still want some way to turn the malts easily. I think the sides of those are also real thick with refractory and would be hard to get something turning in it, horizontally anyway. Vertical turning would do nothing, maybe if it were some sort of auger design?, but I wouldn't have 300 to spend on it anyway.:p

True on most counts:

3k93p93o8ZZZZZZZZZ94jaebd0f18289e1b5a.jpg


I gotta think about the turning... BUT, in terms of spending the $300, I bet you more than make it up in what you are spending on propane vs. the efficiency of a kiln...

Not to mention temp (and maybe humidity) control...

Just thinking out loud...I really like the idea (home malting) as between my hop garden and yeast culturing - the malt is the one thing by winter I would have to buy...

g
 
Wow, this is frickin AWESOME!!!!! Why do I have the feeling that I too will try this at least once.... :D
 
True on most counts:

3k93p93o8ZZZZZZZZZ94jaebd0f18289e1b5a.jpg


I gotta think about the turning... BUT, in terms of spending the $300, I bet you more than make it up in what you are spending on propane vs. the efficiency of a kiln...

Not to mention temp (and maybe humidity) control...

Just thinking out loud...I really like the idea (home malting) as between my hop garden and yeast culturing - the malt is the one thing by winter I would have to buy...

g


Interesting, is there a fan blowing air through those? That's the other thing that has to happen to remove the moisture. I'm still studying the crystal(ing) process so I'm not sure yet about moisture retention/removal rate since you either start with "green" malts or "wetted" malts, have to google some more.

Here's what the wiki says:
The crystallization/caramelization process
To make crystal or caramel malt, maltsters take green malt and, instead of heating it in a dry kiln, stew it in an extremely damp or wet oven. In the presence of water, each kernel of grain essentially undergoes a mash in the hull, converting the grain's starch to sugar. However, since the grain is not crushed, the sugar does not go into solution and create wort. Instead, when the temperature is lowered, the sugar crystallizes in the hull, giving the grain the appearance of a crystal of sugar. The malt is then dried over heat, with the drying temperature and time determining the color and flavor characteristics of the finished product.

"Stewing" has got my brain cranking. I guess I just mash the whole grains then kiln it at different temperatures to get the different lovibond crystals.

Still editing here, heh, So does this mean I go from fully modified green malt (Not dried) to the mash tun? Wouldn't it just keep growing? How long do I mash? Do I dry it a little first? Do I use kilned malts, then mash it to convert it? How long do I mash, etc, etc, Do you see my dilema? I'll try something, there's no teacher like experience. If someone has a detailed schedule with step by step instructions for the making of crystal malts I will accept it gratefully, it will save alot of time. Maybe Fifelee has some malting buddies he could tap for knowledge? ? ? ?
Vern.

Found some interesting/more detailed instructions here: http://brewingtechniques.com/bmg/pauls.html

Another edit: I believe it is the higher temperature of stewing (Mashing) i.e. 155F + or -, that stops the growing process, DUH, I read this at the same site I linked above:

Beeston Crystal Malts
Beeston's caramalt and crystal malts are all produced from green two-row malt using the following method: The surface moisture is dried off at about 122 °F (50 °C) for approximately five minutes. The malt is then stewed at approximately 149-167 °F (65-75 °C) for about 40 minutes to stimulate the conversion of starches to sugars (crystallization). Drying and curing then takes place at about 176 °F (80 °C) for another 40 minutes, depending on the color required. The final drying and curing temperature varies among products; curing is typically done at about 275 °F (135 °C) for approximately two hours, depending on the color required. The darker the colors, the more intense the flavor.

Sounds doable!! YAY!!. . . . . .Now it's time. . . . . to . . . TAKE OVER THE WORLD!!

Vern.
 
Update: They are both fermenting away, started yesterday the 26th, I guess the washed saflager yeast worked (Cellar is currently at 51F). The one in the foreground is the rahr, the one with orange handle is the home malt, it may be turning a little darker than the rahr but we'll see after a few days. The home malt also started fermentation a few hours later than the rahr, if that means anything? I may secondary these depending on haziness. KRAUSEN!!!, CAN I GET A WOOP!!!!!
3481065283_35e1d7e49e.jpg
3481065339_26c91aa243.jpg


I've purchased some screen to fabricate the rotating bins in the kiln, I'll be working on this the next week or so and plan to malt more after that. We have plans already for the remaining home malt. The remaining 10lbs of "Correctly modified" malt will go to a fellow brewer for "testing". and the remaining appx. 22 lbs of over modified we are going to test in a barley wine we've been planning.

I will probably make the next malting into pale also to test the new bins and try to get the entire 50lbs malted correctly at the same time (Also because we will be out of pale by then) then I will try rauchmalting the next 50 lbs of barley as we have plenty of crystal. Crystal will be sometime after that.

As a side note: We were able to improve our efficiency to the low 80's with help from the brains here on the forum, it was appx. 56% for the pale batches, we've since brewed a strong scotch ale (Yesterday) with great results. thanx guys!!!:ban:
 
I find you fermenting in a cave nearly as awesome as all of the other stuff. :mug:
Looking good killer. =]
 
And I thought that going all grain was as close to doing it all yourself you could get. Very cool, I hope it turns out well!
 
I find you fermenting in a cave nearly as awesome as all of the other stuff. :mug:
Looking good killer. =]

It's kindof a cellar:
3290095094_96dc06461a.jpg
3290095054_e6ec2bfd97.jpg


And I thought that going all grain was as close to doing it all yourself you could get. Very cool, I hope it turns out well!

Have you grown your own barley and hops? have you captured your own yeast? There's always something else to do. It's wonderful!
 
Just thought I'd post some of the latest efforts on the home malting. I fabricated this rotating kiln cage which works fine until you put 50lbs of malts in it (Actually more like 100lbs since it's wet and grown, etc). I'm using an old belt driven gearmotor to drive it from the back. I shreded the two old belts on it and the new belts I found are too wide so I'm currently searching for a thinner set. I neglected to take a snap of the gearmotor, but here is the drum/cage inside the kiln:
3512983344_c13e9232e3.jpg
3512176841_292f4554ea.jpg

It has a shaft sticking through the back that I attached a large cement mixer pulley to, the gear motor in turn has a pulley that drives this. I'll take a picture of the rest assuming I can get it to work. For now, I am kilning the second 50lb batch with the same method as previous, I haven't given up on this rotating cage yet.

The only other thing that has happened is we brewed our pinon stout with some of the "over-modified" malt that was left from the first malting:
3512176989_8438211bf4_b.jpg

I calculated this batch for higher abv (appx.8%) because I knew the malt would have less than adequate diastatic power. It ended up being appx. 5% (Depending on FG of course) This drove our efficiency down appx. 37% for this 5gal batch, the wort tasted good, just like our previous stout batches, we'll see how it compares in a few weeks.
You can also see the first SMATH batches in the background, krausen has fallen and I'm contemplating secondary/dry hopping, I'll be taking a gravity reading of them soon. I'll post more as it happens.
 
Back
Top