Drywall is a lot easier to repair than a sprung coolant line on a freezer. Be careful with that!
I love this thread. Keep it up!
I love this thread. Keep it up!


Thanks homemaltster. The lightness of color is definitely from not getting the dark roast correct. I think the off-flavors are probably from the temp being too low for the first day and too high for the day after before getting to the correct range.
We tried to bottle a few last week and drank them this weekend, and there was zero carbonation. I very carefully sanitized everything and added just the right amount of sugar, and kept the bottles at fermenting temp for four days, so I'm not sure what happened. We still drank them, but it wasn't anything to write home about. It's a good think I've got a keg for the rest of it.


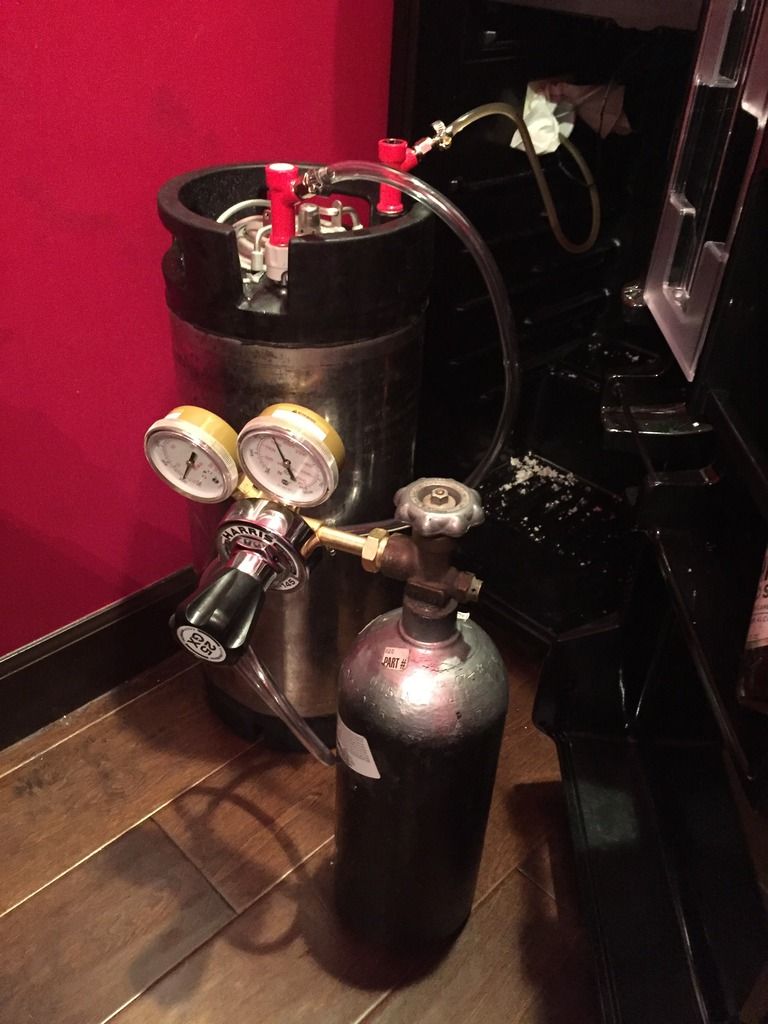
Yesterday I bought the last part I needed to complete my tap system. The nitrogen regulator I bought from a gas supply company in town did not use the same fitting as the hose and pin-lock set I bought from Kegworks, and Home Depot had nothing to marry the two. Going back to the supply store, they sold me a nipple that screwed directly onto their regular (cost me a dollar) and my problem was solved.
I'd already used sanitizer to clean off all the beer line equipment and attach the faucet to the face place via the longer 3" shank, get the nut on the shank, clamp the beer line to the nut, and then down in the fridge connect the beer line to the keg. Getting sanitizer down the beer line, which was in the lead wall at the time was a bit of a bother.
When I connected all the parts and clamps of the gas line and turned it on there was a leak at the regulator. A big wrench fixed that. I eased the pressure up to 30 psi to see if things worked, and they didn't.
From the inside of the fridge I pushed the beer line into the wall. I had fiddled with the faceplate while the line was attached to it, and figured it must have been pulled taught around a corner and kinked. Luckily, pushing the beer line into the wall must have relieved any tension that was there, because my second attempt yeilded a stream of cloudy, pungent beer. Even better, the second pull yeilded clearer, decent-tasting beer!
After a months of malting, brewing, and building, I have a working tap system with home made beer!
I set the pressure to 40 psi to hurry carbonation. On Friday we have guests coming for my wife's birthday, so I wanted everything in order by then.

FYI, for anyone following this thread. I submitted a request to the admins to get our own forum called Growing and Malting Barley (or grain or whatever). He said it was a good idea and was going to bring it up with the other admins. Sounds promising so look for a forum dedicated to this thread!
Yooper's a she. Now you've blown it

Wow i was just perusing this thread and when you mentioned the mill / southern states it caught my eye i grew up in jarretsville and still live in bel air, small pond indeed


![Craft A Brew - Safale BE-256 Yeast - Fermentis - Belgian Ale Dry Yeast - For Belgian & Strong Ales - Ingredients for Home Brewing - Beer Making Supplies - [3 Pack]](https://m.media-amazon.com/images/I/51bcKEwQmWL._SL500_.jpg)


