- Joined
- Nov 13, 2019
- Messages
- 546
- Reaction score
- 377
just saw this and at 125, ill pass.

Has anyone experimented with cooling the Grainfather Conical Fermenter with a simple cooling kit running ice water? What was the lowest temperature you got to? I am in the middle of brewing a lager and I used a simple grainfather cooling kit with a cooler filled with ice water @ 40F. I could get the wort down to about @50F after cooling it overnight. Even after using approx 2-3 lbs of ice every 12 hrs - I am struggling to keep the Grainfather Conical Fermenter to about 55F. Overall I am seeing the temperature anywhere from 52-62F. The amount of ice I need to have on hand is getting a bit tricky as well. I cannot justify spending on the glycol chiller. Does anyone have any better ideas of maintaining a steady temperature? I have given up on cold-crashing in the GCF.... It also doesnt fit into any fridge easily. I am getting a bit tired of baby sitting this fermenter....


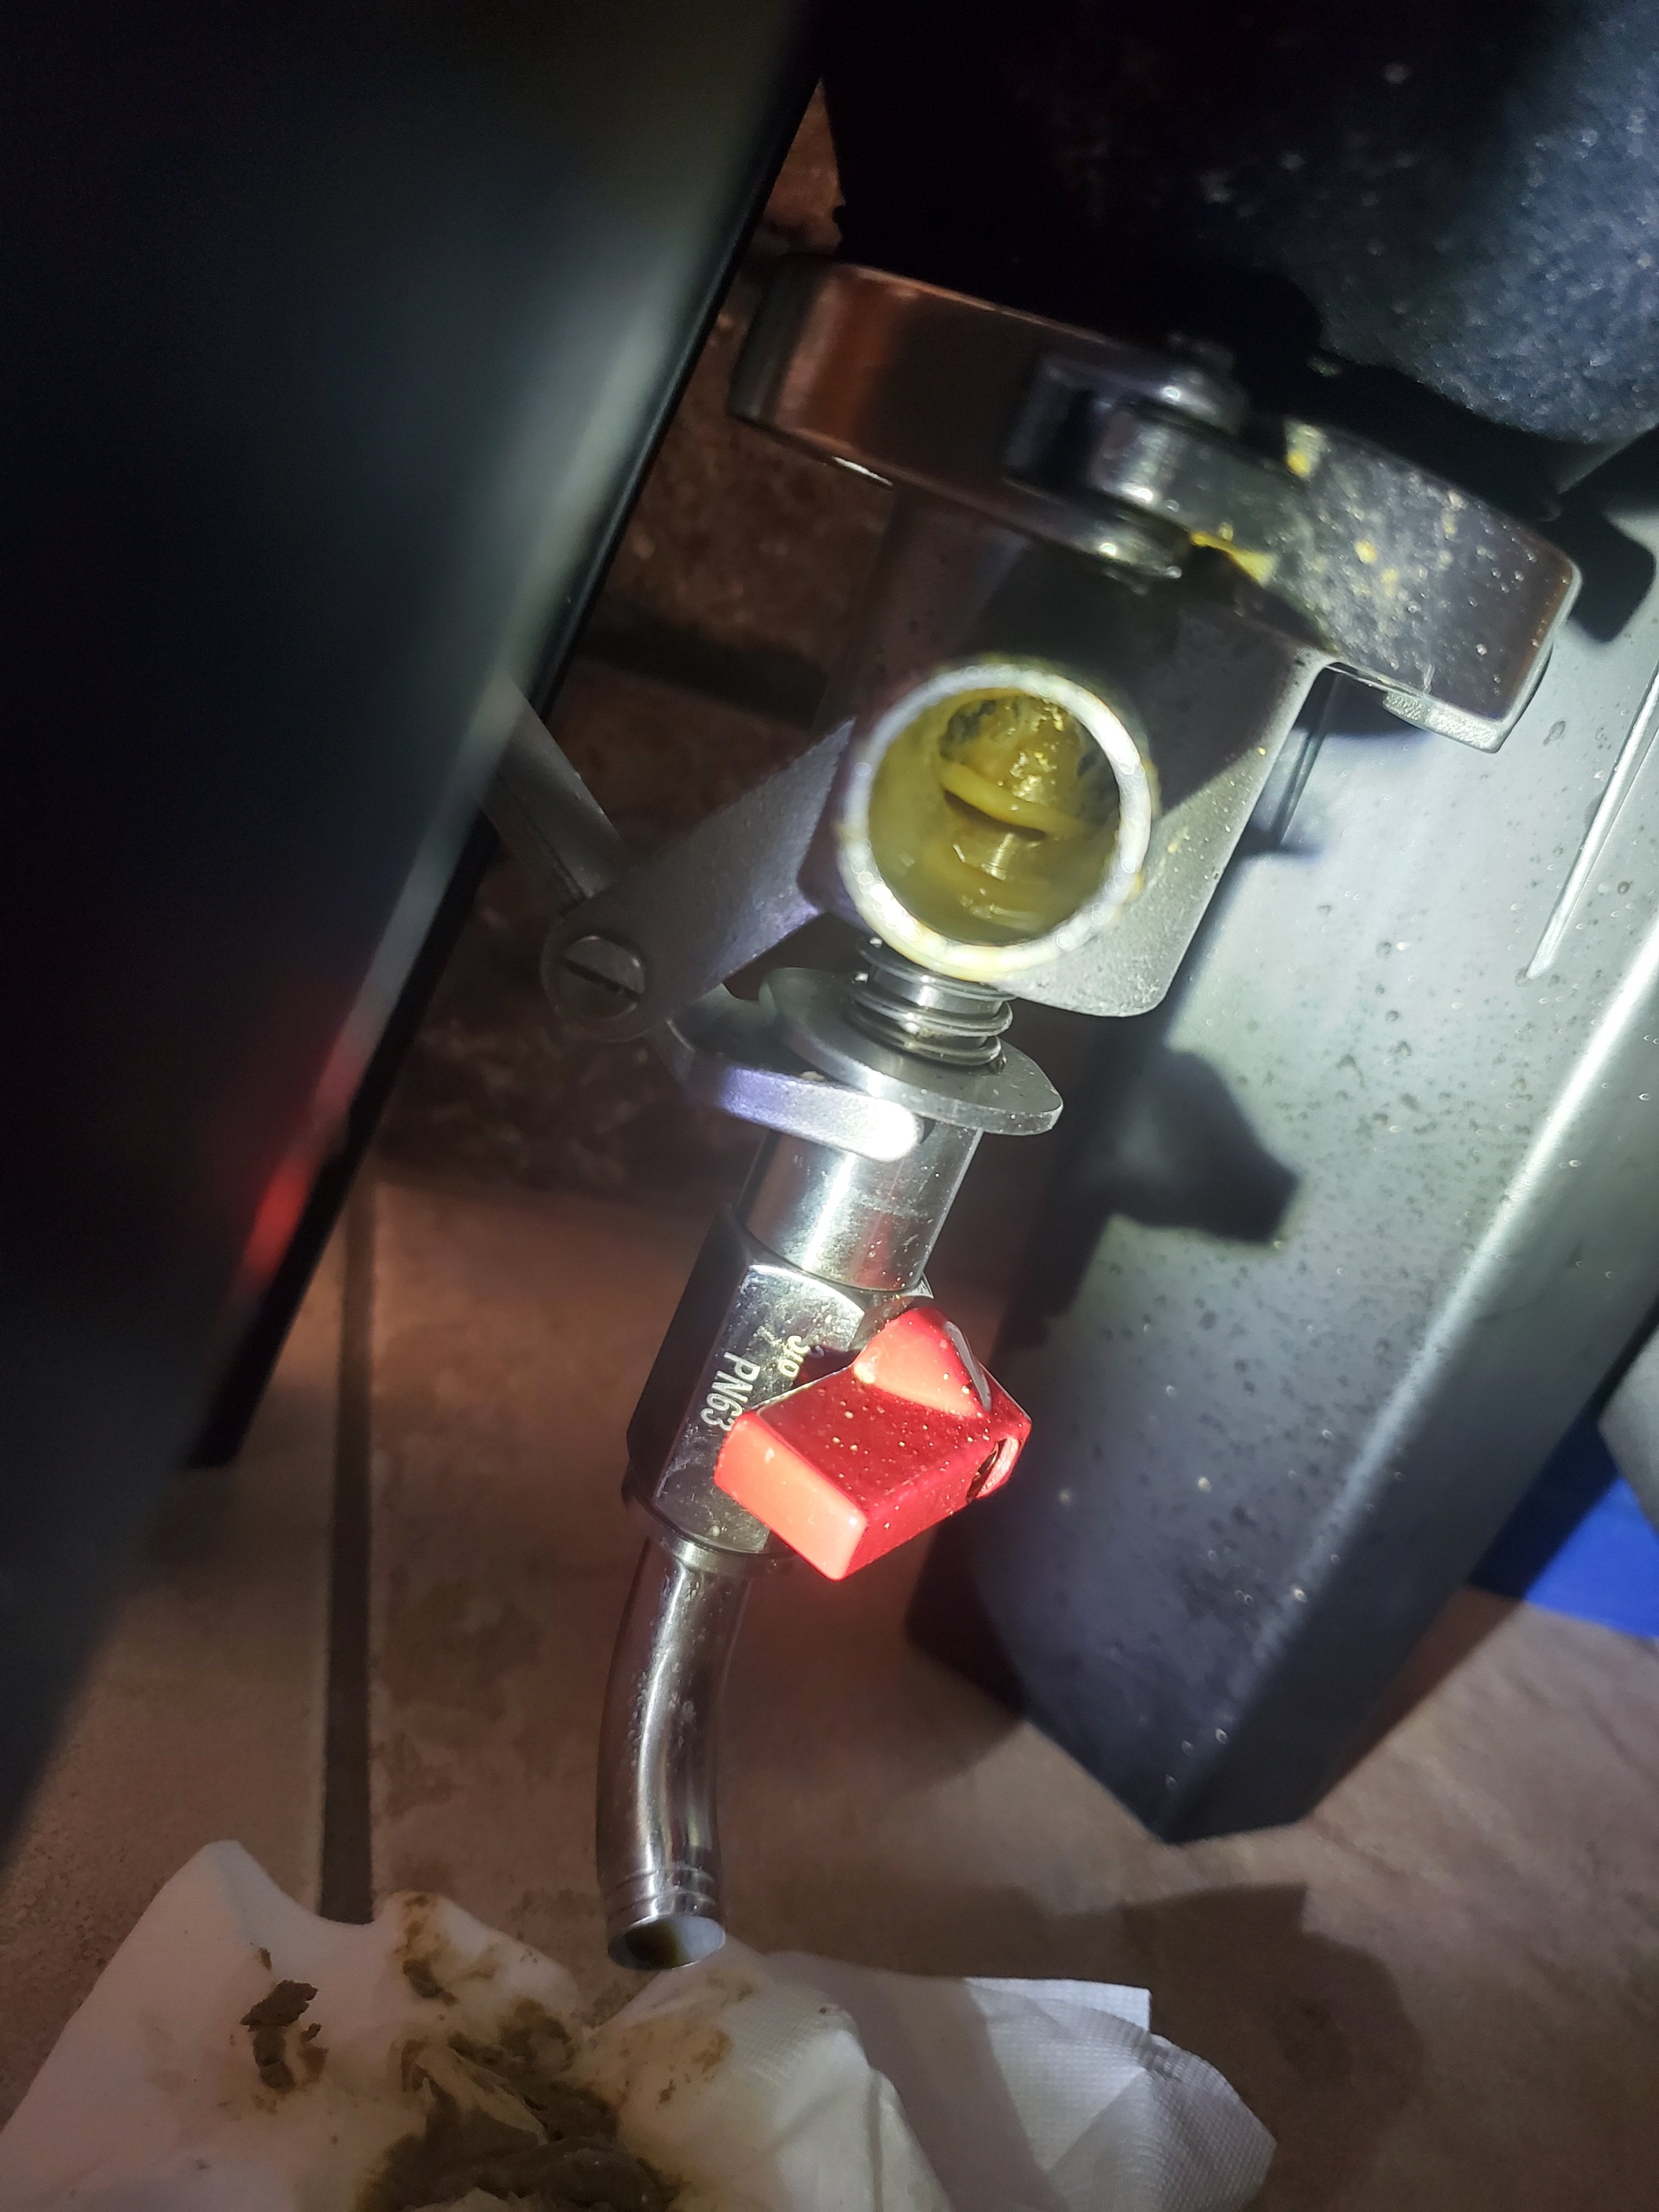
Has anyone figured out a better valve setup for the bottom of these tanks? The dual valve sounded neat at first, but has become a big pain to deal with.
When trying to dump the trub and keep things clear, I've now clogged both times and have to blow co2 up through the valve to clear it. I really like how the FastFerment has a dump jar.. I'm wondering if there's a way to rig up such a setup to these?
The amber ale I made has WLP007 in it right now as a matter of fact. Ive tried dumping it every day since fermentation started on this batch. It's been coming out like a thick sludge once I can get it moving with shooting co2 up inside the dump valve to break it loose. It's more trub than yeast, very little whiteness of the WLP007 in it.At what time during the cold side process are you trying to dump yeast/trub? What yeast are you using? I have completed roughly 30 batches between my two grainfather conicals and have never had problems with dumping, even with highly flocculant yeast such as WLP007.
I have my GCF in the garage (Florida) and could get down to 55F in the summer using the water cooling kit. I had to swap frozen water bottles about twice a day. I would hope I could get down to 45F using the same swapping frequency now that the weather has cooled down.Has anyone experimented with cooling the Grainfather Conical Fermenter with a simple cooling kit running ice water? What was the lowest temperature you got to? I am in the middle of brewing a lager and I used a simple grainfather cooling kit with a cooler filled with ice water @ 40F. I could get the wort down to about @50F after cooling it overnight. Even after using approx 2-3 lbs of ice every 12 hrs - I am struggling to keep the Grainfather Conical Fermenter to about 55F. Overall I am seeing the temperature anywhere from 52-62F. The amount of ice I need to have on hand is getting a bit tricky as well. I cannot justify spending on the glycol chiller. Does anyone have any better ideas of maintaining a steady temperature? I have given up on cold-crashing in the GCF.... It also doesnt fit into any fridge easily. I am getting a bit tired of baby sitting this fermenter....
The amber ale I made has WLP007 in it right now as a matter of fact. Ive tried dumping it every day since fermentation started on this batch. It's been coming out like a thick sludge once I can get it moving with shooting co2 up inside the dump valve to break it loose. It's more trub than yeast, very little whiteness of the WLP007 in it.
 .
.I managed to drop the stir bar from my starter into the fermenter on my last batch. That's probably not helping anything
It's a shame this valve is such a pain point. It does seem like a clever idea and kudos to GF for thinking outside of the box. I'm not aware of anyone else making a true jacketed fermenter like this at this size and price point.
I wish there was more information out there about it. Googling only brings up the instruction manual from GF's website, a GF-made YouTube video, and this thread. I dunno if GF is really good at SEO, or if we're the only people who actually bought one, lol.
 Harbor Freight has them pretty cheap if there's one near you.
I honestly have no idea how it fell out like it did. It went together fine and everything looked and functioned correctly. I was half tempted to put a TC plug in the top and flip it upside down and pull the valve out to fix it.. but it's about done with a couple days of DH to go, so I'll just let it be.
Wow! I was thinking of taking a set of these to a rubber and seal shop nearby and seeing what they could match with better quality. You sir have saved me some hassle and I thank you!! I'll be ordering these right now.
I managed to drop the stir bar from my starter into the fermenter on my last batch. That's probably not helping anything
It's a shame this valve is such a pain point. It does seem like a clever idea and kudos to GF for thinking outside of the box. I'm not aware of anyone else making a true jacketed fermenter like this at this size and price point.
I wish there was more information out there about it. Googling only brings up the instruction manual from GF's website, a GF-made YouTube video, and this thread. I dunno if GF is really good at SEO, or if we're the only people who actually bought one, lol.
Sounds like you are off to a better start with your current batch. A proper whirlpool followed by a long rest can really help settle the trub, allowing you transfer very little to the fermenter. This is how I have my fermenter setup at the start of fermentation:
View attachment 703387
The blow off cane is from norcal brewing solutions:
https://www.norcalbrewingsolutions.com/store/1.5-Inch-Tri-Clover-Connection-Blow-Off-Tube.html
Once primary fermentation slows down, I replace the blow off cane with a gas manifold that I made using the manifold body from spikes as a base:
View attachment 703388
This manifold allows me to maintain a slight positive pressure environment inside the fermenter at all times, which enables me to minimize the ingress of oxygen throughout the cold side process. It also makes closed transfers very easy. I also highly recommend getting yourself one of these plant dollies if you want to be able to move the fermenter around with ease:
https://www.amazon.com/gp/product/B002TRQSYO/ref=ppx_yo_dt_b_search_asin_title?ie=UTF8&psc=1
They fit the legs of the fermenter like they were designed for one another.