Amazon has them, but for something like a buck a piece.Excellent idea! I searched all over for that thread type in an adaptable fitting, with very few ideas. So cool! Thanks!
You are using an out of date browser. It may not display this or other websites correctly.
You should upgrade or use an alternative browser.
You should upgrade or use an alternative browser.
First Time Keezer Build - What do you wish you knew/What lessons did you learn?
- Thread starter Fleischmeister
- Start date

Help Support Homebrew Talk:
This site may earn a commission from merchant affiliate
links, including eBay, Amazon, and others.
Thanks for the Amazon tip! This is why I love the Homebrew Talk site, so many great folks to share their findings and tips. I dug around my box of spare brewery stuff and found some old White Labs yeast vials. Not sure why I saved them but I'm glad I did. What a surprise find, I hope some of the other crap I have becomes as useful.Amazon has them, but for something like a buck a piece.
McMullan
wort maker
- Joined
- Dec 22, 2015
- Messages
- 2,566
- Reaction score
- 3,461
Here's another one. When you fit a collar there's going to be some very useful anchor points on the back, from the original hinge attachments. A little imagination (and an offcut piece of timber) you can festoon all manner of peripherals. I've just got to add a bracket to hold a small CO2 cylinder:

dhickey
Well-Known Member
Do you have a build thread of this keezer. It is super clean, nice work!That's more or less what I did. Except I used oak veneer on ply for the finish, which is more stable generally.
View attachment 749610
View attachment 749611
View attachment 749612
View attachment 749613
Positronic_Matrix
Well-Known Member
Sage advice. I just rebuilt my keezer from scratch and came to the same realization too late. Not only should I have put the taps over the hump but my two gas valve manifolds as well. Instead I have a high-pressure manifold to the left and a low-pressure to the right (over the hump). The taps and the high-pressure manifolds conspire to make it tricky business getting kegs in or out.I would keep your taps at the hump end and not in the middle (if your building a collar). It makes it tuff to load kegs if there in the middle, and taking the handles off each time is a pain.
I spent so long finishing and staining the wood, that I’m going to let it ride until my third rebuild sometime in the future, likely with a slightly larger keezer so I can truly get four on the floor. Right now I can get 3.9 on the floor (the fourth one just clips the hump) which rounds down to 3. Since freezers are cheaper then four slim lines, that’s the path forward.

$76.92 ($2,179.04 / Ounce)
Brewing accessories 1.5" Tri Clamp to Ball Lock Post Liquid Gas Homebrew Kegging Fermentation Parts Brewer Hardware SUS304 Brewing accessories(Gas Hose Barb)
chuhanhandianzishangwu


$479.00
$559.00
EdgeStar KC1000SS Craft Brew Kegerator for 1/6 Barrel and Cornelius Kegs
Amazon.com


$53.24
1pc Hose Barb/MFL 1.5" Tri Clamp to Ball Lock Post Liquid Gas Homebrew Kegging Fermentation Parts Brewer Hardware SUS304(Gas MFL)
Guangshui Weilu You Trading Co., Ltd


![Craft A Brew - Safale S-04 Dry Yeast - Fermentis - English Ale Dry Yeast - For English and American Ales and Hard Apple Ciders - Ingredients for Home Brewing - Beer Making Supplies - [1 Pack]](https://m.media-amazon.com/images/I/41fVGNh6JfL._SL500_.jpg)
$6.95 ($17.38 / Ounce)
$7.47 ($18.68 / Ounce)
Craft A Brew - Safale S-04 Dry Yeast - Fermentis - English Ale Dry Yeast - For English and American Ales and Hard Apple Ciders - Ingredients for Home Brewing - Beer Making Supplies - [1 Pack]
Hobby Homebrew


$44.99
$49.95
Craft A Brew - Mead Making Kit – Reusable Make Your Own Mead Kit – Yields 1 Gallon of Mead
Craft a Brew


$58.16
HUIZHUGS Brewing Equipment Keg Ball Lock Faucet 30cm Reinforced Silicone Hose Secondary Fermentation Homebrew Kegging Brewing Equipment
xiangshuizhenzhanglingfengshop


$176.97
1pc Commercial Keg Manifold 2" Tri Clamp,Ball Lock Tapping Head,Pressure Gauge/Adjustable PRV for Kegging,Fermentation Control
hanhanbaihuoxiaoshoudian


$49.95 ($0.08 / Fl Oz)
$52.99 ($0.08 / Fl Oz)
Brewer's Best - 1073 - Home Brew Beer Ingredient Kit (5 gallon), (Blueberry Honey Ale) Golden
Amazon.com


$22.00 ($623.23 / Ounce)
AMZLMPKNTW Ball Lock Sample Faucet 30cm Reinforced Silicone Hose Secondary Fermentation Homebrew Kegging joyful
无为中南商贸有限公司

$53.24
1pc Hose Barb/MFL 1.5" Tri Clamp to Ball Lock Post Liquid Gas Homebrew Kegging Fermentation Parts Brewer Hardware SUS304(Liquid Hose Barb)
yunchengshiyanhuqucuichendianzishangwuyouxiangongsi


$719.00
$799.00
EdgeStar KC2000TWIN Full Size Dual Tap Kegerator & Draft Beer Dispenser - Black
Amazon.com

$7.79 ($7.79 / Count)
Craft A Brew - LalBrew Voss™ - Kveik Ale Yeast - For Craft Lagers - Ingredients for Home Brewing - Beer Making Supplies - (1 Pack)
Craft a Brew


$33.99 ($17.00 / Count)
$41.99 ($21.00 / Count)
2 Pack 1 Gallon Large Fermentation Jars with 3 Airlocks and 2 SCREW Lids(100% Airtight Heavy Duty Lid w Silicone) - Wide Mouth Glass Jars w Scale Mark - Pickle Jars for Sauerkraut, Sourdough Starter
Qianfenie Direct

$20.94
$29.99
The Brew Your Own Big Book of Clone Recipes: Featuring 300 Homebrew Recipes from Your Favorite Breweries
Amazon.com


18 taps? Damn man, that's a lot of beer. Can I come over and help you drink it. LOL.This post has some pictures of keezer #2. It’s been in operation for a few months now, and I’m mostly pretty happy with it. I didn’t follow the “a little extra room” advice, so replacing kegs is a pain.
I learned that if the collar you build as a stopgap is too good, you will never follow through with your plan to build something better.
"There is nothing as permanent as a temporary solution".I learned that if the collar you build as a stopgap is too good, you will never follow through with your plan to build something better.
Said by somebody famous, probably.
I think I built my table saw's temporary extension in 2007.
Positronic_Matrix
Well-Known Member
I started out with a rough wood, painted white to match the chest freezer. After building a handsome fermentation chamber with a gel-stained pine collar, I wanted to revisit my keezer. I spent hours sanding down that collar to remove the white paint and rough finish, ultimately repeating the gel stain to create a much-improved collar only surpassed by the fermentation chamber. The thought of having to rebuild and restain that collar is upsetting. I admit that it could be several years."There is nothing as permanent as a temporary solution".
Said by somebody famous, probably.
My keezer died a few months back. Reflecting on my build and comparing to what I have now, my opinion is that unless you plan to have more than 2 kegs on tap, go with a kegerator. I found leaning over my collar into the keezer to clean it was a nightmare. Although it was well insulated, it seemed, at least to me that it was losing too much cold and the condenser was kicking on too much, which might have contributed to its early demise. Another issue with my keezer is that it was in my garage and during the winter the taps would freeze.
I have an old refrigerator that will hold 2 kegs and my C02 tank. I just use picnic taps for now. No Inkbird, just let it run at fridge temp. Keeps my beer nice and chilled. I also have more room in my door for canned beers and yeast. Sometime in the future I plan to run the C02 line thru the fridge to put my tank, regulator and distributor on the outside as well and possibly re-installing my 2 taps. (although I will probably have thr tap freezing problem in the winter.
I did enjoy my keezer and pouring beers from the taps but going forward, unless the wife lets me put it inside, I will not ever revisit building a keezer.
I started out with a built keezer, real proud of how it turned out. Two years in, it died. I was gun shy going down that road again. We replaced our kitchen appliances so I used the old fridge as my beer fridge. That was four years ago and it's running fine. The fridge is 30 years old .
Not knowing when it's life will end I decided to buy a beer cooler, it'll be delivered on Monday. It's a commercial kind, two doors, I can route beer lines out the back to my bar taps.
It's an investment for my beer future as I just don't know when I'll be looking again.
Not knowing when it's life will end I decided to buy a beer cooler, it'll be delivered on Monday. It's a commercial kind, two doors, I can route beer lines out the back to my bar taps.
It's an investment for my beer future as I just don't know when I'll be looking again.
I find cleaning a keezer to be pretty easy with a mop and a shop vac.
How long are those lines and do you do anything to cool them?I decided to buy a beer cooler, it'll be delivered on Monday. It's a commercial kind, two doors, I can route beer lines out the back to my bar taps.
I haven't got the new cooler yet so I can't say exactly how long the lines will be but guessing I'm going to try to be five foot. I don't plan to cool the beer lines coming out of the cooler to the taps. As far as insulating them my plan is to use some of that water pipe insulation. Again, it's just a guess right now until I get the unit placed.How long are those lines and do you do anything to cool them?
My current set up has five footers and half of them are uninsulated. I get some foaming but not terrible bad so anything I do better than that is a big plus.
Re: bolded sentence - Which is why I double-hinged my keezer. I can lift the lid or the entire collar. I also built the collar with 2x12's to accommodate a 5 gallon corny keg on the hump.My keezer died a few months back. Reflecting on my build and comparing to what I have now, my opinion is that unless you plan to have more than 2 kegs on tap, go with a kegerator. I found leaning over my collar into the keezer to clean it was a nightmare. Although it was well insulated, it seemed, at least to me that it was losing too much cold and the condenser was kicking on too much, which might have contributed to its early demise. Another issue with my keezer is that it was in my garage and during the winter the taps would freeze.
I have an old refrigerator that will hold 2 kegs and my C02 tank. I just use picnic taps for now. No Inkbird, just let it run at fridge temp. Keeps my beer nice and chilled. I also have more room in my door for canned beers and yeast. Sometime in the future I plan to run the C02 line thru the fridge to put my tank, regulator and distributor on the outside as well and possibly re-installing my 2 taps. (although I will probably have thr tap freezing problem in the winter.
I did enjoy my keezer and pouring beers from the taps but going forward, unless the wife lets me put it inside, I will not ever revisit building a keezer.
ChrisfromAbby
Well-Known Member
I'm on my 4th rebuild. Sort-of. Really just moving the collar to a new freezer really as the old 3rd one died.
Any how, I decided that this time, rather than painting the freezer I'd try vinyl wrapping it. So far so good! The problem with paint was that it scratched off really easily. And was messy. You can see the old painted lid on the collar and the new vinyl covering on the chest freezer body. I still have one strip to go at the top of the freezer under the taps.
Previously, I used some black walnut veneer to finish the exterior on the collar. That also worked great! I used the wood glue "Iron-On" technique to affix it to the underlying frame.
Chris
Attachments

Indian_villager
Well-Known Member
The 2 big things I learned were
1) Seal the heck out of the thing. My initial build had really bad condensation issues and my second build has none.
After you attach your collar, use HVAC tape to cover up everything from where the lid meets the collar to the transition from the collar to the body of the freezer. Ensure you have effective overlap from one piece of tape to the next. Make sure the rubber seal is sealing against the HVAC tape instead of the porous wood. Seal up your whole coffin too if you are going that route.
2) Circulate the air. I have one fan in the main body pulling air through a dessicant pack, and another fan in the coffin. I am having way less foaming and less stratification through the kegerator.
https://www.printables.com/model/268765 This shows the dessicant pack thing I was talking about and if you look closely you'll see what I was talking about on sealing.
mheitt
Active Member
- Joined
- Mar 1, 2009
- Messages
- 26
- Reaction score
- 1
How have folks attached the collar to the freezer? My freezer is in the crawlspace under my kitchen, and I have a trunk line going up through the kitchen floor and cabinet to a tap tower. The clearance in the crawlspace is low, so I used 2x4s instead of 2x6s. Unfortunately, the 2x4s were a bit warped, so I soaked them and weighted them down in my shed to correct the warped collar frame. Most of the warp is corrected, but I'm worried that when the collar gets cold it may twist again.
Attachments

I never attached my collar to my keezer. It sits flat and doesn't budge when I open and close the door. Hasn't been a problem, but I am thinking of doing some light sealing to keep tiny bugs out.
I just used this and have no issues with bugs. The weight of my 2x12 collar holds securely in place. I've checked temperatures around the lid and collar and there doesn't appear to be any cool air leaking.I never attached my collar to my keezer. It sits flat and doesn't budge when I open and close the door. Hasn't been a problem, but I am thinking of doing some light sealing to keep tiny bugs out.
That looks pretty good. And if I use it, I won't have to pry the collar off if the keezer dies, like the Chinese disposable all new keezers are.
I'm on my second keezer (over 15+ years) and didn't attach the collar on either one. Just a little weather stripping. The 2x8's provide plenty of weight. It's not going anywhere. I do insulate the wood with that silver stuff on a roll. I used 2x8's so the ledge will fit two more kegs, not for the weight.
Indian_villager
Well-Known Member
Liquid nails and ratchet straps. My collar had a bit of warp to it and I held the collar down while the liquid nails was curing with ratchet straps. Once cured the collar stayed flat.How have folks attached the collar to the freezer? My freezer is in the crawlspace under my kitchen, and I have a trunk line going up through the kitchen floor and cabinet to a tap tower. The clearance in the crawlspace is low, so I used 2x4s instead of 2x6s. Unfortunately, the 2x4s were a bit warped, so I soaked them and weighted them down in my shed to correct the warped collar frame. Most of the warp is corrected, but I'm worried that when the collar gets cold it may twist again.
Could you share which cooler you purchased?Not knowing when it's life will end I decided to buy a beer cooler, it'll be delivered on Monday. It's a commercial kind, two doors, I can route beer lines out the back to my bar taps.
From Iron Mountain, Peak Cold back bar cooler 48".Could you share which cooler you purchased?
They offer the same style as a kegerator with tap towers. I opt to get this one as I was routing the beer lines from the back. Both are identical.
I love it.

If you are making a keezer - go big ! You won't regret it. I have six on tap and room for 2 more corny kegs to condition/lager and get carbed up before the previous keg dies. It took a while to get all 6 taps going at first but now I am dialed in, with the next up keg ready to go and pour on the day it is tapped.
Make external ports for CO2 for easy transfers and flushing O2. And other ports for power, fans, temp probes etc. You will use them up in no time.
Make external ports for CO2 for easy transfers and flushing O2. And other ports for power, fans, temp probes etc. You will use them up in no time.
Last edited:
That looks awesome! Are you planning to put commercial kegs in that too - like half barrels? It will definitely hold a couple. How many cornies do you think you can get in that? How many taps do you plan to add? You could leave some space for lagering kegs even.From Iron Mountain, Peak Cold back bar cooler 48".
They offer the same style as a kegerator with tap towers. I opt to get this one as I was routing the beer lines from the back. Both are identical.
I love it.
View attachment 858471
I’m not a real handyman. I never had a keezer, I had one of those old harvest green refrigerators from the 70s for awhile with holes drilled through the side for faucets. I didn’t take that with me when I moved and then I bought a real 2 tap kegerator. Nothing like that. Thats made for installation in a working bar!
It'll hold eight corny kegs. I normally keep six in it, three on tap and three waiting their turn. On one end I have some small shelves for hops, yeast and single cans.That looks awesome! Are you planning to put commercial kegs in that too - like half barrels? It will definitely hold a couple. How many cornies do you think you can get in that? How many taps do you plan to add? You could leave some space for lagering kegs even.
I’m not a real handyman. I never had a keezer, I had one of those old harvest green refrigerators from the 70s for awhile with holes drilled through the side for faucets. I didn’t take that with me when I moved and then I bought a real 2 tap kegerator. Nothing like that. Thats made for installation in a working bar!
I don't plan on commercial kegs but it will definitely hold them. It came with shelves but I removed them.
This unit replaced my repurposed kitchen fridge feeding my beer taps. It worked fine but was thirty years old. Not knowing when it would die, I figured I get this so I'm prepared.
I have repurposed three fridges, built a keezer from a chest freezer and built an insulated box with an upright freezer attached. All worked fine after tweaking, adding and adjusting things.
In the end, doling out the money for my new cooler was the best option. It's built for beverages, heavy duty, casters, stainless steel interior, insulated glass doors an adjustable controller and lighted inside. If you can do it, spend the money.
In the end, doling out the money for my new cooler was the best option. It's built for beverages, heavy duty, casters, stainless steel interior, insulated glass doors an adjustable controller and lighted inside. If you can do it, spend the money.
@OakIslandBrewery can you send pictures of how you have the lines going for that? I wrestled with first foamy point for awhile and finally got clear of that with long shanks inside my keezer with a recirc fan blowing cold air right on them. So I'd be nervous about lines to the taps sitting out at room temperature. But I love the idea of those front open doors!
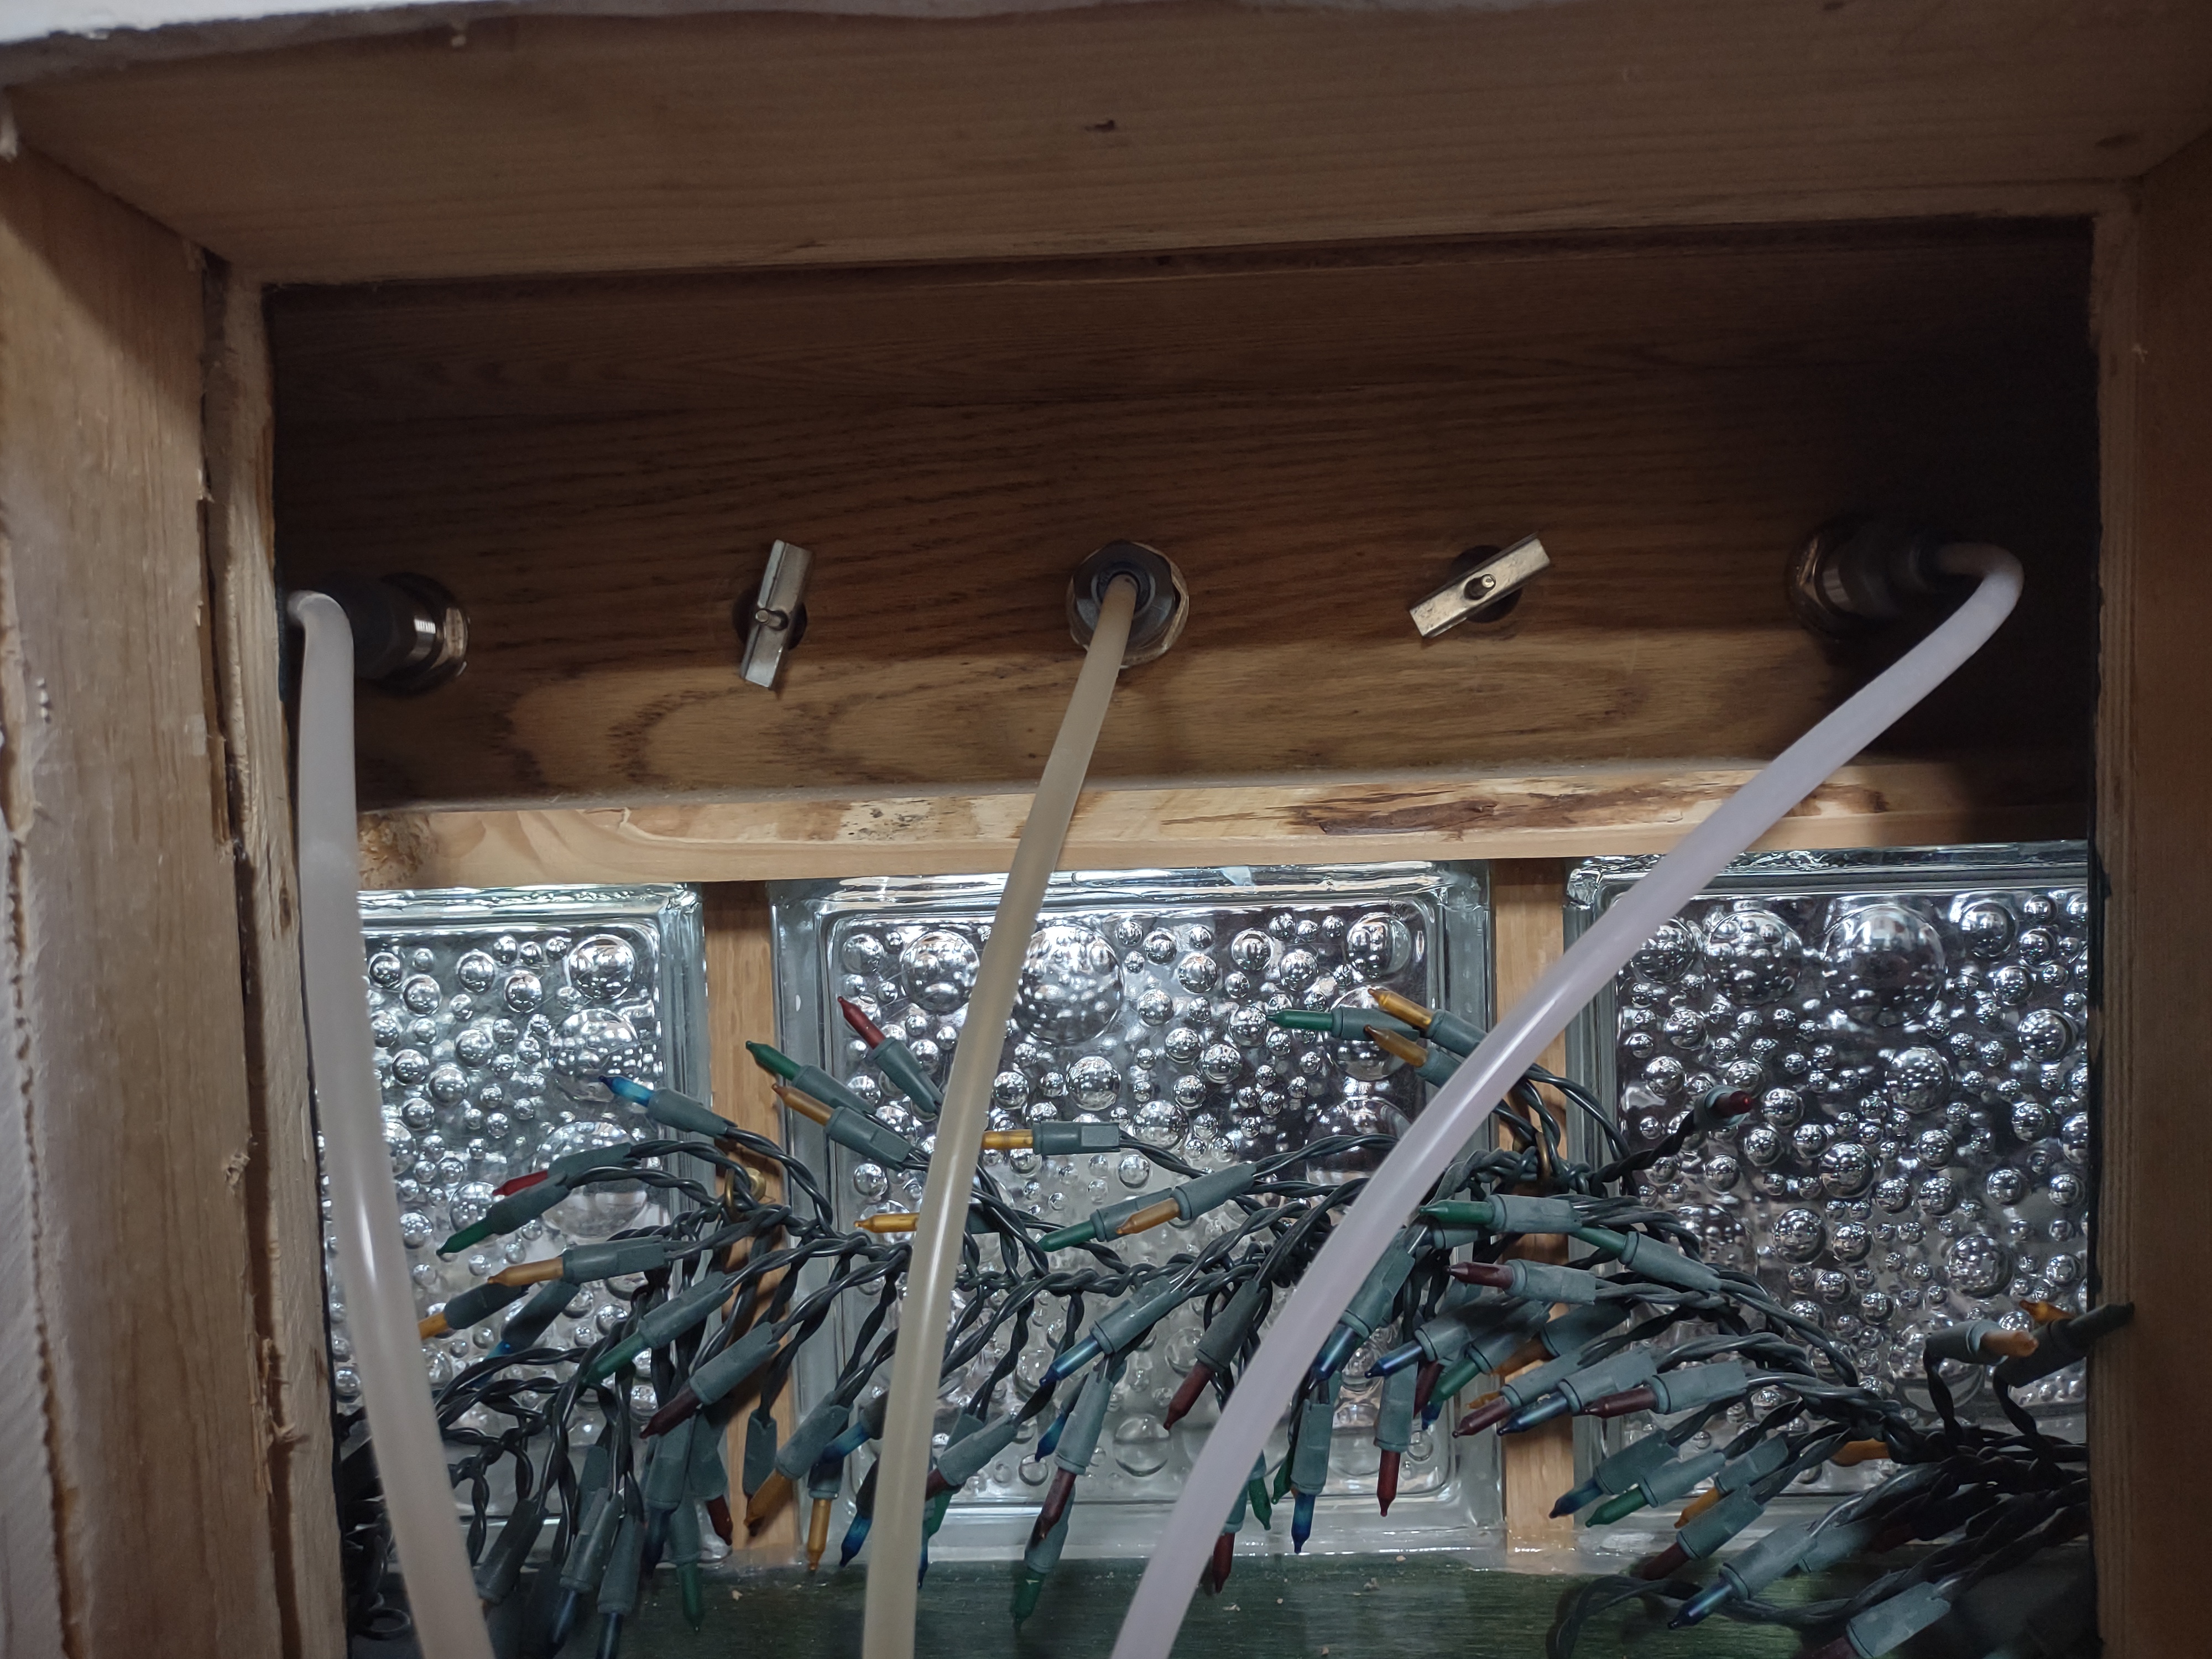
Yes I will post some pictures. The beer lines are routed out the back of the cooler but do run exposed to the taps. The beer lines are just over five foot so the exposed section isn't that much. I don't have any issues with the pour but they could be insulated real easy, even covering the tap shank.@OakIslandBrewery can you send pictures of how you have the lines going for that? I wrestled with first foamy point for awhile and finally got clear of that with long shanks inside my keezer with a recirc fan blowing cold air right on them. So I'd be nervous about lines to the taps sitting out at room temperature. But I love the idea of those front open doors!
Edit: sorry for the late post, lots going on with family in Florida.
Here's a picture of my three beer lines going to the shanks. Like I mentioned, not insulated but no warm beer pours either. The lines are short enough and with a good pour you'd never notice a warm couple of tablespoons from the exposed lines. I hope this helps you!
Attachments
Last edited:
Similar threads
- Replies
- 8
- Views
- 495
