First Batch/IPA

Homebrew Talk - Beer, Wine, Mead, & Cider Brewing Discussion Forum

Help Support Homebrew Talk - Beer, Wine, Mead, & Cider Brewing Discussion Forum:

This site may earn a commission from merchant affiliate links, including eBay, Amazon, and others.

Buick Beer Gardens

Well-Known Member
Joined
Jan 15, 2020
Messages
116
Reaction score
73
Hello all,

I have brewed my first batch. It is a IPA. The picture below is after a 9 days. Fermentation was very active for 4-5 days. Fermentation has all but stopped. Bubble at the airlock has slowed. All appears well in my gallon of beer but I like to have you opinion.

FUvuAmX.jpg
 
Welcome to the forum!

Looks good!
Yeast is settling out, forming the tan-colored cake on the bottom.
Judging by the narrow krausen ring, and clean glass of the headspace, your fermentation was well controlled, no big blow off event.

Have you added dry hops to this? If not, this is the right time.

On a side note, I have never seen a "ribbed" glass carboy like that in one gallon (?) size.
If it's indeed a one gallon carboy, you don't have a gallon of beer in there. ;)
 
Hello IslandLizard. The temp control in my basement is very good. No blow off at all. I have not added dry hops. The carboy is from a kit my daughter gave me for Christmas. It is a gallon size. It is certainly short of gallon no doubt and as you noticed.

Pasadena MD? I'm in the same neighborhood!
 
The beauty of small fermentation vessels is that the outside surface is relatively large to its volume. So heat build up due to fermentation (it's exothermic) is easier dissipated. A 64-66F basement or other coolish area is perfect for that.

You must have transferred pretty clean wort into your fermenter, I don't see much hop trub on the bottom. The greenish krausen ring on top is a signature for IPAs. ;)

If your kit instructions mention "racking to a secondary," just skip over it. Secondaries are not needed (with very, very few exceptions), only causing trouble, solving none.

Is it still bubbling somewhat?
Are you going to dry hop?
 
The wort was clean. When boiling much of the hop was left as a ring around my pot. I would scrap it back into the boiling wort though. However, that ring on the pot did not make it into my fermenter unfortunately. Instructions were not clear on that. Live and learn! Instructions have me bottling after 2-3 weeks. Sit for 2 weeks at room temp then refrigerate.

It is bubbling but slowly. Not like it was when very active. I may dry hop. Will need to pick some up.
Yes, stirring and scraping the side often, letting it drop back into the wort when boiling, is good. You want the hop matter in the wort, that's where it extracts the goodness. It's no use drying up on the side above.

Some drop everything in the fermenter, hops, trub and all. Some try to transfer wort as clean as possible, leaving as much trub behind as they can. And anything in between. They all make good beer and the end result, which one is better, remains inconclusive (AFAIK).

The slow and steady bubbling as seen in your video is perfect!
You could bring her into a warmer area, say ~68-70F to make sure she'll finish out completely. The slightly higher temps also help with conditioning. If you give her another 5-7 days at the slightly higher temps she should be ready to package.

You can add dry hops at the trail end of the fermentation, or wait until she's totally done. Key is not to add them too early. Adding dry hops 3-7 days before bottling (or kegging) is optimal and usually advised.

Since it's such a small batch, I would not take early hydrometer samples. At least not until ready to package, then perhaps do one for all security. You'd "lose" 3-4 oz each time for a sample. But you can drink it to learn about and judge how "green" (young) beer tastes.

Now you could carefully lower a hydrometer into your carboy to take a reading. Tie or securely tape a piece of unflavored dental floss to the top. Make sure it doesn't drop in from above, it will torpedo downward, bottoming out and shatter.
 
It is bubbling but slowly. Not like it was when very active. I may dry hop. Will need to pick some up.

Which hops were in your kit? How much of each?

Depending on your daily travels, there are quite a few homebrew stores around our area.
I recommend Maryland Homebrew in Columbia. That's where I usually go, they've got a wonderful and large selection of hops, yeast, grain, extracts, and pretty much everything else you'd ever need in brewing, wine making, cheese making, you name it. Just walking around in the store/warehouse is inspiring.

Or Annapolis Homebrew in Severna Park. I haven't been there lately, but hear they're good too.

Just double check opening hours of any of these stores before taking the trip, they can be a bit surprising.
 
The dry hops adding, this will not introduce possible bacteria? Thanks for the tips!
The alcohol in the beer is a deterrent to invaders, as is the low pH. Hops themselves are antiseptic, just adding them to the beer is fine, especially pellets and cryo hops. For example, Lactobacillus can't thrive in beer over 10-15 IBU, most beers qualify, certainly IPAs.

Now if you drop the dry hops on your garage floor, sweep the lot up in a dust pan and pour them down a funnel that is normally used to fill small plant pots with dirt, you're on your own. But we still like to hear and see all about it, the technique, the results, the pellicles. All of it! We really like beer drama as much as beer itself. No, we need it!

Dry hopping:
Lacto may not thrive in hoppy beers, there are others bugs, though... that's why we still sanitize things before dry hopping.

Sanitation is very important, sure. Clean, then sanitize everything well that touches chilled wort (<140F) and your beer. FWIW, wort becomes beer as soon as you pitch yeast.

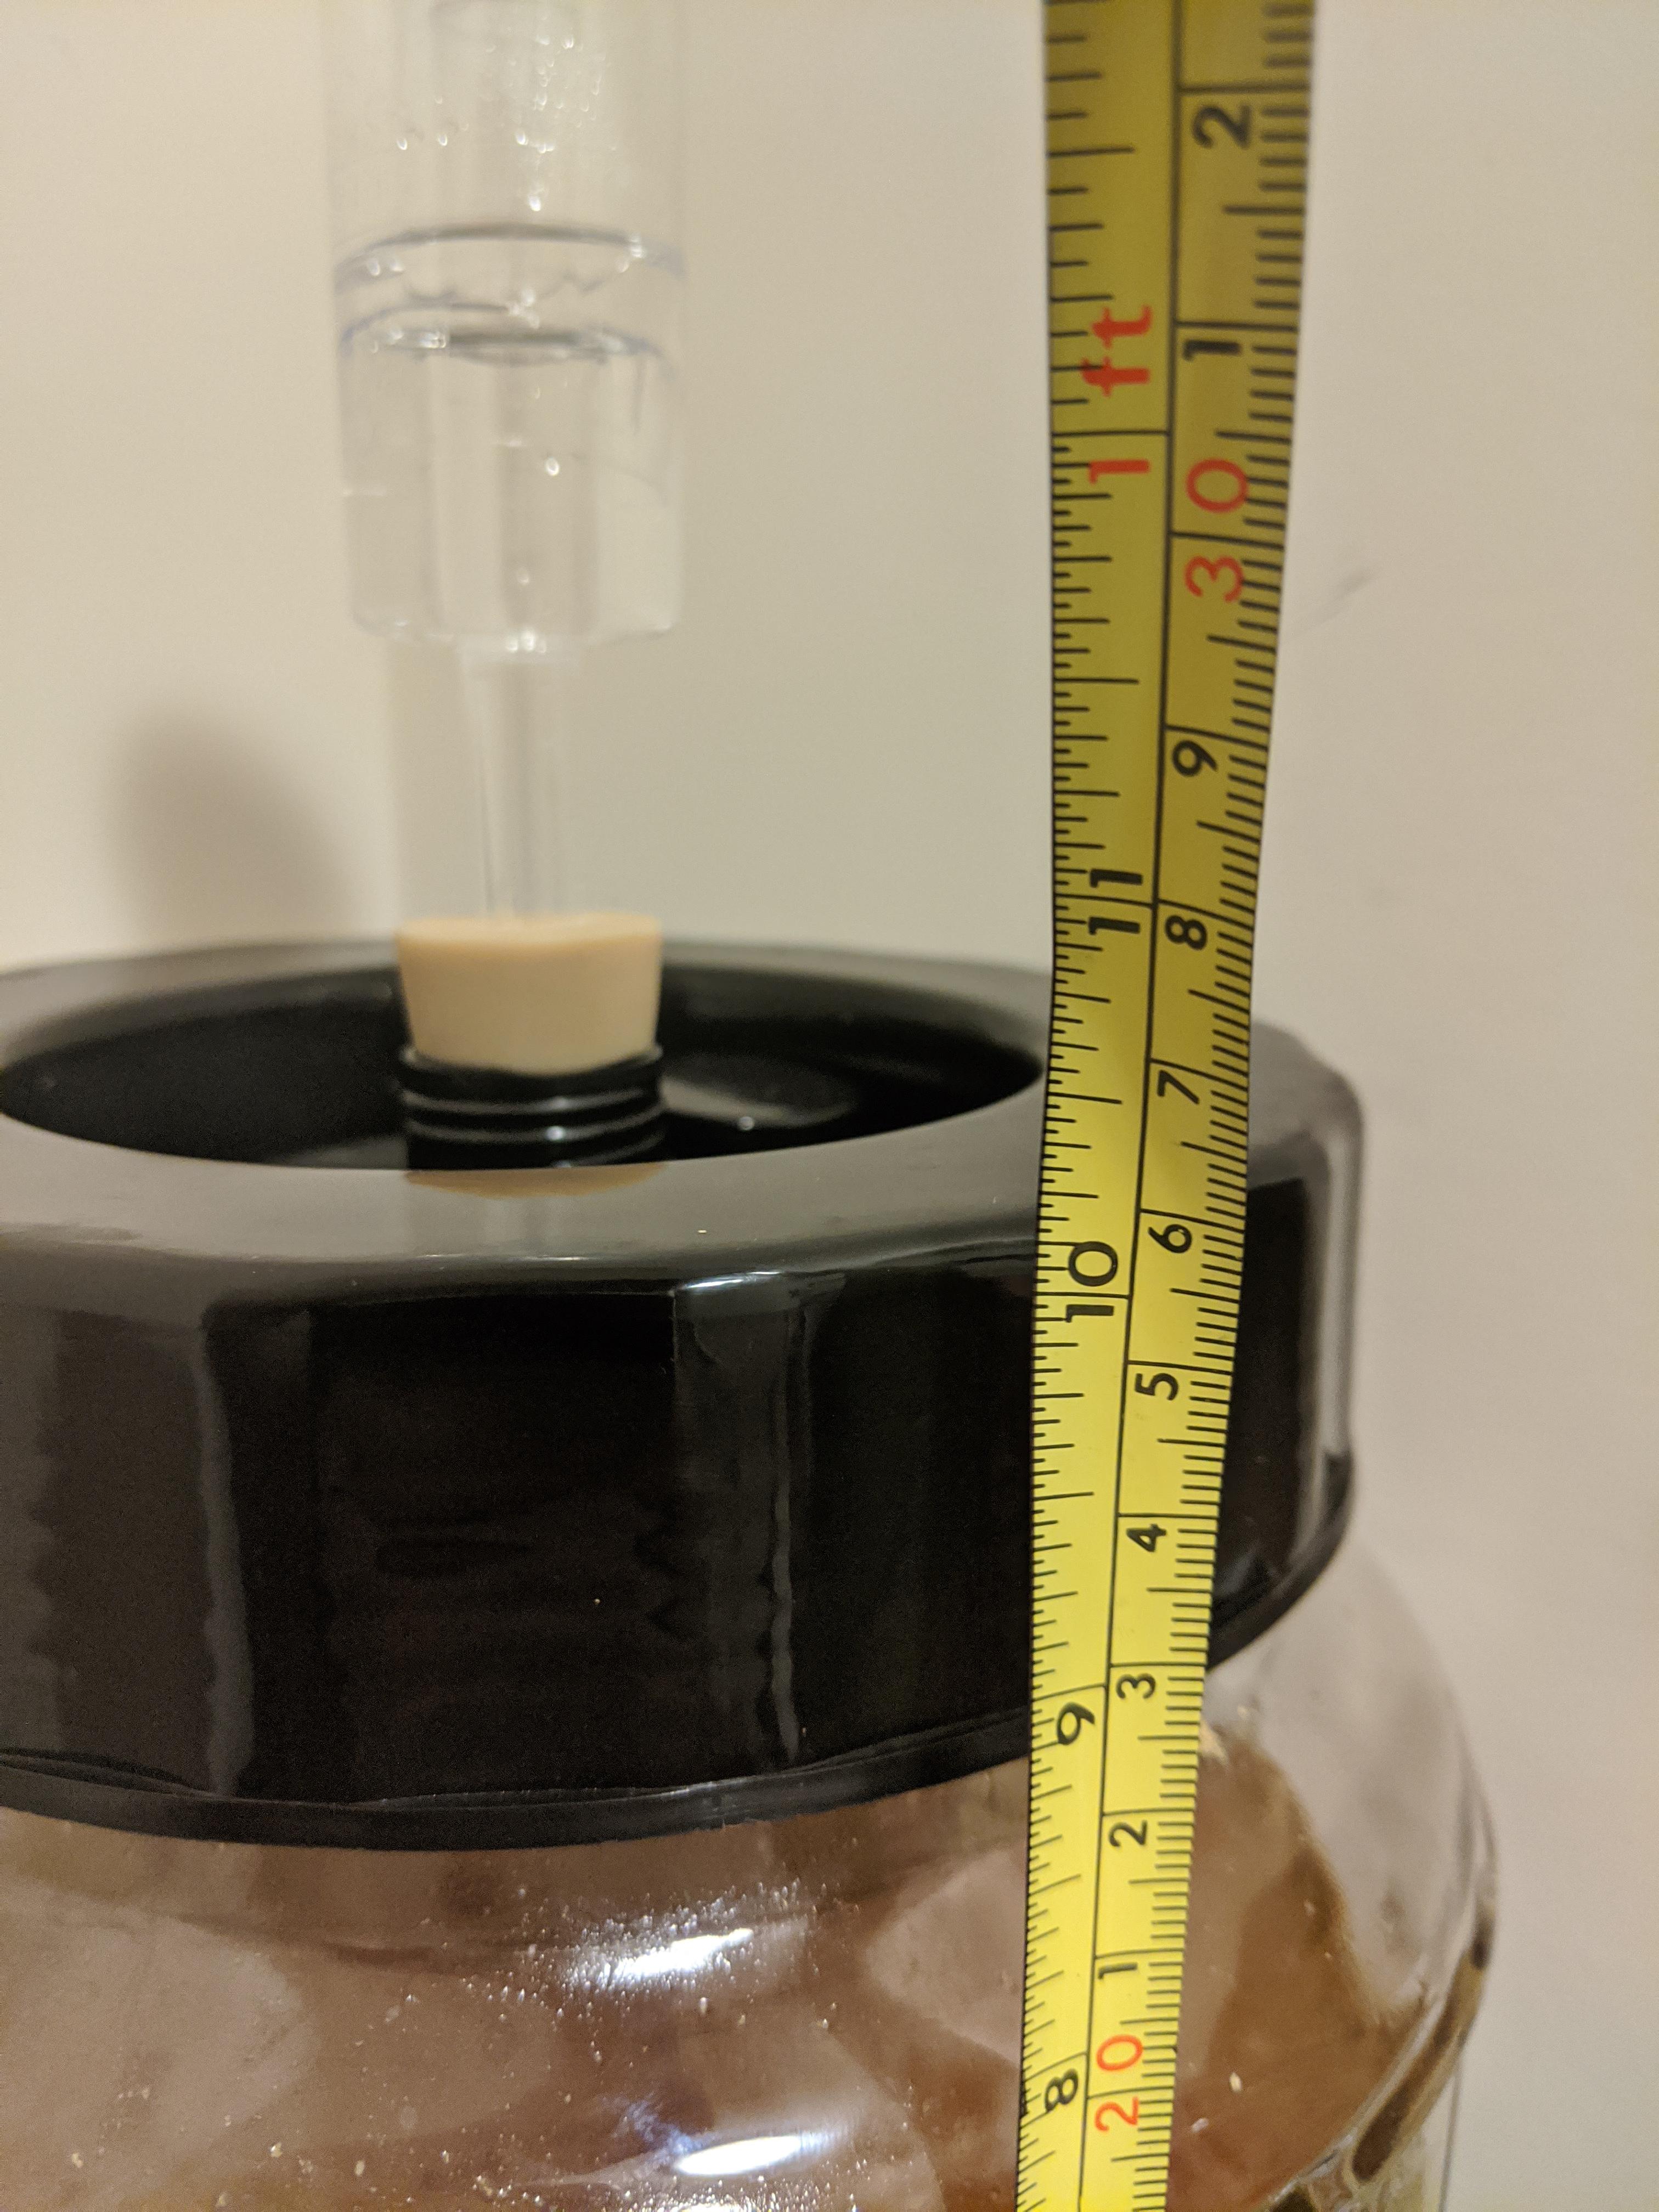
Before removing the stopper with the airlock, spray or mop Starsan around the stopper and the top of the lid on your carboy.

Just wipe the outside of the hop bag and scissors with a small Starsaned washcloth (mopping, dunking, and spraying are the best ways to sanitize), and pour the content into your fermenter. Or if you need a smaller amount, weigh out into a clean plastic Solo cup or so, Starsaned then dried out.

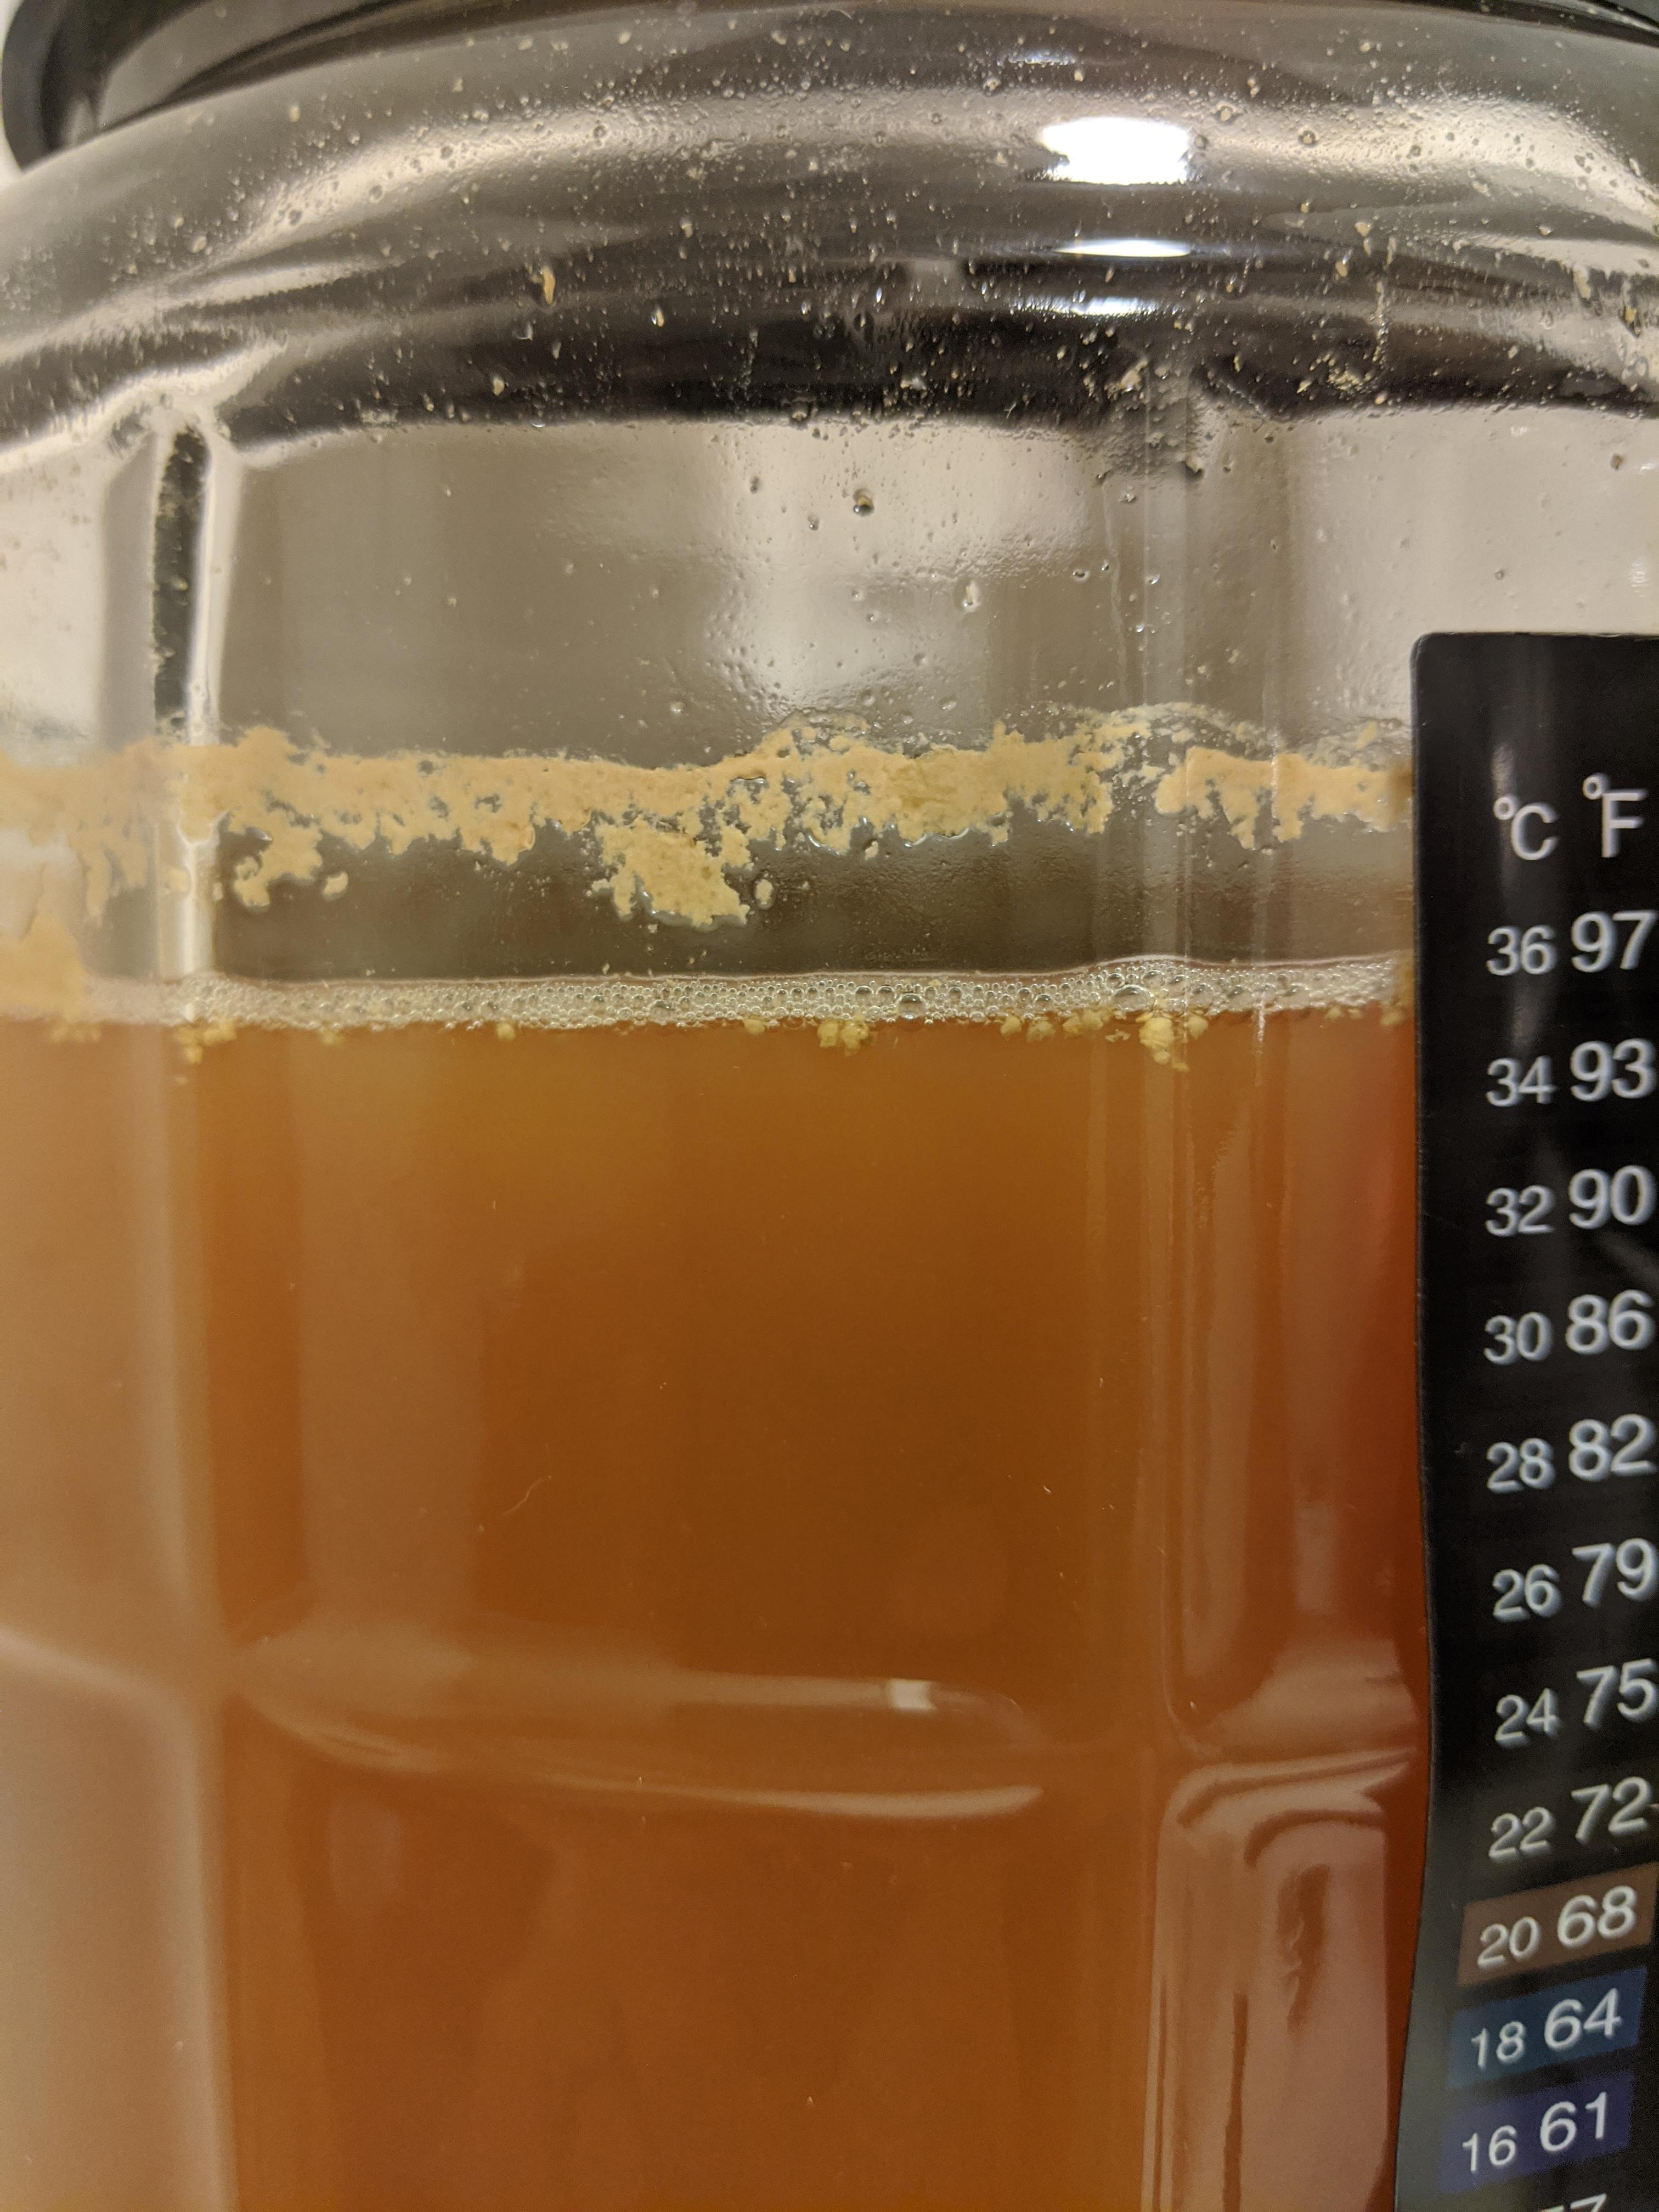
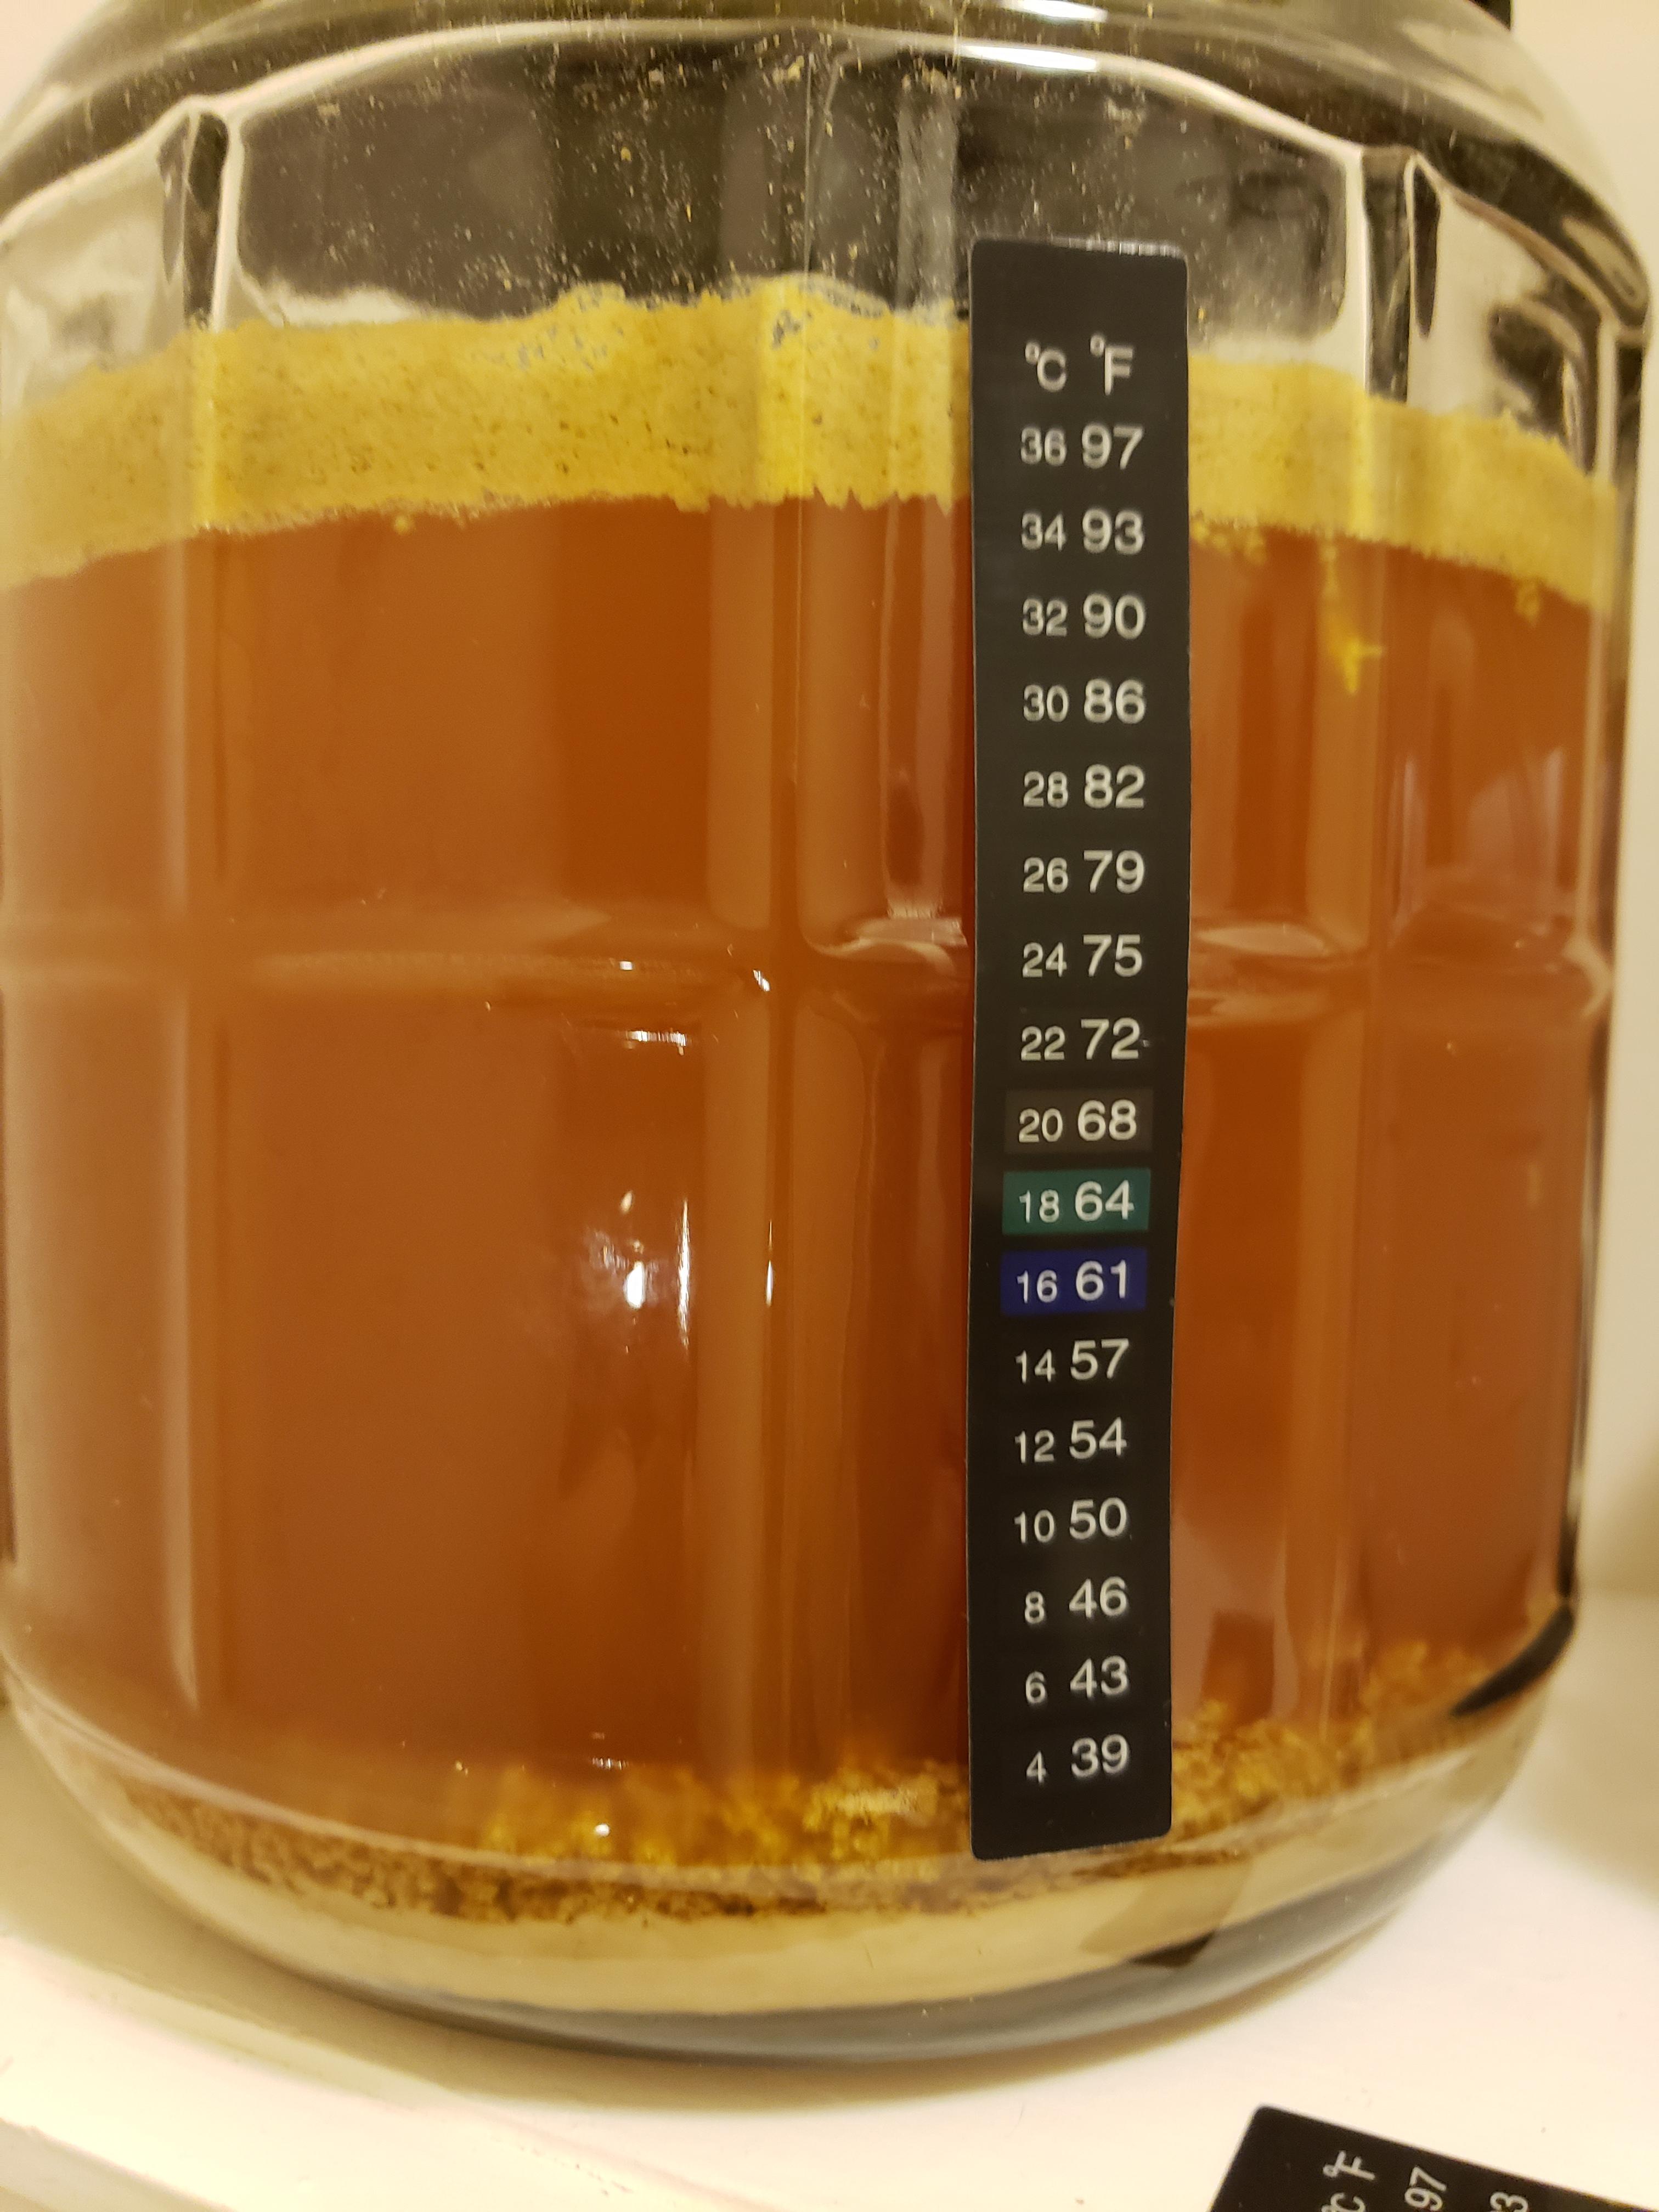
After adding the dry hops, I find some sort of agitation such as carefully swirling the fermenter (or stirring the beer, gently), at least once a day, until all the pulp has submerged gets quicker (and possibly better, more complete) extraction. I can give you more details about that if you want.
 
The beauty of small fermentation vessels is that the outside surface is relatively large to its volume. So heat build up due to fermentation (it's exothermic) is easier dissipated. A 64-66F basement or other coolish area is perfect for that.

You must have transferred pretty clean wort into your fermenter, I don't see much hop trub on the bottom. The greenish krausen ring on top is a signature for IPAs. ;)

If your kit instructions mention "racking to a secondary," just skip over it. Secondaries are not needed (with very, very few exceptions), only causing trouble, solving none.

Is it still bubbling somewhat?
Are you going to dry hop?

I have my first batch in the primary (mine is 5 gal). Would you recommend skipping the secondary as well? I'm brewing a cream ale kit from Brewer's Best. They recommend the secondary for a clearer beer. But if it isn't worth the trouble, I would love to skip it :D
 
I have my first batch in the primary (mine is 5 gal). Would you recommend skipping the secondary as well? I'm brewing a cream ale kit from Brewer's Best. They recommend the secondary for a clearer beer. But if it isn't worth the trouble, I would love to skip it :D

Islandlizard mentions that in his 2nd post . Yes , most of us agree that secondaries are not helpful unless your racking over fruit or long term conditioning.
 
Islandlizard mentions that in his 2nd post . Yes , most of us agree that secondaries are not helpful unless your racking over fruit or long term conditioning.

Thanks! I've been on this forum for about 27 hours now and I'm addicted haha. You guys have been very helpful. I have spent a lot of time reading the thread about mistakes that people have made that still made good beer. It's really calmed my nerves while my beer ferments. Thanks everyone for the help.
 
I have my first batch in the primary (mine is 5 gal). Would you recommend skipping the secondary as well? I'm brewing a cream ale kit from Brewer's Best. They recommend the secondary for a clearer beer. But if it isn't worth the trouble, I would love to skip it :D
Definitely skip it.
By using secondaries you stand to risk oxidation and infection. Especially in novice hands. Beer will clear as much with an inch of trub as it does in a secondary, but without those risks.

Kit instructions tend to be horribly outdated. Some kit sellers have come around and mention secondaries now as "optional."
Just skip them.

In addition to what @Jag75 said, using a secondary also makes sense for long term bulk aging (3-6 months and up) and mixed fermentation sours, but not for kettle sours.
 
Making decent beer one batch at a time is not too difficult, and can withstand a fairly wide range of f-ups. Making very good to great beer consistently and predictably is the challenge! That's where the novelty wears off and becomes an obsession - a fun obsession, as long as you keep things in perspective.
 
Skip the secondary. It does not make clearer beer and runs the risk of oxidation and unintended infection.

Use secondary when adding fruit or other adjuncts.
 
Now you could carefully lower a hydrometer into your carboy to take a reading. Tie or securely tape a piece of unflavored dental floss to the top. Make sure it doesn't drop in from above, it will torpedo downward, bottoming out and shatter.

Assuming OP is fermenting in a container very similar to NB's Little Big Mouth Bubbler (I have a couple of them), it's likely that most hydrometers (regular or finishing) are too long to float (I have one of each).
 
Thanks! I've been on this forum for about 27 hours now and I'm addicted haha. You guys have been very helpful. I have spent a lot of time reading the thread about mistakes that people have made that still made good beer. It's really calmed my nerves while my beer ferments. Thanks everyone for the help.

That's the great thing about this place. It has really been helpful in my brewing , I would be way behind if it wasnt for HBT and the great people here.
 
Assuming OP is fermenting in a container very similar to NB's Little Big Mouth Bubbler (I have a couple of them), it's likely that most hydrometers (regular or finishing) are too long to float (I have one of each).
He has his fermenter pictured in the OP. That's why I said it.
No need to even remove the lid, just lower it on a string through the hole in the lid after removing the stopper.
 
He has his fermenter pictured in the OP.

The video in post #5 shows the air lock as well as the container - which is why I think the fermenter in the 1st post is similar in size to NB's Little Big Mouth Bubbler. Plus, in the picture in post #1, the trub depth seems right for the 1 gallon extract batches I brew in this container. Maybe I'm wrong on the container size. Maybe there's a mini hydrometer that floats in this container.
 
The video in post #5 shows the air lock as well as the container - which is why I think the fermenter in the 1st post is similar in size to NB's Little Big Mouth Bubbler. Plus, in the picture in post #1, the trub depth seems right for the 1 gallon extract batches I brew in this container. Maybe I'm wrong on the container size. Maybe there's a mini hydrometer that floats in this container.
Sorry, I should have referred to the video showing the lid and airlock assembly.

I don't know how deep the beer is, as long as it's deeper than the distance between the bottom and 1.008 mark on the hydrometer. And lower slowly and carefully on a suspension string.

The OP should get a ruler out to verify there's enough depth, if he wants to get the FG that way.
 
He has his fermenter pictured in the OP. That's why I said it.
No need to even remove the lid, just lower it on a string through the hole in the lid after removing the stopper.

Maybe i missed this, but shouldn't the hydrometer first be fully sanitized? Might be good advice for OP as he is new.

@Chris Gossweiler make sure if you do lower your hydrometer inside you first fully sanitize it! If you have star stan that is ususally easiest, but a home made solution can be made with certain basic bleach. (Non chlorine i think, and like a cap of bleach to a gallon of h20- but don't trust me- let the others here fill it in.)

Welcome to the hobby!!! I promise you that beer will be one of the best you ever drank!!
Yes, of course, anything that touches chilled wort or beer should be clean and sanitized. That includes the hydrometer if dropped into the batch directly.

Do not use bleach or chlorine in beer. Instead, use Starsan to sanitize.
Iodophor (or IOStar), also no-rinse, can be used too, but it's not quite as easy or convenient.
 
Sorry all, I was clipped to 5 posts per day for a while. I could not follow up. The carboy is 10 inches tall. I ordered a hydrometer. At this juncture I do not know the length of the hydrometer. But yes, the amount of concern and conversation concerning sanitation of each item used I would use Starsan to sanitize the hydrometer before dropping into the carboy. Sanitize the lid, etc. The picture in the first post, what looks to be a layer of working bubbles, etc is really dried yeast stuck to the glass. The layer of beer is clean. No bacterial growth. Fermenting has all but stopped. Perhaps a bubble every minute or so. I will let it sit for now. Get some dry hops as suggested by IslandLizard.

Yesterday the 3 gallon fermenter arrived! I don't think I will go to 5 gallon or more.
 
The carboy is 10 inches tall. I ordered a hydrometer.
The actual carboy height is insignificant for measuring the gravity of the beer inside your carboy. It's the height of the beer volume that's critical to prevent the hydrometer from bottoming out.
  • Using a ruler measure the distance between the top of the yeast/trub layer and the (approximate) beer surface in the fermenter. Measure on the outside of the fermenter of course. ;) Let's call this your "beer height."
  • On the hydrometer measure the distance from the bottom and the 1.000 line on the scale. With most beer 1.000 is the low limit. Let's call this your "hydrometer height."
  • The "beer height" should be equal to or larger than your "hydrometer height."
Anything special about the hydrometer you ordered? They're about $8-10 at the brew store...
I prefer the hydrometers with a longer scale and using plain white paper. Brix and SG are most useful. Anything else is confusing. I hate the ones with the multi-color scale. They're harder to read while providing no more real info.

For ease of lowering and retrieval in your fermenter, and preventing it from bottoming out, tie a piece of unflavored floss or some other thin string or yarn around it, around 1/2 - 1" down from the top. You can use a clove hitch or double clove hitch. Don't use fishing nylon it's not pliable enough to make a good knot and it slips.
  • Make sure the string is tight enough so it doesn't slip off.
  • Hydrometers are very fragile, so be gentle with them.
  • They're also slippery when wet (especially with Starsan).
  • Hold the hydrometer by the top while lowering it into the fermenter, before moving to holding it only by the string.
Instead, you can fasten the string with a small narrow piece of tape, like painters tape. Or an o-ring of the right diameter or even a very small rubber band.
  • Before its very first use, calibrate the 1.000 reading in distilled water or RO water of the proper temperature (usually 60F). Make a note of any deviation. It may read 1.001 or 1.002. Usually the bottom of the meniscus is read, but it really doesn't matter as long as you always read the same way.
  • For all practical purposes in homebrewing, 1 or even 2 points (0.001 or 0.002) reading accuracy is close enough. In most cases it is more important to notice the change since the last reading. For example, to prevent over-carbonation and potential bottle bombs.
  • Usually a tall, narrow "hydrometer test jar" is used for measuring samples. I like the very clear plastic (acrylic) ones with the wide foot that screws on.
  • Now for small batches losing 3-4 oz for each reading (2 are usually needed) is a rather significant loss, hence the idea to measure in the fermenter directly.
Last but not least, let me reiterate:
Hydrometers are very fragile, be gentle with them!
  • They're made of very thin glass with a lot of heavy weight in the bottom. There are some crappy plastic types floating around too sold by NB. Stay well away from those.
  • Make sure the tube it comes in has a solid, fixed bottom, not a stopper.
  • If it has a stopper as the bottom you need to tape it down securely to the tube. Now, not tomorrow!
  • They roll. Don't put them directly on a counter or other flat horizontal surface. Instead lay them on a small (damp / Starsaned) wash cloth.
  • Resist the urge to shake em off to dry.
  • Dry off carefully.
 
Last edited:
I purchased the Brewer's Elite Triple Scale Hydrometer for Beer and Wine. It comes in a good hard case and a cover as well. There is also a conversion chart if the reading are taken at a temp that is not at 60F. The hydrometer had good reviews.
 
I purchased the Brewer's Elite Triple Scale Hydrometer for Beer and Wine. It comes in a good hard case and a cover as well. There is also a conversion chart if the reading are taken at a temp that is not at 60F. The hydrometer had good reviews.
It should work fine, yes.

It's just that the useful part of the scale we brewers are mostly interested in (1.000-1.090) is rather short (compressed). The whole scale goes to 1.160!
You're ready for reading OG of ultra high gravity beer, as well as wine and mead.
 
Last edited:
Thus far I'm happy with the fermenter. Should be easy cleaning!
It's quite unique in its own little way and fills a niche market very nicely. AFAIK, there is nothing else out there that's in that 1.4 -1.5 gallon range, perfect for full 1 gallon batches. The large mouth makes it much easier to maintain and clean.

I often ferment small test batches in one gallon containers, such as glass wine jugs, even plastic mayonnaise jars, but batch size is limited to around 3/4 gallons at most.

I have one 3 gallon glass carboy (narrow mouth) and a few "half" size, 3.5 - 4 gallon buckets. Last year I picked up 3 beautiful pyrex carboys, 2 2.5 gallons, the other 3.5 gallons. Haven't used them yet, but it's getting there.
 
Yes, it looks very good!

From: https://www.morebeer.com/products/4-gallon-fermenter-lid-spigot.html
Just got this fermenter today, noticed there is no sealing o-ring on the lid even though there is a groove cut in the lid for one, should one be in the lid?

No o-ring needed. It is a little awkward at first but when you get the lid and bucket aligned and then tighten it, it seals air tight just through the snug fit of the plastic. It IS a little difficult at first but by gracing your hands on the upper and lower protrusions along the lid and bucket to brace yourself you can generate enough torque to close it snugly and reopen it. Hard to describe in words but basically fiddle with closing and opening it without using the dimples on the top and you'll eventually figure it out. I have 2 of these and have had no problems getting a seal after approximately 10 brews each.

The dimples at the top are a red-herring and don't work well for opening and closing.
Read up on spigots on fermenters, how to use them, how to keep clean and sanitary, during and after fermentation, and how to keep the trub away from it, so you can get clear beer out of it when bottling.

I guess you do partial boils, chill, then top up with cold water in fermenter?
 
This arrived yesterday. 3 Gallons! Has a spigot.

Did that come from Northern Brewer as well? What is the brand? I ask because my local shop had one of those (though I thought it was in the 2.5 gal range). I snapped a picture and then asked my girlfriend about it (she has been doing 1.2 to 1.5 gal batches split into 2 one gal glass jugs) but when we went back to pick it up, they sold it and did not plan to get them back in stock. She ended up going with a 3 gal Fermonster. I have a thing for small batch brewing and I am interested in other small fermenter options.
 
I had read that note of the difficult lid when I was making my decision on purchasing. I agree, the lid is a bit to fiddle with as I "fiddled with it", but the design assures a good seal.

I was planning on purchasing the 2 gallon kits for this fermenter. Maybe a 5 gallon kit and using half of the ingredients. Once bottled start the remaining half of the kit. And or, brew up the 5 gallons putting 3 in the 3 gallon. One gallon in the one gallon carboy. Taking a bath in the remaining gallon. :)
 
Did that come from Northern Brewer as well? What is the brand? I ask because my local shop had one of those (though I thought it was in the 2.5 gal range). I snapped a picture and then asked my girlfriend about it (she has been doing 1.2 to 1.5 gal batches split into 2 one gal glass jugs) but when we went back to pick it up, they sold it and did not plan to get them back in stock. She ended up going with a 3 gal Fermonster. I have a thing for small batch brewing and I am interested in other small fermenter options.

For the price and size...I could not pass it up. I like small batch brewing.

https://www.morebeer.com/products/4-gallon-fermenter-lid-spigot.html
 
From MoreBeer:
Holds roughly 3.4 gallons total; recommended for 3 gallon fermentations.
The domed lid may give you an additional pint (0.125 gallon) of headspace before the airlock start to spew. If you even remotely anticipate blow off, put a blow-off tube on it. Which is not a bad idea generally, you never know.

Check all your airlocks for any molded-in star-shaped restrictor on the bottom of the center tube. If it has one, cut or grind it off. That tube should be unrestricted to prevent BOOM!. :tank:

The newer airlocks don't seem to have them anymore, but who knows how many from older lots are still floating around, or are on the bottom of your parts bin.
 
From MoreBeer:

The domed lid may give you an additional pint (0.125 gallon) of headspace before the airlock start to spew. If you even remotely anticipate blow off, put a blow-off tube on it. Which is not a bad idea generally, you never know.

Check all your airlocks for any molded-in star-shaped restrictor on the bottom of the center tube. If it has one, cut or grind it off. That tube should be unrestricted to prevent BOOM!. :tank:

The newer airlocks don't seem to have them anymore, but who knows how many from older lots are still floating around, or are on the bottom of your parts bin.


The review had a second picture of this fermenter with a blow off tube. Once I get this fermenter working I will create a thread.
 
That is a cool fermenter. I have a thing for small fermenters, too. It's easy to find suitable small vessels, actually, but a spigot is a rare option and I really appreciate having one. It makes bottling an order of magnitude easier vs. trying to futz with an auto-siphon AND a bottling wand by oneself. I'm glad the market is coming around to offering some more options in the 1-4 gallon range with a spigot and wide opening.
 
It is time to bottle. Will be two weeks come Sunday. Fermentation activity has all but stopped. I took a smell at the top of the bubbler....my goodness the IPA citrus fragrance is alluring! If the fragrance is any indication of the flavor I will be well pleased. I decided not to dry hop as this kit did not recommend.... however....next batch will be dry hopped.
 

Attachments

  • IMG_20200117_193923.jpg
    IMG_20200117_193923.jpg
    2.1 MB · Views: 112
I decided not to dry hop as this kit did not recommend...
It ain't an IPA if it ain't dry hopped...

....but it can still be very good!
Fermentation activity has all but stopped.
You can't safely bottle in glass if it's not done fermenting.
PET (soda) bottles however are much more resilient and fine to use.

Yeast can't read directions, and she doesn't have to, she has her own genetic agenda. ;)
 
Back
Top