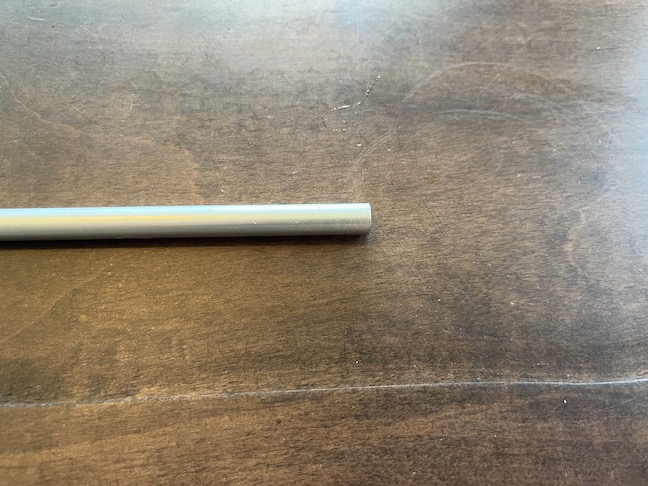
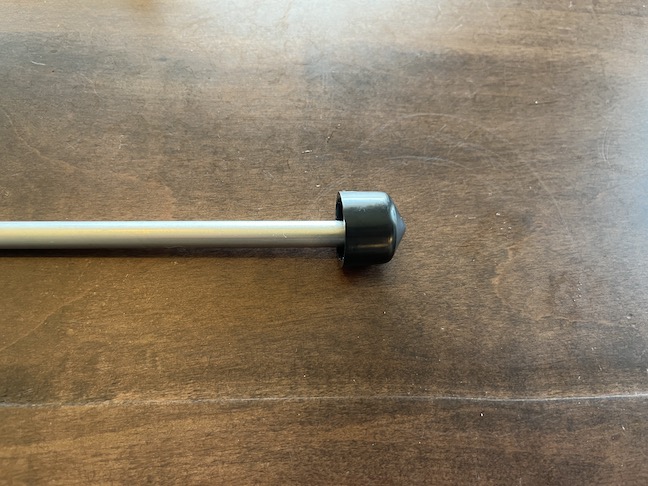
I'm your Huckleberry.
You are using an out of date browser. It may not display this or other websites correctly.
You should upgrade or use an alternative browser.
You should upgrade or use an alternative browser.
Ferment and serve in corny - sediment options?
- Thread starter Cider Wraith
- Start date

Help Support Homebrew Talk:
This site may earn a commission from merchant affiliate
links, including eBay, Amazon, and others.
- Joined
- Nov 26, 2013
- Messages
- 9,926
- Reaction score
- 24,097
You can always use a floater. I use one in ferm 'n serve, just have to "bump" the liquid out side with CO2 at day 4 or 5 to make me feel I've blown krausen out.
Cider Wraith
Well-Known Member
Thanks for replies - much appreciated ... you guys are a tremendous and generous resource
First, thanks to the illustrious and gracious disciples of the Church of the Floating Dip-Tube ... you and your contributions are throughly appreciated .... I hear ya' all - but I’m thinking, maybe floating isn’t for me.
I have a simpler job than you brewers. I’m not a boutique fermenter, my goal is to make generous quantities of known ratios of medium to high quality ingredients with excellent reproducibility. Because I only ever make the same thing over and over again just changing primary ingredients, different apples, cherry, pomegranate, mixed, it’s just occurring to me that the resulting sediment is more consistent and predictable batch-to-batch compared to what brewers are confronting.
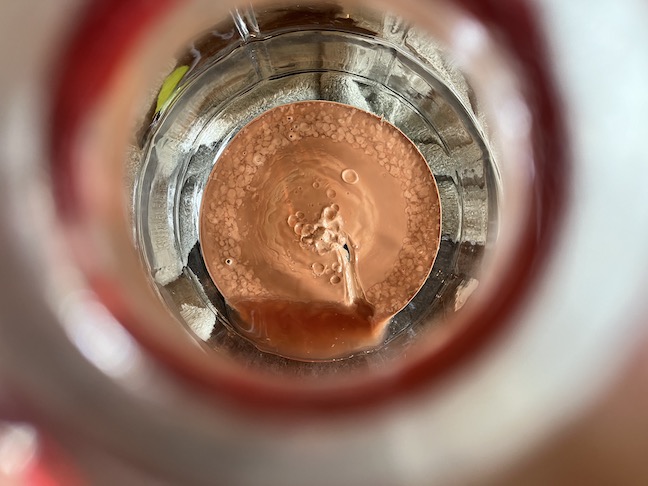
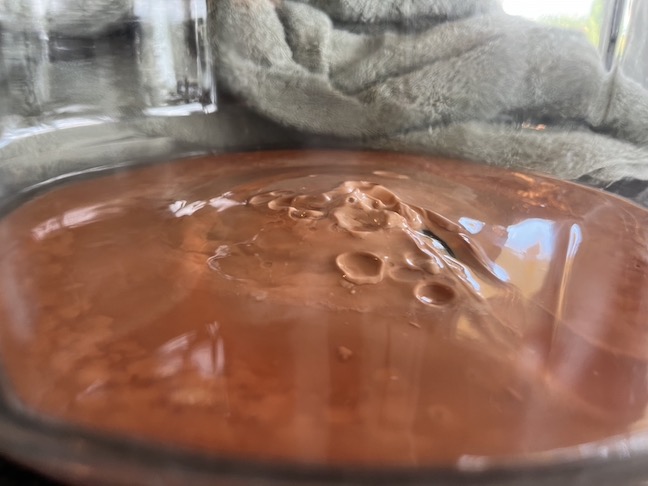
Having paid more attention to sediment recently I’m seeing that there’s a relatively small amount, honestly ….. and it’s fine and would easily pass through any hose/valve. Having put an auto-siphon tube tip into the sediment on my last batch I noticed that after creating a “crater” in the sediment in fact the walls did not collapse around it but in fact it was structurally sound enough to allow the carboy of liquid to evacuate with only producing a small amount of resuspended sediment.
Now, to @Bassman2003 's post - great stuff, beautiful. That’s the direction I expect to go - almost like perpetual motion. So for a slight recap, whenever starting a batch, always have two clean kegs, and honestly kegs are cheap and will last the rest of one’s life so have plenty around, and make all the connections as described. Something for some additional thinking on is purging/priming connection lines. And of course, to minimize sediment disturbance one would imagine before beginning the fermenter should be placed higher than receiving to avoiding jostling later. A big game changer would be using a spunding device …. need to order and begin researching those
So a transfer question would be, when switching to the liquid transfer phase, how do you drain out those first few ounces? What was the Kegland device mentioned that allows that? But I suppose if one had a three way “T” in the liquid line, with one side going to a picnic tap and one side going to serving, then in the beginning the valve to serving could be left closed and the siphon could be begun with the picnic tap and when clear liquid flowed switch flow to serving.
Thought experiment on how much sediment would be transferred to serving during liquid transfer with conventional dip-tubes - a wild guess might be, if doing an initial bleed-off of a few ounces, maybe something like mid-nineties plus percentage of sediment would be successfully left behind. And then when pouring from serving, planning for a couple of ounces of sediment and that might be about it.
So it seems that with conventional dip tubes one might achieve a good rate of sediment elimination. The fear of floating, is maintenance, cleaning, upkeep, and what about if one crashes onto the surface of the yeast-cake moon, then you’d be blowing a sediment fire hose. Well anyway, I understand you guys have great success with them, not knocking them, just exploring where I’d be with conventional.
If anyone is still reading sorry for the rambling and thanks for all your input, highly appreciated!
Last edited:
Here is the Kegland product - Morebeer seels it - Carbonation Ball Lock Quick Disconnect (QD) Cap Tee Fitting | MoreBeer
I would recommend the EVA barrier tubing and QDs that is for sale at Morebeer as well. It is a complete oxygen free setup. Other tubing used in the past lets O2 pass in through the walls.
Purging with the fermentation gas is the name of the game. It is free, pure CO2 so use as much as you can. I have my gas line jumper that is used for the end transfer in the loop as well so it is purged at the same time. It is connected to my spunding valve (also the Kegland product for sale at Morebeer). Also, by running the 1st bit of liquid through your liquid to liquid jumper to the "T", it gets purged as well.
In practice, this is a far smaller concern than one may believe.I am going with a shortened dip tube in my Kegmenter. My thinking is that a floating dip tube would eventually drop into the sediment during transfer and you would not know when to stop flow. With the solid dip tube, you can suck out the stuff in the beginning knowing it will stay clear to the end.
Having a spunding valve to allow pressure differentials as low as 1-2 PSI between ferm keg and serving is key, also going SLOW.
At this pressure I can watch the beer flow thru the lines and stop the transfer once we hit bottom.
The screen I utilize on the end of the tube also cushions you from that last bit of cake/trub getting into the line, but again I can watch it exit the ferm keg, so never makes it to serving.
Does it take a while? Yes, about 20 mins for a 5gal/19L corny.
Ironically I feel sometimes I leave 500mL of drinkable beer in the ferm cuz I stopped transferring a bit early…
My solution for that was to get a single 6.1gal/23L torpedo keg and use that exclusively for fermentation.
I can drop 21L of wort in, have 2L of headspace, and can still reliably get a full 19L into a serving keg.
As many have already mentioned, so many ways and options to do this. What I have is just my solution to this particular situation, and for me it works pretty well.
EDIT - Concur wholeheartedly on EVA… all of my lines are 4mm EVA barrier, all my connections are duotight as are my pair of spunding valves.
Last edited:

$20.94
$29.99
The Brew Your Own Big Book of Clone Recipes: Featuring 300 Homebrew Recipes from Your Favorite Breweries
Amazon.com

$33.99 ($17.00 / Count)
$41.99 ($21.00 / Count)
2 Pack 1 Gallon Large Fermentation Jars with 3 Airlocks and 2 SCREW Lids(100% Airtight Heavy Duty Lid w Silicone) - Wide Mouth Glass Jars w Scale Mark - Pickle Jars for Sauerkraut, Sourdough Starter
Qianfenie Direct

$53.24
1pc Hose Barb/MFL 1.5" Tri Clamp to Ball Lock Post Liquid Gas Homebrew Kegging Fermentation Parts Brewer Hardware SUS304(Liquid MFL)
yunchengshiyanhuqucuichendianzishangwuyouxiangongsi

$22.00 ($623.23 / Ounce)
AMZLMPKNTW Ball Lock Sample Faucet 30cm Reinforced Silicone Hose Secondary Fermentation Homebrew Kegging joyful
无为中南商贸有限公司

$58.16
HUIZHUGS Brewing Equipment Keg Ball Lock Faucet 30cm Reinforced Silicone Hose Secondary Fermentation Homebrew Kegging Brewing Equipment
xiangshuizhenzhanglingfengshop

$176.97
1pc Commercial Keg Manifold 2" Tri Clamp,Ball Lock Tapping Head,Pressure Gauge/Adjustable PRV for Kegging,Fermentation Control
hanhanbaihuoxiaoshoudian

$10.99 ($31.16 / Ounce)
Hornindal Kveik Yeast for Homebrewing - Mead, Cider, Wine, Beer - 10g Packet - Saccharomyces Cerevisiae - Sold by Shadowhive.com
Shadowhive

$479.00
$559.00
EdgeStar KC1000SS Craft Brew Kegerator for 1/6 Barrel and Cornelius Kegs
Amazon.com

$7.79 ($7.79 / Count)
Craft A Brew - LalBrew Voss™ - Kveik Ale Yeast - For Craft Lagers - Ingredients for Home Brewing - Beer Making Supplies - (1 Pack)
Craft a Brew

$53.24
1pc Hose Barb/MFL 1.5" Tri Clamp to Ball Lock Post Liquid Gas Homebrew Kegging Fermentation Parts Brewer Hardware SUS304(Liquid Hose Barb)
Guangshui Weilu You Trading Co., Ltd
I agree, not a huge deal but my fermenter is the pony keg sized Kegmenter. So it is larger diameter compared to a corny. Meaning the float will hit bottom a lot quicker. So I thought a dip tube would be better in this instance.
The silicone line included with floaty kits are sized for use in a standard 5gal ball lock corny methinks, but it also works okay in a 6.1gal torpedo too. The trub layer at the bottom raises the floor somewhat even in the larger keg, which may be why the line length is good for my needs.I agree, not a huge deal but my fermenter is the pony keg sized Kegmenter. So it is larger diameter compared to a corny. Meaning the float will hit bottom a lot quicker. So I thought a dip tube would be better in this instance.
I’ve seen others chop this line down to utilize in a 2.5 corny, perhaps just a trim is all needed for that kegmenter?
It is more about the wider diameter wasting more beer once the float gets to the bottom compared to a corny. I use modified floaters in my serving kegs. They are fine but to get them to work well the distance from the float is a little farther than best for extraction imho. The "sucker" is the first thing to touch. Sediment is a touchy issue as some do not care as much about it than others. My view is that I do not want any sediment if possible.
Cider Wraith
Well-Known Member
More structurally stable than I was wild guessing ...


Last edited:
Cider Wraith
Well-Known Member
...was thinking same thing ... because I ferment ciders getting some sediment into suspension I'm like just drink itSediment is a touchy issue as some do not care as much about it than others. My view is that I do not want any sediment if possible.
Last edited:
Cider Wraith
Well-Known Member
Good idea.
Cider Wraith
Well-Known Member
What if available for purchase was a kit of those ... formed internally to fit onto a dip tube, sized just right to fit between the bottom of the dimple and end of a non-modified dip tube, sized in 3/8 or 1/2 inch increments. Could do trail-and-error evaluations of the amount of sediment to expect for a particular batch, or go conservative with the tallest, or consult a chart of common sediment depths in corny for typical styles. For folks on a budget or no space for multiple kegs no modifications and no tubes to replace.
Wondering what food-grade hack one could could come up that would serve the purpose? Something food-grade and not subject to alcohol degradation. Plastic bottle cap? .....
Wondering what food-grade hack one could could come up that would serve the purpose? Something food-grade and not subject to alcohol degradation. Plastic bottle cap? .....
Stainless is the ultimate food grade!
Cider Wraith
Well-Known Member
YES! Yeah ... there's something somewhere sitting on a shelf that would work ... some type of food industry stainless steel odd-ball part. And if it was looking like one wouldn't be confident it wouldn't wiggle off the end of the tube, could add an inch or so of food-grade plastic hose to give a better fit. I was toying with the idea of multiple pieces of food-grade hose that IDs and ODs would allow nesting one-inside-the-other and after a contraption was put together the vent for feeding liquid would be from drilling three holes around the circumference. Reminds me of jury-rigging a plug for some odd need in automotive work by hose clamping a bolt that wasn't threaded all the way into a hose. Hm....
EDIT - thought of an upside-down corny post with AEB style permanently installed poppets but that wouldn't make it between the bottom of dip and dimple - and probably wouldn't be tall enough and no way for liquid to pass
EDIT - thought of an upside-down corny post with AEB style permanently installed poppets but that wouldn't make it between the bottom of dip and dimple - and probably wouldn't be tall enough and no way for liquid to pass
Brewers shorten their liquid dip tube to achieve that. Or better, cut a 1/16 - 1/8" slit at the height they expect to be above the trub line.What if available for purchase was a kit of those ... formed internally to fit onto a dip tube, sized just right to fit between the bottom of the dimple and end of a non-modified dip tube, sized in 3/8 or 1/2 inch increments. Could do trail-and-error evaluations of the amount of sediment to expect for a particular batch, or go conservative with the tallest, or consult a chart of common sediment depths in corny for typical styles. For folks on a budget or no space for multiple kegs no modifications and no tubes to replace.
When one wants to use the full length again, replace the dip tube with a full length or uncut spare.
I guess when in a pinch, one could cover the slit or lengthen the dip tube with a piece of tight fitting vinyl or silicone tubing. Or tape, etc.
Cider Wraith
Well-Known Member
Absolutely tremendous ... and then as the C02 departs the secondary corny I wish I could cycle it back to apple trees to grow more applesPurging with the fermentation gas is the name of the game. It is free, pure CO2 so use as much as you can
I just set this system up recently and am realizing it should have been done this way years ago. But you live and learn...
Cider Wraith
Well-Known Member
Well how do you like that ... received an old Dr Pepper FIRESTONE CHALLENGER VI that had a bottom side depression rather than center dimple ... so the tube appears to be an appropriate length shorter than conventional so will try in a conventional ferm ... that much shorter might leave behind what, 8 ~ 10 oz?
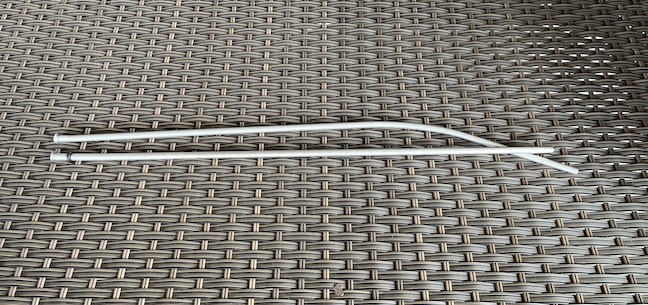

Last edited:
It's around 4" to the gallon (~1 quart per inch) for ball lock kegs, measuring the straight side. The bottom is concave and about 1/2" deep, so only ~1/2-2/3 of it has volume. You may be able to estimate it with those numbers.Well how do you like that ... received an old Dr Pepper FIRESTONE CHALLENGER VI that had a bottom side depression rather than center dimple ... so the tube appears to be an appropriate length shorter than conventional so will try in a conventional ferm ... that much shorter might leave behind what, 8 ~ 10 oz?
Or fill the keg with 2 quarts of water and push out as much as it allows you to, then measure the volume that's left.
Cider Wraith
Well-Known Member
Thanks! ...yeah I was going to look that up eventually ... if the results of using a shorter tube seem to work for me, thought was to measure the sediment of my typical batch and put that much water into the bottom and lower a tube until it touched the water and see how much tube stays above the corny post connector and trim that much off the bottom. And I would just designate two or three to make the modification to to be my dedicated fermsIt's around 4" to the gallon (~1 quart per inch) for ball lock kegs, measuring the straight side. The bottom is concave and about 1/2" deep, so only ~1/2-2/3 of it has volume. You may be able to estimate it with those numbers.
Or fill the keg with 2 quarts of water and push out as much as it allows you to, then measure the volume that's left.
I think you'd be better off cutting a slit at that height, about a third to halfway through the diptube. Reason being the inflow would be horizontal, creating less turbulence and suction from underneath where the trub is.and trim that much off the bottom
A sawed-off diptube will suck from the bottom. One can get away with that for most beer as the yeast/trub cake tends to be fairly dense (cold break proteins and such), but with ciders that sediment cake can be a lot looser.
Another idea.
If you cut the slit at a somewhat conservative height since you can't predict how much trub will be present, there's a good chance you may be leaving too much liquid (cider/beer/etc.) behind.
When getting toward the end of your transfer, tilt the keg toward the liquid dip tube side, by putting a wedge or a piece of wood underneath the gas post side. That allows you to transfer another 8-12 oz., perhaps more. When tilting, even slowly and carefully, the trub cake will slide a tad too, along with the liquid, but still not reach the slit.
I've been doing the tilting (using a bucket) and lowering the racking cane, as the beer recedes, with beer transfers for years, and can transfer close to 100% without trub/yeast. The few times when I get a little too greedy, once I see cloudy beer appear in the top of the transfer tube, I have a few seconds to pull the QD off the receiving keg. My hand is on it, collar disengaged, ready to pull it.
Cider Wraith
Well-Known Member
... for any that remain interested in this topic
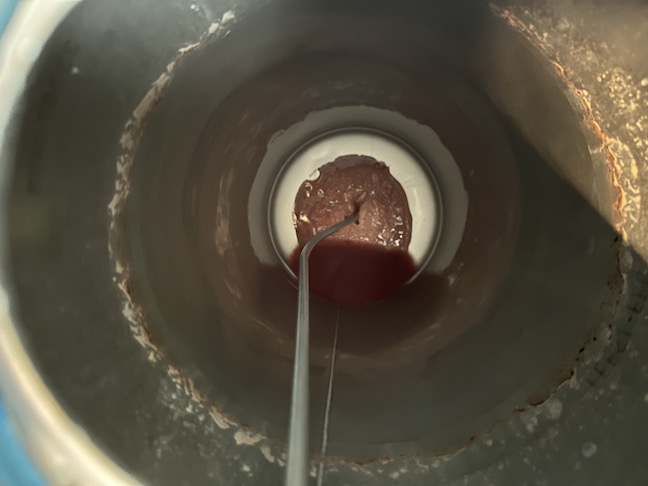
Thought I'd try a quick test with the newly acquired odd-sized tube - glad I did. Now, in the future I can customize tubes in whatever way, but wanted to get this new tube into service today .....
First, discovered that the distance from the top of the threaded post to the bottom of the vessel on a FIRESTONE CHALLENGER VI is different by about an inch compared to a single-handle AEB - the distance on the FIRESTONE is about an inch greater. Gently installed the new tube on an AEB and reached in and the clearance to the bottom was the width of a finger ... so thought that might not be quiet enough. But I had remembered doing the same check on the FIRESTONE and it was oddly greater. Ah, I thought, the FIRESTONE's got about the right distance. Then I thought let's do a water test and confirm. See below ...
So the distance from the tube to the bottom on a FIRESTONE seemed like a maybe a little over an inch. So installed tube and added water until the surface touched the tube, and checked the differential. Looks like that newly acquired odd tube in a CHALLENGER VI loses about 27 ounces of product, I'm thinking that's too much to sacrifice. Will try the tube in an AEB as a fermenter and see what happens. So if the distance from tube to bottom is about the width of a finger that's what, about 7/8 inch, so how much product would that leave?
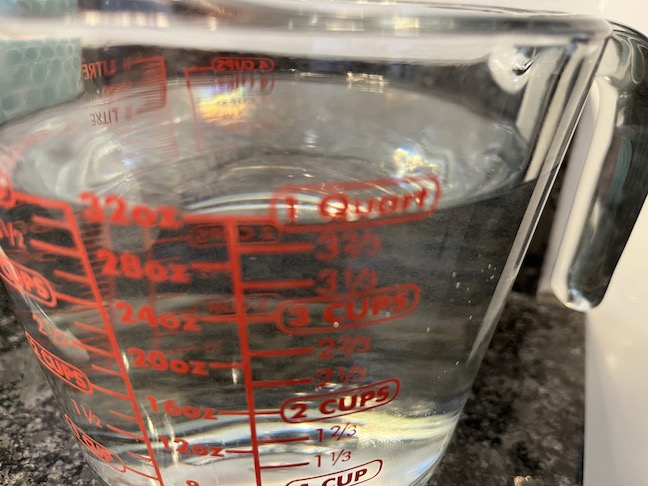
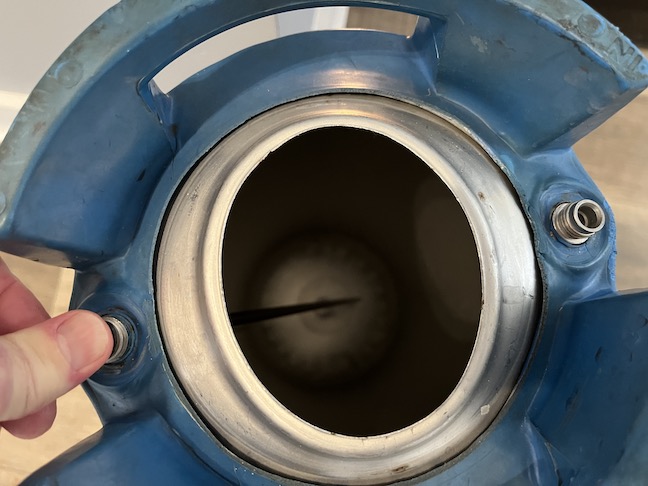
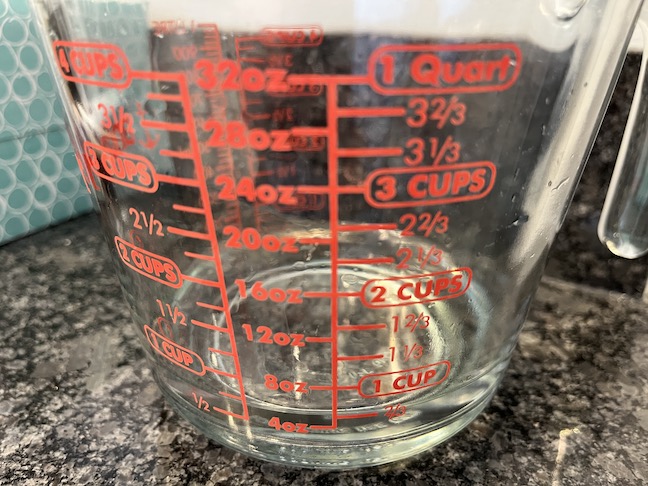


Cider Wraith
Well-Known Member
Yeah, totally with you, I do the same type of stuff - coolAnother idea.
If you cut the slit at a somewhat conservative height since you can't predict how much trub will be present, there's a good chance you may be leaving too much liquid (cider/beer/etc.) behind.
When getting toward the end of your transfer, tilt the keg toward the liquid dip tube side, by putting a wedge or a piece of wood underneath the gas post side. That allows you to transfer another 8-12 oz., perhaps more. When tilting, even slowly and carefully, the trub cake will slide a tad too, along with the liquid, but still not reach the slit.
I've been doing the tilting (using a bucket) and lowering the racking cane, as the beer recedes, with beer transfers for years, and can transfer close to 100% without trub/yeast. The few times when I get a little too greedy, once I see cloudy beer appear in the top of the transfer tube, I have a few seconds to pull the QD off the receiving keg. My hand is on it, collar disengaged, ready to pull it.
EDIT - because this oddly slightly short tube just showed up two days ago I want to begin experimenting with it ... but, something you wrote a few posts ago was great - if wanting to have it perform as a longer tube, just slip on a piece of plastic line and can extend it 1/2 or 3/4 in or whatever, and then have it back shorter again by removing that
Last edited:
Cider Wraith
Well-Known Member
Preliminary observations seem to point to a slightly shorter draw tube being up there with the invention of the Flying Machine ... it works -
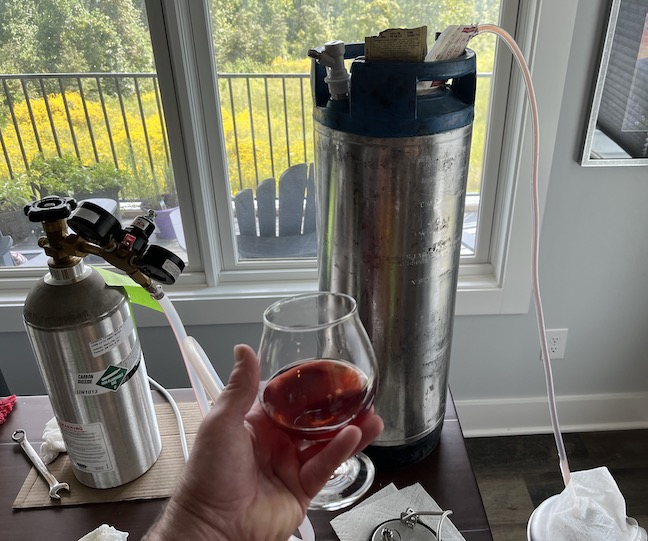
Initially intended to do draw-to-draw tube transfer but experienced multiple odd hydraulic connection failures as a result of not having the right ID tubing so switched to a hybrid connection of shortened tube with gravity and kegged 3.5 gals of tart cherry. But as hoped, the draw from the ferm corny was done using the slightly shorter dip tube .... nice not having to hold that racking cane though the whole transfer
What a success it appears to be. Didn't leave as much liquid in the ferm corny as imagined. Could have gotten more usable beverage but not complaining. Looks like a good compromise and resulted in a serving corny of all clear and ready to refrigerate cider. Finally, threw in more apple/mixed on top of the yeast in the ferm to repurpose
The process can only improve - Thanks for thoughts and feedback.
Shortened dip tube? Tremendous outcome


Last edited:
- Joined
- Feb 26, 2013
- Messages
- 207
- Reaction score
- 86
Looks like you're happy with the dip tube, but just FYI, I have run at least a dozen kegs using a floating dip tubes and love them. Drawing from the top let's you have the first glass without sediment and they do a good job draining the keg. I also have no issues pressure transferring through the floating tube.
Cider Wraith
Well-Known Member
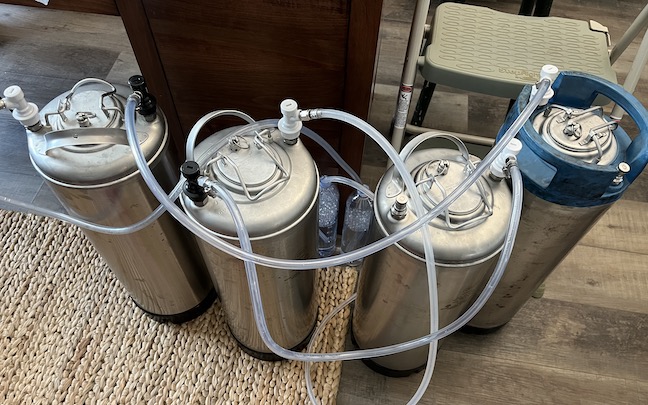
... can't imagine anyone is still reading - ain't pretty but there's purging serving ... surprisingly got enough pressure in serving to have bubbles return in just a minute or so

Last edited:
- Joined
- Nov 26, 2013
- Messages
- 9,926
- Reaction score
- 24,097
Just had a thought.
Cut 3” off dip tube. Put 4” tubin, sliding it to the height you want to leave and make an adjustable end.
Cut 3” off dip tube. Put 4” tubin, sliding it to the height you want to leave and make an adjustable end.
Similar threads
- Replies
- 46
- Views
- 2K
- Replies
- 63
- Views
- 3K
- Replies
- 18
- Views
- 1K


![Craft A Brew - Safale BE-256 Yeast - Fermentis - Belgian Ale Dry Yeast - For Belgian & Strong Ales - Ingredients for Home Brewing - Beer Making Supplies - [3 Pack]](https://m.media-amazon.com/images/I/51bcKEwQmWL._SL500_.jpg)


