• Please visit and share your knowledge at our sister communities:
  • If you have not, please join our official Homebrewing Facebook Group!

    Homebrewing Facebook Group

Electric brewery plans - need help

Homebrew Talk

Help Support Homebrew Talk:

This site may earn a commission from merchant affiliate links, including eBay, Amazon, and others.
Interesting. That's a big jump.

When do you pump that fast that this 30% makes a difference? Thinking about my process, the only time either of my pumps is open 100% is when I'm recirculating the HLT water to avoid stratification. It's already pumping crazy fast right now at 100% open, getting a faster rate won't help me at all.

Just curious!

Kal

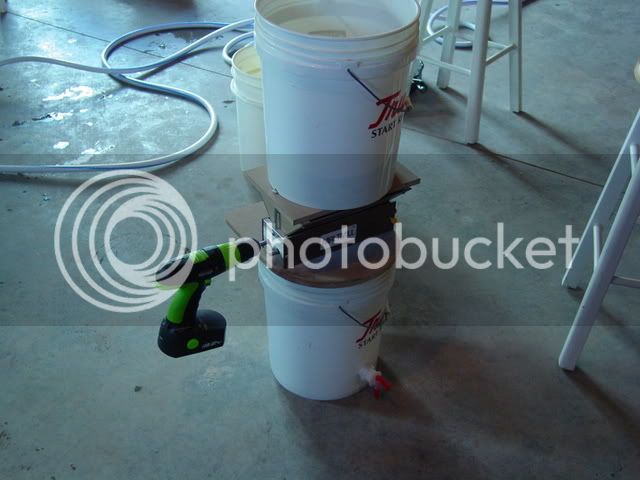
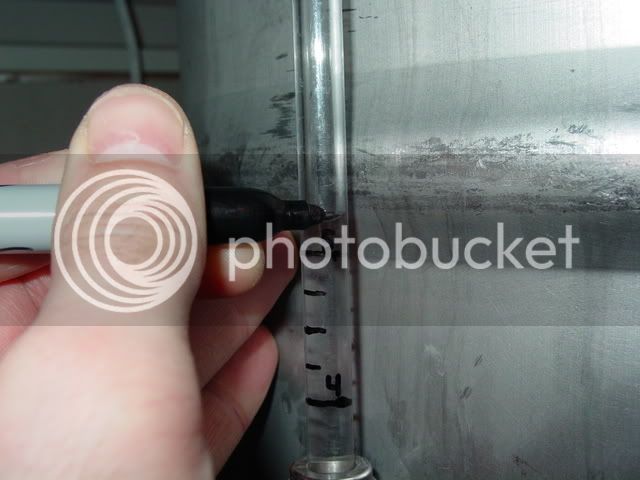
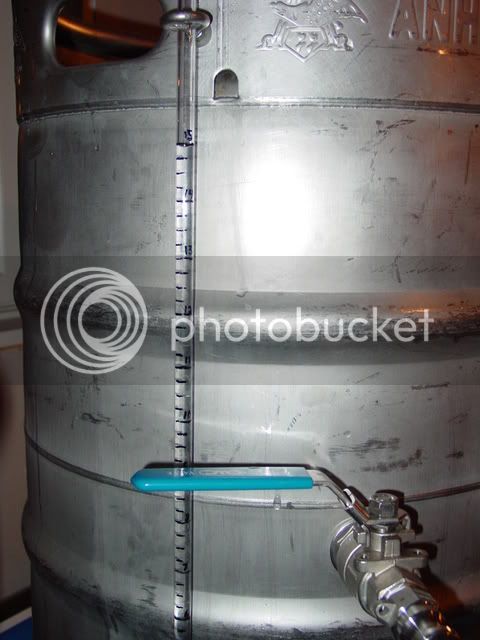
My test was with gravity. Not sure I'd get the same results with a pump.
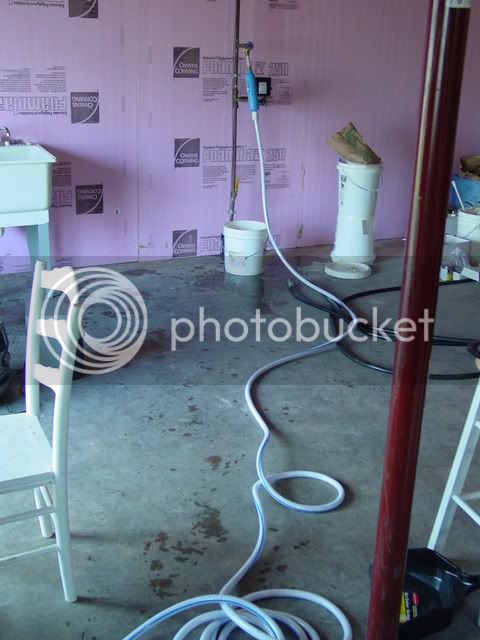
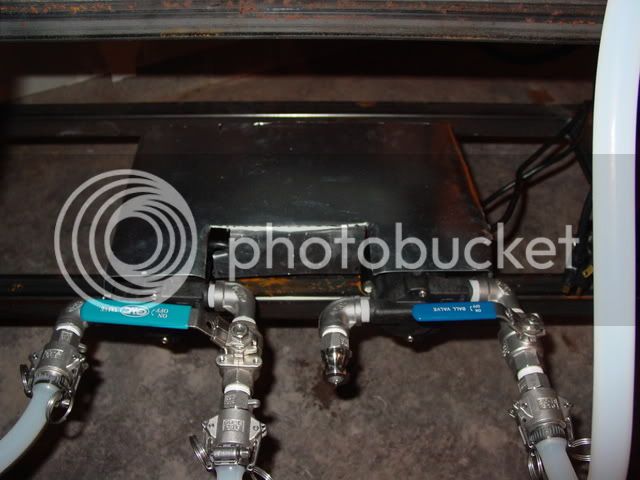
I didn't do the test because I was having a problem with flow rate. I really just wanted to have the max bandwidth available and then control it with valves.

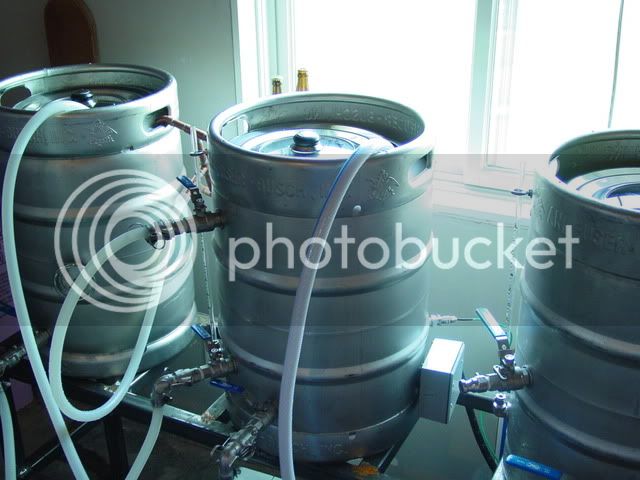
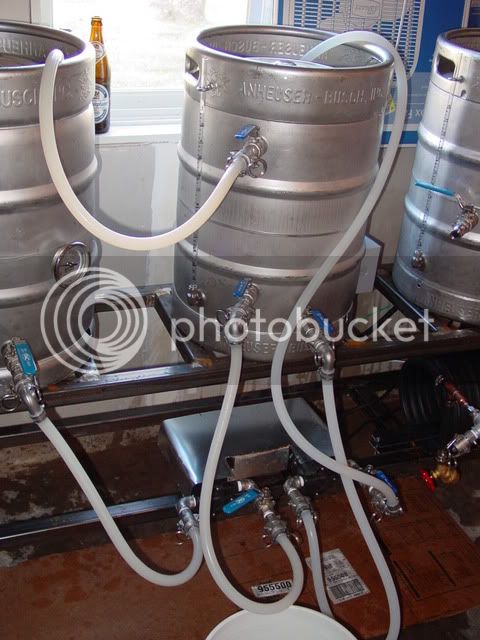
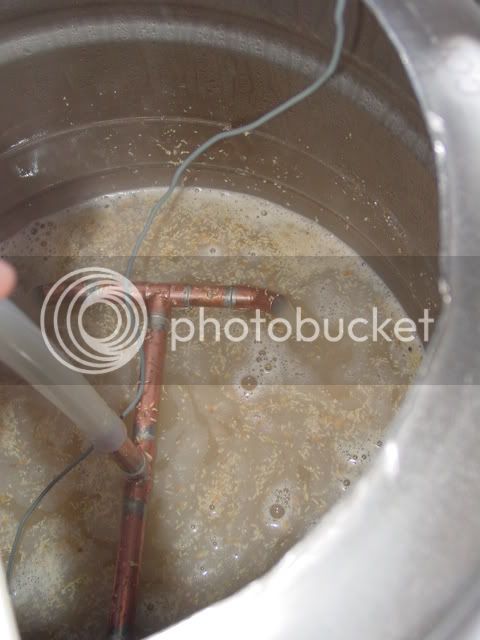
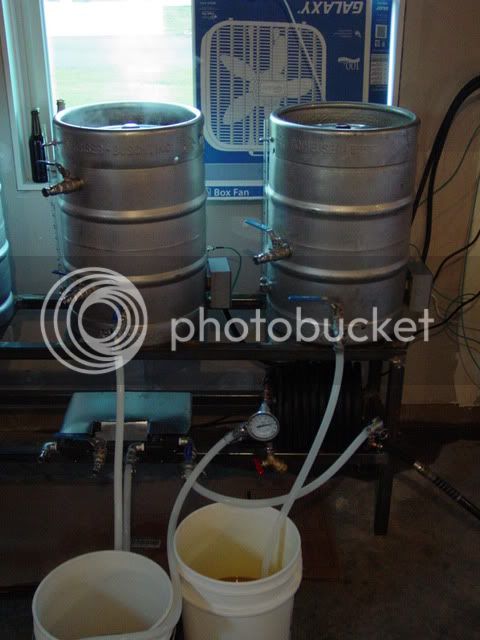
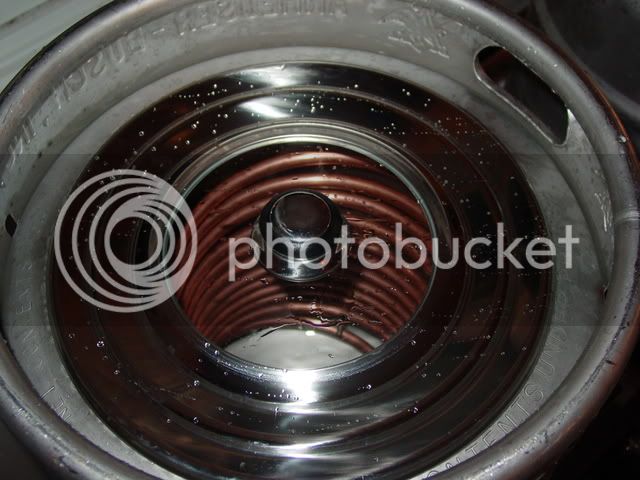
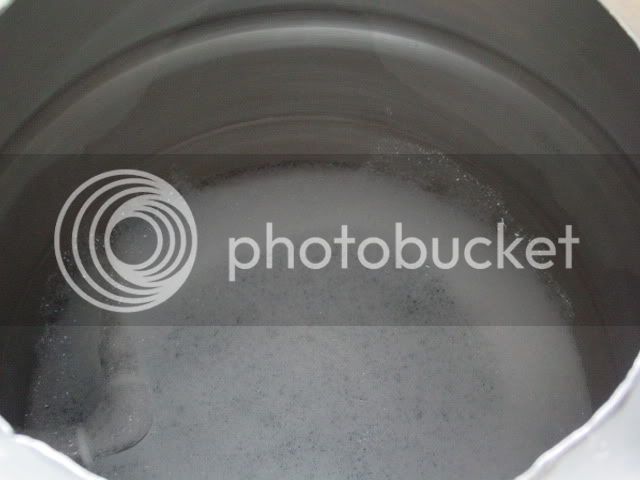
I recirculate back into the BK through a couple coils to cool... that and getting a decent whirlpool are where I would expect to see the benefits most.

Ed
 
I put several finishing touches on the brewery. Just need to get the stand powder coated, but that can wait until I have a few batches done. :D

I'm running a full brewing simulation (no grain), and everything's going very well.

I have lots of new pictures, so I'll post those sometime tomorrow hopefully... although there's a chance I might not get to it tomorrow, because tomorrow is brew day after all. :rockin:

TB
 
hmmm....so where are these pictures....

Thanks for keeping me honest, Gabrew.

Indeed, I have the pictures now. I've been posting from my phone lately since I've been pretty busy with other stuff.

I don't have pictures of me making this, but I did cut out and bend up some galvanized steel to protect the pumps. I might end up painting this thing down the road, but for now it will certainly do the trick:
DSC00331.jpg


I also hacked up my chiller. I shortened it to about 25-30 ft.
DSC00332.jpg


Of course, I was drinking some of the good stuff from my taps while working on the rig. Recipe for this one can be found in the database if you're interested (or click "recipes" under my avatar).
DSC00333.jpg


I also soldered together a sparge arm. Simple, but works very well (more about that later):
DSC00338.jpg


I put together a sort of globe valve setup for the cooling water input on the chiller. Prevents me from having to run back and forth from the rig to the water supply:
DSC00340.jpg


I picked up some stainless lids with glass that fit my keggles perfectly. They were cheap, too.
DSC00348.jpg


Then I calibrated the sight tubes:
DSC00351.jpg


DSC00352.jpg


Did some pre-brewing cleaning with some acid sanitizer (I use iodine for brewing itself though):
DSC00347.jpg


More cleaning:
DSC00354.jpg


TB
 
Looks great!

Did you shorten your CFC because it was too efficient? I also built a 50ft and am unsure if its overdoing it!?%!?
 
Brew day!!

First brew on the new system! I'll post the recipe, merely so that you can follow what I'm doing and with what I'm doing it with. If it turns out well, then I'll let you know in case you want to brew something similar.

5 gal batch

10 lb Ida-Pils malt

Mash @
140 to 148 for 15 min
148 for 30 min
153 for 30 min
170 for 10 min

Boil:
1 oz. sterling 6.0%aa for 90 min
.5 oz. sterling 6.0%aa for 15 min
Irish Moss for 15 min
.5 oz. sterling 6.0%aa for 0 min

Yeast: US-05

OG: 1.042

Here I'm measuring my grains:
DSC00357.jpg


Filling the HLT (using a filter and drinking water safe marine hose):
DSC00360.jpg


Here you can see my water source and marine hose setup in my basement:
DSC00361.jpg


Here's my water filter:
DSC00362.jpg


Milling grains:
DSC00363.jpg


Me stirring the mash at dough-in (crappy picture, I know):
DSC00365.jpg


This one's a little better, even though I'm still in it:
DSC00367.jpg


Recirculating during mash. The mash wort circulates through the HERMS coil, and I recirculate the HLT water throughout the HLT to prevent stratification.
DSC00371.jpg


Sparge manifold at work:
DSC00373.jpg


Here's my ventilation setup for the boil. I'm eventually going to replace that cardboard box with some extruded foam insulation. This works well for now, though.
DSC00375.jpg


[continued on next page]
 
Boiling my wort after first hop addition:
DSC00376.jpg


Here's a shot at the kettle PID when I was using 70% duty cycle. I had to dial it down to 55%, and that was a perfect boil. Keep in mind, this was a 5 gal batch. 75% duty rate is good for a 10 gallon batch.
DSC00378-1.jpg


The good stuff in the carboy, slight activity from the yeast:
DSC00383.jpg


Running a CIP after the brew session:
DSC00379.jpg


That's all I got for now. More updates later. I'll post tasting notes on the beer when it's done, if you're at all interested.

TB
 
were you please with the camlocks? What are your thoughts on step mashing using the HERMS?
 
were you please with the camlocks? What are your thoughts on step mashing using the HERMS?

Yes, I was very pleased with the camlocks. No leaking whatsoever, and easy to switch around on the fly. I got mine from www.bargainfittings.com and used the silicon o-ring that Wayne includes with his camlocks. Easy to clamp, and works like a charm. Gotta be a little careful when handling them after 170 degree Farican (that's 76.7 degrees Canadian ;)) liquid has been running through them.

My thoughts on step mashing with HERMS? Easy as pie. When recirculating the hot liquor through the HLT while recirculating the mash wort through the HERMS coil, the temperature response was just awesome. I dial in a temp on the HLT PID, and a few minutes later the MLT matches it. It couldn't be easier, and I couldn't be happier!

I'm really looking forward to my next batch (this weekend)!

TB
 
that is sick! Glad to hear that the HERMS system is working great...some were telling me that step mashin was not as easy as it was with a RIMS. sick sick sick!

Cant wait to get mine together!

Can we get a sneak peak at the following recipe?
 
that is sick! Glad to hear that the HERMS system is working great...some were telling me that step mashin was not as easy as it was with a RIMS. sick sick sick!

Cant wait to get mine together!

I can't speak for the RIMS guys, but I can tell you that I have every bit of capability as I need for step mashing with my HERMS setup. I'm sure you'll have similar experiences if your build is close to mine. I know Kal mentioned on his website that his HERMS had excellent temp response, too. It seems to me that most RIMS and HERMS setups are fully capable of step mashing alike.

Can we get a sneak peak at the following recipe?

Haha, if you want. I'm doing two SMaSH recipes for my first two brews until my new rig and I get to know each other. Not a very complicated mashing schedule, just keeping it relatively simple.

10 gal batch

20 lbs. Marris Otter pale malt

Mash @
145-154 for 20 min
154 for 60 min
170 for 10 min

Boil:
2 oz. Hallertau 3.9%aa for 60 min
2 oz. Hallertau 3.9%aa for 20 min
Irish Moss for 15 min
1 oz. Hallertau 3.9%aa for 10 min
1 oz. Hallertau 3.9%aa for 0 min

Yeast: US-05

If you want, I'll let you know how it turns out (it will be a few weeks).

TB
 
sounds great!

One more question...how far appart is the bottom of your HERMS coil to your element? Mine is pretty close (about an inch)
 
sounds great!

One more question...how far appart is the bottom of your HERMS coil to your element? Mine is pretty close (about an inch)

Mine is about 1.5-2 inches from the element. I did bend the element down a bit when I installed it, but I also bent the last ring of the coil down a bit, too, to clear the RTD probe when I installed that.

I don't think you have anything to worry about.

TB
 
sounds great!

One more question...how far appart is the bottom of your HERMS coil to your element? Mine is pretty close (about an inch)

I see people ask this from time to time and I don't understand why. Why does that matter? The HERMS coil could be resting right on the element and it wouldn't matter (as long as it's not going to cause physical stress or something on the element).

When you use HERMS you're always recirculating - same as when you're boiling or heating wort directly. The wort should never sit in the HERMS coil. Even if it did, odds are that you're reciculating the HLT water anyway as he's doing here so again, the heat is mixed.

Kal
 
...When you use HERMS you're always recirculating - same as when you're boiling or heating wort directly. The wort should never sit in the HERMS coil. Even if it did, odds are that you're reciculating the HLT water anyway as he's doing here so again, the heat is mixed.

Kal

Exactly. I don't think that the HERMS coil touching the element would pose a real threat to your wort, and from the sounds of it, your coil clears your element just fine.

TB
 
Got my two Camco 4500W ULD elements today from www.plumbingsupply.com. They even threw in a mini bag of Jelly Belly's.

Parts list in OP updated.

TB
I'm looking at their website but didn't see any Stainless Steel heating elements. They told me that theirs are constructed of magnesium oxide inside copper tubing with a zinc coating. I'm converting my propane brew system over to electric and are the heating elements (part #240-4500-ELD 240v 4500w Extra Low Density) the ones you bought? If not, what part #s were the ones you went with?

Thx,
Scott

The ULD elements are corrosion resistant incoloy, not necessarily the stainless steel you're thinking of. This is the picture they have on their website:
water-heater-element-02953.jpg


I believe the zinc coated copper ones are high density elements. The part number for the ones I got is 240-4500-ELD at www.plumbingsupply.com. They are the Camco brand, which seems to be pretty popular amongst electric brewers.

Hope this helps,
TB
 
Did you shorten your CFC because it was too efficient? I also built a 50ft and am unsure if its overdoing it!?%!?

Well, I just ran a test to get some better data. I brought 8 gal of water to a boil, then ran it through my chiller. Before I turned the water on, it read 209-210, which is about right. After I turned the water on full open, it read 55F, which is the current temp of my water supply. To get 70F, I had to close the water valve almost all the way. I'd say it was open 5-10% MAX. I will have no problem with this chiller being 25 ft long. I even have a pretty good flow rate through the 3/8" copper tubing in the chiller, got a 5 gal bucket filled in about 6 minutes +/-. So, for a 10 gal batch, I will be able to fill two 5'ers up in about 12-15 minutes tops.

With you being in Montreal, I'd expect your water temp to be about the same (I actually live north of you), so if you have a similar flow rate through your chiller (i.e. pumped), I'd say 50 ft is a bit overkill.

Hope this helps,
TB


Great, thanks! This thread as a whole has been of tremendous help!
 
Nice build. Are you coating the stand black?
I'm picking up the steel for my stand this week. I ordered 1"x2" rectangular tubing, which should be plenty strong, but I have to get some 1"x1" for the cross pieces. So far I have collected that and one keg to start with.
I plan on putting it on casters to make it possible to keep it out of the way in the basement when not brewing.
 
Nice build.
Thanks! :mug:

Are you coating the stand black?
I'm picking up the steel for my stand this week. I ordered 1"x2" rectangular tubing, which should be plenty strong, but I have to get some 1"x1" for the cross pieces. So far I have collected that and one keg to start with.
I plan on putting it on casters to make it possible to keep it out of the way in the basement when not brewing.
I used 1.5" x 1.5" square tubing .120 wall thk. Yes, I did get a quote for black powder coating from a local facility for $30-40. The plan is to brew a large amount of beer, build up my stock again (I have plenty in bottles, but need to keep four taps on the kegerator flowing), then take the stand in painting.

I think you'll be fine with the steel you got. Mine is built with a bit of overkill, as many on HBT are, but I like it that way. Heck, I've seen some 2x2 sq tubing builds here that could be used to jack up buildings.

TB
 
I can't speak for the RIMS guys, but I can tell you that I have every bit of capability as I need for step mashing with my HERMS setup. I'm sure you'll have similar experiences if your build is close to mine. I know Kal mentioned on his website that his HERMS had excellent temp response, too. It seems to me that most RIMS and HERMS setups are fully capable of step mashing alike.


Haha, if you want. I'm doing two SMaSH recipes for my first two brews until my new rig and I get to know each other. Not a very complicated mashing schedule, just keeping it relatively simple.

10 gal batch

20 lbs. Marris Otter pale malt

Mash @
145-154 for 20 min
154 for 60 min
170 for 10 min

Boil:
2 oz. Hallertau 3.9%aa for 60 min
2 oz. Hallertau 3.9%aa for 20 min
Irish Moss for 15 min
1 oz. Hallertau 3.9%aa for 10 min
1 oz. Hallertau 3.9%aa for 0 min

Yeast: US-05

If you want, I'll let you know how it turns out (it will be a few weeks).

TB

Well, if you're still interested, I ended up brewing a big brown ale instead of the above recipe. Here it is, but keep in mind I haven't tasted the final product yet (brewed yesterday):

11 gal

12# 2-row
7# Munich
1.5# c-40
1.5# c-60
2# c-120
.25# choc

Mash at:
140F for 20 min
140-156F for 15
156F for 50
160F for 10
168F for 10

(something like that - my notes are loose observations)

Boil:
1.5 oz. cascade 7.2%aa 80 min
.75 oz. cascade 7.2%aa 35 min
Irish moss 15 min
.5 oz. sterling 6%aa 5 min

OG: 1.062

cool to 68F, pitch US-05 in one carboy, Notty in the other.

Blow off tubes are showing good activity already today.

Thoughts on the system itself:
There is absolutely nothing wrong with the system, and it is fully capable of doing everything I want it to for brewing beer. I noticed that I do need to get used to it, since I missed a few marks here and there, and forgot to refill the HLT after sparge, etc. I just need to get process nailed down, and make it habit. It didn't help that I had some friends over and we were drinking lots of tasty beer. I'm looking forward to brewing many more batches on this thing! So far, so good, but it should only get better.

TB
 
I just wanted to jump in and say thank you for all the documenting you've done on this build. It looks amazing. I've read this entire thread twice today. I would definitely be interested in seeing a complete parts list. I only have about 20 or 30 brews under my belt with my current system, but I see myself heading this direction sooner than later. It would be nice to start picking up items as my funds allow.

I did have one question, you are using both SSR's and contactors. I've been trying to understand exactly why.

Thanks and congrats on your successful build.

DB
 

Latest posts

Back
Top