leatherfacegoon
Member
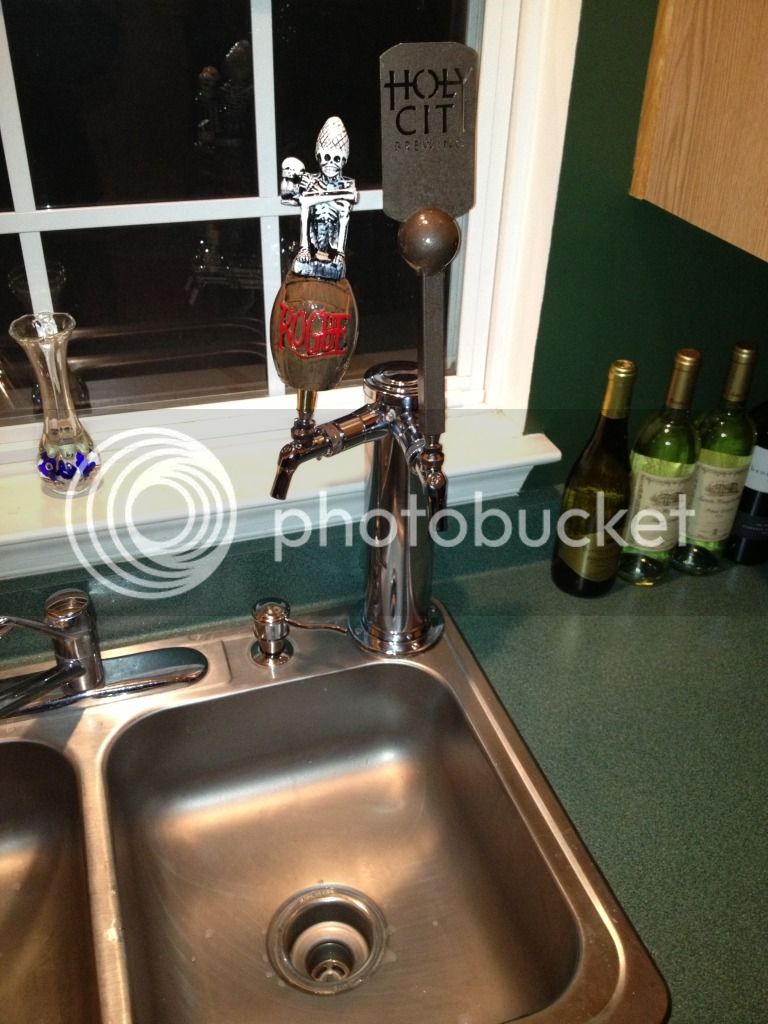
New member as of today but I have been reading the site for at least a year. I know a few are wondering why I would want to do this, but it all started with the sprayer at the kitchen sink. I never use it. I always thought it was a waste of space at the sink. I always wanted to replace it with something. Once I came of age to legally consume I was turned on to microbrews and craft brewing. Why not replace the sprayer with a draft beer tower!
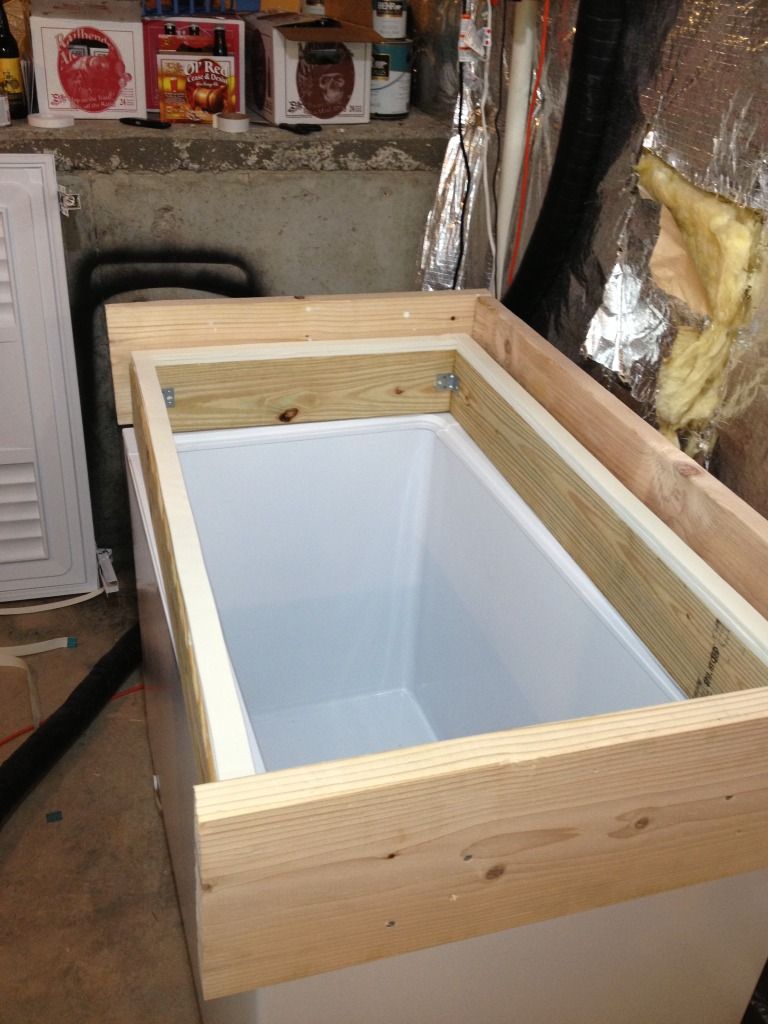
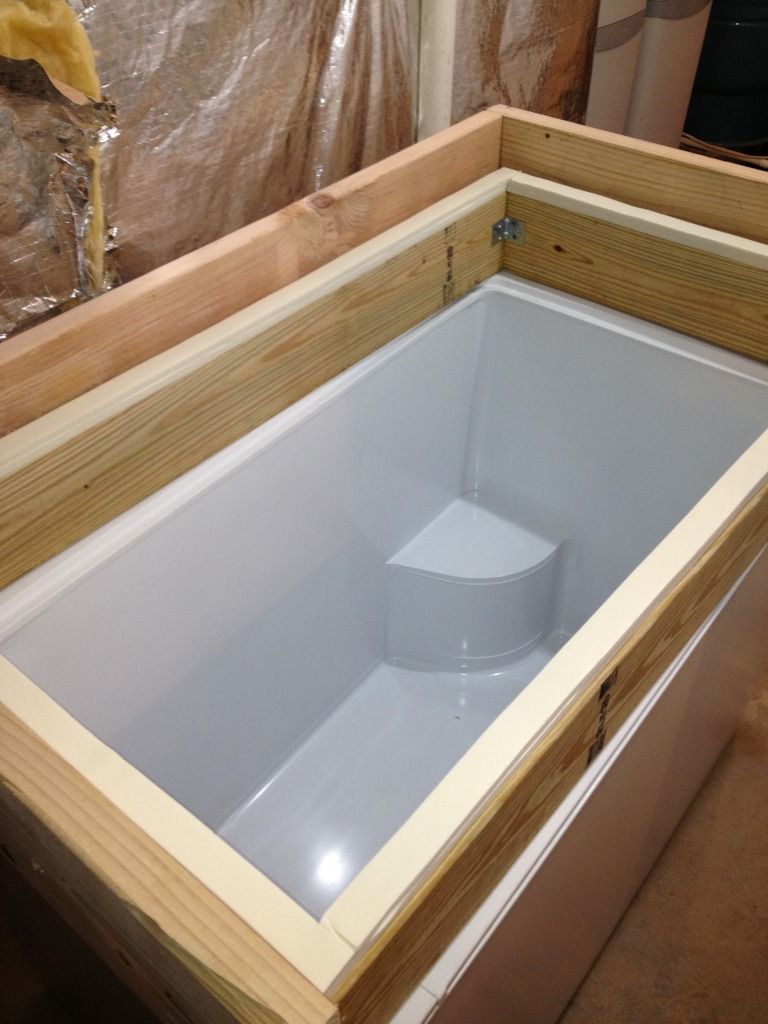
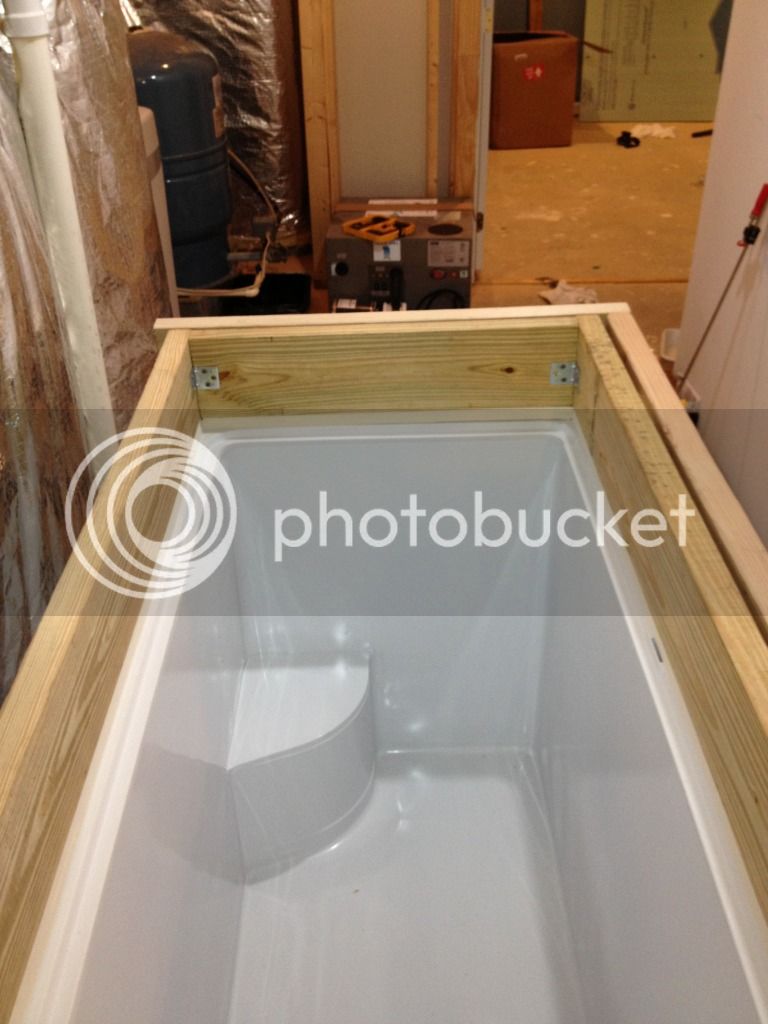
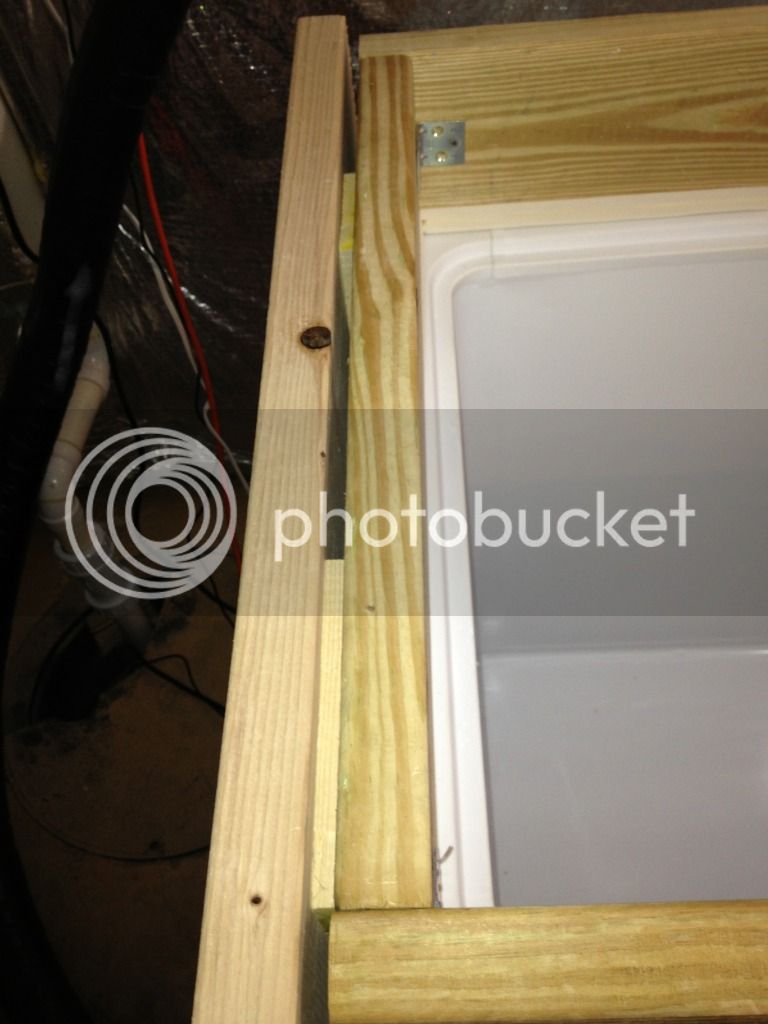
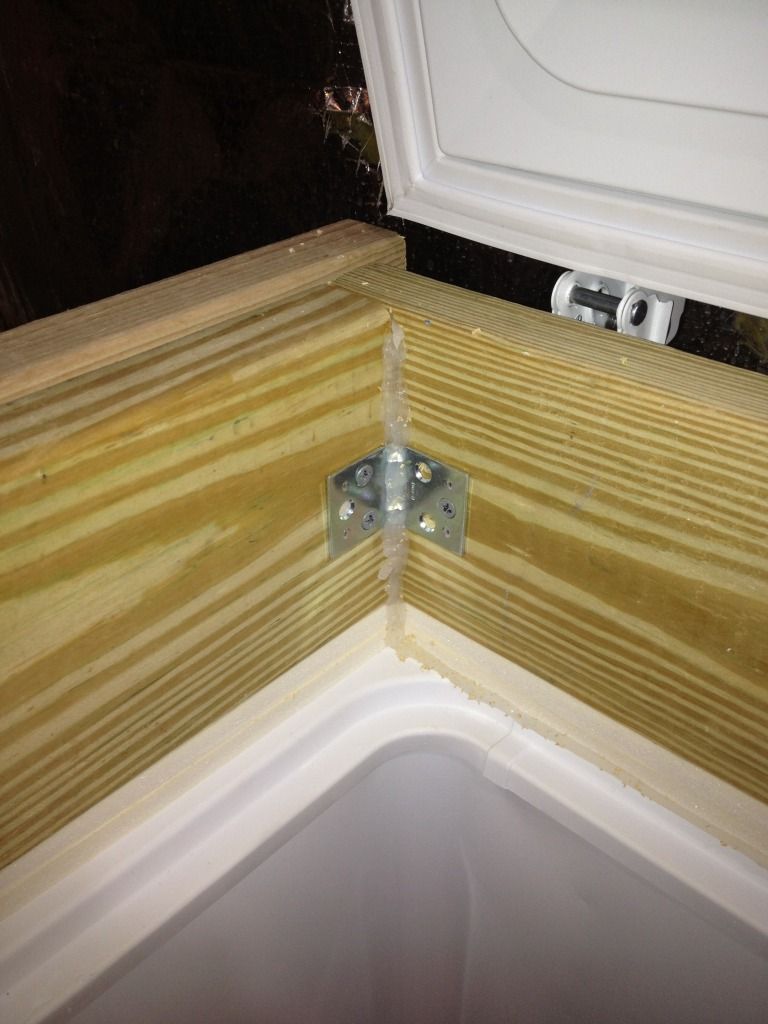
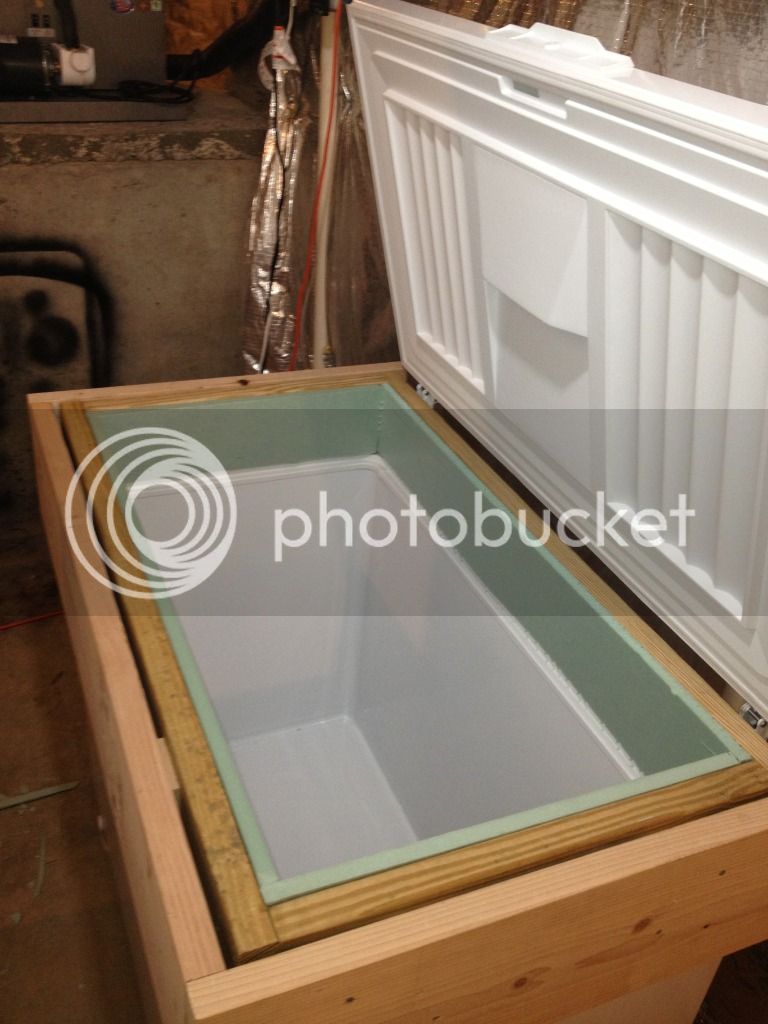
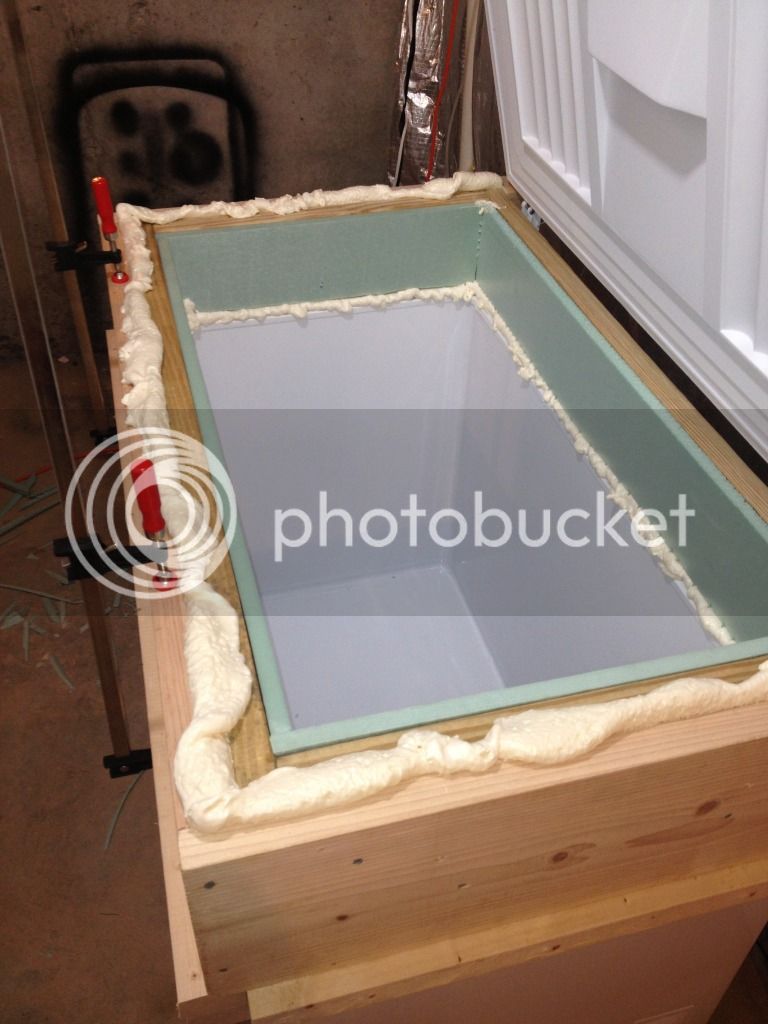
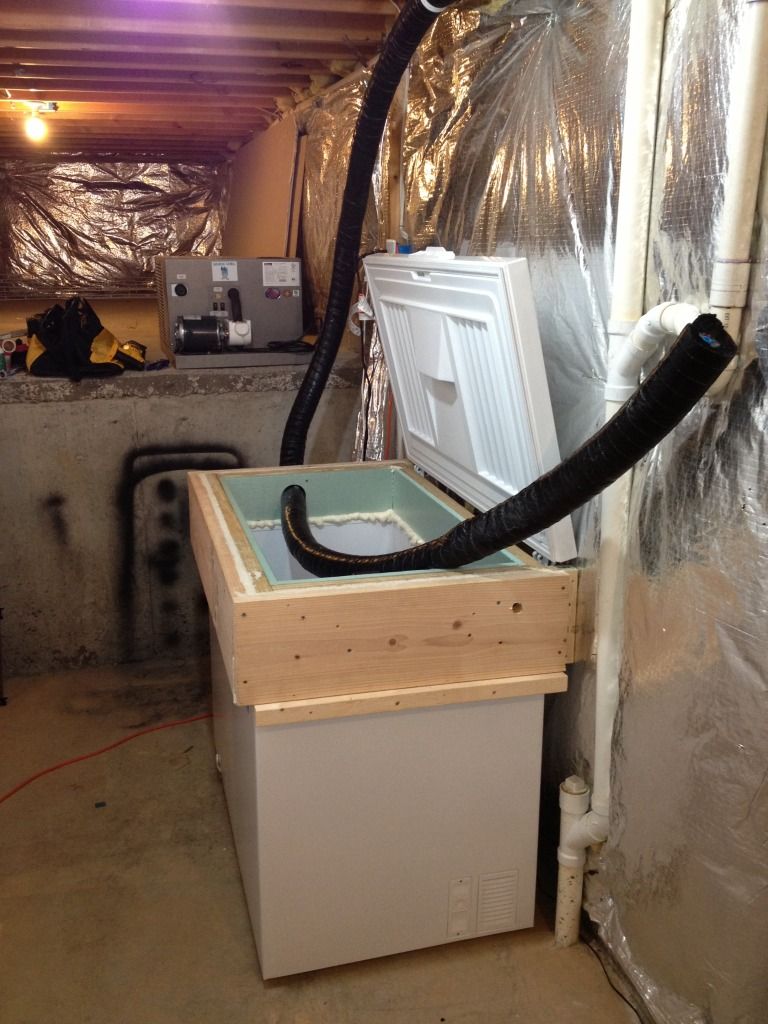
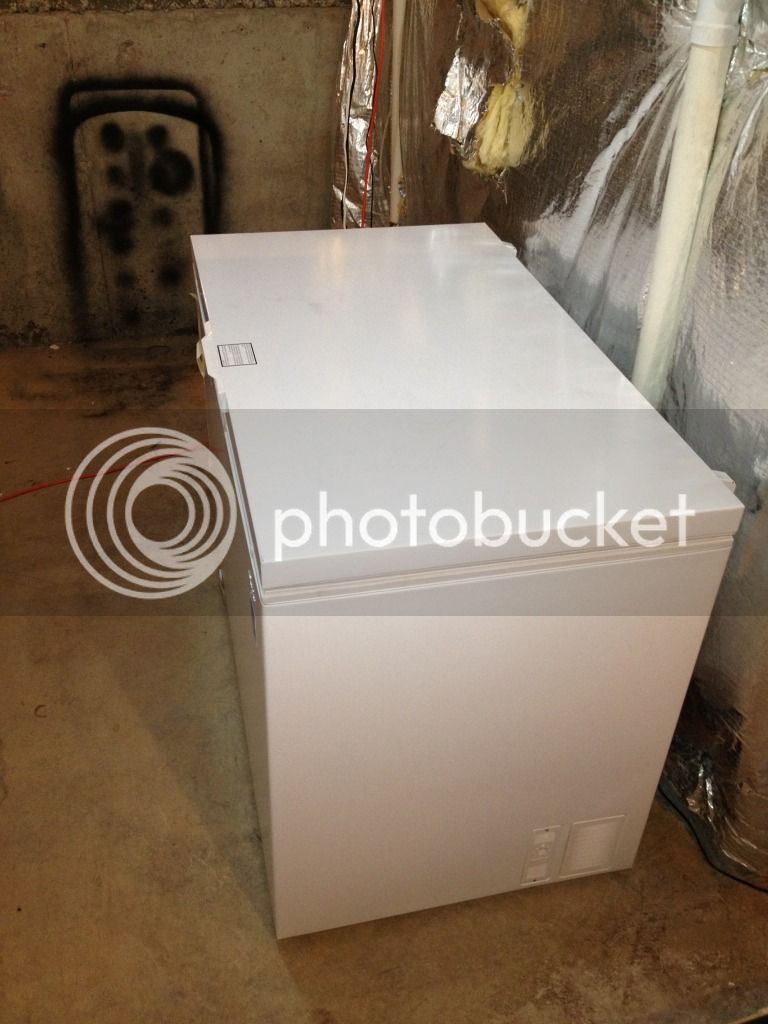
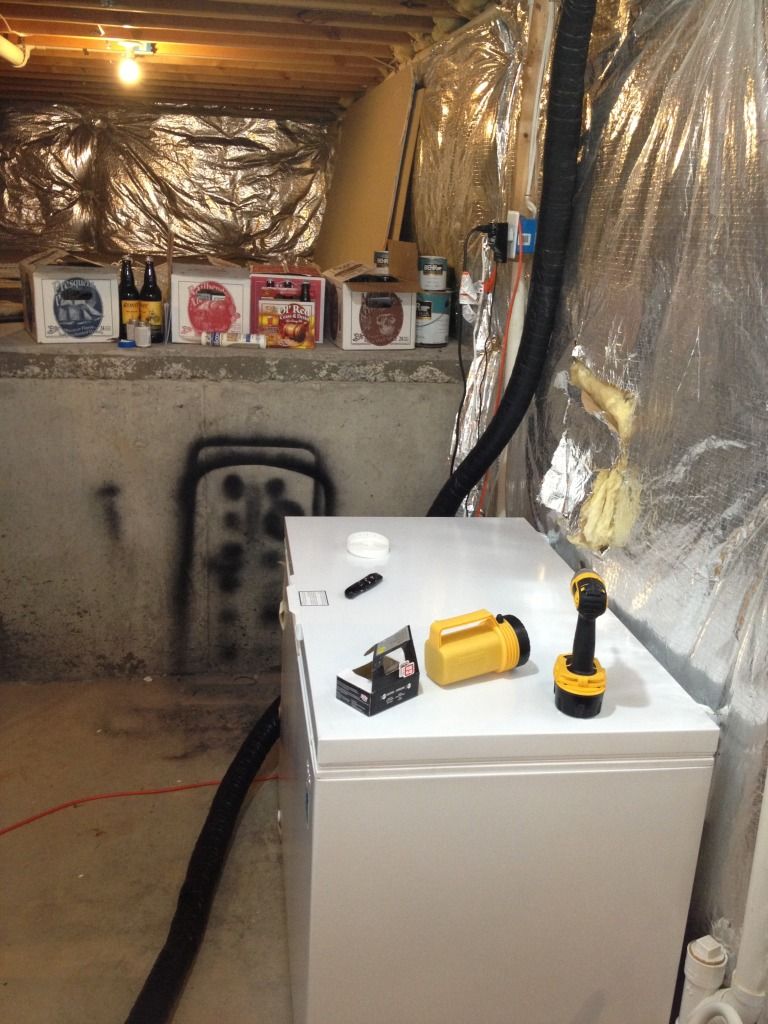
And so the journey begins. I have been wanting to do this project for some time and with all the research I have not been able to find someone that has done exactly as I am doing. I will have my keezer in the basement and run the insulated lines up to the kitchen sink. I picked up my chest freezer at Sears scratch and dent. I looked the freezer over real well and all that I could find was a scratch on the left hand side that didn't even indent the metal. I still need to build the collar. It is big enough to hold 2 half barrels but still not tall enough to go without a collar.
http://www.searsoutlet.com/14-8-cu-...ils.jsp?md=ct_md&cid=823&flt_shipping_length=[0 TO 100]&flt_bdn=Whirlpool&flt_shipping_width=[0 TO 100]&flt_sp=[0 TO 125000]&flt_shipping_height=[0 TO 100]&pn=1&ps=24&pid=86471&mode=seeAll&itemSelectionType=all
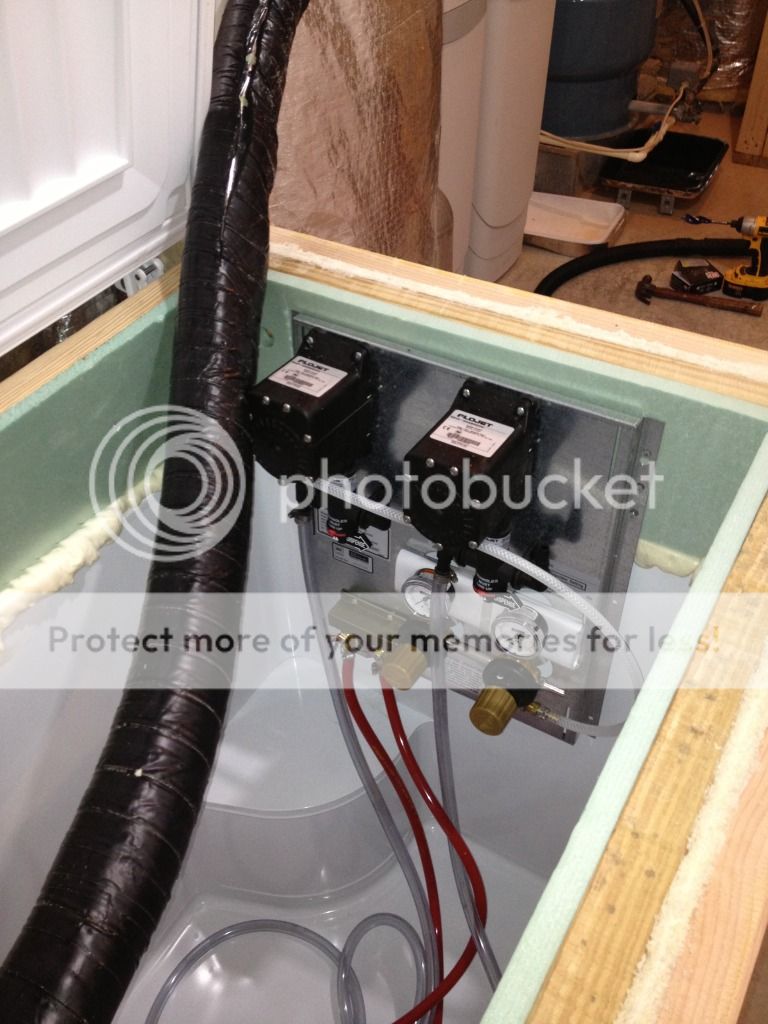
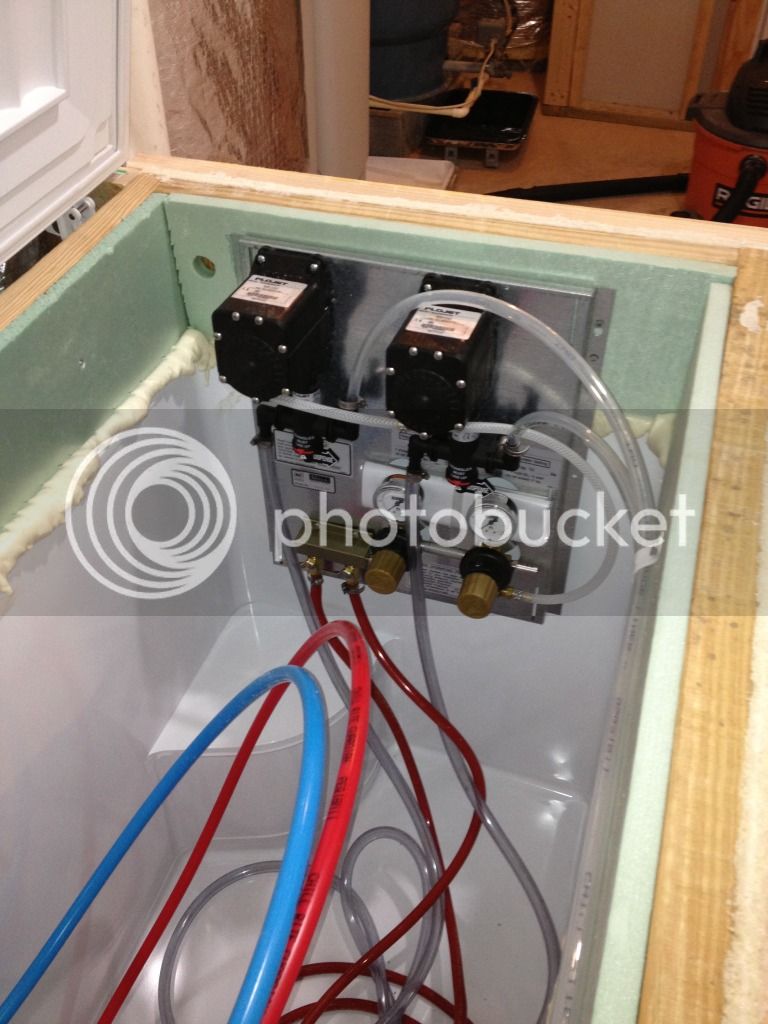
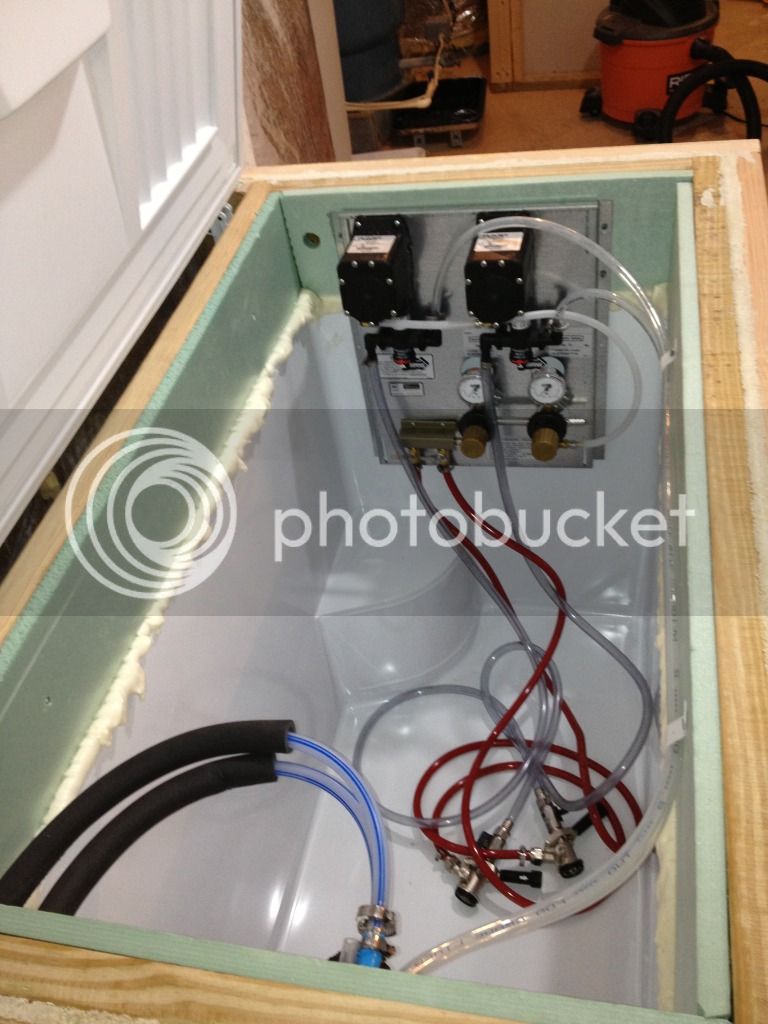
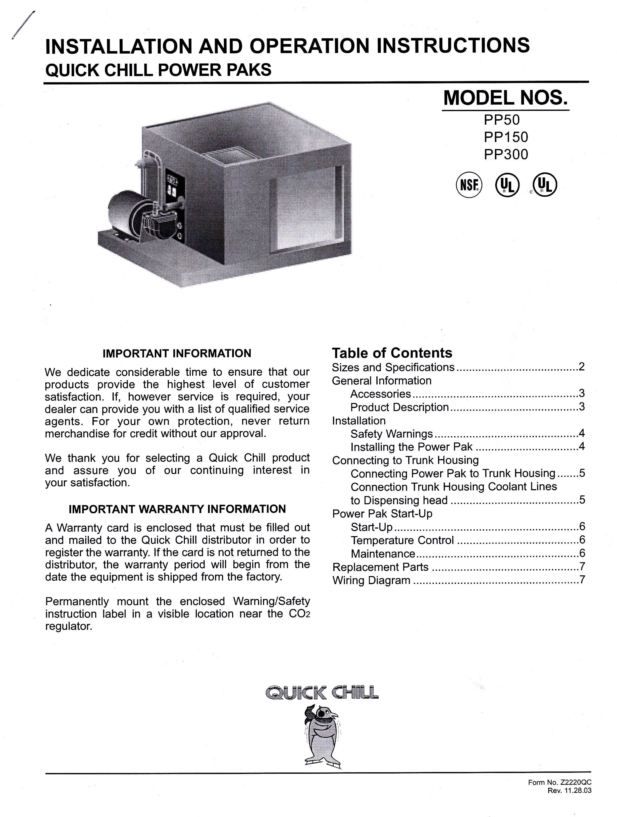
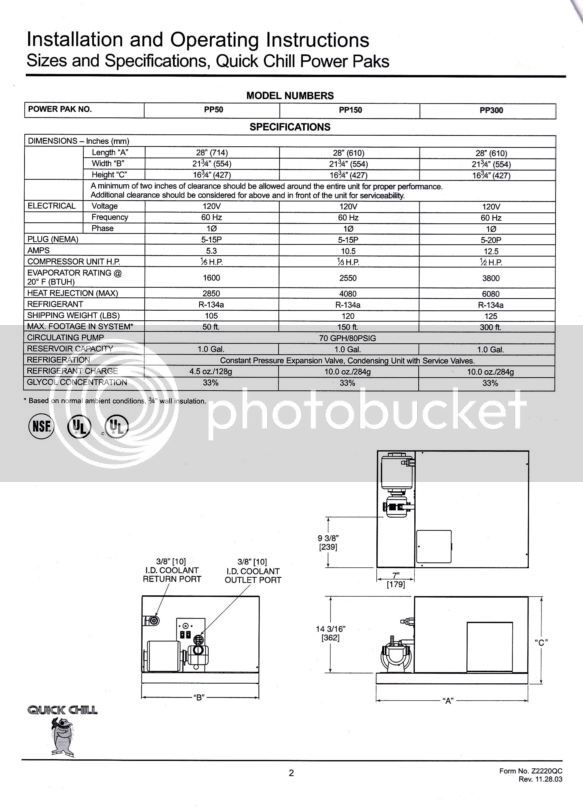
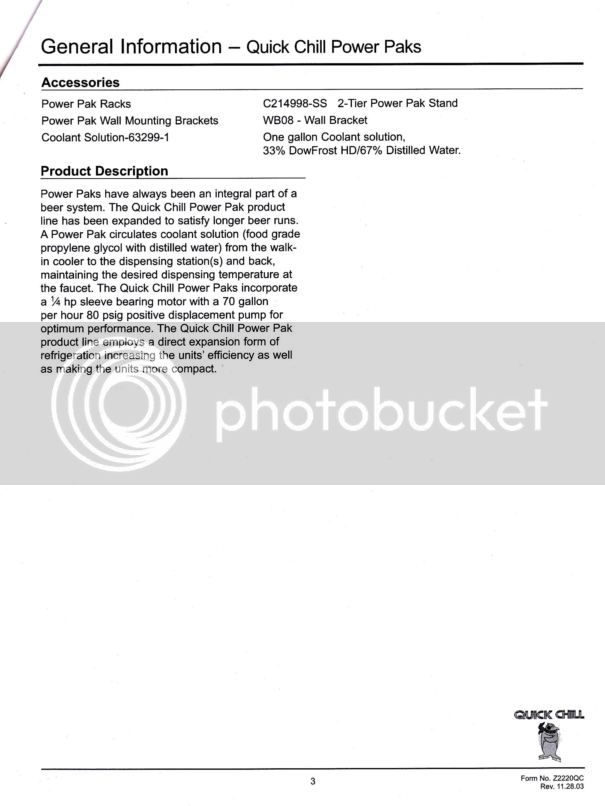
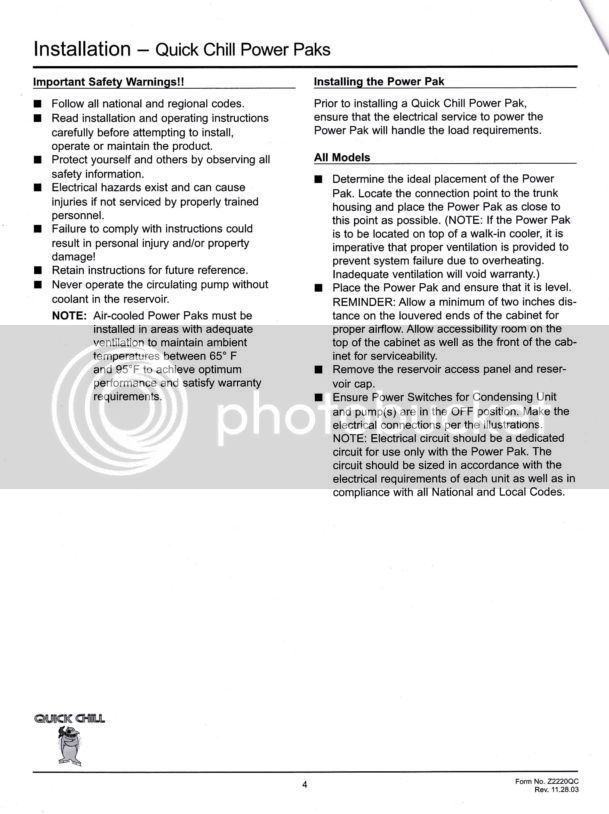
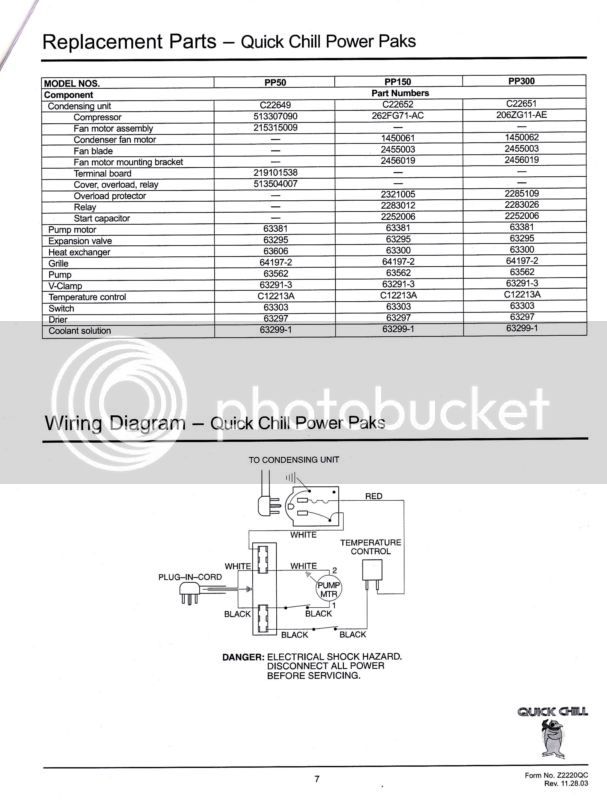
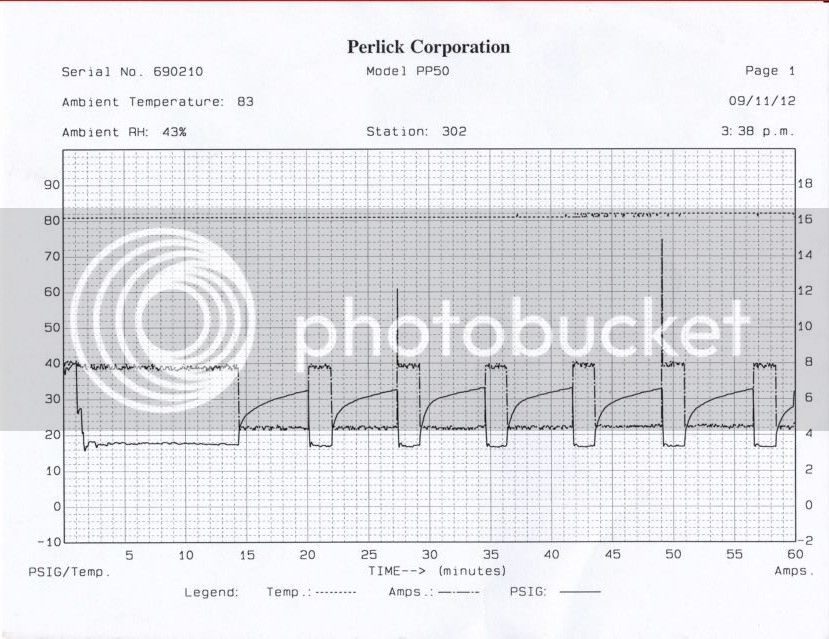
I also picked up a PP50 glycol unit from Perlick to make sure I get a nice cold pour each time. This was by far the most expensive part of my kit. But, it is what I want.
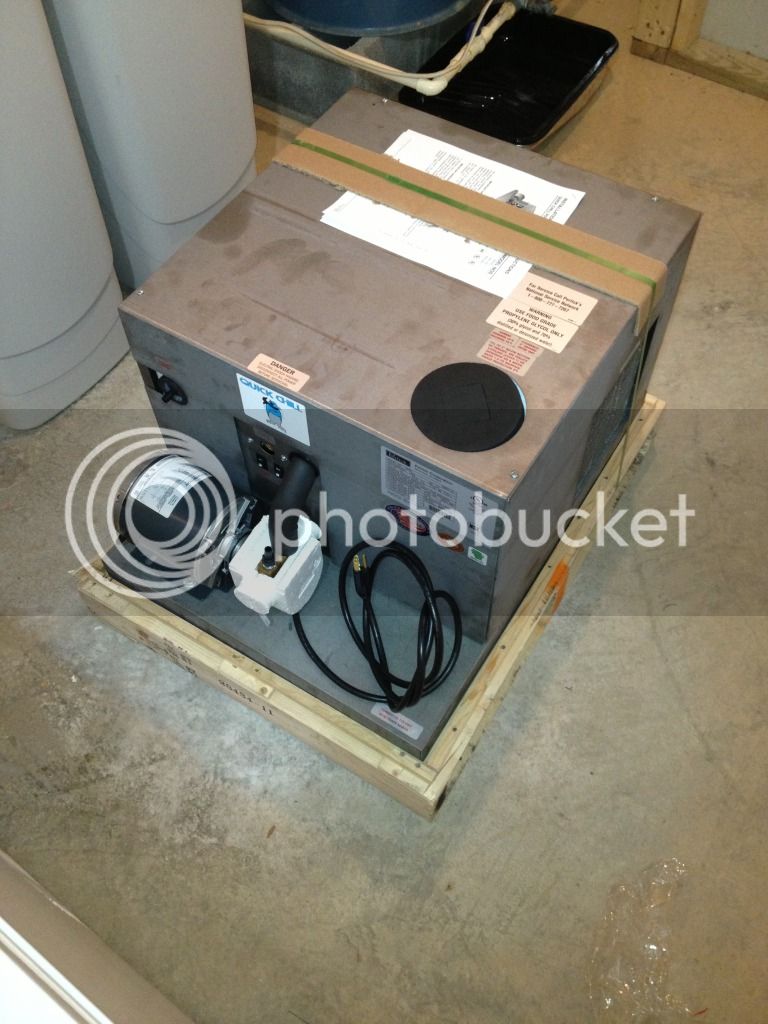
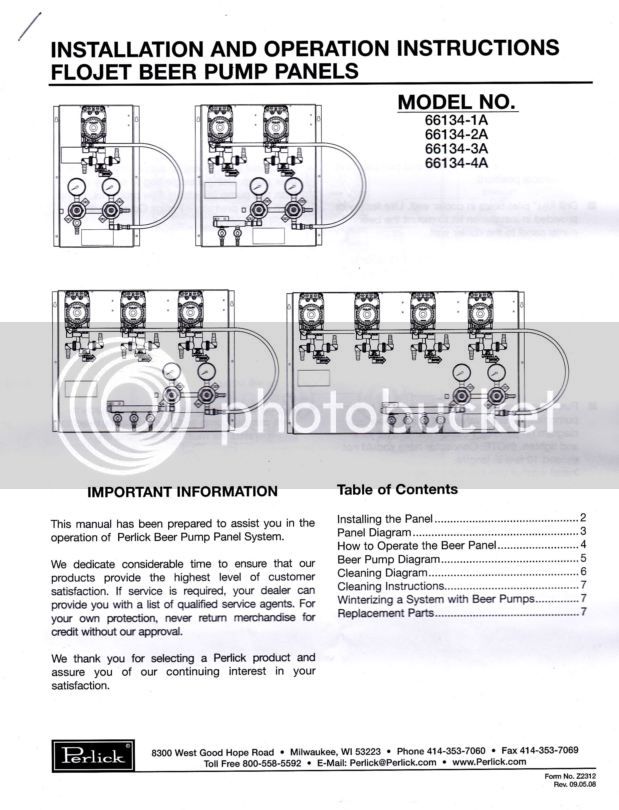
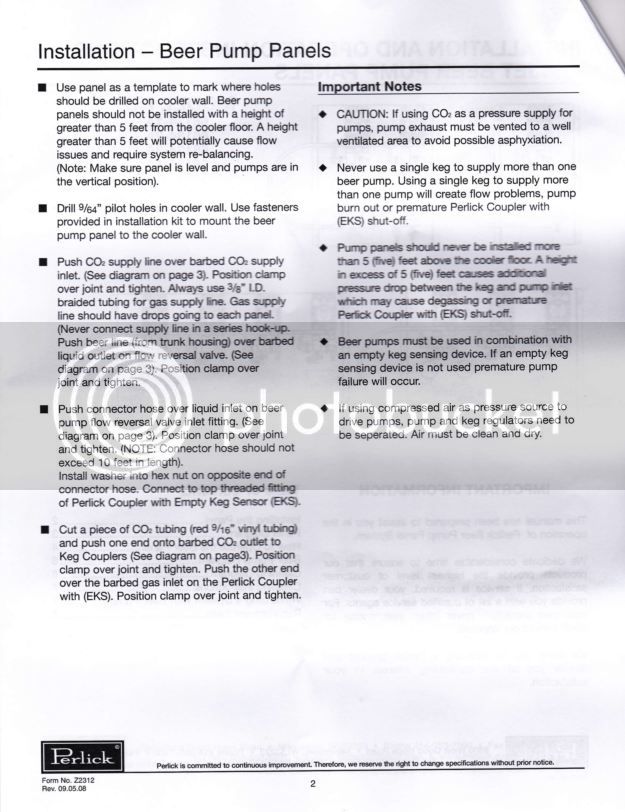
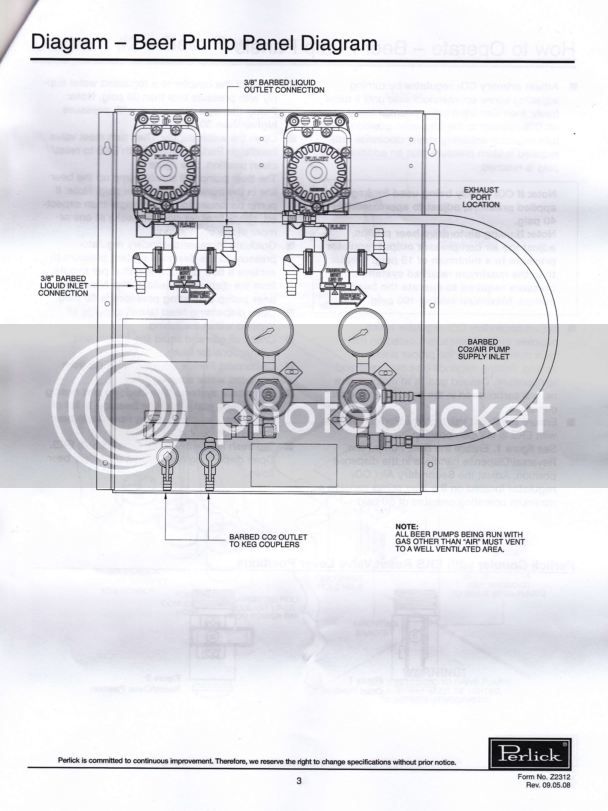
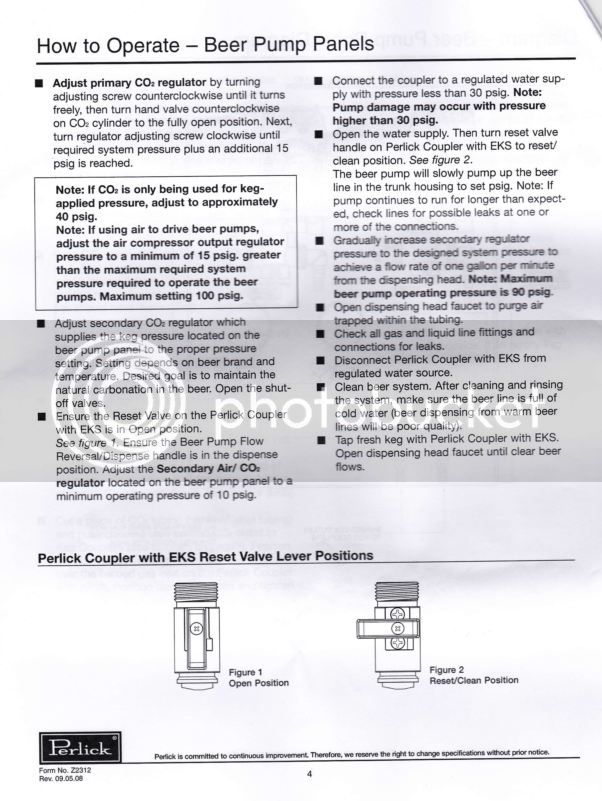
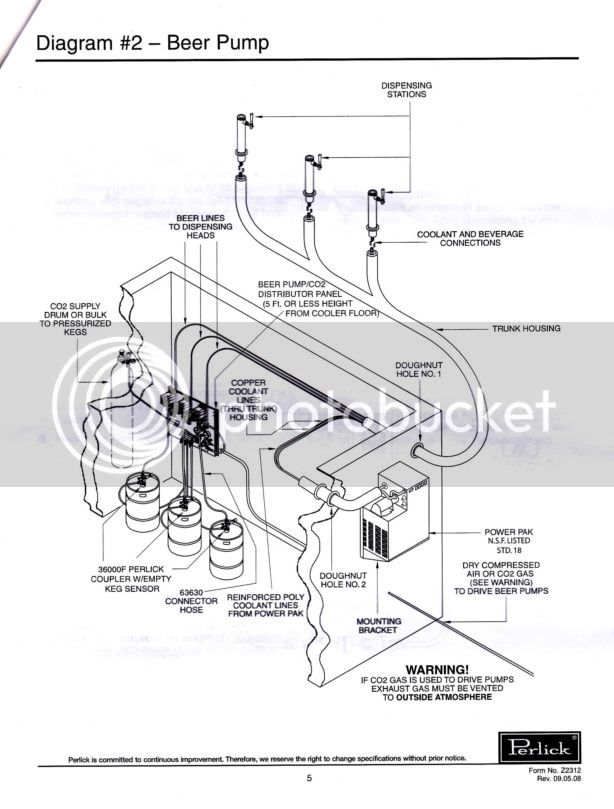
To deal with the effect of gravity I also picked up a pump panel from Perlick. Supply the panel with 40 psi of CO2 and adjust the regulators on panel for your beverage choice.
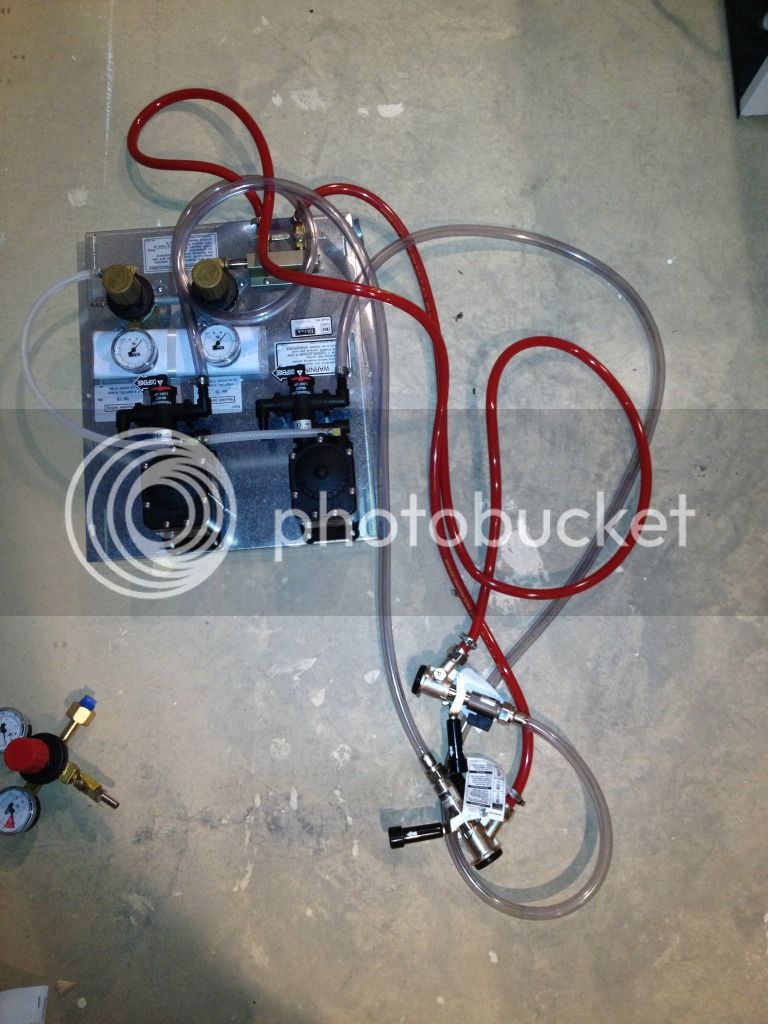
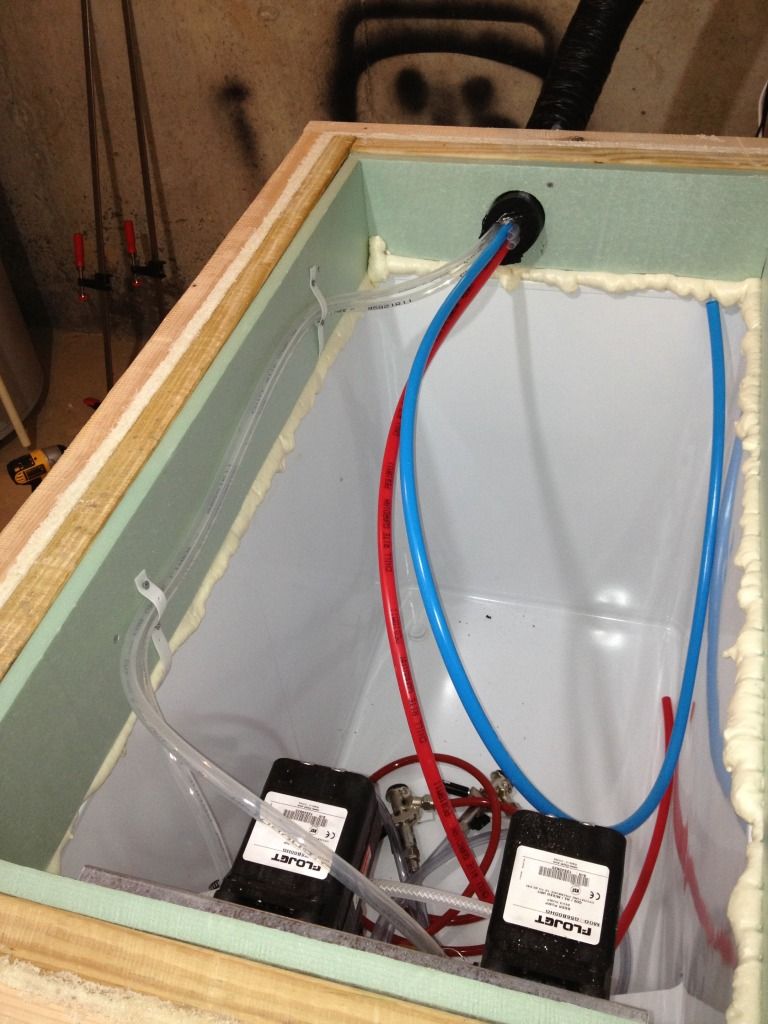
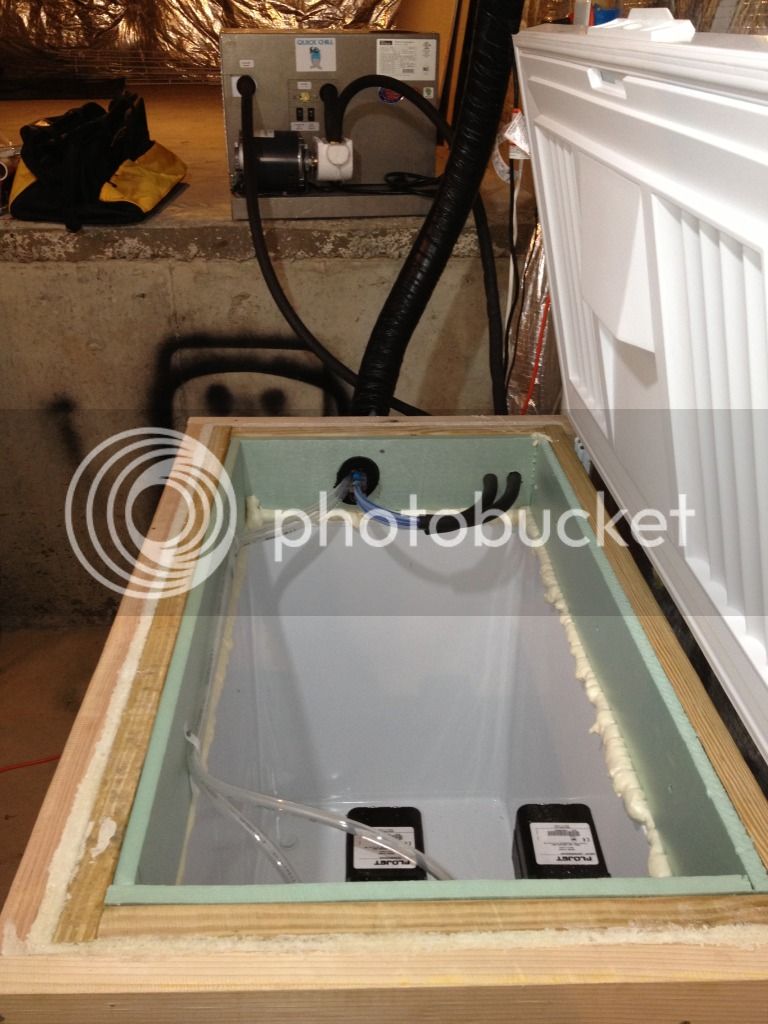
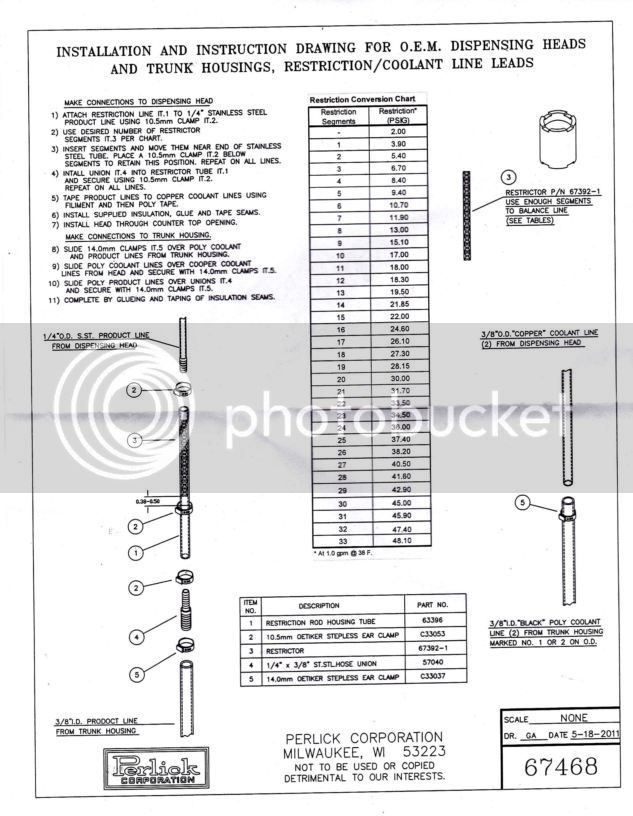
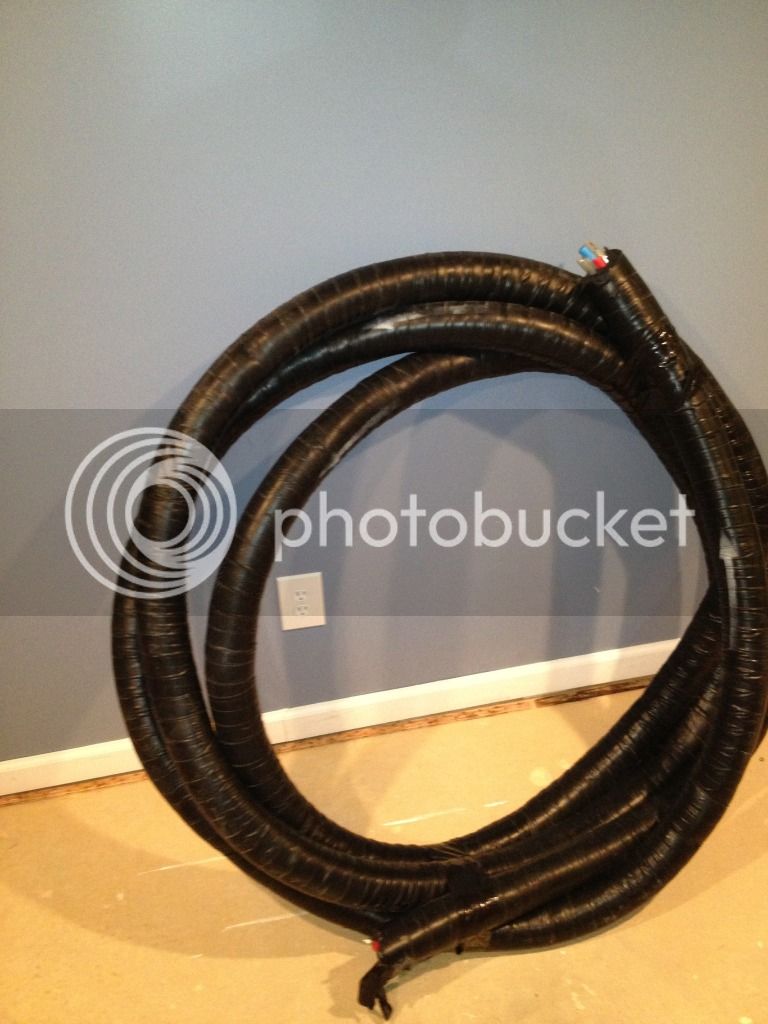
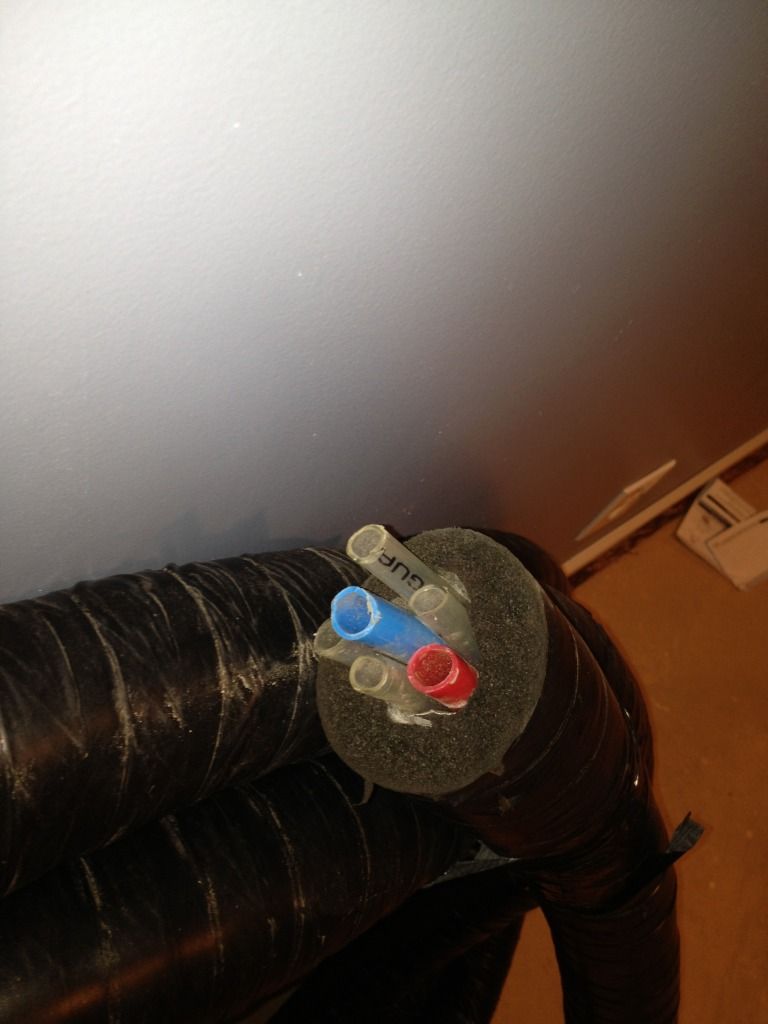
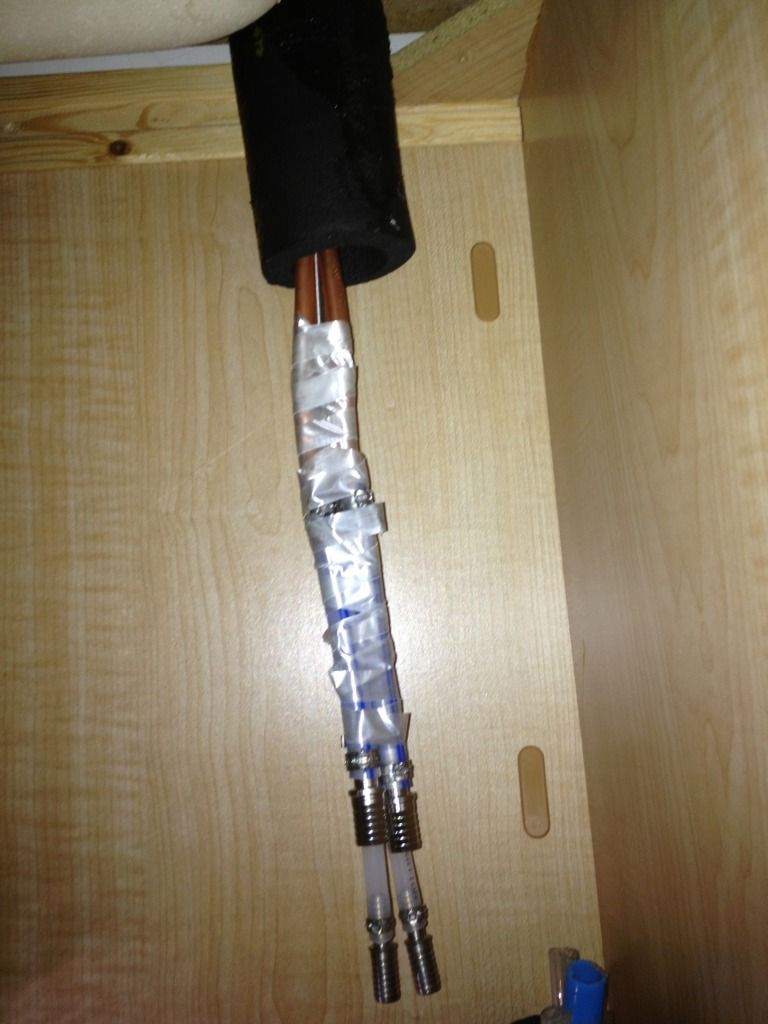
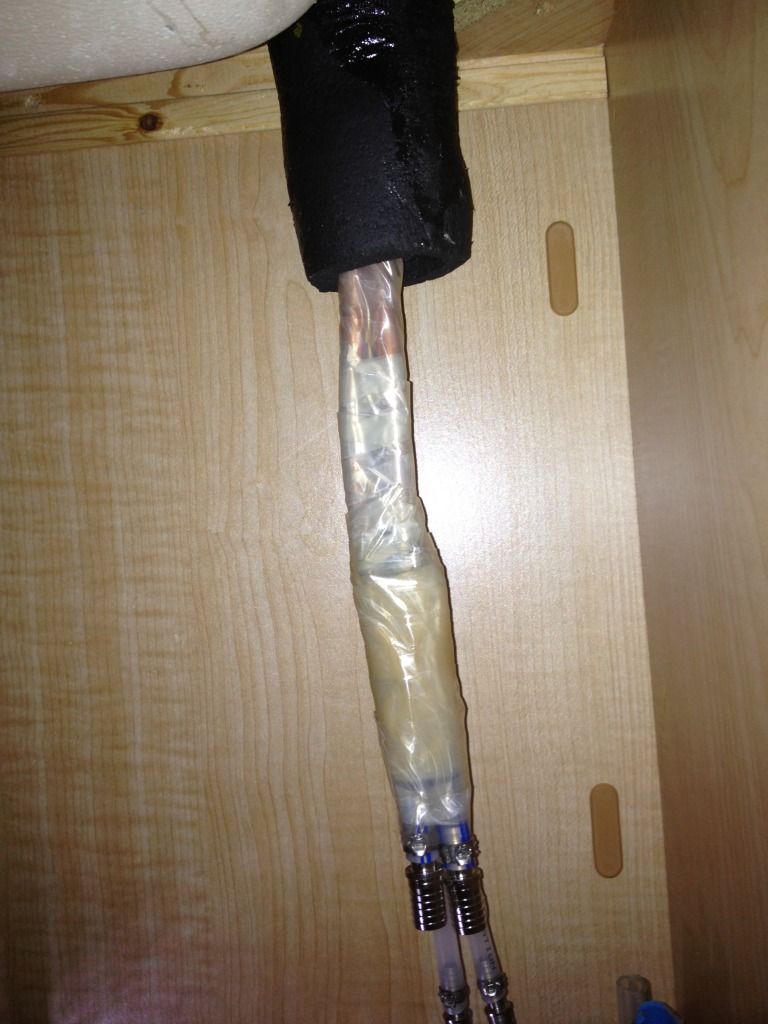
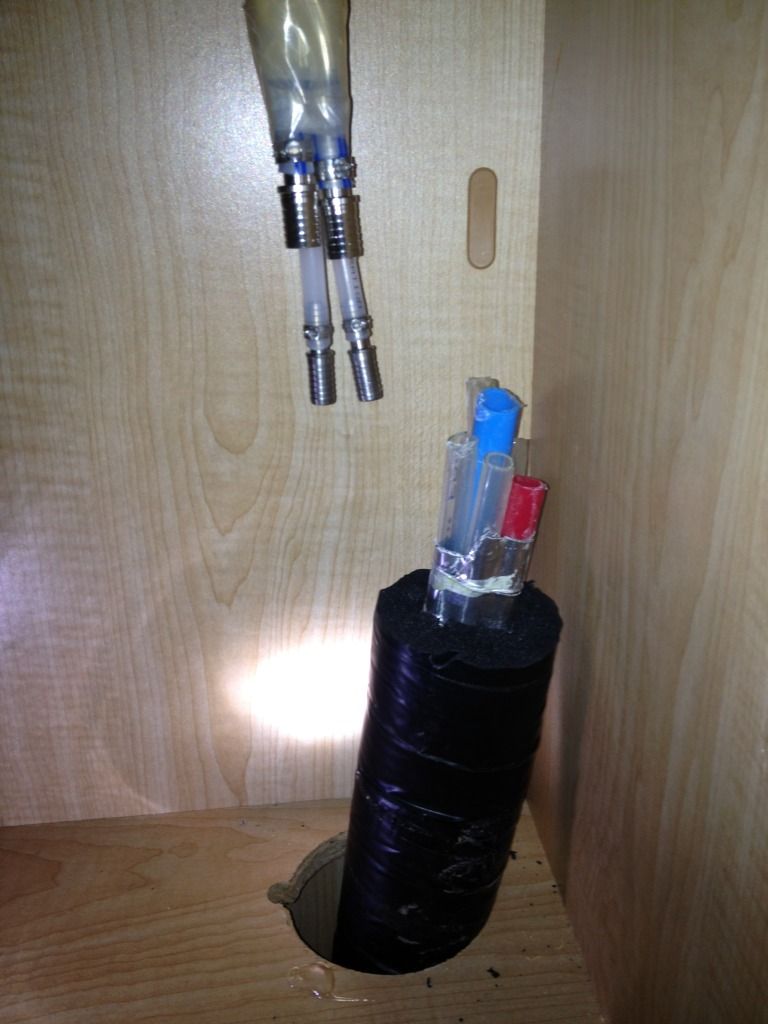
I also picked up some insulated trunk line as well. Although the tower I have now only has 2 faucets, the line has 4 product lines in case I want to expand at a later date.
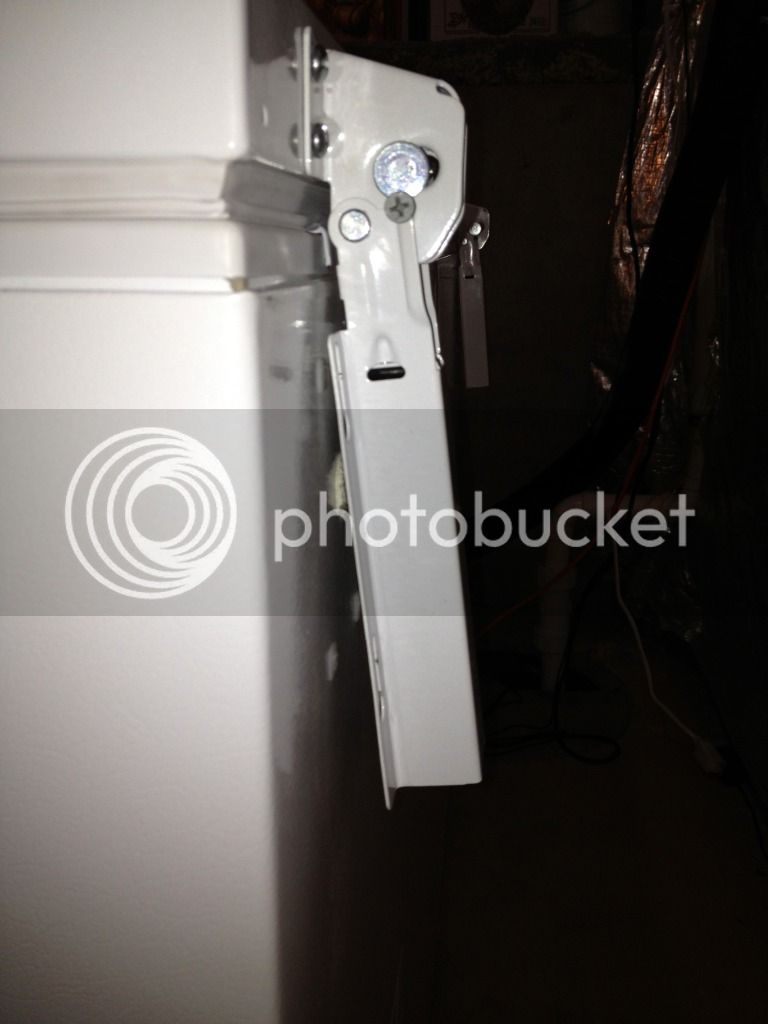
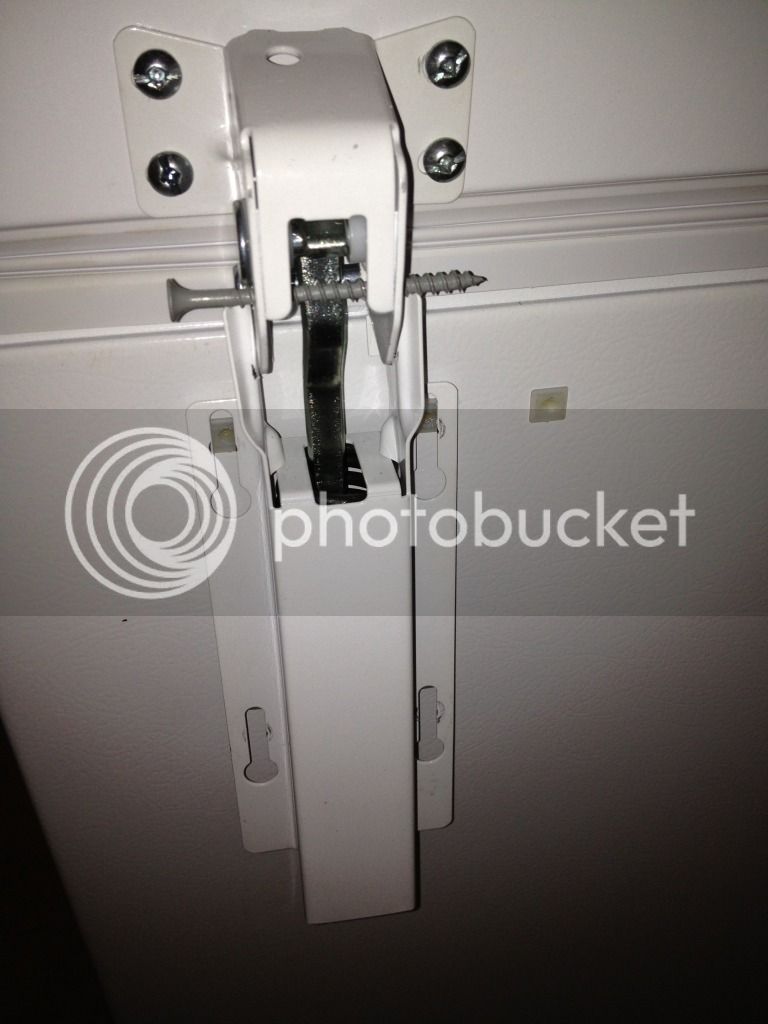
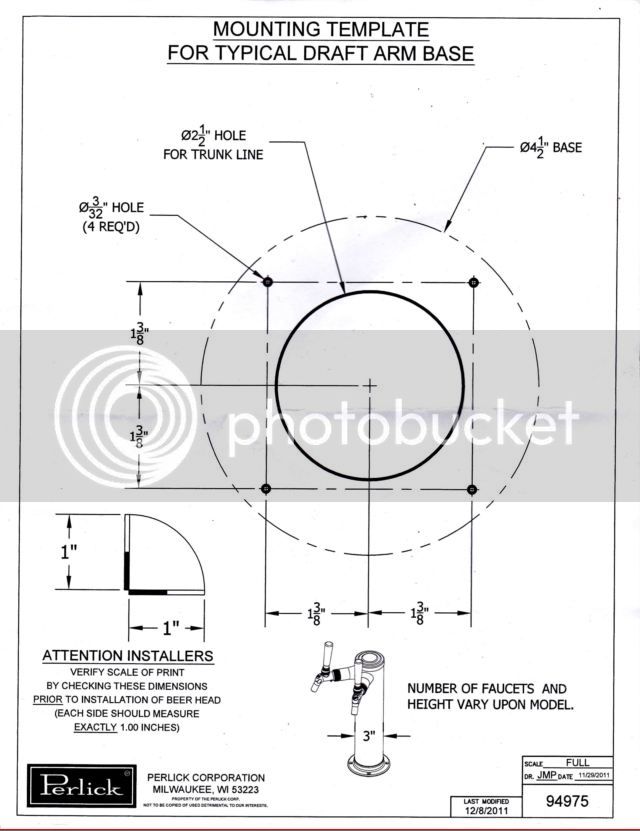
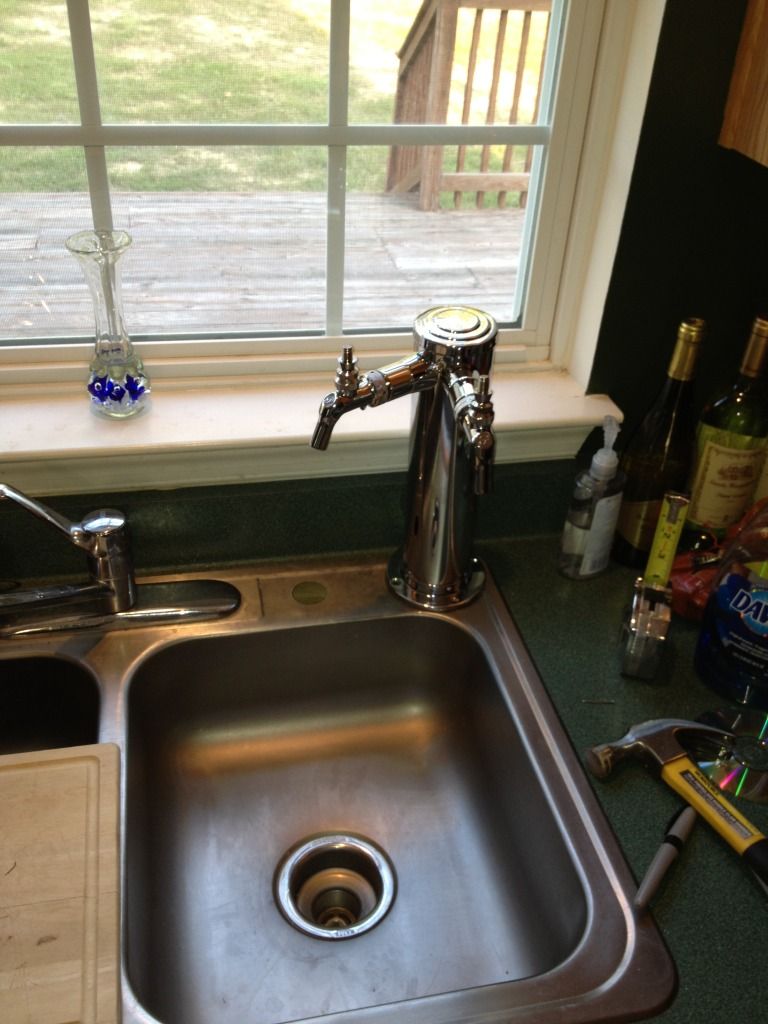
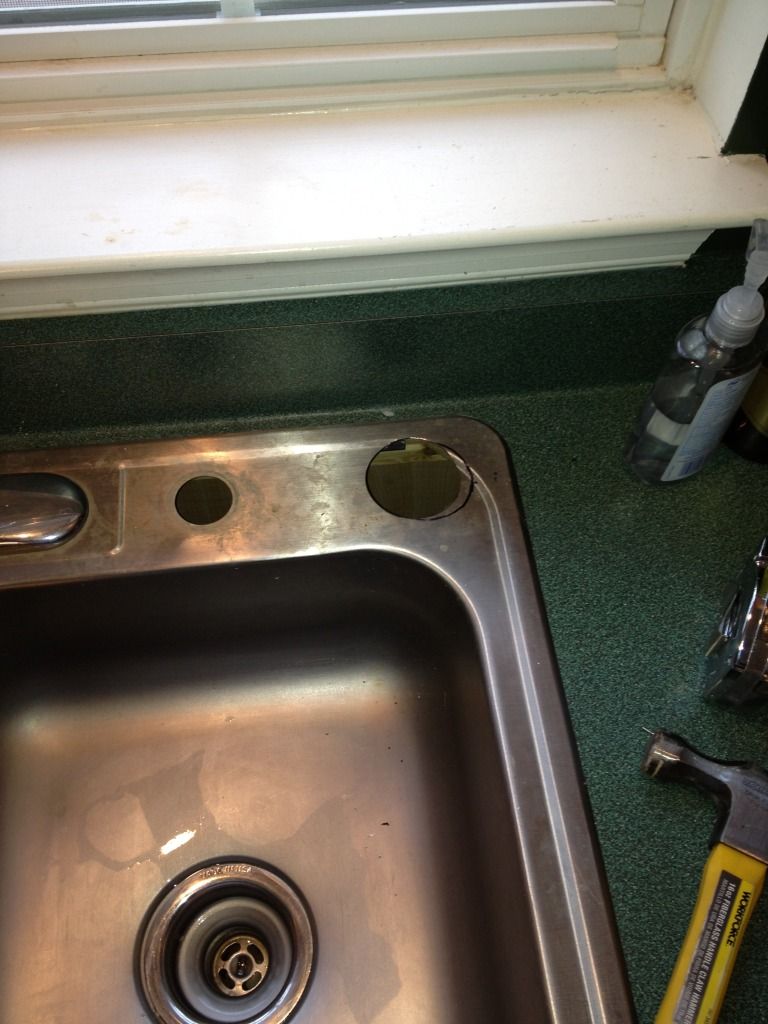
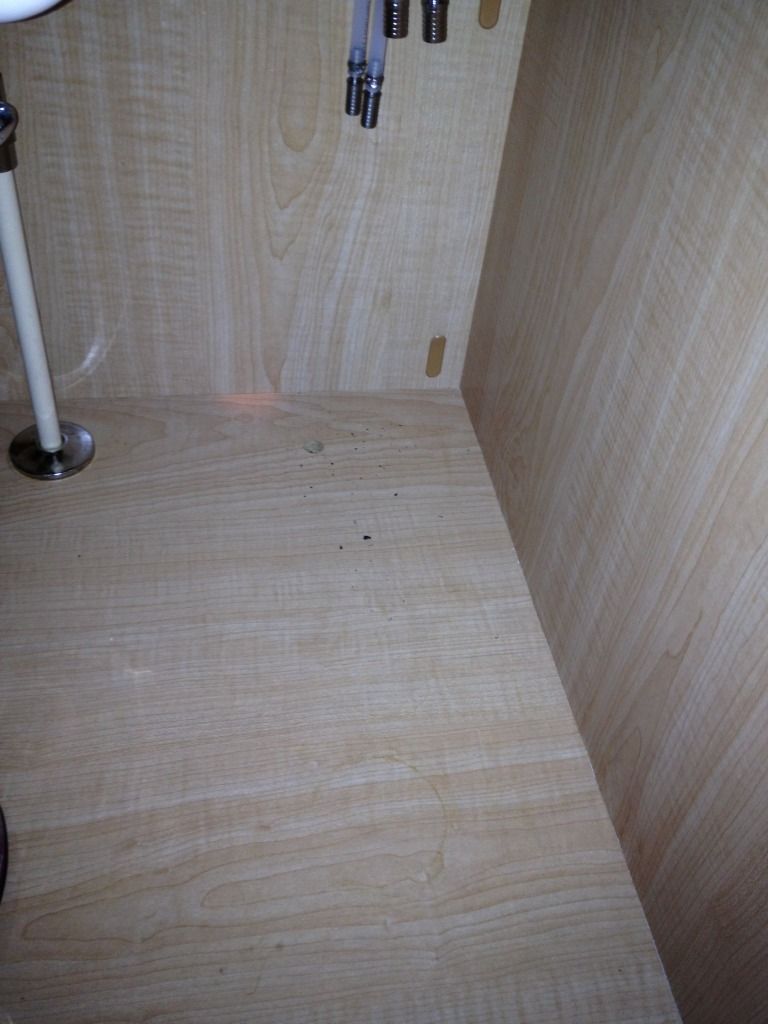
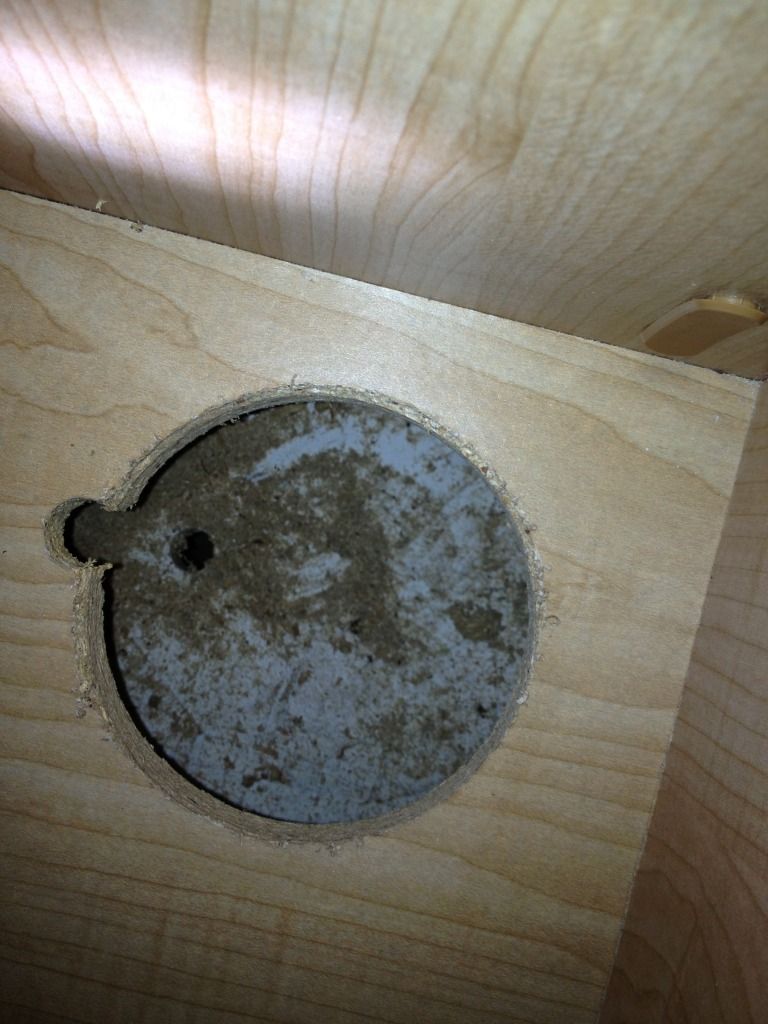
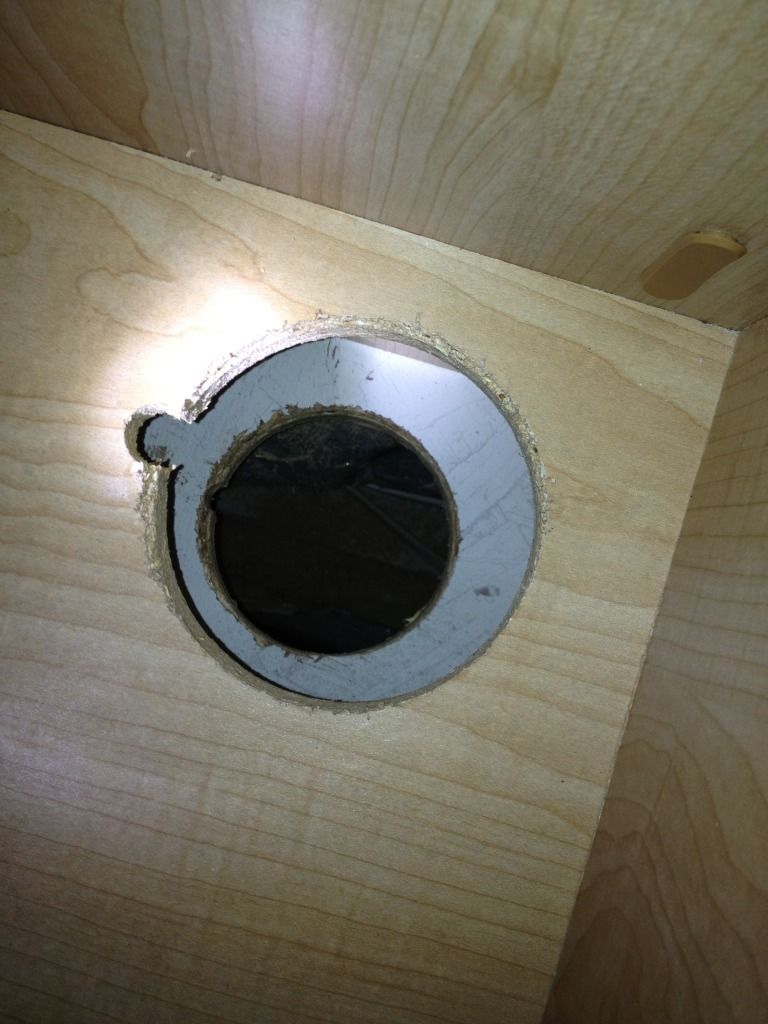
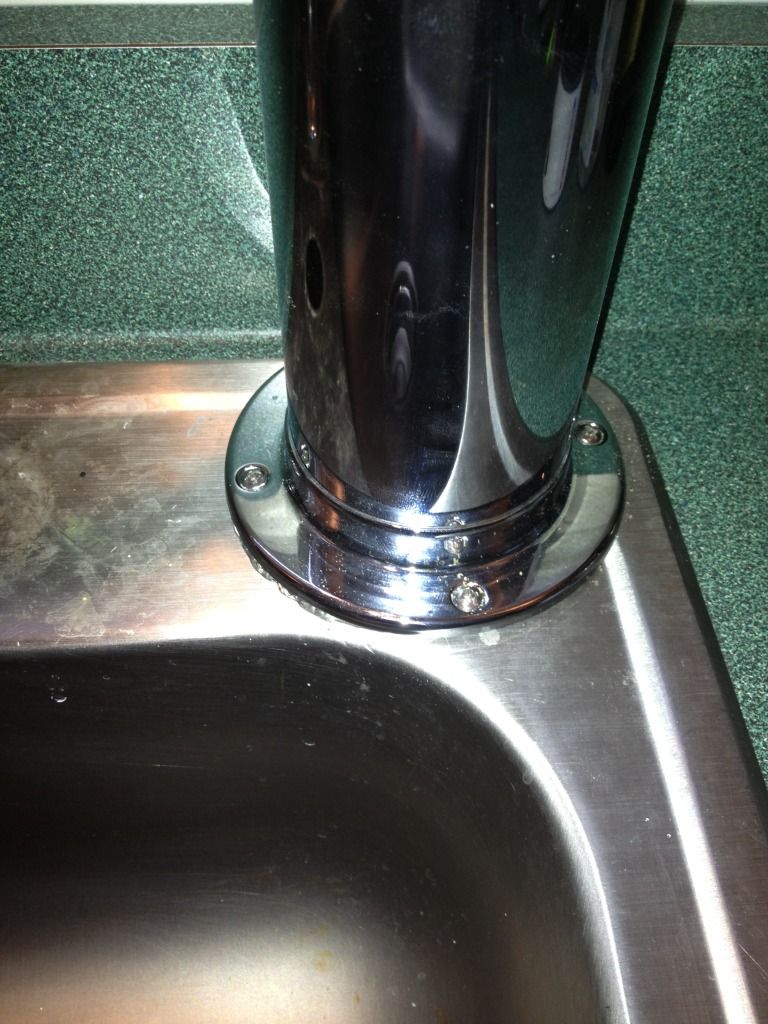
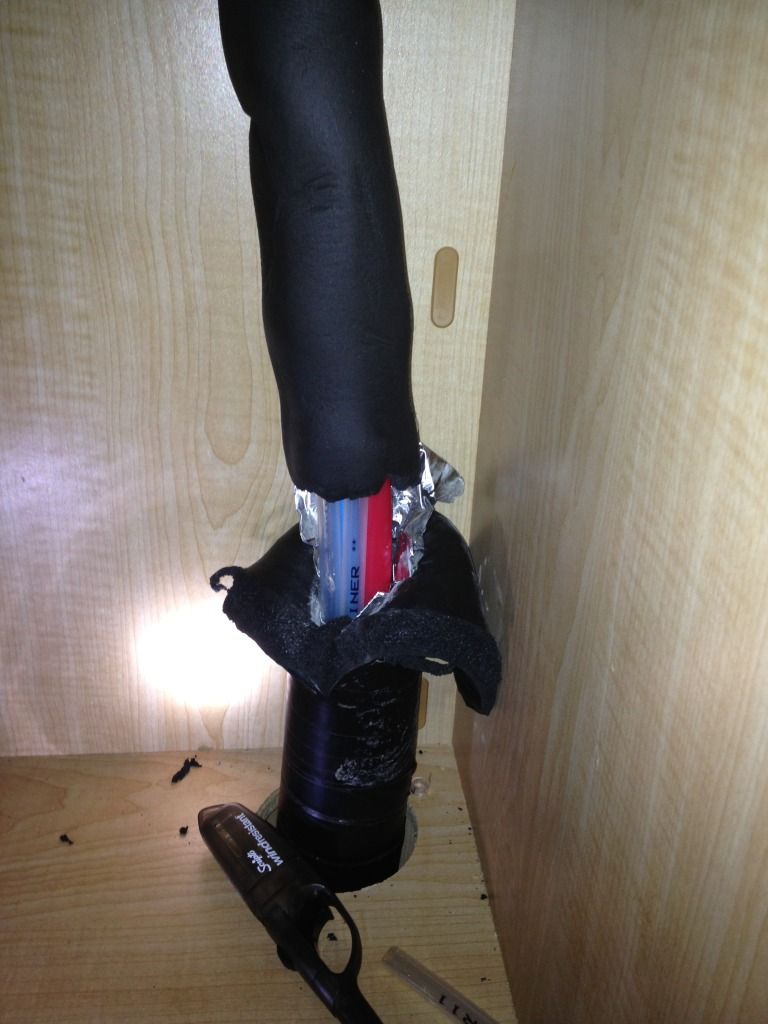
So far the only work that I have done it drill a hole in my sink for the draft tower and a hole through the bottom of the cabinet into the floor to the basement. Easier said than done. As you can see my sink has a 0.125" lip that makes things a little difficult. To overcome the issue at hand I decided to make a spacer. This space ends up kind of looking like the Chicago Bears logo. To make it I used a 4.5" hole saw to cut out a circle from scrap stainless steel. I then used a 2.5" hole saw to remove the inner circle. The first bit of advice I would give is to use a CD to locate where on the sink you want the tower to go. The tower column is 3.5" in diameter but the base is closer to 5" in diameter. Once I found the spot that I liked I held the tower up several times to check before I drilled the sink. Once I was happy I marked the center of the hole and drilled it using a 2.5" hole saw. I then held the spacer over the hole and matched up the inner side of it with the hole in the sink. I marked where the lip was and cut it out using a cut of wheel. I left a little bit of material to grind away an angle to attept to match the angle of the sink lip. I was happy with what I did.
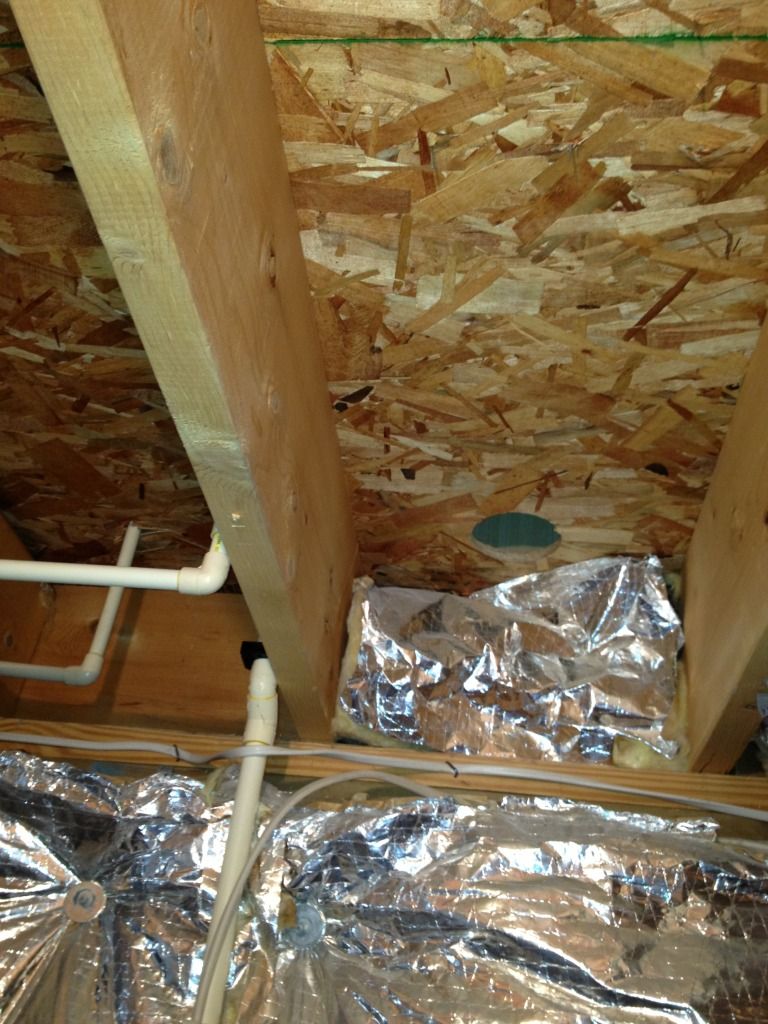
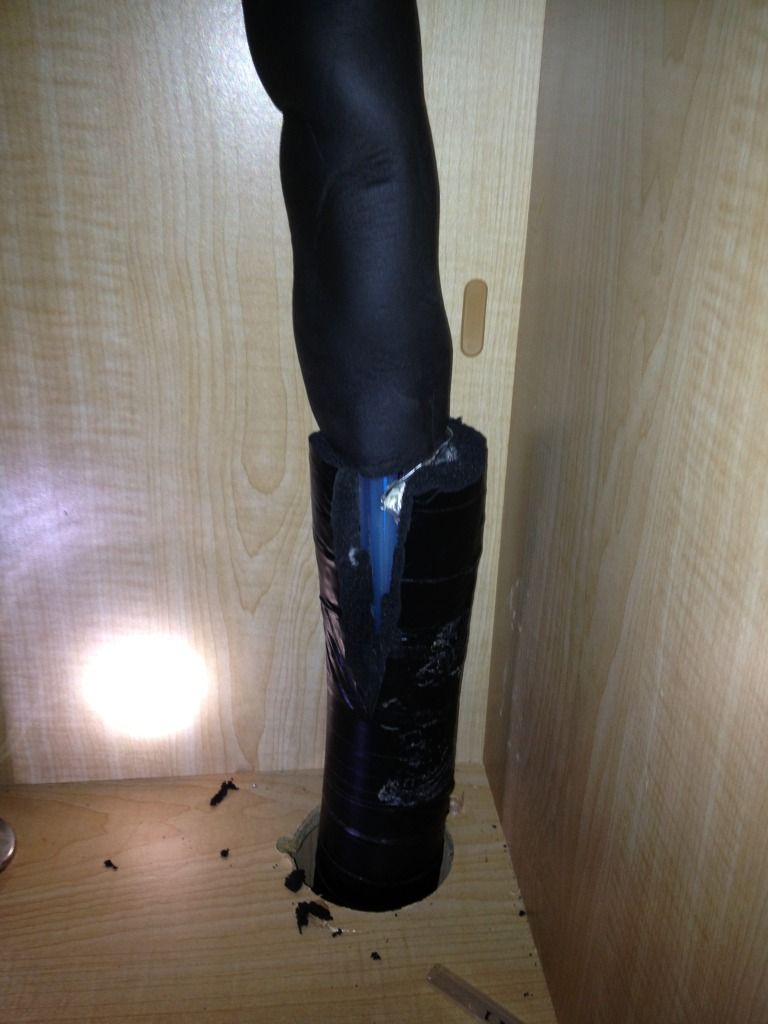
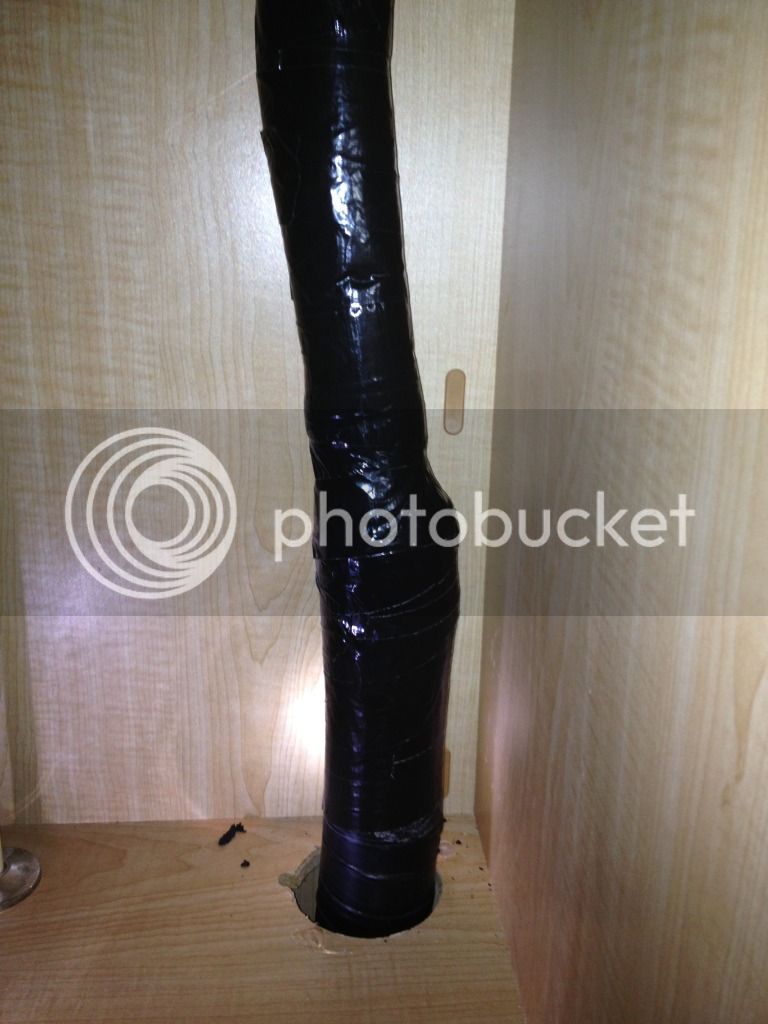
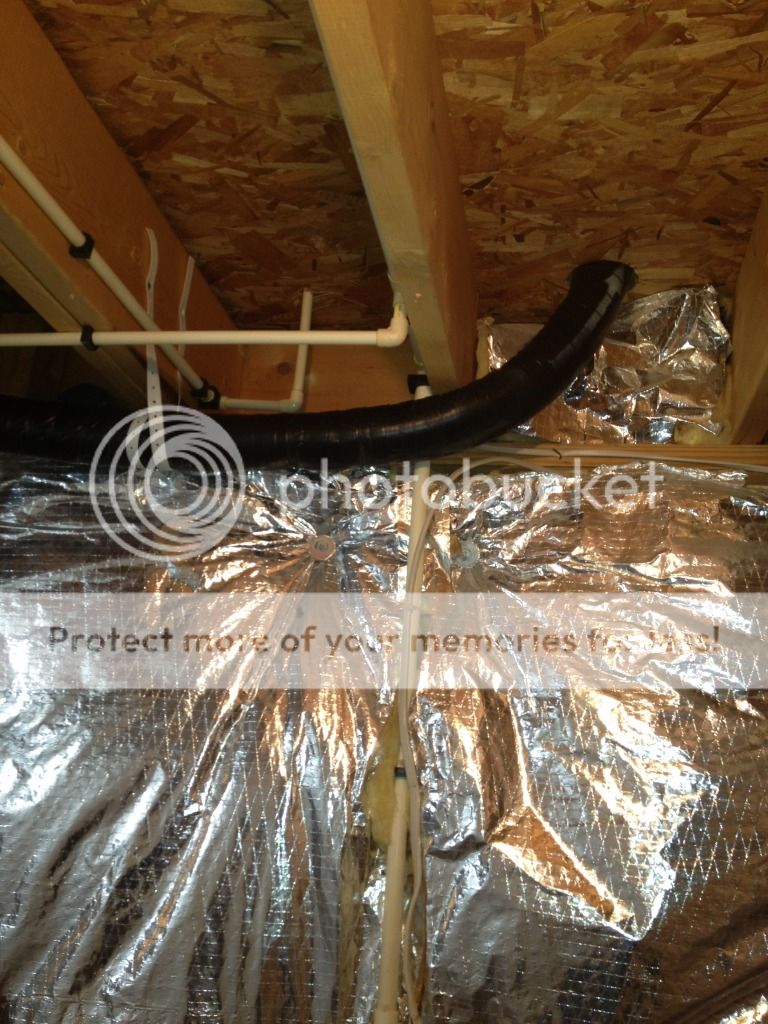
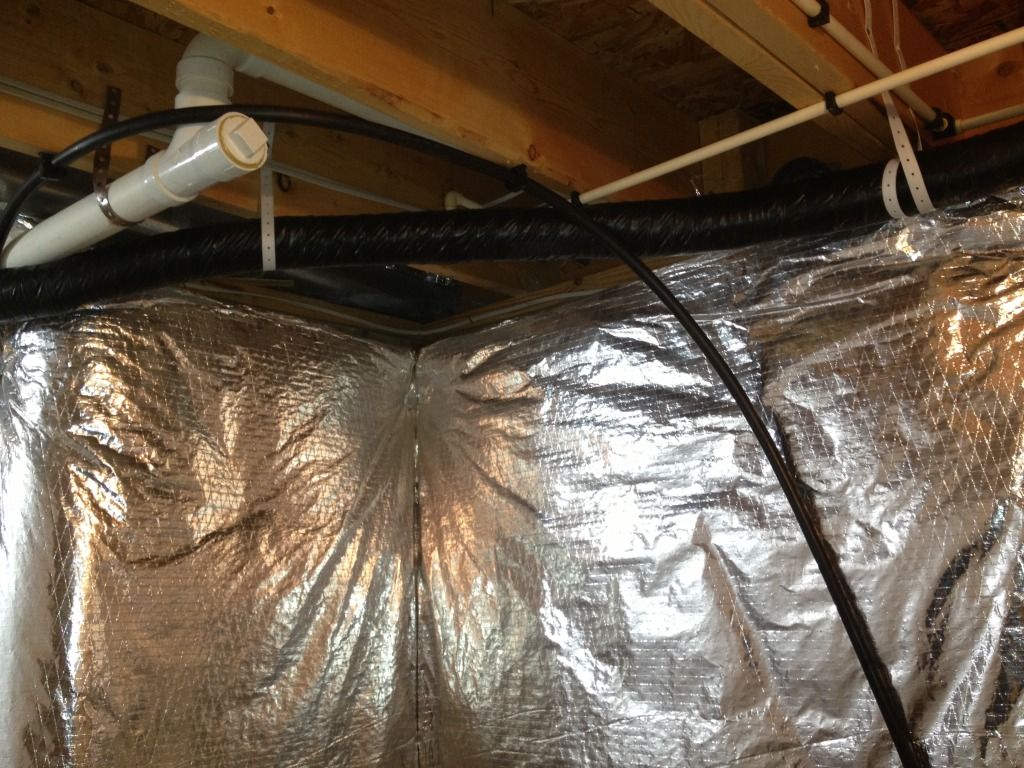
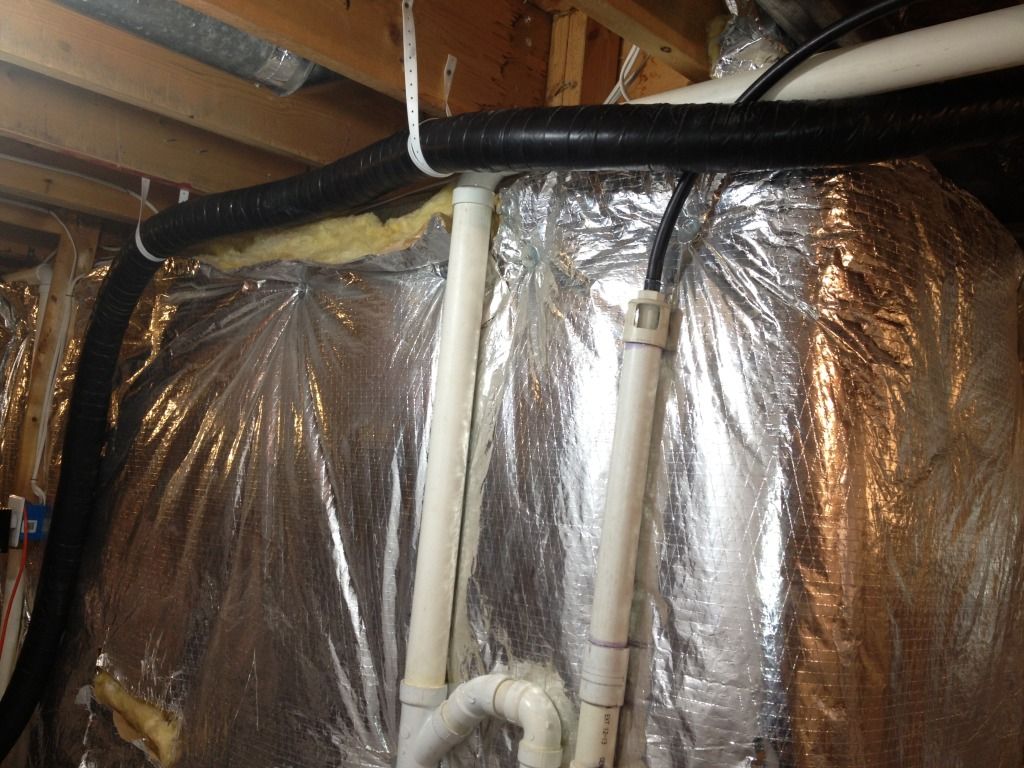
Next up is to drill a hole in the cabinet bottom and subfloor. The insulated trunk line is about 3.5" in diameter. I used a 4" hole saw to drill the 2 holes.
That is all that I have thus far. Another build day begins tomorrow after work. I hope to finish securing the draft tower to the sink and connect the lines underneath the sink. I ran into an issue with one of the four holes that secures the tower to the sink and I thought I would wait until I had a center punch from work to make sure I don't screw up the last hole. I can at least try and do it the right way...I guess. If there are any questions or comments, feel free to chime in. I have looked for some time and have not been able to find this exact project, but I have seen several similar to it on HBT.
And so the journey begins. I have been wanting to do this project for some time and with all the research I have not been able to find someone that has done exactly as I am doing. I will have my keezer in the basement and run the insulated lines up to the kitchen sink. I picked up my chest freezer at Sears scratch and dent. I looked the freezer over real well and all that I could find was a scratch on the left hand side that didn't even indent the metal. I still need to build the collar. It is big enough to hold 2 half barrels but still not tall enough to go without a collar.
http://www.searsoutlet.com/14-8-cu-...ils.jsp?md=ct_md&cid=823&flt_shipping_length=[0 TO 100]&flt_bdn=Whirlpool&flt_shipping_width=[0 TO 100]&flt_sp=[0 TO 125000]&flt_shipping_height=[0 TO 100]&pn=1&ps=24&pid=86471&mode=seeAll&itemSelectionType=all
I also picked up a PP50 glycol unit from Perlick to make sure I get a nice cold pour each time. This was by far the most expensive part of my kit. But, it is what I want.
To deal with the effect of gravity I also picked up a pump panel from Perlick. Supply the panel with 40 psi of CO2 and adjust the regulators on panel for your beverage choice.
I also picked up some insulated trunk line as well. Although the tower I have now only has 2 faucets, the line has 4 product lines in case I want to expand at a later date.
So far the only work that I have done it drill a hole in my sink for the draft tower and a hole through the bottom of the cabinet into the floor to the basement. Easier said than done. As you can see my sink has a 0.125" lip that makes things a little difficult. To overcome the issue at hand I decided to make a spacer. This space ends up kind of looking like the Chicago Bears logo. To make it I used a 4.5" hole saw to cut out a circle from scrap stainless steel. I then used a 2.5" hole saw to remove the inner circle. The first bit of advice I would give is to use a CD to locate where on the sink you want the tower to go. The tower column is 3.5" in diameter but the base is closer to 5" in diameter. Once I found the spot that I liked I held the tower up several times to check before I drilled the sink. Once I was happy I marked the center of the hole and drilled it using a 2.5" hole saw. I then held the spacer over the hole and matched up the inner side of it with the hole in the sink. I marked where the lip was and cut it out using a cut of wheel. I left a little bit of material to grind away an angle to attept to match the angle of the sink lip. I was happy with what I did.
Next up is to drill a hole in the cabinet bottom and subfloor. The insulated trunk line is about 3.5" in diameter. I used a 4" hole saw to drill the 2 holes.
That is all that I have thus far. Another build day begins tomorrow after work. I hope to finish securing the draft tower to the sink and connect the lines underneath the sink. I ran into an issue with one of the four holes that secures the tower to the sink and I thought I would wait until I had a center punch from work to make sure I don't screw up the last hole. I can at least try and do it the right way...I guess. If there are any questions or comments, feel free to chime in. I have looked for some time and have not been able to find this exact project, but I have seen several similar to it on HBT.


![Craft A Brew - Safale S-04 Dry Yeast - Fermentis - English Ale Dry Yeast - For English and American Ales and Hard Apple Ciders - Ingredients for Home Brewing - Beer Making Supplies - [1 Pack]](https://m.media-amazon.com/images/I/41fVGNh6JfL._SL500_.jpg)