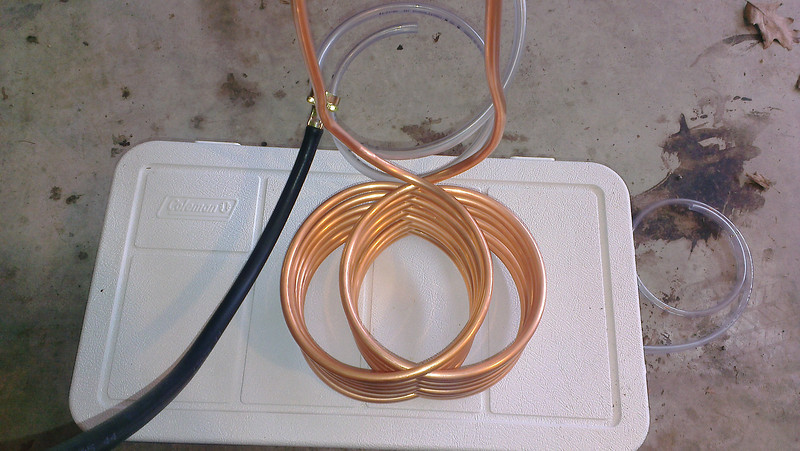
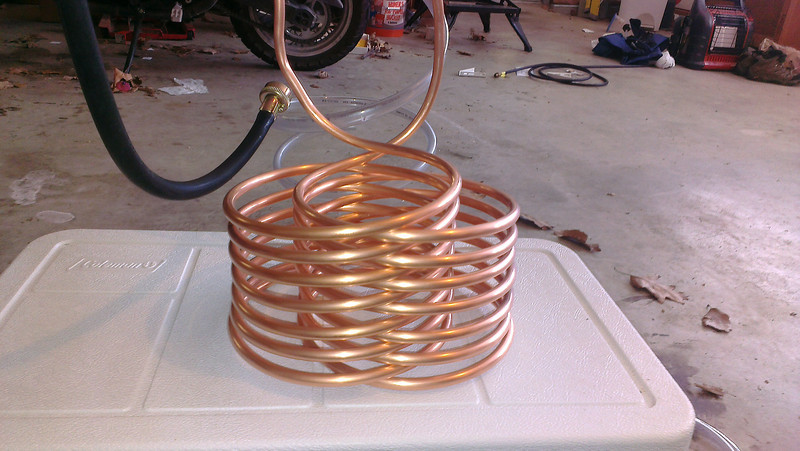
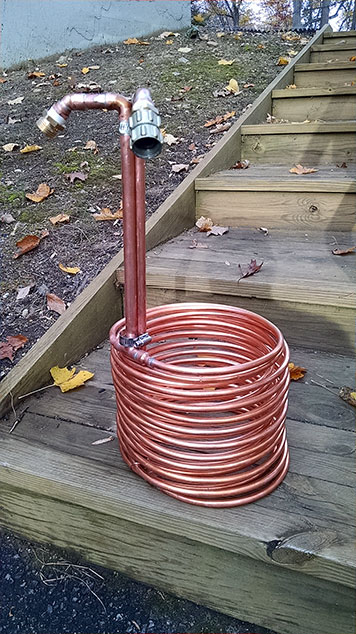
DIY Interwoven "Rib-Cage" Immersion Chiller

Homebrew Talk - Beer, Wine, Mead, & Cider Brewing Discussion Forum

Help Support Homebrew Talk - Beer, Wine, Mead, & Cider Brewing Discussion Forum:

This site may earn a commission from merchant affiliate links, including eBay, Amazon, and others.
I have an immersion chiller I bought that uses a standard female hose fitting. Your idea to use a hose valve makes a LOT of sense... I may have to see if I can't find something like that for my chiller! :D
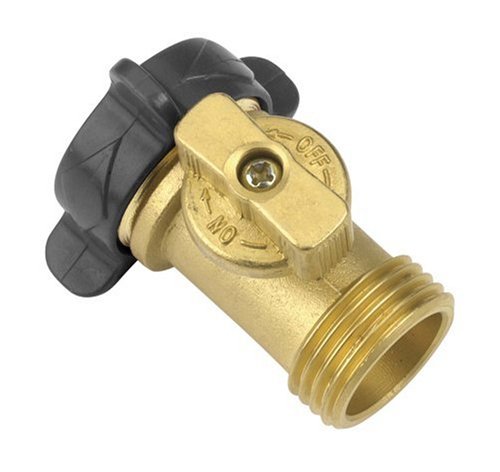
Like this.

41aoh2e7pLL.jpg


I chill in my sink in my basement and I have this splitter with shutoffs so I can have a hose and the chiller at the same time.
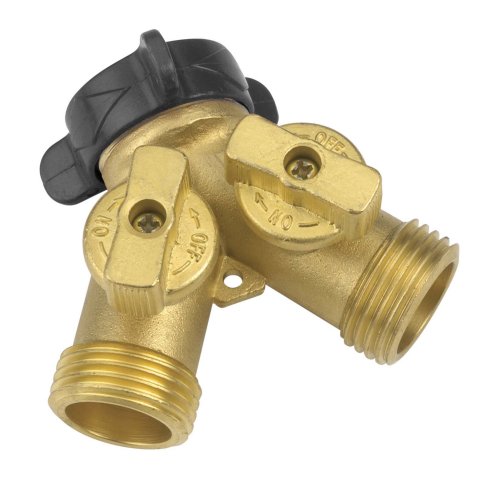
41KSWogLdaL.jpg
 
Last edited by a moderator:
Thanks for the link! Just ordered one, although I went with a slightly less expensive one, sold via Amazon Prime, so I got free shipping. :)
 

This is pretty much what I got.
This literally is the one - Orbit 3/4" hose shut off
since I have a 50-foot run from the spigot to brew site, I didn't want to have to run around, tripping on hoses, propane tanks and so forth to shut it off in a hurry if I needed to. Like I said, best $6 I ever spent on brewing.
 
Last edited by a moderator:
Thanks to the op for the idea.
Made mine today using 30 ft of 3/8 copper. Don't have a tubing bender so the bends for the upright parts are pretty ugly but it should be functional. Hope to test it this weekend with my first all grain brew. :mug:
i-FhBGgVM-L.jpg


i-SD7SDCx-L.jpg
 
Put in a shallow we'll pump now I hook up to that instead of house so I have free cold well water to chill my wort!
 
Don't cook the plants with the exit water, I remember how shocked I was when I first used mine! the exit water was incredibly hot.
 
Have we come to a consensus and what would make the best size tubing? After reading this thread it would appear that most people have chosen to use 3/8" tubing. BUT that description, as I am learning, isn't very specific. There are tubing types K, L, M and refrigerant tubing.

Is the 3/8" that people are using OD or ID? Obviously the thinner the walls the better the heat xfer, but does the wall thickness really have that much effect in this particular situation?

So... any more specs on what tubing you all used?

Would 50 to 60 foot of 3/8" Type L tubing (3/8" OD 1/4" ID 1/16" wall thickness) work well with a harbor freight pump recirculating ice water?
Should I look around more for thinner walled stuff?
 
Like this.

41aoh2e7pLL.jpg


I chill in my sink in my basement and I have this splitter with shutoffs so I can have a hose and the chiller at the same time.

41KSWogLdaL.jpg
The splitter makes a lot of sense; I'm mildly embarrassed that I didn't think of it on my own. That means I can hook my pre-chiller up before I even get started, set it in its pot, hook my ribcage chiller up to it, and stack the whole mess to one side until it's needed. One less thing that needs doing in the middle of the process....
 
Last edited by a moderator:
Making mine today will post after completing it gotta love having a friend in the heating and ac industry got my copper for free stop at lowes later and get the plastic tubing and adapters and clamps
 
Pics as promised, just need to notch my lid and I'm golden for the next brew day can't wait

ImageUploadedByHome Brew1415573099.168902.jpg
ImageUploadedByHome Brew1415573127.203205.jpg

Up at the 6gal mark perfect for me
ImageUploadedByHome Brew1415573189.272975.jpg
 
I built this one, but haven't had time to brew/test it out yet. Been too busy.

It's got two 30' 1/4" coils. Water is plumbed down to the bottom via 1/2 copper, tees into the two separate coils, then re-connects on the top with another tee, then out.

232344d1414541027-anyone-go-back-immersion-chiller-chiller.jpg
 
Hi all,
Quick question. I'm trying to build an IC like this but I live in an apartment so will be hooking up to the sink faucet instead of a hose. Are these the two items I mainly need for the portion to attach to the faucet? Is the second how everyone mainly used to connect to the hosing? I'll be using clamps between hosing and tubing.

Faucet adapter:
http://www.homedepot.com/p/DANCO-15...den-Hose-Aerator-Adapter-9D00010513/204321954

Connection:
http://www.homedepot.com/p/Unbrande...Swivel-Adapter-LFA-683/203468478?N=5yc1vZbuw1

Thanks for your guys' help, couldn't quite find a build that listed out the specific parts.
 
Looks right for the sink, and that's the hose to chiller connection I used on mine my exit hose has nothing cause I rig up a drain with pvc pipe to the yard after collecting the hot water
 
Awesome, thank you. That's what I was hoping when I was checking out everything at Home Depot last night, but unfortunately they were out of stock on the barbed connection for the hose.
 
I built this one, but haven't had time to brew/test it out yet. Been too busy.

It's got two 30' 1/4" coils. Water is plumbed down to the bottom via 1/2 copper, tees into the two separate coils, then re-connects on the top with another tee, then out.

232344d1414541027-anyone-go-back-immersion-chiller-chiller.jpg
Can you get me a close up on the union of 1/4" tubes to the 1/2" please?
 
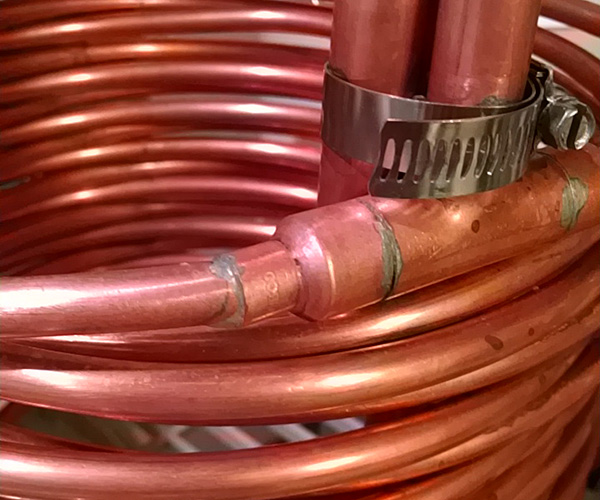
Sure thing. It's a 1/2 copper female to 1/4 copper female. It's *not* refrigeration line. It's 1/4 water line. The OD of the two are different enough that it won't work well.

I couldn't find a 1/2 copper male to 1/4 copper male, so I had to solder in a short stub of 1/2 copper to mate the pieces.

Found all this stuff at Home Depot.

This cooler, with the add-on whirlpool arm I made for it, works incredibly well. My ground water is cold, even in the summer. Somewhere in the mid 50 degrees (fahrenheit) year round, thanks to a deep well. I can go from boil to 65 degrees in anywhere from 6-8 minutes in a 5.5 gallon batch.

The trick to any immersion chiller is keeping the wort moving.

coupling.jpg
 
Thanks, that is what I noticed between refrigeration lines and water lines...water line was far more money. I need to spend some time at the store ironing out all that I need to build one. Looks too simple to make over buying.
 
I built this after I stumbled into a 60 foot coil of 1/4" copper water line on clearance for $36. The deal was too good to pass up.

Edit: Picture went missing, now back.

chiller.jpg
 
Last edited:
Sure thing. It's a 1/2 copper female to 1/4 copper female. It's *not* refrigeration line. It's 1/4 water line. The OD of the two are different enough that it won't work well.

I couldn't find a 1/2 copper male to 1/4 copper male, so I had to solder in a short stub of 1/2 copper to mate the pieces.

Found all this stuff at Home Depot.

This cooler, with the add-on whirlpool arm I made for it, works incredibly well. My ground water is cold, even in the summer. Somewhere in the mid 50 degrees (fahrenheit) year round, thanks to a deep well. I can go from boil to 65 degrees in anywhere from 6-8 minutes in a 5.5 gallon batch.

The trick to any immersion chiller is keeping the wort moving.

NICE.. :ban:

Is it safe to solder any risk of contamination?

will 50'x1/4" ID copper tubing work better than 25'x3/8"?

is there any science behind cooling efficient of tubing length & diameter?
 
The solder is lead free plumbing solder for potable water. It's about as safe as it can get short of no solder joints at all. :)

If the tubing is too large of a diameter, I believe that the water flow will be fast enough that you'll have a lot of wasted water that is barely warmed up as it flows through. The two 1/4" coils flowing in parallel slow the water down enough that it has time to become heat saturated just as it exits the chiller. Smaller diameter tubing will have a higher surface-to-volume-of-water which seems to lead to a higher efficiency in cooling, and restrict flow enough to ensure the water is heat saturated before it exits.

Of course everything has diminishing returns. If the flow is too slow it'll take too long to draw the heat out of the boil kettle. Too fast will draw more heat away from the kettle at the expense of wasted cooling water. At my well pressure (40-60 psi) through a 15 foot hose, my chiller flows about 2.5-3 GPM if I'm remembering it right. It seems to be at that 'sweet spot' for flow vs. heat exchange. I'm very happy with it.
 
Surface area of different diameter and lengths of tubing:

25' of 1/4" - 235in²
50' of 1/4" - 471in²
60' of 1/4" - 535in²
25' of 3/8" - 353in²
50' of 3/8" - 707in²
60' of 3/8" - 848in²
25' of 1/2" - 471in²
50' of 1/2" - 942in² (I'd reserve this beast for a 60qt pot/keggle)
60' of 1/2" - 1131in² (this is the sweet spot for 60qt pots)
25' of 5/8" - 589in²
50' of 5/8" - 1178in² (this beast would be for a 100+ qt pot)
60' of 5/8" - 1414in²

If I had the money, I'd try to build a 5/8" chiller, but I don't think you can bend it around a small enough radius for it to fit in a 60qt pot, so I think that I am going to build myself another chiller, but this time I've had an epiphany that may very well be the next step in the evolution of my chiller design. More to come.
 
I built this after I stumbled into a 60 foot coil of 1/4" copper water line on clearance for $36. The deal was too good to pass up.

You have 565in^2 of chilling area (give or take of course, depending on how tall your verticals are.) I have noticed that 60' lengths are common these days whereas 5 years ago when I was doing this, it wasn't. It's a lot easier to cram 10 more feet into the brewpot than it is to step up to the next diameter of tubing. I think I'm going to add some surface area numbers to the above post to reflect your suggestion about 60' coil lengths.
 
I saw this thread and the coil design, quite nice, and I too made a design I thought I'd share (its 11pm EST here now, so if anyone desires I can post a pic tomorrow). Simply, I had found 60' of 3/8 (OD) copper on sale at Lowes for about $40 or so, don't recall now, but a good deal for sure. At any rate, I have a 8g kettle and made a coil that used 40' and was ~4" < in diameter than the kettle (so ~2" per "side"). With the leftover copper I made a smaller coil with the dimension to split the diameter of the outer coil. I then move the inside coil the most while cooling, and the outside a bit too. It covers all the wort and chills really quick. I chilled w/tap water for 3.5 min to ~110 then to ice bath for 7 min to 65!, I should've stopped a minute earlier! Works great, been doing this since the summer and don't miss those ice baths!!!
 
I think there's a rate of diminishing returns with the larger diameter tubing; after a certain point the water is flowing too quickly to become heat saturated. It'll chill quickly at the trade off of wasting copious amounts of water, unless you constantly monitor the output temps and throttle the flow accordingly.

The reasoning behind the chiller I made is that you'd have *two* 1/4" chillers working in tandem. If you just ran a single 1/4" 60' chiller, the flow would be slow enough that the cooling liquid (water) would be at equilibrium with the surrounding wort far short of the 60' mark, rendering the rest of the chiller effectively useless. With the two shorter coils, this is less of an issue without running into overly high water useage.

And, above all else, you need to stir the wort. That drastically lowers chilling time. I incorporated a whirlpool arm into the chiller expressly for this purpose.
 
And, above all else, you need to stir the wort. That drastically lowers chilling time.

Agreed (and with the larger diameter tubing comment), this is why I decided on two coils, independently of one another with the smaller one able to circulate all the area inside the larger one, as the larger one can only move about 2" around. Simple and the coils become the stirrer!
 
I think there's a rate of diminishing returns with the larger diameter tubing; after a certain point the water is flowing too quickly to become heat saturated. It'll chill quickly at the trade off of wasting copious amounts of water, unless you constantly monitor the output temps and throttle the flow accordingly.

The reasoning behind the chiller I made is that you'd have *two* 1/4" chillers working in tandem. If you just ran a single 1/4" 60' chiller, the flow would be slow enough that the cooling liquid (water) would be at equilibrium with the surrounding wort far short of the 60' mark, rendering the rest of the chiller effectively useless. With the two shorter coils, this is less of an issue without running into overly high water useage.

And, above all else, you need to stir the wort. That drastically lowers chilling time. I incorporated a whirlpool arm into the chiller expressly for this purpose.
I agree 100%. I sold my 50' x 1/2" chiller with my keggles and still need to buy/build a replacement and was never super happy with the chill times and water wasted with the 1/2" tubing. I would fill 2 keggles with wasted chill water on a 5 gallon batch most of the time.

I think your chiller would be the ticket for my needs. I could make it so it could fit inside my 4 gallon pot for my small batches and still use it on my 10 and 17 gallon pots for 5 or 10 gallon batches. That's a big bonus for me, one item to serve multiple purposes since I brew a variety of batch sizes.
 
Can someone point me in the direction of the faucet connector beyond bringing the diffuser to home depot to match the fittings.... i.e. what am I using to connect to the plastic tubing then to the copper tubing...im missing the part where there is some kind of taper to make it fit the diameter of the tubing.....anyone have a picture to describe it?
 
I had a simple coil type 3/8" tubing chiller, and it did ok but I was looking for better efficiency and saw this thread. I went and bought 50' of 1/2" and made this beauty. I have not tried it yet, but it will be fed from a 17 gallon tub of ice water, and the exhaust water will go in an empty 17 gallon tub to pre-clean my brewing gear.

After seeing how well this turned out, I tried to do the same with my 3/8" one, but I suppose using it hardens the copper because it was not as easy to re-bend it. The results were ok on the 3/8" one, but now I wish I had went with that design to start with.

16336951592_bdd464d462_o.jpg
 
Very good work!!

Looks like you used all 50' since the endcaps are still in place. What kind of height and widest-width did you end up with? What size diameter "ribs" did you go with? Last, is that 1/2" ID or OD do you know?
 
The form I used to bend the coils was a standard 1 gallon paint can. The nice thing with the design is you can pull the coils apart, both vertically and horizontally to better fit a wider or taller pot. The coils ID is about 7", and the width is about 10.5", height of the coil stack is about 10".

If you had a wider or taller pot you could stretch the height and width up to the limit of what the copper would allow without kinking. I use an 11 gal Bayou Classic BK, so the compact height is ideal. If I move up to a 15-20 gal BK then I would stretch it.

The copper is thin walled, and I will check but I believe it is 1/2" OD. http://www.menards.com/main/plumbin...s/1-2od-x-50-refrig-tube/p-1394459-c-8565.htm
 
I have a 54' - 5/8" chiller, and it cools a 30 quart pot fast. It is a dual pass design; water goes into both coils in the bottom, and comes out of both coils at the top. Due to a lot of poor planning before bending, it is great for a 30 quart, as they are tall and narrow, leaving a half of a coil in the air with a 5 gallon batch. In a 40 quart pot however, when chilling a 5 gallon batch, at least half of the coils are in the air. I have another roll of tubing to make another IC, but this time, I will maximize the amount of tubing under the level of the wort for a 5 gallon batch. It will be a dual coil design of some type. The company that names their coils after insects, has given me something to think about before I wind another coil. BTW, the 5/8" coil is quite ugly, as it is a real b!tch to bend w/o kinking. Somewhere on this site I have pictures posted, and if I find them I will post them here.
 
Sounds like 1/2" is the best bet then. I won't deny, it was real work bending it. I used a tube bending spring for the work on the ends. Mine is a single pass - goes in at the top of one coil, travels down to the bottom of that side, and back up the other where it exits the other port. Doing my first AG next week, and can't wait to try this one out.
 
An earlier post asked about what fittings to use... the only ones I found that weren't cost and labor prohibitive were "Shark Bite" brand. I didn't want to spends hours custom soldering hose end adapters. After the fact it dawned on me I should have bought the correct size vinyl tubing and a couple of hose clamps for each side.
 
Decided to upgrade my wort chiller to this rib-cage style! Thanks for the instructions!

A couple years ago I had made a real basic wort chiller from 20' of 3/8" copper tubing. Had lots of issues with it. It didn't cool nearly as fast as I'd like (took about 30 min at best to get to tap-water temps), and almost every time I used it I managed to kink it in a different spot. Plus I'm doing all-grain now and it was fairly small for cooling 5 gallons in my 10-gallon kettle.

I picked up 50' of 1/2" OD copper tubing (refrigeration coil), some bare copper wire (I untwisted some 7-strand twisted 6 gauge wire), and some 1/2" ID vinyl tubing. Used a spring bender around a 1 gallon glass jug. Took a bit of work, but I'm really happy with how it turned out! Hopefully it'll chill faster on my next brew!

Front.jpg


Top.jpg
 
Dang, that is a work of beauty, keep us posted on how it works.
Thanks! I also purchased a paint mixer, to use with my cordless drill, to keep the wort continually stirring around the coils. I tested the setup today with 6 gallons of boiling water. My tap water is about 50 &#730;F. Ran the tap at full blast and stirred with my drill in the center hole of the chiller.

Within 3 minutes the temperature was under 100 &#730;F. In 6 minutes it was below 70 &#730;F.

I'm pretty happy with those results!! I can't wait to brew a batch of beer and see all the cold break it forms!
 
Back
Top