My MM2 has been great. Went for a 2 roller with the bigger 2" rollers after reading about additional pains with a 3 roller mill.
You are using an out of date browser. It may not display this or other websites correctly.
You should upgrade or use an alternative browser.
You should upgrade or use an alternative browser.
Deciding between Kegco or monster 3 pro mill
- Thread starter olotti
- Start date

Help Support Homebrew Talk:
This site may earn a commission from merchant affiliate
links, including eBay, Amazon, and others.
olotti
Well-Known Member
I bought the Kegco, mainly for the bearings. I then built a large base and a hopper extension. The only thing I don't like about the Kegco is that it has stainless rollers.View attachment 679660View attachment 679661
Before and after.
my plan is to have it set up like your second pic. What do u have the gap set at? Do u condition the grains? Did yours come with the black plate base and if it did is it quality or just better to mount it as you have it in the second pic.
Last edited:
CodeSection
Well-Known Member
- Joined
- Feb 4, 2018
- Messages
- 1,655
- Reaction score
- 819
....What do u have the gap set at? Do u condition the grains? .....
As you will see, many HBT members mill at different gap sizes Vote for your Grain mill Gap setting It really is going to depend upon your setup/process and how much you fine tune to achieve efficiency. You will need to dial it in to your setup. Personally, I mill at .035 with my setup.
Since you are learning about grain mills, you might find the thread below beneficial to learn about using a drill with high torgue and low RPMs...... So what’s the right Harbor Freight drill for a mill? 20% off coupon out now
olotti
Well-Known Member
As you will see, many HBT members mill at different gap sizes Vote for your Grain mill Gap setting It really is going to depend upon your setup/process and how much you fine tune to achieve efficiency. You will need to dial it in to your setup. Personally, I mill at .035 with my setup.
Since you are learning about grain mills, you might find the thread below beneficial to learn about using a drill with high torgue and low RPMs...... So what’s the right Harbor Freight drill for a mill? 20% off coupon out now
good point About the milling. Guess I was just looking for a starting point.
I read that thread yesterday, very informative. It led me to the hf site coincidentally there’s one about a mile away from me. Found a nice corded d handle drill with the high torque low rpm settings for 45$ On their site.
Dave Sarber
Unindicted Co-conspirator
I have mine set at .025. I think I ordered mine from MoreBeer, and it did come with the black metal plate, which is very sturdy. However, it does not come with the plywood. The way it is intended to be used is upside down from the way I have it in the picture. The lips on the plate are supposed to fit inside a bucket to keep the mill positioned. The drawback with that is the large gap left exposed allows grain dust to go everywhere. When I first set it up, I reversed the metal base and added the plywood just to keep the dust in check.my plan is to have it set up like your second pic. What do u have the gap set at? Do u condition the grains? Did yours come with the black plate base and if it did is it quality or just better to mount it as you have it in the second pic.
And no, I don't condition the grains.
Dave Sarber
Unindicted Co-conspirator
I have mine set at .025. I think I ordered mine from MoreBeer, and it did come with the black metal plate, which is very sturdy. However, it does not come with the plywood. The way it is intended to be used is upside down from the way I have it in the picture. The lips on the plate are supposed to fit inside a bucket to keep the mill positioned. The drawback with that is the large gap left exposed allows grain dust to go everywhere. When I first set it up, I reversed the metal base and added the plywood just to keep the dust in check.
And no, I don't condition the grains.
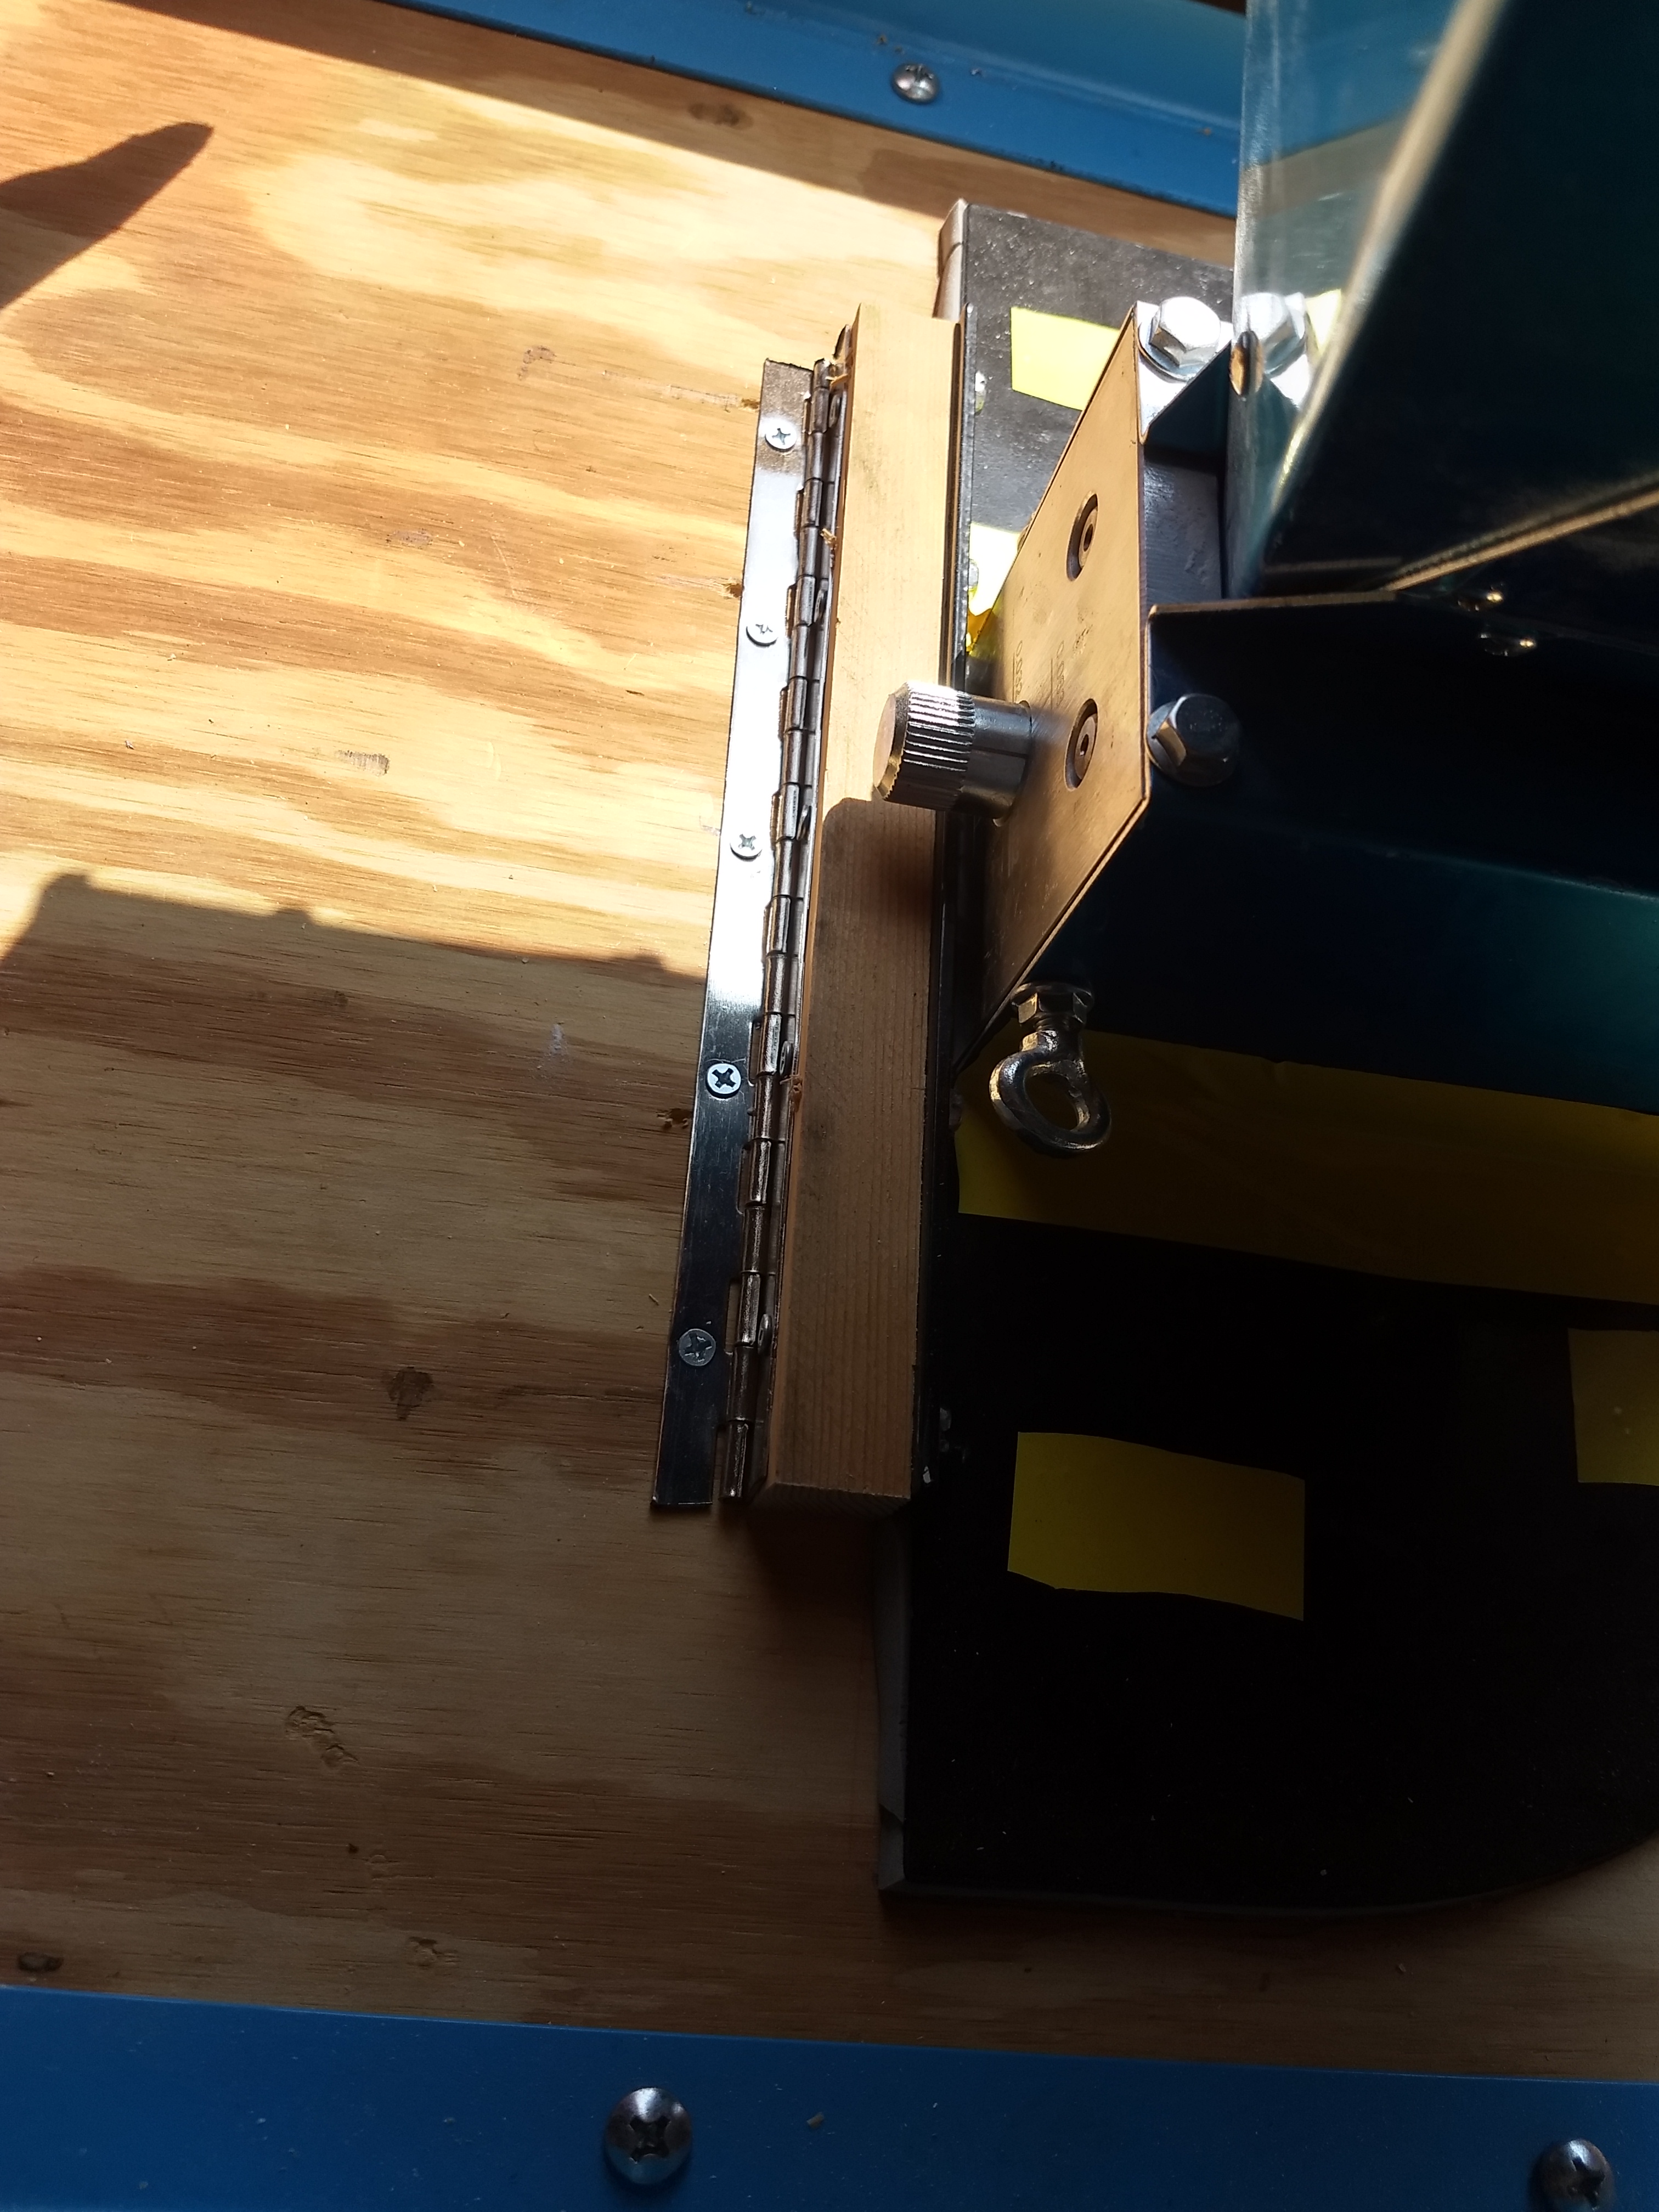
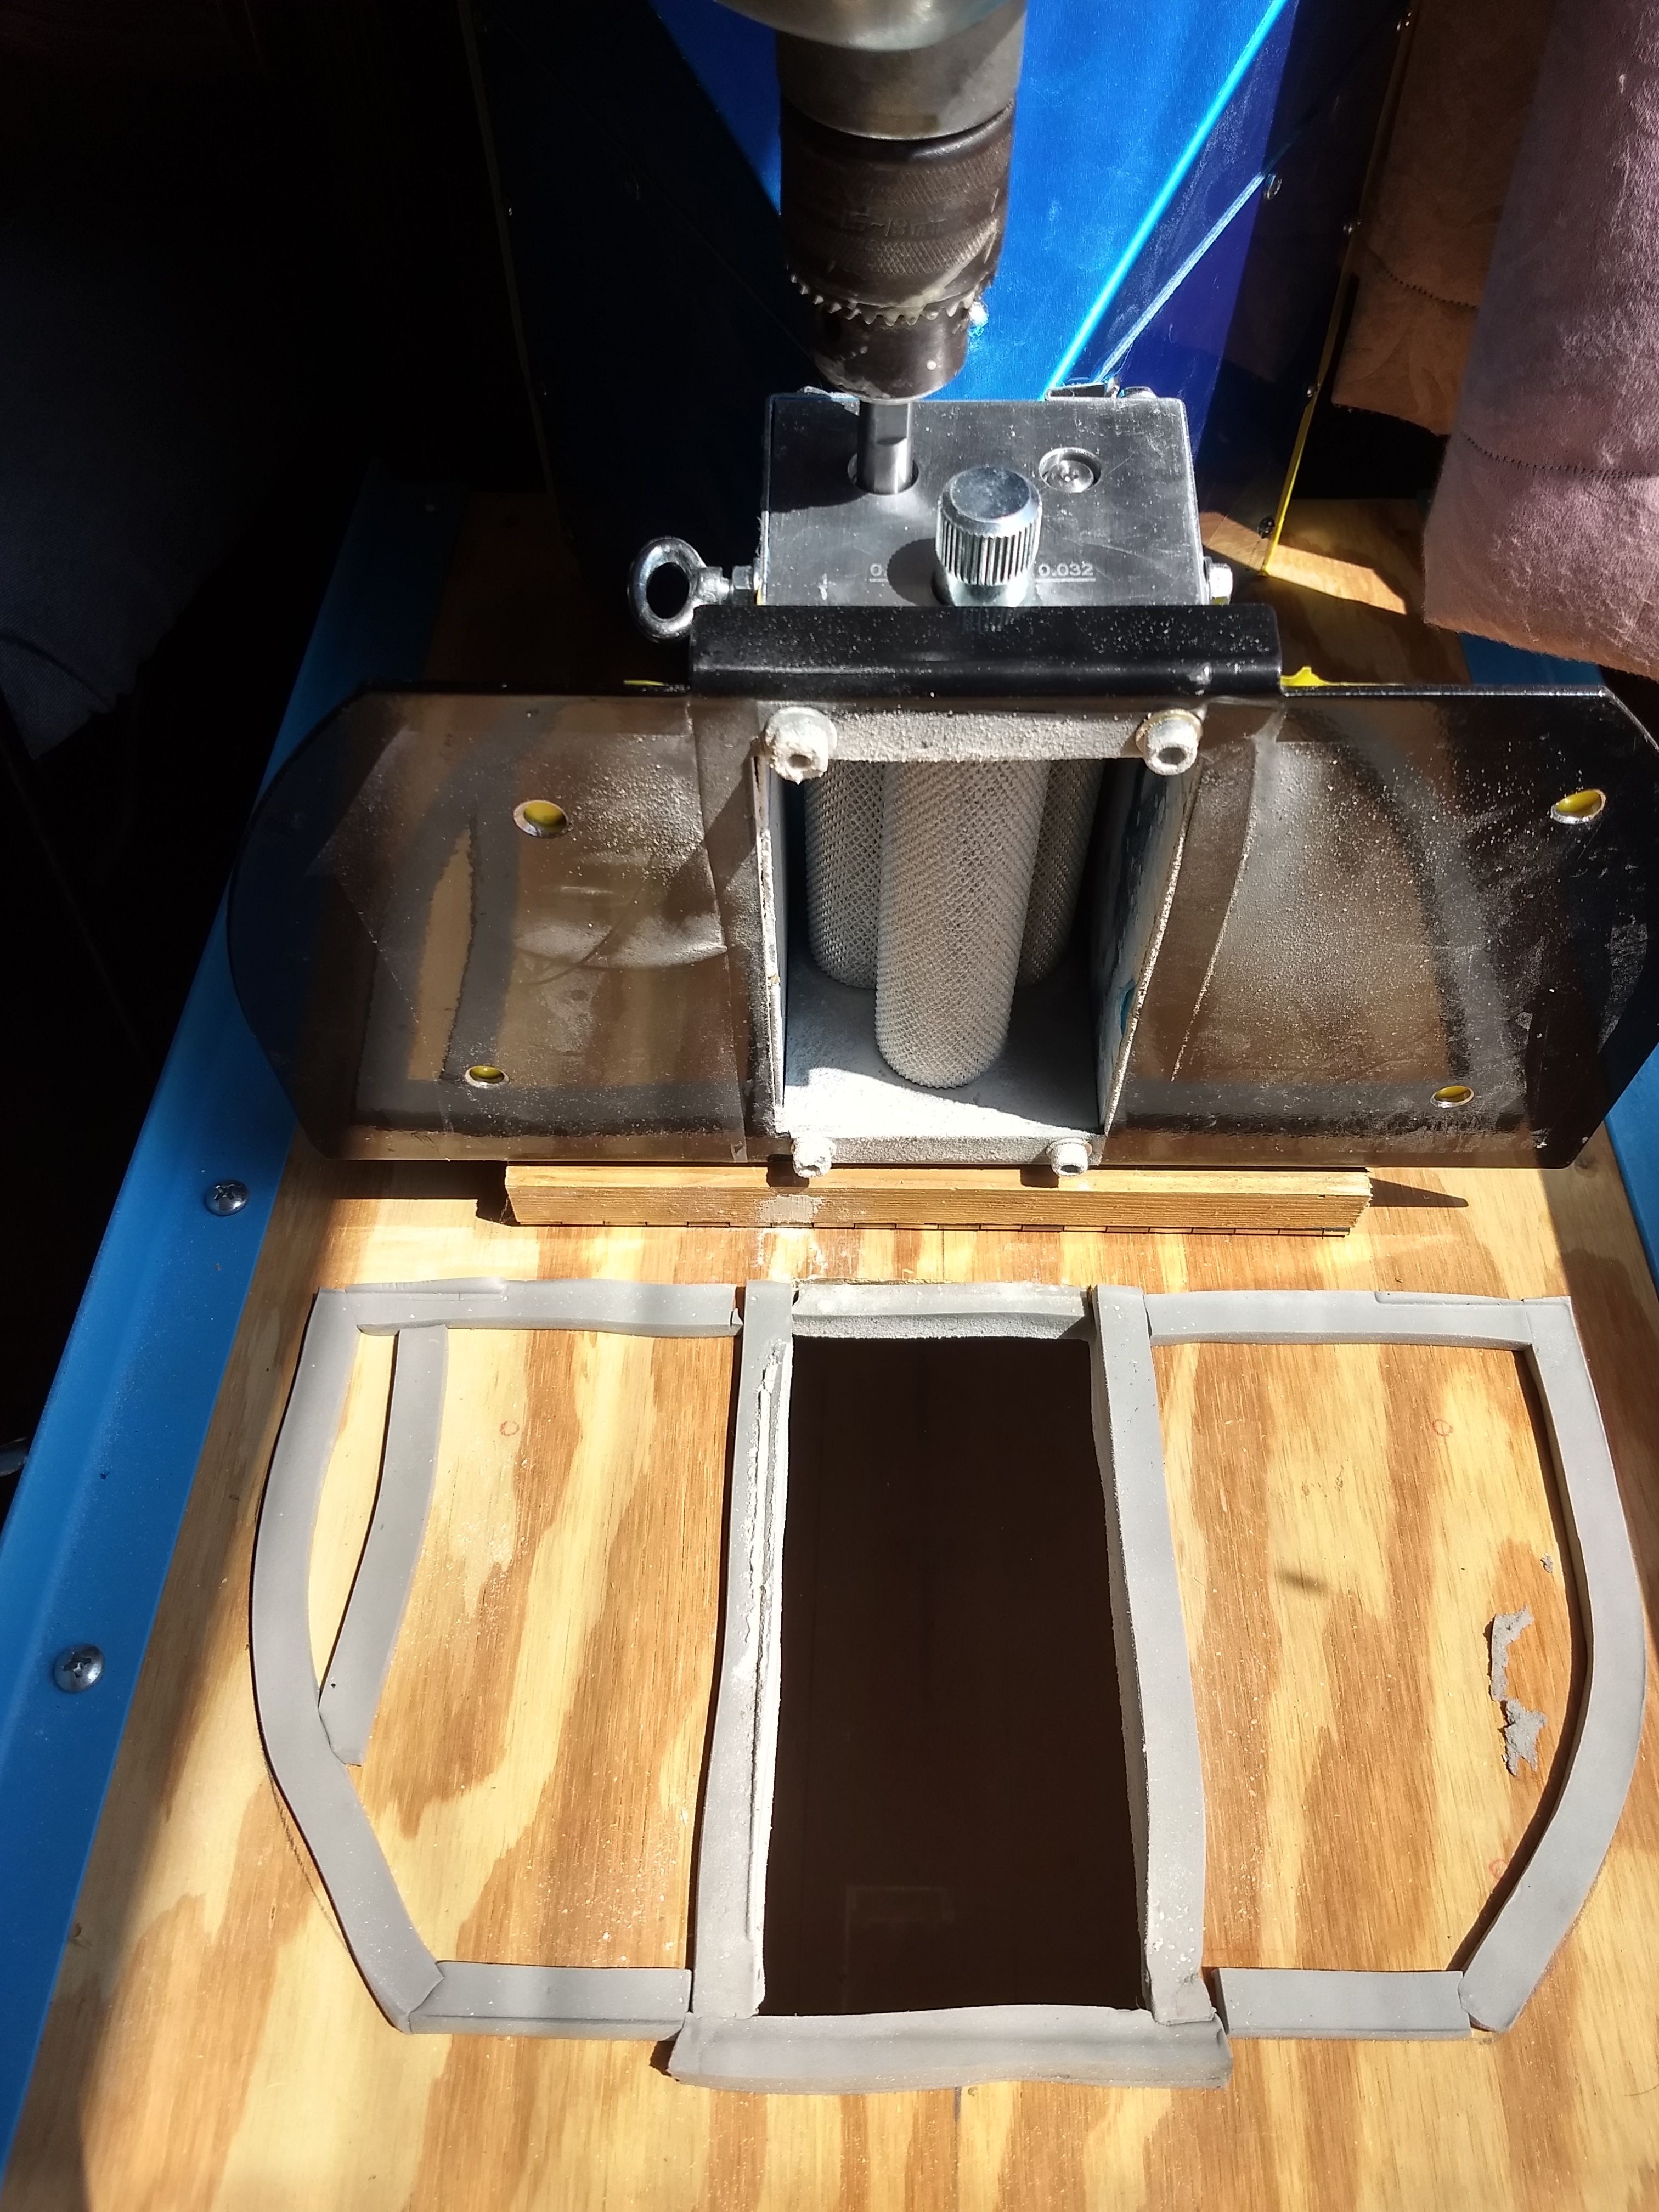
BTW, I still use the metal base plate, but I used the lip to attach a hinge.

$7.79 ($7.79 / Count)
Craft A Brew - LalBrew Voss™ - Kveik Ale Yeast - For Craft Lagers - Ingredients for Home Brewing - Beer Making Supplies - (1 Pack)
Craft a Brew

$176.97
1pc Commercial Keg Manifold 2" Tri Clamp,Ball Lock Tapping Head,Pressure Gauge/Adjustable PRV for Kegging,Fermentation Control
hanhanbaihuoxiaoshoudian

$53.24
1pc Hose Barb/MFL 1.5" Tri Clamp to Ball Lock Post Liquid Gas Homebrew Kegging Fermentation Parts Brewer Hardware SUS304(Liquid Hose Barb)
Guangshui Weilu You Trading Co., Ltd

$22.00 ($623.23 / Ounce)
AMZLMPKNTW Ball Lock Sample Faucet 30cm Reinforced Silicone Hose Secondary Fermentation Homebrew Kegging joyful
无为中南商贸有限公司

$20.94
$29.99
The Brew Your Own Big Book of Clone Recipes: Featuring 300 Homebrew Recipes from Your Favorite Breweries
Amazon.com

$10.99 ($31.16 / Ounce)
Hornindal Kveik Yeast for Homebrewing - Mead, Cider, Wine, Beer - 10g Packet - Saccharomyces Cerevisiae - Sold by Shadowhive.com
Shadowhive

$172.35
2 Inch Tri Clamp Keg Manifold With Ball Lock Posts, Pressure Gauge, PRV (0-30 PSI) – Homebrew, Fermentation, Kegging System
wuhanshijiayangzhiyimaoyiyouxiangongsi

$33.99 ($17.00 / Count)
$41.99 ($21.00 / Count)
2 Pack 1 Gallon Large Fermentation Jars with 3 Airlocks and 2 SCREW Lids(100% Airtight Heavy Duty Lid w Silicone) - Wide Mouth Glass Jars w Scale Mark - Pickle Jars for Sauerkraut, Sourdough Starter
Qianfenie Direct

$53.24
1pc Hose Barb/MFL 1.5" Tri Clamp to Ball Lock Post Liquid Gas Homebrew Kegging Fermentation Parts Brewer Hardware SUS304(Liquid MFL)
yunchengshiyanhuqucuichendianzishangwuyouxiangongsi

$58.16
HUIZHUGS Brewing Equipment Keg Ball Lock Faucet 30cm Reinforced Silicone Hose Secondary Fermentation Homebrew Kegging Brewing Equipment
xiangshuizhenzhanglingfengshop
![Craft A Brew - Safale S-04 Dry Yeast - Fermentis - English Ale Dry Yeast - For English and American Ales and Hard Apple Ciders - Ingredients for Home Brewing - Beer Making Supplies - [1 Pack]](https://m.media-amazon.com/images/I/41fVGNh6JfL._SL500_.jpg)
$6.95 ($17.38 / Ounce)
$7.47 ($18.68 / Ounce)
Craft A Brew - Safale S-04 Dry Yeast - Fermentis - English Ale Dry Yeast - For English and American Ales and Hard Apple Ciders - Ingredients for Home Brewing - Beer Making Supplies - [1 Pack]
BellaRae
Stand
Well-Known Member
For me it would come down to diameter of rollers and how hard they are.
They knurling on my barley crusher is toast, and the crush I am having a harder time sparging.
I am waiting for Maltzilla to come to US for an upgrade.
They knurling on my barley crusher is toast, and the crush I am having a harder time sparging.
I am waiting for Maltzilla to come to US for an upgrade.
olotti
Well-Known Member
BTW, I still use the metal base plate, but I used the lip to attach a hinge.View attachment 679703
View attachment 679704
thnaks for the reply. So could I remove the base plate and either build my own like u have or I think u said it’ll fit the monster mill base plate as well and I could just buy that, right?
How I set mine up.
Dave Sarber
Unindicted Co-conspirator
thnaks for the reply. So could I remove the base plate and either build my own like u have or I think u said it’ll fit the monster mill base plate as well and I could just buy that, right?
I don't know if the monster mill plate will fit or not.
I only used the plate so I could hinge the whole mill to check the gap. There are graduations on the adjusting knobs, but I like to check the gap with a feeler gauge.
olotti
Well-Known Member
I don't know if the monster mill plate will fit or not.
I only used the plate so I could hinge the whole mill to check the gap. There are graduations on the adjusting knobs, but I like to check the gap with a feeler gauge.
I really like that idea. So you flipped the metal base and hinged it to flip the mill so u can measure the gap. I’m pretty anal about stuff like this and like the way this sets up. Where did u get the base board it’s mounted on? And the hinge?
My MM3 setup works great. Would I buy it now with so many options, I’m not sure. A true sealed bearing would be an improvement. The stainless rolls show no wear. I’ve probably ran 40-50 sacks through it. I bought the stainless because of conditioning.
Attachments
olotti
Well-Known Member
Thats a nice setup.My MM3 setup works great. Would I buy it now with so many options, I’m not sure. A true sealed bearing would be an improvement. The stainless rolls show no wear. I’ve probably ran 40-50 sacks through it. I bought the stainless because of conditioning.
Dave Sarber
Unindicted Co-conspirator
I really like that idea. So you flipped the metal base and hinged it to flip the mill so u can measure the gap. I’m pretty anal about stuff like this and like the way this sets up. Where did u get the base board it’s mounted on? And the hinge?
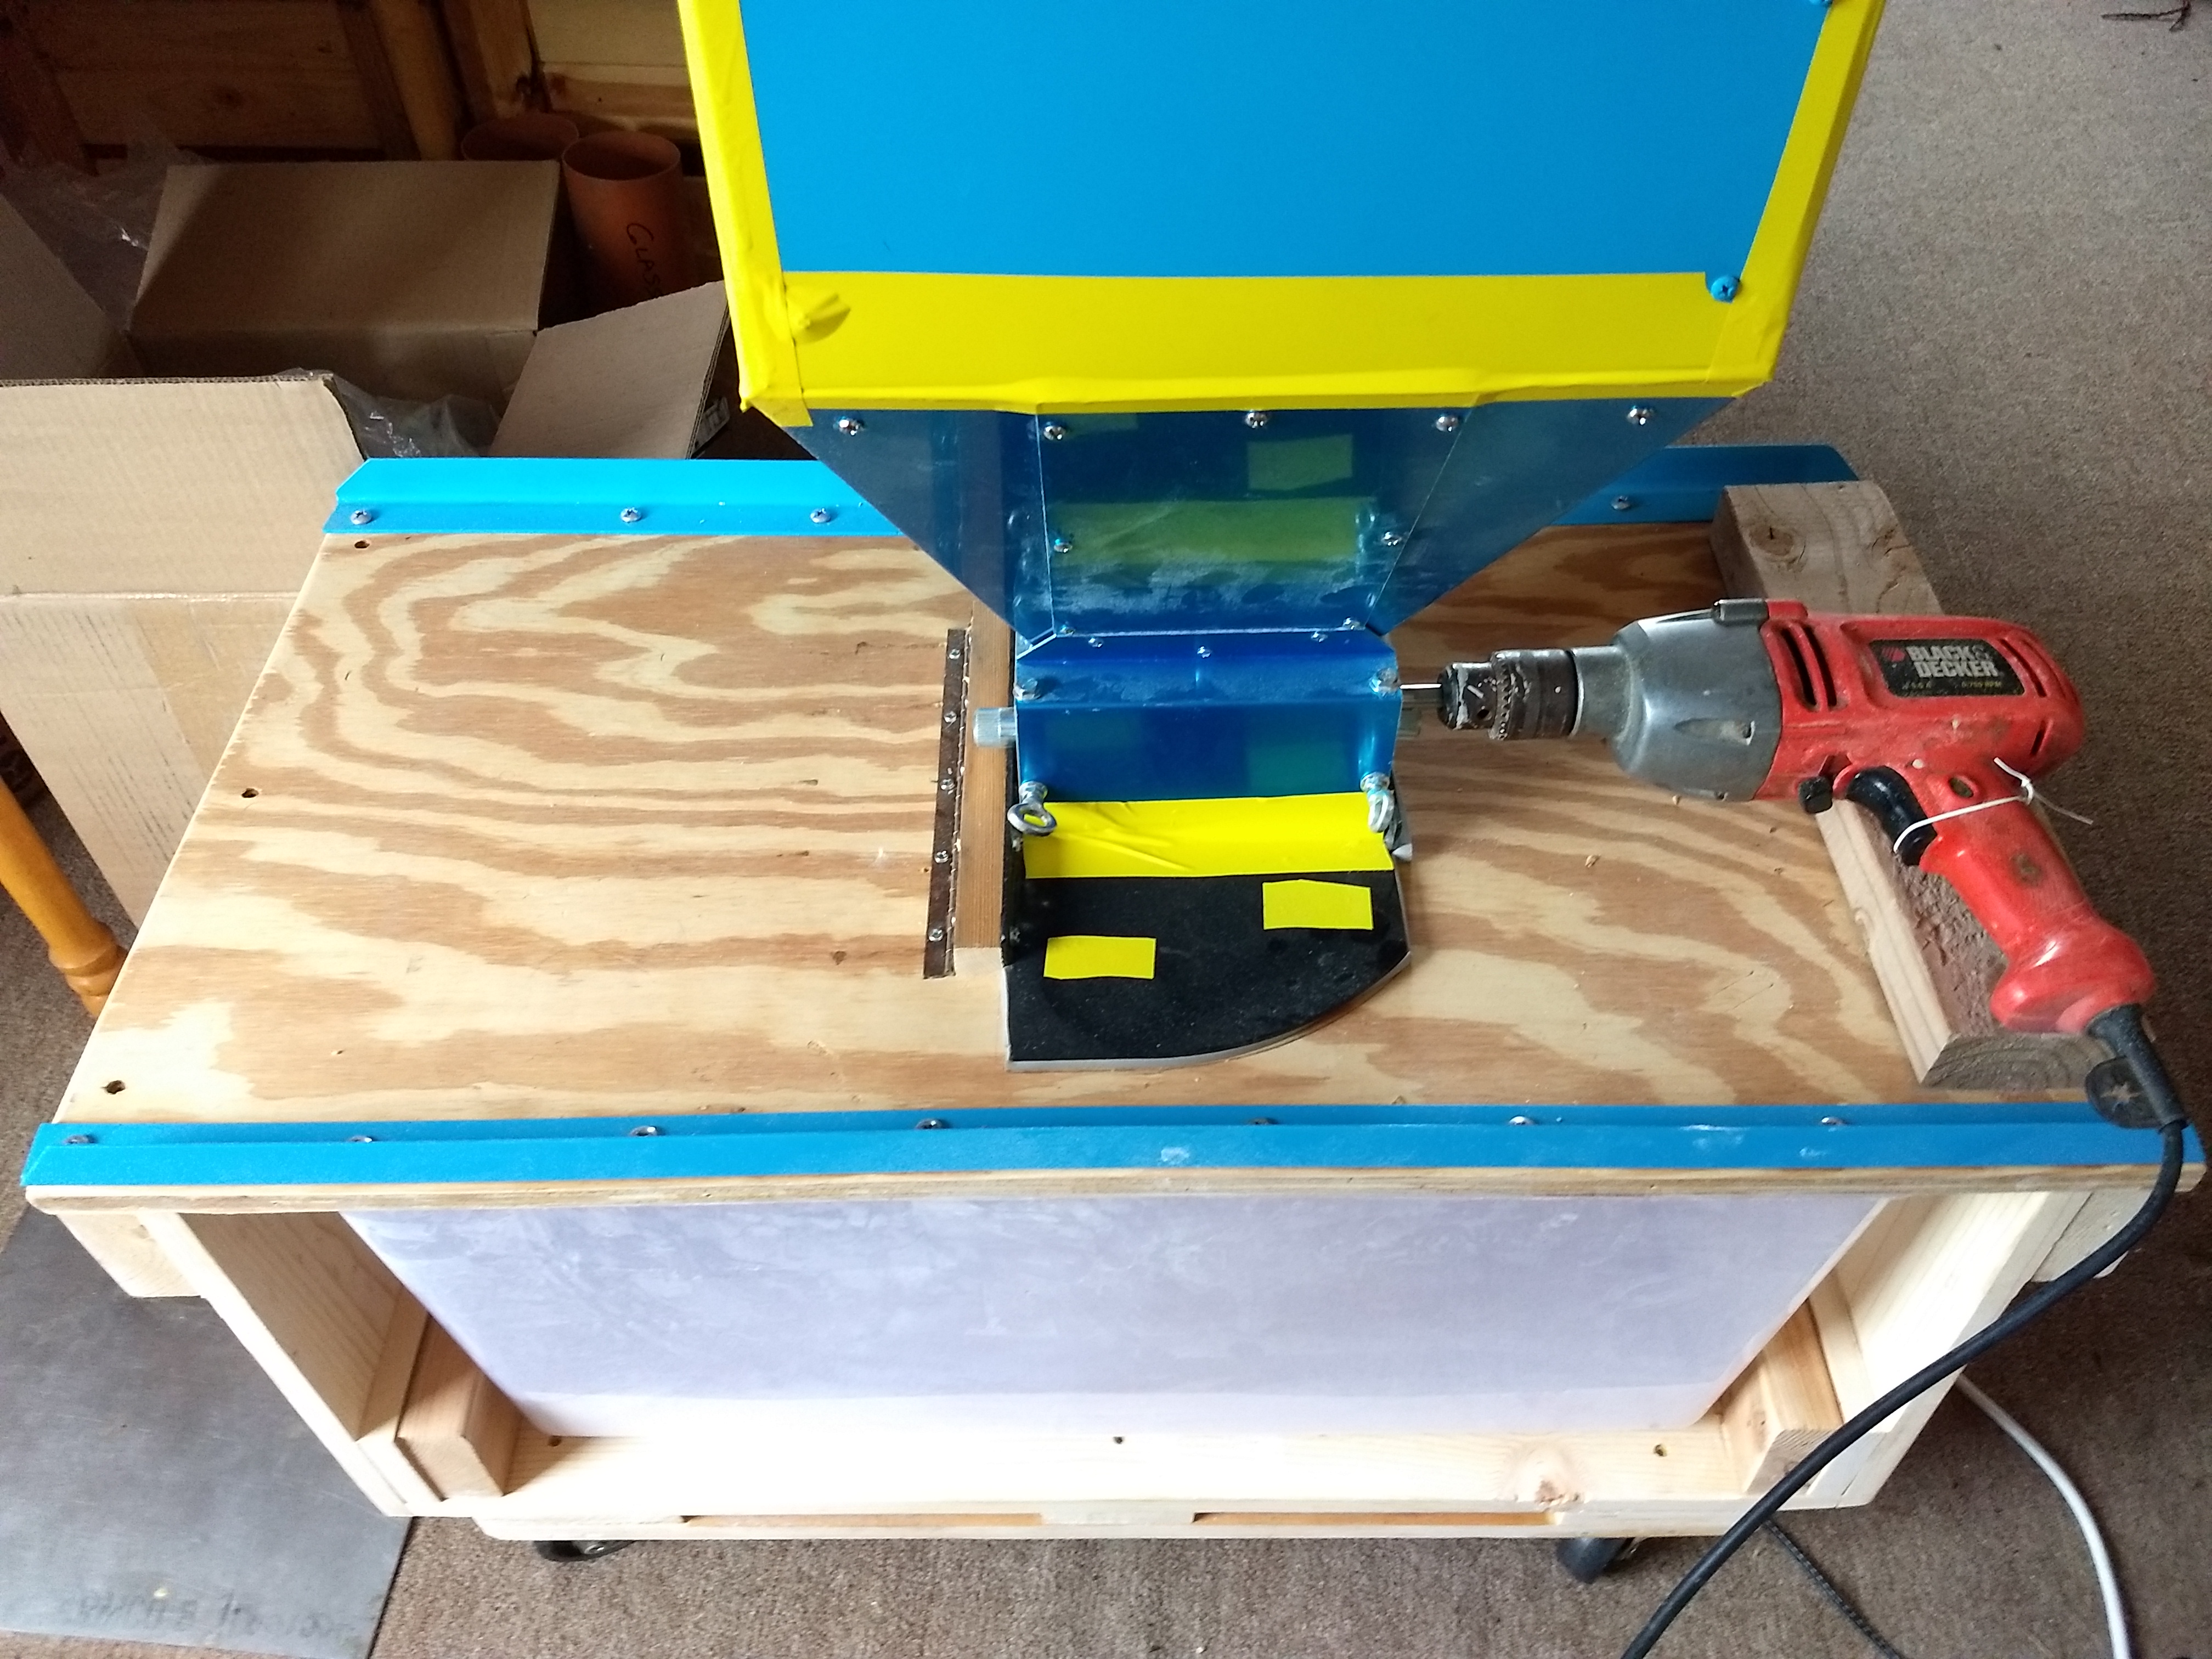
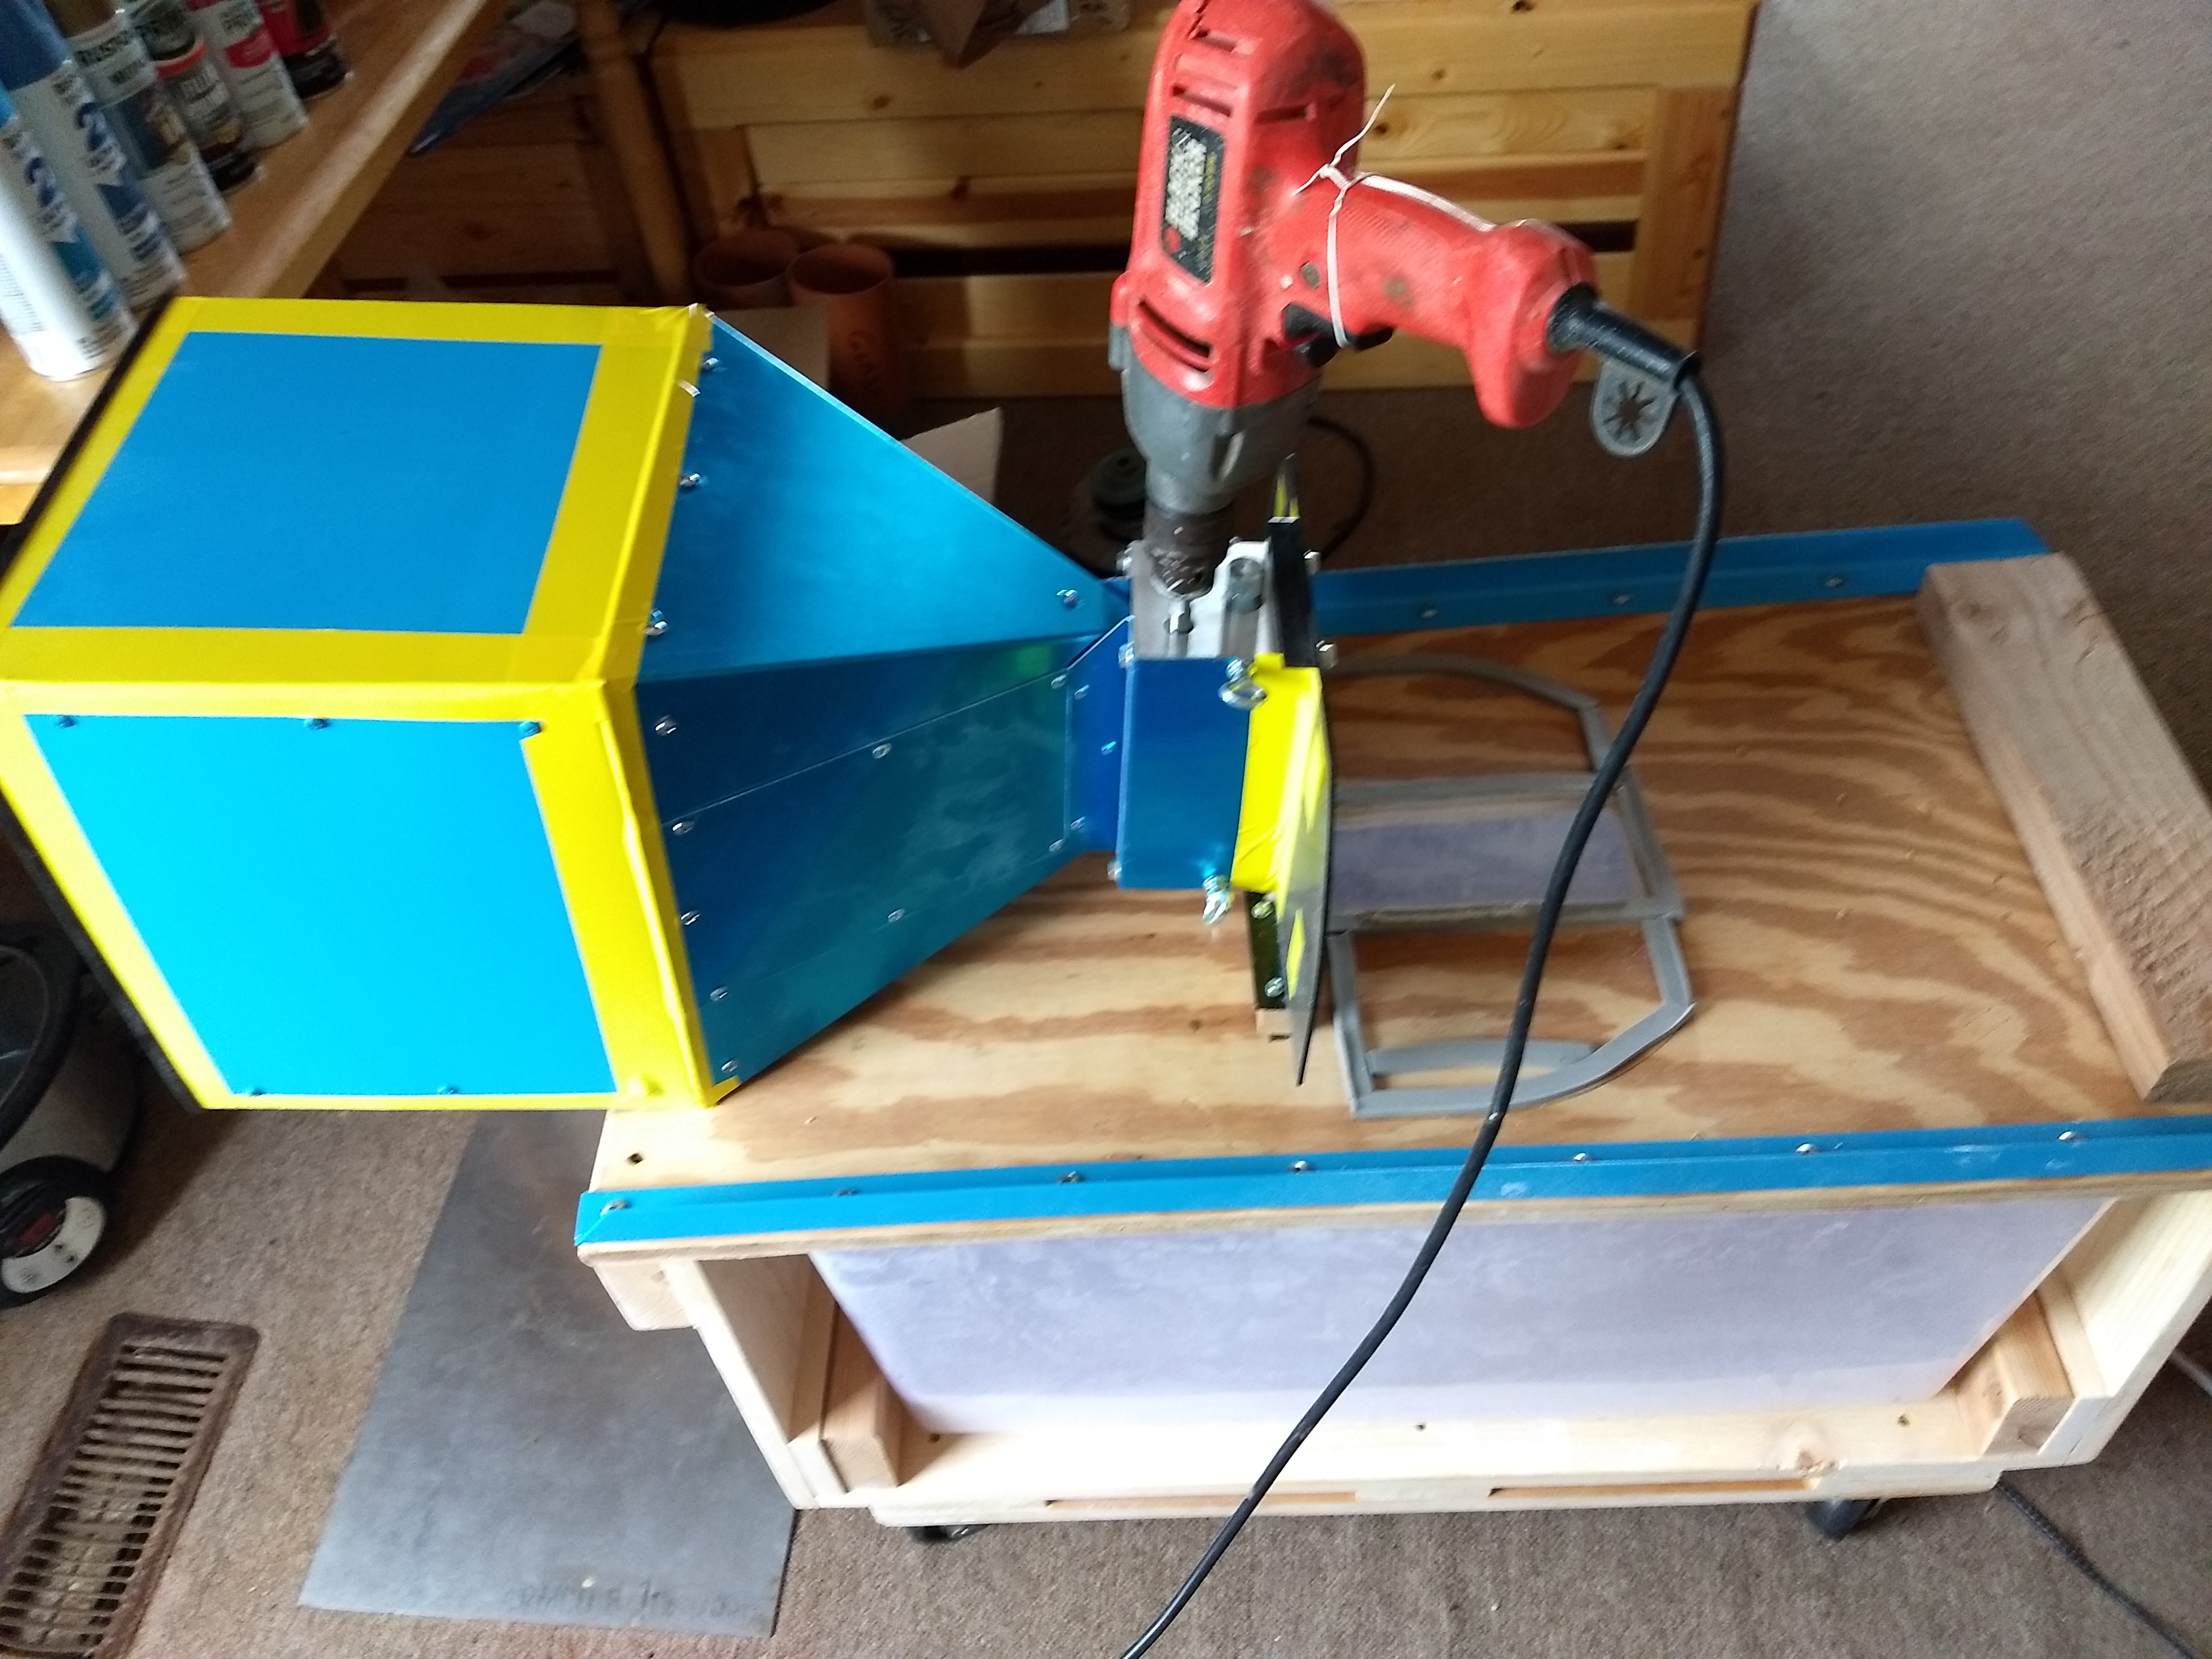
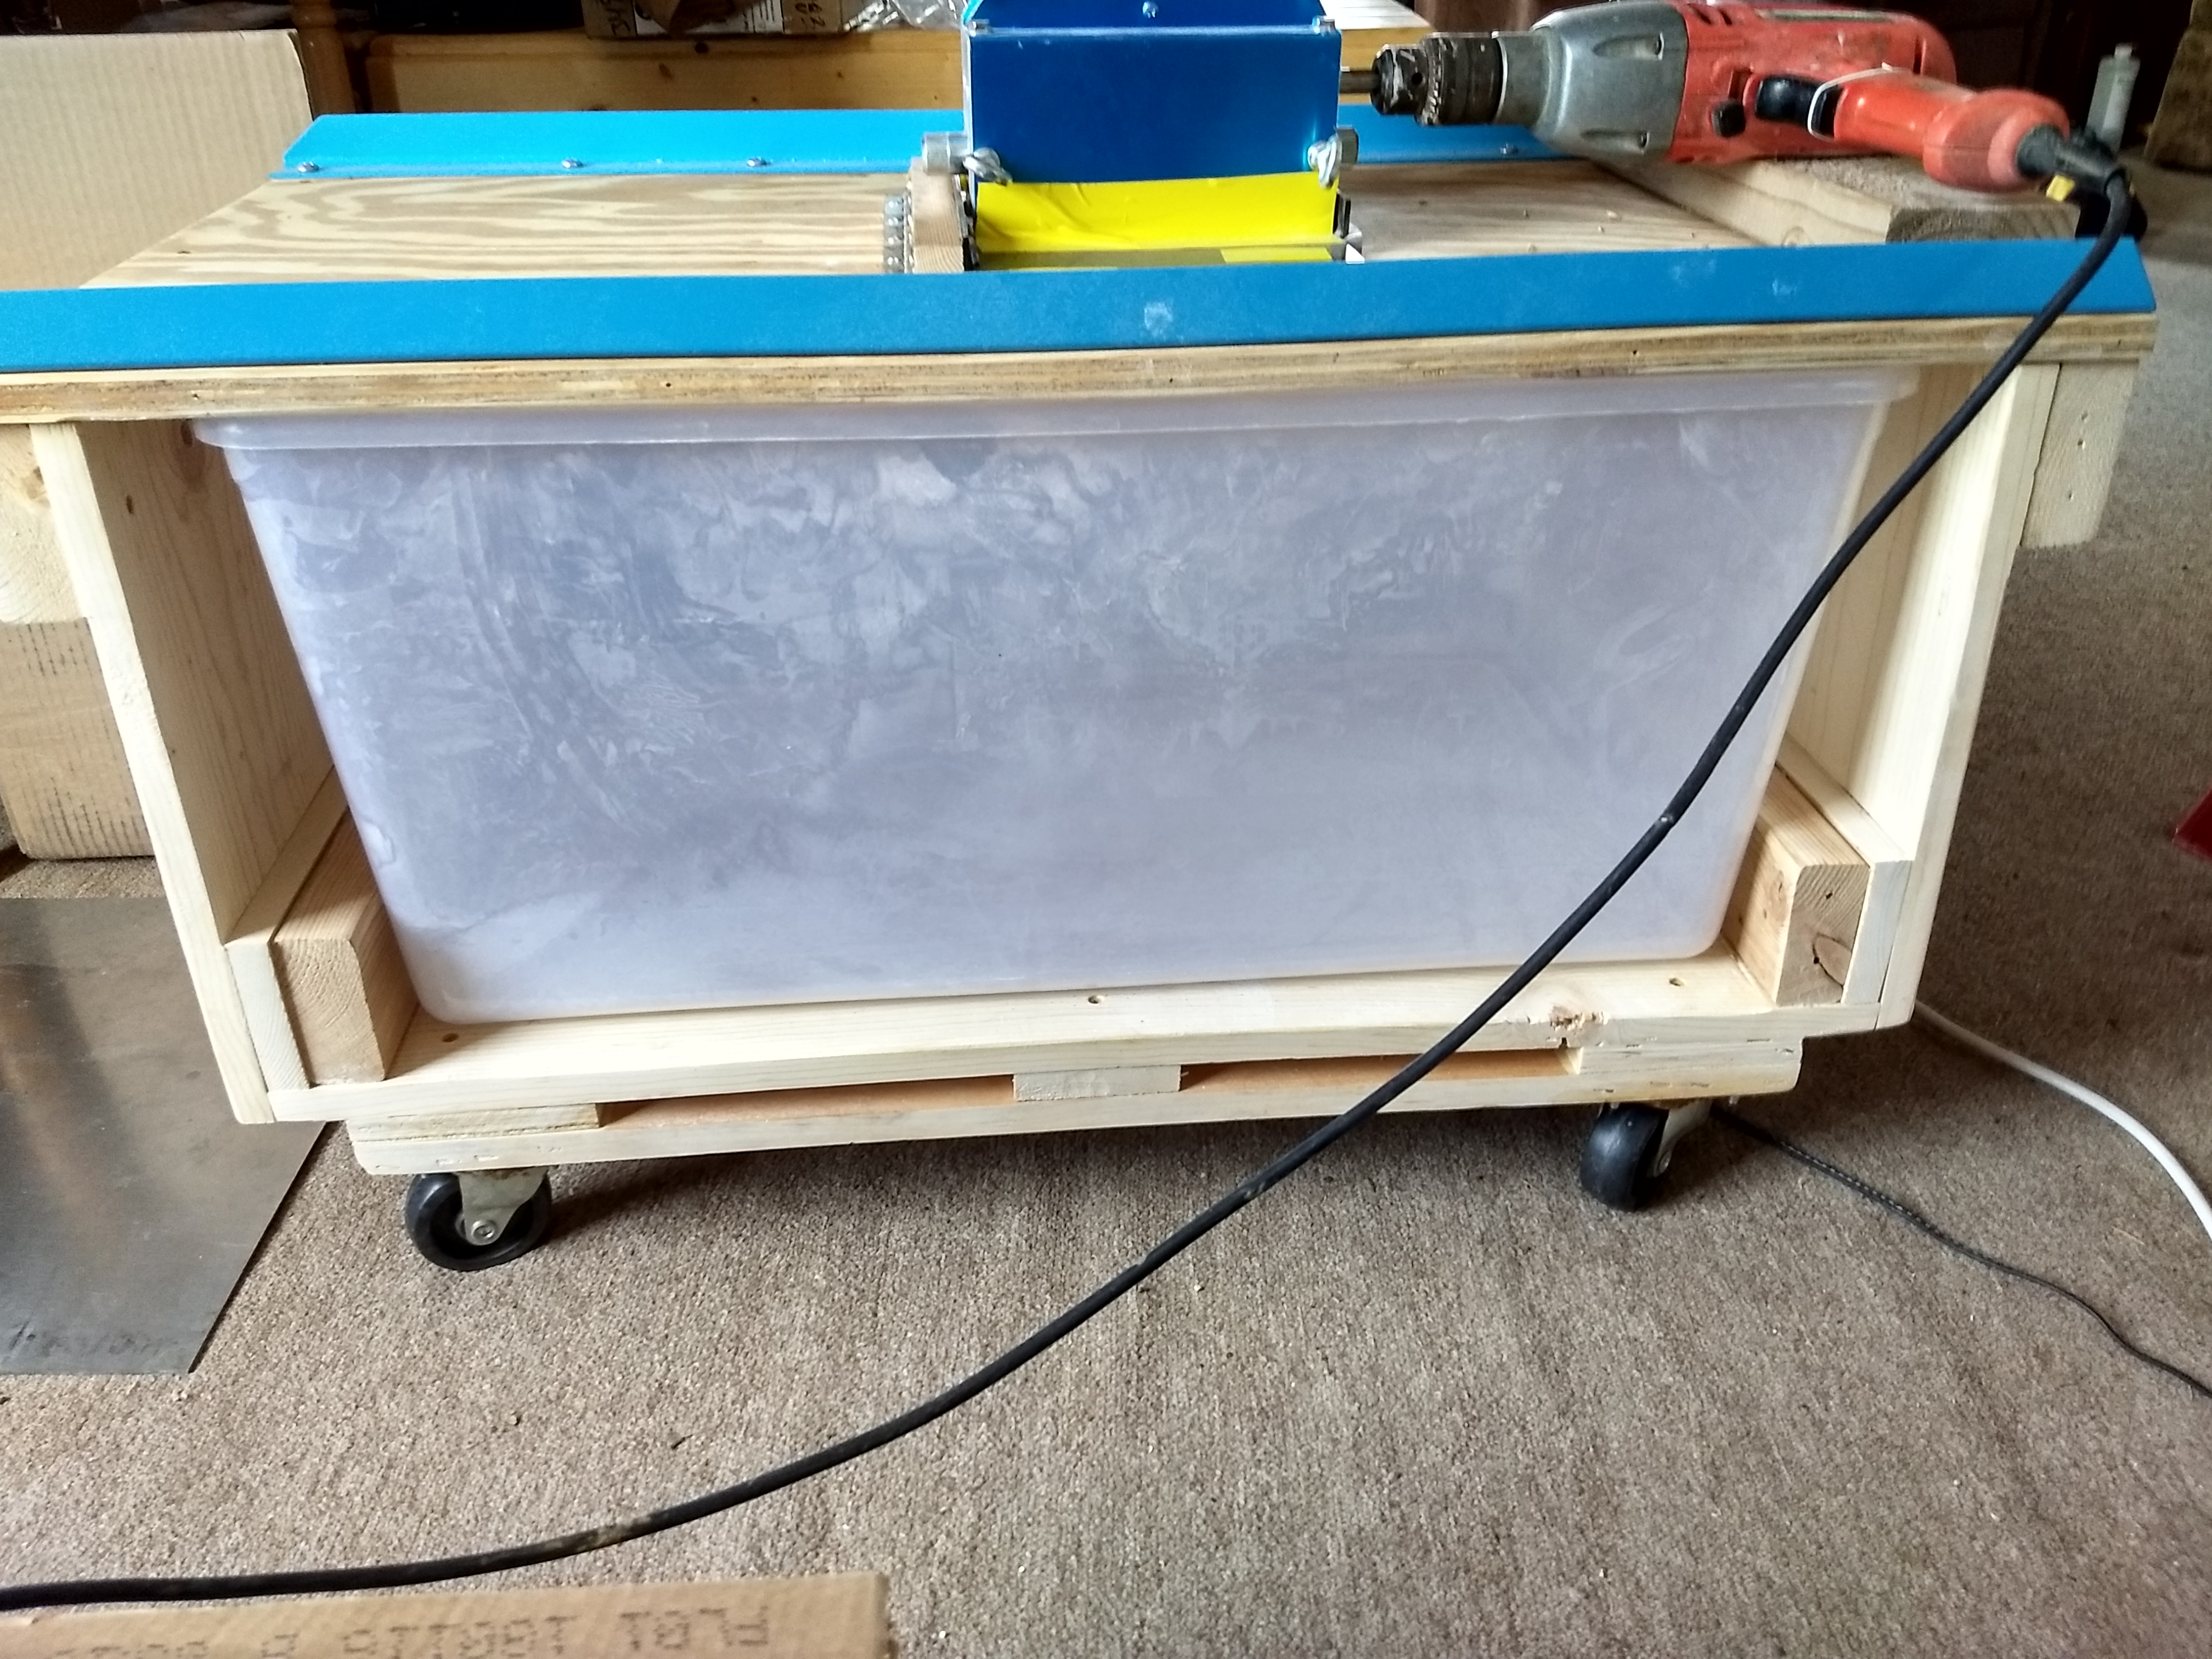
Ok. The hinge is from Home Depot. The plastic bin is from Walmart. The wheeled base is from a furniture dolly from Harbor Freight. The sheet metal for the hopper extension, Home Depot. The angle iron reinforcing the top deck is from an old bed frame. Paint from home Depot. All wood from my shed.
- Joined
- Oct 6, 2017
- Messages
- 1,702
- Reaction score
- 988
I was conditioning my malt with 2% water but didn't find it made much difference for me plus I kind of hated doing it and if I didn't wait long enough for it to fully equalize it tended to gum up the knurling.
olotti
Well-Known Member
View attachment 679749
View attachment 679750
View attachment 679751
Ok. The hinge is from Home Depot. The plastic bin is from Walmart. The wheeled base is from a furniture dolly from Harbor Freight. The sheet metal for the hopper extension, Home Depot. The angle iron reinforcing the top deck is from an old bed frame. Paint from home Depot. All wood from my shed.
appreciate the assistance. Think I’m going with the kegco.
Dave Sarber
Unindicted Co-conspirator

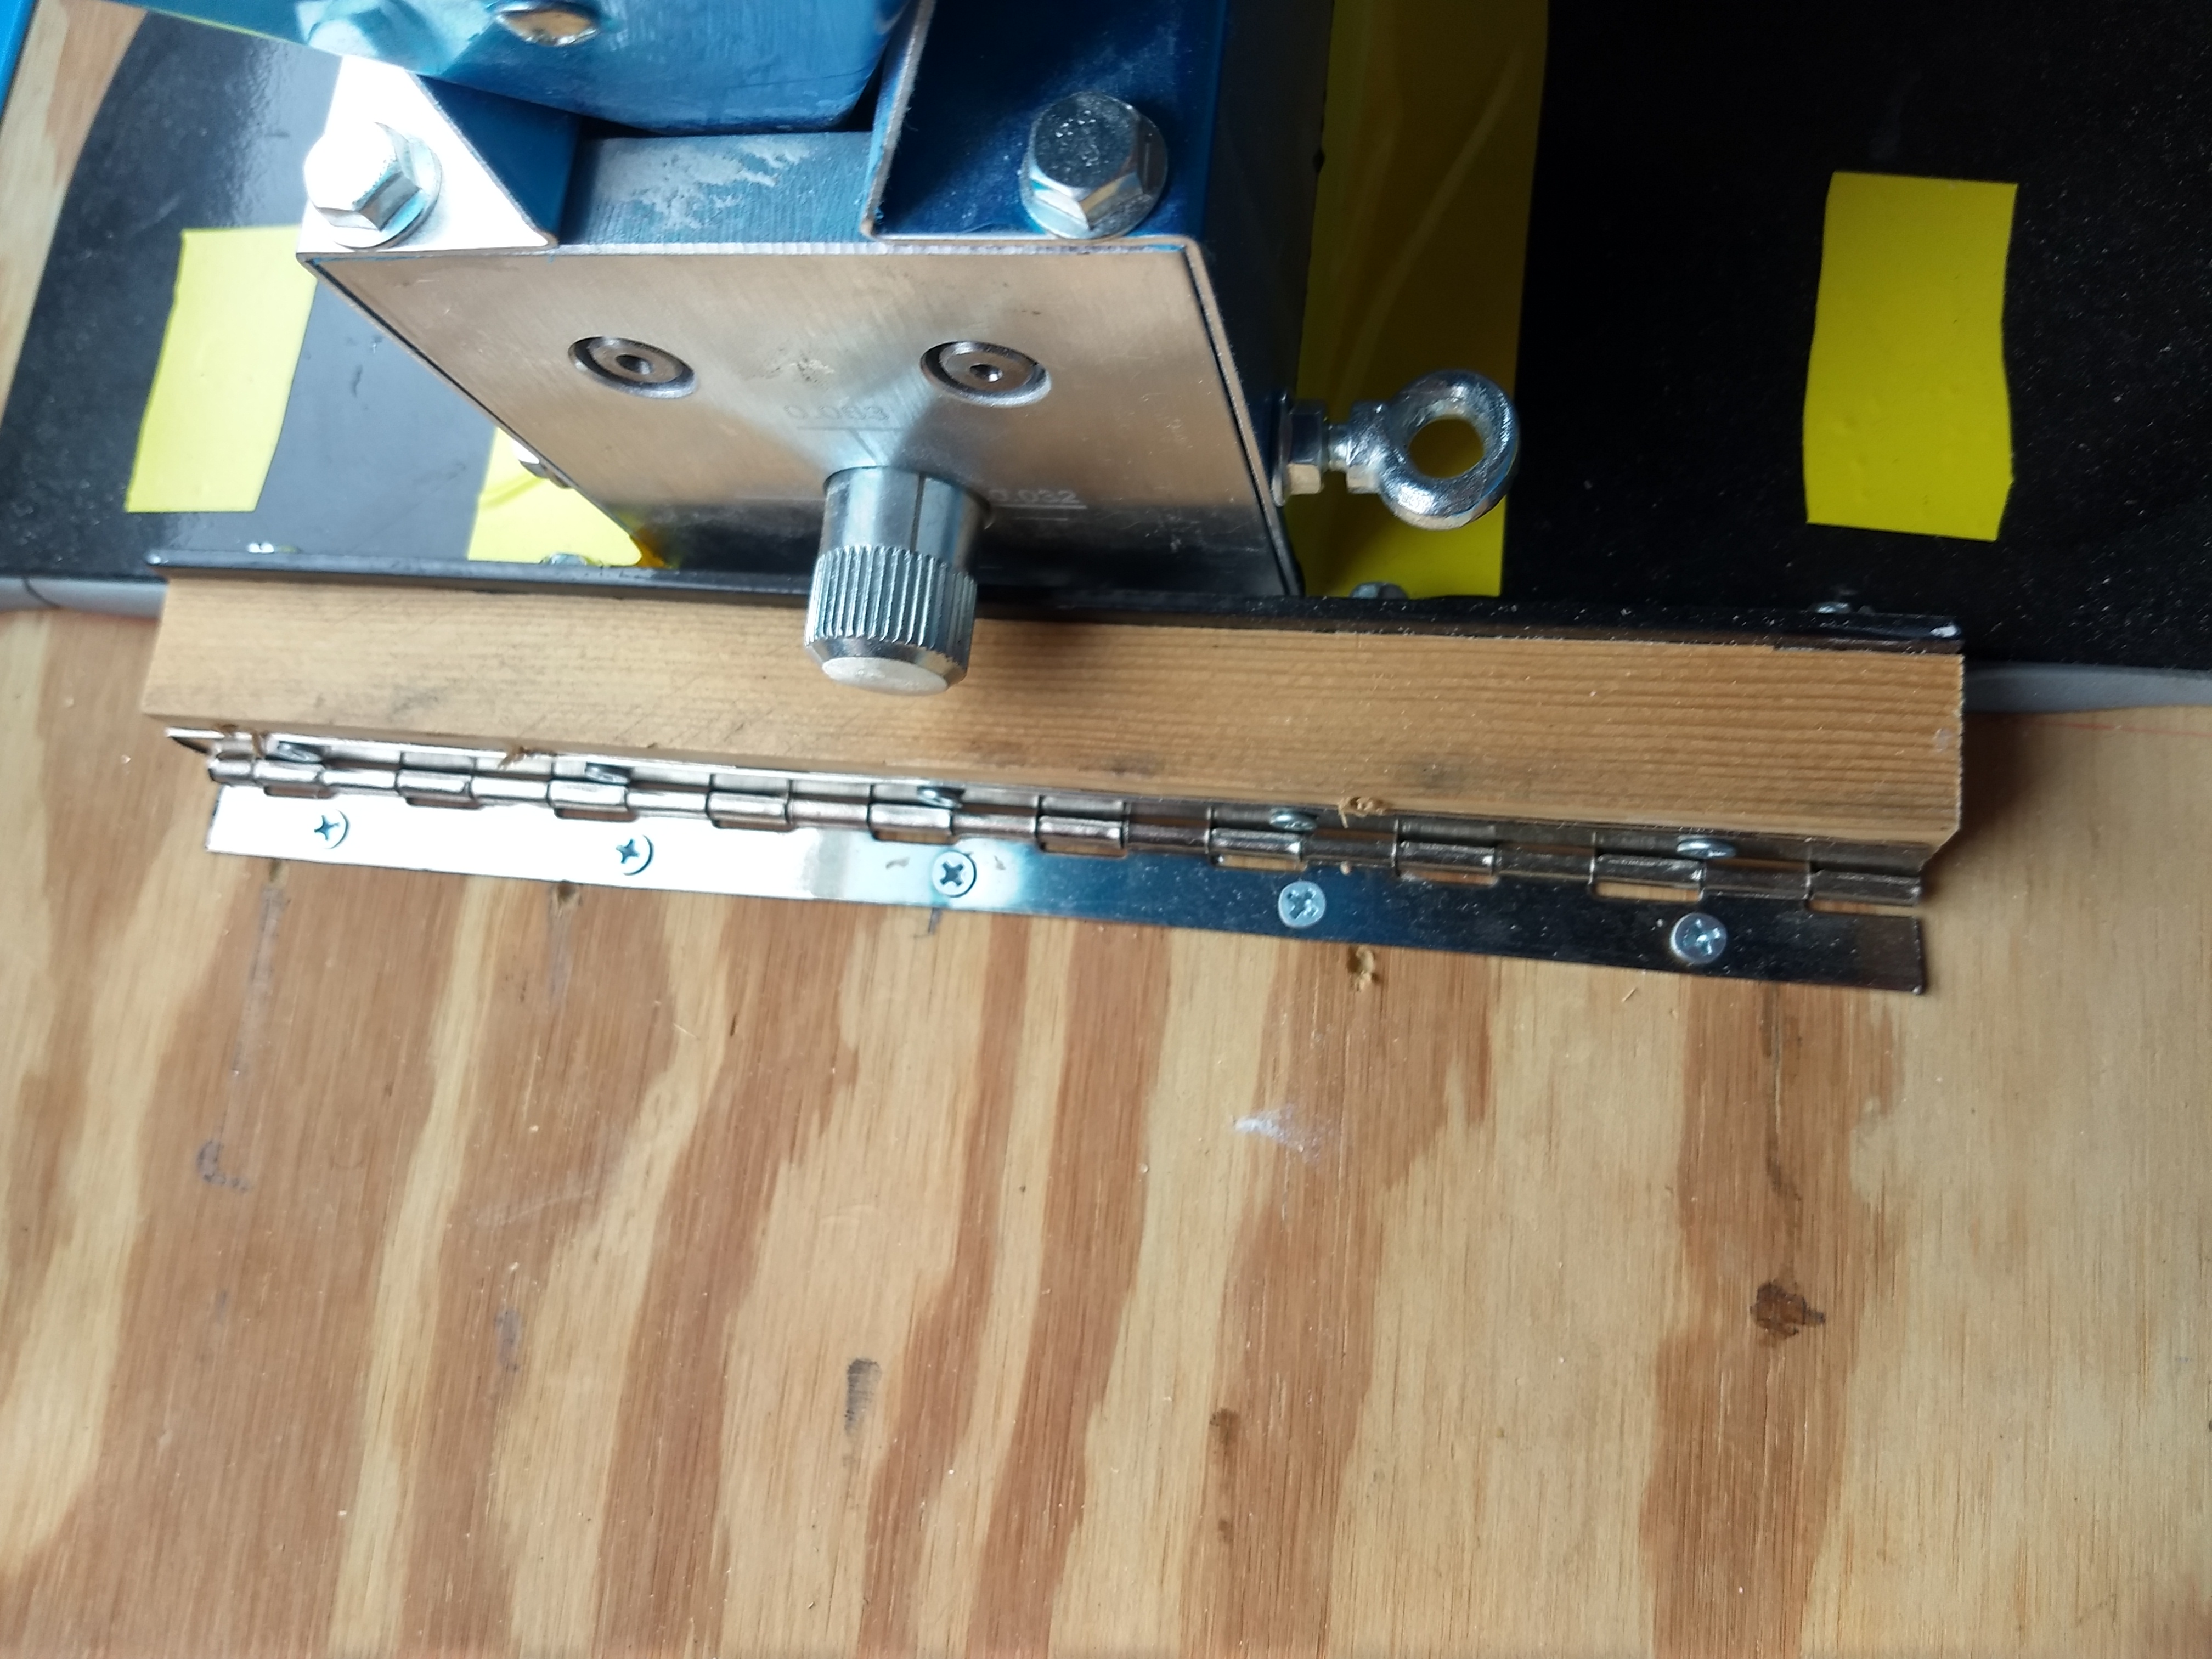
More details. Top pic is my solid state speed control.
Bottom pic is a wood block installed between hinge and plate, to keep adjustment knob off the deck when mill is swiveled up. The hinge is from a 4 foot long piece that you cut to length.
Last edited:
Similar threads
- Replies
- 0
- Views
- 351
- Replies
- 55
- Views
- 3K
- Replies
- 24
- Views
- 2K
- Replies
- 7
- Views
- 1K


