• Please visit and share your knowledge at our sister communities:
  • If you have not, please join our official Homebrewing Facebook Group!

    Homebrewing Facebook Group

Cooling my Anvil SS 7.5 bucket FV - is this going to work?

Homebrew Talk

Help Support Homebrew Talk:

This site may earn a commission from merchant affiliate links, including eBay, Amazon, and others.
Just a little tip for keeping your cooler water cool without letting ice melt into the water directly when trying to keep your FV at a certain temp:
The gel ice packs are great, but they're small, so they're thawed pretty fast when you're trying to cool down beer using a cooling coil in a fermenter.
So I switched to freezing water in gallon plastic water jugs. However, that is another problem since those plastic jugs will get holes punched in them or crease and crack as the water freezes. So don't fill them all the way, squeeze the air out so that the jug can expand again as the water freezes. I've had so many freeze and crack that I've stopped using them.
So then I decided to try something else. Ziplock bags (double bag for safety and make sure you get the ones with the double ziplock (freezer bags)). They won't crack. If you have the big 2 gallon bags, then you can fill one up with a huge amount of water that'll create a great big brick of ice. Let that sit in your cooler for a day easily and it'll be fine. My cooler water now stays under 48F all day and night now thanks to this one. And as long as you seal the bags up proper, they will stack so you can freeze several at a time.
 
The 2 gallon bags may not be strong enough to hold all that ice water :) Mine sprang some leaks through both bags.
I'm trying some 1 gallon bags now instead.
 
I use half gallon juice jugs. I fill them nearly full. When they freeze, the flat sides or even the bottom may expand outwards, but I have never had one crack. I use them over and over. Three or four will keep mine in the 40’s to low 50’s all day. They can, of course, be switched out twice a day to keep things cooler if necessary.
 
I use half gallon juice jugs. I fill them nearly full. When they freeze, the flat sides or even the bottom may expand outwards, but I have never had one crack. I use them over and over. Three or four will keep mine in the 40’s to low 50’s all day. They can, of course, be switched out twice a day to keep things cooler if necessary.
I might try those instead. The water jugs just seem to develop leaks every few uses. So I'll go buy some healthy juice and drink those up and try them instead. Maybe their plastic is a bit thicker.
 
I might try those instead. The water jugs just seem to develop leaks every few uses. So I'll go buy some healthy juice and drink those up and try them instead. Maybe their plastic is a bit thicker.
Purchase ten ½ gallon jugs of Concord grape juice (no preservatives), 8 lbs of cane sugar, and a pack of Premier Classique wine yeast. Then, you will have everything you need for 5 gallons of red wine and 10 jugs for cooling your fermenter!
 
Just another little find to add here...
I moved my bucket to the kegerator to cold crash it. Well, the cold crash guardian C02 bladder was so full it wouldn't fit in the fridge :D Hoping I haven't squeezed out too much that things go bad. But just an fyi for others that may be trying something similar to me. If you have a smaller kegerator (mine only fits my bucket and 1 5g keg and c02 tank or two 5 gallon kegs and the c02 tank).
It may fit better if you stick the bladder in first, behind the bucket, as there's some excess room there. However, i foolishly didn't have a long enough tube, as i cut mine rather short when i got them :D Probably need to buy some more tubing and make some adjustments now haha.
This wasn't the fault of the place I purchased them from btw. This was _my_ fault for not leaving enough tube connected :)
Luckily the second one has plenty of extra tubing on it. So I'll see how that fits when i move the second bucket in to crash (although I am tempted to try and bring it down as low as I can without the fridge and see how far I can get it first. Will add an update to this thread about it when I do it, and see how far I can cool it)
 
Well, the cold crash guardian C02 bladder was so full it wouldn't fit in the fridge :D Hoping I haven't squeezed out too much that things go bad.
I don't think you'd need a whole full bladder to make up for cold shrinkage of a 6.5 7.5 gallon bucket containing a 5-5.5 gallon batch of beer. Most of the temp-related shrinkage will occur in the headspace gas, though.
 
Last edited:
Hope not :D I'd say there was still about half a bladder full. Made me chuckle when i tried to squeeze it all in the fridge though :D
Yeah, I can only imagine what that looked like... ;)

I've modified my original reply, refining it, but it's basically the same message.
Half of that bladder volume should suffice, yes.

I use a mylar party balloon, with EVA-barrier tubing off course!
The most difficult part was pushing the tubing through the balloon's valve system, it was darn tough and resistant. I could not find any online instructions on how to do that, let stand doing it elegantly.
 
Ran into another pitfall with the cooling coil too. Two actually:
First is if anyone does this setup with this cool, then get some sort of quick disconnect connectors. That way it’ll be a lot easier to disconnect the cooling tubes from your coil in/out.
I actually ordered a different type of quick disconnect to see how they will work. They look like they’re a bit easier to disconnect than the duotight/john guest ones. And I couldn’t find those with a 3/16” connection. When I get them added I’ll post a pic to show and if they work or not. Should be here on Thursday. So I’ll get them added tomorrow.

The second pitfall is due to the first one, the rubber stopper might work itself loose while you’re trying to get the tubes off. Which justifies the quick disconnects being added further along the tubing. That way you’re not trying to wiggle the tubes off the coil and pulling the stopper loose.
 
Ok, the ones i ordered were a bit of a let down. The quick disconnects work amazing. I love the way they click and you just press a little metal bit to release them. They even have built in shut off valves to stop anything flowing out of them after they're disconnected.
The drawback is they also restrict the water flow more. The flow between them was tiny. So I ordered some tailonz 8mm (5/16") OD hose union connectors that will work for water. These should do the job. (another switcheroo on the tubes on sunday haha)
But I'm sure the other ones will find an application somewhere around :D
 
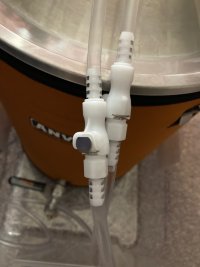
Here's the pic of the quick disconnects I tried:
IMG_8029.JPG
They work great, just with the already small amount of water flow, these are restricting it just that little bit more. Maybe it doesn't matter enough, maybe it's just my perception. Just seems to take a little longer to hit the temp I set. However, that may also be down to the longer hoses I added too. Maybe they're too long (easily remedied). Anyway, just wanted to show these in case anyone was wondering about them.
 
Some lessons I've learned this week:
1. If you make your tubing too long, then your pump will cry and probably break, or just not have the ability to pump the water through properly. So make sure you only have enough tubing for the application.
2. To help the water flow, rather than have 3/16" ID tubing all the way through the system, go from the bigger ID tubing and reduce it to the 3/16" tube gradually. To this end I've got some 1/2" ID tubing, some 3/8" ID tubing and some 1/2" to 3/8" reducers and some 3/8" to 3/16" reducers to hopefully allow the water to pump through the system faster, help the water pump work more efficiently, and increase the cooling efficiency.

So hopefully by Monday night, I should have things working properly again and better.
I’m certainly no expert in fluid mechanics or pumps and such. I would think that minimizing the lift, or height the pump has raise the water would be a critical factor. I also am going out on a limb and saying that the smallest diameter in your system is the critical factor regardless of what the rest looks like diameter-wise. I think it would be ideal if the outlet on the pump is the smallest diameter in your system so that there’s nothing ahead of the pump to create any resistant back pressure other than any unavoidable lift.
I’m just guessing here, so maybe someone else can confirm/correct me.
Thanks for the info, Closet. I'm definitely no expert on this stuff. I was thinking more along the lines of how plumbers reduce the pipe diameter gradually to reduce stress and thought maybe it would apply here too.
The problem is, my pumps are sump and pond pumps, none of them come with the right 3/16" barb. And if they did, they're also reducing directly from the output into that, so it would probably create the same back pressure you mention right at the pump output. Not sure, just thinking out loud. Hence the reason I thought maybe if i reduced it slowly from the larger diameter to 3/16" at the cooling coil in/out that it might help things.

The good news is, I switched out the quick disconnects and put the tailonz (https://tailonz.com/product/tailonz-pneumatic-blue-straight-push-to-connect-tube-fittings-push-lock) (like duotight, just cheaper and work great for this application) union connectors instead, and now the water is flowing freely again, no leaks either. Now I just have to get the temp back to where it was after that minor mishap :D

I'll have all the tube reduces in tomorrow, so I'll make some changes and report the results of that. My hope is it does what I was expecting it to do. But at the very least it won't make it worse than it was with the other quick disconnects in place :D
 
The good news is, I switched out the quick disconnects and put the tailonz (https://tailonz.com/product/tailonz-pneumatic-blue-straight-push-to-connect-tube-fittings-push-lock) (like duotight, just cheaper and work great for this application)
Whoa, be careful! Those are to be used only for air pressure (or vacuum):
  • Do Not Use Any Medium Other Than Air. the Product is Limited to Air or Vacuum Environment.
I don't know how they'd hold up with liquids (water).

There are alternatives to Duotight push-to-connect ("ptc") connectors, such as John Guest:
https://www.freshwatersystems.com/collections/fittings?q=&filters=[["vendor","John Guest"]]
Due to the plethora of products, the site can be a little difficult to browse and select the correct items, though.

I haven't checked them (FreshWater) lately, but their pricing used to be most lucrative when buying 5- or 10-packs, and to make sure the whole order is large enough to make shipping cost worthwhile. They have tons of other stuff too.

I do not know how Duotight and John Guest compare quality/durability-wise. Maybe someone can elaborate.

Important Note:
One thing we found out on these forums is that Starsan seems to attack Acetal, IIRC, making it brittle, so exposure Starsan (Acids?) should be avoided or at least very, very limited, no soaking and such.
Yeah, they seem to only be for air. However, I did a fair bit of reading and people seem to use them for water too, without leaks. Funnily enough the description on amazon no longer mentions the use of water for the ones i bought either. Just air. Which I find a little odd.
Anyway, they appear to be fine. They haven't given me any trouble since I put them on. No leaks and I gave them a good yank to see if the tubing would come loose and it never budged.
If they fail, then it's only a little water that'll get pushed out into the container my FV is sitting in (I've always put them in one, in case the spigot on the bottom of the FV bucket leaks), and I can return them easy enough.

That site you linked though has given me an idea. They do some bulkhead john guest fittings, so I'm thinking that maybe I can remove the tubes from the lid of my cooler and drill through the back, then fit the bulk heads in place to seal up the holes nicely.

Maybe I should've just thought this out before I buy things :D Thankfully it's easy to return a lot of it.
Ok, back to the drawing board while I figure out how to do this cooler mod for the bulkheads and make it easier to run the tubing to the FV's and hopefully cut down on the length of tubing I'm using too.
 
ok, here's what I'm thinking:

Cut out the 5/8" OD tube from the pump entirely.
Get some 1/2" OD pump connectors to go from the pump, then connect that to a bulkhead coupler (1/2" OD to 1/2" OD), then connect the outside 1/2" tube to a 1/2" to 5/16" reducer. Then connect 5/16" tube from the reducer to the cooling coil using 5/16 john guest superseal connectors that I can connect directly to the cooling coil.

These superseal connectors to connect directly to the SS cooling coil in/out:
https://www.freshwatersystems.com/p...-5-16-superseal-x-5-16?variant=13249977647147

These bulkheads to run my 1/2" OD tube from the pump out to the FV:
https://www.freshwatersystems.com/p...lkhead-union-1-2-x-1-2?variant=37902503641272

Then these to just reduce from the 1/2" OD to 5/16" OD of the tube that connects to the superseal connectors above:
https://www.freshwatersystems.com/p...t-connector-1-2-x-5-16?variant=13250677604395

And these to connect to my pumps:
https://www.freshwatersystems.com/p...or-nptf-1-2-x-1-2-nptf?variant=37902507311288

Anyone see anything wrong with this? The gradual reduction of tubing didn't seem to make any difference at all in the flow. So I didn't see any point in trying to stick to that in this process.
 
ok, here's what I'm thinking:

Cut out the 5/8" OD tube from the pump entirely.
Get some 1/2" OD pump connectors to go from the pump, then connect that to a bulkhead coupler (1/2" OD to 1/2" OD)
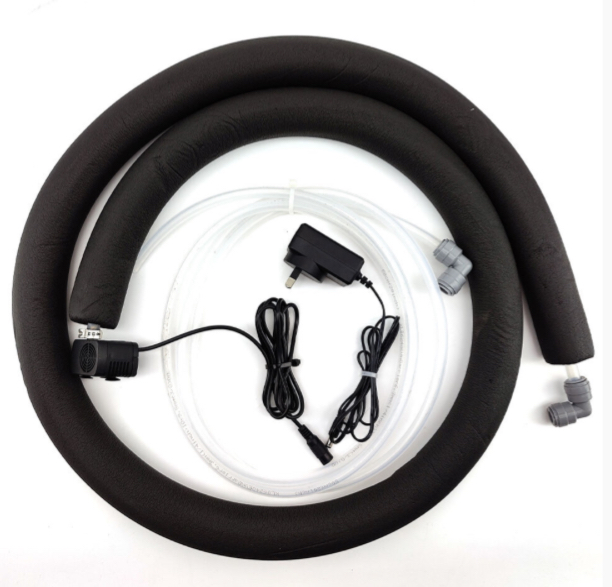
Wow! What size pump are you using that can function with ½” and 5/8” lines? My lines are ¼” and the pump is tiny; about the size of a phone charger. It has no problem chilling a 10 gallon batch in a 13 gallon fermenter.

It’s not necessary to have the water moving extremely fast through the lines; it just needs to move. You want the cool water to pick up the heat being transferred through your coil. I don’t suppose it hurts anything to be overpowered there, but it doesn’t take a whole lot to do the job.

IMG_0685.jpeg

Here’s the stock photo of my rig. The pump is smaller than the AC/DC converter plug! 🤣
It draws less than 5watts at 12volts DC. Depending on the lift height, (up to 7’), it pumps 25 to 90 gallons per hour.
With a good insulation wrap on the fermenter, it has no problem keeping the fermenter at set point. My most recent batch was 10 gallons and it held 65° in the uninsulated shed with daytime temperatures getting up to 90° or more in there. I only changed out the frozen ½ gallon jugs, (2-4), once a day. I fermented a lager back in April and it held at 57°.

I really like the idea of using the bulkheads instead of through the lid. It is a bit of a pain exchanging the jugs with the lines running through the lid. I will have to give it some thought though; I have an extra lid for this cooler and can use it in its unmodified condition when needed. If I add the bulkheads, I may have to dedicate it for temp control only. However, that might be acceptable. 🤔
 
Wow! What size pump are you using that can function with ½” and 5/8” lines? My lines are ¼” and the pump is tiny; about the size of a phone charger. It has no problem chilling a 10 gallon batch in a 13 gallon fermenter.

It’s not necessary to have the water moving extremely fast through the lines; it just needs to move. You want the cool water to pick up the heat being transferred through your coil. I don’t suppose it hurts anything to be overpowered there, but it doesn’t take a whole lot to do the job.

View attachment 876513
Here’s the stock photo of my rig. The pump is smaller than the AC/DC converter plug! 🤣
It draws less than 5watts at 12volts DC. Depending on the lift height, (up to 7’), it pumps 25 to 90 gallons per hour.
With a good insulation wrap on the fermenter, it has no problem keeping the fermenter at set point. My most recent batch was 10 gallons and it held 65° in the uninsulated shed with daytime temperatures getting up to 90° or more in there. I only changed out the frozen ½ gallon jugs, (2-4), once a day. I fermented a lager back in April and it held at 57°.

I really like the idea of using the bulkheads instead of through the lid. It is a bit of a pain exchanging the jugs with the lines running through the lid. I will have to give it some thought though; I have an extra lid for this cooler and can use it in its unmodified condition when needed. If I add the bulkheads, I may have to dedicate it for temp control only. However, that might be acceptable. 🤔
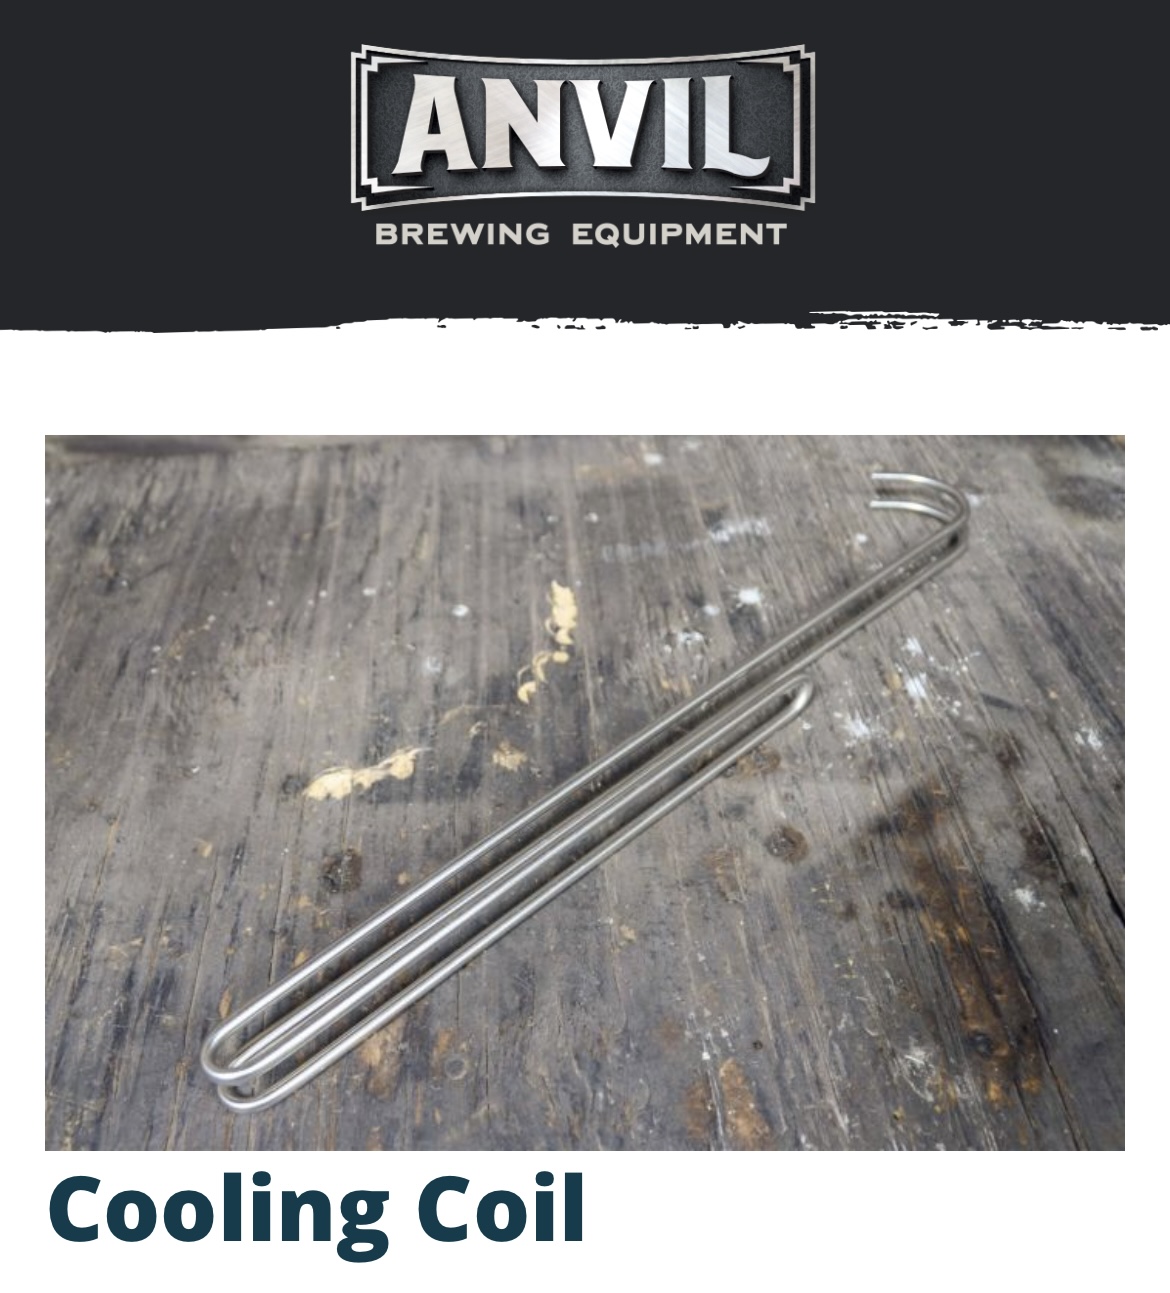
Don’t forget he’s using the tiny cooling loop from Anvil which is probably limiting the cooling effectiveness more than the flow rate.

IMG_3936.jpeg
 
Wow! What size pump are you using that can function with ½” and 5/8” lines? My lines are ¼” and the pump is tiny; about the size of a phone charger. It has no problem chilling a 10 gallon batch in a 13 gallon fermenter.

It’s not necessary to have the water moving extremely fast through the lines; it just needs to move. You want the cool water to pick up the heat being transferred through your coil. I don’t suppose it hurts anything to be overpowered there, but it doesn’t take a whole lot to do the job.

View attachment 876513
Here’s the stock photo of my rig. The pump is smaller than the AC/DC converter plug! 🤣
It draws less than 5watts at 12volts DC. Depending on the lift height, (up to 7’), it pumps 25 to 90 gallons per hour.
With a good insulation wrap on the fermenter, it has no problem keeping the fermenter at set point. My most recent batch was 10 gallons and it held 65° in the uninsulated shed with daytime temperatures getting up to 90° or more in there. I only changed out the frozen ½ gallon jugs, (2-4), once a day. I fermented a lager back in April and it held at 57°.

I really like the idea of using the bulkheads instead of through the lid. It is a bit of a pain exchanging the jugs with the lines running through the lid. I will have to give it some thought though; I have an extra lid for this cooler and can use it in its unmodified condition when needed. If I add the bulkheads, I may have to dedicate it for temp control only. However, that might be acceptable. 🤔
I have some little 550gph aquarium pumps and a 2000ish gph sump pump (got this one recently to test out on my immersion chiller to see if it helps cooling efficiency of the wort after a boil). Currently it's connected to the sump pump. But the connectors aren't the issue. I want to run the 1/2" OD (3/8" ID) tubing all the way up to the coil, as there's no adapters to go all the way down to the little 5/16" OD from the pump directly.
The main thing is getting the right connectors on the pump output, I've got one connector here that works for the 1/2" OD tubing nicely. It was on one of my aquarium pumps and worked great.
I do have some drilled holes in the lid of my cooler currently, but it won't be hard to block those up. The bulkheads seem like a nice easy way to just get tubing out the way of the lid and my cooler is only used for cooling my FV's, so I don't mind ruining it :D.

Does the insulation around the tubes make much difference to the water temp when it's moving through? Or is it more of a extra mile thing to try and help mitigate as much temp change in the water going into the coil as possible?

Don’t forget he’s using the tiny cooling loop from Anvil which is probably limiting the cooling effectiveness more than the flow rate.

View attachment 876524
It's not as bad as you might think. I've got my FV down to 54 degrees now. Slapped a gauge on the outside around the 2.5 mark on the bucket. The inkbird in the thermowell by the coil is reading 53, and the outside reads 54.
Before I cold crash the lager in the fridge, I'm going to try and bring the temp down as much as I can using this little bugger first and see how far I can bring it down. As I don't see many people posting anything about the temps they've gotten from it. So I thought I'd make some attempts to show what it can do and maybe Anvil Brewing might take note and send me a nice 10.5 foundry as a thank you :D haha. (wishful thinking, I know, but I can dream).

I enjoy the tinkering about on this stuff, trying to find something that works as efficiently as possible. It might mean some extra cost, but my thinking is if I spend the extra money now and figure out the best way to get the little Anvil coil cooling as good as it can, then hopefully anyone else who buys one and doesn't know the best way to set it up for cooling, can find this info and use it and save themselves some money.

I'll leave the items in my cart for a few more days and if there's no other suggestions, I'll put the order in and see how it all turns out when it gets here :D
 
Does the insulation around the tubes make much difference to the water temp when it's moving through? Or is it more of a extra mile thing to try and help mitigate as much temp change in the water going into the coil as possible?
Hey, I am not criticizing; I am here to learn too! I can’t tell you how much I appreciate what I have learned from the guys here. I enjoy the back& forth challenge of ideas/procedures. I think it’s good to be challenged to defend yourself; makes you really think things through.

As far as the insulation on the tubing goes, it came with the kit, so I used it. It’s used on the supply to the coil, but not the return. I’m thinking about shortening up the lines a bit and using it on both. I believe you’re in AZ. The closest I have been to AZ is Four Corners, so yeah, one foot in AZ! 🤣
Here, in the South, we have a humidity issue that is not the case there. The thing I remember most about the southwest, is stepping out of the vehicle at Four Corners and feeling moisture being sucked out of my eyeballs! That was a totally foreign experience for someone raised in the Carolinas. The issue I have with the uninsulated line is that it sweats condensate on the floor. Anything cold here sweats in the summertime; even the taps on my kegerator!

Keep is posted on your progress and I hope that it all goes well! Cheers! 🍻
 
Hey, I am not criticizing; I am here to learn too! I can’t tell you how much I appreciate what I have learned from the guys here. I enjoy the back& forth challenge of ideas/procedures. I think it’s good to be challenged to defend yourself; makes you really think things through.
Oh, no, I wasn't feeling criticized. Just wanted to explain what I had on hand with regards to the pumps. Actually after using the bigger sump pump, I think it works better to be honest. The smaller pumps seemed to switch on and run for about 5 minutes before the temp went back down to 53 at the coil. This bigger one runs for approximately 30 seconds, and then shuts off again. Coil temp drops down to 52.8. Was just watching it do it a sec ago while changing out my iced water containers and gel packs. (i try to keep the water temp in the cooler at about 38-39 so by the time I get around to switching out the containers, the temp is between 45-49.
As far as the insulation on the tubing goes, it came with the kit, so I used it. It’s used on the supply to the coil, but not the return. I’m thinking about shortening up the lines a bit and using it on both. I believe you’re in AZ. The closest I have been to AZ is Four Corners, so yeah, one foot in AZ! 🤣
Here, in the South, we have a humidity issue that is not the case there. The thing I remember most about the southwest, is stepping out of the vehicle at Four Corners and feeling moisture being sucked out of my eyeballs! That was a totally foreign experience for someone raised in the Carolinas.
:D I feel that feeling almost every day I step outside. I've lived here for 24 years and moved over from England. And I've still never gotten used to it.
The issue I have with the uninsulated line is that it sweats condensate on the floor. Anything cold here sweats in the summertime; even the taps on my kegerator!

Keep is posted on your progress and I hope that it all goes well! Cheers! 🍻
aah, yeah, condensation would be annoying to have to keep worrying about from the tubes.
 
ok, I timed the pump today. 1m 45.6s to go from 54 to 53.
The little ones were definitely longer, but they also take up less space in the cooler. So I'll switch back to them once I get all the tubing redone with the bulkheads and such all set up.
 
ok, since I'm planning to cold crash my oktoberfest now, I've decided to put this cooling coil through its paces first. Set the inkbird down to 42 F. Water in the cooler is down to 39 F. Let's see if the outside temp on the FV drops down that far. I'll take a pic if i can later to show what it's at before i stick it in the kegerator to really cool down.
 
ok, the cooling coil temp area hit 47.9 and wasn't dropping much more than that. Seemed to be fighting the beer temp over and over. Maybe if i'd given it more time, it'd of managed it but I needed to get it in the fridge.
However, I'd say that even with that tiny coil, 47.9 in there wasn't half bad. The outer temp was just about 50ish, leaning more towards the 52 mark. So I'd say it works pretty nicely for what it is. I'd be willing to say I could get it lower if i baby sat the water with a constant exchange of ice blocks and maintaining the water temp really low.
Sorry, forgot the pic, had too many things going on.

All in all, I'd say the money i invested was worth it. There's very little effort to maintain the lager yeast fermenting temps and I don't think i'd ever have the patience to let a lager really truly lager for 8 odd weeks or however long it be. Maybe when I have a back log of brews in kegs, then perhaps I can consider lagering them while they're kegged and I can find a fridge to borrow for 8 weeks from someone :D (obviously sans gas and beer lines to prevent unwanted drinkage occurring in said persons house :D).

I can definitely recommend the Anvil coat and the 4 hole rubber stopper setup.
Looking forward to getting this into a keg on Saturday morning and getting into it on Saturday afte..evening :D
 
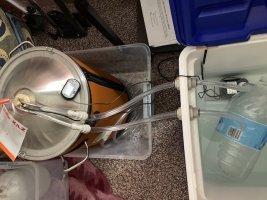
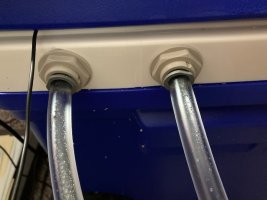
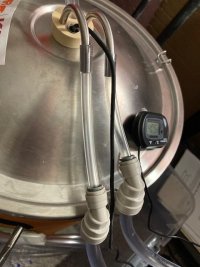
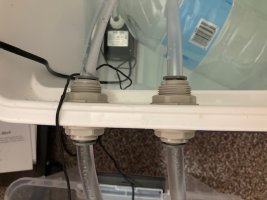
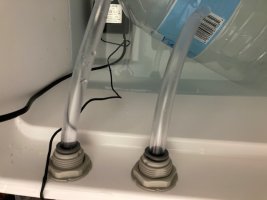
alrighty, I got some work done this afternoon. Added the bulkheads and the john guest connectors.
Not needing to worry about the longer length tubing going through the lid is so much nicer. Need to make another order of these for the second FV

image0(2).jpegimage4.jpegimage3.jpegimage2.jpegimage1(2).jpeg
 
Just another little update:
After cutting out a gap for the pump mains wire and then using some duct tape to tape it in place, and installing the bulkheads, then closing up the holes in the lid with some more duct tape, the cooler seems to keep the water at a much cooler temp for much longer now. I've only been changing the gallon jugs of ice water out once a day now. (this was accidental as we all came down with flu so I didn't feel like getting up to change it). But when i was able to crawl out of bed without feeling like I was going to die, I had a quick peek at the water temp in the cooler and after roughly 24 hours it was still holding at just under 41F.
I know that wasn't the case when i had the tubes running through the lid and didn't have the cut out for the power cord, it was easily up to about 60F after 24 hours then.

So if anyone's thinking of doing holes in the lid then think again. You'll be better off with some bulkheads through the top panel just below the lid. They work a treat
 

Latest posts

Back
Top