- Joined
- Nov 30, 2016
- Messages
- 110
- Reaction score
- 22
I posted this to someones post in general discussion and figured i should post here for future reference. This is a tried and true method i have been using for years that is simple and just works!
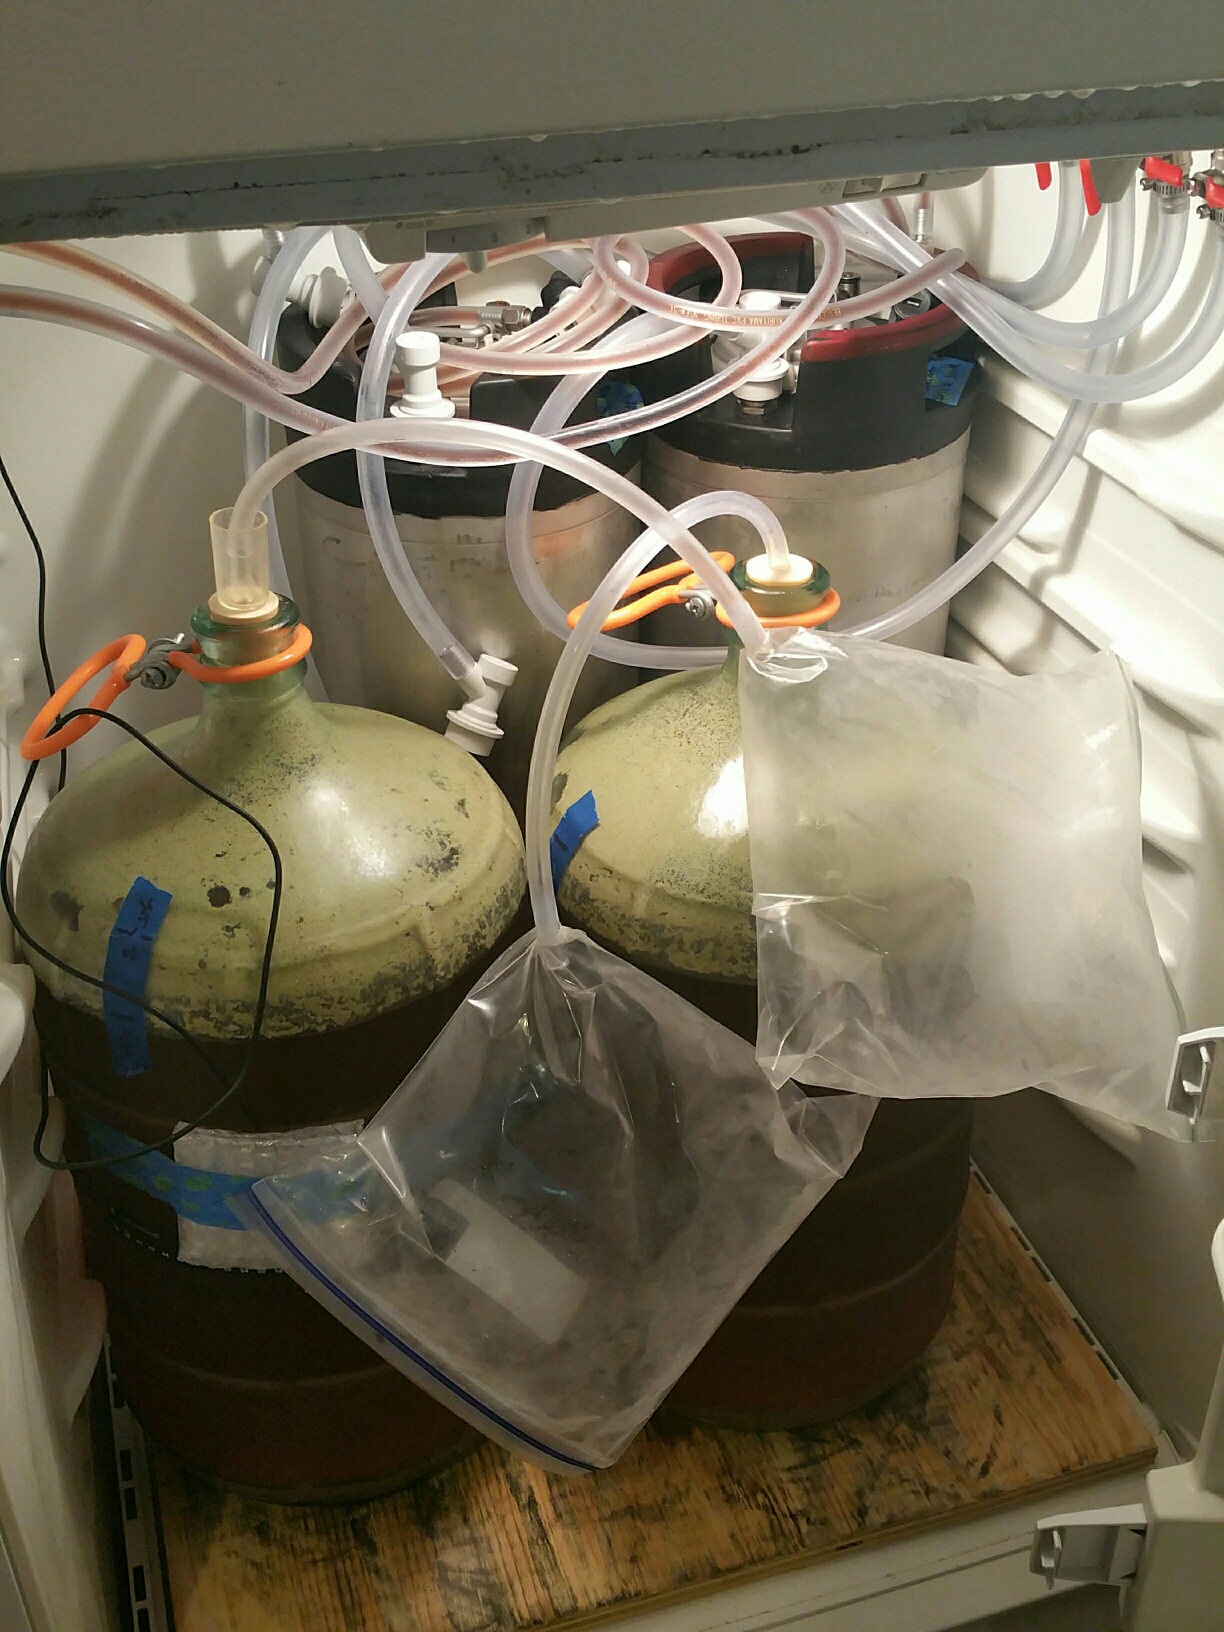
I take no credit for this as i read about this here on HBT several years ago, but those posts are probably hard to find now. It simply calls for using a 1 gallon ziploc bag and some hose. I can take a d-rest beer from 68-70F down to 30F and still have some CO2 in the 1 gallon bag. If i had to guess suckback in my brewbucket seems to be more than my glass carboys to about 3 quarts/liters and this size bag works great.
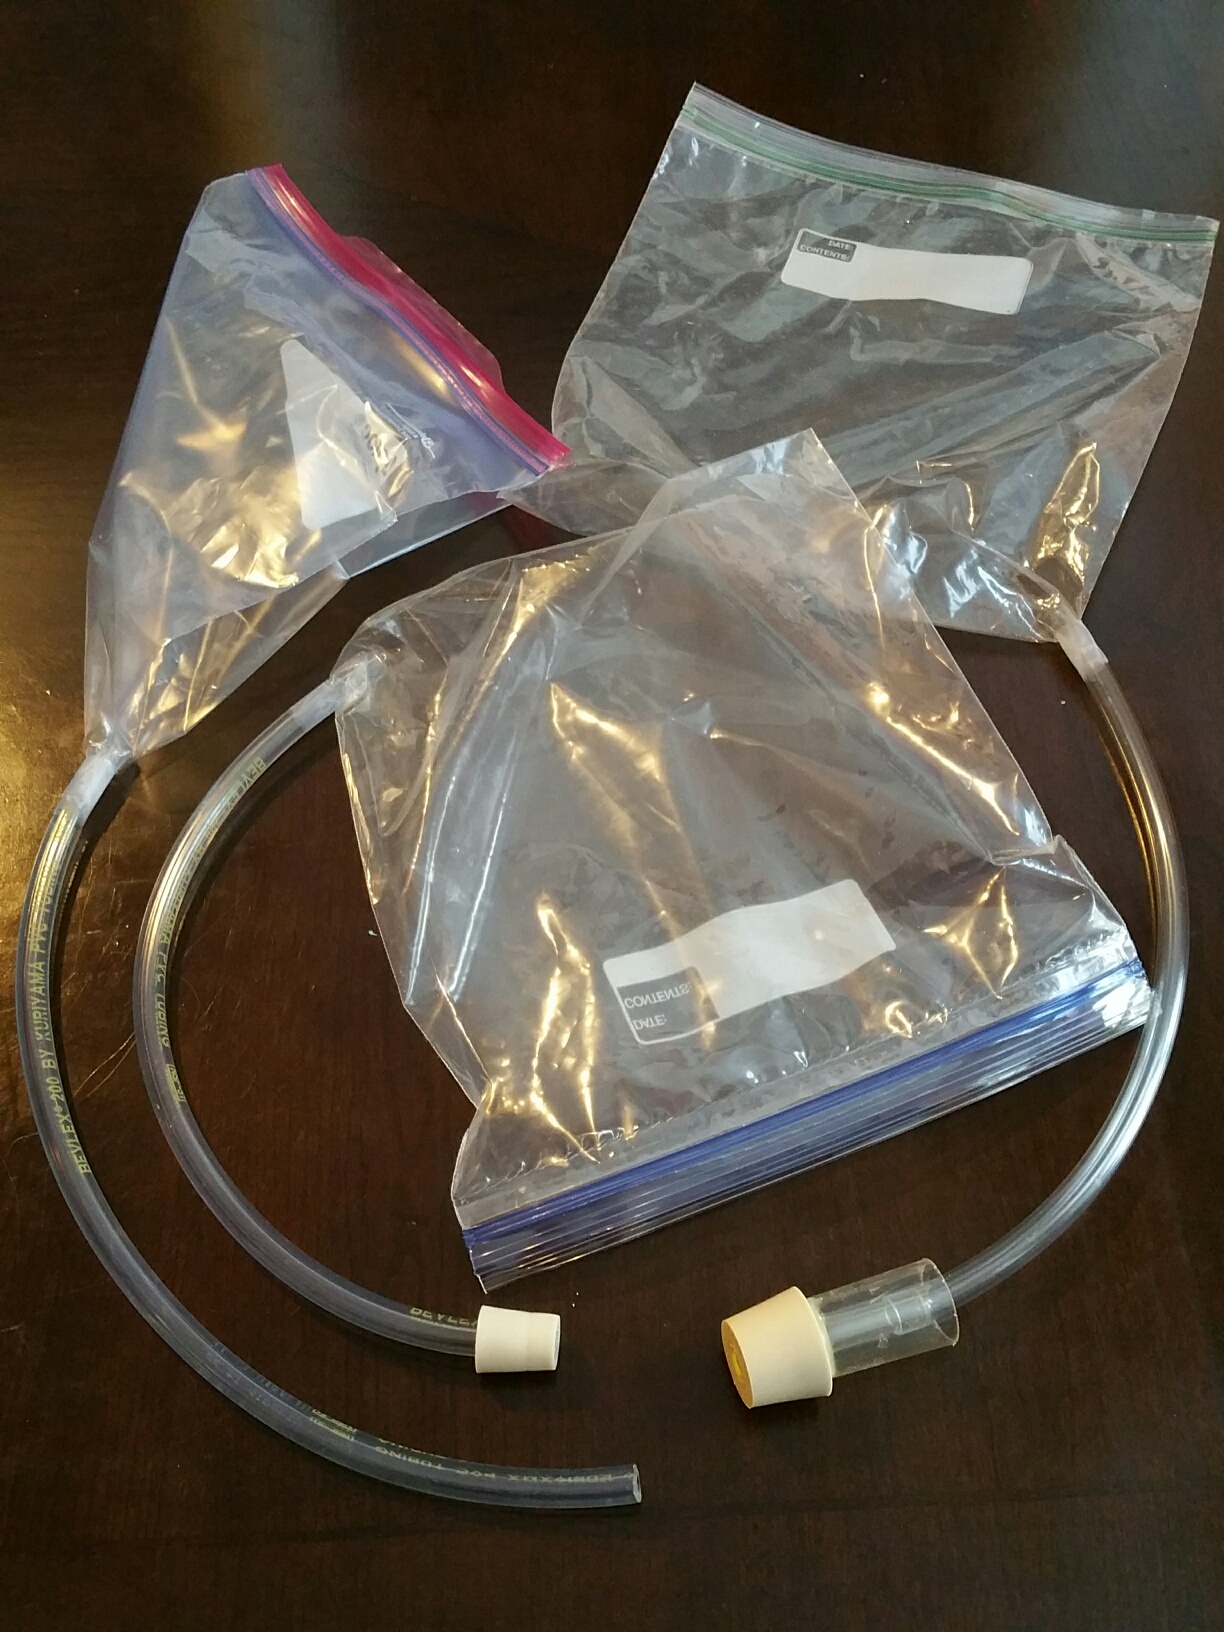
CO2 ziploc stopper bag construction
- You simply take a 1 gallon ziploc bag and trim the corner so that the resultant hole is slightly smaller than the hose you plan to put through. If too big start over and throw away the bag. This step is important to get a good seal. The hose will be sticky so you need to dip the tubing in starsan to lubricate. If done right the plastic bag should stretch a little and be drawn onto the tube as you reach the end of the tube.
- Once it is dry i apply some scotch tape to keep it in place. The scotch tape wont seal, why step 1 is important. I have experimented with different tubing and attaching to OD and ID of airlocks, the tubing is not as secure and have evolved to my current version which simply is inserted directly into the stopper (with starsan as lubricant of course). The bevlex beer line is the ideal tubing for this that has the right OD to fit in stopper.
- Once beer is done and ready for cold crash i inflate the bag with a open CO2 line from the stopper end a couple of times to push out any small amounts of oxygen in the line or the flattened bag.
- On the last, inflate bag until it is a little tight i put my thumb over stopper and walk over to my container of premade starsan i keep around to sanitize random items between brews.
- I dunk the stopper end with my thumb over stopper and momentarily remove my thumb to get sanitizer on the bottom of stopper and in between my thumb. The positive pressure in the bag from step above will burp out a little CO2 so starsan will not enter. If for whatever reason you did not have enough pressure in the bag and some starsan entered put a little pressure on the bag and loosely take thumb off stopper to drain while pointed down.
- I walk over to my fermenter that was preplaced in my cold crash refrigerator and quickly swap airlock with this stopper bag setup.


