gcdowd
Well-Known Member
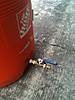
Ahhh mine keeps leaking. The stainless steel washer on the inside is not flush against the plastic, which is how I suspect it's leaking. I tightened everything as best I could, am I missing something?

gcdowd said:Ahhh mine keeps leaking. The stainless steel washer on the inside is not flush against the plastic, which is how I suspect it's leaking. I tightened everything as best I could, am I missing something?
bottlebomber said:Its not supposed to be flush against the plastic on the inside, its supposed to have the "stock" white rubber gasket that came with the cooler between the inside wall and the washer creating a seal. Hopefully that's your only problem
gcdowd said:So the whole rubber seal needs to be on the inside? Right now I have it half in, as it was when I bought it.
bottlebomber said:The white rubber seal should completely cover the hole through the cooler, and the washer clamped against this should seal it. If it doesn't, you you may have a little too much play in the setup and may need to add another washer on the outside. Looking at mine now... I think you need to flip the white rubber piece around so that the smaller side of it is facing outward, not going inside the hole. That's how mine is at least, accidently im sure.


MichaelBrock said:Another common problem is that the nipple is too long and lacks sufficient threads. This keeps the inside nut from applying proper compression to tighten things down (which is why adding the washers helps). When I built mine I ended up needing too many washers so I followed the advice of someone in this thread and went to a shorter nipple that is threaded on its entire length (there is a special name for it but it eludes me; search for "nipple" on the thread). I ended up needing only a single washer on the outside and inside and things tightened down very well. Initially it didn't seem that the nipple would be long enough but it worked.
How long was the brass nipple you got? I fear the shorter nipple will cause my valve handle to hit the side of the cooler so it won't close all the way.
MichaelBrock said:Mine does hit the side of the cooler and I too was worried about that but it does close completely. Unfortunately, with that shorter nipple you won't be able to add another washer on the outside to give it sufficient clearance.
MichaelBrock said:I think the original post includes an o-ring in the line-up and other posters have used it. If you already have one handy no harm in trying it.
bottlebomber said:I don't think the O ring on the outside was functional in my case... the seal was on the inside. If it wasn't that would mean hot wort was contacting the foam inside the cooler. That would be lame
gcdowd said:You put the o-ring on the inside? As I have it now, the only thing separating the inside from outside was the rubber seal that came with the cooler. It doesn't seem like the ss washer was pressed enough against it. My first attempt leaked immediately. I tightened some things and filled half way with water, no leak. Opened the valve, water came out but also leaked under the valve as well, a slow steady drip.


Looks like I will be building this soon.
Waterboy42 said:Finally up to do this with two ten gallon coolers, since they dropped in price. No stainless braids. But I want the versatility to fly sparge. Buying the NB false bottom tomorrow and seeing how it goes.
bottlebomber said:You might want to research/reconsider that... there is a LOT of murmering about that particular item, evidently it kind of sucks. It doesn't really fit the cooler that well to begin with, and after the cooler inevitably warps from putting 170 degree water in it a few times the situation gets worse. This is really the way to go if your not going to invest in a kettle set up.
FYI:
I converted a chest cooler that has a drain on a 45 degree angle to the bottom. To bring the opening closer to the bottom and reduce the dead space I used Watts parts:
A-760 (3/8 FIP x 3/8 FIP) Male to Female thread gender changer
A-186 (3/8 MIP flare x 3/8 MIP) 90 degree adapter
between the A-298 (3/8 FIP x 3/8 hose barb) and the A-786 (3/8 MIP nipple).
I haven't tried it out yet (still trying to get the leaks to stop), but I don't think it will be a problem.
For hose I'm planning on using Watts SBVKG10 (5/8 OD, 3/8 ID) Braided Vinyl Tubing (Home Depot says it's good to 175 degrees F) unless someone thinks that would be a problem...


![Craft A Brew - Safale BE-256 Yeast - Fermentis - Belgian Ale Dry Yeast - For Belgian & Strong Ales - Ingredients for Home Brewing - Beer Making Supplies - [3 Pack]](https://m.media-amazon.com/images/I/51bcKEwQmWL._SL500_.jpg)


