Should have read some of the other pages.
Yup, more than the ones I did...
Should have read some of the other pages.
...Wish I'da read this post before spending $ at Home Depot...
Tutsbrew said:Yup, more than the ones I did...
You know the old "measure twice, cut once" adage? I should've listened to that. I got a 48 qt "Dr Pepper" branded Igloo cooler at a yard sale (which is pretty sweet) and went straight to HD without checking the size of the spigot/hole on my cooler. I bought all 3/8" brass, the hole appears to be 1/2". I guess I get to test their return policy tomorrow.
I followed the OP directions, and had no problems. I haven't brewed AG yet, but my first shipment of grains is on it's way and I have a no leak/inexpensive tun.
Thanks for the great directions!
Anyone know of where I can buy a replacement "seal from plastic spigot of cooler"? Is there something I can use instead of having this?
Has anyone heard of treating brass fittings with a weak vinegar water solution before using the mash tun for the first time?
Cleaning Brass
Some brewers use brass fittings in conjunction with their wort chillers or other brewing equipment and are concerned about the lead that is present in brass alloys. A solution of two parts white vinegar to one part hydrogen peroxide (common 3% solution) will remove tarnish and surface lead from brass parts when they are soaked for 5 minutes or less at room temperature. The brass will turn a buttery yellow color as it is cleaned. If the solution starts to turn green and the brass darkens, then the parts have been soaking too long and the copper in the brass is beginning to dissolve, exposing more lead. The solution has become contaminated and the part should be re-cleaned in a fresh solution.
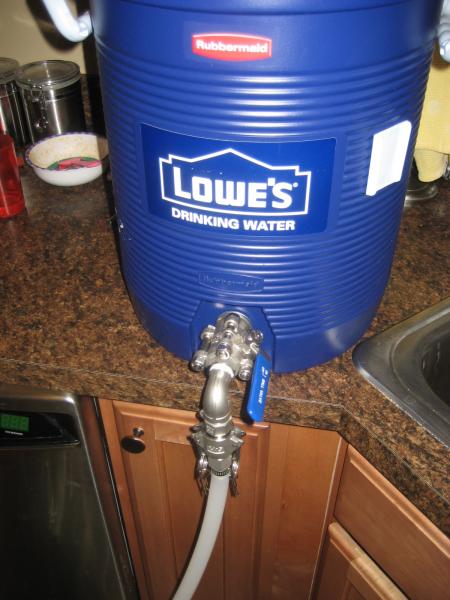
So, I have a question. I'm relatively new to brewing (have 10 brews under my belt, all extract with 1 PM) and am looking to start doing AG asap. Found this DIY and am going to be looking at trying to piece together the parts to build myself a MLT this weekend.
My question is this, in one of the first few pages of the thread it was mentioned that this MLT is best suited for Batch Sparging, is there anyway to make it suitable for fly sparging? at this point I don't even know which way I want to go with sparging as I've never actually Sparged anything yet. I have my extract brewing done to an art and can usually get everything done in just over 3 hours, including cleanup. So, I'm looking to do something that 1) is easy to learn, 2)will help to keep my process streamlined.
All help is appreciated
Thanks,
Brew
ok, so I've been looking at some batch sparging and it looks like I may just go that route for now, as my current setup will be best utilized this way. I don't currently have a brew stand, just a blichman burner and a keggle. I have 3 kegs, just need to cut the tops out of the other 2 and set them up for this great adventure of mine.
one more question, does batch sparging benenfit more from the braided line than from manifold or false bottom? or is it not as reliant on the grain bed settling like fly sparging?
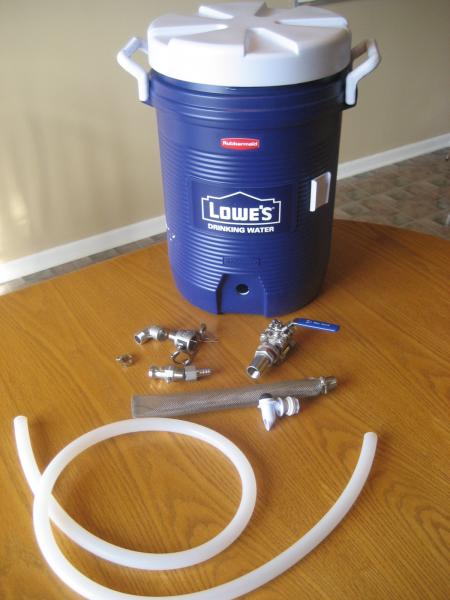
poobaca said:Anybody use the home depot rubbermaid 5 gallon cooler for this? Seems to be one of the cheaper ones at around $22. Some of the cheaper ones I saw though said not to be used with hot liquids.
So, I have a question. I'm relatively new to brewing (have 10 brews under my belt, all extract with 1 PM) and am looking to start doing AG asap. Found this DIY and am going to be looking at trying to piece together the parts to build myself a MLT this weekend.
My question is this, in one of the first few pages of the thread it was mentioned that this MLT is best suited for Batch Sparging, is there anyway to make it suitable for fly sparging? at this point I don't even know which way I want to go with sparging as I've never actually Sparged anything yet. I have my extract brewing done to an art and can usually get everything done in just over 3 hours, including cleanup. So, I'm looking to do something that 1) is easy to learn, 2)will help to keep my process streamlined.
All help is appreciated
Thanks,
Brew
I use a Home Depot rubbermaid 5 and 10 gallon cooler for my mashes. They work fine.
5 gallon will work but you may wanna go bigger now instead of later unless you don't want to do beers over 8% with only grain. You could do bigger beers by adding adjuncts or extract.
In addition to the other responses, I would add that keeping it easy and streamlined is a vote for batch sparging. I fly sparge with the false bottom (extra $25 or $30 right there), and I'm beginning to wonder why I'm doing it this way.My question is this, in one of the first few pages of the thread it was mentioned that this MLT is best for Batch Sparging, is there anyway to make it suitable for fly sparging? at this point I don't even know which way I want to go with sparging as I've never actually Sparged anything yet. I have my extract brewing done to an art and can usually get everything done in just over 3 hours, including cleanup. So, I'm looking to do something that 1) is easy to learn, 2)will help to keep my process streamlined.
All help is appreciated
Thanks,
Brew
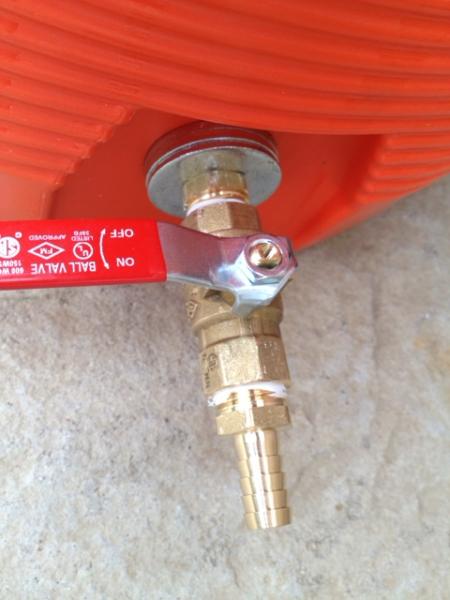
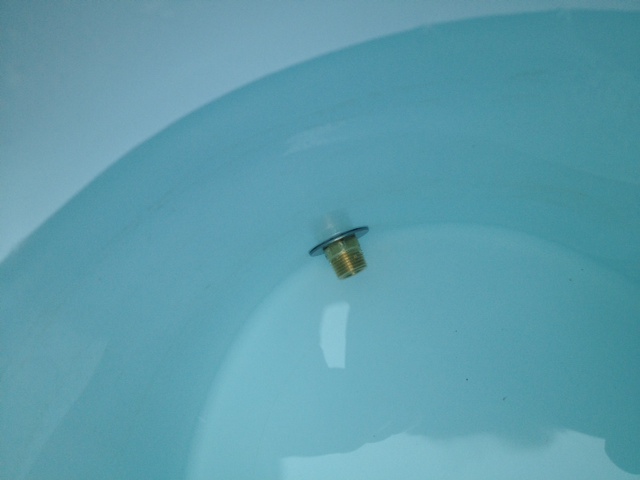
I bought an igloo cooler for my mash tun. The rubber washer that comes with it does not work for a sealer, so I had to buy something else. I actually bought a large faucet washer and cut the inside out a little larger. I did a leak test, and it worked fine.
BTW: Igloo coolers have a larger spigot hole of 1/2 inch. So, the 3/8" ball valve does not fit. You can still make it work by purchasing a 3/8" O-ring. The O-ring will fill the space around the nipple, which actually creates a pretty good seal. Use the rubber faucet washers for the interior and exterior seals. One of the benefits of the igloo cooler is that it does not have insulation where the spigot is. That means if you have any leaks, there's no chance for the wort to get into the inside of the cooler. It also means you will not need the 1-1/2 nipple. A close nipple will work just fine.
J-Wood said:I bought an igloo cooler for my mash tun. The rubber washer that comes with it does not work for a sealer, so I had to buy something else. I actually bought a large faucet washer and cut the inside out a little larger. I did a leak test, and it worked fine.
BTW: Igloo coolers have a larger spigot hole of 1/2 inch. So, the 3/8" ball valve does not fit. You can still make it work by purchasing a 3/8" O-ring. The O-ring will fill the space around the nipple, which actually creates a pretty good seal. Use the rubber faucet washers for the interior and exterior seals. One of the benefits of the igloo cooler is that it does not have insulation where the spigot is. That means if you have any leaks, there's no chance for the wort to get into the inside of the cooler. It also means you will not need the 1-1/2 nipple. A close nipple will work just fine.
This was the problem I ran into. Do you have a picture of yours? I'd love to see how you set it up.