You are using an out of date browser. It may not display this or other websites correctly.
You should upgrade or use an alternative browser.
You should upgrade or use an alternative browser.
Can Seamer DIY
- Thread starter EspetoHomebrewing
- Start date

Help Support Homebrew Talk:
This site may earn a commission from merchant affiliate
links, including eBay, Amazon, and others.
david.steel67@btinternet.
New Member
will you be selling this item as would be very interested in getting on
david.steel67@btinternet.
New Member
will you be selling these if so how much will they beHi again!
New support piece mounted. It has 2 bearings per axis and more density and x/y reinforcement:
View attachment 763582
The looseness has been removed. The spin of the can is not perfectly circular due to the base piece, but it seems that it does not affect the closing.
View attachment 763583
And here we have the final result!
View attachment 763584
- Joined
- Oct 6, 2017
- Messages
- 1,703
- Reaction score
- 988
He hasn't been here since April so I wouldn't expect a response.
will you be selling these if so how much will they be
EspetoHomebrewing
Member
- Joined
- Mar 12, 2022
- Messages
- 11
- Reaction score
- 37
Hi guys,
First of all, sorry for the delay and being disconnected all this time. I started this project last year, and since then my life turned very busy.
I can share with you the final design (or at least the first one fully functional). My thoughts were to share a step by step process, but unfortunately during the design I lost all the photos made, so I'll try to explain how to mount it and share the parts with you.
First, a picture of how it is finally:

The STL files to be printed:
I recommend to print with a good quality pla filament and if possible a high infill percentage.
So, the only parts you need to buy are the seamer wheels:
https://es.aliexpress.com/item/4001...t_main.15.30bc194dXymPQh&gatewayAdapt=glo2esphttps://es.aliexpress.com/item/4001...t_main.14.30bc194dXymPQh&gatewayAdapt=glo2espThese wheels are different, you need both, 1st and 2nd op.
Apart of that, you would need 5 22/8mm bearings ,3 hexagon screws (8mm diameter)


At least one of them 80mm long (or more).
The mount is very simple, just keep in mind to introduce every bearing in its hole and calibrate the height of the wheels and the top plastic piece with some rings, like the following:


Some tips:
- I recommend to use a screwdriver instead of a drill, to control speed which must be slow or medium to control de seam process
- First seam must be done from soft to hard slowly, but finishing hard enough to be sure is perfectly seamed. Patience, you will waste a lot of beer while you get the perfect can XD.
-Second seam must be done soft, it's very common to broke the can in this process, so be careful. It's just an aesthetic seam.
-Take your time. This is not an Oktober Design machine
I have a lot of movement and vibration on the spin, but I'm trying to fix it for future versions. If you control the speed of the screwdriver and control the strength, it works fine. I'll try to update the design for v2.0
I hope you can enjoy it soon and share your own. I expect to upload a video soon, but in the meanwhile you can see some of them in my Instagram profile.
See you soon ( hope less than a year)
Inst: https://www.instagram.com/s/aGlnaGx...59546555346028_4818335541&igshid=YmMyMTA2M2Y=
First of all, sorry for the delay and being disconnected all this time. I started this project last year, and since then my life turned very busy.
I can share with you the final design (or at least the first one fully functional). My thoughts were to share a step by step process, but unfortunately during the design I lost all the photos made, so I'll try to explain how to mount it and share the parts with you.
First, a picture of how it is finally:
The STL files to be printed:
I recommend to print with a good quality pla filament and if possible a high infill percentage.
So, the only parts you need to buy are the seamer wheels:
https://es.aliexpress.com/item/4001...t_main.15.30bc194dXymPQh&gatewayAdapt=glo2esphttps://es.aliexpress.com/item/4001...t_main.14.30bc194dXymPQh&gatewayAdapt=glo2espThese wheels are different, you need both, 1st and 2nd op.
Apart of that, you would need 5 22/8mm bearings ,3 hexagon screws (8mm diameter)
At least one of them 80mm long (or more).
The mount is very simple, just keep in mind to introduce every bearing in its hole and calibrate the height of the wheels and the top plastic piece with some rings, like the following:
Some tips:
- I recommend to use a screwdriver instead of a drill, to control speed which must be slow or medium to control de seam process
- First seam must be done from soft to hard slowly, but finishing hard enough to be sure is perfectly seamed. Patience, you will waste a lot of beer while you get the perfect can XD.
-Second seam must be done soft, it's very common to broke the can in this process, so be careful. It's just an aesthetic seam.
-Take your time. This is not an Oktober Design machine
I have a lot of movement and vibration on the spin, but I'm trying to fix it for future versions. If you control the speed of the screwdriver and control the strength, it works fine. I'll try to update the design for v2.0
I hope you can enjoy it soon and share your own. I expect to upload a video soon, but in the meanwhile you can see some of them in my Instagram profile.
See you soon ( hope less than a year)
Inst: https://www.instagram.com/s/aGlnaGx...59546555346028_4818335541&igshid=YmMyMTA2M2Y=
Last edited:
Looks awesome. Thanks for sharing.


$7.79 ($7.79 / Count)
Craft A Brew - LalBrew Voss™ - Kveik Ale Yeast - For Craft Lagers - Ingredients for Home Brewing - Beer Making Supplies - (1 Pack)
Craft a Brew


$27.29 ($13.64 / Count)
$41.99 ($21.00 / Count)
2 Pack 1 Gallon Large Fermentation Jars with 3 Airlocks and 2 SCREW Lids(100% Airtight Heavy Duty Lid w Silicone) - Wide Mouth Glass Jars w Scale Mark - Pickle Jars for Sauerkraut, Sourdough Starter
Qianfenie Direct


![Craft A Brew - Safale S-04 Dry Yeast - Fermentis - English Ale Dry Yeast - For English and American Ales and Hard Apple Ciders - Ingredients for Home Brewing - Beer Making Supplies - [1 Pack]](https://m.media-amazon.com/images/I/41fVGNh6JfL._SL500_.jpg)
$6.95 ($17.38 / Ounce)
$7.47 ($18.68 / Ounce)
Craft A Brew - Safale S-04 Dry Yeast - Fermentis - English Ale Dry Yeast - For English and American Ales and Hard Apple Ciders - Ingredients for Home Brewing - Beer Making Supplies - [1 Pack]
Hobby Homebrew


$39.22 ($39.22 / Count)
Brewer's Best Home Brew Beer Ingredient Kit - 5 Gallon (Mexican Cerveza)
Amazon.com


$53.24
1pc Hose Barb/MFL 1.5" Tri Clamp to Ball Lock Post Liquid Gas Homebrew Kegging Fermentation Parts Brewer Hardware SUS304(Liquid Hose Barb)
yunchengshiyanhuqucuichendianzishangwuyouxiangongsi


$20.94
$29.99
The Brew Your Own Big Book of Clone Recipes: Featuring 300 Homebrew Recipes from Your Favorite Breweries
Amazon.com


$53.24
1pc Hose Barb/MFL 1.5" Tri Clamp to Ball Lock Post Liquid Gas Homebrew Kegging Fermentation Parts Brewer Hardware SUS304(Liquid Hose Barb)
Guangshui Weilu You Trading Co., Ltd

$176.97
1pc Commercial Keg Manifold 2" Tri Clamp,Ball Lock Tapping Head,Pressure Gauge/Adjustable PRV for Kegging,Fermentation Control
hanhanbaihuoxiaoshoudian


$22.00 ($623.23 / Ounce)
AMZLMPKNTW Ball Lock Sample Faucet 30cm Reinforced Silicone Hose Secondary Fermentation Homebrew Kegging joyful
无为中南商贸有限公司


$10.99 ($31.16 / Ounce)
Hornindal Kveik Yeast for Homebrewing - Mead, Cider, Wine, Beer - 10g Packet - Saccharomyces Cerevisiae - Sold by Shadowhive.com
Shadowhive


$33.95
Five Star - 6022b_ - Star San - 32 Ounce - High Foaming Sanitizer
Bridgeview Beer and Wine Supply


$172.35
2 Inch Tri Clamp Keg Manifold With Ball Lock Posts, Pressure Gauge, PRV (0-30 PSI) – Homebrew, Fermentation, Kegging System
wuhanshijiayangzhiyimaoyiyouxiangongsi


$58.16
HUIZHUGS Brewing Equipment Keg Ball Lock Faucet 30cm Reinforced Silicone Hose Secondary Fermentation Homebrew Kegging Brewing Equipment
xiangshuizhenzhanglingfengshop


Thank you for sharing! I got a set of seamer wheels from morebeer and would like to try this. I have a project on the 3d printer now but will get one of these going when that is done. I just need to get some cans now!
DefiantTurtle
New Member
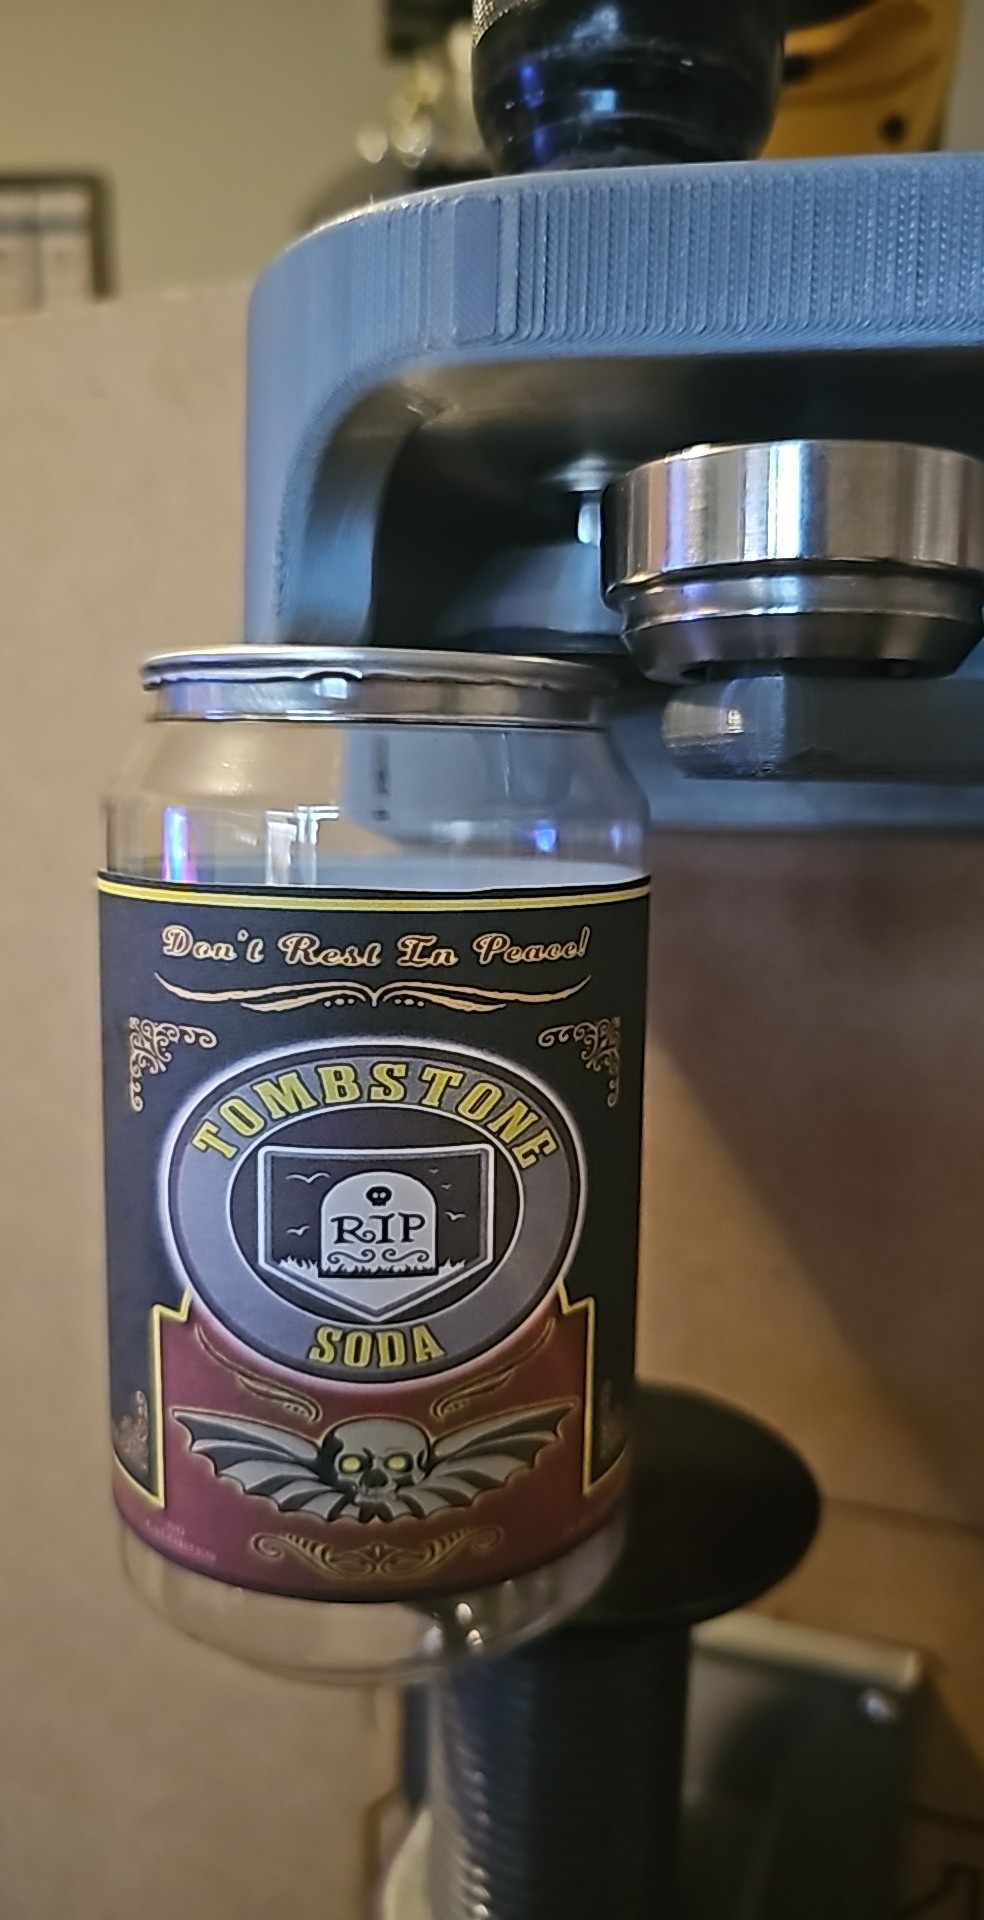
Hi everyone, I also took a stab at this project based on the ideas in this thread. I didn't want to post anything until I had confirmed that it can reliably seal cans. I have everything mounted to 4080 extrusion, and the platform mechanism is taken from Liero's project. I made some significant changes to the parts originally provided by EspetoHomebrewing. The rollers are individually adjustable on the lever now so that you can fine tune the height. The platform bearing uses the original cannular platform 2-piece bearing since it's only about $5. I did end up buying a B64 cannular chuck also, since it made the sealing action a lot more repeatable. All told, this project cost me a spool of filament, $100 for the rollers + bearing + B64 chuck, and another $75 for the aluminum extrusion. I also designed a mount for my nukatap counterpressure filler so that I could use the back of the aluminum extrusion as a can/counterpressure bottle filler. That way, you are able to fill and seal all on the same tower. I have some more tweaks to the files that I need to do in order to prevent some slight wooling on the can, but everything works quite well and the seals hold carbonation. I will make a full write up and post all the files when it is done.
Here is a picture of a sealed can on the system, just as a teaser") Thanks everyone for the inspiration and prior work on this project.
Thanks everyone for the inspiration and prior work on this project.
Here is a picture of a sealed can on the system, just as a teaser
Thanks everyone for the inspiration and prior work on this project.Attachments

Hi, is it possible to upload everything needed to do it your way. Blueprints, purchased items, generally the overall build.Hi everyone, I also took a stab at this project based on the ideas in this thread. I didn't want to post anything until I had confirmed that it can reliably seal cans. I have everything mounted to 4080 extrusion, and the platform mechanism is taken from Liero's project. I made some significant changes to the parts originally provided by EspetoHomebrewing. The rollers are individually adjustable on the lever now so that you can fine tune the height. The platform bearing uses the original cannular platform 2-piece bearing since it's only about $5. I did end up buying a B64 cannular chuck also, since it made the sealing action a lot more repeatable. All told, this project cost me a spool of filament, $100 for the rollers + bearing + B64 chuck, and another $75 for the aluminum extrusion. I also designed a mount for my nukatap counterpressure filler so that I could use the back of the aluminum extrusion as a can/counterpressure bottle filler. That way, you are able to fill and seal all on the same tower. I have some more tweaks to the files that I need to do in order to prevent some slight wooling on the can, but everything works quite well and the seals hold carbonation. I will make a full write up and post all the files when it is done.
Here is a picture of a sealed can on the system, just as a teaser
FloppyKnockers
Well-Known Member
All you need is in post #35Hi, is it possible to upload everything needed to do it your way. Blueprints, purchased items, generally the overall build.
paulywill
Member
- Joined
- Mar 7, 2023
- Messages
- 6
- Reaction score
- 4
What application did you use to make the original design? This is amazing project!!!Hi guys,
I'm new to the forum, although I've been following you from the shadows for a long time. First of all, sorry for my bad English, I'm from Spain and I'm a bit oxidated on the Shakespeare language.
I'd like to start in this community sharing with you my new project, a 3D Printed Can Seamer.
My main idea, to save effort in a solid structure, is that the sealer was anchored to the wall, so the wall would be the structure. I've already used this idea whit my counter pressure filler support (I'll make a post ASAP with the design pieces)
So, for now I can tell you, I've been designing the top part main pieces:
View attachment 762456
And printed the most difficult part. The piece that would fit the lid of the can:
View attachment 762457
Apart from screws, nuts and bearings (which I will specify when I check that everything fits), the only metal parts that I cannot print and need to be purchased are the two sealing wheels:
1st Op Roller
2nd Op Roller
View attachment 762458
I'll be back with more updates soon!! Stay tuned!
mawalton910
New Member
- Joined
- Jan 27, 2024
- Messages
- 1
- Reaction score
- 3
I built one based on Post #35.
Yes it is wobbly a bit and I could probably remount perfectly but for my purpose its works amazingly and saved me a crap ton of money for my limited use.
Thank you @EspetoHomebrewing
Yes it is wobbly a bit and I could probably remount perfectly but for my purpose its works amazingly and saved me a crap ton of money for my limited use.
Thank you @EspetoHomebrewing
Attachments
paulywill
Member
- Joined
- Mar 7, 2023
- Messages
- 6
- Reaction score
- 4
@DuncB the platform is self locking (over dead center leverage) ==> also "handsfree"
View attachment 763869
The initial design for the mechanism is from an german homebrew forum, I just adopted it to make it fully printable.
What's the update? Do you have the 3d print files?
Carlos Eduardo Santana
New Member
- Joined
- Mar 23, 2024
- Messages
- 3
- Reaction score
- 1
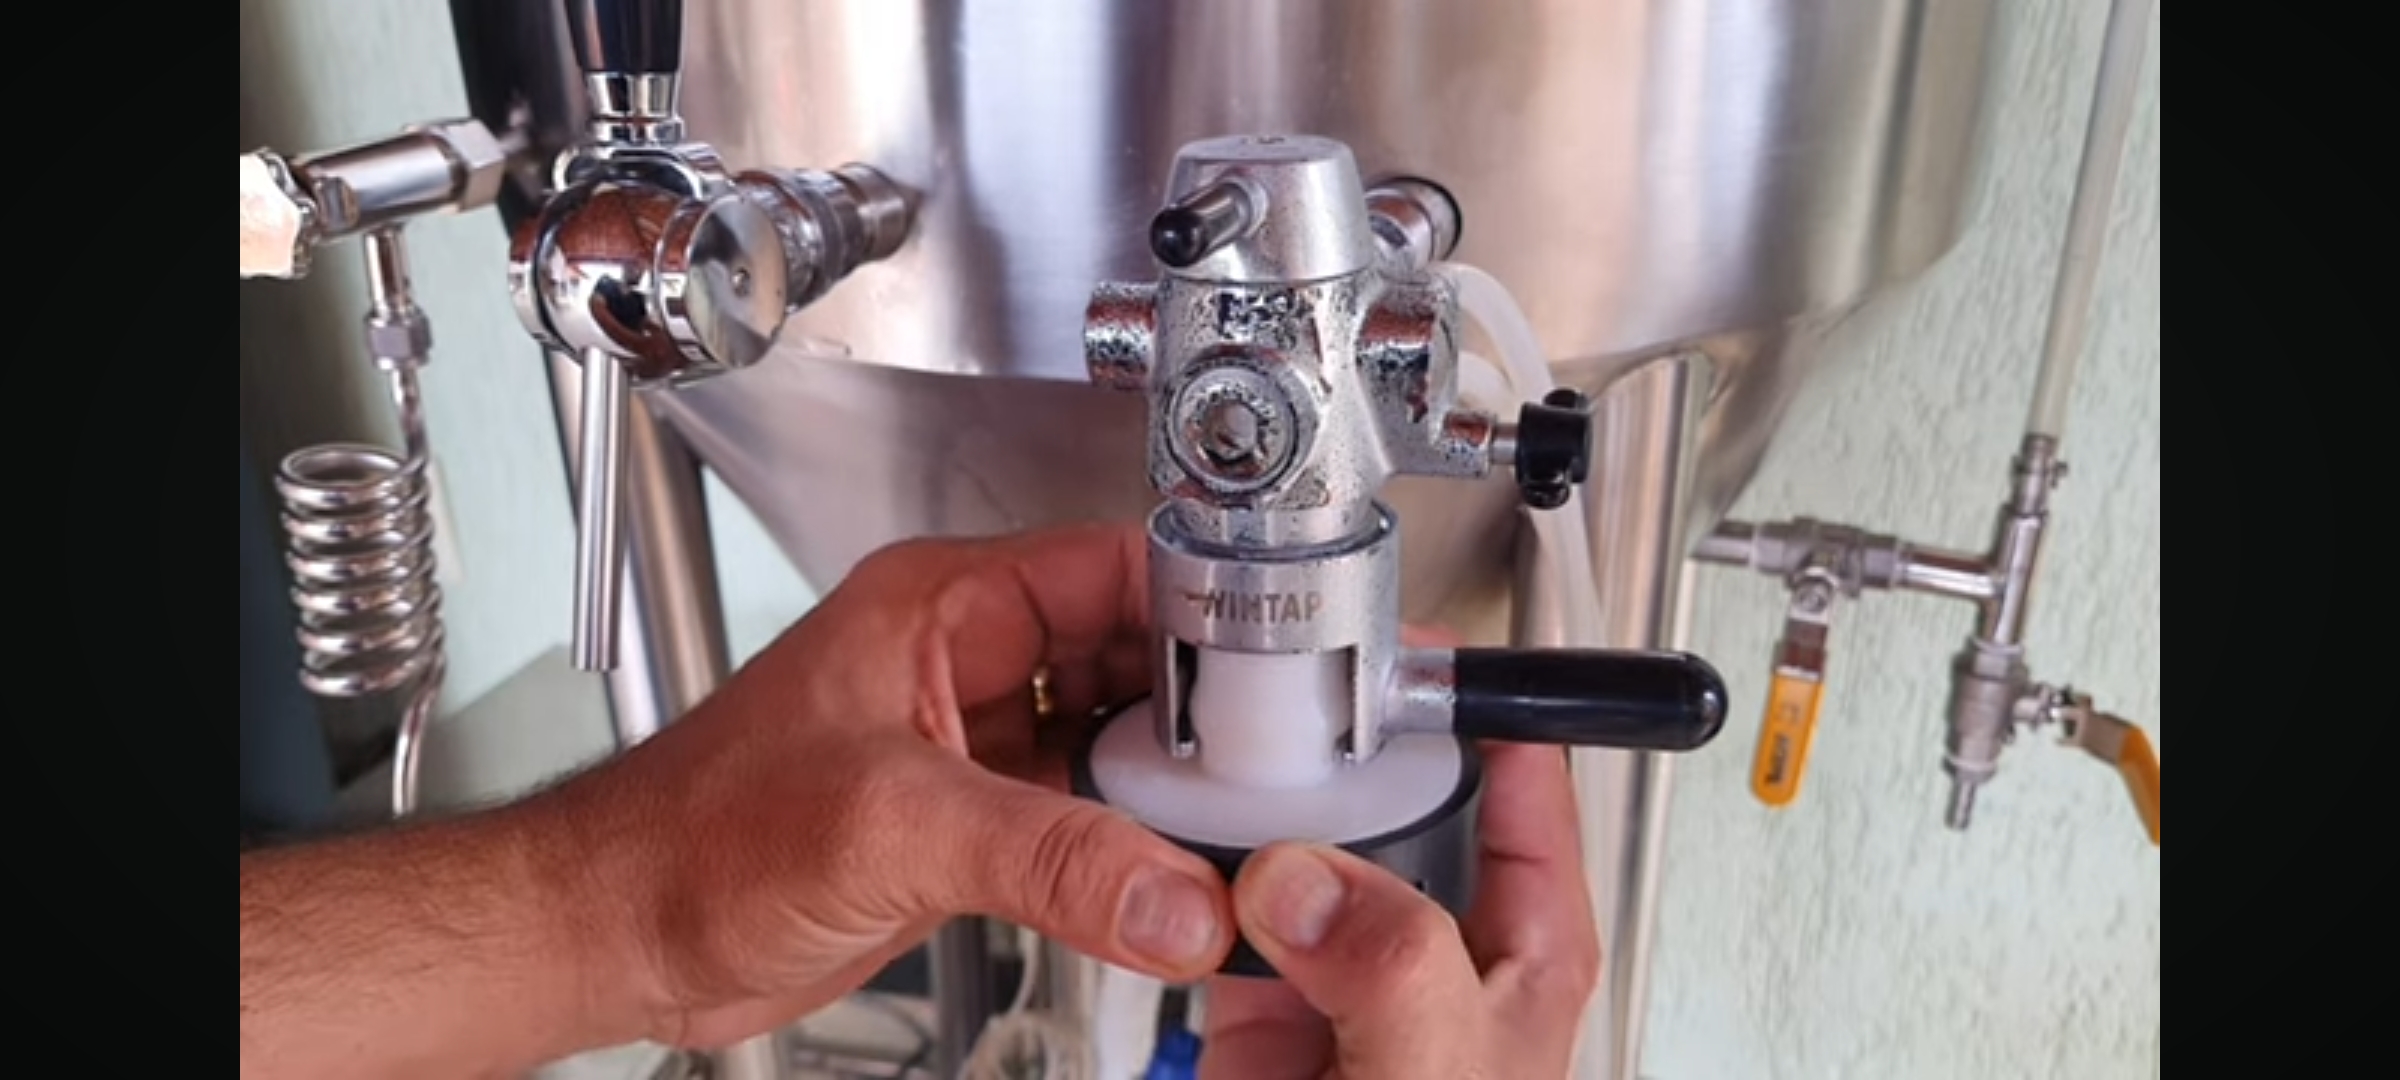
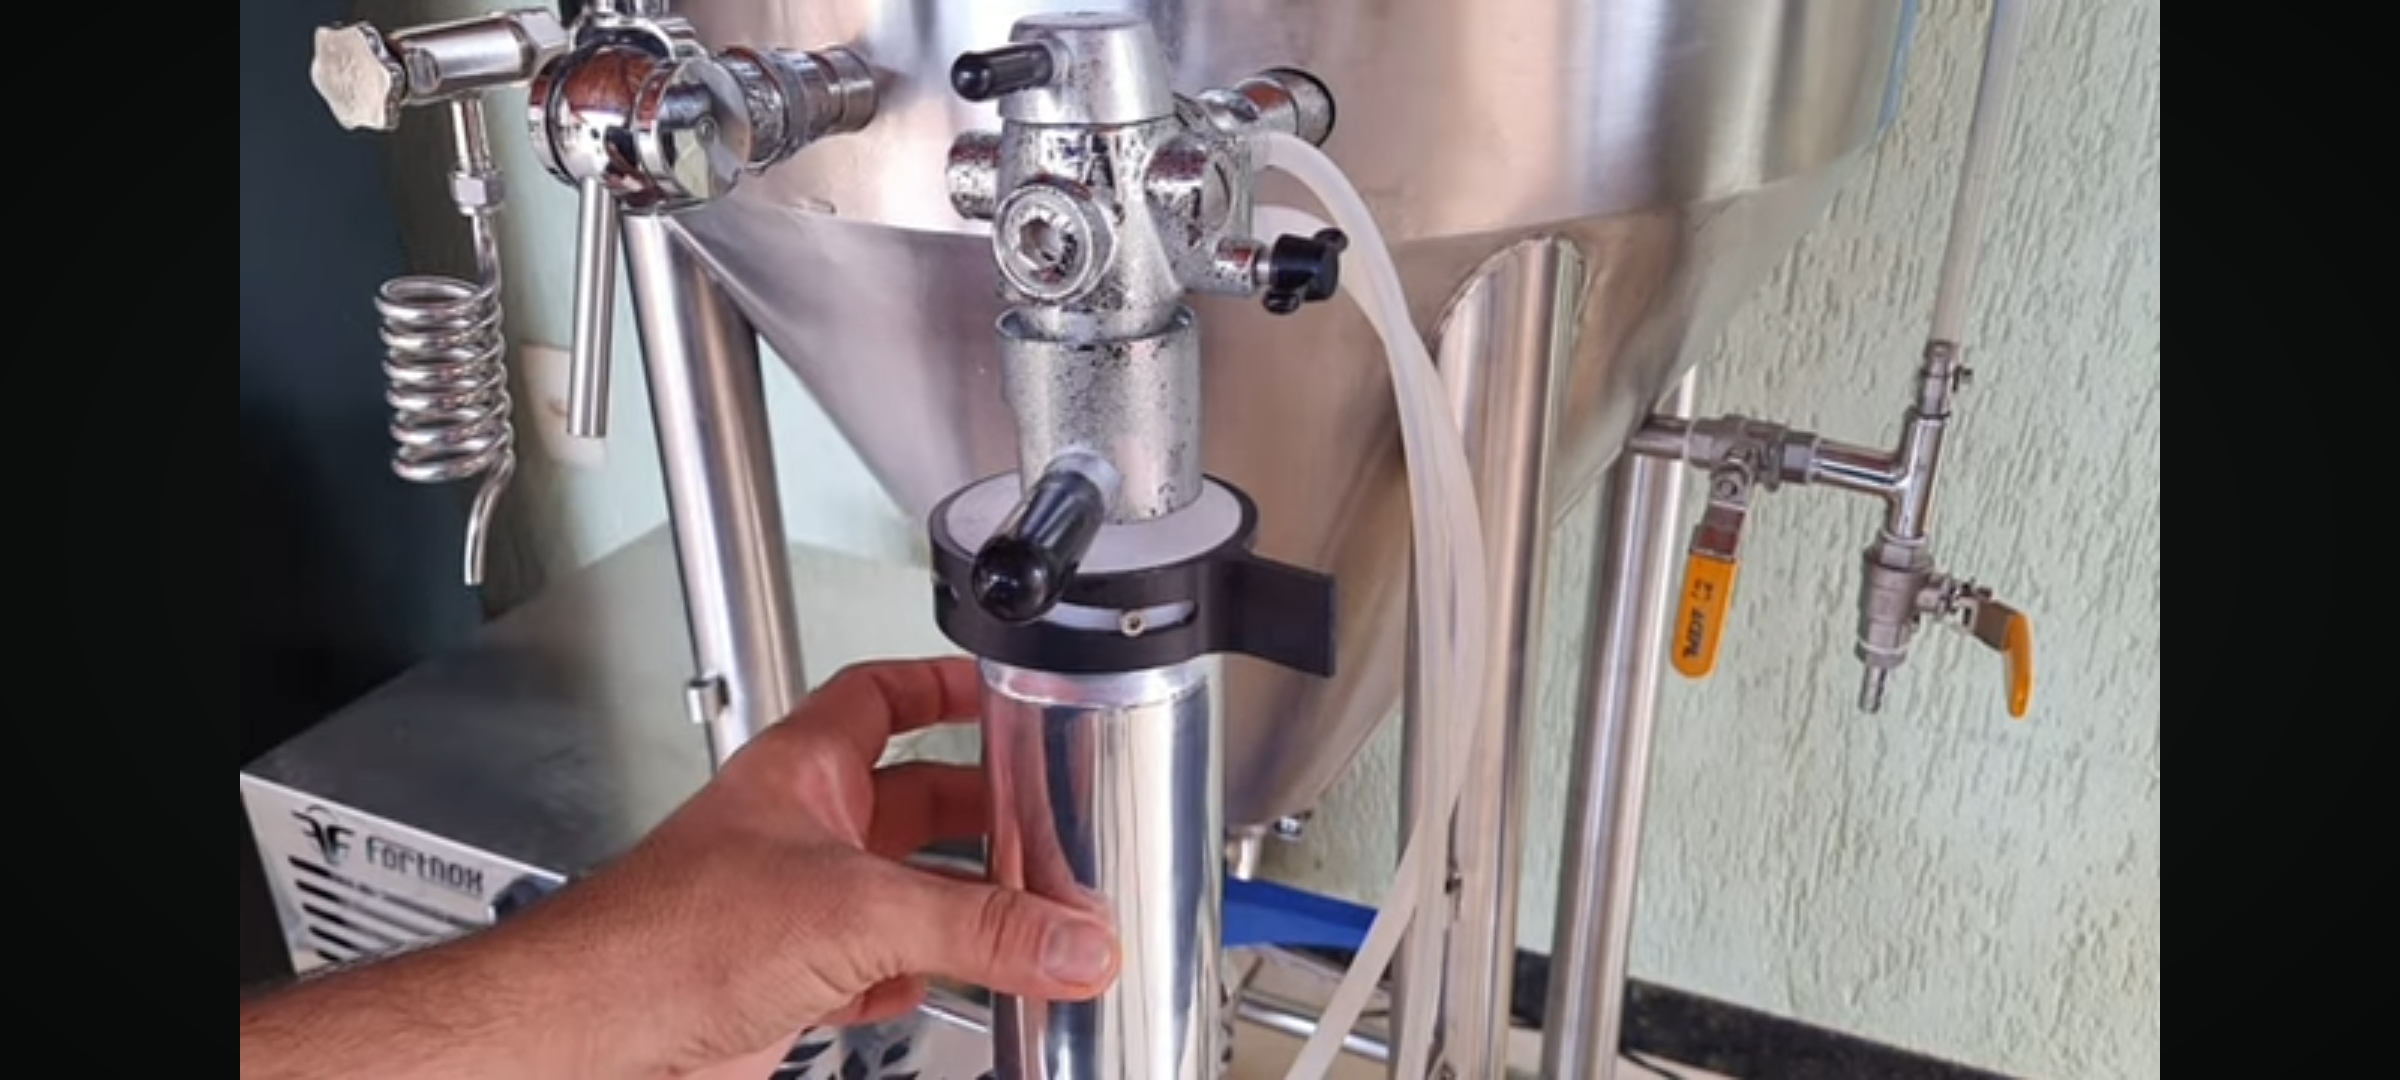
Olá a todos, pensando também no enchimento em contrapressão, alguém já desenvolveu um adaptador para enchimento de latas para o wintap?
Attachments

Carlos Eduardo Santana
New Member
- Joined
- Mar 23, 2024
- Messages
- 3
- Reaction score
- 1
https://drive.google.com/drive/folders/1j7Z9pEWR4MwYaYAjY5ke3JmqANN7M19POlá a todos, pensando também no enchimento em contrapressão, alguém já desenvolveu um adaptador para enchimento de latas para o wintap?
Carlos Eduardo Santana
New Member
- Joined
- Mar 23, 2024
- Messages
- 3
- Reaction score
- 1
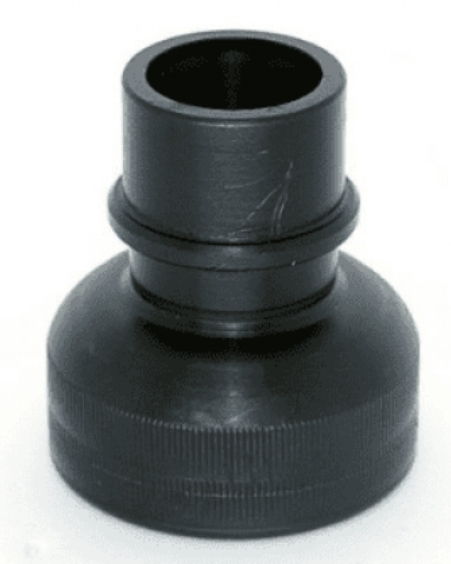
This link has a can lid that could be improved to connect to the wintap.
Kleiton Guerra
New Member
Boa noite. O unico que achei foi o da brewmetal, mas custa mais de 1000 reais e estou procurando desde outro ou como fazer.
Bernhard Richter
New Member
- Joined
- Feb 19, 2025
- Messages
- 1
- Reaction score
- 0
Hi. I also tried to build this machine, but I think the rollers need to be fixed in the y direction. From what I can see in the picture you've attached, it seems like you have a solution for that. Did you modify the 3D print files or did you just drill through the stands for the rollers?Hi everyone, I also took a stab at this project based on the ideas in this thread. I didn't want to post anything until I had confirmed that it can reliably seal cans. I have everything mounted to 4080 extrusion, and the platform mechanism is taken from Liero's project. I made some significant changes to the parts originally provided by EspetoHomebrewing. The rollers are individually adjustable on the lever now so that you can fine tune the height. The platform bearing uses the original cannular platform 2-piece bearing since it's only about $5. I did end up buying a B64 cannular chuck also, since it made the sealing action a lot more repeatable. All told, this project cost me a spool of filament, $100 for the rollers + bearing + B64 chuck, and another $75 for the aluminum extrusion. I also designed a mount for my nukatap counterpressure filler so that I could use the back of the aluminum extrusion as a can/counterpressure bottle filler. That way, you are able to fill and seal all on the same tower. I have some more tweaks to the files that I need to do in order to prevent some slight wooling on the can, but everything works quite well and the seals hold carbonation. I will make a full write up and post all the files when it is done.
Here is a picture of a sealed can on the system, just as a teaser
Resurrecting this post. Do you have the files for the modifications you made? Also, do you still use it and has it continued to work reliably? I have purchased the 202 chuck, adjustable base from the cannular pro, and 2 seaming rollers. I was thinking of making this work with a bench top drill press.Hi everyone, I also took a stab at this project based on the ideas in this thread. I didn't want to post anything until I had confirmed that it can reliably seal cans. I have everything mounted to 4080 extrusion, and the platform mechanism is taken from Liero's project. I made some significant changes to the parts originally provided by EspetoHomebrewing. The rollers are individually adjustable on the lever now so that you can fine tune the height. The platform bearing uses the original cannular platform 2-piece bearing since it's only about $5. I did end up buying a B64 cannular chuck also, since it made the sealing action a lot more repeatable. All told, this project cost me a spool of filament, $100 for the rollers + bearing + B64 chuck, and another $75 for the aluminum extrusion. I also designed a mount for my nukatap counterpressure filler so that I could use the back of the aluminum extrusion as a can/counterpressure bottle filler. That way, you are able to fill and seal all on the same tower. I have some more tweaks to the files that I need to do in order to prevent some slight wooling on the can, but everything works quite well and the seals hold carbonation. I will make a full write up and post all the files when it is done.
Here is a picture of a sealed can on the system, just as a teaser
Similar threads
- Replies
- 7
- Views
- 677
- Replies
- 1
- Views
- 2K

Latest posts
-

-
-

-
-
 I just poured 42 bottles of HB Dunkelweizen down the drain
- Latest: Hoochin'Fool
-

-

-
