• Please visit and share your knowledge at our sister communities:
  • If you have not, please join our official Homebrewing Facebook Group!

    Homebrewing Facebook Group

Brewzilla Gen4 Discussion/Tips Talk

Homebrew Talk

Help Support Homebrew Talk:

This site may earn a commission from merchant affiliate links, including eBay, Amazon, and others.
Does anyone know if you get the 240v BZ gen 4 you can run it on 110v? I've heard the GrainFather (I think it was GF) can if you flip a switch and do a dance you can switch to 110. LOL! I have 240 already for other things, just wondering if I don't go 110 just because if I want to go brew somewhere without 240 then I can. But if it's easily convertible then I'd prefer the time savings when at the house. :)

No, it's wired for 240v.

The Anvil Foundry has a voltage select switch but still has to have a plug of the selected voltage amount wired in, you can't just flip the switch and use the opposite voltage.
 
I received my 110V Gen4 Brewzilla the other day and brewed a simple 5 gallon batch yesterday. I am coming from stovetop BIAB brewing indoors (condo). Here's what I found and had a few issues that can hopefully be resolved:

1. You definitely need to drop the heating element to about 40% while mashing. I initially left it at 100% and was getting heating overshoots up to 8F(!)

2. My mash got stuck quite a bit near the beginning. I was constantly stirring until finally it seemed to be able to drain and flow through the pump well. I don't know why the pump also has a % setting, as it actually seems to turn the pump on and off. You can instead control flow through the ball valve on the recirc arm which seems to make a lot more sense to me.

The bad:

1. When it came time to drain into my fermenter, I used the drain at the bottom, without the pump. It was flowing fine until there was about a gallon left in the bottom of the Brewzilla. No amount of stirring, shaking, or turning the pump on would lodge it loose, so I ended up having to dump that wort. There was a clog at the pump I had to disassemble the bottom tubing and put it all back together. It was fine as I ran through cleaning solution, etc.

I have a hop spider and used it for some of the hop pellets but not all. The video I was watching didn't use any and it seemed fine. I think this was my issue. The false bottom was covered in hop sludge but so was the real bottom, and drain, which was the issue. I will use a hop spider next time, and I will also increase my grain crush size. I only have about 2 oz of hops into the wort directly. My crusher was set below 0.03 so I'll bring it back to that.

2. No physical manual with the device? I had read the PDF earlier but it would be nice to have something to refer to. The manual itself could use some work too as things like setting the heating element % aren't exactly intuitive. There are a number of settings not referenced in the manual.

So with that said, should I have used the pump for getting wort into the fermenter? Through the recirc arm or the drain? Positioning was another thing I will have to consider. The brewzilla itself it tall, plus pulling out the malt pipe makes it a bit ridiculous working at counter height. I wanted it high enough to drain into my fermenter (I use corny kegs for the most part), but next time I was thinking I would have the Brewzilla on the floor and use the recirc arm to drain the wort.

Overall I'm confident I'll be able to improve the performance and there's a lot of nice things about this unit that improve on the stovetop experience, obviously.
 
I received my 110V Gen4 Brewzilla the other day and brewed a simple 5 gallon batch yesterday. I am coming from stovetop BIAB brewing indoors (condo). Here's what I found and had a few issues that can hopefully be resolved:

1. You definitely need to drop the heating element to about 40% while mashing. I initially left it at 100% and was getting heating overshoots up to 8F(!)

2. My mash got stuck quite a bit near the beginning. I was constantly stirring until finally it seemed to be able to drain and flow through the pump well. I don't know why the pump also has a % setting, as it actually seems to turn the pump on and off. You can instead control flow through the ball valve on the recirc arm which seems to make a lot more sense to me.

The bad:

1. When it came time to drain into my fermenter, I used the drain at the bottom, without the pump. It was flowing fine until there was about a gallon left in the bottom of the Brewzilla. No amount of stirring, shaking, or turning the pump on would lodge it loose, so I ended up having to dump that wort. There was a clog at the pump I had to disassemble the bottom tubing and put it all back together. It was fine as I ran through cleaning solution, etc.

I have a hop spider and used it for some of the hop pellets but not all. The video I was watching didn't use any and it seemed fine. I think this was my issue. The false bottom was covered in hop sludge but so was the real bottom, and drain, which was the issue. I will use a hop spider next time, and I will also increase my grain crush size. I only have about 2 oz of hops into the wort directly. My crusher was set below 0.03 so I'll bring it back to that.

2. No physical manual with the device? I had read the PDF earlier but it would be nice to have something to refer to. The manual itself could use some work too as things like setting the heating element % aren't exactly intuitive. There are a number of settings not referenced in the manual.

So with that said, should I have used the pump for getting wort into the fermenter? Through the recirc arm or the drain? Positioning was another thing I will have to consider. The brewzilla itself it tall, plus pulling out the malt pipe makes it a bit ridiculous working at counter height. I wanted it high enough to drain into my fermenter (I use corny kegs for the most part), but next time I was thinking I would have the Brewzilla on the floor and use the recirc arm to drain the wort.

Overall I'm confident I'll be able to improve the performance and there's a lot of nice things about this unit that improve on the

I also had my first brew on the Gen 4 this weekend so I'll add on to this.

Heat: I filled the unit all the way to the top so I could heat my mash and sparge water together. Then drained off the sparge water into an insulated cooler before starting to brew. Heating 9+ gallons of water took about 1.5 hrs so you definitely have to plan early to do that. Agree with 40% heating during mash. There were still some swings in temp but more controllable with the heating element turned down.

Pump: I knew that the pump would pulse on and off when the % is lowered from 100% but I am not a big fan of that. I guess I am old school and always thought that constantly turning something on and off will decrease its life span. I plum forgot all about using the ball valve to restrict flow so I ended up leaving the pump at 100% and just turning it on for a few seconds then off every 10 minutes or so. Next time I will definitely use the ball valve.

Boil: Based on a video from MB, I decided to put in a BIAB bag before inserting the malt pipe. There was some grain residue in it when I pulled it out after the mash but not enough to matter so I'll probably skip that next time. The stuff that was in the bag was probably a result of too fine a crush (see next paragragh). I did use a hop spider. There was still a little residue under the false bottom but not enough to clog the pump. I'll continue using the hop spider just for peace of mind.

Crush: coming from BIAB brewing I still had my crush too fine. Will definitely increase the size next time. That along with lots of flaked grains in this batch caused my drain off to take FOREVER. I think a larger crush and adding some rice hulls should help next time.

Manual: There is definitely no manual included but I had printed a copy from online and put in a notebook in the brew shed for reference.

Neoprene jacket: a total bear to get this thing on. The design has the velcro connection seam right under the pump return pipe with the flap that covers the return pipe connected at that same point. I literally thought I was going to break something trying to get it on. I emailed kegland and suggested placing the velcro seam somewhere else and just have the pipe flap as a separate piece that can be added over the pipe with velcro.

Cleaning: this was a breeze. My unit was right next to the sink so I just ran the pump return arm/hose into the sink and could easily use the pump to run cleaner, water and sanitizer through the unit without have to move it at all. I had mine set on an overturned pot so that it was about a foot off the floor and found this to be a good working height.

Transfer: I did use the pump to transfer to the fermenter and that was great. You don't need the Gen 4 to be higher than the fermenter. Just run a hose from the spigot up and into the fermenter. Once I tuned the pump on, it took all of about a minute to empty every drop.

Lastly - be sure you are paying attention to your display screen. Double check often to make sure heat is not on when it should be off and the pump is not running when you disconnect the overflow or open/close any valves, etc. I could see getting in a hurry and creating a mess. Fortunately this did not happen but I was checking things often.

I definitely learned alot. Overall, the brew was a success and with a few tweaks next time will be better.
 
Last edited:
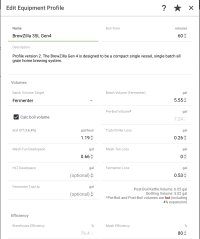
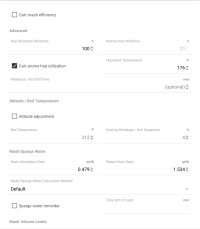
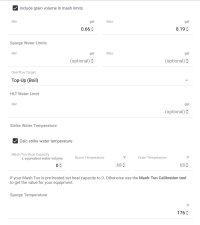
BrewFather has a gen 4 profile for the 35L. Does anyone know how close it is? And are there any other free softwares I should look at?
 

Attachments

  • Screen Shot 2022-11-15 at 5.54.25 PM.jpg
    Screen Shot 2022-11-15 at 5.54.25 PM.jpg
    226.2 KB
  • Screen Shot 2022-11-15 at 5.54.44 PM.jpg
    Screen Shot 2022-11-15 at 5.54.44 PM.jpg
    155.7 KB
  • Screen Shot 2022-11-15 at 5.55.00 PM.jpg
    Screen Shot 2022-11-15 at 5.55.00 PM.jpg
    167.7 KB
BrewFather has a gen 4 profile for the 35L. Does anyone know how close it is? And are there any other free softwares I should look at?
This video has values directly from KegLand and a few of them are a bit different. I wound up using the ones in the video and going for a thinner mash than either.

 
Has anyone been having issues with the boil temperature reading too high and the boil cutting out after 45+ minutes of boiling? I'm on the 110v 35L system. My first boil was over 217F, so I calibrated it with ice water and boiling water and verified those with another thermometer, then the second brew's boil I had the same issue, ~217F.

It also stops boiling for a few seconds, starts again, and repeats this while it's at this wrong boil temp reading. I have the set temperature well above the reading. Maybe it's the relay cycle time of 5 seconds in the settings? I'm not sure what that does exactly since I don't think it's cycling it normally when at 100% heat and below the set temperature. The flame icon stays on the whole time.

I haven't tried PID yet considering the temperature reading seems off. I'm going to going to give it a run with just water to rule out the bottom getting insulated by solids, but I don't think that's the issue because I was recirculating through a hop spider and there wasn't much there when cleaning.
 
BrewFather has a gen 4 profile for the 35L. Does anyone know how close it is? And are there any other free softwares I should look at?
That looks almost exactly the same as the default profile for the 3.1.1, but that is NOT surprising, being that they are very close to the same, with the 4 have a couple upgrades that might affect some of the values. I have a 3.1.1 and the only things I have changed from the default is to use 1.2 qts/lb for mash water and 170F for a hopstand temperature and it works very well for me..
 
Has anyone tried running the pump during the boil? I did my first batch on the 110V 35L today. I kicked on the pump for S&G and the temp went up and it seemed to boil a bit harder. I also got break/hop/mash material under the false bottom. Do I need to consider a BIAB bag and or a hops spider. I have the spider, just didn't use it to see how things went on the maiden voyage.

All in all it went well. @rtstrider seems to be on point with the 6.5gal preboil volume gives you 5.5gal in the fermenter. That's what I saw today. Quite impressed with conversion. OG was supposed to be 1.062 and I wound up with 1.064.
 
Has anyone been having issues with the boil temperature reading too high and the boil cutting out after 45+ minutes of boiling? I'm on the 110v 35L system. My first boil was over 217F, so I calibrated it with ice water and boiling water and verified those with another thermometer, then the second brew's boil I had the same issue, ~217F.

It also stops boiling for a few seconds, starts again, and repeats this while it's at this wrong boil temp reading. I have the set temperature well above the reading. Maybe it's the relay cycle time of 5 seconds in the settings? I'm not sure what that does exactly since I don't think it's cycling it normally when at 100% heat and below the set temperature. The flame icon stays on the whole time.

I haven't tried PID yet considering the temperature reading seems off. I'm going to going to give it a run with just water to rule out the bottom getting insulated by solids, but I don't think that's the issue because I was recirculating through a hop spider and there wasn't much there when cleaning.
Mine didn't read too high today, it read 209ish the whole boil. I calibrated points 1 and 2 after. We'll see what happens with batch #2 In a couple weeks. I'll empty fermenters and try another after Thanksgiving. I did notice it seemed to boil hard, burp and then stop boiling too. I'd be interested in hearing others' opinions.
 
Has anyone been having issues with the boil temperature reading too high and the boil cutting out after 45+ minutes of boiling? I'm on the 110v 35L system. My first boil was over 217F, so I calibrated it with ice water and boiling water and verified those with another thermometer, then the second brew's boil I had the same issue, ~217F.

It also stops boiling for a few seconds, starts again, and repeats this while it's at this wrong boil temp reading. I have the set temperature well above the reading. Maybe it's the relay cycle time of 5 seconds in the settings? I'm not sure what that does exactly since I don't think it's cycling it normally when at 100% heat and below the set temperature. The flame icon stays on the whole time.

I haven't tried PID yet considering the temperature reading seems off. I'm going to going to give it a run with just water to rule out the bottom getting insulated by solids, but I don't think that's the issue because I was recirculating through a hop spider and there wasn't much there when cleaning.
I've had some weird temperature fluctuations. I checked for, and ran, an update after the first batch. That helped out a good bit. It seemed to tighten up some temperature differential values too. For the boil mine reads anywhere from 215-217 during the boil and it runs just fine. It does take a good bit to actually get to a boil though even with the insulator. One thing that's helped also is adjusting the heater element power during the mash. I'll set that anywhere in the 60%-70% range depending on the day and how it's looking with temperature swings. Will be brewing a belgian wit, with fresh picked Satsumas, next weekend. Really curious to see how this handles all of the adjuncts/flaked grains. I expect it to be extra gummy :)
 
I've had some weird temperature fluctuations. I checked for, and ran, an update after the first batch. That helped out a good bit. It seemed to tighten up some temperature differential values too. For the boil mine reads anywhere from 215-217 during the boil and it runs just fine. It does take a good bit to actually get to a boil though even with the insulator. One thing that's helped also is adjusting the heater element power during the mash. I'll set that anywhere in the 60%-70% range depending on the day and how it's looking with temperature swings. Will be brewing a belgian wit, with fresh picked Satsumas, next weekend. Really curious to see how this handles all of the adjuncts/flaked grains. I expect it to be extra gummy :)
My last batch had 2 lb flaked oats in it and the drain/sparge took forever. Recommend lots of rice hulls
 
My last batch had 2 lb flaked oats in it and the drain/sparge took forever. Recommend lots of rice hulls
Rice hulls are used in every batch for cheap insurance lol I may try running the flaked wheat/oats through the grain mill. I see that's what's recommended here

https://byo.com/article/witbier-style-profile/
"Mill the grains (including the flaked grains, but excluding the rice hulls). Mix the rice hulls into the grain post milling"
 
I ran a test with just water and I think I found the cause of the intermittent bubbling and high temperature reading during the boil. It seems to be steam getting caught under the false bottom. I found a couple of things contribute to it: the pump on with the valve half way open so it's emptying the dead space without sucking much water down, and the angle of the floor the unit is on making the bubbles go towards the temperature probe. I imagine having solids on top of the false bottom will also contribute to it. Interestingly, having the pump totally off or having it on full speed both brought the temps down when testing with water, but I tried both during my brews without much success probably because the trub was blocking some steam from getting up as well as wort from draining down.

After seeing what's causing it, I don't think there's much to worry about.
 
Last edited:
I did some quick PID testing with the 110V unit and these values seemed to work decently for me with 5 gallons of water:

P: 1.0
I: 0.0010
D: 0

I guess the lower power of the 110V unit means the P value should be pretty high. This was just me messing around and having it try to hit a mash temp target starting from a few degrees below the target. This gave me no overshooting with the pump recirculating at a normal mash rate and the lid on. The hysteresis I've been using at ~0.3F because at 0 it seemed like a lot of wear on the relay.
 
Rice hulls are used in every batch for cheap insurance lol I may try running the flaked wheat/oats through the grain mill. I see that's what's recommended here

https://byo.com/article/witbier-style-profile/
"Mill the grains (including the flaked grains, but excluding the rice hulls). Mix the rice hulls into the grain post milling"
I know it may vary based on the types of grains and equipment used, how much rice hulls are most people using in a typical 5 gallon batch of beer?
 
I know it may vary based on the types of grains and equipment used, how much rice hulls are most people using in a typical 5 gallon batch of beer?
I Brew on a 3.1.1 and I don't weigh them, I just throw a handful in for every 3 or so pounds of grain, spaced out as I am adding the grains to the water....
 
I know it may vary based on the types of grains and equipment used, how much rice hulls are most people using in a typical 5 gallon batch of beer?
I've been using around 5% and so far have been getting mixed results. My mash is 1.5 qts per lb so maybe it's a bit too thick for these systems? The issue I've run into is a stuck recirculation. Just put in the grain order for next weekends brew. Can't wait to fire up the Brewzilla...Err....Plug in the Brewzilla...Again ;)
 
I used the 3.1.1. If using s lot of grain, I add a half handful of rice hulls every 3-4 lbs. If the grain is more than can really fit, I split it up into a reiterated mash. And I manually dial down the speed on the pump during the mash until I can visually confirm the liquid level is not rising (the flow rate is different for different mashes).
 
I've been using around 5% and so far have been getting mixed results. My mash is 1.5 qts per lb so maybe it's a bit too thick for these systems? The issue I've run into is a stuck recirculation. Just put in the grain order for next weekends brew. Can't wait to fire up the Brewzilla...Err....Plug in the Brewzilla...Again ;)
I don't think 1.5 qts/pound is the issue. I use 1.2 and don't have problems. As far as stuck recirc, I turn the flow way down to start the mash, then periodically increase it, monitoring the liquid level and insuring it does not increase to a problem level...
 
I don't think 1.5 qts/pound is the issue. I use 1.2 and don't have problems. As far as stuck recirc, I turn the flow way down to start the mash, then periodically increase it, monitoring the liquid level and insuring it does not increase to a problem level...
This is what I used to do with my robobrew 3 only used rice hulls on really sticky mashes with a lot of oats and wheat.
I stopped using the false bottom plate and started using a trubtrapper with the whirlpool.
 
Are you guys dialing down the pump by using percentage where it kicks on and off or by the valve on the recirculation arm? I did not use a hops spider on the first go round but I think I will on the next one because I did get hops material below the false bottom and the pump couldn't pull enough wort through the FB to do a good whirl pool (First time and started after I shut down the boil, should I have started during?). What about a BIAB for mashing? Should I grab one of those? Right now I don't have a mill, maybe that's the route vs the BIAB bag. And do we think the new plate for the false bottom is going to help with the steam accumulation under the false bottom?

LOTS of Qs! LOL!
 
This is what I used to do with my robobrew 3 only used rice hulls on really sticky mashes with a lot of oats and wheat.
I stopped using the false bottom plate and started using a trubtrapper with the whirlpool.
I use the false bottom, but am open to options, got a link for the trubtrapper you use?
 
Are you guys dialing down the pump by using percentage where it kicks on and off or by the valve on the recirculation arm? I did not use a hops spider on the first go round but I think I will on the next one because I did get hops material below the false bottom and the pump couldn't pull enough wort through the FB to do a good whirl pool (First time and started after I shut down the boil, should I have started during?). What about a BIAB for mashing? Should I grab one of those? Right now I don't have a mill, maybe that's the route vs the BIAB bag. And do we think the new plate for the false bottom is going to help with the steam accumulation under the false bottom?

LOTS of Qs! LOL!
I am using a 3/1/1 so my only option is to use the valve. I also throw my hops in commando and I get a little bit below the false bottom, but it does an amazingly good job at stopping it. I also only use the whirlpool after the boil. I usually put the arm with the hose on it and blow backwards through it to clear the pump, then put on the whirlpool arm. No sanitization worries as the wort is at 200+ degrees. I have used a BIAB bag under the malt pipe once, didn't like it, won't do it again. Can't help with the rest..

YMMV

Lon
 
@Teufelhunde

I made one of them after seeing the portly gentleman use one and then the later brewtools trubinator.

First one I used in my robobrew 3 and then a bigger one made for my Guten 70 which is similar in size to brewzilla 65.

https://www.brewtools.us/brewing-system-accessories/7712699/trubinator-s-ø320
https://homebrewingdeal.com/2017/04/11/trub-trapper-review/
https://www.westcoastbrewer.com/hom...w-homebreiwng-device-called-the-trub-trapper/
trub trapper not in production anymore and the trubinator wasn't available in New Zealand. I just bought some fine SS mesh, some silicone U shaped seal and bent it up around a stainless steel bar. Catches the hops very well and a lot of the break as well.
 
New to forum, ebiab, and bewing controls, so I'll lead by pleading ignorance.

I've ordered a 35L Gen4, and I saw in the manual that PID parameters are adjustable.

0. Do you think the integrated temperature sensor a garbage data point, or is it simply an issue of action-response lag? (The following questions assume the latter.)

1. Has anyone attempted to tune the PID system to account for mash system constants?

2. Do the constants change enough from batch to batch that there is no (reasonably) general stable solution?

3. Do the constants change during the mash (eg changes in viscocity) such that stability is hard to maintain?

4. I haven't looked into whether these parameters can be adjusted as part of recipe, but obviously ideal mash parameters will not match ideal boil parameters. Any thoughts?

5. Is this a big problem if you're mashing in at target temperature and maintaining, or is this hitting people after an acid rest or something?

Thanks for any insights and discussion!
 
Last edited:
New to forum, ebiab, and bewing controls, so I'll lead by pleading ignorance.

I've ordered a 35L Gen4, and I saw in the manual that PID parameters are adjustable.

0. Do you think the integrated temperature sensor a garbage data point, or is it simply an issue of action-response lag? (The following questions assume the latter.)

1. Has anyone attempted to tune the PID system to account for mash system constants?

2. Do the constants change enough from batch to batch that there is no (reasonably) general stable solution?

3. Do the constants change during the mash (eg changes in viscocity) such that stability is hard to maintain?

4. I haven't looked into whether these parameters can be adjusted as part of recipe, but obviously ideal mash parameters will not match ideal boil parameters. Any thoughts?

5. Is this a big problem if you're mashing in at target temperature and maintaining, or is this hitting people after an acid rest or something?

Thanks for any insights and discussion!

The system suffers from several design flaws:

https://www.homebrewtalk.com/threads/brewzilla-gen4-discussion-tips-talk.702436/page-5#post-9344414
You can tune the PID:

 
Just finished my second brew and have been having some pretty frustrating issues. This is my first time doing all grain brewing and I’m using the 9 gallon 240V gen 4.

The first brew was an English mild with 9.5 lbs of grain. I used the malt pipe only and the pump kept losing suction causing the temperate to swing wildly as in over 15F greater than the set temperature. I used a large whisk to stir and kept doing this for the hour long mash, recirculating rarely as the pump would almost immediately bind. When I pulled the basked out to sparge, drainage was incredibly slow and took using the whisk to scrape the bottom to get any sort of flow. All in all not a particularly fun experience. Tangentially this beer got stuck at 10.20 (from 10.36) and I’m wondering if the mash issues were the major cause.

Today I feel a little more confident and attempt a Jubelale clones using 17 lb of grain and a bag since my local store wasn’t able to adjust the grind size which didn’t look particularly fine anyways. Same issues with this, maybe a little more flow but obvious signs of the pump losing suction and the same wild temperate swings which I assume are just a reading of the dead space under the grain basket. Same deal as last time all the way until the sparge which was also incredibly slow until I pulled the bag up and pretty good flow started.

Now I know how to use it with a bag, but constantly pulling on the bag for the sparge seems quite tedious and is frustrating considering the $600+ I spent on this.

Has anybody else had these issues and found a good solution?

1.) Use a coarser crush
2.) Use rice hulls
3.) Slow the flow until the grain bed sets, only open the valve 1/4 to 1/2 open

Trade that thing in on a Grainfather or a Braumeister ;)

Watch Gash on YouTube, observe his crush and how he uses rice hulls and slows the flow until the grain bed sets. Of course it doesn't work for him all time either but he plays around with it until it flows!
 
Just finished my second brew and have been having some pretty frustrating issues. This is my first time doing all grain brewing and I’m using the 9 gallon 240V gen 4.

The first brew was an English mild with 9.5 lbs of grain. I used the malt pipe only and the pump kept losing suction causing the temperate to swing wildly as in over 15F greater than the set temperature. I used a large whisk to stir and kept doing this for the hour long mash, recirculating rarely as the pump would almost immediately bind. When I pulled the basked out to sparge, drainage was incredibly slow and took using the whisk to scrape the bottom to get any sort of flow. All in all not a particularly fun experience. Tangentially this beer got stuck at 10.20 (from 10.36) and I’m wondering if the mash issues were the major cause.

Today I feel a little more confident and attempt a Jubelale clones using 17 lb of grain and a bag since my local store wasn’t able to adjust the grind size which didn’t look particularly fine anyways. Same issues with this, maybe a little more flow but obvious signs of the pump losing suction and the same wild temperate swings which I assume are just a reading of the dead space under the grain basket. Same deal as last time all the way until the sparge which was also incredibly slow until I pulled the bag up and pretty good flow started.

Now I know how to use it with a bag, but constantly pulling on the bag for the sparge seems quite tedious and is frustrating considering the $600+ I spent on this.

Has anybody else had these issues and found a good solution?
Like @CleanEmUpIves mentioned, don't run the pump on full. I open the valve 1/8 or so and adjust till I get it right to stop that. I also noticed on the last brew that the top plate was really impeding the flow during sparge. I pulled it and the sparge went way quicker. I may skip the top plate all together the next one and see if that helps during the mash as well.
 
Just finished my second brew and have been having some pretty frustrating issues. This is my first time doing all grain brewing and I’m using the 9 gallon 240V gen 4.

The first brew was an English mild with 9.5 lbs of grain. I used the malt pipe only and the pump kept losing suction causing the temperate to swing wildly as in over 15F greater than the set temperature. I used a large whisk to stir and kept doing this for the hour long mash, recirculating rarely as the pump would almost immediately bind. When I pulled the basked out to sparge, drainage was incredibly slow and took using the whisk to scrape the bottom to get any sort of flow. All in all not a particularly fun experience. Tangentially this beer got stuck at 10.20 (from 10.36) and I’m wondering if the mash issues were the major cause.

Today I feel a little more confident and attempt a Jubelale clones using 17 lb of grain and a bag since my local store wasn’t able to adjust the grind size which didn’t look particularly fine anyways. Same issues with this, maybe a little more flow but obvious signs of the pump losing suction and the same wild temperate swings which I assume are just a reading of the dead space under the grain basket. Same deal as last time all the way until the sparge which was also incredibly slow until I pulled the bag up and pretty good flow started.

Now I know how to use it with a bag, but constantly pulling on the bag for the sparge seems quite tedious and is frustrating considering the $600+ I spent on this.

Has anybody else had these issues and found a good solution?
I ran into these issues on my first two batches. The third one I did went well when doing all of these:
  • Start the pump with the valve closed and slowly crack it open. You'll only want it about 1/3 to 1/2 open at most. If the pump starts making noise, try to adjust the valve a little in either direction. Sometimes having more or less flow helps it reach an equilibrium. If that doesn't work, turn off the pump, open the valve, make damn sure the pump is off (not on and clogged), blow into the tube, close the valve, and repeat these steps.
  • Increase your water to grain ratio. I was doing about 1.5 qt/lb and upped it to 1.75 qt/lb. I think the dead space between the malt pipe and vessel walls makes it thicker than intended. I wouldn't be doing 17lb grain bills until you've worked out these issues.
  • Use rice hulls. I used them in all my batches, so it's hard to say how much they help.
  • Make sure your heating element is only on for short periods of time through heating % or PID. Also make sure your strike temperature is set right and the lid is on for the mash when you're not stirring.
I had tried using a bag around the malt pipe, but it was 90 micron mesh and trapped flour and made dough balls that stopped flow. If you start slow and don't pull all of the fine grain through immediately, it should be able to flow through the recirculation and get trapped on top of the grain bed without using a bag.

When I tried the screen on top of the mash it seemed to compact the grain so I just put it on for the sparge. When mashing I just make sure the hose is positioned so its outlet is at the surface.
 
Back
Top