Pela lógica é isso mesmo, só que nem o Bruno soube responder o pq não funciona mudando ali.
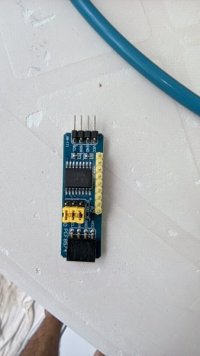
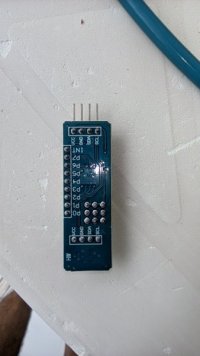
Eu sei que se colocar o PCF8574A pros botões, vai funcionar.
É alguma configuração na biblioteca do PCF no BrewUno, no BMEX a biblioteca é mais antiga se não me engano e se mudar esse parâmetro ele aceita o PCF8574, no BrewUno deve ter alguma restrição na biblioteca mais atual.
Então Mazza, acredito que seu palpile sobre a biblioteca esteja certo, pois fiz um teste com um sketch que faz teste do keypad com o LCD e está funcionando a comunicação perfeitamente(esse sketch e para um keypad 3x4 mas da para testar o 1x4).
As bibliotecas usadas são diferentes da usadas no brewuno.
Código usado...
/* Arduino I2C-Keypad using an I2C_Expander module
Created by Yvan /
Tutorials | Brainy-Bits
This code is in the public domain...
You can: copy it, use it, modify it, share it or just plain ignore it!
Thx!
*/
#include <Keypad_I2C.h> // I2C Keypad library by Joe Young
joeyoung/arduino_keypads
#include <LiquidCrystal_I2C.h> // I2C LCD Library by Francisco Malpartida
https://bitbucket.org/fmalpartida/new-liquidcrystal/wiki/Home
#define lcd_addr 0x27 // I2C address of typical I2C LCD Backpack
#define keypad_addr 0x20 // I2C address of I2C Expander module (A0-A1-A2 dip switch to off position)
// LCD Pins to I2C LCD Backpack - These are default for HD44780 LCD's
#define Rs_pin 0
#define Rw_pin 1
#define En_pin 2
#define BACKLIGHT_PIN 3
#define D4_pin 4
#define D5_pin 5
#define D6_pin 6
#define D7_pin 7
// Create instance for LCD called: i2c_lcd
LiquidCrystal_I2C i2c_lcd(lcd_addr,En_pin,Rw_pin,Rs_pin,D4_pin,D5_pin,D6_pin,D7_pin);
// Define the keypad pins
const byte ROWS = 4;
const byte COLS = 3;
char keys[ROWS][COLS] = {
{'1','2','3'},
{'4','5','6'},
{'7','8','9'},
{'*','0','#'}
};
// Keypad pins connected to the I2C-Expander pins P0-P6
byte rowPins[ROWS] = {0, 1, 2, 3}; // connect to the row pinouts of the keypad
byte colPins[COLS] = {4, 5, 6}; // connect to the column pinouts of the keypad
// Create instance of the Keypad name I2C_Keypad and using the PCF8574 chip
Keypad_I2C I2C_Keypad( makeKeymap(keys), rowPins, colPins, ROWS, COLS, keypad_addr, PCF8574 );
void setup() {
i2c_lcd.begin (16,2); // our LCD is a 16x2, change for your LCD if needed
// LCD Backlight ON
i2c_lcd.setBacklightPin(BACKLIGHT_PIN,POSITIVE);
i2c_lcd.setBacklight(HIGH);
i2c_lcd.clear(); // Clear the LCD screen
I2C_Keypad.begin();
}
void loop() {
// Put value of pressed key on keypad in key variable
char key = I2C_Keypad.getKey();
// Light up key pressed on LCD
switch (key) {
case '1':
i2c_lcd.setCursor(0,0);
i2c_lcd.print(key);
break;
case '2':
i2c_lcd.setCursor(0,1);
i2c_lcd.print(key);
break;
case '3':
i2c_lcd.setCursor(3,0);
i2c_lcd.print(key);
break;
case '4':
i2c_lcd.setCursor(3,1);
i2c_lcd.print(key);
break;
case '5':
i2c_lcd.setCursor(6,0);
i2c_lcd.print(key);
break;
case '6':
i2c_lcd.setCursor(6,1);
i2c_lcd.print(key);
break;
case '7':
i2c_lcd.setCursor(9,0);
i2c_lcd.print(key);
break;
case '8':
i2c_lcd.setCursor(9,1);
i2c_lcd.print(key);
break;
case '9':
i2c_lcd.setCursor(12,0);
i2c_lcd.print(key);
break;
case '0':
i2c_lcd.setCursor(12,1);
i2c_lcd.print(key);
break;
case '*':
i2c_lcd.clear();
break;
case '#':
i2c_lcd.setCursor(15,0);
i2c_lcd.print(key);
break;
}
}




![Craft A Brew - Safale S-04 Dry Yeast - Fermentis - English Ale Dry Yeast - For English and American Ales and Hard Apple Ciders - Ingredients for Home Brewing - Beer Making Supplies - [1 Pack]](https://m.media-amazon.com/images/I/41fVGNh6JfL._SL500_.jpg)


