famouslastworts
Member
Hi there,
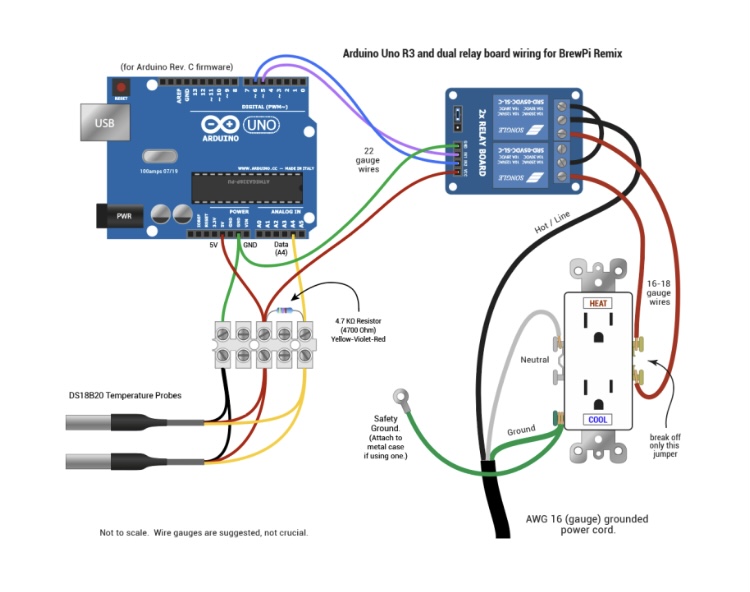
over the last few days I started to assemble my first fermentation controller. Since I’m not a very crafty person I strictly adhered to the brewpiremix.com tutorial and to my surprise everything went smoothly. The software is up and running and the temperature probes are doing their thing as well. Last hurdle I have to take is the high voltage wiringwich is where my situation differs a little from the documentation.
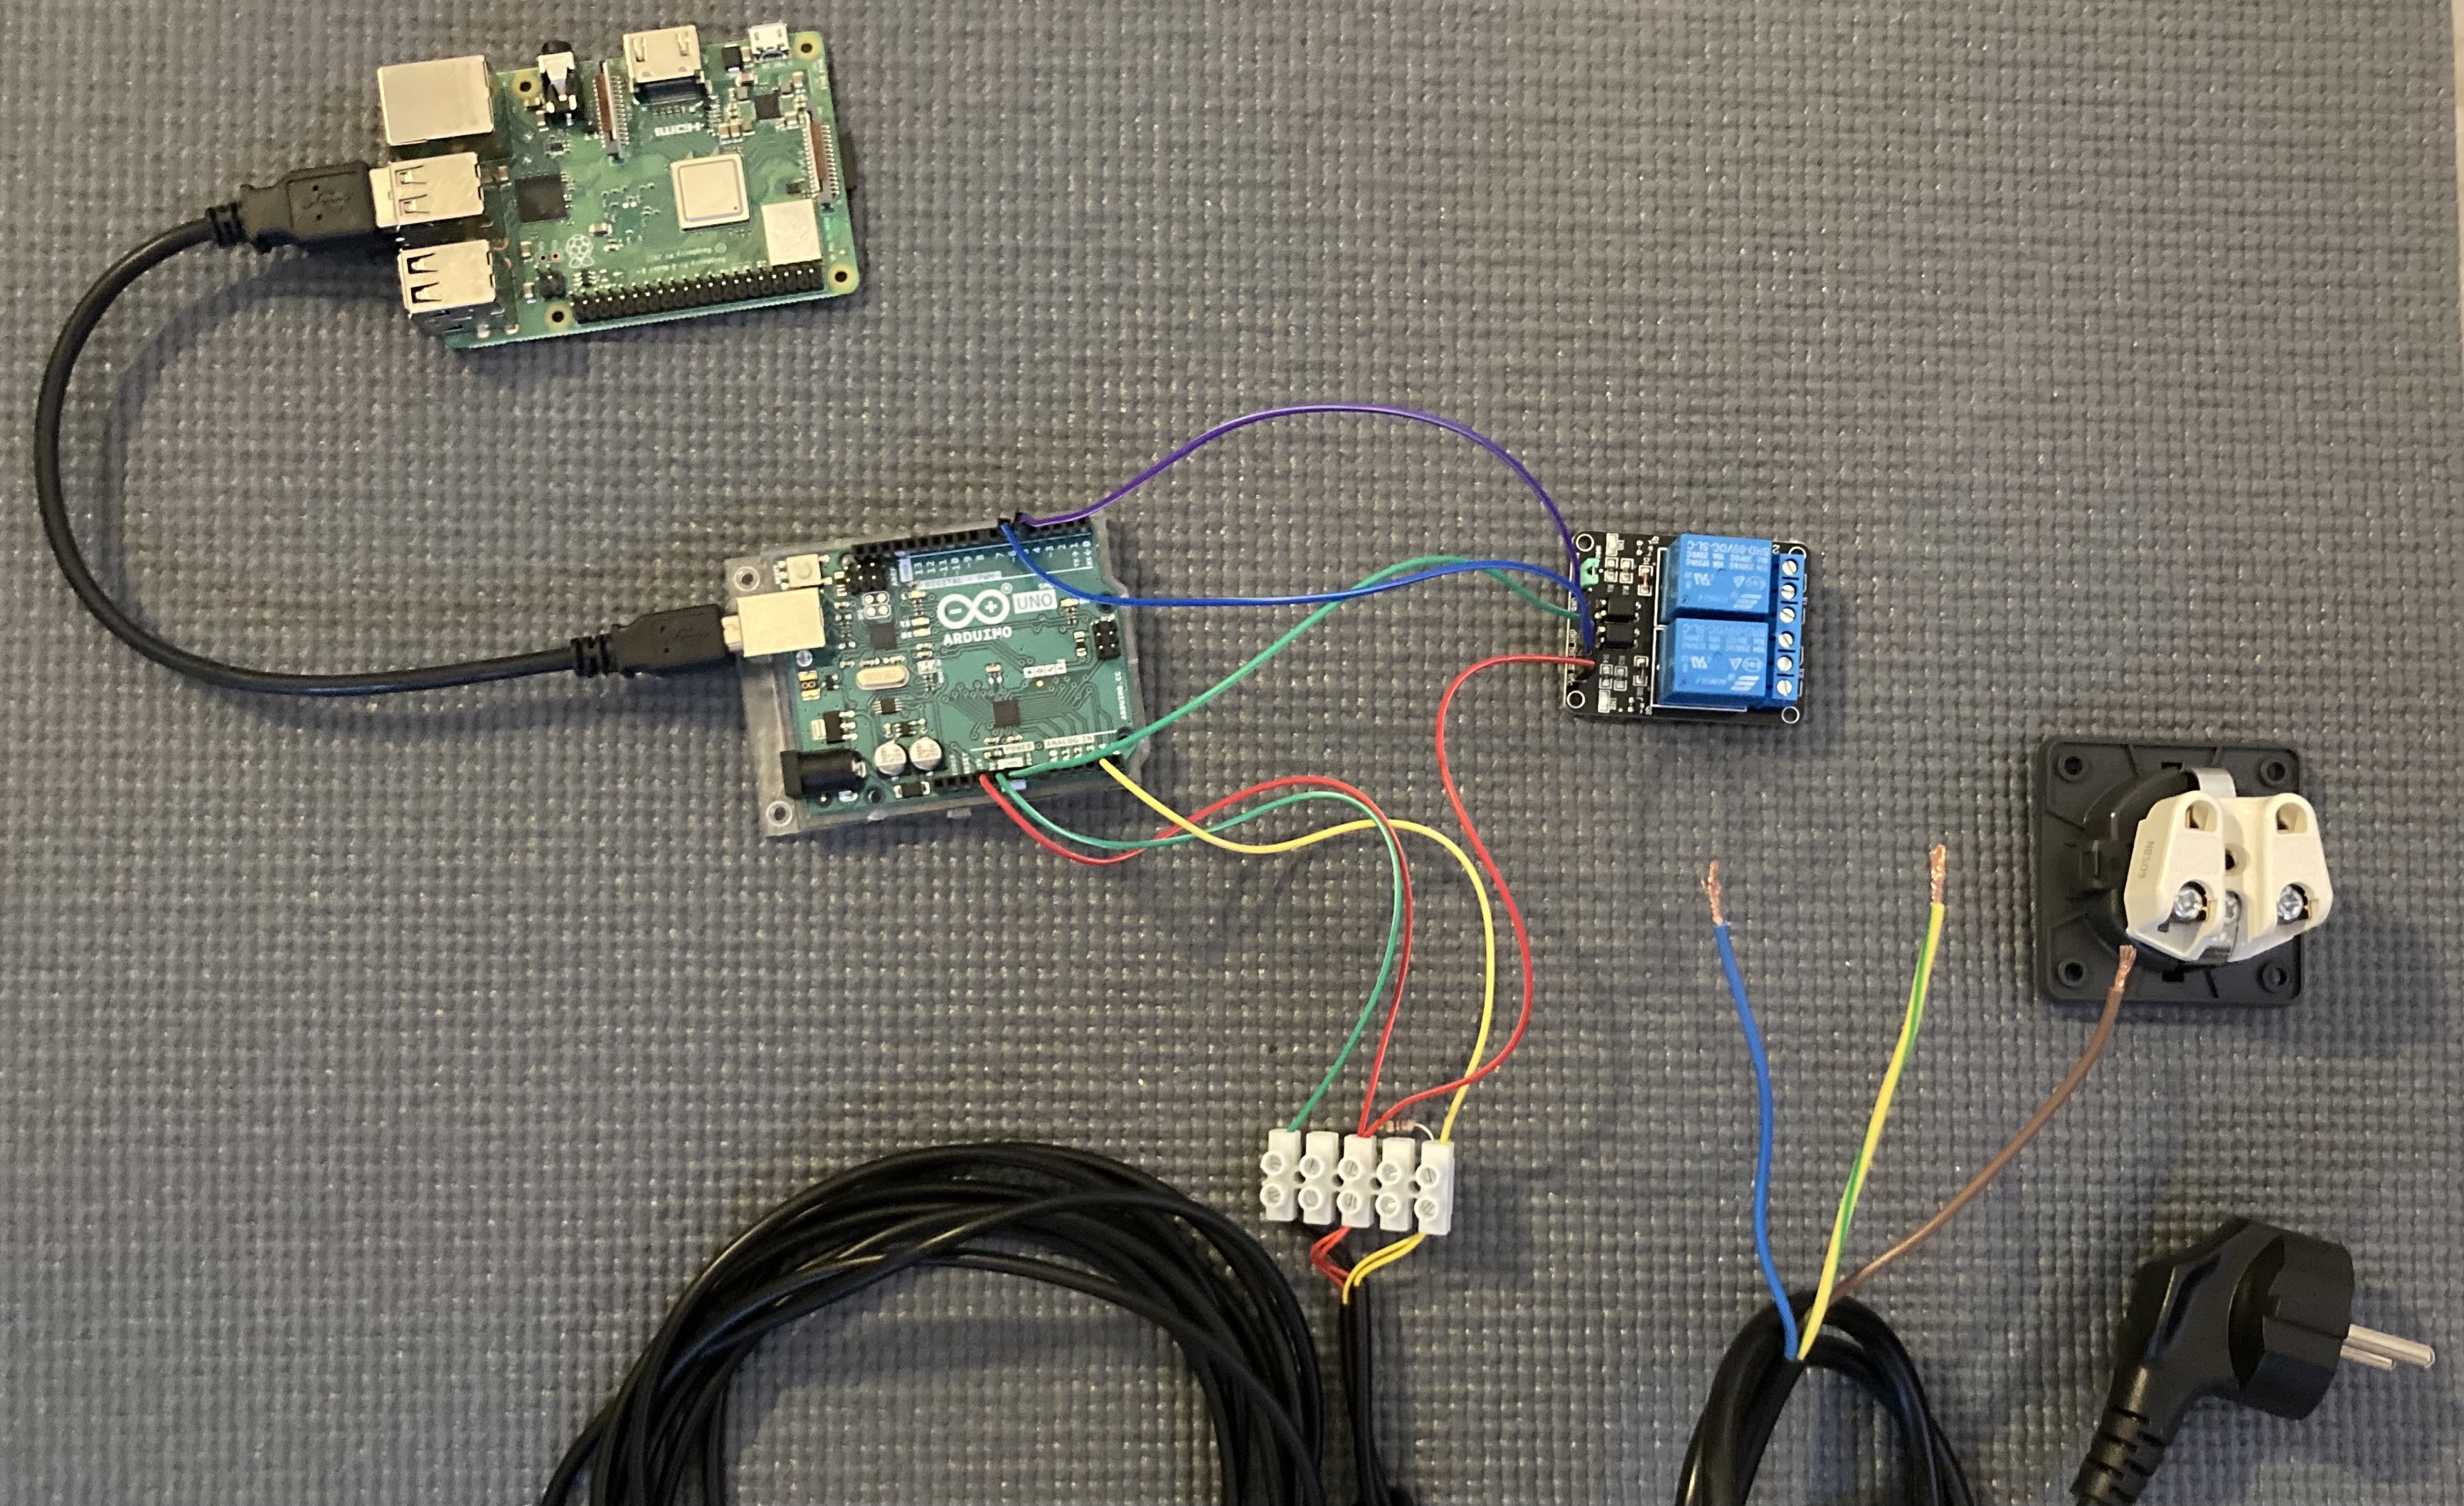
I am using single European style power outlet I intend to use for the fridge, I won’t need a heater in my conditions. I would really appreciate someone were to have a look at the original wiring scheme and my situation, maybe even give me a little hint through the powers of MS Paint.
The power cords colors are:
Live > Brown
Neutral > Blue
Earth > Green/Yellow
over the last few days I started to assemble my first fermentation controller. Since I’m not a very crafty person I strictly adhered to the brewpiremix.com tutorial and to my surprise everything went smoothly. The software is up and running and the temperature probes are doing their thing as well. Last hurdle I have to take is the high voltage wiringwich is where my situation differs a little from the documentation.
I am using single European style power outlet I intend to use for the fridge, I won’t need a heater in my conditions. I would really appreciate someone were to have a look at the original wiring scheme and my situation, maybe even give me a little hint through the powers of MS Paint.
The power cords colors are:
Live > Brown
Neutral > Blue
Earth > Green/Yellow