Matt,
I'm loving your system. I've looked at plenty of various HERMS setup and components, but I love your design: not too complex and utilized a good design with smart components. My future setup will be pretty close to yours.
Thanks! It's been fun. We've learned quite a bit and I'll highlight a few of our latest tweaks in a follow-up thread to this. Also plan to finish our write-up so our details, part #s, diagrams, etc are all up to date with our final build as it stands now.
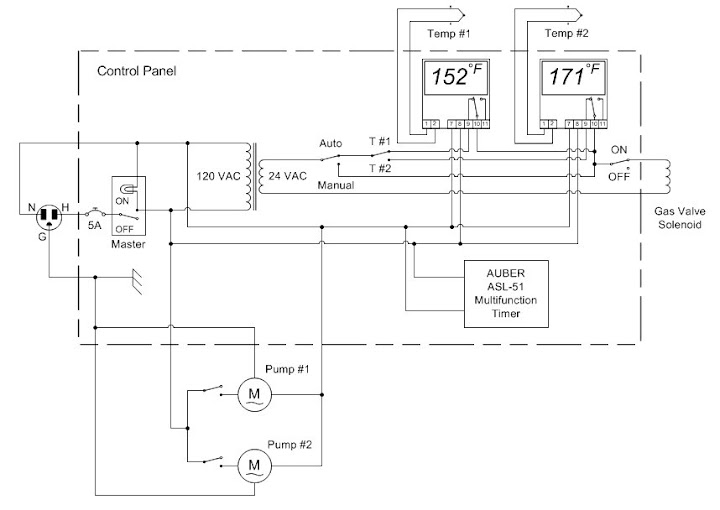
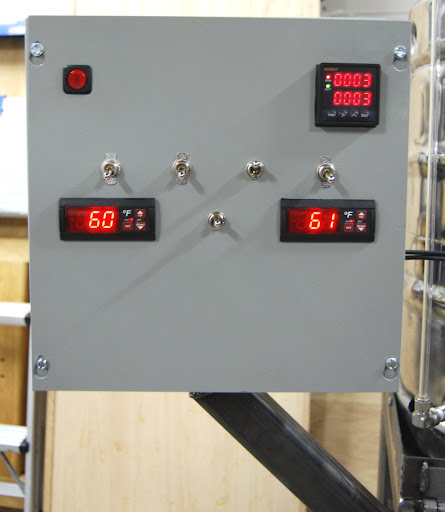
A few questions. How exactly did you wire the timer? I've used the Love controllers on my kegerator but have never used a timer. Your wiring diagram was great but didn't show the timer.
The timer is completely independent from the Love Controllers and the actual brew circuit. We only added it so we'd have a quick panel mount timer to help us with our hop additions, etc during boil. In all honesty we're not super impressed with the timer we picked up. It's got a lot of functionality we'll never utilize and we knew that but it also doesn't easily give us the quick timer capabilities we had hoped to find in a panel mount. Live and learn! We'll probably play around with it more and figure something out but we're not too hung up on it right now. Finding a panel mount timer that gives us easy pause/start/stop/reset/buzzer just doesn't seem to exist - the Love unit was along the same lines as this one and was a bit more $ so either way we weren't finding exactly what we were looking for.
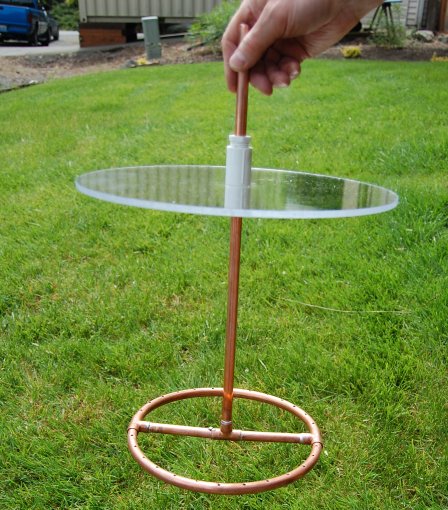
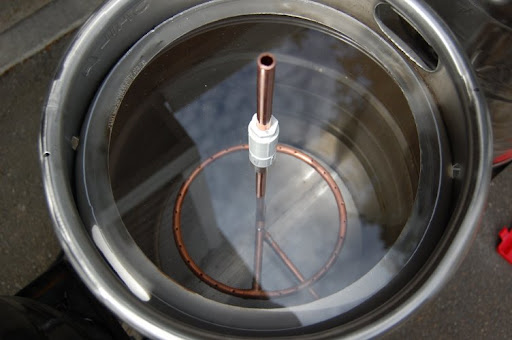
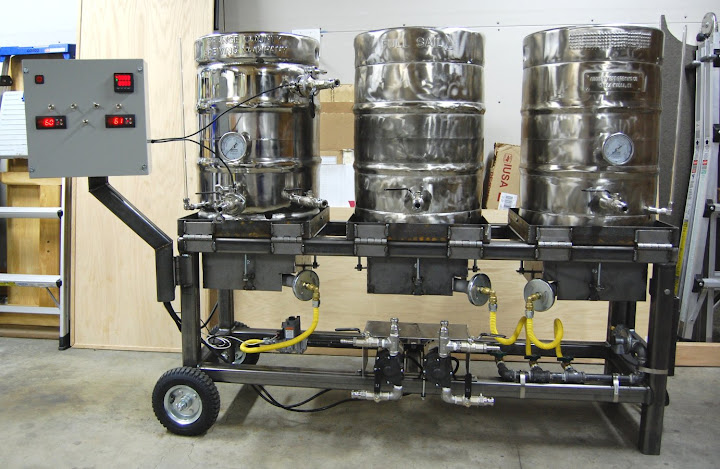
On your cam-lock connections (brilliant by the way), do they have any internal rubber rings? Just curious if everything is good for high temp.
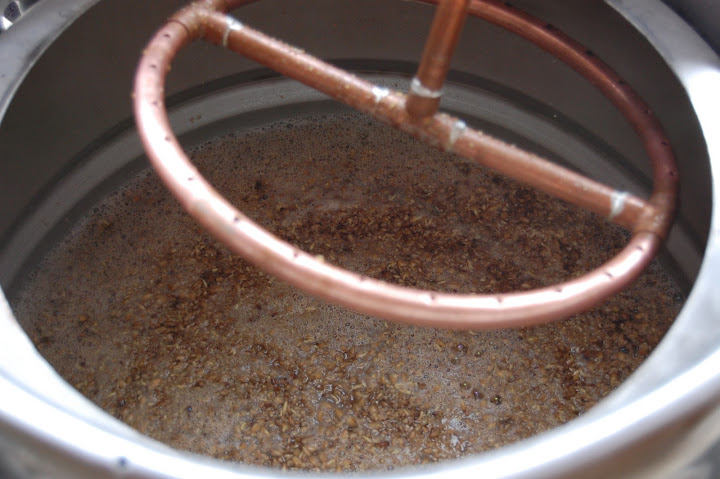
Yes they do have a BUNA seal on the inside of the female side of the cam lock sets from Pro Flow Dynamics. There are several threads on here discussing these camlocks - we lucked out and got in on them before the craze hit and demand went up so not sure they are available or not, I heard they've had problems keeping them in stock. In that thread though your concerns around hot liquid has come up. I can tell you in our water tests recently we've been pushing hot water (not boiling yet) around 180 degrees F through them and haven't seen any issues.
Lastly, I'm going to be using the furnace solenoid valve, thermocoupling, and pilot light direction. Where did you get your 2-stage regulator? Do you have a make and model?
Marshall 290 was the regulator we picked up. Found it on eBay at a decent price.
What size inlet and outlet did you get?
They are 1/4" inlet/outlet on the regulator. Finding a 1/4" hose was kind of a pain in the rear. Most everything you'll find either already has a regulator attached (which you don't need) or is the wrong thread/size. So we pieced something together with parts from eBay (1/4" x 1/4" hose and then a QCC1 BBQ tank nut).
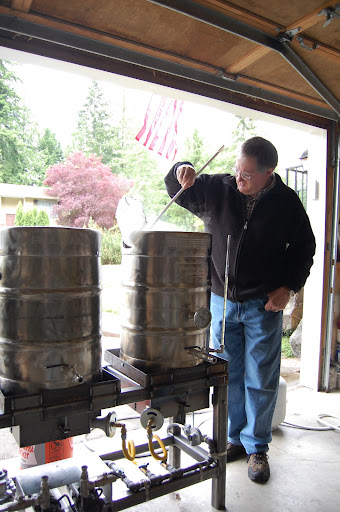
I figure your pipe supply for the burner would need to be a little larger than the size to each burner. The two-stage regulator does everything for you correct? You won't need a regulator on the BBQ tank right?
Not sure I understand what you're getting at with the different sizes. As you'll see in our photos we grabbed a few elbows and adapters to get our yellow flex line down to our valves and black pipe. We used 1/2" black pipe throughout which was easy to find parts for and wasn't a huge difference to step down or up if we needed to for parts.
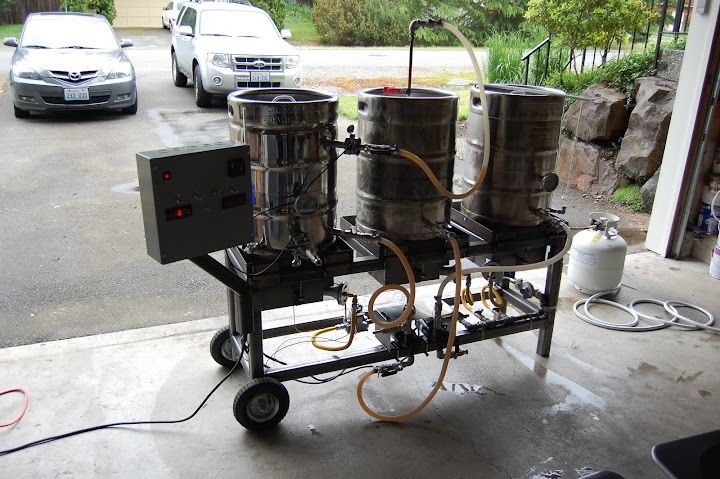
Anywho, It is a lot to digest. I think you guys have developed a brilliant rig. Thanks for the great documentation too.
No problem and I totally know what you are saying about a lot to digest. Like I said we've learned a lot but we don't claim to know all of the answers either. We're trying to do our best to consolidate everything we've learned in a format that is helpful rather than having to dig through all kinds of threads on here like we've had to do. Not saying our way is the best or right way, just know some don't want to go digging!
I'll follow this up later tonight with some lessons learned from our latest water tests and modifications to the whole setup. Nothing HUGE but things we're catching as we fire it up and start running things.
The electrical diagram is incorrect and I'll post our latest as well.


![Craft A Brew - Safale BE-256 Yeast - Fermentis - Belgian Ale Dry Yeast - For Belgian & Strong Ales - Ingredients for Home Brewing - Beer Making Supplies - [3 Pack]](https://m.media-amazon.com/images/I/51bcKEwQmWL._SL500_.jpg)


") . Our wire color matching went to hell because we ran out of wire and weren't going to go get a spool - we know what goes where so we're happy with it.
. Our wire color matching went to hell because we ran out of wire and weren't going to go get a spool - we know what goes where so we're happy with it.