You are using an out of date browser. It may not display this or other websites correctly.
You should upgrade or use an alternative browser.
You should upgrade or use an alternative browser.
Brew stand... giving it a go!
- Thread starter mtmetzler
- Start date

Help Support Homebrew Talk:
This site may earn a commission from merchant affiliate
links, including eBay, Amazon, and others.
PorterBoy
Well-Known Member
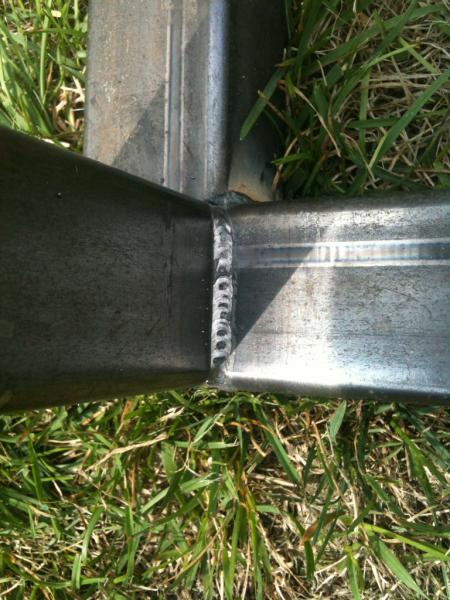
Looks great!! The weld in the last picture.. If your not a welder i would be proud of that. That weld looks good. They will only get better. I ike your stand design as it looks almost like mine. Keep up the good work
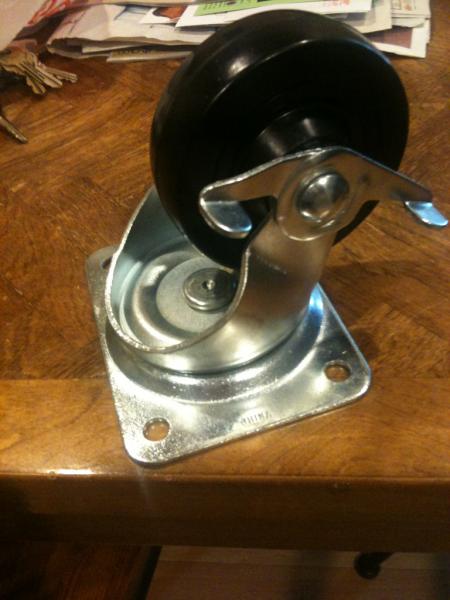
Has anyone welded zinc plated wheels to their stand? Just curious about how this would affect the weld. Reluctant to bolt everything but will if needed. Attached a pic of one of the wheels I plan to use. 4" caster with zinc plated mounting plate. Good for 225lbs a piece and will have 4 of them.

PorterBoy
Well-Known Member
They dont weld the best but it will work, Just dont breathe the smoke. You can take a grinder and grind some of the coating off and that will help it weld better. I was going to weld mine right to my frame but was thinking if i do that and one breaks, it may be hard to match it up right. I got a piece of 3x3 plate or so and welded it and drilled it so if i wanted to change the casters i wouldnt have to chop the stand.
PorterBoy said:They dont weld the best but it will work, Just dont breathe the smoke. You can take a grinder and grind some of the coating off and that will help it weld better. I was going to weld mine right to my frame but was thinking if i do that and one breaks, it may be hard to match it up right. I got a piece of 3x3 plate or so and welded it and drilled it so if i wanted to change the casters i wouldnt have to chop the stand.
Good point. Have some extra pieces so I am going to weld a few more cross pieces and bolt them on. Thanks!

$58.16
HUIZHUGS Brewing Equipment Keg Ball Lock Faucet 30cm Reinforced Silicone Hose Secondary Fermentation Homebrew Kegging Brewing Equipment
xiangshuizhenzhanglingfengshop

$39.22 ($39.22 / Count)
Brewer's Best Home Brew Beer Ingredient Kit - 5 Gallon (Mexican Cerveza)
Amazon.com

$172.35
2 Inch Tri Clamp Keg Manifold With Ball Lock Posts, Pressure Gauge, PRV (0-30 PSI) – Homebrew, Fermentation, Kegging System
wuhanshijiayangzhiyimaoyiyouxiangongsi

$53.24
1pc Hose Barb/MFL 1.5" Tri Clamp to Ball Lock Post Liquid Gas Homebrew Kegging Fermentation Parts Brewer Hardware SUS304(Liquid MFL)
yunchengshiyanhuqucuichendianzishangwuyouxiangongsi

$176.97
1pc Commercial Keg Manifold 2" Tri Clamp,Ball Lock Tapping Head,Pressure Gauge/Adjustable PRV for Kegging,Fermentation Control
hanhanbaihuoxiaoshoudian

$53.24
1pc Hose Barb/MFL 1.5" Tri Clamp to Ball Lock Post Liquid Gas Homebrew Kegging Fermentation Parts Brewer Hardware SUS304(Liquid Hose Barb)
Guangshui Weilu You Trading Co., Ltd

$22.00 ($623.23 / Ounce)
AMZLMPKNTW Ball Lock Sample Faucet 30cm Reinforced Silicone Hose Secondary Fermentation Homebrew Kegging joyful
无为中南商贸有限公司

$10.99 ($31.16 / Ounce)
Hornindal Kveik Yeast for Homebrewing - Mead, Cider, Wine, Beer - 10g Packet - Saccharomyces Cerevisiae - Sold by Shadowhive.com
Shadowhive

$49.95 ($0.08 / Fl Oz)
$52.99 ($0.08 / Fl Oz)
Brewer's Best - 1073 - Home Brew Beer Ingredient Kit (5 gallon), (Blueberry Honey Ale) Golden
Amazon.com

$7.79 ($7.79 / Count)
Craft A Brew - LalBrew Voss™ - Kveik Ale Yeast - For Craft Lagers - Ingredients for Home Brewing - Beer Making Supplies - (1 Pack)
Craft a Brew
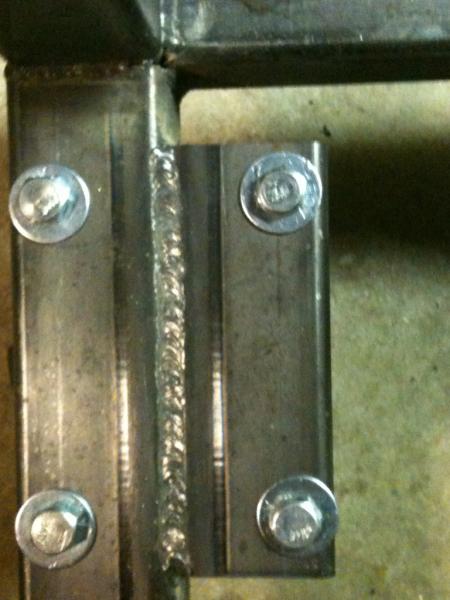
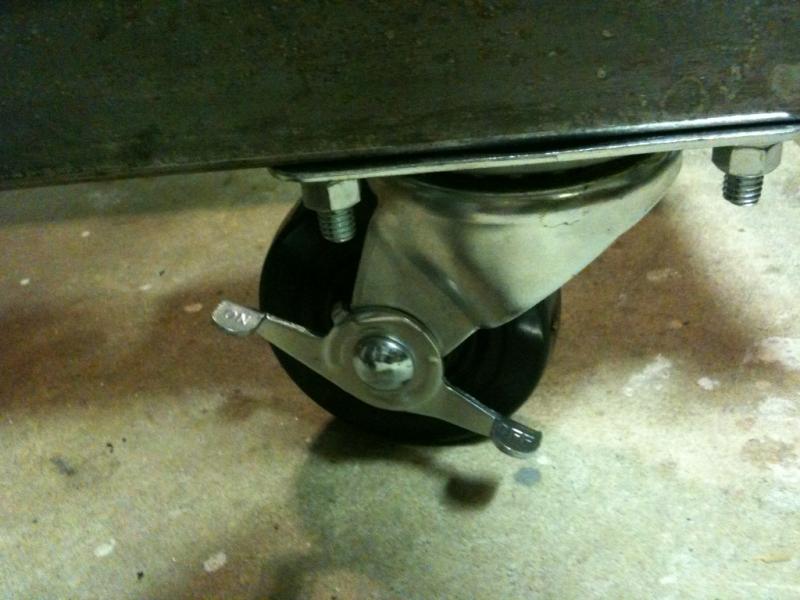
Ok stand is now mobile. Took some advice about not welding zinc plated and chose to bolt them on. Two 4" locking swivels and two 4" fixed casters. Each caster is rated for 225lbs. Pics attached below.



PorterBoy
Well-Known Member
Looks good!! I like how you used the tubing to space it out an make the pad for your casters.
Looks good!! I like how you used the tubing to space it out an make the pad for your casters.
Thanks! I was going to go get a plate, cut, and drill it but figured I had the extra pieces so why spend more $. Next thing is to build and mount the heat shields for the burners. One of the guys going in on the build bought the burners which should be delivered next week. Went with 2 of the Bayou burners
which we will mount in spots 1 and 2. For the heat shields/mounts I picked up a 36" X 24" sheet of 16ga steel. Going to cut 2 strips and bend round and spot weld by drilling some offset holes and filling in with weld material. Moving pretty good now.
:rockin:
Huaco
Well-Known Member
Are those double locking casters? If not you could possibly have them rotate once you start loading up your brewstand with weight. Double locking casters lock the caster (Rolling) as well as locking the pivot about the swivel axis.
I didn't use double locking casters on mine, however, if/when I change them out I will most likely get double locking. BUT, I have never had a problem with mine moving at all. It takes a little bit of man handling to get it to change direction when I move it around, once i get it in position for brewing I just make sure all the casters aren't pointed the same way. Again, not ideal but its working without any stand movement at all.
rekoob said:I didn't use double locking casters on mine, however, if/when I change them out I will most likely get double locking. BUT, I have never had a problem with mine moving at all. It takes a little bit of man handling to get it to change direction when I move it around, once i get it in position for brewing I just make sure all the casters aren't pointed the same way. Again, not ideal but its working without any stand movement at all.
Thanks for the input. How are your casters fixed to the stand?
Nice pics... now mine is not made tubulare steal... it is made from perferated angle Iron... looks like an adult Erector Set.
On one end there are wheels like you would have on a grill... you pick-up one end and roll it around.
Easy to lift for two adults,, even me and a 14 years old could get it out aof a truck...
DPB
On one end there are wheels like you would have on a grill... you pick-up one end and roll it around.
Easy to lift for two adults,, even me and a 14 years old could get it out aof a truck...
DPB
socalboomer
Well-Known Member
Mine aren't double either and I've never had them move... I wouldn't worry about it unless you brew on a slope, lol.
Looks quite good!
Looks quite good!
Who would have thought grinding could be so much fun!  Man is this time consuming and when your done doesn't feel like you accomplished much. After completing the top surface and side first pass course grinding I figured I would add one corner piece for one of the kettles. All that said, not a huge update here but at least still making forward progress.
![IMG_1487[1].jpg IMG_1487[1].jpg](https://cdn.homebrewtalk.com/data/attach/59/59520-IMG-1487-1-.jpg)
![IMG_1488[1].jpg IMG_1488[1].jpg](https://cdn.homebrewtalk.com/data/attach/59/59521-IMG-1488-1-.jpg)
![IMG_1490[1].jpg IMG_1490[1].jpg](https://cdn.homebrewtalk.com/data/attach/59/59522-IMG-1490-1-.jpg)
![IMG_1491[1].jpg IMG_1491[1].jpg](https://cdn.homebrewtalk.com/data/attach/59/59523-IMG-1491-1-.jpg)
![IMG_1489[1].jpg IMG_1489[1].jpg](https://cdn.homebrewtalk.com/data/attach/59/59524-IMG-1489-1-.jpg)
PorterBoy
Well-Known Member
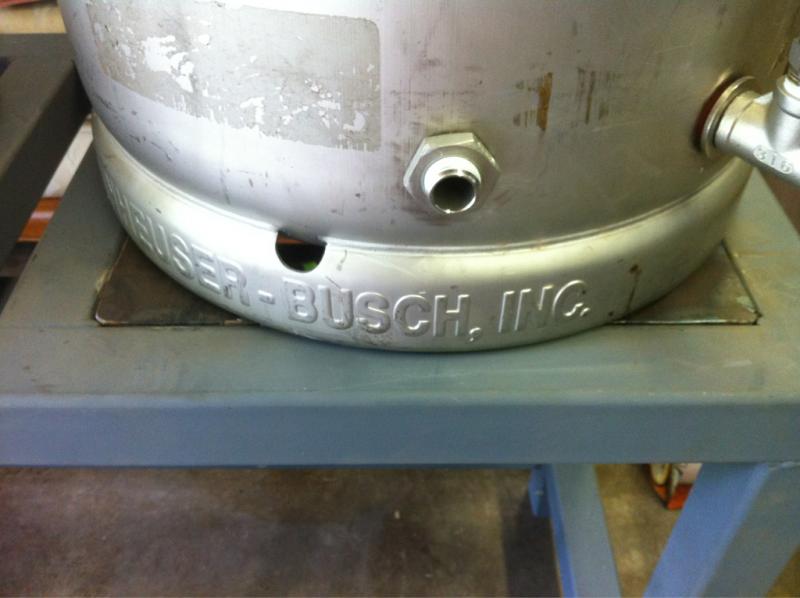
Looking good man. I used to run a 10" hand grinder all day sometimes so i know about the fun of grinding. I see you got some welders helpers in the pic(the big red magnets). Those are a big hep when fabbing stuff up. I used to use them every day at the plant. After this your going to want to start a fab shop eh?? I got part of my heat shields welded up on my stand this weekend. Will be finishing up my rims tube after vaca this week.



@PorterBoy
Your stand is looking AWESOME! :rockin:
Yeah and I am only using a 4 1/2 in grinder. Was thinking of jumping up a bit to help speed up future grind sessions.. haha Your thought's?
Also, where did you get your sight glasses? They look awfully close to the ones BobbyM is selling. Smart call on the weldless versions as well. Here some stories about not so great welds and bacteria build up. At least those you can tear down when needed and get a good clean in.
Also, did you use sheet metal for corner braces? It is a bitch cutting tubing on a 45 with the chop saw I picked up from Harbor Freight. (I know what do you expect) Wondering on your thoughts here as well or at least a better way to cut 45's. The vise in my chop saw keeps allowing material to slide. I am finding my self spending about 20 min grinding the piece to even out the top an bottom to be square. Might just have to throw a 5" C clamp on it.
As always thanks for your help/suggestions.
PorterBoy
Well-Known Member
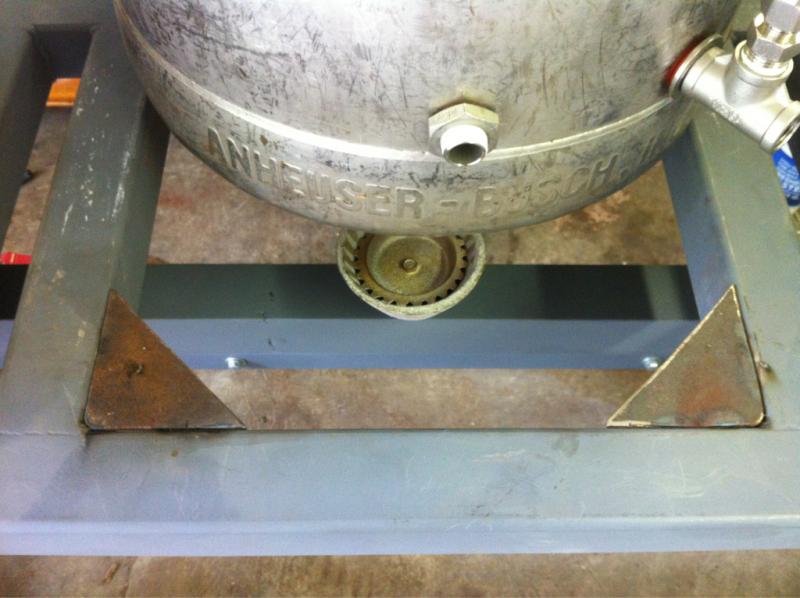
Well if you have a 9" grinder handy it will speed up material removal if you have alot of grinding but i wouldnt go out and get one just for this job. I used some 1/8" plate that i had laying around and just cut some gussets with a grinder and razor wheel. Seemed most of my heat was coming up through those spots. I only put them on the front as im not worried so much as the heat on the back as i am the front because my ball valves and sight glass i want to protect.
Gotcha and thanks, I have found the number of tools I have acquired the past few months is astounding. Just when you think you have everything, BAM there is something else you want/need (always really the want instead of the need). I picked up some 16ga sheet metal and will make some 10'' or so rings for the burners we picked up. These will sit inside the corners I am putting in now, so most if not all heat will be directed under the keggle.
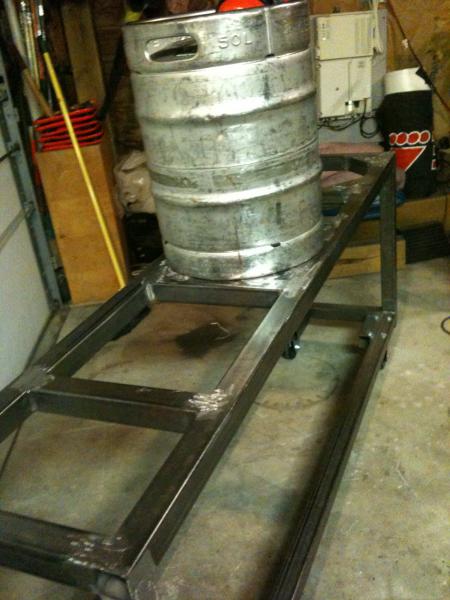
Ok, so another good night of progress. I finished adding the angle pieces to support the two keggles and ground down the welds. Next step is to cut 4" strips out of the 16ga sheet metal in the pic and make some rings to mount our 10" burners. All in all making good headway and starting to see some light at the end of the tunnel. I also added a pic of someone checking in on me to be sure I kept on task... pretty cool if you ask me.



Looking good!
jsmoon888 said:Looking good. Only have one batch on my new stand.
Looks good! How did your first batch turn out?
Ok, gave it another night of work. Going to take a break and brew some this weekend. Unless I feel like sweating like crazy, my next update won't be until sometime next week/weekend. As for tonight added the spacers to get me to 11" along with a heat shield. Only have one heat shield and will have to do over as the gauge I had is too flimsy. Will drill and tap so I can mount the shield with some screws. I didn't want to make it permanent in case it needs to adjusted for max burner efficiency. Always open for suggestions and critics. Thanks!


mtmetzler said:Ok, gave it another night of work. Going to take a break and brew some this weekend. Unless I feel like sweating like crazy, my next update won't be until sometime next week/weekend. As for tonight added the spacers to get me to 11" along with a heat shield. Only have one heat shield and will have to do over as the gauge I had is too flimsy. Will drill and tap so I can mount the shield with some screws. I didn't want to make it permanent in case it needs to adjusted for max burner efficiency. Always open for suggestions and critics. Thanks!
Very nice touch.
loh777
Well-Known Member
Can't wait to fire this thing up. Looks awesome
Great weekend! Was able to brew up a Belgian Tripel Sat Morning and attended a great tasting/homebrew party in the afternoon.
FERMENTABLES
6.6 lb. Light LME
3 lb. Pilsen DME
1 lb. Light Candi Sugar
8 oz. Maltodextrin
SPECIALTY GRAINS
4 oz. Aromatic
HOPS
1.5 oz. Bittering UK Kent Goldings
1 oz. Aroma UK Kent Goldings
55 min boil in total
That excitement aside, a big thanks to loh777 and mfiure for supplying more parts for our brew stand. We now have 2 Banjo BG14 Burners and 2 all SS dip tubes + valves for the keggles. I also received and hooked up the mash tun SS screen and valve. Needing to still order 2 sight glass for the keggles. Hope I can get one or two days in this week to finish the mounts for the burners and do a semi final grind on the whole thing. Keep you posted.
Thanks for the input. How are your casters fixed to the stand?
I just tacked them on the bottom of my legs, knowing I would most likely change them in the future.
Similar threads
- Replies
- 0
- Views
- 589
- Replies
- 14
- Views
- 2K
- Replies
- 0
- Views
- 581
- Replies
- 1
- Views
- 1K



![Craft A Brew - Safale BE-256 Yeast - Fermentis - Belgian Ale Dry Yeast - For Belgian & Strong Ales - Ingredients for Home Brewing - Beer Making Supplies - [3 Pack]](https://m.media-amazon.com/images/I/51bcKEwQmWL._SL500_.jpg)


