You mention wiring in series (for neutral). P-J, others, I had read that ground wires should always be done via "home run" style wiring (where the grounds are not put in series) for safety reasons. Can you confirm?
You are using an out of date browser. It may not display this or other websites correctly.
You should upgrade or use an alternative browser.
You should upgrade or use an alternative browser.
Brew Magic to electric
- Thread starter jtkratzer
- Start date

Help Support Homebrew Talk:
This site may earn a commission from merchant affiliate
links, including eBay, Amazon, and others.
IMHO that is not true. Consider a series of multi drop outlets in a modern kitchen. A single mains cable goes to the first outlet box and the 120V line, the neutral & ground are connected to the first outlet. From there a cable is run to the next outlet box and then the next outlet. In such a layout none of the conductors need to be duplicated. They are simply connected in series.You mention wiring in series (for neutral). P-J, others, I had read that ground wires should always be done via "home run" style wiring (where the grounds are not put in series) for safety reasons. Can you confirm?
Another thing to keep in mind: Your brewery should be powered from a dedicated outlet with GFCI protection in place. Your brew controller is a single device plugged into that outlet. Common sense applies to your controller. Set it up and wire it the way you feel comfortable doing it. The NEC ends at the outlet.
Just saying...
OP
OP
You have it exactly right.
One other thing that you can do is to make a jumper wire for your drops. Just remove the wire insulation from the wire where you are going to make a connection. Just remove enough insulation to wrap it around the terminal or just enough to fit on a single crimp-on terminal lug. (Don't cut the wire. You can apply solder to that stripped section and just wrap it around the terminal.)
If you have a wire going to 4 places, it's really easy to do. Just be sure to do a layout (place the wire with the route you will be using) and then plan out your connections. Single wire, no wire cuts, All done!
P-J
I sure hope this makes sense.
I think that makes sense, trying to visualize. If I start with a length of wire, perhaps a roll, and work from the "farthest" point on the leg and work back to the terminal block. End point might have a crimp connector on it at the terminal. Working back along the route, at the next point I want to connect that wire to a component, use the wire strippers to make two cuts in the insulation, and then a cut along the wire to remove that section of insulation. Wrap that section of exposed wire around the terminal and keep working back to the terminal block finishing with either bare wire clamped in or a crimp connector.
If my explanation sounds like we're on the same page, that makes easy work of connecting a number of components without the expense of crimp connectors.
Absolutely right on the money.!!!I think that makes sense, trying to visualize. If I start with a length of wire, perhaps a roll, and work from the "farthest" point on the leg and work back to the terminal block. End point might have a crimp connector on it at the terminal. Working back along the route, at the next point I want to connect that wire to a component, use the wire strippers to make two cuts in the insulation, and then a cut along the wire to remove that section of insulation. Wrap that section of exposed wire around the terminal and keep working back to the terminal block finishing with either bare wire clamped in or a crimp connector.
If my explanation sounds like we're on the same page, that makes easy work of connecting a number of components without the expense of crimp connectors.
IMHO that is not true. Consider a series of multi drop outlets in a modern kitchen. A single mains cable goes to the first outlet box and the 120V line, the neutral & ground are connected to the first outlet. From there a cable is run to the next outlet box and then the next outlet. In such a layout none of the conductors need to be duplicated. They are simply connected in series.
Another thing to keep in mind: Your brewery should be powered from a dedicated outlet with GFCI protection in place. Your brew controller is a single device plugged into that outlet. Common sense applies to your controller. Set it up and wire it the way you feel comfortable doing it. The NEC ends at the outlet.
Just saying...
Thanks P-J!
OP
OP
I'm done buying components for this thing...I just ordered a couple SW2 switches. I decided to ditch the central power switch that turned on both PIDs in favor of an Auber SW2 switch for each PID. Chose that switch over the SW1 as the PID will be lit up when it's on, no need to spend double the money for the switch to have another lit up switch. Also ditched the idea of adding a keyed central power switch as I can either throw the breaker in the spa panel, sub panel, throw both breakers, or P-J let me know I could hit the e-stop at the end of the day to ensure there's no way of turning anything back.
Third SW2 switch is to turn the alarm on and off. I'm hopeful the alarm is loud enough that I can set the alarm to go off when the strike water is up to temp and while that's heating, I can do other stuff around the house.
Those should be here Saturday and I'll do my final measurements and get the holes in the panel cut for the switches, PIDs, and outlets. Then it's time for a paint job and drilling the back plate and mounting the internal components.

$10.99 ($31.16 / Ounce)
Hornindal Kveik Yeast for Homebrewing - Mead, Cider, Wine, Beer - 10g Packet - Saccharomyces Cerevisiae - Sold by Shadowhive.com
Shadowhive


$22.00 ($623.23 / Ounce)
AMZLMPKNTW Ball Lock Sample Faucet 30cm Reinforced Silicone Hose Secondary Fermentation Homebrew Kegging joyful
无为中南商贸有限公司


$53.24
1pc Hose Barb/MFL 1.5" Tri Clamp to Ball Lock Post Liquid Gas Homebrew Kegging Fermentation Parts Brewer Hardware SUS304(Liquid MFL)
yunchengshiyanhuqucuichendianzishangwuyouxiangongsi

$27.29 ($13.64 / Count)
$41.99 ($21.00 / Count)
2 Pack 1 Gallon Large Fermentation Jars with 3 Airlocks and 2 SCREW Lids(100% Airtight Heavy Duty Lid w Silicone) - Wide Mouth Glass Jars w Scale Mark - Pickle Jars for Sauerkraut, Sourdough Starter
Qianfenie Direct

$176.97
1pc Commercial Keg Manifold 2" Tri Clamp,Ball Lock Tapping Head,Pressure Gauge/Adjustable PRV for Kegging,Fermentation Control
hanhanbaihuoxiaoshoudian


![Craft A Brew - Safale BE-256 Yeast - Fermentis - Belgian Ale Dry Yeast - For Belgian & Strong Ales - Ingredients for Home Brewing - Beer Making Supplies - [3 Pack]](https://m.media-amazon.com/images/I/51bcKEwQmWL._SL500_.jpg)

$172.35
2 Inch Tri Clamp Keg Manifold With Ball Lock Posts, Pressure Gauge, PRV (0-30 PSI) – Homebrew, Fermentation, Kegging System
wuhanshijiayangzhiyimaoyiyouxiangongsi

$7.79 ($7.79 / Count)
Craft A Brew - LalBrew Voss™ - Kveik Ale Yeast - For Craft Lagers - Ingredients for Home Brewing - Beer Making Supplies - (1 Pack)
Craft a Brew


$20.94
$29.99
The Brew Your Own Big Book of Clone Recipes: Featuring 300 Homebrew Recipes from Your Favorite Breweries
Amazon.com

$39.22 ($39.22 / Count)
Brewer's Best Home Brew Beer Ingredient Kit - 5 Gallon (Mexican Cerveza)
Amazon.com

$58.16
HUIZHUGS Brewing Equipment Keg Ball Lock Faucet 30cm Reinforced Silicone Hose Secondary Fermentation Homebrew Kegging Brewing Equipment
xiangshuizhenzhanglingfengshop


$53.24
1pc Hose Barb/MFL 1.5" Tri Clamp to Ball Lock Post Liquid Gas Homebrew Kegging Fermentation Parts Brewer Hardware SUS304(Liquid Hose Barb)
Guangshui Weilu You Trading Co., Ltd

OP
OP
In these Sabco kettles, I have stainless dip tubes....two are tri clover to work with the folding false bottoms, and the HLT is fixed. All are welded to the kettles.
There is dead space based on the distance between the "mouth" of the dip tube and the bottom of the keg...which is fine for the BK to prevent sucking up all the trub and break material.
Is there any reason to put bottom drains on these, even if it's for cleaning and allowing all fluid to completely drain?
A bottom drain in the MLT would keep me from having any wort loss due to dead space as well as the cleaning. The other two kettles would be purely for cleaning and fully draining without having to tip them over, etc. I suppose with a false bottom, hop spider, and if I added Brewer's Hardware filter, I would be able to catch most of the crud and drain every last drop into the fermenter.
Just not sure if it's worth the money since I already have the original plumbing in place...
kpr121
Well-Known Member
Although my setup is not exactly the same as yours, my easy solution to cleaning the last bit of liquid that is not pulled from under the diptube = SHOP VAC. I run my cleaning solution through the system, then shop vac each vessel once the pump looses suction due to the diptupe sucking air. Never have to tip or dump the vessels that way.
I don’t really worry about the wort lost either, I just adjust my batch sizes/volumes accordingly. I really only lose less than a quart of wort in the BK, and most of that is soaked up in hops anyhow. I dont lose anything in the MLT 'cause its a Rubbermaid container that I can tip to drain if I really want to (usually I dont).
YOU JUST SAID YOU ARE DONE BUYING COMPONENTS FOR THE SYSTEM LAST NIGHT! (I know, I am addicted to tinkering like you are)
OP
OP
I meant electrical stuff!
I stopped by the welder's place to drop off an additional coupling and he's done with the element ferrules and they look awesome. He also modified the welded pickup tubes to make room for the elements. They look awesome. He has the three couplings to weld in and a patch to put on one of the false bottoms since the pickup tube isn't going to be perfectly centered after shortening it.
I figured bottom drains weren't worth the additional expense since I have something that works already.
kpr121
Well-Known Member
Haha I was just teasing, but yea the bottom drains would be a little bit of overkill. If you didn’t already have the side ports then it might be a different story.
OP
OP
This is the MLT, but the fitting is identical to the BK. I wanted to see how this tee fitting, thermometer, and ball valve would hook up using the Brewer's Hardware compression fitting to 1/2" MNPT.

I was concerned about the amount of weight on a compression fitting after hooking up a hose on top of the fittings.
Thinking about having the compression fitting welded on to give more strength. Maybe cutting off everything to the right of the hex part of the fitting or using half of a 1/2" nipple.

Maybe I just won't use this thermometer at all. The BK will have the temp probe connected to the PID already. I want to see the temp as I'll BR using the HERMS coil to chill and will be able to see the wort temp as it's recirculated.
I bought a couple things from Stainless Brewing today...90* elbow compression fitting to use on the inside of my MLT to whirlpool, a couple couplings and a few ball valves for the future second pump. Zach looks like he has the start of a great business going there.
I was concerned about the amount of weight on a compression fitting after hooking up a hose on top of the fittings.
Thinking about having the compression fitting welded on to give more strength. Maybe cutting off everything to the right of the hex part of the fitting or using half of a 1/2" nipple.
Maybe I just won't use this thermometer at all. The BK will have the temp probe connected to the PID already. I want to see the temp as I'll BR using the HERMS coil to chill and will be able to see the wort temp as it's recirculated.
I bought a couple things from Stainless Brewing today...90* elbow compression fitting to use on the inside of my MLT to whirlpool, a couple couplings and a few ball valves for the future second pump. Zach looks like he has the start of a great business going there.
OP
OP
1/2" conduit punch works well. This one is obviously for my power cord. 11 more to go for the switches, alarm, etc.

kpr121
Well-Known Member
How much was that 90 compression elbow?
OP
OP
kpr121 said:How much was that 90 compression elbow?
He's got them for $23.99 for the 1/2".
http://www.stainlessbrewing.com/SS-Comp-90_p_57.html
It's going here in the MLT:

OP
OP
Progress:

OP
OP
And more...

I'm really happy with how the holes for the PIDs came out. I spent quite a bit of time getting the measurements right and square. I used a small drill bit to open the corners to prevent cutting too far with the cutoff wheel, which I used to open the holes. They needed quite a bit more material removed to fit the PIDs. I got the first one done, constantly checking measurements to ensure the holes where square. After the first was done, I pulled measurements from the first to apply to the second hole from the other side of the lid and it seems to have worked out pretty well to my eyes.
My SW2 switches for the PIDs and alarm will be here tomorrow.
Just need holes for the element and pump outlets. Then time for paint.
OP
OP
Looks like enough room for wiring and connectors.

OP
OP
Measured the spots for the 15/32" holes for the RTD connectors on the bottom of the enclosure and spots for the two 30A dryer outlets for the elements on the right side of the panel to keep them as far away from liquids as possible and because my plugs have 90* bends at the plug. I need about 2.100" for the dryer outlets, and the closest knockout punch I have is 1.9955". I'm thinking I'll give that shot and use the Dremel to open the holes up a little at a time until the outlets push through.
kpr121
Well-Known Member
jtkratzer said:Measured the spots for the 15/32" holes for the RTD connectors on the bottom of the enclosure and spots for the two 30A dryer outlets for the elements on the right side of the panel to keep them as far away from liquids as possible and because my plugs have 90* bends at the plug. I need about 2.100" for the dryer outlets, and the closest knockout punch I have is 1.9955". I'm thinking I'll give that shot and use the Dremel to open the holes up a little at a time until the outlets push through.
Yea you can have a lil extra opening for the outlets . Are you gonna put covers over them?
OP
OP
Yea you can have a lil extra opening for the outlets . Are you gonna put covers over them?
I didn't want to jump up to 2 3/8"...seemed like that would be too much, unless I used covers. I wasn't planning on it. Any particular reason I should use a face plate?
If I use my 2" conduit punch, I'll have a 2 3/8" hole. After mounting the outlet, I could cover up the outlet and the excess hole with one of these:
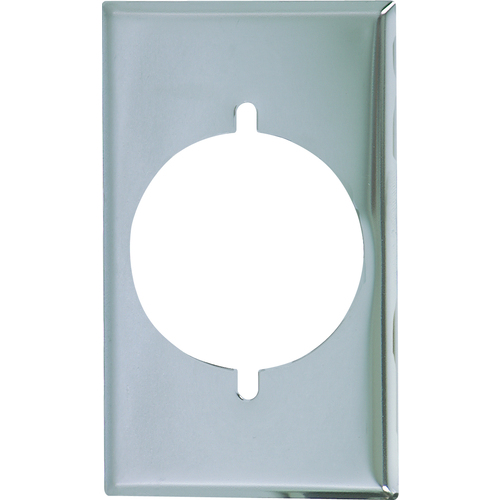
http://www.lowes.com/ProductDisplay...gId=10051&cmRelshp=rel&rel=nofollow&cId=PDIO1
But then I have two of those mounted on the side of my panel...I guess it's just cosmetic.
kpr121
Well-Known Member
jtkratzer said:I didn't want to jump up to 2 3/8"...seemed like that would be too much, unless I used covers. I wasn't planning on it. Any particular reason I should use a face plate?
If I use my 2" conduit punch, I'll have a 2 3/8" hole. After mounting the outlet, I could cover up the outlet and the excess hole with one of these:
http://www.lowes.com/ProductDisplay?partNumber=71251-334-39CH-SP-L&langId=-1&storeId=10151&productId=1098693&catalogId=10051&cmRelshp=rel&rel=nofollow&cId=PDIO1
But then I have two of those mounted on the side of my panel...I guess it's just cosmetic.
I don't have cover plates on my outlets. I wouldn't think you'd need em either.
OP
OP
kpr121 said:I don't have cover plates on my outlets. I wouldn't think you'd need em either.
I think I'm going to get them. It allows me to cut the holes and not worry about grinding/filing a 1.95" hole to 2.1" to fit the receptacle. If I don't like the look of the stainless, I can paint the covers the same as the rest of the panel.
OP
OP
Last few switches came today.

Done for now working on my remodeling, meeting at 2, then it's time to make the last few holes and figure out the painting. I'd like to get the back plate drilled today as well.
I think I going to have to drill my pilot holes with the biggest bit I have and then file it to get it open to 3/4" for the knockout draw stud.
OP
OP
Holes for the RTD probe mounts are drilled. A little TLC from the Dremel and grinding wheel will smooth them out for a better fit with the o-ring.
If I can figure out these receptacle holes, I'm optimistic I can get a coat of paint on the panel today.
If I can figure out these receptacle holes, I'm optimistic I can get a coat of paint on the panel today.
OP
OP
Picked up a 3/4" hole saw to cut the pilot hole for the knockout draw stud, outlets for the pumps, face plates for the element receptacles, and shrink tubing for the pump wiring.
Looks like my 1" knockout will be perfect for the round pump outlets.
I haven't checked the paint can, but I'm assuming a light sanding will help when painting the panel...
Looks like my 1" knockout will be perfect for the round pump outlets.
I haven't checked the paint can, but I'm assuming a light sanding will help when painting the panel...
OP
OP
Holes for the element and pump outlets are cut with holes drilled for mounting hardware.
I'm going to look it over again tomorrow after a 5k fundraiser, but I think I'm ready for paint.
I'd like to get a coat on tomorrow and start drilling the back plate to mount the electrical components tomorrow as well.


I'm going to look it over again tomorrow after a 5k fundraiser, but I think I'm ready for paint.
I'd like to get a coat on tomorrow and start drilling the back plate to mount the electrical components tomorrow as well.
OP
OP
First coat of paint on the door and the bottom plate. Holes drilled for the bolts to mount to the stand. I'd eventually like to get a swinging arm with a slight angle for the panel welded together.


I'm hoping a little sanding and a second or third coat will wipe out the scrape/gouge I put in the front panel with a file the other day. Facepalm.

Yes, that's the end of a fire hose in the background.

I'm hoping a little sanding and a second or third coat will wipe out the scrape/gouge I put in the front panel with a file the other day. Facepalm.
Yes, that's the end of a fire hose in the background.
OP
OP
All the metal pieces of the control box have 2 coats of paint and I haven't touched the second can yet.
A pool of PB blaster is sitting on the rusty spots on the brew stand where the paint was fried by the NG flame and subsequently rusted. I sent emails to two places for quotes on powder coating. No idea what that stuff runs, but if it's not ridiculous, I think I can convince SWMBO to call it an early birthday present.
All that's left is drilling the back plate for the internal stuff and wiring.
Is there any trick or strategy on where these things should be mounted? Obviously I have the locations for the receptacles and SSRs. However, the orientation of the terminal buses and circuit breakers seems to be a personal preference.
Logical order of following the wiring diagram says source -> terminals -> breakers -> switches/components -> SSRs -> contactors -> outlets.
I guess to bring the power from the breakers to the components and switches on the panels, I could keep the outgoing side of the breakers close to the hinges in the door to bring them across the hinges and along the door.
OP
OP
The gouge is not going away. Oh well. Maybe I'll get a decal made after picking a name for my "brewery."
OP
OP
Pump plug and wires connected with butt connectors, electrical tape, and heat shrink tubing. Ordered a second pump today. Decided that would be more versatile and easy to work with than the stir motor mounted in a lid. It will hit the classifieds.
I need to cut some lengths of hose from my silicone tubing to test the new o-ring in the pump.
I need to cut some lengths of hose from my silicone tubing to test the new o-ring in the pump.
Similar threads
- Replies
- 20
- Views
- 1K
- Replies
- 8
- Views
- 579
