• Please visit and share your knowledge at our sister communities:
  • If you have not, please join our official Homebrewing Facebook Group!

    Homebrewing Facebook Group

Bottling Tips for the Homebrewer

Homebrew Talk

Help Support Homebrew Talk:

This site may earn a commission from merchant affiliate links, including eBay, Amazon, and others.
Great, thanks for the clarification.
As a newbie I'm always interested in knowing how much leeway I have, just in case something happens.

Indeed indeed. Bottle bombs are to be avoided at all costs. As they say, "it's all good fun till someone puts an eye out."
 
Yep. The dunk and gurgle method works, but it takes a lot longer. The Vinator makes it much less of a chore.

I have a pair of hard plastic straws to help with the dunk and gargle method for sanitizing.

Two bottles in one hand and two straws in the other, I stick the tip of the straw just past the mouth of the bottle when I dunk and keep the end above water so it can let the bubble out. To dump, I use my thumbs to hold the straws and stick the straws all the way to the bottom so they can let the air back in. Eliminates the slow gargle, speeds things up, and doesn't leave a bunch of big sanitizer bubbles in the bottle.
 
Found this thread immediately after bottling my first batch (nothing went terribly wrong, except my bottle filler staying stuck on twice) and over the last couple days made it through 56 pages.. Can't do anymore lol but amazing thread and tips Revvy, you're the man! :mug:
 
Looking for recommendations for a clean Safale yeast to use at time of bottling to assure good carbarnation, following a 6 week cold conditioning of a lagar. And how much yeast to use for a 5 gallon batch.
 
Looking for recommendations for a clean Safale yeast to use at time of bottling to assure good carbarnation, following a 6 week cold conditioning of a lagar. And how much yeast to use for a 5 gallon batch.

Forget safale, use the yeast actually grown for bottle and cask conditioning beers. Danstar CBC-1 Cask and Bottle Conditioning Yeast.

A saccaharomyces cerevisiae yeast culture specifically chosen for it's refermentation quality and performance, this dried yeast is perfectly suited for priming and conditioning in casks, bottles, or kegs. Alcohol tolerance is high, at 12-14%ABV. This yeast can also be used for primary fermentation or slow or sluggish fermentations. When used for priming, dextrose (corn sugar) works best - this yeast does not metabolize maltotriose, so wort is not an ideal priming agent. Recommended inoculation rate is 2 grams per 5 gallons, or approximately 1/2 tsp.

I usually use a half packet/ 5 gallons.
 
Awesome. That's all I can say about this! I've been brewing off and on for 11 years, and have always utilized the tip, then lift method of bottling with a bottling wand attached to about 3' of tubing.

I bought a 3/4" threaded PVC elbow, and the only thing that was left in my bucket was about 1oz of residual hop sludge.

File that one in the "why TF did I not do this earlier" cabinet.

So I say it again...
Awesome.
 
Hey, I’m pretty new to brewing and I’m just wondering. Can you ‘force carbonate’ beer in a keg and then bottle it from the keg without losing the carbonation?
 
As long as you are talking about getting co2 from a tank through a regulator, yes you can bottle from the keg. There are several ways, just using a tube to the bottom of the bottle and filling with low pressure, or different types of "beer guns". There are different techniques for each procedure. For the tube, chilled bottles keeps the beer from foaming. etc.
 
Hi everyone! Great thread. I have a question that isnt really in regards to the technique or process of bottling, but actually the beer conditioning in the bottle itself. Over the last few batches, Ive experienced something sorta strange.

The taste and aroma of the beers are wonderful going in to the bottling bucket. Never have any issues with off flavors or strange smells when we take samples. However, after the bottles condition for 2, 3, or 4 weeks and they are carbed, there is a very astringent flavor and aroma. After looking around, the only thing i can think of is some sort of carbonic bite/acid. Im getting in to kegging now and have been reading alot about serving temperatures etc. Do you guys think that the beer could be too cold, leading to the liquid absorbing more Co2, leading to that carbonic bite flavor and aroma that I'm getting?
 
I just bottled a one gallon all grain black IPA. All went well. One week into bottling I noticed three bottle caps are dimpled up. Does this mean those 3 went bad? Not sure how this happens? Any help with the situation is much appreciated.
 
I would suspect that the capper did that. I would think the bottles would explode before the caps would dimple up. But, just in case, handle those ones with great care in case they are extremely over carbonated.
 
I would suspect that the capper did that. I would think the bottles would explode before the caps would dimple up. But, just in case, handle those ones with great care in case they are extremely over carbonated.

Thanks will be cautious when opening.
 
I just bottled a one gallon all grain black IPA. All went well. One week into bottling I noticed three bottle caps are dimpled up. Does this mean those 3 went bad? Not sure how this happens? Any help with the situation is much appreciated.
Do you have an all metal wing capper with red plastic grips? If so I have the same capper, the dimple is intended as visual confirmation of a properly sealed cap; when they pop up its an indication of high carbonation but doesn't mean over-carbed bottle bombs. I've had them all pop up on a batch of belgian tripel, they poured normally when chilled, no gushers whatsoever. At first, when I started labeling my beers with a sticker on the cap I hated the dimple, but I quickly realized what a useful feature it is for keeping tabs on carbonation level.
 
Do you have an all metal wing capper with red plastic grips? If so I have the same capper, the dimple is intended as visual confirmation of a properly sealed cap; when they pop up its an indication of high carbonation but doesn't mean over-carbed bottle bombs. I've had them all pop up on a batch of belgian tripel, they poured normally when chilled, no gushers whatsoever. At first, when I started labeling my beers with a sticker on the cap I hated the dimple, but I quickly realized what a useful feature it is for keeping tabs on carbonation level.

Yes it sounds like the same capper. We will see how it pans out this weekend. Thanks.
 
Yes it sounds like the same capper. We will see how it pans out this weekend. Thanks.
I've capped over 700 bottles with this capper and have had zero mishaps. The only thing keeping me from buying a bench capper is a fear of crushing bottles. For now, this wing capper is just the thing for reliable capping.
 
So I can't find anything on an experiment I might try on my next bottling day.

Has any one ever tried adding commercial beer to the bottling bucket with the priming sugar?

Would that even do anything? I mean I'm sure it would but just wanted to see if anyone has tried it and if so what were their thoughts on it.
 
A couple of things.

If the commercial beer was pasteurized, nothing will happen and you will have a sweet beer.

If you don't let the commercial beer go flat before bottling you could create bottle bombs.

And a question - Why would you even want to do this? The beer is already carbonated.
 
Nevermind.

Well, the beer I was thinking about adding to a similar IPA was Dogfish Head 120 it ages well and I was thinking it's awesome yeast would some how make my beer awesome overall. It's a stretch I know.

It was worth a post I guess. So what I got from you is it's a bad idea. Thanks.
 
If you want to mix Dogfish Head 120 with your IPA, you could do it in the glass.

You could let the Dogfish Head 120 go flat then mix with your beer and bottle as you described. But, 1) isn't Dogfish Head 120 really expensive? 2) letting it go flat will lessen the hop flavor and aroma. 3) unless your IPA is really good, you might be just ruining the DH120.

If you are looking for the yeast, sanitize a container, pour the last 1/4 inch of each bottle in there then when you have drunk the DH 120 six-pack, make a starter from the dregs. But, a word of warning. Some breweries ferment with one yeast and use another for conditioning. That is if they naturally carbonate the beer at all.

Sounds good thanks for the input I might just try to harvest like you mentioned with the dregs.
 
Thanks OP for the great thread! After a few futile and frustrating attempts trying to bottle from siphon to bottle (bad advice from a starter kit pretty much saying to do this), I bought a bottling bucket and #1 - Things were so much easier, and #2 I ended up getting more bottles in my last batch! Bottling doesn't seem to be a huge hassle it once was just by adding the bucket.

Also to save time on bottling day, I've been washing bottles and putting them on the bottle tree shortly after I use them. So when bottling day comes, I have clean bottles and all they need is a quick rinse and sanitize.

Previous bottling days for me took a couple hours and a lot of frustration involved. Yesterday took 30 mins, and about 20-30 mins after for cleanup. I could probably get the bottling done faster if I mixed the priming sugar in the batch, but I still do it with a funnel & 1/2 tsp of cane sugar in each bottle. I started doing it that way and was happy with the consistent carbonation I've gotten in every bottle so far.
 
Last edited:
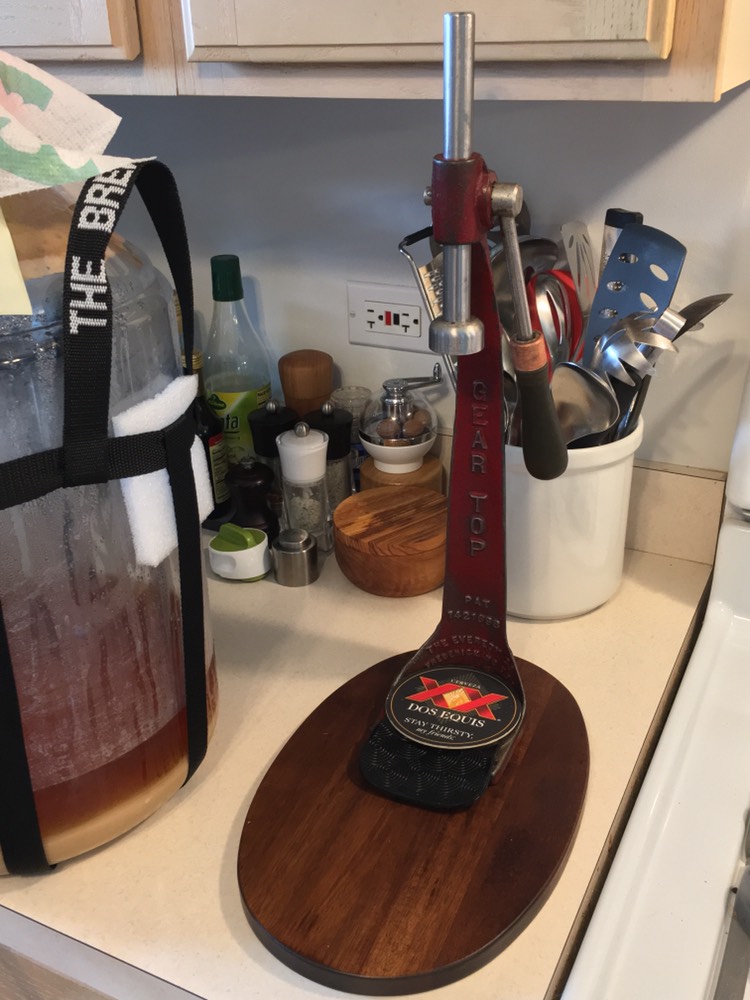
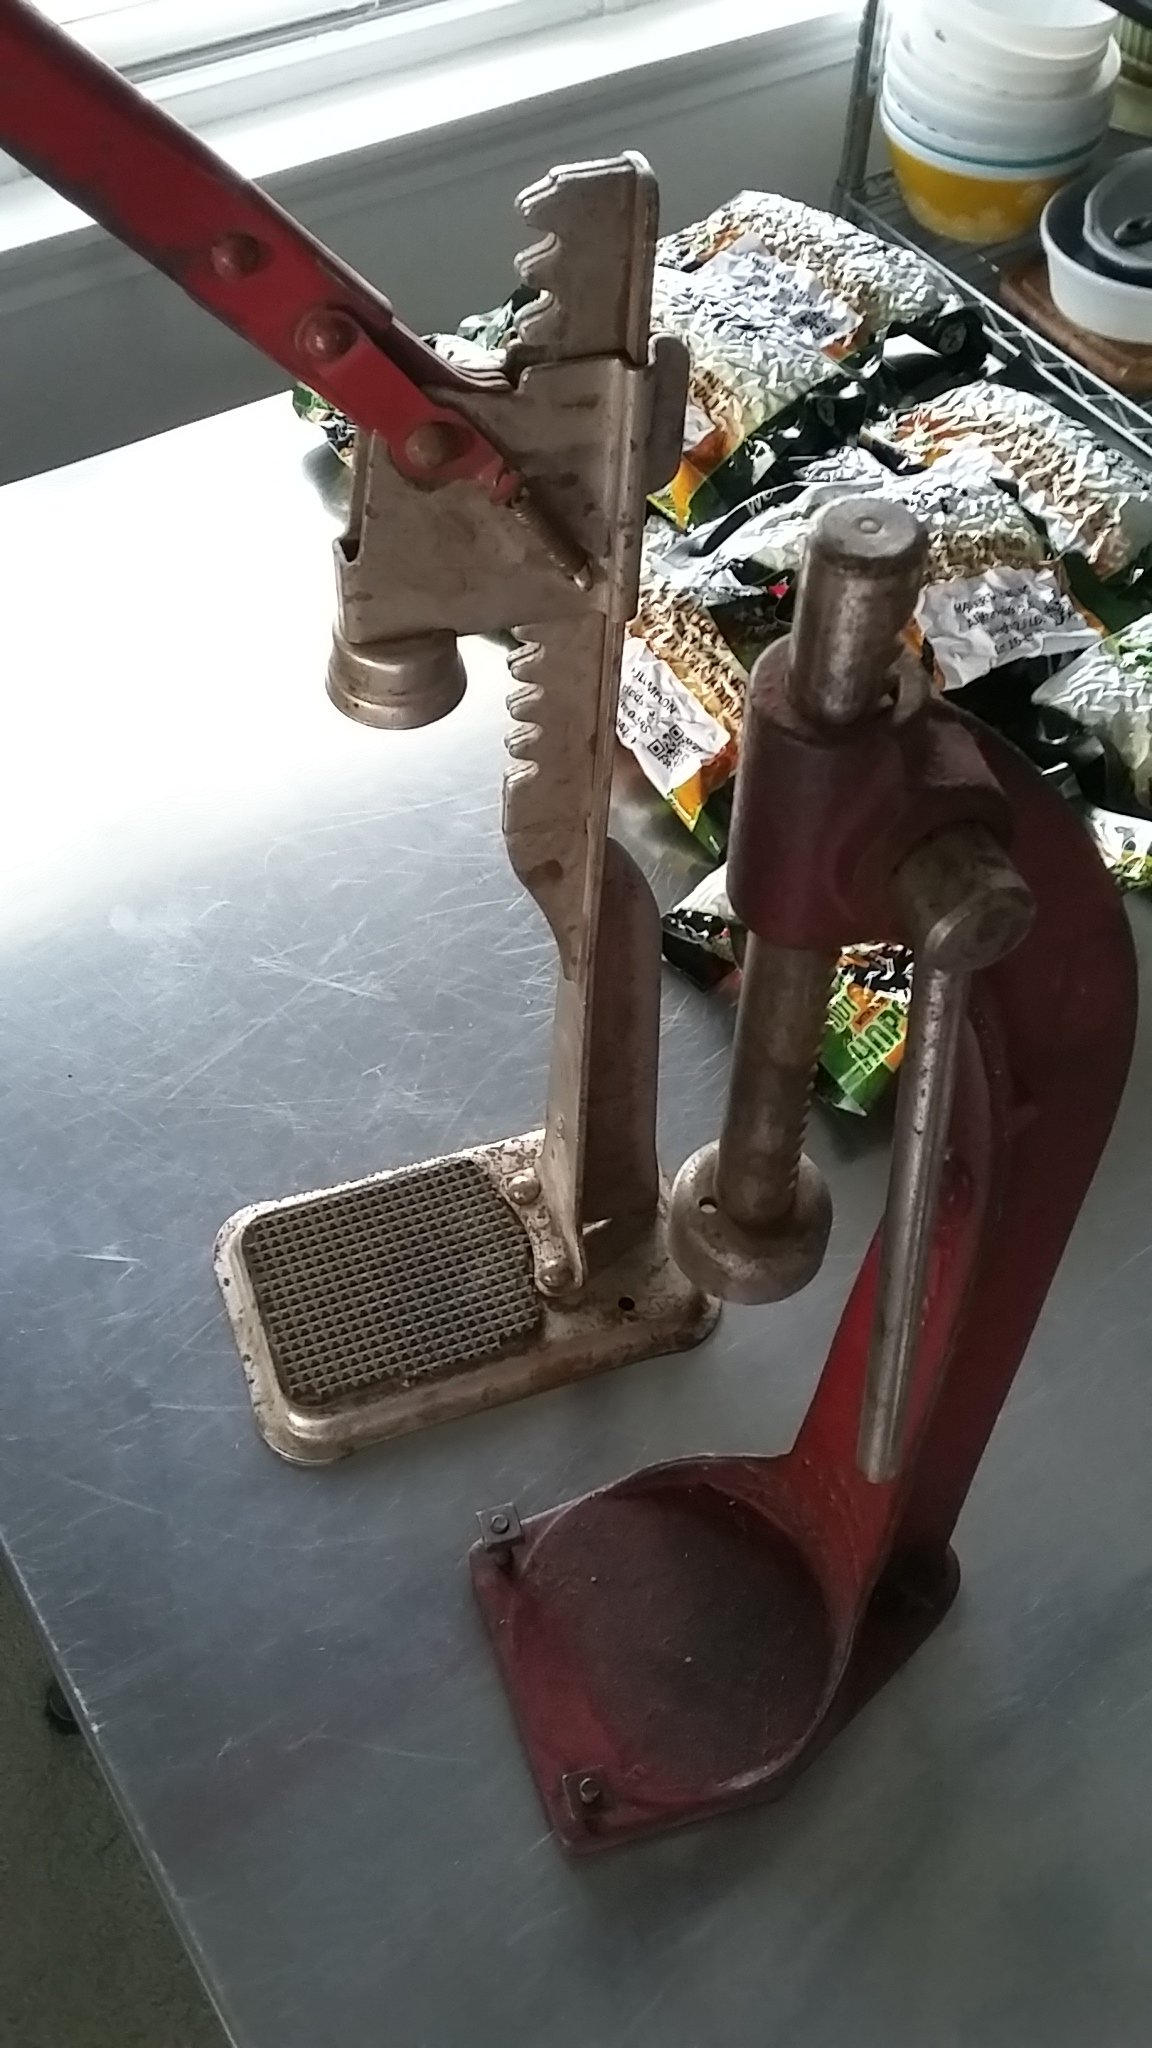
I recently picked up a prohibition-era antique cast iron gear top capper, cleaned it up and lubed it, installed a new rubber washer into the bell, then this past Saturday was my first chance to try it out. The capper worked amazingly well, requiring much less force than my wing capper and the bottling went so much faster that I decided to bottle a second batch since everything was already set up! Bench cappers in general are a huge improvement over wing cappers, and if you can get you hands on one of these bulletproof vintage cappers in good condition, you can save quite a bit of money over the $150-200 you'll spend on an all-steel modern bench capper. I picked up two different cappers both made by Everedy in Frederick, Maryland for $8.99 plus $10 shipping on www.shopgoodwill.com
I freaking LOVE this thing.

EDIT: Here's a video of it in action. Pretty cool that there were homebrew clubs back in the day.

a9adf83b-57d1-4351-a00e-860b5c64d7ac.jpg

20180608_182617.jpg
 
Last edited:
I’m just starting back up home-brewing after about 25yr hiatus. Appreciate this thread as I’ll be bottling in larger bottles. 1L if I can source them with appropriate caps. Not too interested in the grolsch style caps. I do have an all in one wine pump that has bottling attachments and uses a vacuum pump to fill bottles. I feel like this will make easy work on bottle days. The vacuum pump works great for transferring and racking between carboys.

Cheers!
-jonny
 
AA103E2D-7F38-4525-83FF-5245C420494E.jpeg
I recently picked up a prohibition-era antique cast iron gear top capper, cleaned it up and lubed it, installed a new rubber washer into the bell, then this past Saturday was my first chance to try it out. The capper worked amazingly well, requiring much less force than my wing capper and the bottling went so much faster that I decided to bottle a second batch since everything was already set up! Bench cappers in general are a huge improvement over wing cappers, and if you can get you hands on one of these bulletproof vintage cappers in good condition, you can save quite a bit of money over the $150-200 you'll spend on an all-steel modern bench capper. I picked up two different cappers both made by Everedy in Frederick, Maryland for $8.99 plus $10 shipping on www.shopgoodwill.com
I freaking LOVE this thing.

AA103E2D-7F38-4525-83FF-5245C420494E.jpeg


EDIT: Here's a video of it in action. Pretty cool that there were homebrew clubs back in the day.
AA103E2D-7F38-4525-83FF-5245C420494E.jpeg


View attachment 576767
View attachment 576768


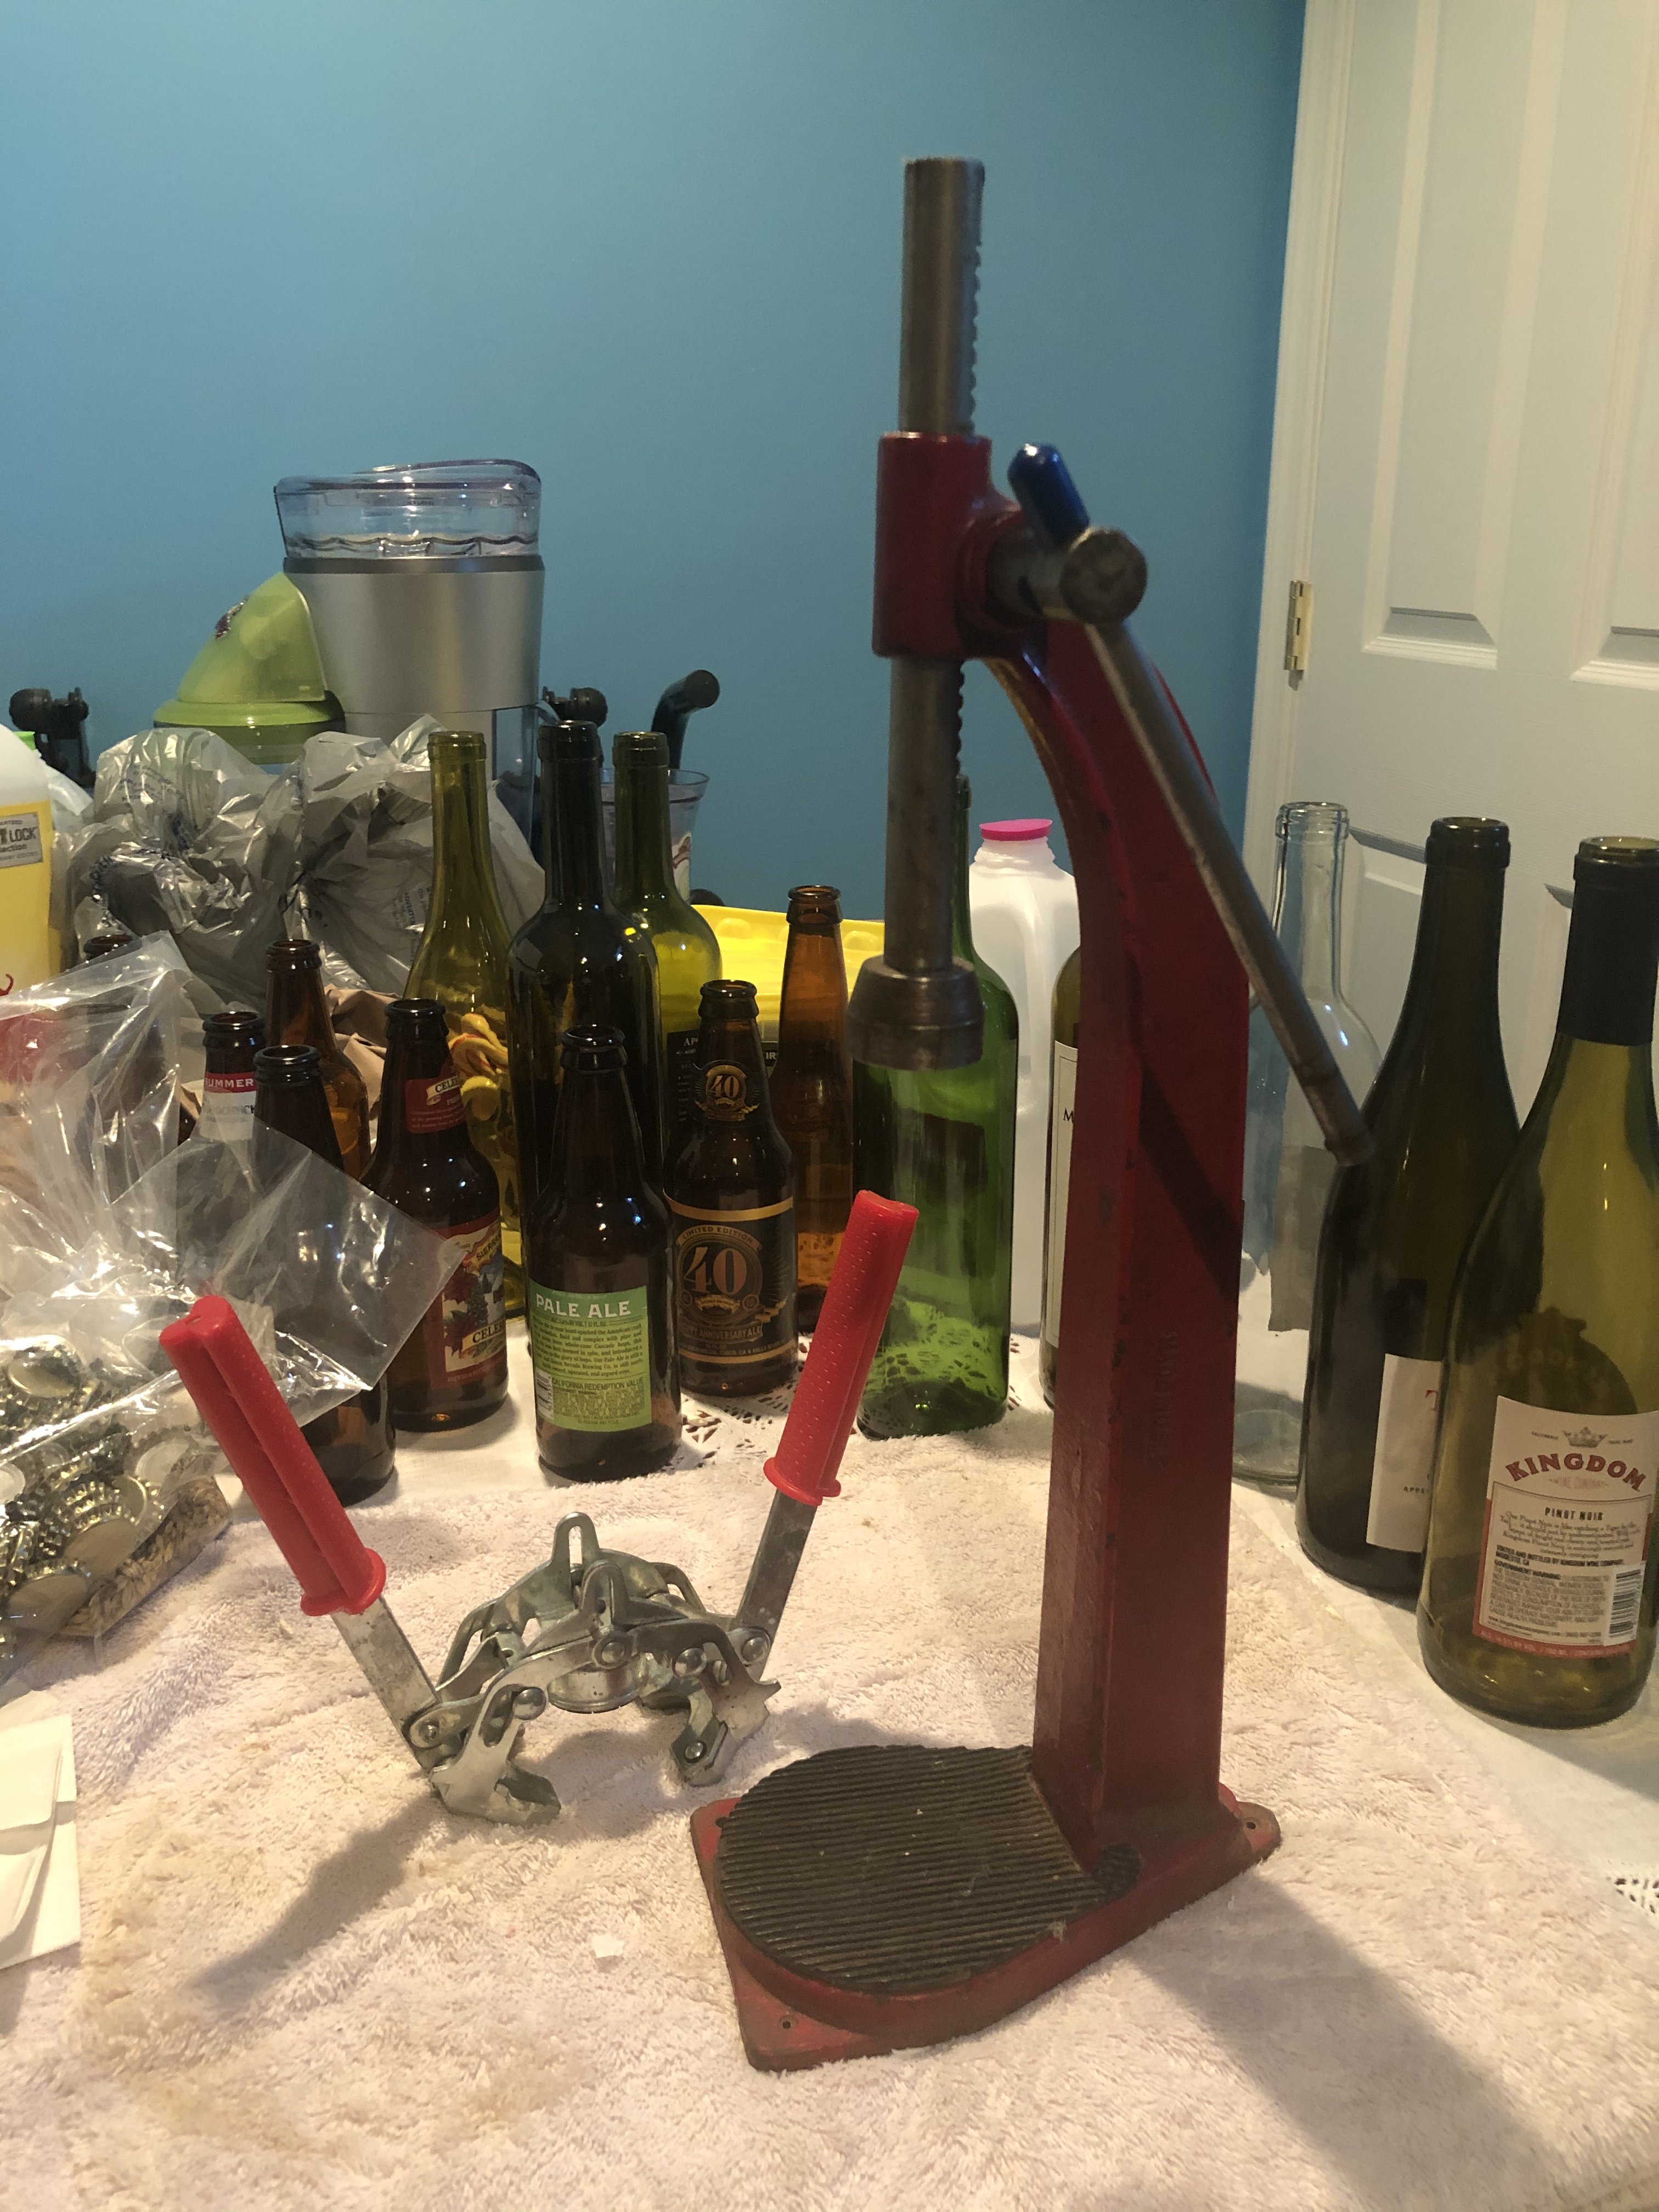
These are my 2 cappers. My dad gave me the big red one. Said he used to bottle root beer with it when he was a kid. He’s a child of the 30’s. I never really used it. I consider it a display piece. Its stamped “Made in USA” but has no other markings I can find.

I like the metal wing capper - thats my go to - definitely better than the cheap plastic red ones they sell now.
 
Last edited:
Bottled my first 5-gallon batch last night using a lot of the tips from this thread, so thanks everyone! Started as soon as the kids were in bed, and I was done (including cleanup) in 1.5 hours. Some thoughts:

- Using an elbow on the back-side of the spigot got me another bottle or two. All that was left in the bucket was a single gulp of uncarbonated beer. On a related note, it's hard to drink even a single gulp of beer from a 6.5 gallon bucket without spilling all over yourself.

- Mounting the bottling wand directly to the spigot with a very short piece of tubing is the way to go.

- The bench capper is WAY easier and faster than the wing capper! Worth every penny!

- I need to hone my racking skills. I racked 4.6 gallons from my carboy to my bucket before I started sucking up trub, but there was still a quart or more of beer on top of the trub. Anybody have any tips/hacks?

- If I had 4.6 gallons in my bucket, and my bucket has 3 oz of deadspace (I measured it with water a week or so ago), I should get 4.6 x 128 - 3 = 586 oz into my bottles. 586 / 12 = almost 49 bottles. I ended up with 47.5 bottles. (Side note: Is there anything more frustrating than being one bottle short of a full case?) I didn't overflow my bottles, and I had just a few drips from my wand: not an entire bottle's worth. It's a mystery that I will have to investigate.

- I mixed a bucket of Star San on brew day, and I kept it sealed/lidded to use on bottling day, then discarded it. I think that's going to be a good system. I'll get two uses out of a solution, and at three to four weeks, I'm not really in any danger of the Star San losing effectiveness.
 
I snorted coffee thru my nose when I read the part about trying to drink the bottom of the bucket. If you have to, use a straw!
I almost exclusively bottle, kegs can be a pita, too.
Some thoughts:
I use a wing capper. I have a bench capper, but it does not seem to crimp the cap as well as the wing capper.
FastFerment trays, available on Amazon. Get a few of these, and you'll never go back to a tree. Available in several different sizes, for different sized bottles.
Not sure of the brand name (Vino?) bottle washer also available on Amazon. The kind that you push the bottle down onto, it squirts sanitizer up into the bottle with spring pressure. Use about a pint of sanitizer to rinse several cases of bottles, then put them in the FastFerment trays to drip dry. Then put your caps in the bottom tray of the bottle washer to sanitize.
 
Last edited:
Back
Top