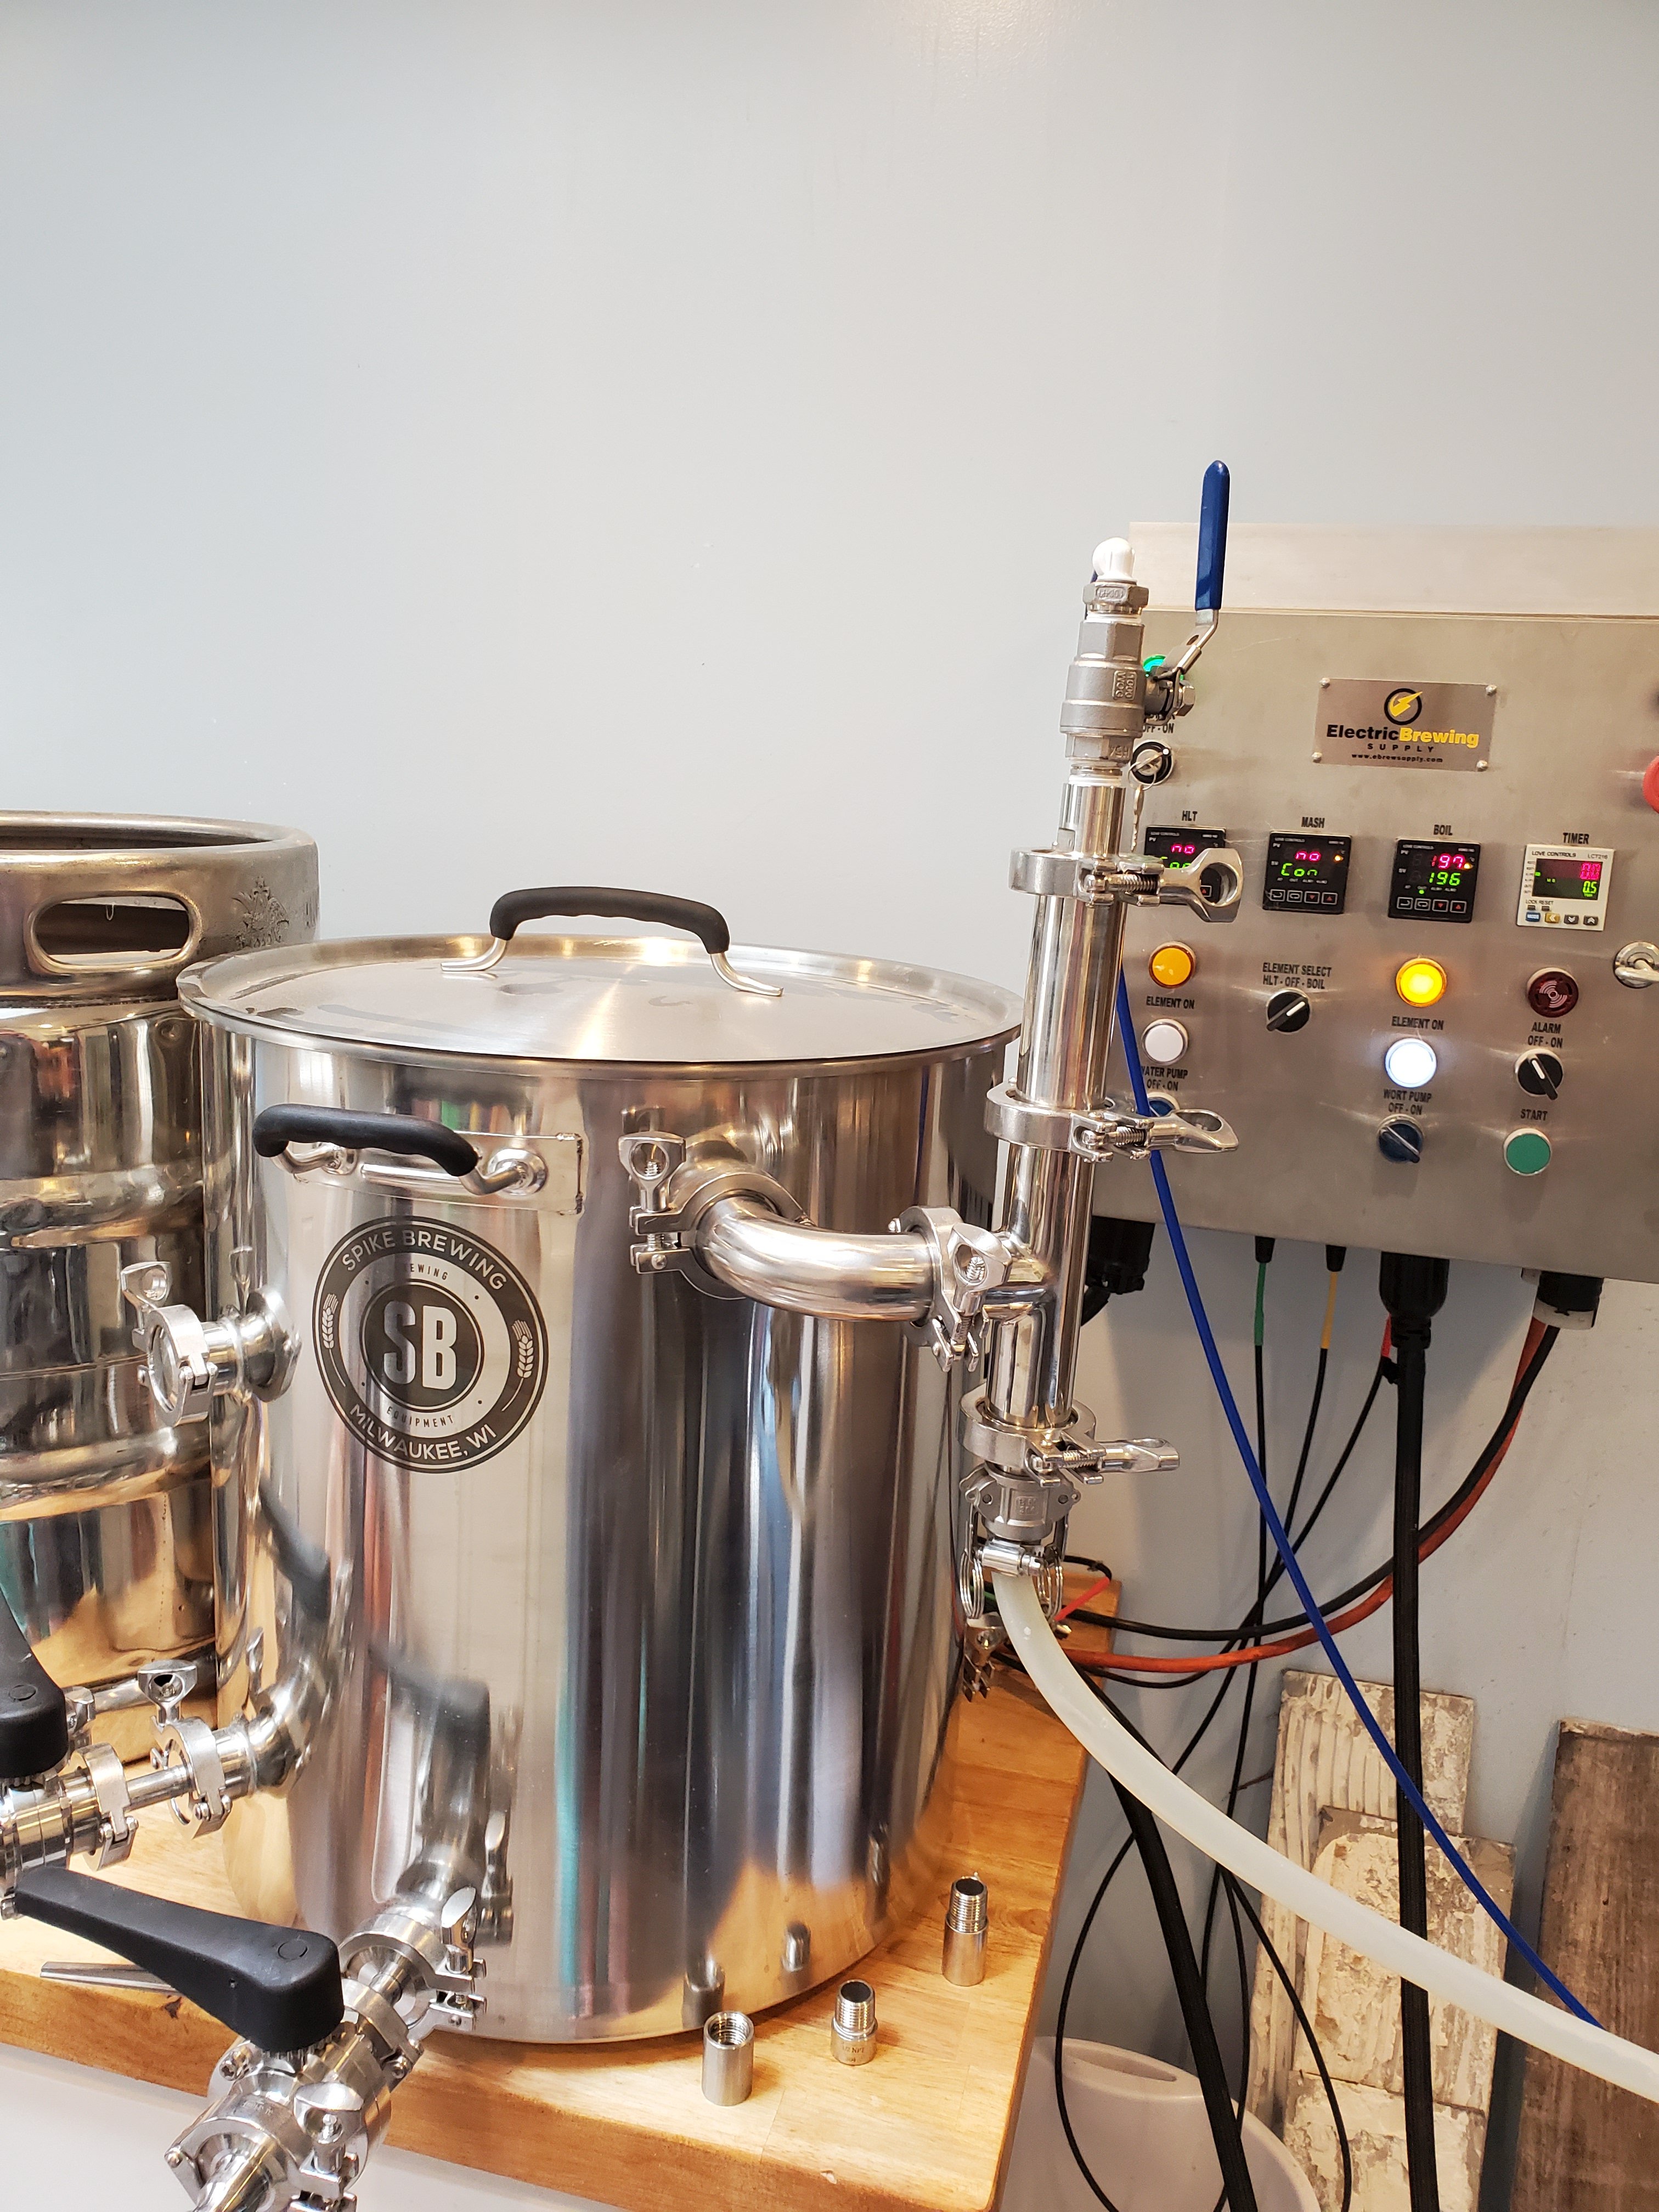
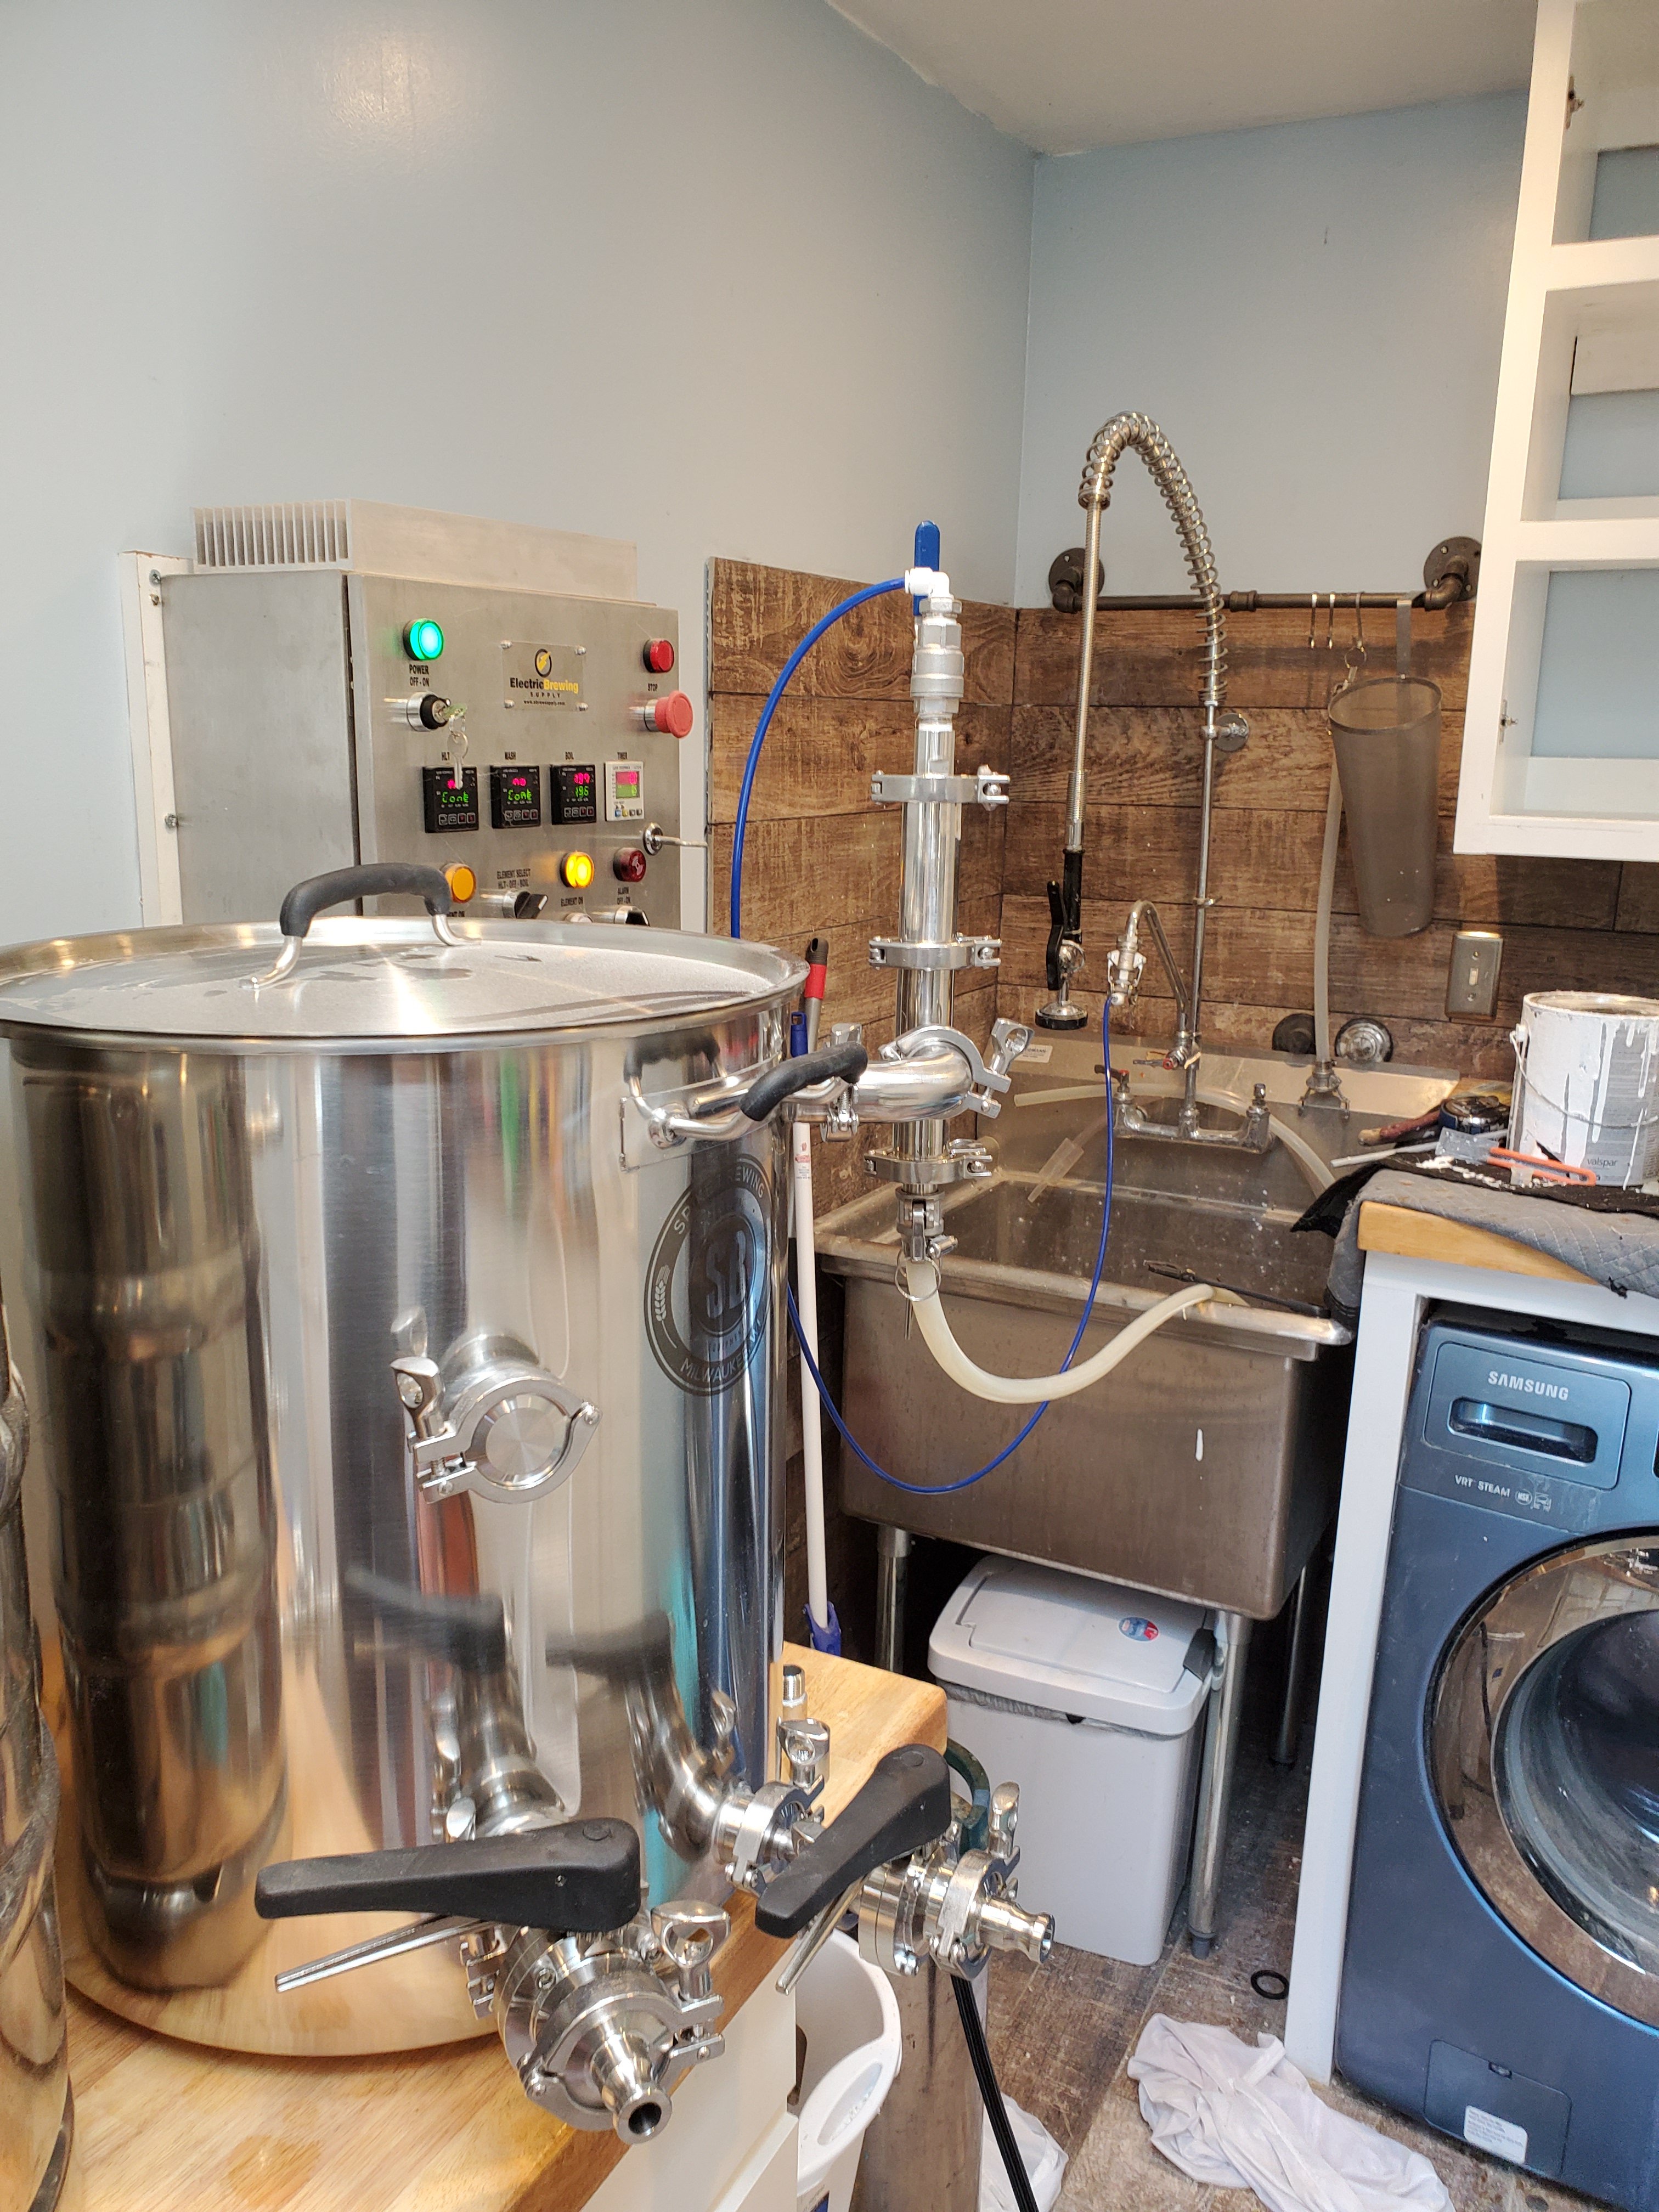
Boil kettle condenser - no overhead ventilation needed

Homebrew Talk - Beer, Wine, Mead, & Cider Brewing Discussion Forum

Help Support Homebrew Talk - Beer, Wine, Mead, & Cider Brewing Discussion Forum:

This site may earn a commission from merchant affiliate links, including eBay, Amazon, and others.
I did my first brew yesterday.
- Not running my exhaust hood was definitely nice.
- Definitely some DMS "aroma" coming off the water which I just ran it into a bucket this time. I'm going to get a drain to the sealed sump pump set up before the next session which should make a dramatic difference.
- 35% power was still a little high for me. I had some hop material buildup above the boil line indicating some foaming so I'm going to drop a couple percent for the next brew.
- My OG was off by 4 points, not terrible, but more than I'm used to (usually get +/-2) I completely forgot to check my post-boil volume but suspect my boiloff was slightly lower than my water test.
 
It may be a worthwhile test, but I suspect the pressure change is in the neighborhood of a fraction of a psi. In my initial tests, I boiled without a lid, using plastic wrap, and it deflected but held on. Any serious vacuum would have pulled it off. Keep in mind the vacuum creation is self limiting - without the steam to condense, the vacuum cannot be created.
 
I got my plumbing all set up. Except I realized there’s no reason my chiller water can’t go down here too so I’ll be adding a wye.
 

Attachments

  • 3C71C0C1-B8AC-4931-AE4D-0DFEFE5096D6.jpeg
    3C71C0C1-B8AC-4931-AE4D-0DFEFE5096D6.jpeg
    1.9 MB · Views: 299
Starting buying parts for this based on post #278 since I, unfortunately, cannot get a steam slayer right now. Is there any alternate source for the 6gph sprayer? The stainless version does not appear to be in stock on McMaster-Carr.
 
Starting buying parts for this based on post #278 since I, unfortunately, cannot get a steam slayer right now. Is there any alternate source for the 6gph sprayer? The stainless version does not appear to be in stock on McMaster-Carr.
Any reason not to use the brass version?
 
Just mount to the side. It’s not going be as efficient with a narrow long tubing. I’m more of a fan of the side mounts: Then can easily add hops without making the lid heavy and awkward for adding hops. You can always cap it off during BIAB if you’re concerned about losing volume.

On a different note: i semi-recently started using my BIAB pulley to support my steam condenser. Super easy and cheap.

On a third note: i was having issues with the condenser working when running a tube directly from the condenser to my sink or floor drain. As mentioned above , i think this was because of the angle the tubing had to make... to solve this, i have the condenser draining straight to a bucket with a spigot. Then tubing from the spigot to my sink. This way, draining from the condenser is not slowed.

Pic
Very curious about your setup. I would like to do something similar. Would you be able to give me a quick breakdown of what equipment you're using and what your brew process is?
 
Just my luck, ship arrived in port with 100 Steam Slayers. Shipment got split up and Im sitting on 100 bodies without the cap and sprayer adapters. Will announce when they are finally here.
 
Equipment:
-17 gallon, 220 volt digiboil kettle
-Neoprene jacket and sleeping bags
-Wilser bag and pulley
-Steam condenser (condenser boss) (installed using Stepbit).
-handful of 5 gal buckets
-stainless steel immersion coil
-ball and keg temperature coil For fermenter
-anvil bucket fermenter 7.5 gal
-inkbird temperature controller


Process:
I do BIAB. Mill grain finely. Use the kettle to heat to strike temp. Mash in , reduce kettle to mash temp, and stir for 5-10 mins. Turn kettle off. Wrap kettle in sleeping bags. Mash for 90 mins. Loses 2-3 deg.

Lift bag with pulley and squeeze bag using 3 bucket press: 3 nested buckets. Middle bucket contains pencil sized holes in sides and bottom. Grain bag goes in middle bucket. Use body weight to press top bucket to squeeze bag so wort falls into bottom bucket.

Heat kettle to boil using all 3 burners on digiboil (500 watt, 1000 watt, 2000 watt). Once it reaches boil, turn on water to steam condenser and adjust flow so that out water from condenser is warm to touch. Turn off 500 watt and 2000 watt switches and continue oil with only 1000 watt switch enabled. Readjust condenser water flow as needed. Add hops according to schedule. After boil, cool with immersion coil. Transfer to fermenter.
Thank you so much for the detailed post. How do you like the digiboil as your all in one vessel?
 
Thank you so much for the detailed post. How do you like the digiboil as your all in one vessel?

It’s great for BIAB. Seems to be the best bang for you buck, at least when i bought it 7 months ago. I’ve probably done around 10 batches with it since then.

It will heat to the temp you set it to accurately. I’ve verified it with other thermometers. If you don’t mash in right away it will drop a few deg before the heater element kicks back on to heat it back up. Often times it does overshoot the temp by a deg or two (due to lack of stirring?). This doesn’t really bother me since I’m not using it to keep a specific mash temp for very long- just heating to strike temp and mashing in with the kettle off.

If you wanted to recirculate during the mash and keep the temp completely stable, You could Always recirculate with a small pump. Instead of going this route, i invested money in a mill and just mill my own grain very fine since most of the people on here say conversion (And part of the mash that is most temperature Sensitive) is done in 10-15 mins. The temp is stable for that amount of time without recirculating, so i didn’t really see the point.
 
OK I will put together a list for you all, though I want to run a brew with it before qualifying the design. Stay tuned.
Great idea Dog. Do you have a parts break down with a step by step that you might be willing to share?
 
I appreciate BB's plug, though I think crediting me for only the TC tee isn't exactly telling the whole story. I did not receive any notice, but they certainly weren't obligated to. I put the information on here freely for the advancement of the community. If they want to package the kit and make a a few bucks on it - it's all good.

In any event, here is a parts list should anyone want to piece this up themselves. This uses 2" TC, but you could perhaps go smaller as BB is. Maybe 1.5" TC would be acceptable and save a few dollars - I just didn't test that so cannot vouch for it. I used different parts in mine but I think this would be how I would do it if starting over. This will yield a 1/2" NPT female connection for you to add whatever fitting you need to for incoming water. It mounts via a 2" TC flange that needs to be soldered on, welded, or JB welded on for those kettles that don't have a TC port there. Other methods for connected can certainly be explored. For example, BrewHardware sells a 1.5" weld-less TC port that could work if going 1.5" TC.
Great idea Dog. Do you have a parts break down with a step by step that you might be willing to share?


It's in post number 103 in this thread.
 
So I tried tried putting one of these together w a 9.49gph nosel and have blown 3 hoses. I am just running straight off my sink on cam and groove fittings.
What am I doing wrong here? Is there a different hose something reinforced? I'm currently using standard hose w stainless hose clamps.
 
Not sure what you mean by standard hose, but water from your sink is high pressure (~30 psi +). You also don’t need much flow (gallons per *hour*, not minute). You should use a small, pressure rates tube and fittings assembly. Say 1/4” OD polyethylene (even 1/8 but multiple step down fittings will probably be needed). If using large hose (~1/2”), it definitely needs to be reinforced and rated for high pressure.
 
Not sure what you mean by standard hose, but water from your sink is high pressure (~30 psi +). You also don’t need much flow (gallons per *hour*, not minute). You should use a small, pressure rates tube and fittings assembly. Say 1/4” OD polyethylene (even 1/8 but multiple step down fittings will probably be needed). If using large hose (~1/2”), it definitely needs to be reinforced and rated for high pressure.
Thanks for the help. I have been brewing a while but not used to playing w this pressure range. Sorry to be a bother but all of the fittings I am finding are either bulky plastic non threaded or push fittings that are specifically for "air only"
I have been searching a couple hours and am not finding what I need to make the NPT to hose connection. Can anyone point me in the right direction?
I'm so close to having my new rig up and running! Thanks for the help.
 
Screenshot_20200728-102932_Amazon Shopping.jpg
about to pull the trigger on this unless I'm way off base. The fittings are rated for misting systems. My concern is plastic screwing into metal NPT cross threading / leaking. Again this is out of my comfort zone so I may be worried for nothing.
 
Boil testing right now seems to be working like a champ. Only snags I got were forgetting to turn the element down which caused steam to escape and drain hose was too long and filling w water. All of my fittings are 1.5" TC do it looks like it doesn't have to be 2"
20200731_144503.jpg
20200731_144608.jpg
20200731_145748.jpg
20200731_144503.jpg
20200731_144608.jpg
20200731_145748.jpg
 
is that pulling steam out with that sharp bend in the drain hose? I know mine wont work unless its straight down and the end can't be submerged either.
 
is that pulling steam out with that sharp bend in the drain hose? I know mine wont work unless its straight down and the end can't be submerged either.
Yes it is pulling steam at the angle shown in the pics. I did have too much hose sitting in the sink at first which filled with water and blocked the flow. I trimmed the hose where it just hanging into the sink and it flowed great after that.
 
What is the extra spool for above the tee? Eat up length of the nipple inside?
Yes exactly. My initial test, when running the wrong hose type for my water supply, I had a lot of the mist entering my kettle. At that point there were a couple variables that were different.
#1 I had the T fitting mounted directly to the kettle. I have now added the elbow to move it away. I plan to add another moving it lower to ensure no mist enters the kettle.
#2 the sprayer sat pretty much dead center of the T when installed. I have a feeling this would not have been the case had I used 2" TC fittings.
My thinking in adding the upper section was to move the spray away from the kettle fitting and to increase the size of the condensation chamber since I used the 1.5" fittings. I was planning on trying a few different configurations but this one worked so well I'm not sure that I need to. I did order the lower gph sprayer and might try it to see if it can keep up?
 
What's everyone doing with their waste water? I don't have a drain very close to my kettle, and I have just been using a 5 gallon bucket to catch wastewater and just swap out the buckets. As my brewery is getting more hands off, it's kind of irksome dealing with the buckets. I think it's time to get some kind of pump in the mix...

Has anyone used a condensate pump to pump waste into? It seems like a good option, due to the small foot print of the pump. It'd be pretty easy to run 3/8 tubing into my washing machine drain from there. Anybody doing something like this?
 
Has anyone used a condensate pump to pump waste into? It seems like a good option, due to the small foot print of the pump. It'd be pretty easy to run 3/8 tubing into my washing machine drain from there. Anybody doing something like this?

I would recommend checking max temps. The waste water will be 120 to 140F. Do you already have a pump for brewing?
 
I do, that was my original plan. I just really liked the idea of something smaller like the pump used on my HVAC. I'll do some research on different pumps. Really I just want to avoid adding a holding tank for the waste water to be pumped out of.

I would recommend checking max temps. The waste water will be 120 to 140F. Do you already have a pump for brewing?
 
I looked at a condensate pump but most either had no ratings or were rated at the edge of what would work. I did come across a higher temp one but don't recall where, just that it was pretty expensive.

I ended up running about 20' of 1-1/2" PVC pipe to my sump pump. Mine has a sealed cover for radon remediation so I put a trap in the line but most people wouldn't need that (I considered just capping it when not in use.) It works so well I added a wye to send my chiller water down there too. The hand test tells me it has cooled substantially by 20' but there's virtually always at least a little ground water coming to further cool it so I really don't worry much about the effect on the pump. Some day this line may also end up being a condensate drain for a mini-split heat pump system we are considering for heating/cooling the basement.

The other issue might be odor if you find it objectionable. Running mine this way minimized that over my first brew where I ran it into a bucket. I didn't notice so much brewing as it built slowly over time, but a couple hours later when I went down the basement it was quite noticeable. Now not so much.
 
Hi I just purchased a steam slayer from brewhardware. After my first time using it i was only getting a discharge temp of around 100 degrees on a trickle from my faucet using a 9 gph mister. Is this to low of a temp? Should I try the 6gph that I have instead?
 
100F is extremely low. Any idea what your water pressure is? Your discharge water temp should be something more like 120-150 depending on your discharge rate.
 
Last edited:
Well sadly I don't know my water pressure. But I made the mistake when putting in my weldless fitting on my kettle a little too high and didn't account for the dip in the kettle lid. Although when I noticed the issue on my first brew with the steam slayer I threw some weights on the lid and didn't have any steam coming out, I think this might be the issue and there wasn't a true vacuum. I have since ordered the ferrule pull through and going to make it weldless so the lid seats the right way. The true test will be when i taste the first beer and see if there is any DMS.
 
Hi I just purchased a steam slayer from brewhardware. After my first time using it i was only getting a discharge temp of around 100 degrees on a trickle from my faucet using a 9 gph mister. Is this to low of a temp? Should I try the 6gph that I have instead?
PIC of setup? yes that is too low. if there is any bend in the discharge hose, warm water will drain out like you experienced, but it wont pull steam out of the kettle. discharge water should be hot-in the 130 neighborhood.
 
Your discharge temp will be lower with the 6gph nozzle. 100F is extremely low. Any idea what your water pressure is? Your discharge water temp should be something more like 120-150 depending on your discharge rate.

Sorry, you have this backwards. The less spray water, the higher the effluent temp, assuming all the steam is being condensed.
 
PIC of setup? yes that is too low. if there is any bend in the discharge hose, warm water will drain out like you experienced, but it wont pull steam out of the kettle. discharge water should be hot-in the 130 neighborhood.

I'm brewing tomorrow so I'll take a picture. There is no tube coming off the steam slayer as I have my electric kettle sitting on a plant dolly and its just high enough to get a bucket underneath the discharge barb.
 
Back
Top