• Please visit and share your knowledge at our sister communities:
  • If you have not, please join our official Homebrewing Facebook Group!

    Homebrewing Facebook Group

Boil kettle condenser - no overhead ventilation needed

Homebrew Talk

Help Support Homebrew Talk:

This site may earn a commission from merchant affiliate links, including eBay, Amazon, and others.
Try agricultural suppliers in your area. These nozzles are used for spraying chemicals and fertilizers on crops, as well as misters for keeping livestock cool.
 
Hi everybody. I am new into this forum as writing, but I have been a reader for long while. I read this post since the beginning and I got very interested in implementing the ideas here. I decided to have this solution to my own homebrewing and as I live in Sweden I can't find the nozzle as a private person. Is there anyone who knows if/where I can find some equivalent Nozzle in Europe? Thank you.

I use this nozzle. Works ok, I have 3.5 bar water pressure and I am boiling 50 liter with a 4500W element at 60% duty.
 
Try agricultural suppliers in your area. These nozzles are used for spraying chemicals and fertilizers on crops, as well as misters for keeping livestock cool.

I will try to find in those stores, thanks.

I use this nozzle. Works ok, I have 3.5 bar water pressure and I am boiling 50 liter with a 4500W element at 60% duty.

Thanks for the tip, I will look this option, it seems quite simple but if works I am good with that.
 
Any update on this configuration? Would appreciate any findings you could share.
Did a maiden voyage brew on it the earlier part of last week . Worked out well, drained it right into the drain for my washing machine
, so no babysitting a bucket for overflow. Once the boil started to roll I turned it down to just the 1000w element and locked down the lid. Still gotta dial in the boil off rate , but not by much . Extending my boil could of helped me hit my numbers but I was only off my target gravity by <.05 . Still have some tinkering and playing around to do with the system overall to get the kinks out. I did use a wilser bag inside the mash pipe so I could go extra fine on my crush and to aid in clean up. All in all I'm satisfied. Should make New England winter brewing more comfortable.
 

Attachments

  • IMG_20181016_092110.jpg
    IMG_20181016_092110.jpg
    2.5 MB
Last edited:
Hello, I just finished reading thru this thread and I'm looking to purchase a new boil kettle soon and I would like to incorporate this design with my order (Spike Brewing). I make 5 gallon batches and typically need 7 - 7 1/2 gal at the start of my boil. Currently I'm leaning towards using the 2" design, would a 10 gallon tank be sufficient size? I'm concerned the port may be too close to the boil as I'm not sure where the 10 gal mark in the kettle is, and where the hole would align with that mark.

Not sure if this matters, as most people throughout the thread sound like they are electric brewers, but I'll be brewing in my basement on the stove top that I have down there.

Thanks for the help, and the research into this, looking forward to implementing it in the near future.
Are you still intending to make 5 gallon batches? If so, you should be fine, since most everyone is reporting about half as much boil-off with the condenser systems. In other words, you'll be reducing your pre-boil volume compared to open boiling.

As to your other concern, I agonized over port placement also. I finally went through the lid, using an elbow fitting. I'm certain that, had I gone through the side, I would've regretted my choice. This way I can just rotate the lid to clock the condenser wherever I like. I put the port as close to center as possible. To my immense suprise, there was no problem with the condenser assembly overbalancing the lid. Of course I am using Bobby M's 1-1/2" unit on a 15 gallon kettle, 2" on a 5 gallon lid might be different. If I had found the expected balance issue, I intended to make a cloth bag filled with sand or shot to keep the lid in place.

BTW: I have yet to find a kettle that actually holds the rated volume. Maybe the high-end kettles are better in that respect?
 
BTW: I have yet to find a kettle that actually holds the rated volume. Maybe the high-end kettles are better in that respect?

Define "hold". My 20g G1 kettles hold 20 gallons with an ~1-1/2" free board remaining.
I wouldn't even consider doing a pre-boil volume that large, but it sure comes in handy for big ass beers (like a 110 point stout) in the mash tun...

Cheers!
 
Define "hold". My 20g G1 kettles hold 20 gallons with an ~1-1/2" free board remaining.
I wouldn't even consider doing a pre-boil volume that large, but it sure comes in handy for big ass beers (like a 110 point stout) in the mash tun...

Cheers!
By hold, I meant that a 15 gallon (stated on box) kettle should contain at least 15 gallons without overflowing, measured by some reliable graduated liquid container. Or by weight, I suppose, I haven't tried that. My economy grade kettles always come up a quart or more short. It's not a real problem, I wouldn't try to boil more than, say, 12 gallons in a 15 gallon pot, and then very cautiously. By training and experience I'm a nuc operator and tool & die maker, by nature I'm a bit of a perfectionist (at least where other people's claims are concerned (joke)). It just annoys me to see '60 quart' on the label, and measure out 57.5 max. before it overflows. End of rant, sorry.
 
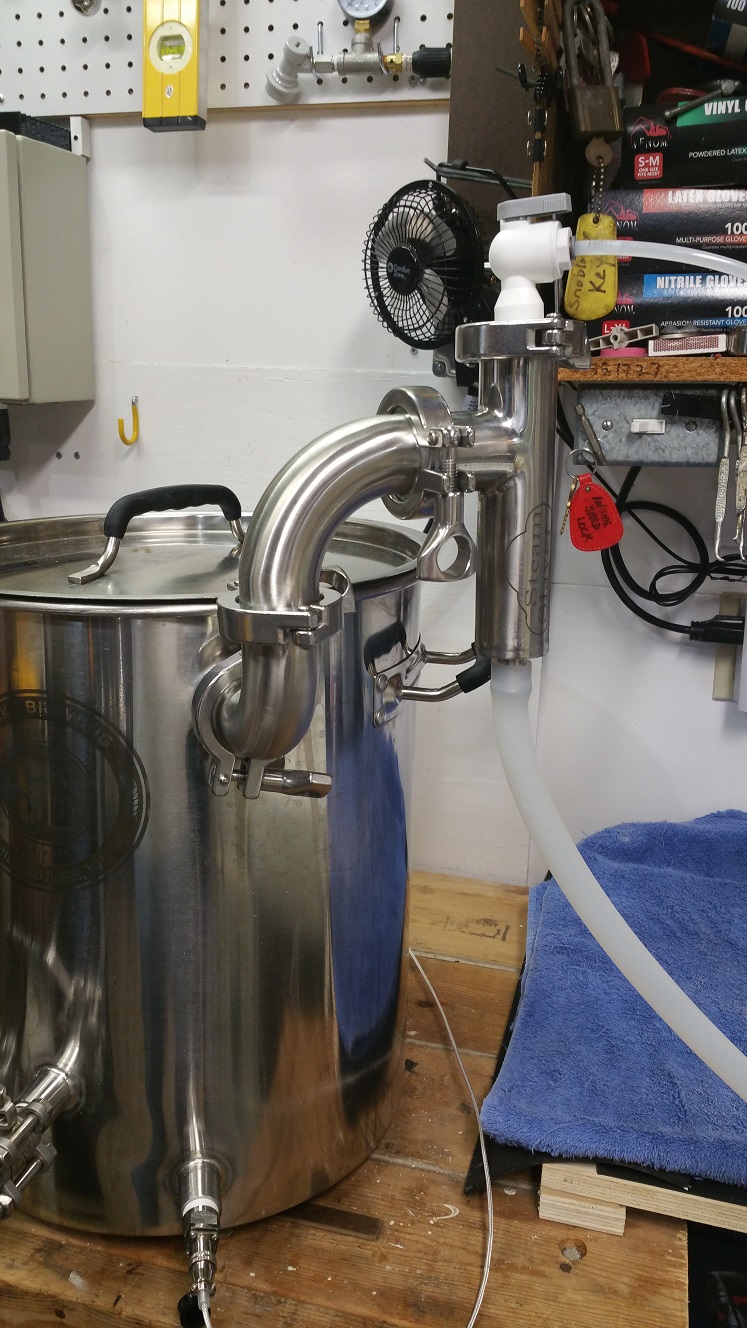
I was finally able to brew yesterday using BobbyM's steam slayer, a complete brew, not a test.

Those above who noted issues with "too hot" wastewater would be addressed by reducing the vigor of the boil were right--I had the element powered at 28 percent of max, and the wastewater is actually pretty mild in temp. Very, very little steam from it.

In fact, the water is so cool that I think I can figure a way to drain it directly into the trap pipes under my sink--though capturing some of it for cleaning is something I probably will also do.

I also ended up using just about 10 gallons for a 1-hour boil--certainly in line with the 9 gph rating of the spray fitting. I was running both an RO filter and the spray fitting off the same water line, so I am sure the pressure was less than it otherwise would have been.

All in all--very pleased how this worked. I'm set up to be able to brew in the garage in the dead of winter, and I don't need ventilation to do it.
Ran another brew day yesterday, and I took a short video of the steamslayer working--linked below.

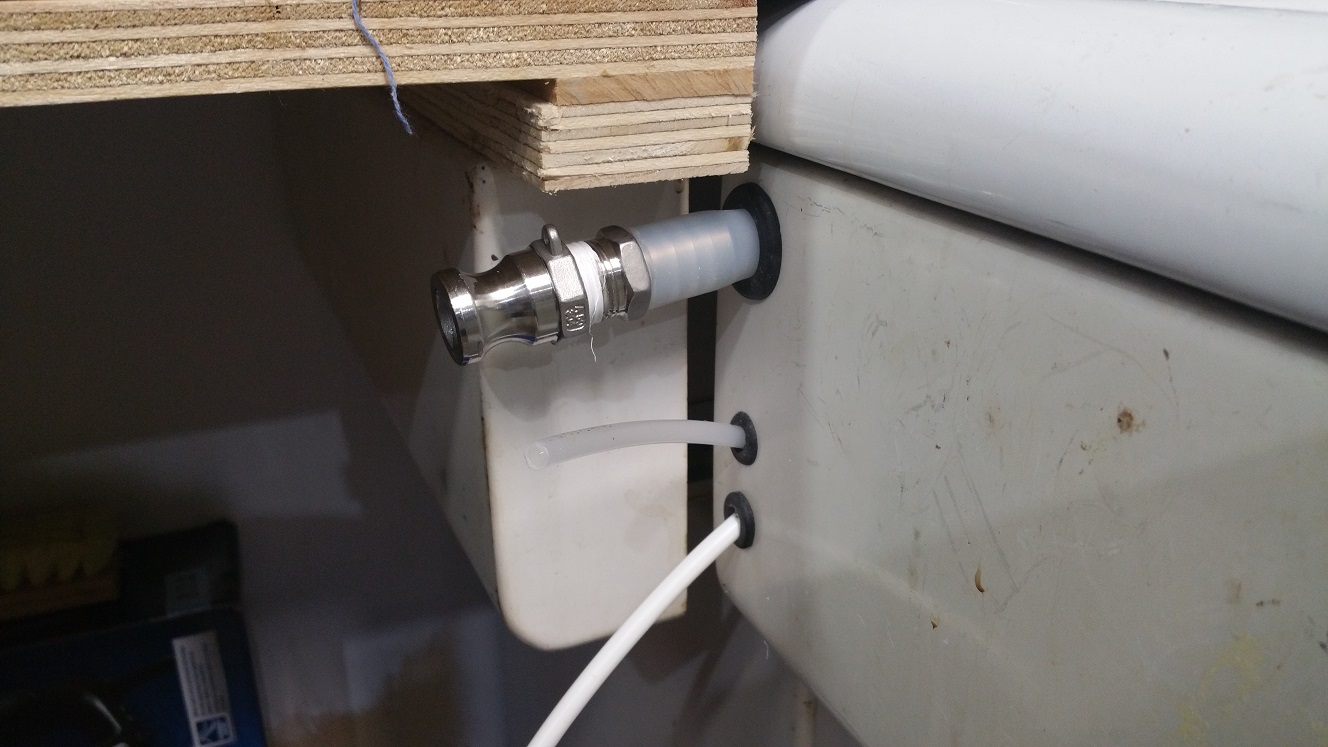
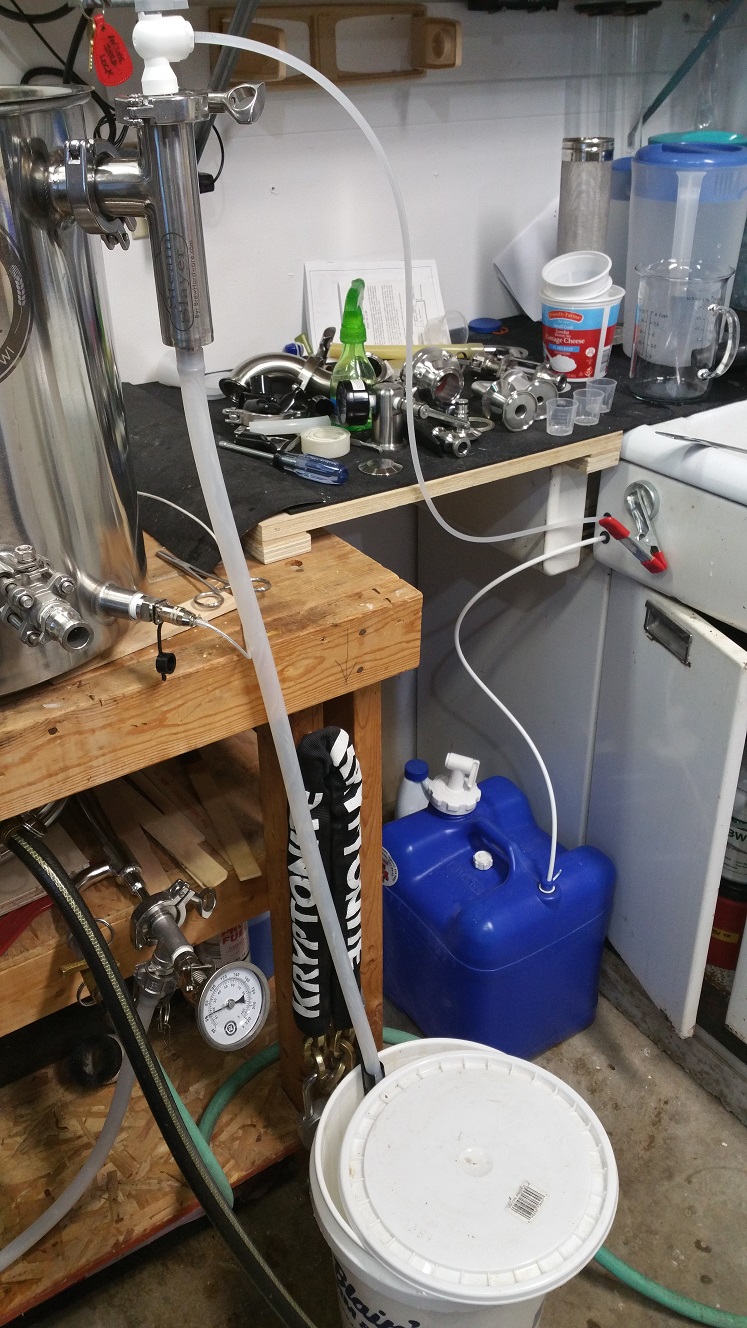
The only remaining thing to do with it is figure out how to set it to drain in the trap under the sink to the right. Below is a pic showing the current setup. I have two 1/4" water lines coming out from under the sink. One is from the RO filter replenishing my water supply (goes into the blue aquatainer). The other is from the house water line, feeding the steam slayer.

There is enough room that I could run a longer silicone hose from the steam slayer to a hole cut in the sink facade just above the grommets where the water lines come out. I want something that I can connect to the drain, then disconnect to collect water for cleaning as I wish. There's a standing pipe drain that feeds into the trap, so just putting the end of the hose in there would work.

But I want a fitting or something on the outside that lets me connect/disconnect the silicone hose from that fitting, so I can drain to a bucket or not, as the case may be. Any ideas for that?

steamslayerwater.jpg


Mount a 1/2" ss close nipple on the sink facade, screw on a camlock type A post to the outside, run more 1/2" silicone to your drain on the inside...

Cheers!

Hmmmm.....I didn't think about using camlocks or NPT stuff....I might even have parts to do that. I have a 1/2" barb, a Type A post, and a nipple.

What makes it a "close" nipple? Short? Or something else?
 
Hmmmm.....I didn't think about using camlocks or NPT stuff....I might even have parts to do that. I have a 1/2" barb, a Type A post, and a nipple.

What makes it a "close" nipple? Short? Or something else?
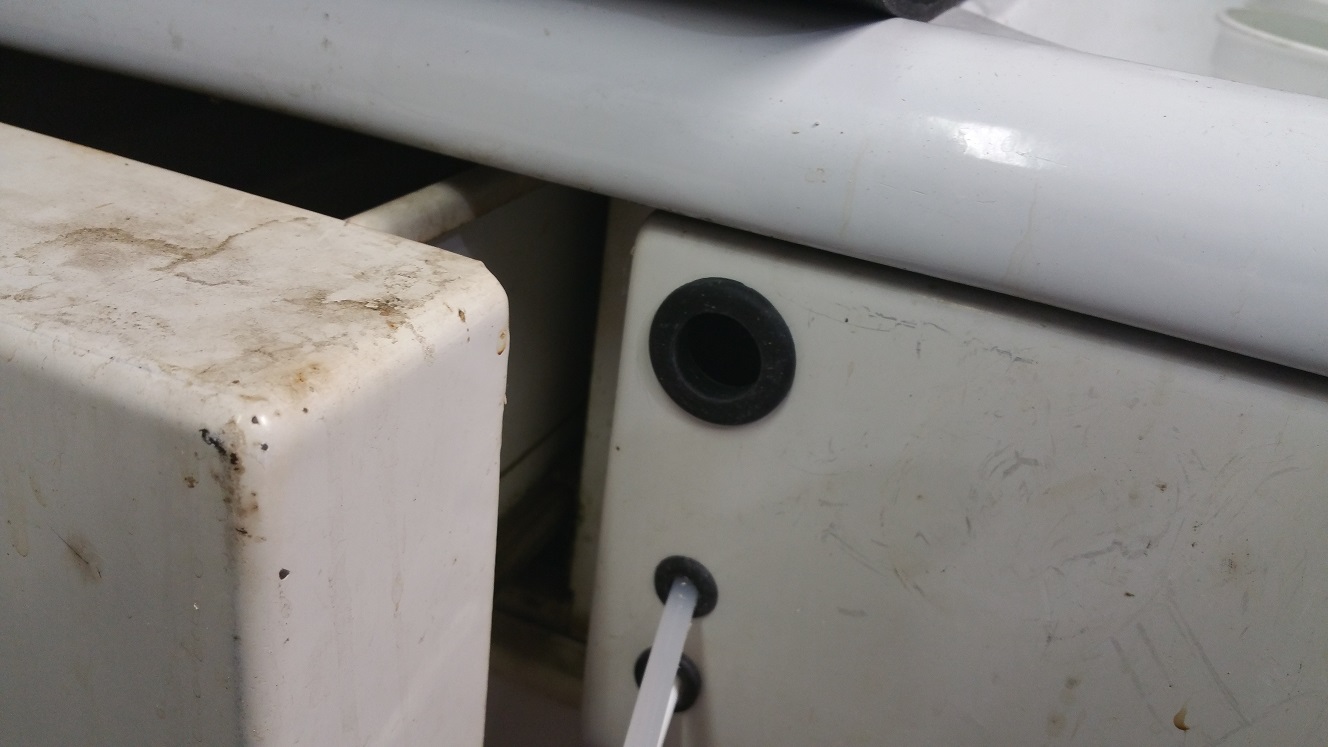
Yes, a "close" nipple is one that is about as short as possible, while still keeping the threaded sections at the minimum required length.

Brew on :mug:
 
OK, @day_trippr and @doug293cz , here's what I ended up doing after your responses and ideas.

I realized with my setup that it would be difficult to get a camlock on and off a fixed connection. The place for the line to go through the front facade of the sink has to be all the way to the left, to clear the sink bowl, and in that location, I wouldn't be able to close the camlock wings.

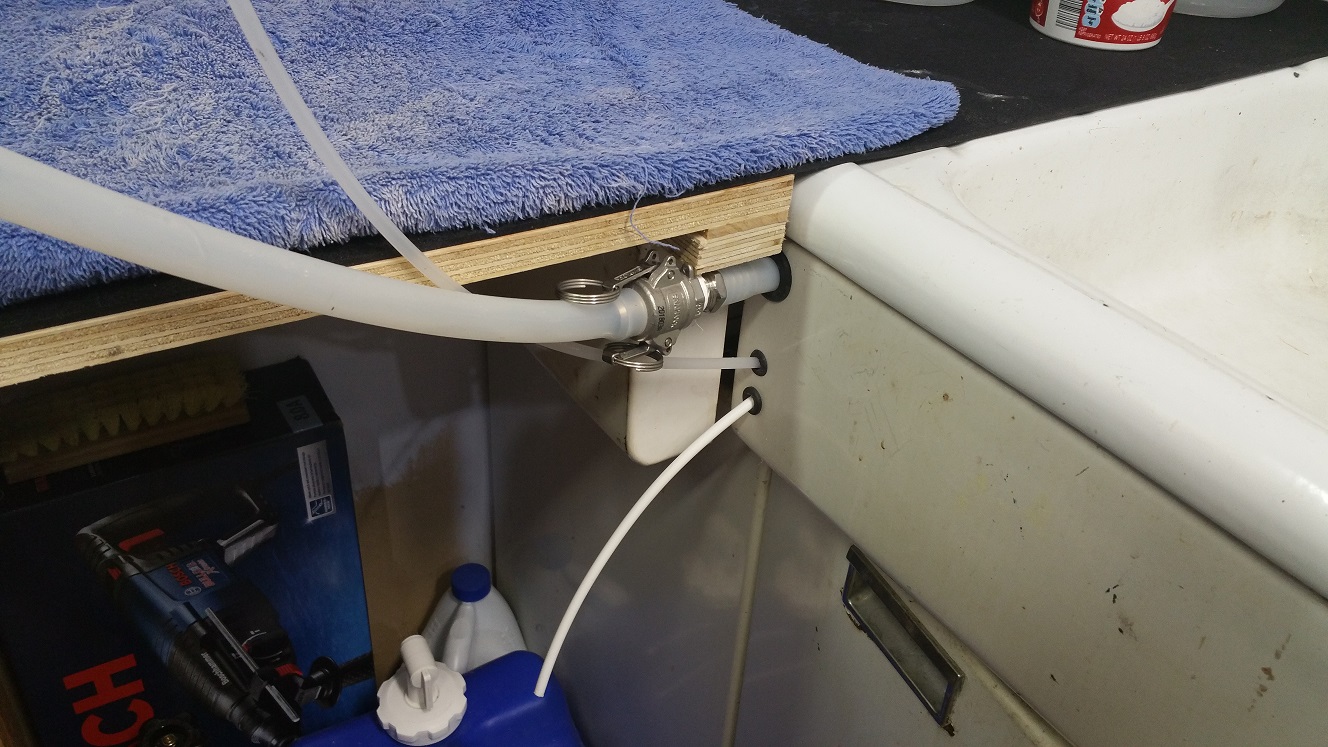
So I checked my parts box and found I had a rubber grommet that is exactly the right size for that 1/2" ID silicone tubing. I drilled a hole with a step-bit, added the grommet, then put a male camlock connector on the silicone tubing. Fed it through and sent it down the PVC pipe coming up from the trap, and connected the other side to the steam slayer.

It works. I have the double-elbow on there to raise the height so as to have enough elevation drop to avoid any pooling of the water. As said by either @Bobby_M or @BrunDog if the line terminates in water or fills with water, it won't work. The other advantage is that last time I used this, I had a boilup of hops, and that went out the port and into the water bucket. This should prevent that, at least to some extent.

I ran the system this afternoon with a few gallons of boiling water. Here's a short you-tube video showing it working and taking the lid off showing the steam.


Also some pics showing how it works. I wanted something that wouldn't require me to monitor a bucket full of water, but if I add a short piece of silicone tubing with male camlock to what comes off the steam slayer, I can drop that tubing into a bucket to reuse for cleaning.


slayer1.jpg
slayer6.jpg
slayer4.jpg
slayer5.jpg
slayer3.jpg
slayer2.jpg
 
For what little value this probably adds, I built an eBIAB system a few weeks ago only to have my kitchen filled with steam. I picked up a Steamslayer and brewed this past weekend, with ZERO steam in the house.

I wasn't able to dial back the heat as much as others on here have mentioned. Without the condenser my 5500W heating element had to be dialed back to about 65% power to get a really good boil going. With the condenser I dropped it to about 50%. But still good power savings. My water run off gave some "cooked corn" smell, but I wouldn't call it strong.

Overall it worked like a charm! Thanks @BrunDog for the invention, and everyone else who tried it out along the way!
 
I really wish I had found this thread a few days earlier! I just ordered a 20g kettle from Spike for my new electric setup that is getting delivered tomorrow. I really don't want to have to send my new kettle back to have a TC added but I like this solution a lot more than installing a vent hood.
 
I really wish I had found this thread a few days earlier! I just ordered a 20g kettle from Spike for my new electric setup that is getting delivered tomorrow. I really don't want to have to send my new kettle back to have a TC added but I like this solution a lot more than installing a vent hood.

Bobby sells a fitting for you: https://www.brewhardware.com/product_p/tc15wlf.htm

Not as elegant as a Spike welded fitting, but it gets the job done! He has solder fittings as well if you don't want weldless. Many ways to get the job done for a lot less than shipping the kettle back to Spike.
 
Bobby sells a fitting for you: https://www.brewhardware.com/product_p/tc15wlf.htm

Not as elegant as a Spike welded fitting, but it gets the job done! He has solder fittings as well if you don't want weldless. Many ways to get the job done for a lot less than shipping the kettle back to Spike.

Yes, I was considering this. I'm just not sure if I want to start drilling holes in my brand new kettle. I spent the extra money so that I would have nice properly welded ports... I don't think I can bring myself to drill a hole in it so soon.

Anyone putting these on the lids? I might be able to convince myself to do that.
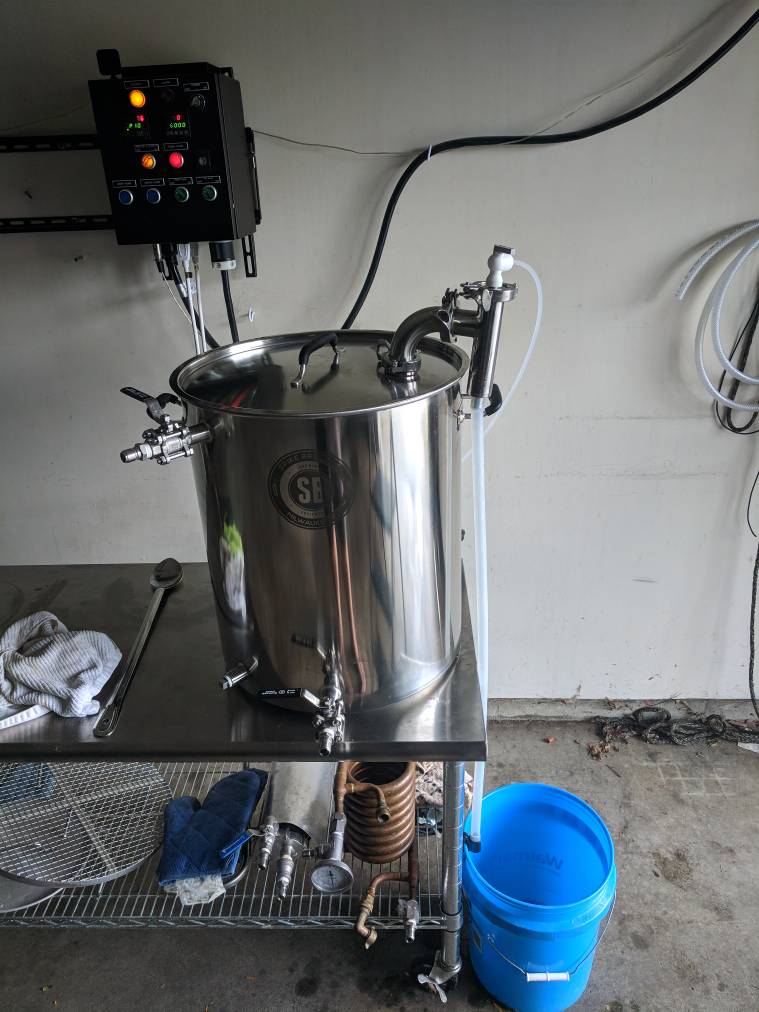
 
Thanks for your pioneering work on this @BrunDog, and for @Bobby_M making it a One Stop Shopping experience! I had already picked up this hood for $35 and really wanted to use it, so i just scaled back the fan.


20181119_153715.jpg
 
Yes, I was considering this. I'm just not sure if I want to start drilling holes in my brand new kettle. I spent the extra money so that I would have nice properly welded ports... I don't think I can bring myself to drill a hole in it so soon.

Anyone putting these on the lids? I might be able to convince myself to do that.
I have a 20 gal spike with a weldless bulkhead in the lid. Works perfect.
IMG_20180925_162301.jpeg
 
Bobby sells a fitting for you: https://www.brewhardware.com/product_p/tc15wlf.htm

Not as elegant as a Spike welded fitting, but it gets the job done! He has solder fittings as well if you don't want weldless. Many ways to get the job done for a lot less than shipping the kettle back to Spike.
I have a 20 gal spike with a weldless bulkhead in the lid. Works perfect.View attachment 598682

Thanks! I'm thinking I might go this route too.
 
Yes, I was considering this. I'm just not sure if I want to start drilling holes in my brand new kettle. I spent the extra money so that I would have nice properly welded ports... I don't think I can bring myself to drill a hole in it so soon.

Anyone putting these on the lids? I might be able to convince myself to do that.
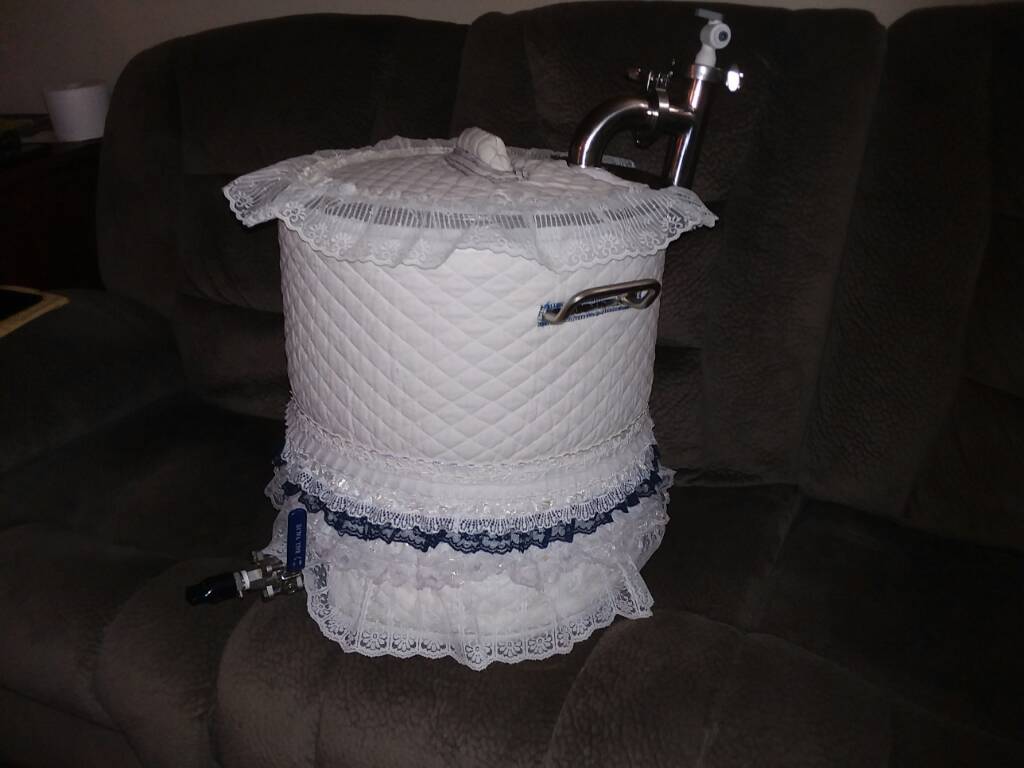
Mine is on the lid. Used a 90° elbow and a weldless TC fitting. There's pictures here somewhere. The best part is that you don't have to wonder how to clock the thing, just rotate the lid to the best position.
 
Yes, I was considering this. I'm just not sure if I want to start drilling holes in my brand new kettle. I spent the extra money so that I would have nice properly welded ports... I don't think I can bring myself to drill a hole in it so soon.
Your trepidation about not wanting to drill your brand new kettle is perfectly understandable, especially knowing that you could have had that port added if you knew a few days sooner. However, I added Bobby's weldless TC port to my 20G Spike and have no complaints except it just doesn't have as much bling as a weldless port up there (above the liquid level)
I had already picked up this hood for $35 and really wanted to use it, so i just scaled back the fan.
Damn, that is some nice bargain hood for $35. I had searched for over a year for a similar bargain before Brundog showed me the light.
 
Damn, that is some nice bargain hood for $35. I had searched for over a year for a similar bargain before Brundog showed me the light.

Thanks, it was just a Craigslist sale. Of course when I told SWMBO what kind of bargain it was, she just rolled her eyes! I imagined the ceiling tiles soaking up a ton of moisture like a sponge, so I figured it wouldn't hurt to also have the fan. I actually tiled the ceiling around the hood as backup.
 
Back
Top