Profiles>Equipment>Add-ons
Sweet! Got it. Thank you!
Sorry group, damn mobile device.

Profiles>Equipment>Add-ons


So after reading these two posts back to back, its seems like one of you checked pH and used water modifiers, the other did not.
ding ding ding.
this is the #1 most important efficiency factor with this system. It bumped my efficiency from the low 60's to the high 70's, consistently. Ive even hit the 80's with one batch.
I'm doing a write up and instructional video this week for Great Fermentations on my process and how to get the most out of your system.... keep an eye out for it next week.


Well I did not check the pH with a meter. I used the EZ water spreadsheet to calculate the water additions, the spreadsheet calculates the estimated pH value witch I mentioned.
Maybe some day I'll buy a pH meter
I'll be looking forward to your write up and video
I really appreciated all the things you have written here as well as the youtube timelaps video
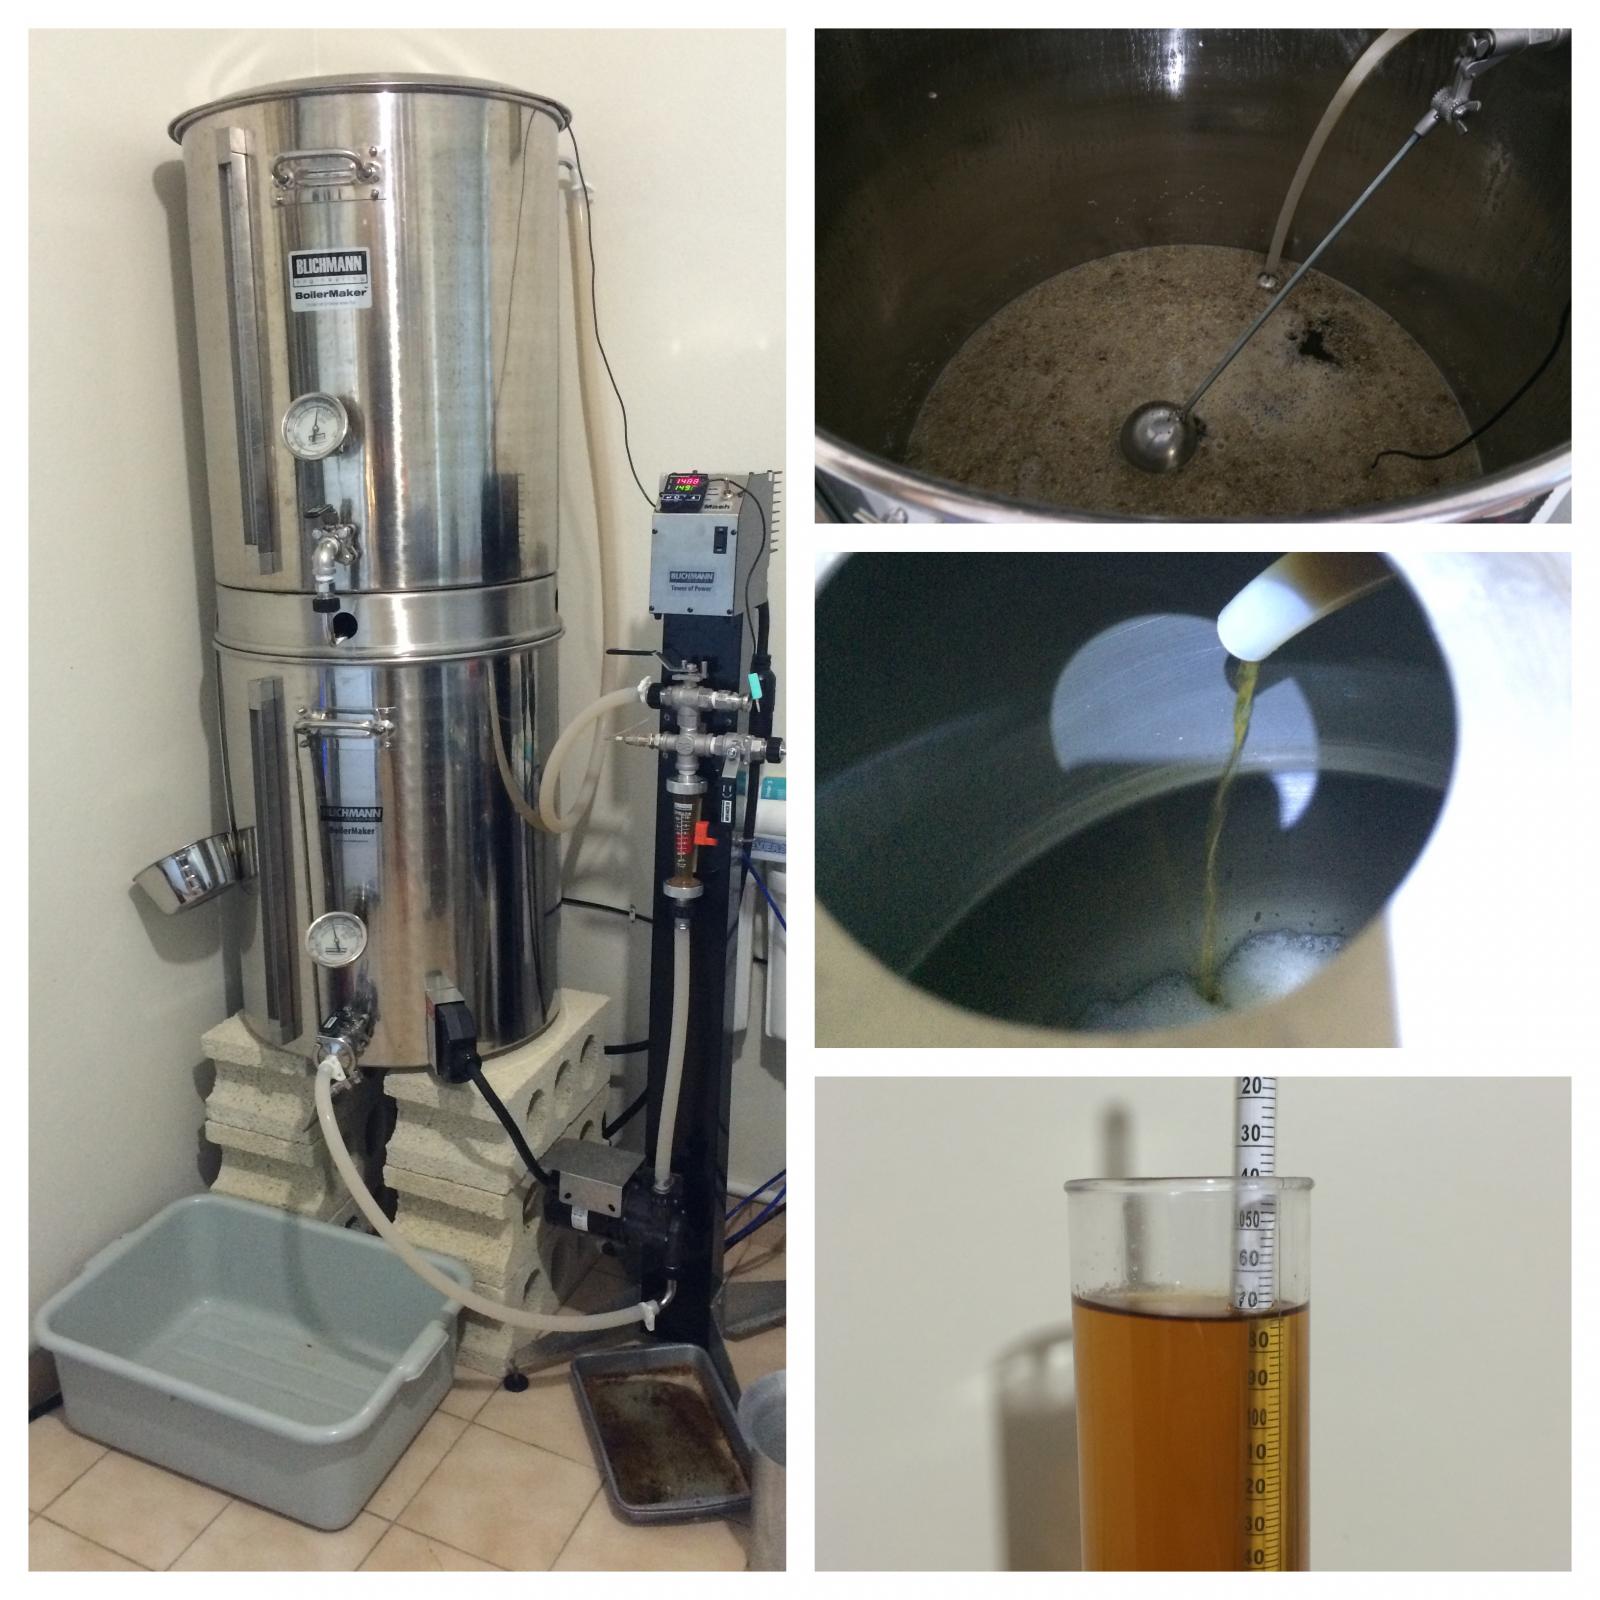
Here are two photos from my first brew, first one I'm still mashing, the late one I have finished everything, the the beer is fermenting there


One batch down, cryastal clear wort.
4 degree F difference between ToP and middle of mash, so had to compensate. Everything else ran smoothly.
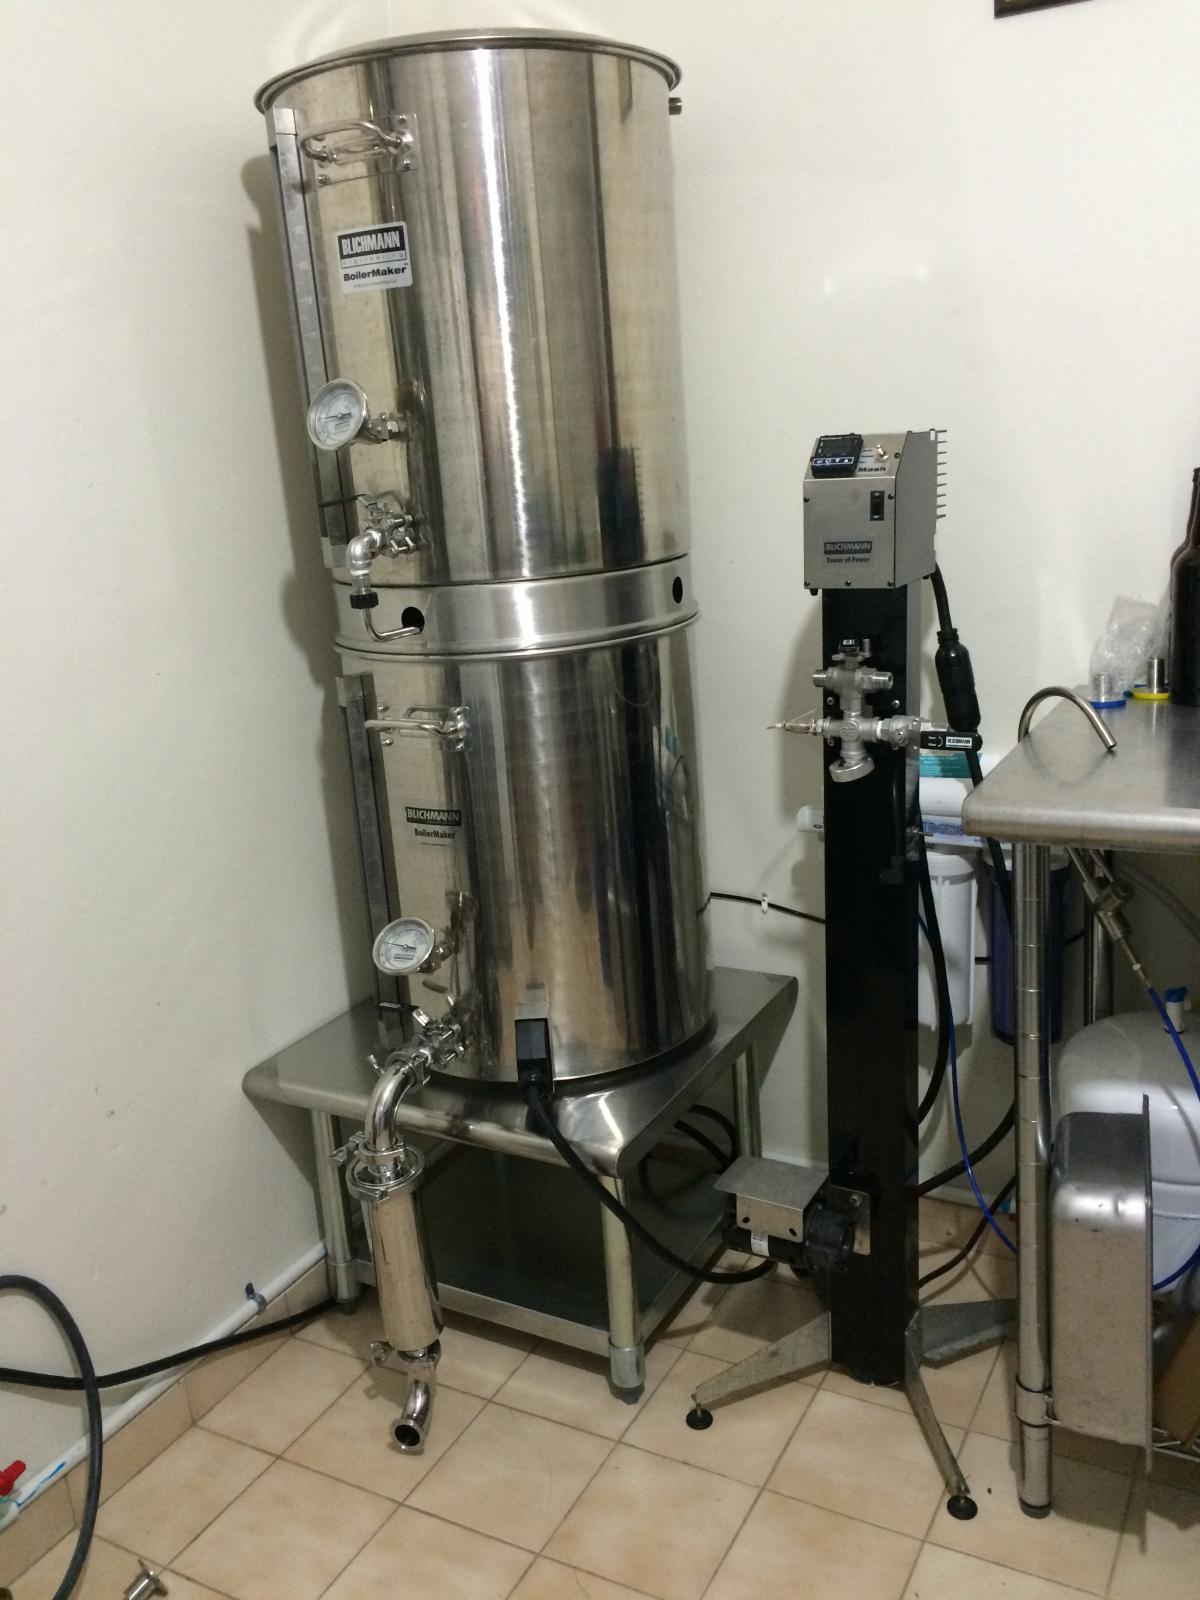
Cinder block stand upgraded to 24x24" stainless table.
I am going to do a 10 gallon batch of a Labatt Blue clone which is a Pilsner and a staple around here.
I could stream this live if anyone was interested; I would take advice and constructive criticism at the same time.
I'll definitely start a new thread with live updates reporting time, losses and upload pictures.
I'm doing my first breweasy this weekend. I have the 10G gas system. I have some questions on what mash profiles to load into my software. I use the iBrew 2. Any information on grain absorption, cooling shrinkage, hourly boiloff, mash tun loss, & kettle trub loss would be appreciated. I plan on brewing a 5 gallon simple pale ale for my first trial run. Any other suggestions, hints?
Thanks! My first post on this forum.
I have the gas (propane) 5 gallon version of the Breweasy. I don't plan on getting the Tower of Power in the near future.
I plan to use the system this weekend. Just trying to plan for unforeseen events.
Help me out here:
1. Get the proper amount of water up to strike temperature in the bottom kettle. Then pump that water up to the top mashtun. Make sure the valve on the top kettle is closed so the water does not drain back into the bottom kettle.
2. With the pump off, the pump valve closed and the valve for the bottom kettle closed, add the proper amount of water to the bottom kettle and quickly heat the water to target mash temperature.
3. Add grains to top mashtun kettle. Give it a good stir.
4. Open the valve for the bottom kettle. Open the pump valve. Turn on the pump. Open the valve for the top kettle.
5. Monitor top kettle mash temperture and adjust the flame as needed to maintain target mash temperature.
Does this sound about right? Sure it's over simplified, but I'm trying to get the logic of the basic procedure correct in my head before moving any further.
Please chime in with further insight or tips. Especially, since this will be a manual method of maintaining mash temps. I can't afford the Tower or Power just yet.
Thanks.....
1. You could heat ALL the water in the bottom kettle and then pump to the MT on top, OR you could divide the water in half to each vessel, start cycling between both vessels while you heat until you achieve strike temp. Your choice. I just heated the bottom, and then circulated half onto the MT, and THEN doughed in. Remember to close off the valves and shut off the pump while you dough in.
2. Between step 4 and 5, remember to adjust the Auto-Sparge (AS) to about 1-2 inches above the grain bed. This step is tricky, since the water and metal will be hot, so be careful. The soft and tender skin in my armpit served as a cute reminder not to lean on the MT while doing this.
3. As for step 5, monitor both the temp AND THE VOLUME in each vessel while you recirculate. If your MT sigh glass bottoms out, you're dumping into the kettle too fast. You want the highest flow that does not empty it out before it goes back up the pump.
4. If you are manually adjusting your burner, remember to shut it off a few degrees short of your target temp. This will avoid temp overshoots, and keep your thermal mass happy.
5. Final tip: Don't drink homebrew until AFTER pitching the yeast.
Very cool. Thanks man.
Since I will be recirculating directly from the pump into the mashtun, should I use the valve at the pump outlet to regulate flow?
I imagine calculating the mash thickness would be the standard calculation of 1.25 to 1.50 quarts per pound of grain. That would be the amount of water needed to begin with in the top mashtun kettle. Minimum. It would be okay for the water level to remain above the top of the grain but falling below would likely affect efficiency.
The rest of the water in the bottom boil kettle would amount to the difference in water to get a full pot for boil.
Which of the rubber flow control orifices would you recommend I use to begin with?
3. As for step 5, monitor both the temp AND THE VOLUME in each vessel while you recirculate. If your MT sigh glass bottoms out, you're dumping into the kettle too fast. You want the highest flow that does not empty it out before it goes back up the pump.
No AutoSparge? With the AS, you fully open valves, and the AS regulates the flow, mostly.
Without it, you need to dial in the flow coming out of the kettle into the pump, or better yet, coming OUT of the pump to match the drain orifice.
I started with 1.5 GPM, but it was too fast for such a thin (26lbs of malt) grist, so I'll drop down to 1.25 GPM. You want the largest orifice that will drain without doing so too fast. I would suggest a simple water run to familiarize yourself with the flows.
I calculated water volumes in Beersmith as if I had been doing a BIAB. You need the full liquor volume, divided into 2 vessels to even them out, plus a few inches above the grain bed. The rest is BrewEasy.
Just my observation, when the sight glass bottoms out as you mentioned, ( I'm using the 1.25 orifice) I found the cause was a stuck sparge or at least a slowed one. I shut the valve in the MT off, same for the pump and stirred the grain bed all the way to the false bottom removing what feels like clumps in the grain bed.
I then waited a minute or two for things to settle, then started recirculating again.
This has happened to me on both 10gal batches so far and I never figured out on the first batch how to fix the painfully slow sparge.
On the second batch I follow the instructions that came with the kit and it worked like a charm. I found this happened right after dough in as the grains raise to sparge temps.
What were the instructions you followed? Was your grain crush too fine?
Highly recommend a hop spider when using the Therminator. I didn't use it during my first brew on the BE and regretted it tremendously. I spent three hours the second brew day flushing and back flushing with PBW and water before I even started mashing. Take my word for it HOP spider.
The Therminator chills my wort instantly. Great device.
Yes the action of chilling is instant but how long would it take to lower to pitching temperature, let's say for lagers?
A hop spider is a good idea as it takes a long time to whirlpool the wart and let hops settle to the bottom for the hop blocker to work correctly.