• Please visit and share your knowledge at our sister communities:
  • If you have not, please join our official Homebrewing Facebook Group!

    Homebrewing Facebook Group

Banjo Burner-Waste of Gas/Money?

Homebrew Talk

Help Support Homebrew Talk:

This site may earn a commission from merchant affiliate links, including eBay, Amazon, and others.
Why would you want to raise the burner? I would think you'd rather keep it closer to the ground so the top of the shroud would be above it as much as possible.

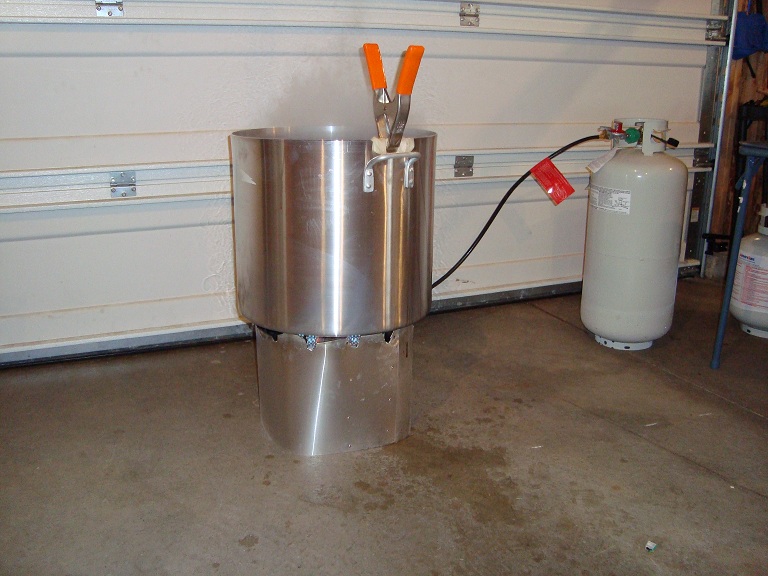
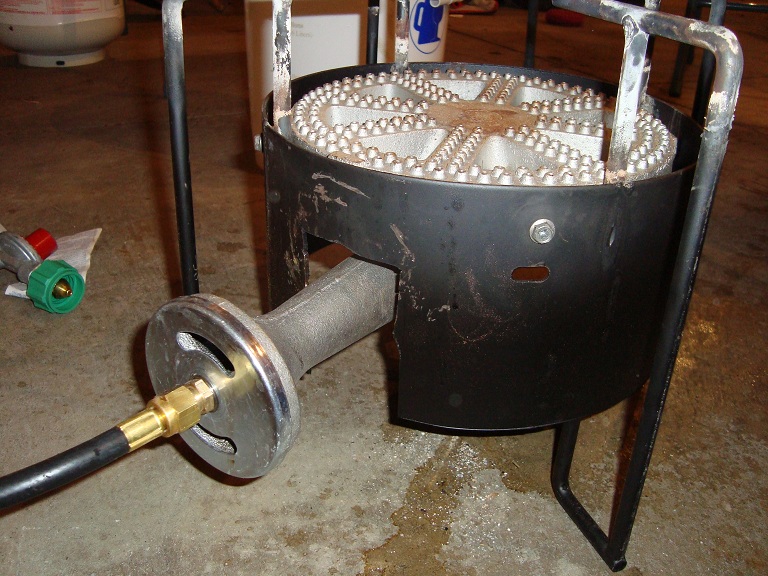
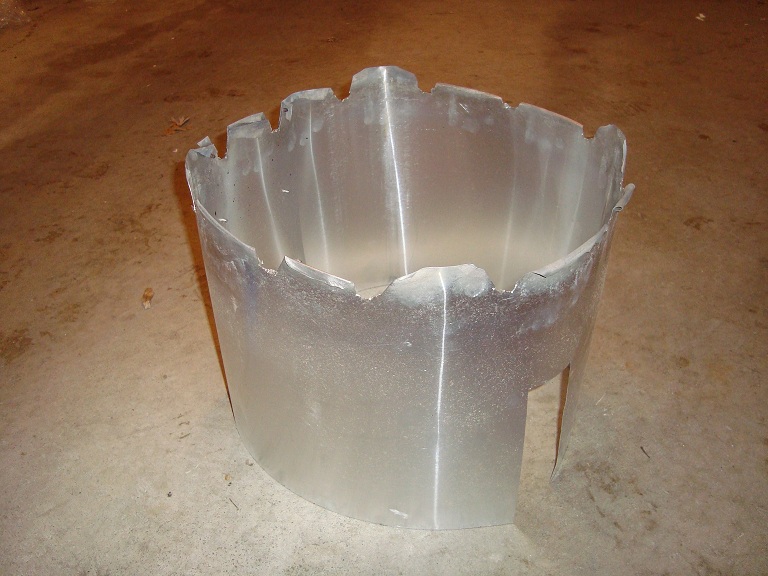
Well, when i first raised the burner it was to create some height for transferring the wort. I have a bad back, so being able to leave my kettle in place and just open my ball valve and transfer into the fermentor was nice. Once i realized i needed a shield i just kept using the blocks. I don't really see a big advantage for having the shied go too high up the sides of my pot. For one thing, it'd be very tough to light the burner since i have the thing wrapped pretty tightly around the burner/pot. I also don't think the contact time with the sides would give me that much better heat exchange. It might be better protected from the wind if it was on the ground, but i've had good luck with this method and haven't needed to change in a year.
 
How did you get the aluminum to stay put on the ends? Is it overlapping or is there a small gap at the intake?
 
How did you get the aluminum to stay put on the ends? Is it overlapping or is there a small gap at the intake?

I did basically the same as coldrice, I'll try to take some pics tomorrow and post them here. I had some 12" roof flashing in a roll that I cut, and then wrapped around the burner and riveted. It's tight enough that it stays on until I want to take it off. With my 80qt pot, there was no gap between the shielding that I made and the pot, so I cut some triangles out of the top of the flashing around the top edge.

I also moved my burner up from the pre-punched holes into new holes, so that the burner is flush with the top of the factory wind screen. It required that I cut the metal of the screen for the inlet, but raised the burner up, what, 2" or so.

I plan on brewing on Monday or Tuesday, so I'll take some action shots and relate my experiences with the new work.
 
its just gotta be an adjustment. I use the smaller one from an sq14 and have no problem boiling from 150 to 212 rolling in maybe 10-15 minutes. Never really measured it. I find its helpful to adjust the flame when its dark out so i can see it clearly. My first night i had it, I musta had it on for 3 hours and could barely get it to boil, now i got it dialed in, marked with a pen on the regulator where full blast and nice rolling boil are so next time i just light it and go. You have to adjust both things together too, the air and the fuel. Lots of variance when you change one or the other.
 
How did you get the aluminum to stay put on the ends? Is it overlapping or is there a small gap at the intake?

I basically just wrapped it around the whole thing and then cut the excess off so there would be about 3-4 inches of overlap. I think notched out a big U from one side so that the intake could sit outside the shield. If you are looking at it the right end in notched and butts up against the right (as you look at it) side of the intake. The left edge butts up against the left side of the intake.

I then used a screw driver to punch two sets of holes that align (one on top and bottom of each end). I took two screws and hex nuts and fed them through the holes from the inside out. All i have to do is match the holes and line everything up and feed the screws through both ends and it holds the flashing around the pot without any troubles at all. I can take a picture if need be but i think you should be able to get the idea.
 
Thanks for the wisdom, everyone. One last question, though... what about the ball valve? Can it be within the shroud without there being any danger of the o-rings melting? I would think the presence of the wort would keep the rubber seals around 212F without going any higher, but I just thought I would ask.
 
I'll upload pictures later, but WOW! Did I use a LOT less gas between the combo of moving the burner up on the factory stand by ~ 2", and my homemade wind screen. I think the important thing with this burner/stand combo is to get the burner out of any wind, and to get it closer to the pot if you have a wide flat-bottomed pot.
 
I would also check out the interior of your burner as well. I had continual issues with the same burner you are using. I used a ton of gas, and could not get a nice blue flame no matter what I did. I just happened to look inside the horizontal part of the intake part of the burner, and noticed that the interior diameter was a ton smaller than the exterior. I poked around a but with a piece of wire or something, and a ton of casting medium fell out. Turns out that almost the whole tube was packed with casting medium similar to a metallic sand. Once I got all that cleaned out - almost two cups worth, I got a nice blue flame and have been using a lot less gas.
 
I'll upload pictures later, but WOW! Did I use a LOT less gas between the combo of moving the burner up on the factory stand by ~ 2", and my homemade wind screen. I think the important thing with this burner/stand combo is to get the burner out of any wind, and to get it closer to the pot if you have a wide flat-bottomed pot.

Here's a few pics, as you can see, the aluminum roofing flashing isn't quite up the task, it melted all around the top!

DSC01904.JPG


DSC01908.JPG


DSC01909.JPG
 
Thanks for your post. I am brewing this week, and will show my procedure, my idea for the aluminum shroud is a bit different than yours. Let's see what happens!
 
Back
Top