ANVIL FOUNDRY ALL-GRAIN BREWING SYSTEM

Homebrew Talk - Beer, Wine, Mead, & Cider Brewing Discussion Forum

Help Support Homebrew Talk - Beer, Wine, Mead, & Cider Brewing Discussion Forum:

This site may earn a commission from merchant affiliate links, including eBay, Amazon, and others.
Will do! thanks again for the input, ill go down to -3 or -4 (0.033 and 0.028 respectively) next time. Also the "ball valve" i mentioned was the one on the anvil. I just found it was easier to do that than the pump. Next brew day ill give some results. Cheers!
If you are using a bag, either of these would suffice, but Id recommend trying 0.033" first because you are still recirculating to maintain temps with the foundry. Ive played with lots of gap sizes including 0.028 and have found that it can be tricky regulating the flow to be slow enough so that you don't get stuck mashes (depends on grain bill too i.e. oats/wheat which tend to be sticky) but with no issues at 0.030-0.032. I could be wrong with this, but even though its easier to regulate flow with the ball valve, you could run the risk of damaging the pump if its not adequately primed the whole time. Thats why most recommend regulating flow from the output of the pump. The clamp does work well in this regard but I agree it can be a little more finicky than just turning a ball valve. Thats why I eventually added a ball valve on the output side of my pump.

Cheers!
 
Will do! thanks again for the input, ill go down to -3 or -4 (0.033 and 0.028 respectively) next time. Also the "ball valve" i mentioned was the one on the anvil. I just found it was easier to do that than the pump. Next brew day ill give some results. Cheers!
If you are closing off the ball valve which is before the pump then you are starving the pump for fluid. Since the pump utilizes the fluid to help lubricate the moving parts, you could not only cause cavitation in the pump head but also unwanted wear. That is why Anvil gives you a flow restrictor for the exit of the pump -- it is much better for the pump.
 
Barbarossa you want to draw from the bottom and deliver to the top so the water can go through the grain again. You want to increase the flow through the grain and gravity is your best bet. Are you using a bag? That may be the easiest way to reduce the flour from the wort. :mug:
For the geometry of the Anvil, you want to control the flow of the wort through the malt pipe. If you try to flow too much wort, you will cause greater downward pressure on the gran bed and this may lead to compaction and channeling. I have played around with the recirculation flow for several brews and recommend a recirculation flow of around 1 liter per minute (a little over a quart/minute) for good recirculation without too much head pressure on the grain bed.
 
PHEW! All caught up reading the entire thread. Thank you all for the tips and tricks. One thing I’d like to mention when pursuing mash efficiency is to consider mash ph. And what one of the experts (Martin Brungard) recommends is that mash ph reading should be taken at the 45min mark.

You could argue that its too late to adjust the ph if it’s too low or too high, by the time 45mins rolls around. However the idea is to be within range, and adjust your target for the next time you brew that beer. As some else said here, data keeping is key if you want consistent results.

https://www.homebrewtalk.com/threads/when-to-test-the-mash-ph.660062/post-8483442
Cheers!
 
Last edited:
PHEW! All caught up reading the entire thread. Thank you all for the tips and tricks. One thing I’d like to mention when pursuing mash efficiency is to consider mash ph. And what one of the experts (Martin Brungard) recommends is that mash ph reading should be taken at the 45min mark.

You could argue that its too late to adjust the ph if it’s too low or too high, by the time 45mins rolls around. However the idea is to be within range, and adjust your target for the next time you brew that beer. As some else said here, data keeping is key if you want consistent results.

https://www.homebrewtalk.com/threads/when-to-test-the-mash-ph.660062/post-8483442
Cheers!
OMG you have more tenacity that I do. LOL That's a lot of posts to plow through. :bigmug:
 
OMG you have more tenacity that I do. LOL That's a lot of posts to plow through. :bigmug:
Yeah... i read this whole thread, too... it is VERY worth it as it helped me decide on the anvil vs. other AIO units.

I will say this... it was quicker to read this thread then to get my anvil 10.5... still on back order from my jan 26th payment. :confused:
 
@Bishop9.5 @renstyle

Thanks for the tidbits, I’ll admit to having been somewhat carefree about noting post boil volume and only just recently labeled 1 of 2 of my fermenters with volume markings. There has been a lot of, meh..good enough or guesstimates with those two specific things. So my actual numbers might be better, but as you’ve noted. GI/GO

And honestly, if I’m not disciplined enough to provide specific detailed numbers, I have no room to get irked at the resulting percentages.

I think my desire to not become obsessive about detail because this is supposed to be a hobby is intersecting with the real life version of me who abhors displays of half-a’d effort.

Anyways, thanks for the headslap. Now back to your original programming...

Brewing is what you want it to be, man! Personally I love the numbers aspect. Even more when I can use that data to reduce workload while making a kickass beer. 🍻
 
@Bishop9.5 @renstyle

Thanks for the tidbits, I’ll admit to having been somewhat carefree about noting post boil volume and only just recently labeled 1 of 2 of my fermenters with volume markings. There has been a lot of, meh..good enough or guesstimates with those two specific things. So my actual numbers might be better, but as you’ve noted. GI/GO

And honestly, if I’m not disciplined enough to provide specific detailed numbers, I have no room to get irked at the resulting percentages.

I think my desire to not become obsessive about detail because this is supposed to be a hobby is intersecting with the real life version of me who abhors displays of half-a’d effort.

Anyways, thanks for the headslap. Now back to your original programming...
Don't beat yourself up man! I agree it is a hobby for sure, but in the end even if you miss your OG by 1-8 points, you will still have beer! Admittedly I get to be a numbers freak myself but luckily I have a great wife to set me straight and help me see the big picture. She doesn't give a rats a** about me missing my OG, she just wants and enjoys the end product lol.
 
Yeah..I feel like that is exactly where I want to be at. If the BH efficiency is low, so be it. I just want some consistency. This was for the tropical stout that I made last week.

View attachment 721629

Okay..whatever, so I'll adjust the profile as suggested. Just mucked w/the numbers a bit, can't even really remember what I did.

Yesterday's session ended up w/this. This was a strong ale.

View attachment 721630

So I adjusted my profile again, not sure why..but I did this last night. Physically measured out the actual kettle losses and reduced that by .2 quarts, and reduced the 'mash-tun addition' (drainable volume below your mashtuns false bottom) to 4, as it was set to 6 quarts for some reason.

And yes..I'll agree w/your comment about boil off rate. With yesterday's I had my power set to 100% (w/240) so that I would get to 5.5 into the fermenter. I brew with a bag in the malt pipe, and haven't quite settled on how much I want to bother squeezing. At the moment, I'm at a:

After it is done draining into the AF, set the malt pipe into a Home Depot bucket, press on the bag a bit with a half assed effort, or until I'm tired of burning my hands (which yesterday was 3 times) and dump whatever I managed to squeeze out into the AF.

OK, so I didn't see your data here until now, but aside from your admittedly not paying attention too much to volumes, I THINK your conversion efficiency is low. I have no clue how your software calculates this for you (beersmith doesn't estimate this and thats what I use), but I calculate my own conversion efficiency (braukeiser formula) and it has helped a ton to help me determine how my mash went overall and thus helped me problem solve mash/lauter efficiency as a result. However, calculating conversion efficiency is problematic with these AIO systems that have solid sided malt-pipes anyways because the wort is not homogenous with the ENTIRE volume of strike water (sides between malt-pipe and kettle) not mixing with the grains. So not sure, if those conversion efficiencies are correct or not. I actually posted a question about this exact problem last summer. I was hoping peeps, including the great @doug293cz, would have a solid answer for me lol. I have since re-adjusted my crush from that post to 0.030 as well. See my post on this issue here: Determining Conversion Efficiency in "All-in-one" electric systems

Nevertheless, if we assume that your conversion efficiencies are correct by your software, I would suggest looking into your grain crush quality as well because those conversion efficiencies should be higher IMO. Keep in mind that mash/lauter efficiency is calculated by conversion efficiency*lauter efficiency. So Id start with trying to improve conversion efficiency.

FWIW, I have my BH efficiency in beersmith still set to 65% but will be upping it higher based on my previous few brews and will continue to tweak until I am happy and consistent which matters most. I am also totally fine with lower BH efficiency because I do voluntarily take more losses going into the fermenter because I let my hop free roam baby! lol.

Cheers man!
 
What is the biggest batch size with the anvil 10.5?

I would really like to brew about a 10 gallon batch, even if it meant boiling a few gallons in another pot and adding it back at the end of the main boil.

I thought of getting a mash tun and do two consecutive batches, mashing one while the other is boiling then boil the second one. But then I found a nice 12g mash tun that could accommodate a whole 10g batch. Made me wonder if there's a way to pull it off.
 
OK, so I didn't see your data here until now, but aside from your admittedly not paying attention too much to volumes, I THINK your conversion efficiency is low. I have no clue how your software calculates this for you (beersmith doesn't estimate this and thats what I use), but I calculate my own conversion efficiency (braukeiser formula) and it has helped a ton to help me determine how my mash went overall and thus helped me problem solve mash/lauter efficiency as a result. However, calculating conversion efficiency is problematic with these AIO systems that have solid sided malt-pipes anyways because the wort is not homogenous with the ENTIRE volume of strike water (sides between malt-pipe and kettle) not mixing with the grains. So not sure, if those conversion efficiencies are correct or not. I actually posted a question about this exact problem last summer. I was hoping peeps, including the great @doug293cz, would have a solid answer for me lol. I have since re-adjusted my crush from that post to 0.030 as well. See my post on this issue here: Determining Conversion Efficiency in "All-in-one" electric systems

...
After thinking some more about the non-homogeneity issue with malt pipes, something that might work to homogenize the wort prior to SG sampling would be to raise the pipe, let it drain well, and then lower the pipe back into the wort. A few cycles of this should be pretty effective at mixing up the wort.

Brew on :mug:
 
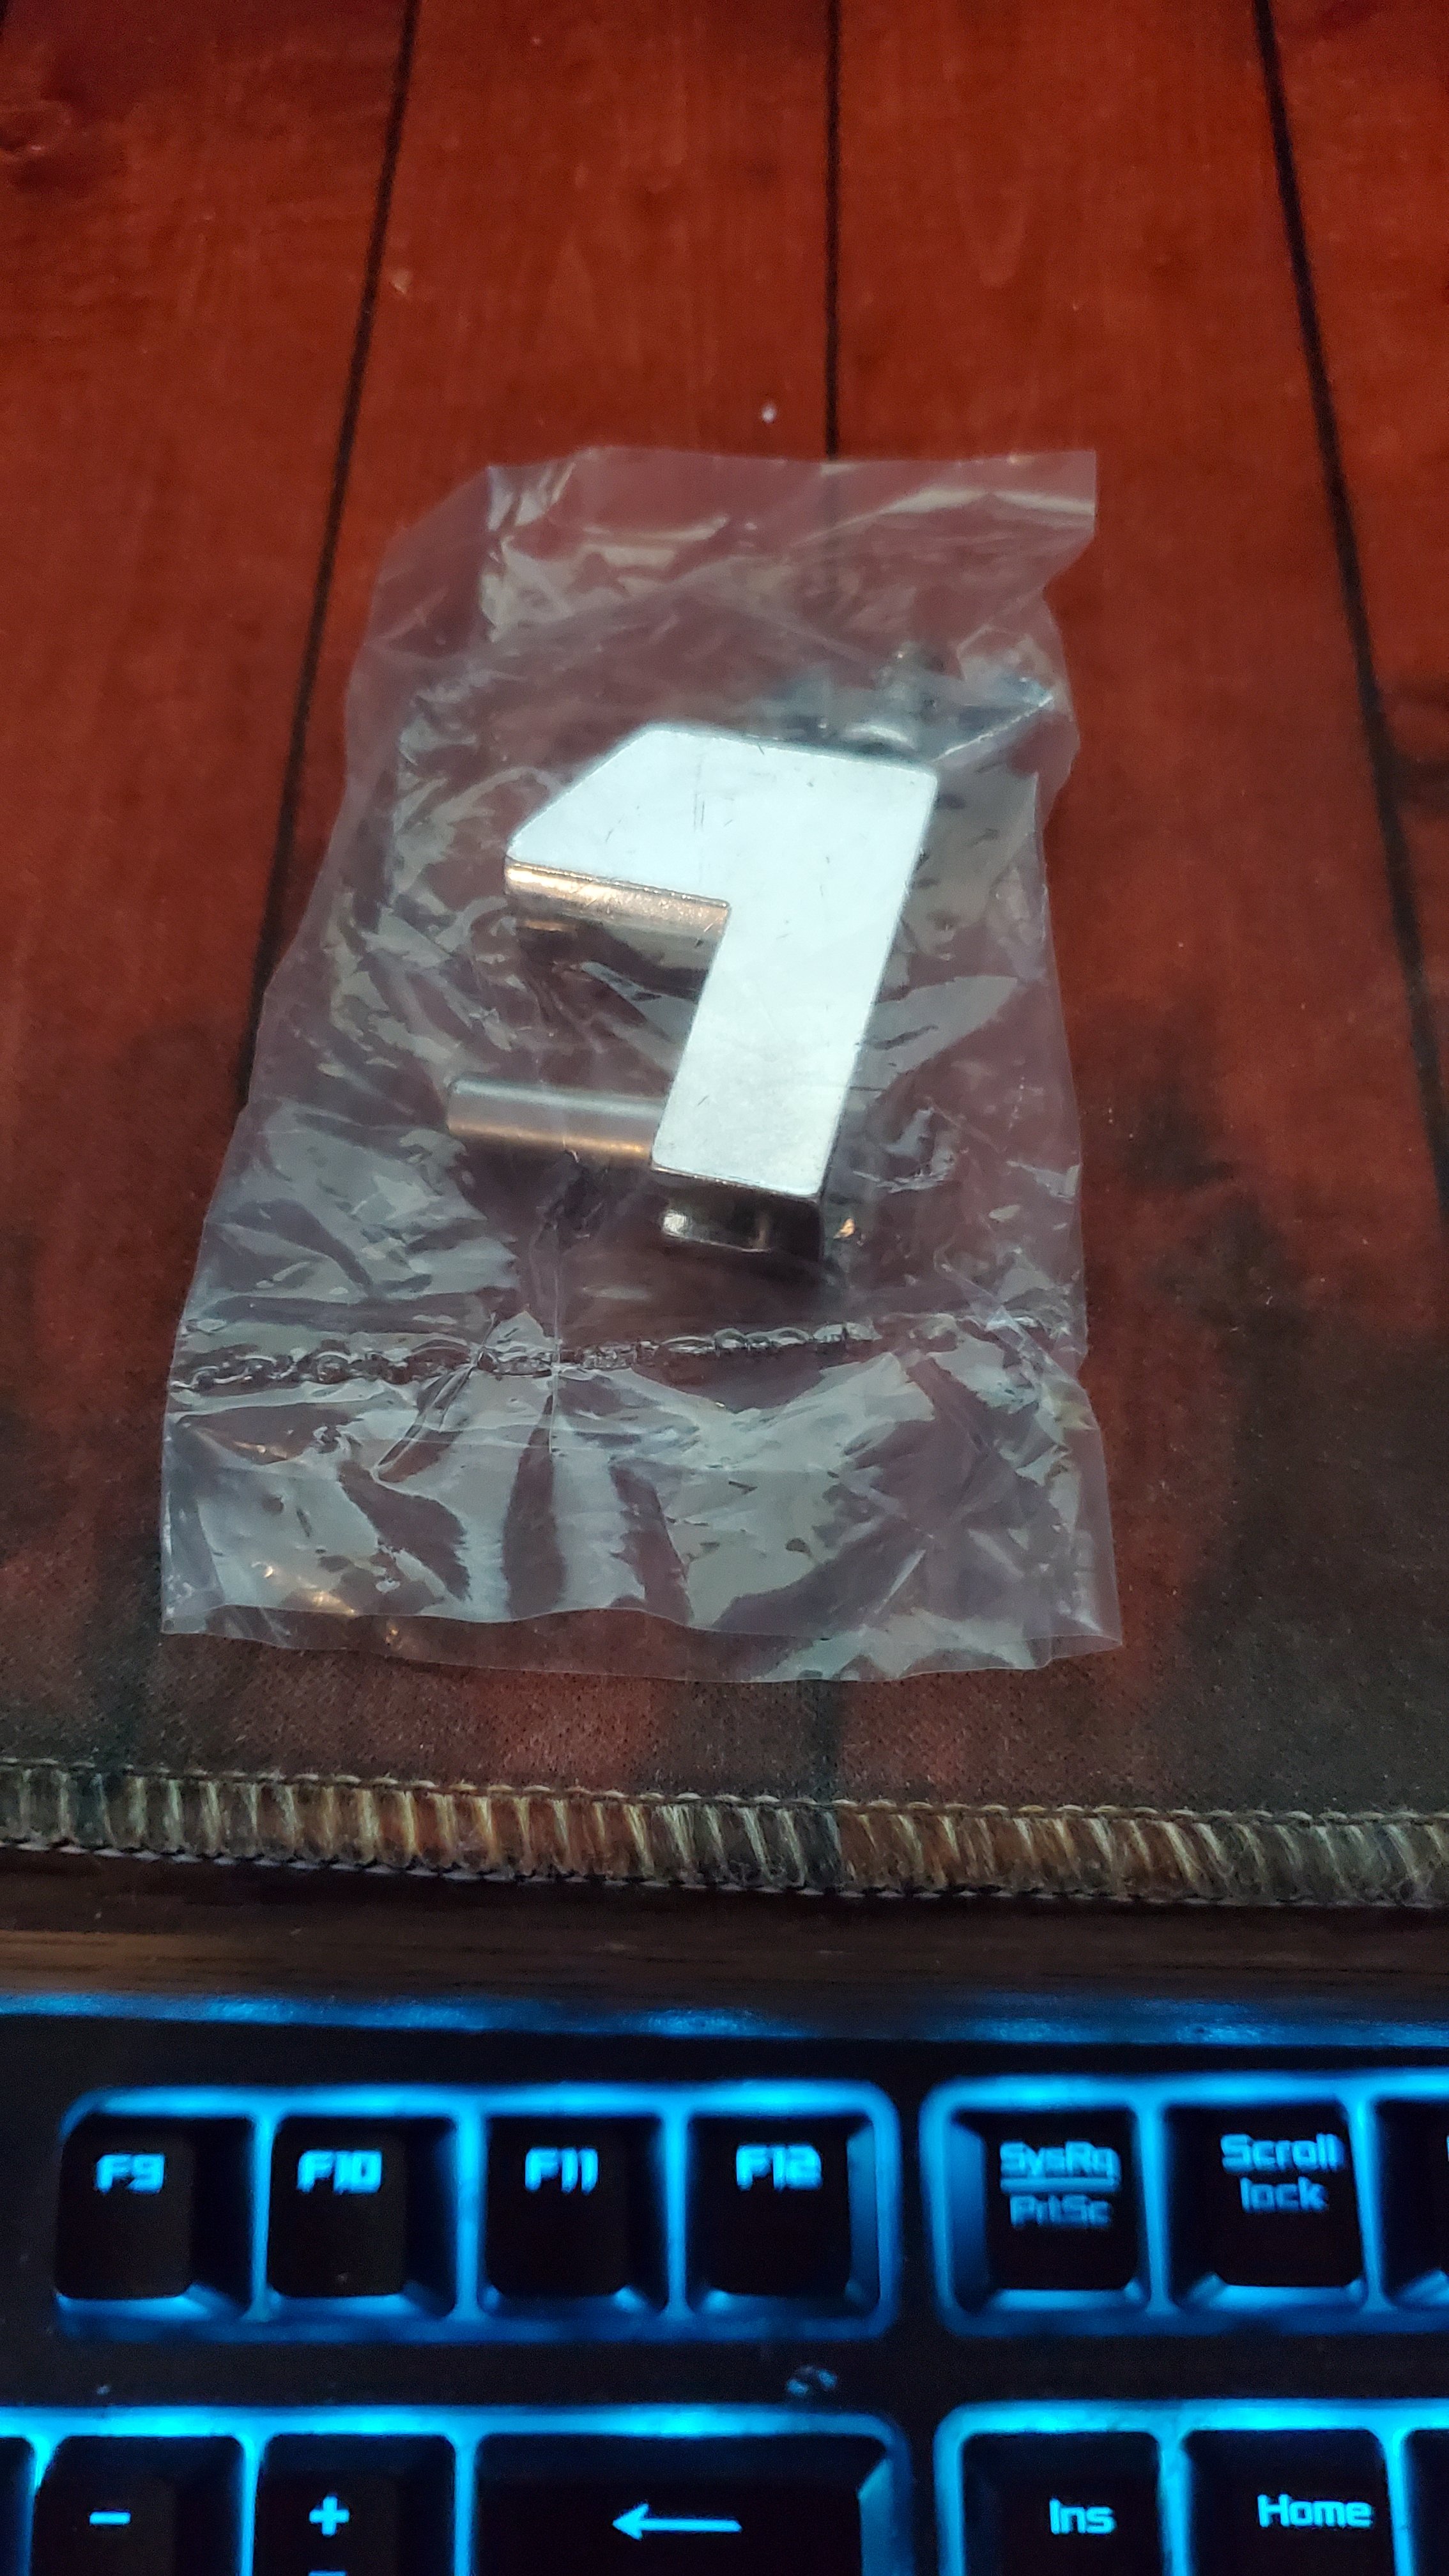
That is why Anvil gives you a flow restrictor for the exit of the pump -- it is much better for the pump.
I must have missed this part. Is that it?
20210311_083924.jpg
 
What is the biggest batch size with the anvil 10.5?

I would really like to brew about a 10 gallon batch, even if it meant boiling a few gallons in another pot and adding it back at the end of the main boil.

I thought of getting a mash tun and do two consecutive batches, mashing one while the other is boiling then boil the second one. But then I found a nice 12g mash tun that could accommodate a whole 10g batch. Made me wonder if there's a way to pull it off.

Squeezing a 10 gallon batch out of a Anvil, you are looking at some serious logistic issues to over come. IMHO you are defeating the purpose of an all in one system.

If you want to do 10 gallon batches, I suggest you look at other solutions. A larger all in one. Or a 15-20 gallon BIAB set up. Essentially, the Anvil Foundry is a 5 gallon BIAB set up.

Get a pot, a bag, a way to hoist up the bag and the big decision is what do you use to control the electric heating element. Pot size, you have calculate the largest grain bill you wil want to accommodate and how much head room for boiling 10 gallons. Heating element controler can be fairly simple (and cheap) or very complicated and expensive.

If you have a mash tun, you could run a two vessel system.
 
@Oginme commented on this a while back. Could try checking w/him to see how his trials ended up.
  • Oginme
  • Post #3
  • Dec 28, 2020
  • Forum: Electric Brewing

  • An inherent inefficiency in the Anvil design is the large gap between the basket and the side wall of the unit. The water trapped in this area has very little sugars which have diffused from the bottom of the kettle. On my 6.5 gal Anvil, this amounts to 2.9 liters of water which is not directly involved in solubilizing starches and the subsequently produced sugar. I typically mash with about 15 liters of water, so that would make it around 19% of the water added is not used in the mash. I can only guess at the volume in the 10.5 gal Anvil, but it will be close to proportionally the same.

    Having measured the gravity of the water alongside the basket versus the wort which is recirculated and in the mash basket a couple of times, I decided to lift the mash basket about halfway through the mash and then again just before mash out to mix this water trapped on the sides of the basket into the active wort.

    I was getting around 83% mash efficiency (I do full volume/no sparge mashes) and increased that to 86% to 88% on my last four brews trying this new method. It is a bit more work and still have some additional work to nail down the process to get it a bit more consistent, but it does make a noticeable improvement in extraction efficiency.

    [/QUOTE
 
@Oginme commented on this a while back. Could try checking w/him to see how his trials ended up.

My personal opinion, we may be focusing way too much on what the grain pipe does or doesn't do during the mash. I get it if you're chasing every last % point for efficiency and it's what you're into. But ultimately if you can consistently reproduce a mash efficiency you're happy with and you're hitting your SG every time does it really matter what's going on in that dead space?

Ultimately you still have more than enough water in the grain pipe to achieve an acceptable water/grist ratio during the mash. I'd get the concern if we weren't able to properly hydrate the grains, but that's not the case.

If you have low efficiency and your goal is to improve it this would be the last place I'd look. Focus on the fundamentals already mentioned several times; get your volumes dialed, grain crush appropriate to your setup, get the recirc slowed down to avoid tunneling and put some time into mash PH if you're still not happy. The rest sorts itself out.
 
OK, so I didn't see your data here until now, but aside from your admittedly not paying attention too much to volumes, I THINK your conversion efficiency is low. I have no clue how your software calculates this for you (beersmith doesn't estimate this and thats what I use), but I calculate my own conversion efficiency (braukeiser formula) and it has helped a ton to help me determine how my mash went overall and thus helped me problem solve mash/lauter efficiency as a result. However, calculating conversion efficiency is problematic with these AIO systems that have solid sided malt-pipes anyways because the wort is not homogenous with the ENTIRE volume of strike water (sides between malt-pipe and kettle) not mixing with the grains. So not sure, if those conversion efficiencies are correct or not. I actually posted a question about this exact problem last summer. I was hoping peeps, including the great @doug293cz, would have a solid answer for me lol. I have since re-adjusted my crush from that post to 0.030 as well. See my post on this issue here: Determining Conversion Efficiency in "All-in-one" electric systems

Nevertheless, if we assume that your conversion efficiencies are correct by your software, I would suggest looking into your grain crush quality as well because those conversion efficiencies should be higher IMO. Keep in mind that mash/lauter efficiency is calculated by conversion efficiency*lauter efficiency. So Id start with trying to improve conversion efficiency.

FWIW, I have my BH efficiency in beersmith still set to 65% but will be upping it higher based on my previous few brews and will continue to tweak until I am happy and consistent which matters most. I am also totally fine with lower BH efficiency because I do voluntarily take more losses going into the fermenter because I let my hop free roam baby! lol.

Cheers man!

I remember seeing that thread, because I specifically recall your initial response and getting a chuckle out of it.

Well damn! I was hoping for some sort of lightning rod answer with infinite wisdom! lmao :)

I also recall kevin58 referencing oginme's lifting of the malt pipe, but it wasn't something that I had put into practice yet.

I'm using a bag in the pipe, and have been mashing at .028 with a cereal killer. I know you've made a couple different references to your crush rate of .030 in this thread, so I'm going to run w/that and give it a go for my next batch.

Also ordered a new pH meter yesterday, mainly because I wasn't paying enough attention that I should not have been rinsing and then letting it air out to dry after use. Ordered this one: Beverage Doctor - Pen Style PH Meter | MoreBeer

Per @Bishop9.5 's suggestion, I'm going to measure my boil off rates today. I know that @Oginme mentioned a recirculation rate of 1 liter/minute, and while I feel like I recirculate at a really low rate so that I'm not introducing channeling, I'm not certain what 1 liter/minute looks like visually either.

You can also look for channeling when you pull the grain pipe up. Pull it very slowly and as the wort runs out you should be able to see it present as a shallow, loose spot on the grain bed.

While you're checking your boil off verify your kettle losses as well.
 
@Bishop9.5 @renstyle

Thanks for the tidbits, I’ll admit to having been somewhat carefree about noting post boil volume and only just recently labeled 1 of 2 of my fermenters with volume markings. There has been a lot of, meh..good enough or guesstimates with those two specific things. So my actual numbers might be better, but as you’ve noted. GI/GO

I think my desire to not become obsessive about detail because this is supposed to be a hobby is intersecting with the real life version of me who abhors displays of half-a’d effort.

As many have previously stated... other than sanitation, which is a must in almost all circumstances, and (ideally) avoiding boil-overs, other aspects of brewing are fairly forgiving, and offers alot of leeway, which makes the hobby fun!

I fancy myself as an "amateur engineer"... I don't have the distinct credentials but my day job is "solving problems, sometimes by building/designing something", which to alot of folks is the epitome of what being an engineer is... so compiling facts/figures/data actually accentuates my brewing hobby.

Making graphs of gravity readings over time makes me smile. ;)

Knowledge is power, and with homebrewing that power offers you the ability to re-create a fantastic batch consistently should you choose to do so. That's what drives me to take all of the notes to gain a better feel for the system I am using. "Dialing it in" has never been as much fun. :D
Just wondering, if you love data, do you have a Tilt? I'm thinking of getting one.
 
If you are using the hose clamp that came with the recirc package it almost squeezes the hose shut and some wort just gets by.

I got lazy (again) and didn't bother pulling out my pump. I found a container that measured in liters and just measured the rate at the kitchen sink. Calibrating in my head the visual volume of a liter was, I knew it was going to be fairly slow. Didn't realize how slow.

Odd thing is, I had been speeding up the rate a little bit because I thought the trickle that I was going with before was just that...too slow. I have a riptide pump, and was pretty much strangling the outflow w/the valve. Looks like that was the right thing to do..

I boiled off 2 gallons yesterday, one at 100% and one at 80%. Both reduced the volume by 4 Liters/1 Gallon, taking into account the thermal expansion/reduction.

Took 1 hour and 21 minutes to go from 64 Degrees to 208, at which point I noted a visual boil.
Took 40 minutes to go from 168 to 208. This is a good number to have, because I've been guesstimating when I should ramp up to boil temp while the malt pipe is dripping.

I measured kettle loss at 1.2 quarts, as I typically just leave the pump running until I hear the pickup sucking air. I've managed to move my hand somehow in the past while watching the volume go down in the foundry and ended up in wort NOT going into the fermenter...that was a fun mess to clean up....:rolleyes:

Silicon tubing running from AF to Pump hold about .2 quarts, so I threw that number in there for losses too.

Measured 4 quarts below the malt pipe, but I guess that is more of a strike water addition thing.

Grain absorption and Hop Absorption I'm just leaving at the default values of .5 qt/lb and .15 qt/oz, mainly because I have no idea. My assumption is settling in on a milling gap will help w/the prior, and I still haven't figured out which method I'm sticking with in regards to hops. Bags or filter. I was messing around with placement yesterday and I think I can get the filter to sit on top of my IC w/o falling in well enough. Better than having a hop sock find its way to the pickup tube and having me wonder why all of a sudden nothing is going into the fermenter and my tubing is collapsing from sucking a whole lot of nothing!! :confused:
 
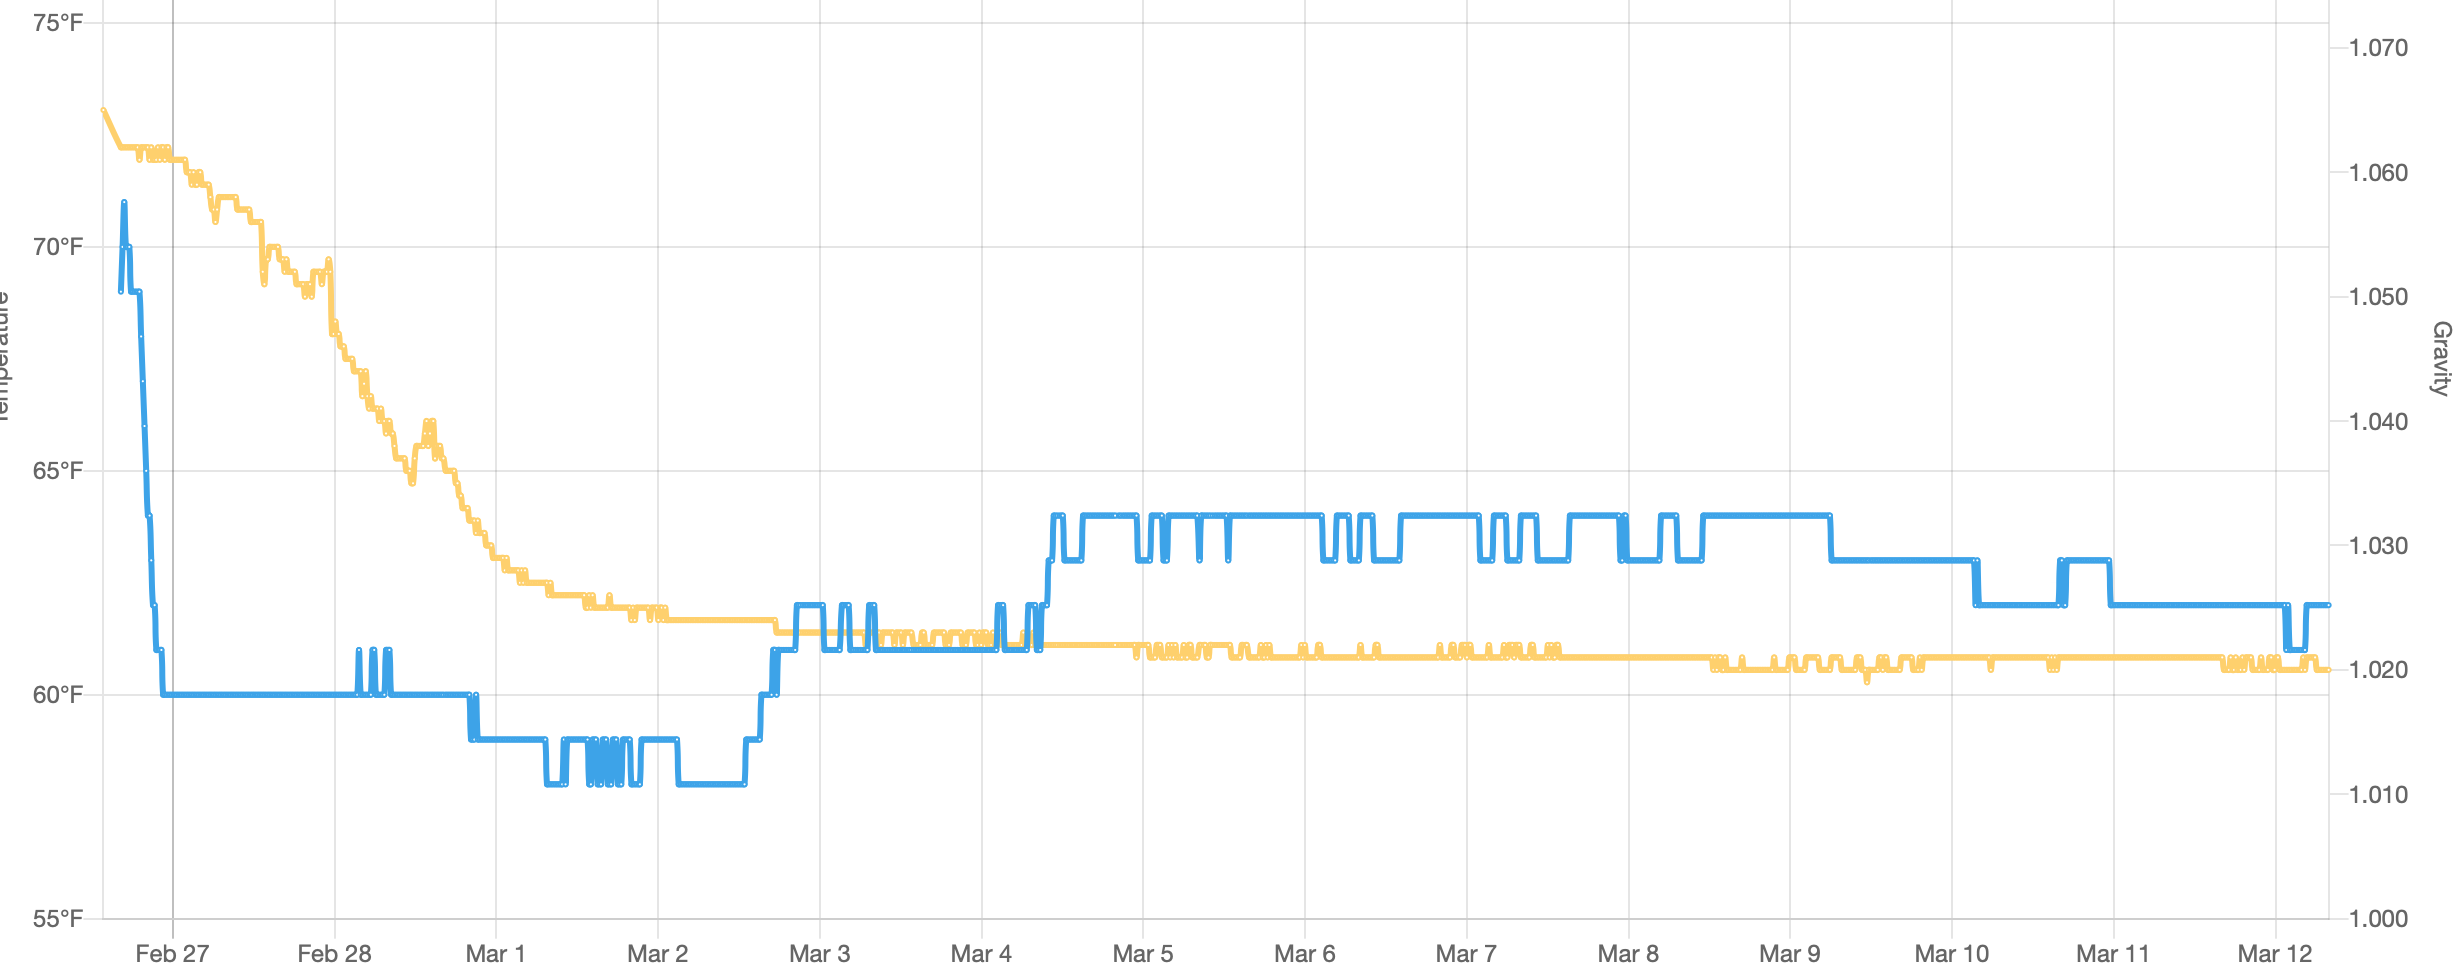
Just wondering, if you love data, do you have a Tilt? I'm thinking of getting one.

They are kind of neat...I got one when morebeer was providing a coupon back in December site wide, and the Tilt wasn't excluded. Didn't get it until early February, but whatever. My setup doesn't allow me to check readings easily during fermentation, so it has been useful in that regard...as well as verifying the temperature offset of my chamber. And yeah..this is the tropical stout that I missed my numbers on..but as has already been said. It will beer...so already a net positive.

Screen Shot 2021-03-12 at 8.07.28 AM.png
 
@Oginme commented on this a while back. Could try checking w/him to see how his trials ended up.

My goal in exploring the effect on efficiency that the pipe geometry and trapped water on the sides has was not to chase higher efficiency, but to determine a way to obtain a consistent efficiency when increasing the extracted gravity based upon the recipe. The majority of my brewing is sub-1.060 gravity and for the most part, my efficiency (and therefore gravity expected) is consistent at around 83% +/- 1%. When I do start to increase the gravity above the 1.060 level, the efficiency drops off dramatically. Most of this is due to the dilution effect of the water trapped on the sides. It amounts to adding dilution water to the mash.

Since my trials in November and early December, I have been focusing on lagers for which most of them have involved a decoction (each to their own, I have found that my decoction lager brews have consistently tasted better and scored consistently higher in competitions. YMMV) for which I raise the malt pipe to scoop out the thick mash. This in effect mixes the water trapped on the sides and my efficiencies reflected the initial findings for most brews. When I brewed my Bock and Doppelbock, I ended up at right around 82% to 83% mash efficiency, which suits my initial intent.

I am still working on the timing and building that into my BeerSmith mash profile to provide some consistency in process, but expect that I will not be doing any lifting for anything sub 1.050 target gravity, lifting the mash pipe at around 40 minutes into the saccharification rest for those between 1.050 and 1.065, and twice during any recipes with a target above 1.065. This keeps my mash efficiency consistent around that 83% mark, which makes my expected targets more reliable and repeatable.

BTW, I also did a couple of mashes without the malt pipe, clipping the bag to hang just above the heating element when full of grain. My results were consistent with the above improvements.

Oginme, that is good to hear. Also I was wondering if you could use a bag without the pipe or a false bottom with just clipping the bag to the kettle just off the bottom. I'm really gald to hear this. I think this will also allow me to make smaller batches without the pipe attachment. I may have to contact Wilser BIA Bags soon. Thanks for letting us know.
 
Just wondering, if you love data, do you have a Tilt? I'm thinking of getting one.

I have an iSpindel :cool:

Another HBT compatriot was kind enuf to put together 5 or 6 from kits they got from Open Source Distilling and offered the extras for sale, so I snagged one. Methinks it was $49 shipped, and I wanted the Wi-Fi connection rather than BT as I am using steel kegs as fermenters.

I picked up an 18650 cell for it recently, still need to do the proper "calibration dance" with descending-gravity sugar water to get the proper equation so that software like Brewfather (currently) as well as Fermentrack (a near future project) can graph my results and avoid pulling hydrometer readings on a regular (which from a corny can add up).

The unit's initial tilt angle in distilled water is within spec, and it sits properly on a level table, so it's a good start!
 
Last edited:
Anyone else noticing that the foundry is getting to a boil before the display hits 212? I recently hooked up my 240v connection and thought I would run it up full of water to make sure all is good and see what the boil was like. That sucker was a full on violent boil and the display was at about 205.. I noticed it with the 120 as well but just wondering if that’s a common thing. I let the water cool down to around 160 and checked with a thermometer and it was only off by about a degree so I “think” the probe is working correctly. Is there any was to re-calibrate the internal probe?
 
Anyone else noticing that the foundry is getting to a boil before the display hits 212? I recently hooked up my 240v connection and thought I would run it up full of water to make sure all is good and see what the boil was like. That sucker was a full on violent boil and the display was at about 205.. I noticed it with the 120 as well but just wondering if that’s a common thing. I let the water cool down to around 160 and checked with a thermometer and it was only off by about a degree so I “think” the probe is working correctly. Is there any was to re-calibrate the internal probe?
From what I have heard the temperature probe is calibrated for the center of the mash pipe at mash temperature. So it is not unusual for the boil to not match 212F.
 
Anyone else noticing that the foundry is getting to a boil before the display hits 212? I recently hooked up my 240v connection and thought I would run it up full of water to make sure all is good and see what the boil was like. That sucker was a full on violent boil and the display was at about 205.. I noticed it with the 120 as well but just wondering if that’s a common thing. I let the water cool down to around 160 and checked with a thermometer and it was only off by about a degree so I “think” the probe is working correctly. Is there any was to re-calibrate the internal probe?
I have seen this periodically too but not all the time which is a little odd to me. At strike temps, my thermapen measured at the top of water is exactly the same as the foundry. So no issue there. But at boil, I have seen the foundry report 206 often but the top (which is boiling) reads 212 with the thermapen. Other times, the foundry reads 212. So Im not really sure why this is but it doesn't really affect what I do. If its boiling, its boiling.
 
Water only boils at 212 degrees F. when two conditions are met:

1) You are at sea level
2) Your barometric pressure is an "honest" 29.92 inches of mercury.
(actually water boils at 212 F. anywhere if condition #2 is met, but.... see below)

Note: For some very odd reason your local barometric pressure conditions as reported by weather stations are always manipulated and "corrected to sea level". Denver, CO (the mile high city) is reporting 29.79" of mercury barometric pressure as I'm typing this. Their real pressure reading is much less than this. 29.92" of mercury = 14.69 PSI. I believe the average atmospheric pressure for Denver is about 12.5 PSI. That would be about 25.46 "honest" inches of mercury if not "corrected to sea level".

I'm at 1,180 feet above sea level, and water "nominally" boils at about 209.87 degrees here. Give or take a degree or so to allow for barometric pressure fluctuations.
 
Last edited:
As a ballpark "rule of thumb", pressure decreases by ~0.01 inches of mercury for every 10-foot increase in altitude above sea level.
 
In the early models (such as mine), John Blichmann stated that the temperature probe and indicator was calibrated to be the most accurate for mash temperatures, which meant that given the type of thermocouple/thermistor they used, it would not be accurate at boiling temperatures or at room temperatures. This suits me fine, since I really don't need the temperature display to tell me when the wort is boiling as the rolling surface and steam bubbles usually are a good indicator.
 
How do you take accurate pre-boil gravity readings? I can never seem to get everything mixed up well enough to take an accurate pre-boil gravity. My pre-boil gravities end up reading a point or 2 away from the starting gravity or sometimes even higher than the post-boil gravity. So it's obviously a mixing issue. I've even waited until it started boiling and give it a couple minutes in the hope the rolling boil would help mix things up. I've just stopped taking them because at this point, they offer no useful information.

So what do you do to mix things up enough to get an accurate pre-boil reading? Probably not Anvil specific, but it's what I'm brewing in.
What are you using to measure gravity? Not too long ago I purchased a set of brewing hydrometers and one is calibrated to 155F. This makes gravity readings a no brainer.
 
Anyone else noticing that the foundry is getting to a boil before the display hits 212? I recently hooked up my 240v connection and thought I would run it up full of water to make sure all is good and see what the boil was like. That sucker was a full on violent boil and the display was at about 205.. I noticed it with the 120 as well but just wondering if that’s a common thing. I let the water cool down to around 160 and checked with a thermometer and it was only off by about a degree so I “think” the probe is working correctly. Is there any was to re-calibrate the internal probe?
Yes, I've noticed the temperature that the unit displays is, at best, an estimate. I use a digital probe to get the correct temperatures.
 
What are you using to measure gravity? Not too long ago I purchased a set of brewing hydrometers and one is calibrated to 155F. This makes gravity readings a no brainer.
I'm using a refractometer. And I'm not too concerned on that because the post-boil reading from the refractometer and hydrometer are very close. And I obviously let the sample cool before checking with the refractometer.
 
Back
Top