ANVIL FOUNDRY ALL-GRAIN BREWING SYSTEM

Homebrew Talk - Beer, Wine, Mead, & Cider Brewing Discussion Forum

Help Support Homebrew Talk - Beer, Wine, Mead, & Cider Brewing Discussion Forum:

This site may earn a commission from merchant affiliate links, including eBay, Amazon, and others.
I have to watch the center area on the bottom, gets pretty dark but no scorching
Does this clean off pretty easy, like just wipe it off with a sponge or do you have to scrub at it. I get a big black spot of burnt sugars that takes an overnight pbw soak and an 1hr + of scrubbing.

Cheers
 
I figured this was the place to ask. I'm thinking about pulling the trigger on an anvil foundry because the all in one I'm using now scorchs the crap out of my wort on most brews(its a mash and boil) has anyone had this with the foundry? Really don't want to drop cash on a new system and wind up with the same problem.

Cheers
Just so you know, I was told by Anvil that my order was delayed 3 weeks because of the Swirly arm attachment that I ordered. They were waiting for more Swirly arms to be manufactured. If I had just ordered the 10.5 foundry and the recirculation kit, it would have shipped in less than a week. Hope that helps!
 
Does this clean off pretty easy, like just wipe it off with a sponge or do you have to scrub at it. I get a big black spot of burnt sugars that takes an overnight pbw soak and an 1hr + of scrubbing.

Cheers
just hot water and a green scrubber cleans it immediately
 
Just so you know, I was told by Anvil that my order was delayed 3 weeks because of the Swirly arm attachment that I ordered. They were waiting for more Swirly arms to be manufactured. If I had just ordered the 10.5 foundry and the recirculation kit, it would have shipped in less than a week. Hope that helps!

3 weeks? Geez.

A couple of us in here got these before the Swirly arm was a thing. I had a camlock attached to this. Put a camlock compression adapter on the stainless return tube as well.

https://www.brewhardware.com/product_p/spincycleoverboard.htm
 
Just so you know, I was told by Anvil that my order was delayed 3 weeks because of the Swirly arm attachment that I ordered. They were waiting for more Swirly arms to be manufactured. If I had just ordered the 10.5 foundry and the recirculation kit, it would have shipped in less than a week. Hope that helps!

That's weird. My swirly arm shipped separately and arrived before the Foundry box!
 
No scorching. Turn down the power to 40-60% during mash. I do get a build up on the bottom that comes off with Powdered Brewery wash (PBW) soak and a green 3M scrub. PBW works much better than oxyclean.
How long of a soak and scrub are you doing. A few minutes and light scrub or multiple hr soak and vigorous Scrub?

Cheers
 
How long of a soak and scrub are you doing. A few minutes and light scrub or multiple hr soak and vigorous Scrub?

Cheers
I just did my 50th brew on the 10.5gallon version today. Was nice since I hadn't brewed in almost three months. After every brew, I always do a hot PBW recirculating cleaning. It essentially recirculates for about 45minutes to an hour depending on what I have going on. After this time and draining, I use a non abrasive sponge to wipe the center ring area. No scrubbing ever required to remove the cake. I've also done a beerkeepers friend scrub two times on the bottom for annual cleaning. Never had legitimate scorching ever. I mash at 50% power (240V) and when I ramp up the temps, Im at 75% power. Boil = 85-87% power. Never any black scorching.
 
double brew day today, cleaned everything with a sponge and a spray nozzle before mashing in the next, it helps to clean as you go, rather than drink and get tired and say leave it till tomorrow

Yeah..I feel like thinking this and never follow through with it. I’ve taken to not chilling as long and dumping to fermenter earlier and just throwing into FC to get to pitching temps. Can still get to 80s, mid 70s within 10G of water way quicker than I can get settled to think to time it before I start recirculating. I’ve taken to 10G of run off being my limit to be wasteful.

I used to dump and dump more and more ice, to get to mid 60s but those days are over.

Once fermenter is in FC, I’m taking some of that run off water and recirculating PBW whilst doing other various clean up items. I’m usually moving kinda slow by this point (RHAHB) and by the time I’m done cleaning, wort is usually ready for yeast.
 
At the end of the brew I rinse out the kettle throw in a few gallons of water and some one-step or pbw for 10 minutes. Drain and use green scrubby and any buildup on bottom comes right off. Rinse it and done.
If I suddenly have to handle kids or am tired and just want to be done and leave everything for morning I just leave some water in it so it does not dry out.
 
So here is the first poor trying with the buddy who got me the hops. Super tasty. Will edit with full recipe later

Edit. For recipe:

36.4% 2-row
36.4% golden promise
12.1% flaked Oats
12.1% white wheat
3% Honey Malt (had left over from another brew.

Mashed @154* for 1 hours.

.5oz mosaic at 30min
1oz of both Mosaic and Simcoe at 10 min
2oz mosaic/simcoe 1oz of galaxy 30 min whirlpool at 160

1pkg of both imperial and juice

Ferment at 68 till fg reach raised to 70 for 48 hours.

Drop to 60 for 72hour dryhop
4oz galaxy
2.5oz Mosaic
1.5oz Simcoe

cold crash before packaging.

OG : 1.074
FG: 1.018
 

Attachments

  • 20220312_164816.jpg
    20220312_164816.jpg
    1.2 MB · Views: 14
I've been eyeballing this and like the upgrades listed here


I'm holding out for rea$on$ but should be purchasing this by next Summer if life allows. The Clawhammer upgrade seems neat but not too sure I'd go that route. Now what really sticks out was the Brew Bag. I can see where using a bag, in the malt pipe, that's larger than the malt pipe could be extremely beneficial in keeping grains in the malt pipe. Also it would allow for a more normal mash/sparge setup. By that I mean mash in around 1.5 to 1.8 lbs per gallon then use a hlt for a fake fly sparge. Even though the grains aren't submerged in the water at that point I'd have to think that would make a difference. Also the most recent pictures on the Foundry site looks like they may have removed the holes on the side bottom of the malt pipe so a small batch adapter may no longer be needed for better efficiency?
 
Who's got a few brews on the 18 gallon system and wants to share their thoughts? I'm ready to buy a system large enough for 10 gallon batches and I don't see much that competes. Only bummer is I don't need the pump or chiller or hoses...and I'd use a bag when one is available. Hate paying for all the extras.

Any competition worth looking at? I really like the Clawhammer setup, but don't think I can fit it in the budget.
Replying to myself, to say that I might also look at going with the Clawhammer 20G starter set, using my propane, and upgrading to the 240v controller/coil next year! Maybe the best of both worlds...
 
Who's got a few brews on the 18 gallon system and wants to share their thoughts? I'm ready to buy a system large enough for 10 gallon batches and I don't see much that competes. Only bummer is I don't need the pump or chiller or hoses...and I'd use a bag when one is available. Hate paying for all the extras.

Any competition worth looking at? I really like the Clawhammer setup, but don't think I can fit it in the budget.
just my 2 cents I've brewed 10 to 15 gallon batches for at least 15 years and I wouldn't even think about it without a pump, your losing efficiency and temperature control without one, but with that said its on a 3 pot herms system not a single vessel, I still wouldn't do it but good luck
 
just my 2 cents I've brewed 10 to 15 gallon batches for at least 15 years and I wouldn't even think about it without a pump, your losing efficiency and temperature control without one, but with that said its on a 3 pot herms system not a single vessel, I still wouldn't do it but good luck
Oh, I don't need those because I have a pump/chiller/hoses and such now. I use them all for 5 G batches in my 10G pot on propane. I am just wanting to upgrade to a 10gallon batch capable rig, and my current burner is trash, so I'd need to upgrade that as well if I go to a larger batch.
 
I always hate when folks ask questions of a community then don't follow-up with what they did. I ended up going with the 20 gallon kettle from Clawhammer and paring with a Blichmann Hellfire burner. This will allow me to delay the electrical work and extra cost until next year's bonus season, but still get on with making 10 gallon batches.
 
I have the 6.5gal foundry and have used it a few times without any major issues. I really enjoy the system overall! I’ve been reading through this forum and am excited to try out a few of the recommendations. Especially the one about lifting up the malt pipe a couple times during the mash in order to better mix the higher-concentration part of the mash liquor with the liquid in the space outside the pipe.

I just placed an order for the in-basket brew bag as well as the stainless steel Anvil pump head. I’m thinking I could put a ball valve on the pump outlet instead of that dumb clamp thing. Setting a recirculating flow rate has easily been the most frustrating part of using the foundry for me.

Any advice on grain crush using the bag in the malt pipe? Ive never done proper BIAB before. My plan is to still do no-sparge and recirculate during the mash. I’m not obsessed with efficiency or anything. I mostly just like the idea of using the bag to make cleanup easier. I’ll take ease of use and consistency over just about anything else these days.

Also, any recommendation for an immersion chiller upgrade that fits this system? I like to recirculate (whirlpool) post boil to aid in chilling but I’m not a fan of the included chiller at all.

Cheers!
 
I have the 6.5gal foundry and have used it a few times without any major issues. I really enjoy the system overall! I’ve been reading through this forum and am excited to try out a few of the recommendations. Especially the one about lifting up the malt pipe a couple times during the mash in order to better mix the higher-concentration part of the mash liquor with the liquid in the space outside the pipe.

I just placed an order for the in-basket brew bag as well as the stainless steel Anvil pump head. I’m thinking I could put a ball valve on the pump outlet instead of that dumb clamp thing. Setting a recirculating flow rate has easily been the most frustrating part of using the foundry for me.
I just crank the clamp down about as far as it will go. I'm not worried about getting it just right. As far as I'm concerned you can't go too slow.
Any advice on grain crush using the bag in the malt pipe? Ive never done proper BIAB before. My plan is to still do no-sparge and recirculate during the mash. I’m not obsessed with efficiency or anything. I mostly just like the idea of using the bag to make cleanup easier. I’ll take ease of use and consistency over just about anything else these days.

Also, any recommendation for an immersion chiller upgrade that fits this system? I like to recirculate (whirlpool) post boil to aid in chilling but I’m not a fan of the included chiller at all.

Cheers!

The old rule of thumb for BIAB grain crush is to crush it finer and finer until you get scared. It' probably just about right at that point. 0.025 to 0.028 is not unheard of. As for immersion chillers you can't go wrong with the Hydra.
 
@Pehlman17
I tried the lift malt pipe a bit and jiggle it about to mix the dead space water, I didn't have a full malt pipe of grain and so the up and down dunking popped the bottom malt pipe screen up a bit and I had to reposition it with the stir paddle.
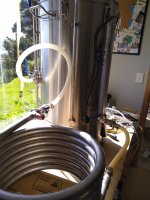
I have a guten 70 so it's a bit bigger than the Anvils but use the coolossus counter flow chiller ( there is an upgraded bigger one now as well ) and then whirlpool via setup back thru the bottom tap. I fitted a three way in the vertical pipe to make this easier but you could just do it off the top of the recirc pipe it will be less efficient. There are also whirlpool arms designed for brewzilla that might work as well but in a different way. That inside picture shows the whirlpool I made at the bottom of the picture the other thing is the trubtrapper I made.
IMG_20210909_005212.jpgIMG_20210909_111017.jpgIMG_20210508_080224.jpg
 
I actually do have a counterflow chiller as well (Exchillerator) but I haven’t used it yet. The only reason that I whirlpool currently is just to move the wort around to speed up the chilling with the immersion chiller. Now that I’ll be getting the stainless steel pump head, maybe I should consider testing out the counterflow finally. Is recirculating wort through the chiller and back to the kettle just after the boil a good way to assure the chiller is sanitized before turning on the water and directing the wort into the fermenter?
 
I have the 6.5gal foundry and have used it a few times without any major issues. I really enjoy the system overall! I’ve been reading through this forum and am excited to try out a few of the recommendations. Especially the one about lifting up the malt pipe a couple times during the mash in order to better mix the higher-concentration part of the mash liquor with the liquid in the space outside the pipe.

I just placed an order for the in-basket brew bag as well as the stainless steel Anvil pump head. I’m thinking I could put a ball valve on the pump outlet instead of that dumb clamp thing. Setting a recirculating flow rate has easily been the most frustrating part of using the foundry for me.

Any advice on grain crush using the bag in the malt pipe? Ive never done proper BIAB before. My plan is to still do no-sparge and recirculate during the mash. I’m not obsessed with efficiency or anything. I mostly just like the idea of using the bag to make cleanup easier. I’ll take ease of use and consistency over just about anything else these days.

Also, any recommendation for an immersion chiller upgrade that fits this system? I like to recirculate (whirlpool) post boil to aid in chilling but I’m not a fan of the included chiller at all.

Cheers!

The lift & lower along with a few stirs does make a big difference.

And yes one benefit to the stianless head is adding a ball valve right on the end of it. Go for it. Just don't forget to add a barb fitting on the other side of the valve as well to connect a hose.

I shoot for .030" gap on mine w/ feeler gauges. I'm sure oyu could go finer but I think after an hour mash you'll get everything the grain has to give up and finer may not help much if at all.

W/ the 6.5 I use an old copper chiller I already had. The hydra and others are crazy great but much too big for us 6.5 owners. Just be sure you get something that fits inside and also pay attention to the height vs. your typical wort level. A 50' piece of 3/8 copper is probably enough.
 
I have the 6.5gal foundry and have used it a few times without any major issues. I really enjoy the system overall! I’ve been reading through this forum and am excited to try out a few of the recommendations. Especially the one about lifting up the malt pipe a couple times during the mash in order to better mix the higher-concentration part of the mash liquor with the liquid in the space outside the pipe.

I just placed an order for the in-basket brew bag as well as the stainless steel Anvil pump head. I’m thinking I could put a ball valve on the pump outlet instead of that dumb clamp thing. Setting a recirculating flow rate has easily been the most frustrating part of using the foundry for me.

Any advice on grain crush using the bag in the malt pipe? Ive never done proper BIAB before. My plan is to still do no-sparge and recirculate during the mash. I’m not obsessed with efficiency or anything. I mostly just like the idea of using the bag to make cleanup easier. I’ll take ease of use and consistency over just about anything else these days.

Also, any recommendation for an immersion chiller upgrade that fits this system? I like to recirculate (whirlpool) post boil to aid in chilling but I’m not a fan of the included chiller at all.

Cheers!
I have the 6.5. I use it for 3 gallon batches. And I pretty much only use it as a mash tun. I have their pump and I recirculate the wort for the whole mash. It’s usually crystal clear by the end of the mash.

What I found is when you pull the basket at the end to drain you disturb and re-distubite all the junk you just spent an hour or more recirculating to get rid of. As soon as you pull the basket the wort is all cloudy.

So I don’t pull the basket. I drain all that crystal clear wort into my brewpot and boil on the stove. It works with a 3 gallon batch. I figure its saving some wear and tear on the Foundry, too.

Since I’m boiling in my brewpot I use the chiller I’ve had. I have a kitchen sink with a crappy spray head that I have to screw off and rig the chiller to. I’ve never been able to find the right connector. If I had a good connection I’d think about a plate chiller.

[edit] the dumb clamp thing drives me crazy. Pump flow gets slower and faster throughout the mash and it has to be constantly adjusted.
 
Last edited:
Any advice on grain crush using the bag in the malt pipe? Ive never done proper BIAB before. My plan is to still do no-sparge and recirculate during the mash. I’m not obsessed with efficiency or anything. I mostly just like the idea of using the bag to make cleanup easier. I’ll take ease of use and consistency over just about anything else these days.
I use a Wilser bag on the malt pipe of the Mash&Boil — doubt that’s any different than doing so on the Foundry. I had the bag fitted to go around the outside of the unit so no grain would go down between the malt pipe and the kettle. I have a built-in pump and a couple pieces of grain would clog it. I also started lifting the pipe 2x during the mash and efficiency went up.
 
For bag in pipe, I too use Wilser. It does the job and didn't cost much, and it's cut to the perfect size.

For bag only, well for no pipe, I use the brew bag branded one from the Anvil site. And a false bottom mentioned around here a few times. This bag is definitely stronger, and of course ought to be for like twice the price.
 
I make sure the counteflow has a good rinse through after a brew, then recirculate the PBW before another washout and prop it up so it drains and dries out in the sun, which is hot here. Then plug it in and recirculate on the way to the boil for ten minutes so that I'm not running the pump with boiling wort going throug it.
 
Curious if anyone is running the Foundry in 240V but using 2 separate 120V outlets? I only have 120V in my garage but do have 2 separate circuits that happen to be on opposite sides of the main panel (which is located on the opposite side of the house on a different level and not easy to run a new wire from). Considering an adapter to connect them, the pair of 120's that is, with a GFCI in-line. Currently brewing in the basement where I do have 240V and wouldn't mind getting some sun shining on my brewing over the next few months.

Not really interested in running the full brew day process with 120V. May end up however using a Foundry for mashing (only) with the 120V, then draining to a kettle for the rest of the steps (I have everything I need to brew w/ propane and have used it many times). It would be the "proper" way but of course the 240V idea is intriguing.
 
Last edited:
Curious if anyone is running the Foundry in 240V but using 2 separate 120V outlets? I only have 120V in my garage but do have 2 separate circuits that happen to be on opposite sides of the main panel (which is located on the opposite side of the house on a different level and not easy to run a new wire from). Considering an adapter to connect them, the pair of 120's that is, with a GFCI in-line. Currently brewing in the basement where I do have 240V and wouldn't mind getting some sun shining on my brewing over the next few months.

Not really interested in running the full brew day process with 120V. May end up however using a Foundry for mashing (only) with the 120V, then draining to a kettle for the rest of the steps (I have everything I need to brew w/ propane and have used it many times). It would be the "proper" way but of course the 240V idea is intriguing.
If your current 120V outlets in the garage are GFCI protected, this won't work. Using two 120V circuits on opposite phases to get 240V only works if neither of the circuits is GFCI protected. Current code requires garage outlets to be GFCI.

Brew on :mug:
 
If your current 120V outlets in the garage are GFCI protected, this won't work. Using two 120V circuits on opposite phases to get 240V only works if neither of the circuits is GFCI protected. Current code requires garage outlets to be GFCI.

Brew on :mug:
Dang! They are indeed both GFCI protected. I knew to research having it this way, that it may not work, the combo may end up throwing them both off. I will call it confirmed. Thank you.
 
Looking to grab a brew bag for the foundry 10.5… notice they come in 2 sizes (for malt pipe and w/o malt pipe).

Was about to pull the trigger on the larger bag (to be used without malt pipe), but wanted to run this by the forum… am I missing something ? Not sure whyd they give this option if the point was to move away from the inefficiencies of the malt pipe?
 
It can help trap grain if you have issues w/ it escaping. Also helps some sparge styles (I for one lift the bag and stick it in a nearby pot). If you arne't sure why you'd need one for the pipe then - you probably don't and the bigger one is perfect.
 
It can help trap grain if you have issues w/ it escaping. Also helps some sparge styles (I for one lift the bag and stick it in a nearby pot). If you arne't sure why you'd need one for the pipe then - you probably don't and the bigger one is perfect.
No real issue w/ grain escaping. Stuck recirculation / slow sparge have been my issues with the malt pipe. I wouldn’t mind keeping the sparge step if the bag in the malt pipe would alleviate these issues…. If not yea I’ll probably just go with the bigger one.
 
Could consider a slightly bigger mill gap, at least .030" range if you have feeler gauges (credit card is quite close if not). Rice hulls. Or just stir it up and try again.

I'd say a bag in the pipe is convenient for cleaning, or moving grains if needed, but not necessarily a fix for anything. If you do try the bag inside consider a Wilser for it. I have one of each, and the Wilser is a lot less... rigid and less expensive as well. Potentially less robust but when used inside the pipe that should be OK.
 
If you do try the bag inside consider a Wilser for it. I have one of each, and the Wilser is a lot less... rigid and less expensive as well. Potentially less robust but when used inside the pipe that should be OK.

I have both as well for my Mash & Boil and also agree on the Wilser due to less rigidity. Also, I had it made to fit the outside of the kettle, not the malt pipe. This eliminated the possibility of any grains getting in between the the pipe and the side of the kettle when poring the grain.I requested the Brew Bag be made this way but what they sent me was simply a bit bigger around the top But didn’t fit. I wish they’d simply said they couldn’t do it due to the rigidity. Very disappointed, money down the drain. I liked their bag I used in my 10G cooler for mashing. So I bought the Wilser for my M&B and its great.
 
Could consider a slightly bigger mill gap, at least .030" range if you have feeler gauges (credit card is quite close if not). Rice hulls. Or just stir it up and try again.

I'd say a bag in the pipe is convenient for cleaning, or moving grains if needed, but not necessarily a fix for anything. If you do try the bag inside consider a Wilser for it. I have one of each, and the Wilser is a lot less... rigid and less expensive as well. Potentially less robust but when used inside the pipe that should be OK.
Thanks, might try that Wilser.. looks to be about half the price compared to the brew bag on Anvils website.
 
So I have been brewing on my Foundry for about 7 months now. A couple months ago, I took it over to a friend's house and brewed on his porch while he brewed a 10G batch on his 5500W/240V system. I was shocked when we both needed to chill at the same time! To be fair, he had just made some very big upgrades to his system and it took him extra time to dial things in, but still....

A month later, my back went out and I couldn't lift 5lbs, much less brew. My wife stepped up and made the whole beer as I just talked her through the steps. The only 'issue' we had was we had planned for 70% efficiency but got just over 78%. I really love the system, it's portability, and simplicity.
 
Back
Top