• Please visit and share your knowledge at our sister communities:
  • If you have not, please join our official Homebrewing Facebook Group!

    Homebrewing Facebook Group

Another fermentation chamber build

Homebrew Talk

Help Support Homebrew Talk:

This site may earn a commission from merchant affiliate links, including eBay, Amazon, and others.

stratslinger

Well-Known Member
Joined
Dec 28, 2010
Messages
2,609
Reaction score
237
Location
Terryville
Well, here's another fermentation chamber build thread - I'll try to keep it updated, but my progress might not be what one would consider _fast_ over the next week or so... ;)

Anyway, I've had good luck thus far fermenting in my basement underneath my workbench (I'll try to get a picture up of the current setup), but I'm hitting the time of year that, for whatever reason, even my basement climbs up well into the 70's, sometimes 80's. I've got two brews going at the moment who wrapped up the really active part of their fermentation last week - right up around 68F. Definitely time to do something about temp control before I get another brew going!

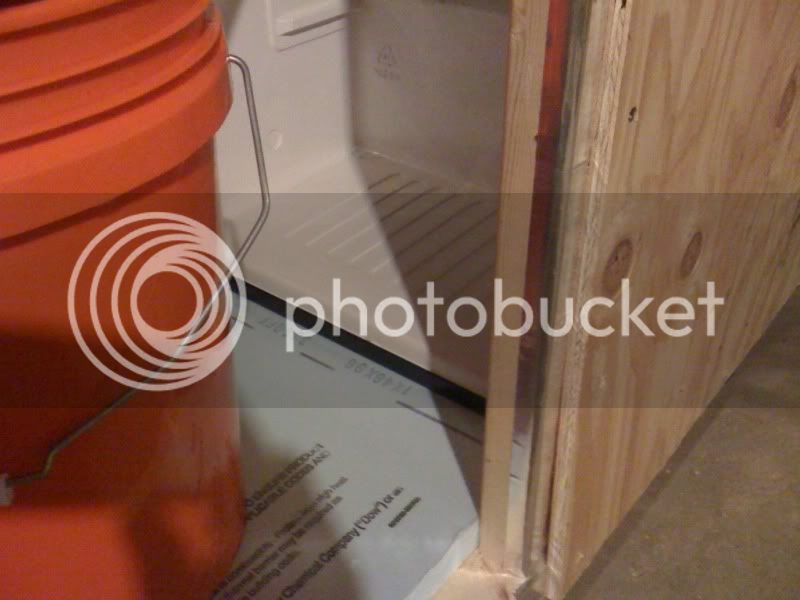
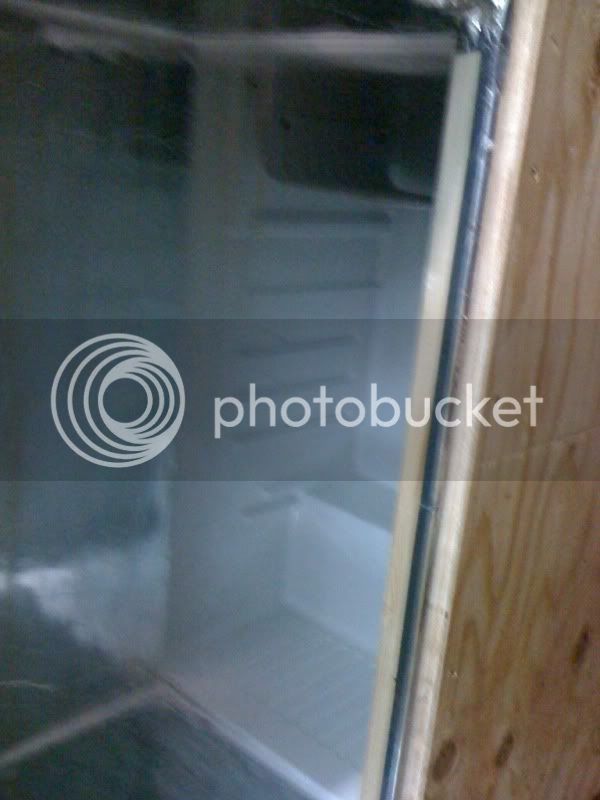
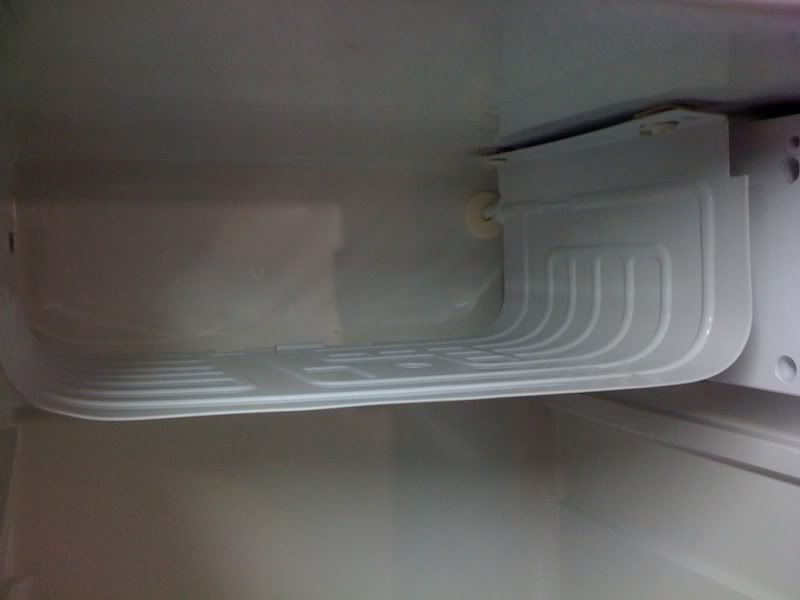
A couple months ago, my mother-in-law hooked me up with a little Magic Chef dorm-sized fridge her office was getting rid of:
7c8dc1a0.jpg


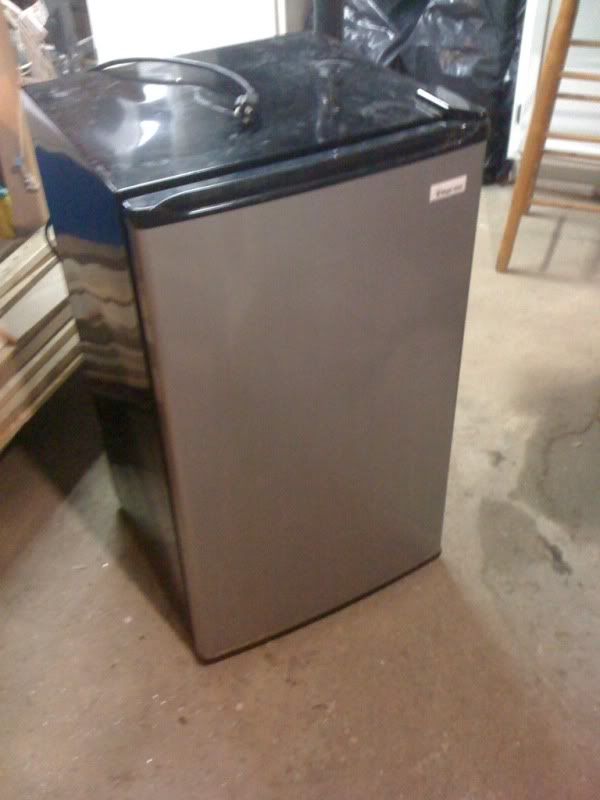
This has sat in the basement since, and basically been used as a stand to place things on next to my utility sink. Time to put that thing to a better use, I say!

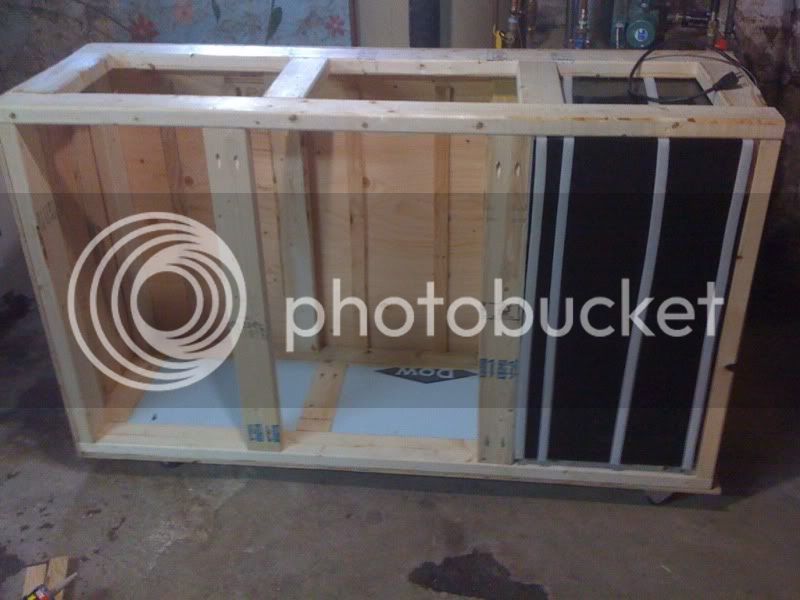
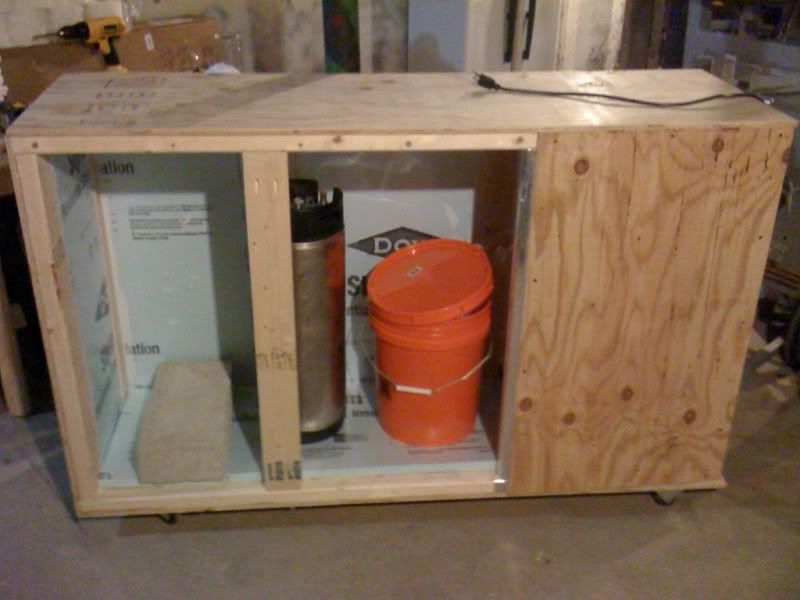
I've been playing with ideas for the chamber for a while now, and finally decided on a plan... The chamber will be 5' long, counting the fridge. This should provide plenty of space for a pair of carboys and even a corny or two for bulk aging. I basically decided I didn't want to build something, simply to outgrow it in a year or less and have to re-do it all. I think this should fit the bill nicely.

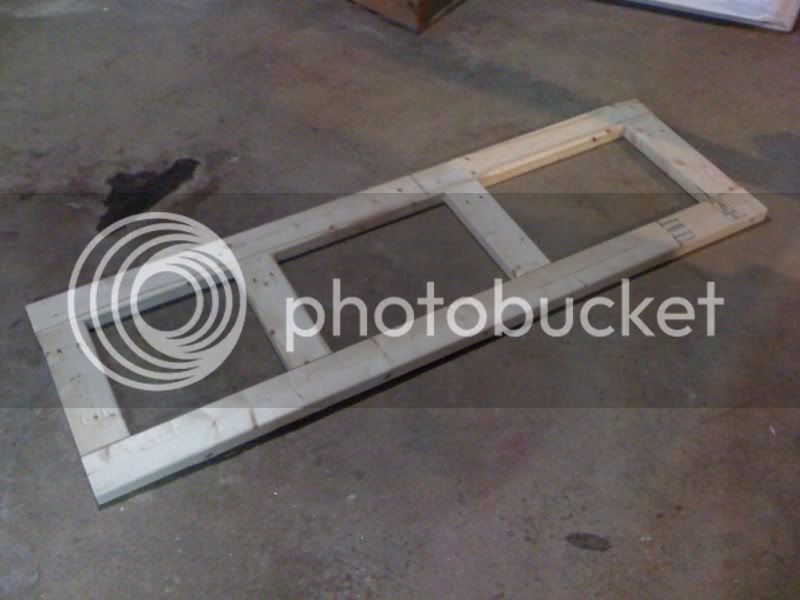
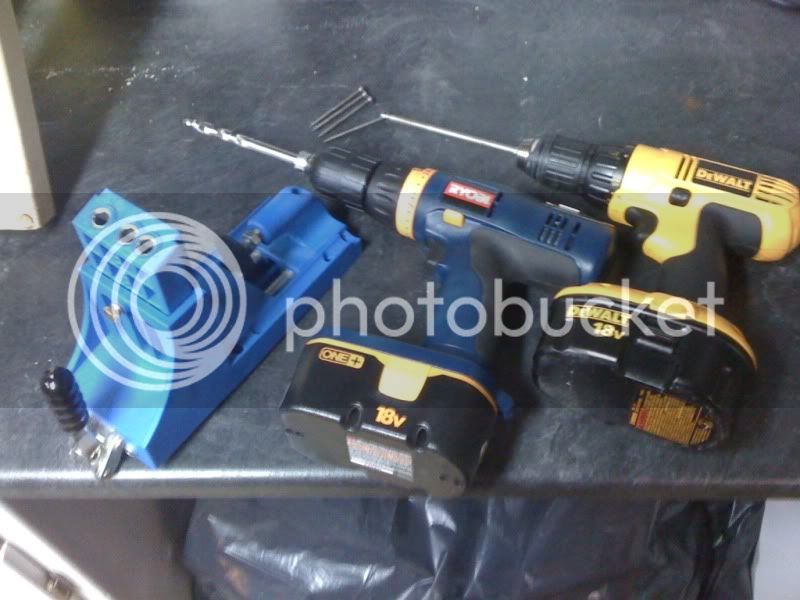
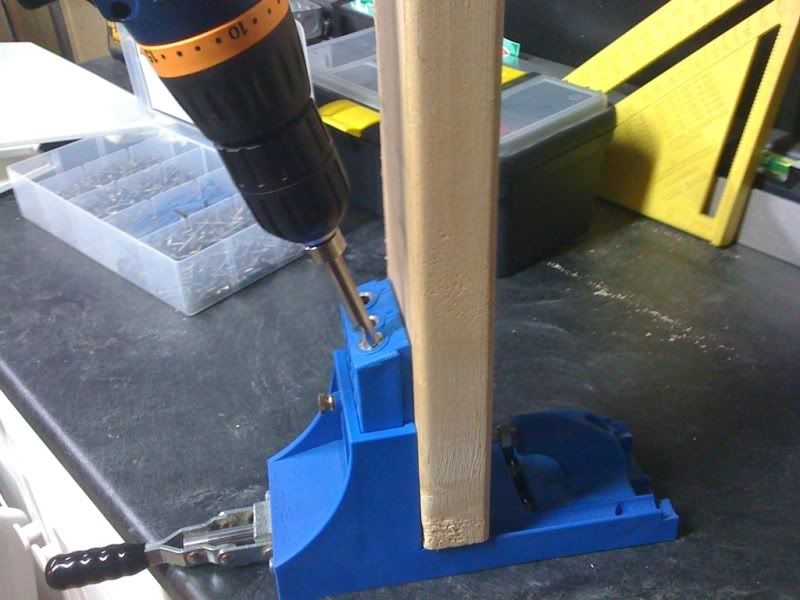
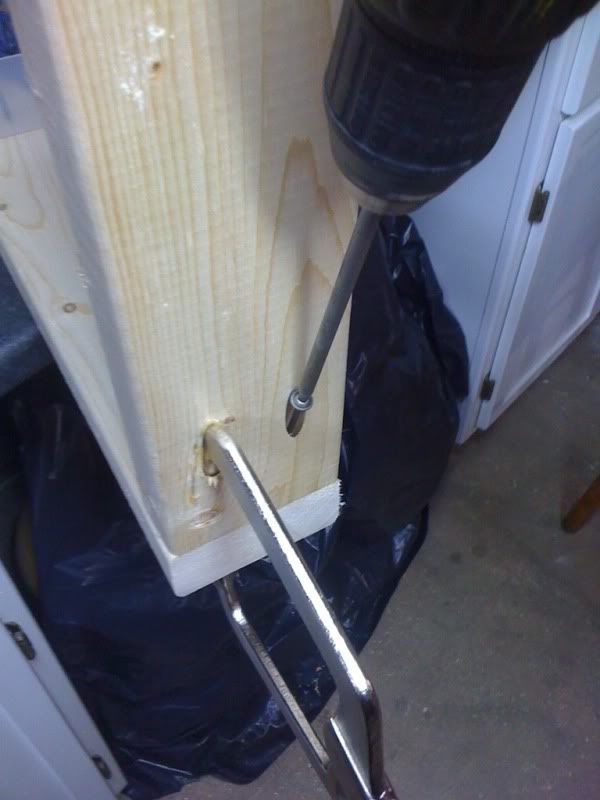
Last night I cut all the frame members for my chamber, drilled out the holes (I'm putting it together with pocket screws because... well... I've got a Kregg pocket hole jig and wanted to play with it!).

The base:
b4ffb393.jpg


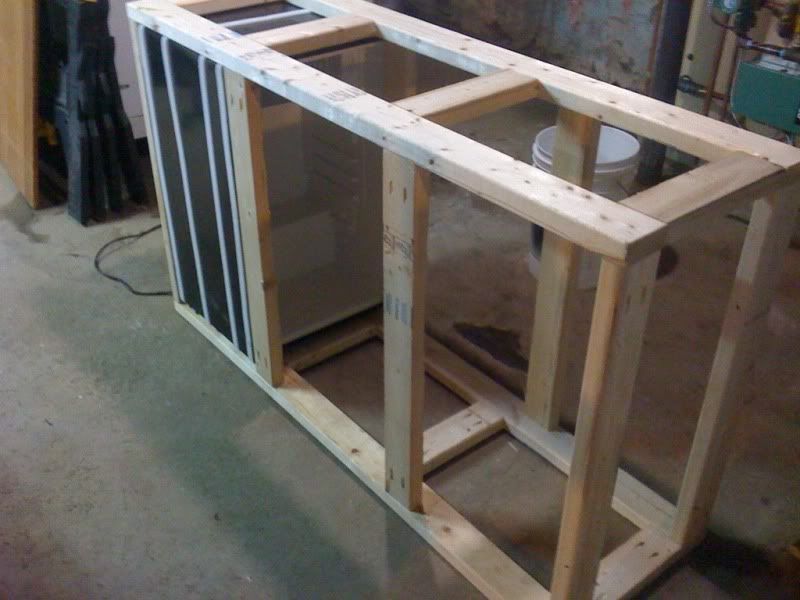
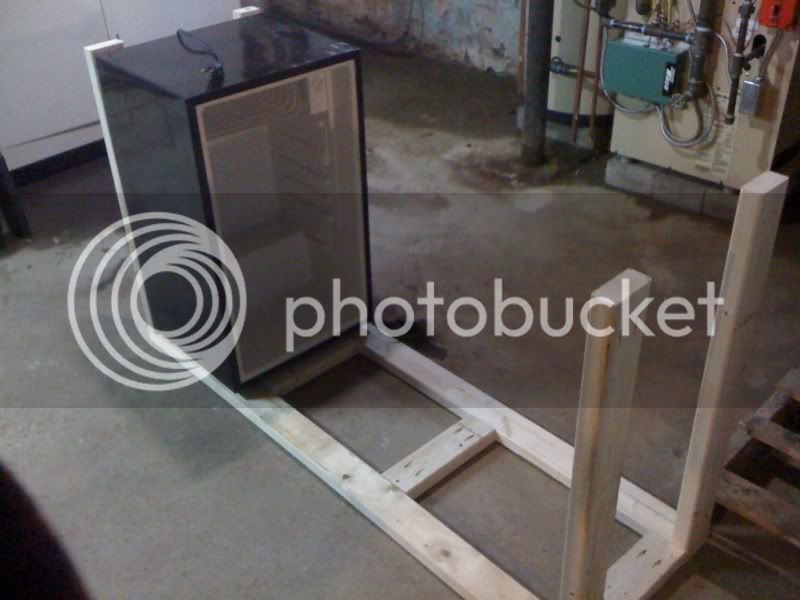
The base with the fridge in place and the first four vertical members - note, the top isn't actually attached yet - still have a little work to do to get things to fit before I make anything any more permanent:
896f8c85.jpg


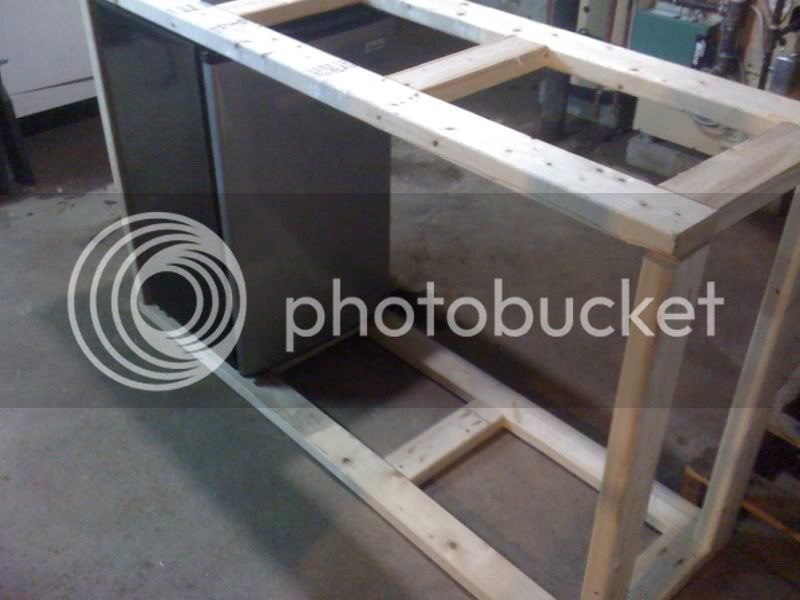
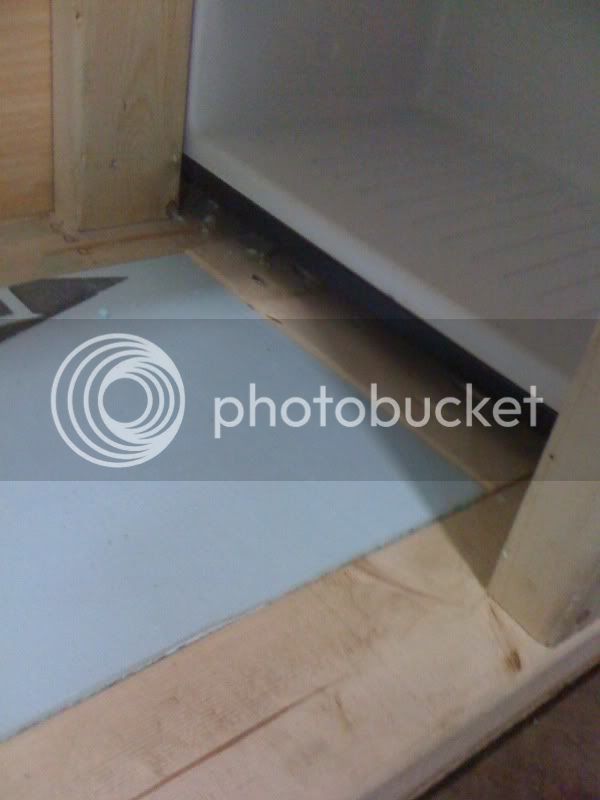
So, again something I don't have a picture of, but I ran into my first minor hurdle when I test-fit this together: There's a small relay on the back of the fridge, right near the compressor, that has a wire protruding just a bit from the back of the fridge - right into one of the 2x4 vertical members. So, I need to either take a chisel and hollow out the corner of that 2x4, replace that one with a 2x3 (not sure if that'll even give me enough room), or relocate that relay.

I may or may not get to work on this thing any further tonight - definitely will get back to it a little Thursday and Friday though.

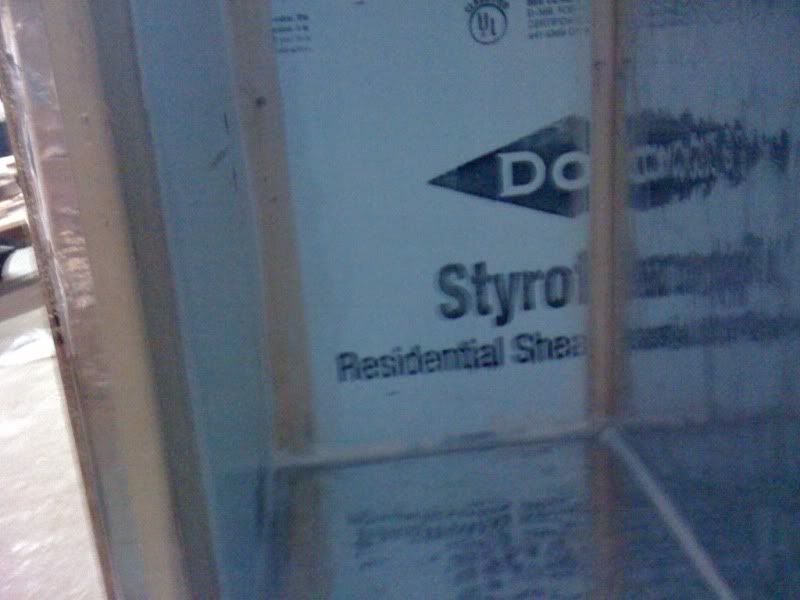
My overall plan calls for this frame to be sheathed with some utility-grade plywood (looking for function, not necessarily form!), then rigid foam insulation in the spaces within the frame, more rigid insulation just inside of that, and quite possibly plastic sheeting to make it all pretty and condensation-friendly... (Thanks goes out to another active build thread of that particular idea!)

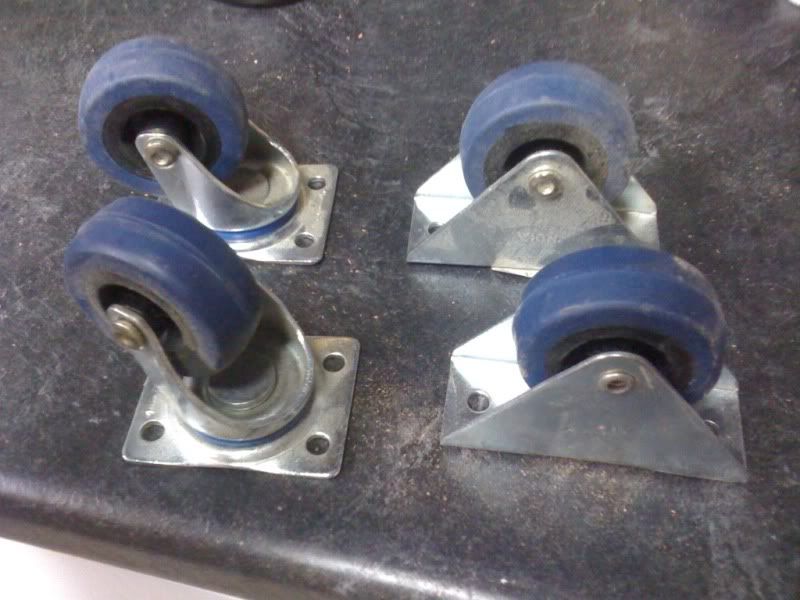
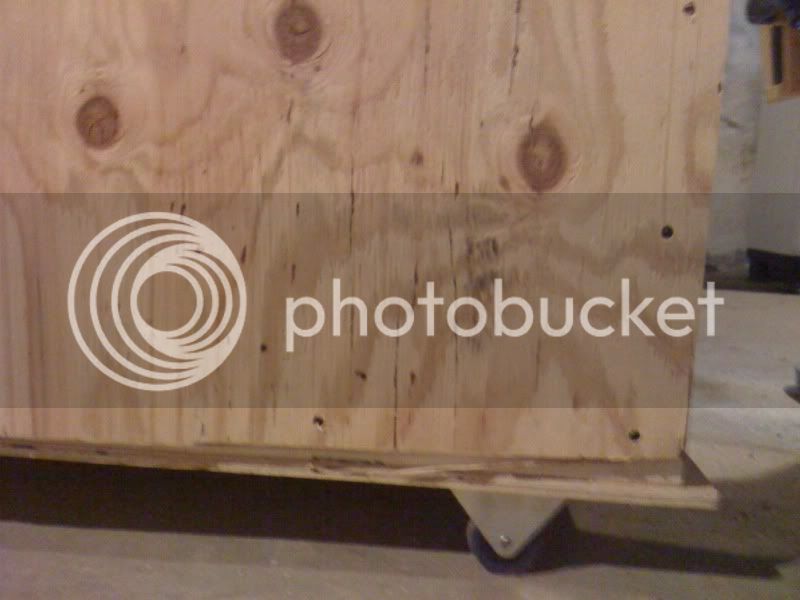
I do have a set of casters to keep this thing movable, and I'll probably be putting together an ebay temp controller once the chamber itself is complete.
 
Good luck with the build. Can't wait to see progress and it finished.

One thing I did was get to small of casters. Makes it a pain the as and I will most likely upgrade mine.
 
Is this a proven design, or an experiment? I have a fridge that would be perfect for this, and I would love to try this out.
 
Bucks - thanks for the advice... I'll double-check the pictures in your thread, but yours seemed close in size to what I've got. Maybe I'll have to go a little bigger?

And Brandonovich - I've seen a ton of variations on this basic design. Seems to be pretty well proven out from what I can tell.
 
I made about another 30 minutes' progress on this (busy damn near every night this week)... Does that mean I don't have too much stuff to share?

Hell no, I say! ;)

I took a couple measurements and decided that replacing that one vertical 2x4 with a 2x3 would easily give me the clearance I needed, so that was a nice easy swap (BTW, assembling this thing with pocket screws makes this kind of swap out SUPER easy - so much so that I'm half considering taking apart most of those joints and reinforcing them with some wood glue). This picture shows the new 2x3 in place and the clearance for the protruding relay:

7d39984c.jpg


The only other real progress I've made was to remove the door from the fridge and remove the flap over the freezer compartment, then test-fit the fridge to be sure all's still moving according to plan:

29ca5f7c.jpg


Next steps will include applying a bunch of weather stripping, strategically placed around the fridge, to hopefully insulate the fridge end of the box and help hold the fridge in a relatively steady position, then complete construction of the frame. Tonight and, probably tomorrow night too, I'll be busy with other things, so there won't be a whole lot of progress to share on here until the weekend.

One thing I will NOT be doing is bending down the freezer coils. This picture should illustrate exactly why I think such an effort would be a fool's errand with this particular fridge:

7f09e406.jpg


Most of the fridges I've seen on the boards here have the supply line running to the bottom of the coil, so they're relatively easy to bend down. This one is halfway up the side... I suppose I could try bending the entire coil down to the side of the fridge, but I really don't see that that's going to get me anything that I wouldn't get from a well-positioned fan or two, so I'll leave the coil alone and plan to go the fan route.

So, at this point, some of you might be asking "what the hell is a pocket hole jig or a pocket screw?". Basically, it's a cool way to join wood that basically results in very well controlled, countersunk, toe-nailed screw joints. I've used my pocket hole jig mostly when assembling face-frames for cabinets (I built half a dozen cabinets for my workshop a couple years back - neat project that). But they also work quite well for 2x4 framing!

Here's the scoop:
73f026cd.jpg


Basically, you have this cool clamp-on jig that helps you line up the pocket holes, and a pair of drill bits - one for drilling the holes, the other for driving the screws.

42516343.jpg


You adjust the jig for the size of the material you're using (you want to drill a pocket hole into a 3/4" piece of wood to a very different depth than you want to drill one on a 2x4, for instance), then clamp the jig onto the piece of wood, then drill out the holes. There's three holes on the jig for various hole placements - it's typically enough to put two screws into each workpiece. Though if you want to overengineer, the sky's the limit! ;)

81cbce47.jpg


Lastly, you use one of a couple different clamps to hold the pieces together in the right position (effectively giving you another hand) and start driving screws.

All in all, it works pretty darned well. Sure, it's not quite as quick as say, busting out a framing nailer - but I just got to play with a framing nailer on another household project a couple weeks ago, and the cats are far less upset by the sound of a couple cordless drills in the basement than they are by the sound of an air compressor in the basement, and less upset cats = happier SWMBO, so I did the math and chose to use the pocket holes this go around.
 
I replaced a wall with a doorway in my house, and when i was framing it up I totally could have used a jig like that, or a framing nailer. It definitely wasn't pretty but the finished wall looks good.
 
Well, I made a bit of progress last night, only really two pictures to share.

I cleaned out the inside of the fridge, applied a bunch of weather stripping, then slapped it into place and completed the framing. I'm left with this - which is definitely bigger than what I had pictured in my mind's eye:

3dc09936.jpg


The fridge is definitely wedged in there snugly, and the plywood should only serve to make it slightly more snug, which is good.

So, either tonight or tomorrow I should be able to get the plywood cut down and actually enclose most of the box - I plan to leave it at least partially open to allow easier access while insulating it.

I realized when moving this thing last night that I may have made one minor mistake. These are the casters I have on-hand - they were originally purchased for a completely different purpose, but I never wound up using them. I figured I had them on hand, they'd work for this project. Check them out:

aaf5d0b5.jpg


For the life of me, I don't remember what kind of load they're rated for. And this thing's already getting pretty heavy. Once all the plywood is in place it's going to be a lot more so, and with a fermenting carboy or two and an aging corny or two in there, I'm doubtful these casters will be up to the task. So, I probably need to make another trip to home depot after all...

HHP, you know, the jig comes with all sorts of documentation saying that it's great for framing in addition to about 90 bajillion other things. But honestly, I think it's slightly too involved for the purpose. Framing doesn't have to look super pretty (unless you're posting pictures of it on the interwebz), and a hammer and nails are definitely cheaper and will get the job done - likely more quickly (no drilling or jig setup!). But yes, the framing naile, if you have one or (like me) has a friend willing to lend you one, beats the other two hands down!
 
All in all, it works pretty darned well. Sure, it's not quite as quick as say, busting out a framing nailer - but I just got to play with a framing nailer on another household project a couple weeks ago, and the cats are far less upset by the sound of a couple cordless drills in the basement than they are by the sound of an air compressor in the basement, and less upset cats = happier SWMBO, so I did the math and chose to use the pocket holes this go around.

I lol'd at this pretty hard!

che-CHUNK from a framing gun + cats = :eek:

Also, HD/Lowes usually have two types of casters with different wheel materials. The hard plastic ones tend to be a few bucks cheaper, but they can leave streaks/marks on floors when they're loaded up. They also sell rubber wheeled ones that tend to not leave marks. When the rubber ones get loaded up, they flex and increase the contact patch with the ground which results in less pressure. You should probably be ok with the ones you have on hand though.

A caster in hand is worth 4 in the bush...err hardware isle
 
Actually, it's the compressor cycling that scares the cats most, I know they haven't noticed my finish nailer much, but I suppose the framing nailer could be a little more noticeable...

Thanks for the advice on the casters... Figure I'll try what I've got and upgrade if necessary. Fortunately, this will be in my completely unfinished basement, so no big deal if it marks up the slab floor.
 
Keep up the good work, strat. It's looking really nice, I would love to build something like that soon. Tough to keep the temps in my basement below 73-ish this time of year.

Is that your hot water heater in the background on a couple of your pics, or the world's smallest boiler?
 
Had to go back and look to be sure commonsenseman, and the answer is... yes.

The sqared off unit is the boiler, and just behind it and to the left is the hot water tank. It's not quite as small as you think, though the boiler is definitely a little smaller than the one it replaced, since this one doesn't need to contain the domestic hot water coils the old one had...

Thanks for the compliments, by the way. This part is easy to keep clean and neat looking. I'm honestly just a bit nervous about the next couple of steps, and making sure to keep everything neat and tidy when it comes to the insulation and caulking and such.
 
Made some more progress, and of course a couple mistakes, yesterday - this thing is really starting to take shape...

f2b8da09.jpg


So, I cut down all the plywood and sheathed 3 of the 5 faces of the box I plan to sheathe. I'm using polyurethane construction adhesive and screws to hold everything together - I figure this should make the sheathing nice and tightly sealed and hopefully help keep things nicely insulated... This was where I discovered my first mistake: somehow I goofed on measuring one of the cuts, and the section of sheathing cut for the side of the fridge on the door side of the chamber came out just a bit too short... And crooked. Still scratching my head on how that happened, especially considering that the section for the other side of the door was cut from the same piece and fits almost perfectly... Whatever the case, I'll need to pick up another 2x4 panel of half inch ply to replace the one I botched.

I then started cutting down and installing the insulation in the frame. As you might have spotted in the picture above, I'm using 1" insulation to fit into the 1.5" space inside the framing members - so I cut up a bunch of firring strips out of my leftover plywood to fill up a little of that space, yet leave for the most part 1/2" of dead air between the outside of the insulation and the inside of the plywood sheathing - this should help with the insulation a tiny bit, and also make things fit... Made another mistake with the insulation - it seems I cut one piece to size, then rather than cutting the next piece from the off-cut, I apparently cut the next piece from the good one... Fortunately, I think I've got enough insulation that I shouldn't need to re-buy any to make up for that mistake.

Last up, I made a bit of an interesting discovery that I'm trying to decide on how to address. Check out this pic:

38939582.jpg


Basically, I've found as things are coming together that the bottom of the fridge is apparently exactly 1" above the frame. The blue insulation I'm using here fits perfectly underneath the fridge. So, I'm trying to decide: once all my insulation cuts are complete, do I glue in (with more of that adhesive) a bunch of off-cuts of the blue insulation on the bottom to fill that gap before I put in the inside layer of insulation, or do I attempt to cut the foiled insulation to size to tuck an inch or two of it under the fridge?

I'm leaning towards the extra layer of blue insulation, if I've got enough; it should bring the foiled insulation just about level with the inside of the fridge, and an extra layer of insulation on the bottom of the chamber, where the carboys will be sitting, should be a good thing.

I'm not going to have any time to work on this today, but with some luck I'll get a little time tomorrow afternoon or evening, so I probably won't have any progress to share until tomorrow night or Tuesday morning...
 
Looking real good. We used to make fun of my dad when he bought his pocket screw jig. He used to get so excited about anything that could be fastened with pocket screws and we just thought he was a geek. Now I understand how cool they really are, simple and very effective (I guess I'm an old geek now).

As far as your insulation gap. I definitely say you add another layer of insulation up to the inside bottom of the fridge elevation. Aside from adding more R-value in the layer that could have the highest delta T (maybe), it will also give you a solid base to seal up against the fridge edge. You want to seal that edge up with silicone BTW (not sure if that was in your plan) in case you have any leaks or spills inside.

Keep up the good work. I keep half-ashing my fermentation control but I should just buck up, get some pocket screws and do something like this.
 
+1 with adding the insulation. Also by adding the insulation would that make the floor even with the for of the fridge.

+1 with sealing with silicon. Help make it air tight and minimize clean up if needed.

Wish I had used pocket screw jig. Makes it look clean and professional.

Awesome build looks great!
 
A tiny bit of progress to report, but no pictures this go-round...

I finished cutting down all the blue foam insulation this morning. Those pieces do include a long section to fit as an extra layer on the bottom, to allow the inner insulation layer to be level with the inside of the fridge - this required that I kinda sorta McGuyver together a pair of pieces of insulation in one of my top gaps - I haven't decided yet it that's acceptable or it I'll cut a single piece to size from some other rigid insulation I have from out in my garage. I also test-fit my side panels again and reminded myself that this is supposed to be a case of function before form - the panel on the side of the fridge is definitely cut a little bit wrong, but not disastrously so; so I'm just going to use that one as-is after all.

So, at this point, I've learned two more important lessons. This project is taking far more construction adhesive than I had assumed (finished my first tube this morning, I plan to pick up two more to finish things off). Also, the project will take up more caulking than I had assumed - I've got probably 2/3 of a tube at home, will pick up 2 more of those as well.

Maybe the other thing I've figured is this: this project takes more time than I had figured. I figured I'd knock the thing out in a weekend. Which might have been true, if I'd actually had a full weekend to dedicate to it. Since I do not have that much solid time to block out for it, this project is going to take a while longer than I'd expected.
 
I'm sure it'll all be worth it in the end. When you're beer is brewing at a nice, cool 65 degrees year around, the rest of us suckers will be struggling to stay under 75.
 
OK, now for some more pictures, and more lessons (re)learned...

So, current state of things:
022f7640.jpg


It's definitely taking shape. I've got the top sheathing in place, and all the insulation installed and caulked in on the sheathed walls. Further, I've installed the extra layer of insulation on the bottom. I've got some weight in there right now to help ensure the liquid nails bonds well with the bottom of that insulation. Also, I installed the piece of sheathing on the side of the fridge.

Here's a shot to show the poorly cut nature of that sheathing - it definitely fits adequately, but looks a bit sloppy. Still, function over form and all, and it will certainly function:
6f4105ae.jpg


Here you can see where the extra layer of insulation fits in there:
b5ee3700.jpg


So, for lessons (re)learned... This thing eats liquid nails and drinks caulk. I first used a tube of polyuerthane construction adhesive - it had a thick consistency, and seemed to go a ways before running out. I grabbed 2 things of liquid nails - mostly because it was $2 less per tube than the stuff I was using. I already killed one of those with the two pieces of sheathing and 4 pieces of insulation that I installed tonight, so I'm apparently still going to need more. I also went with two tubes of silicon caulk in addition to the 2/3 of a tube I've got. I went through one of those full tubes tonight... And looking at the fit of the new layer I just installed on the bottom, I'm going to be picking up some more of each (liquid nails and caulk) and a can of great stuff to fill the bigger spaces.

So, I'm definitely not going to make any progress tomorrow - I'd expect the next update Thursday night or Friday morning. I'm shaping up to have some time to focus on Saturday too, I wouldn't expect the box build to extend past that. Later this week I think I'll start working on collecting parts for the controller for this beast.
 
Looks good. Starting to come together pretty good.

Mine too ate and drank caulk and liquid nail! If you put up the white plastic panel it is even more.
 
I looked today at home depot for that plastic sheeting, and couldn't find it. Think I'll probably skip it in that light...
 
Well originally I was just looking for a mini fridge to ferment one bath at a time in...now I feel that will inadequate. I thank you, my wife on the other hand will not. Keep up the good work man!
 
stratslinger said:
I looked today at home depot for that plastic sheeting, and couldn't find it. Think I'll probably skip it in that light...

Lowes? HD has been a real disappointment lately around me.
 
By the wood paneling, or in the area where they have the clear plexi panels? Neither my local Home Depot nor Lowe's has it near the paneling or plywood - but it just occurred to me on my way back to work from Lowe's that maybe it would've been near the plexiglass...
 
I know it was by trim. The stuff you cut to length. They have little carts with the yellow mitre saw box. (HD). I believe that it was by the Plexiglas.
 
Its called FRP (reinforced fiberglass panels). Its in the trim aisle at my local Lowes as well.
 
More progress to report:

This thing is really starting to come together and look like something!
104ba99c.jpg


I used great stuff to fill some of the gaps around the the extra layer of bottom insulation, caulked the hell out of everything, then started installing the foil-backed insulation. So far I have the top, bottom, and back of said insulation installed. I also then finished enclosing the end.

A quick shot inside the fridge end:
f57d0547.jpg


Again, caulking the hell out of every joint I can, and I plan to install reflectix foil tape over those joints for a littel additional protection from the elements.

And the other end:
26c0b1b9.jpg


As you can see, I've still got to install two more sections of the foil-backed insulation inside, but I just kinda ran out of steam tonight. Figure I'll get them in tomorrow, caulk things up some more, then Saturday once the caulk is cured I'll apply foil tape, and get working on the door.

I'll probably head over to home depot one more time to look for that plastic sheet... If I find it and it's not too expensive, I'll pick it up and work that into the design too - though I'm not quite sure if I'll be able to get such a thing into there through the door (the longer pieces of insulation for the top/bottom/back only made it in through the open end, which is now decidedly closed up... Maybe if I put it in by sections - but then I'll be stuck with a lot more joints.
 
FYI- the paneling is around $10 if I remember right. It comes in 4'x8' sections. You will also need silicon for the joints and adhesive.

Looks awesome. Where are you mounting the love controller?
 
Back
Top