pheggeseth
Member
- Joined
- Dec 31, 2011
- Messages
- 6
- Reaction score
- 4
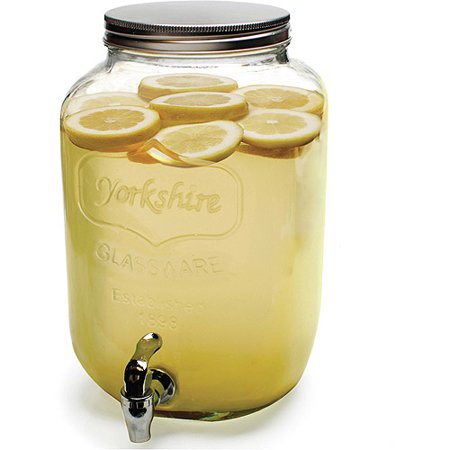
Reviving an old thread here, but just wanted to chime in by saying that these 2.5 gallon Montana Jars are my FAVORITE fermentors for brewing beer. I always brew small batches between 1-2 gallons (usually stovetop BIAB), and almost always use these. Online merchants like Northern Brewer have made a big deal of their "Big Mouth Bubbler" fermentors of late (basically driving Better Bottle out of the market, from the looks of it), but they don't sell a small size version. That's basically what these Montana Jars are!
Originally, I attempted to use an airlock with them by unscrewing the brushed metal lid from it's white, plastic underside (where the silicone gasket is actually attached), and then widening the hole in the middle of the plastic part of the lid slightly to fit a rubber grommet and then the airlock. I then attached stuff to the lid with Command Strips (unused picture hanging hooks in this case) to make sure the lid didn't fall into the fermentor when you put it on!
This way, by using the hole in the center of the plastic for the airlock, I could
use an airlock with the jar, but not destroy the metal part of the lid.
BUT...I ended up having problems with the lid not holding pressure enough to make the airlock do anything. If you look close, you'll see two holes in the silicone gasket (all of these jars come with these holes), which I tried to fill up with hot glue, and ultimately failed. Also, over time, if you use a fridge to control fermentation temps (especially lagers), the plastic will eventually crack.
LONG STORY SHORT...I eventually gave up on the airlock altogether and went much lower tech. Now, I don't use the lid at all, and just stretch plastic wrap over the top of the jar, use a large rubber band to secure the plastic wrap around the jar lip (which flanges out, by the way, conveniently making sure the rubber band doesn't accidentally ride up and come off), and make one very tiny pin prick in the center of the plastic wrap, to relieve fermentation gas pressure build-up.
That's it. Works like a charm, and I've never (in the 4+ years I've been doing it) had an infected batch. I'm pretty confident in the CO2 blanket produced by the fermentation (provided you don't get in there and mess with it a million times) and its ability to keep bad stuff out. Anyone who practices open fermentation obviously does too, and this plastic wrap method is much lower-risk than that.
If you want to measure internal temps with a thermowell and probe, take a sacrificial plastic lid to something (Oxy Clean works pretty well, but it just needs to be wider than the jar opening), drill a small hole in the middle for the thermowell, put the lid over the jar, cover with plastic wrap as usual, and then just poke the thermowell through the plastic wrap and hole (no need for an additional pressure relief hole). The rubber band will keep the plastic lid centered, and the plastic lid will keep the thermowell centered. I use this method if I'm using my heating pad/mini fridge to control temps.
They're sold at a lot of places, like Target, Bed Bath & Beyond (20% off coupons!), even Amazon (Prime shipping!) for around $20.


![Craft A Brew - Safale S-04 Dry Yeast - Fermentis - English Ale Dry Yeast - For English and American Ales and Hard Apple Ciders - Ingredients for Home Brewing - Beer Making Supplies - [1 Pack]](https://m.media-amazon.com/images/I/41fVGNh6JfL._SL500_.jpg)