• Please visit and share your knowledge at our sister communities:
  • If you have not, please join our official Homebrewing Facebook Group!

    Homebrewing Facebook Group

110v Recirculating eBIAB 2.5 gallon batches

Homebrew Talk

Help Support Homebrew Talk:

This site may earn a commission from merchant affiliate links, including eBay, Amazon, and others.
I have had several requests for the first diagram (page 1 on this thread) to have an added 2nd element for a 120V system.

So I spent some time making a drawing for that setup. Power is being fed from 2 seperate 20A 120V GFCI outlets. It includes E-Stop that will trip both GFCI outlets at once.

I hope this is of help to thedude00 and others that have requested it.

As always - Click on the image to see a full scale diagram printable on Tabloid paper (11" x 17")


Wishing all the best.

P-J


Thanks a million for the two element drawing P-J!! My only question (Sorry I am a newb to this) is with one PID, does it control both elements. For example if I set my Mash temp to 152, it will be firing both elements to achieve this temp. Then in Manual mode it will fire both elements to achieve my boil?
Dustin
That is correct. You also have control over each element with switches 1 & 2. This allows you to have them both powered or just one or the other.
 
How do you go about keeping your bag off of the element? Or are you even concerned about it?

I use the paint strainer bags from lowes and they touch the element without issue, yet. My intentions were to use the basket that came with my pot but the lid doesn't sit flush with the basket in. I decided to try it without basket and it seems to work fine.
 
Awesome project! Caught my eye since it's on a 110v system, and got my brain thinking (which according to swmbo means uh-oh, project, money, and time lol).

I have a corner of a spare room in our place to take over, and using 1 pot instead of 3 would just be perfect for me. However, I did 1 extract kit so far and got kicked out of the kitchen, so would this be viable to mix the extracts, or would the heating element prevent doing that? Also, to provide the main 110v, did you cut an end off the extension cord you keep bringing up from an outlet, or did you "skip" the outlet and use the wire straight from a breaker?

Either way I'm already thinking of ways to implement a system like this since I just like doing tech related stuff. Woosh, back to the drawing board!!!
 
The extension cord plugs into the wall. I'm not real sure about the extracts, but I have read people using electric kettles to do extracts. Maybe someone who has done it can give more info.
 
I have everything put together finally and have one snag.

The contactor keeps buzzing loudly when turn the switch on for it. Any ideas on what I did wrong?

I am also wondering what the purpose of the contactor is? Seem like the button could go straight to the element?
 
jammin said:
I have everything put together finally and have one snag.

The contactor keeps buzzing loudly when turn the switch on for it. Any ideas on what I did wrong?

I am also wondering what the purpose of the contactor is? Seem like the button could go straight to the element?

Contactors buzz but I wouldn't really call it loudly. You can hear it though. Your probably ok. The contactor is needed because the switches aren't rated for the amps the element pulls.
 
I noticed you have the probe in the kettle as opposed to a T on the outflow. any chance this is causing you to over shoot your mash temps from dead spots? I know Kal has his hooked up through the T. That way you are reading the hottest liquid and can not overshoot. With the way you have it there is a possibility, especially with the grain bag that channeling could isolate some of the liquid by your probe. Thus the system is tricked into thinking it is at a lower temp and over heats.
 
If the contactor is buzzing really a lot of times it is because it is not screwed down tight enough. Then again some contactors just buzz louder than others (you did buy a new one I hope) as they get older they get a little noisier also. Here is a trick I picked up years ago, take a piece of foam (the gasket from a weatherproof outlet) and mount it underneath the contactor. Works like a charm to quiet it down.
grandequeso
 
Ya that's where I would start too. Make sure everything is tight. Are you getting good voltage to the element when the contactor engages?
 
I noticed you have the probe in the kettle as opposed to a T on the outflow. any chance this is causing you to over shoot your mash temps from dead spots? I know Kal has his hooked up through the T. That way you are reading the hottest liquid and can not overshoot. With the way you have it there is a possibility, especially with the grain bag that channeling could isolate some of the liquid by your probe. Thus the system is tricked into thinking it is at a lower temp and over heats.

My temps are spot on. Don't fluctuate at all. That's the reason for the pump. First couple of brews I monitored different spots in the kettle with my long dial therm. Spot on, don't bother anymore. Btw, I brewed an Irish red today, still loving this rig!

62c42d20d0c74b0747d5190f03b7cfa5.jpg
 
grandequeso said:
If the contactor is buzzing really a lot of times it is because it is not screwed down tight enough. Then again some contactors just buzz louder than others (you did buy a new one I hope) as they get older they get a little noisier also. Here is a trick I picked up years ago, take a piece of foam (the gasket from a weatherproof outlet) and mount it underneath the contactor. Works like a charm to quiet it down.
grandequeso

I went and checked the mounting. It feels pretty solid. I tightened the screws and it didnt help. The weird thing is, I can hold the contractor poles(?) down and it suppresses the buzzing/vibration. So the buzzing is definitely coming from the coil assembly.

It fell off my workbench onto the concrete floor. I have a feeling something broke loose.
 
jrb03 said:
Ya that's where I would start too. Make sure everything is tight. Are you getting good voltage to the element when the contactor engages?

The element heats up almost instantly if the contactor is buzzing or if I manually engage it. Power seems to be good. All screws are tight.
 
The element heats up almost instantly if the contactor is buzzing or if I manually engage it. Power seems to be good. All screws are tight.

You probably know this but don't ever dry fire one of these elements. Will burn out almost instantly. If it is as loud as a dryer alarm I'm thinking your on to something with the fall lol. Maybe someone with more experience can chime in. I will say I recently found contactors on amazon for like $5. I would probably order one at least as a backup. I got one for my A/C unit.
 
My temps are spot on. Don't fluctuate at all. That's the reason for the pump. First couple of brews I monitored different spots in the kettle with my long dial therm. Spot on, don't bother anymore. Btw, I brewed an Irish red today, still loving this rig!

Do you recirculate through the entire mash? What do you have on the outlet side of the pump inside the kettle to keep the splashing down?
 
Do you recirculate through the entire mash? What do you have on the outlet side of the pump inside the kettle to keep the splashing down?

Yes I recirculate the entire mash. I don't have anything on the outlet side. It shoots out and splashes and foams as some of my pictures show. I've thought about adding some hose or something but don't really see the need yet.
 
Well apparently contactors do not like being dropped on concrete. I replaced it this morning and it works as it should. Here is a shot of mine auto-tuning:


image-4158045159.jpg

Thinking about brewing a DFH 90 minute inspired beer for the first session.

My friend and I ordered all the parts and each built one of these. He brewed a Victory "Hop Devil" for his very first home brew and first brew on the kit. He boiled of .75 gallons over 90 minutes just as you do JRB. He also had ~ 75% efficiency as a total beginner.

I'm looking to brewing on this kit early next week!
 
jrb03,

I see that you have been a member here for several years and I'm honored to be able to answer your first post.

I spent a few hours this morning drawing a diagram that should fit your needs.
The entire build should fit in the Auber Instruments Project Box.

I suggest that you also order their External Mount Heat Sink for the SSR.
The RTD temp probe could be the Deluxe version of Liquid Tight RTD Sensor. It is well worth the extra $9 for it.

I'm not sure how you plan on supplying the 12V power to your pump. I show a 120V outlet that can be used to plug in a transformer. (Edit: I did a search on greatbreweh and found their pumps. They ship with a 12V plug in transformer so the diagram is good to go for that as well.)

I hope this is of some help to you.


As always - Click on the image to see a full scale diagram printable on Tabloid paper (11" x 17")


Wishing you the best.

P-J


Also is anyone running the original 1 element diagram. i dont like the idea of running 2 separate cords from 2 different circuits.
 
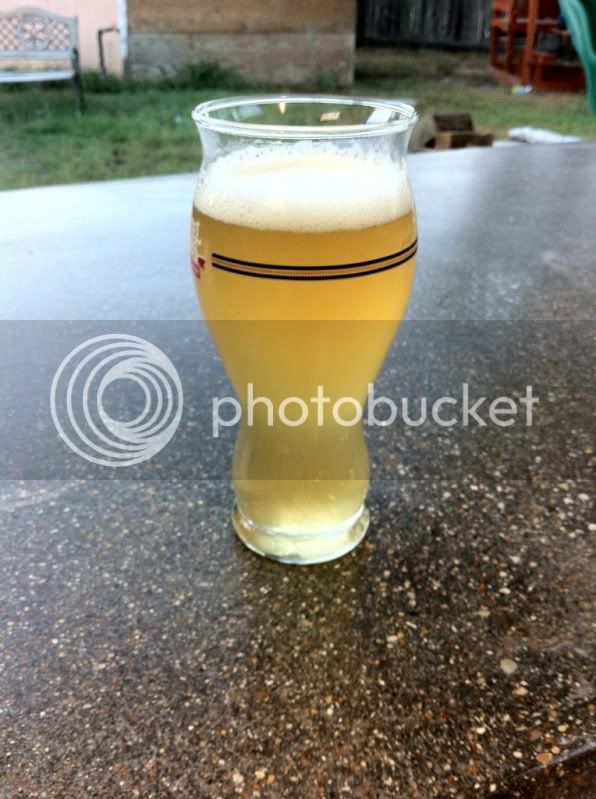
Got the first brew session in. Temps hold steady and it can move to mashout or boil expediently with 3 gallon batches. I managed 79% brew house efficiency on a 1.049 Citra Blonde ale. I think a 90 min boil would put my kit into the low 80's.


View attachment 74309

Looks great jammin! Thanks for sharing your experience! I am also getting around 80% efficiency (according to ibrewmaster). Please keep us updated!
 
Also is anyone running the original 1 element diagram. i dont like the idea of running 2 separate cords from 2 different circuits.

Mine is the original one element design built exactly as pj drew up. I have several posts in this thread detailing my build and performance. I have 4 brews on it and love it so far!
 
Jammin, can post a detailed pic of how you installed your element when you get a chance. It looks like you used a PVC cap of some sort. Also, what size pot are you using? Great looking build.
 
Hi jrb,

I will try and get another pic of the element install. I am currently using an idea I saw here. It is a conduict clamp (?) screwed in a 1.5" pvc cap. It seems to be ok, but I think I can make a little better. I don't feel entirely comfortable with it currently.


I did another brew session today. I went from mashout to boil in just under 10 minutes with 4.15 gallons of wort.

I also did a 90 minute boil today and didn't boil off quite as much I calculated. Not sure why the rate changed.

Good news is, I hit 84% brewhouse efficiency when I planned on 80 - thus nailing my anticipated gravity of 1.053.

cheers,
~j


PS: P-J, pm me a mailing address if you see this message. I'd like to send you a couple bottles of homebrew in gratitude for the wiring diagram :)
 
DD730882-826A-4915-9D9D-0B237E4A44ED-7075-000003A8FAFF0012.jpg


Well here is the first glass of my first brew on this system. It is BM's Cream of Three Crops. Ready just in time for the big game. All I can say is yummmmmm. Turned out better than I imagined. The game too. :)
 
:off:that game was bull****:off:

You've inspired me, even though it seems like you might be a cowboys fan. I have a question about the parts list - and this is probably just a noob electrician question but it isn't obvious to me.

What is this thing for:
Terminal block - http://www.amazon.com/dp/B00144CK7W/?tag=skimlinks_replacement-20

It's hard to see from your wiring pics, and I don't see where it is noted in PJ's wiring diagram? Is it the ground for everything?
 
Last edited by a moderator:
jrb - nice look'n pint!


The terminal block is like an outlet adapter so you can plug several things in to the same spot. I split a jumper on mine and made very efficient use of 1 terminal block.
 
Back
Top