New eBIAB build, questions about controls

Homebrew Talk - Beer, Wine, Mead, & Cider Brewing Discussion Forum

Help Support Homebrew Talk - Beer, Wine, Mead, & Cider Brewing Discussion Forum:

This site may earn a commission from merchant affiliate links, including eBay, Amazon, and others.
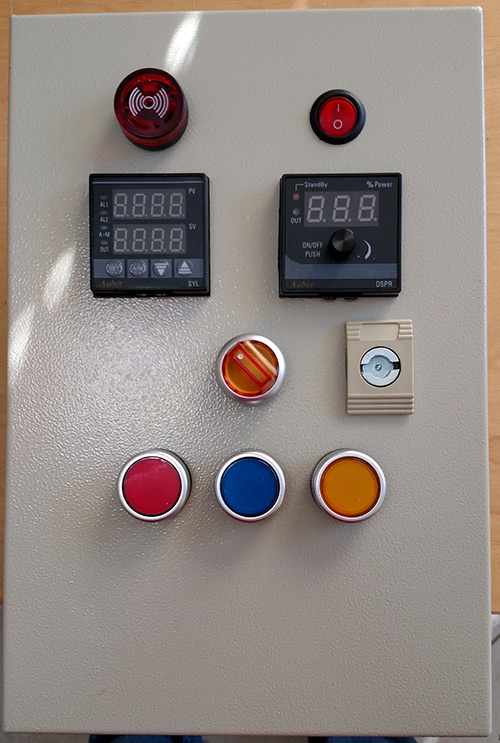
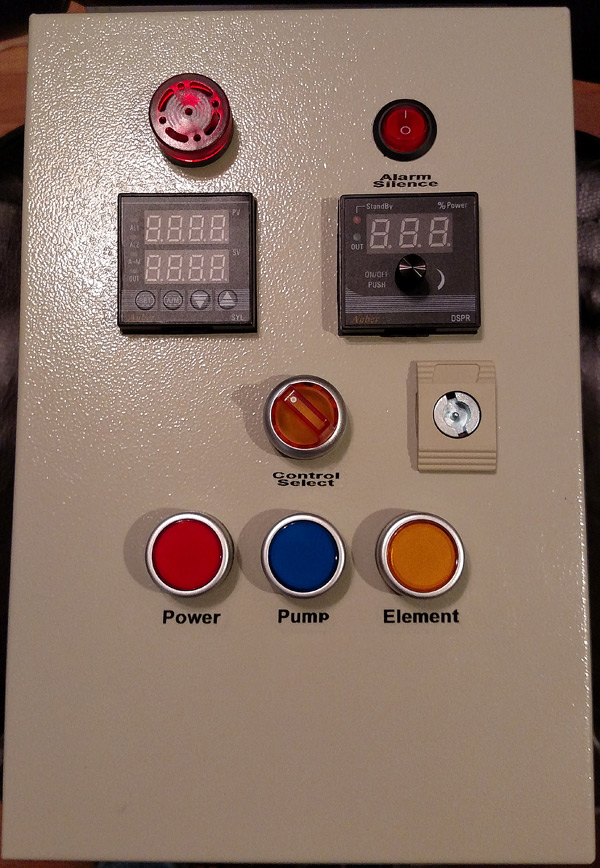
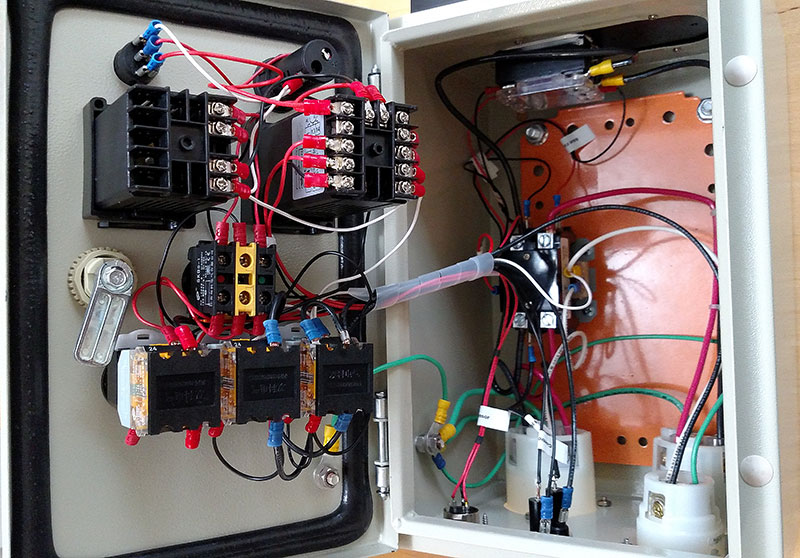
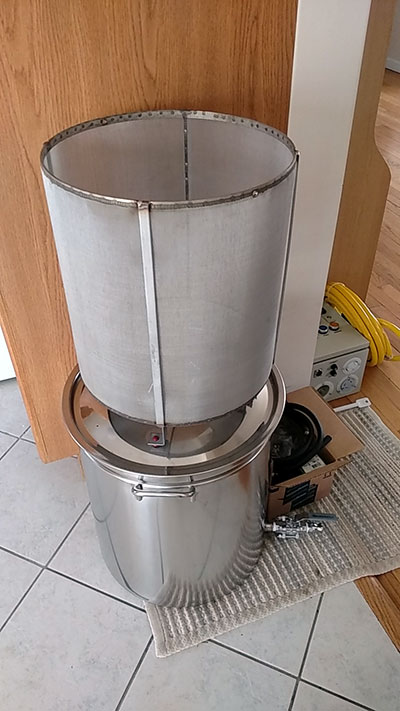
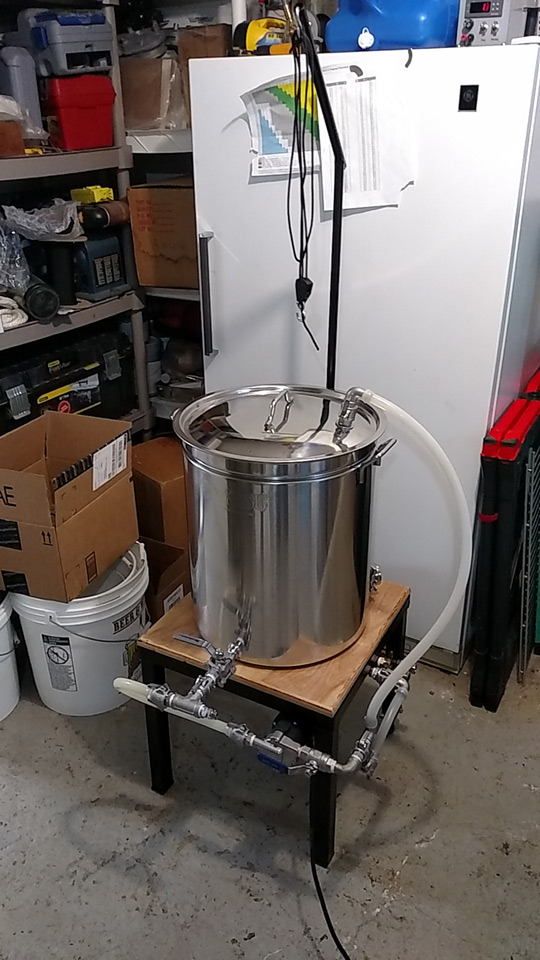
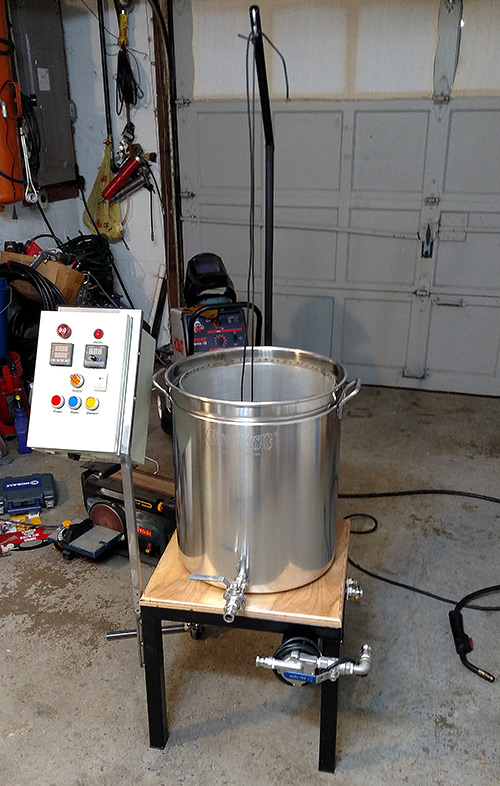
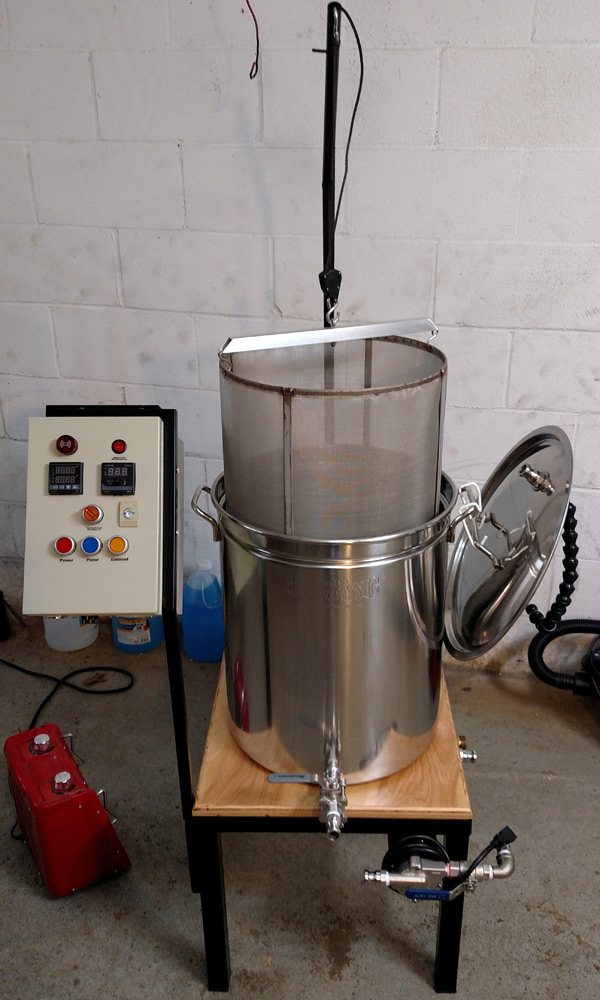
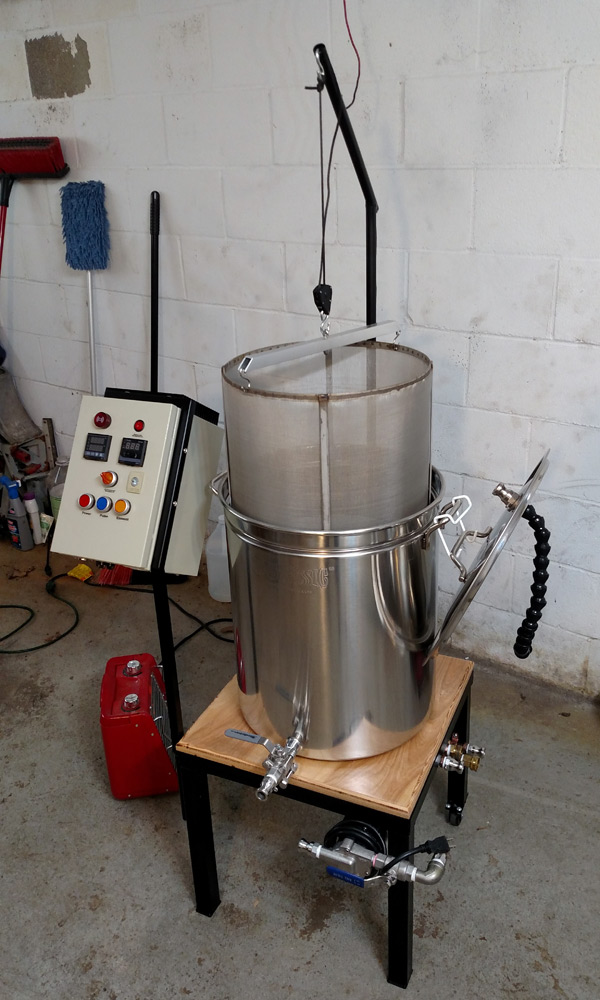
The paint's dry, panel's mounted, and the basket lifting brace is made. Now to clean up the disaster I have made my garage into.

Hoping for a water test this afternoon, but I *have* to clean up first.

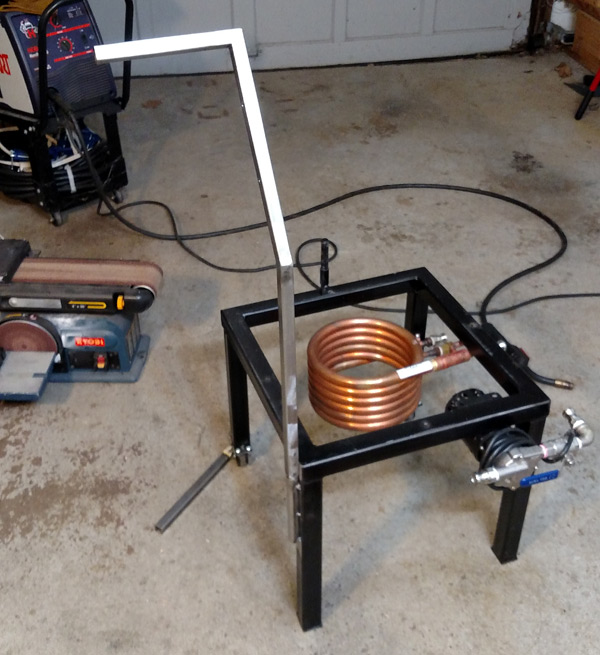
The whole setup is modular. The panel arm comes off easily, as does the boom in the back that holds the basket up for draining.

Now I just need to find some sort of trivet/insulating pad for the bottom of the kettle.

fabdone1.jpg


fabdone2.jpg
 
That looks great!

I can't tell from the pictures where you plan to mount the temperature probe. I wish now that I had mounted mine somewhere in the plumbing instead of directly in the kettle. I also wish that I'd gone with a SS thermowell instead of the cheap-o PT-100+wingnut approach.

When I do make the change I think I'm going to put the probe at the kettle outlet. It will make it easier to keep the cords from tangling, if nothing else.
 
I currently have the temperature probe mounted in a T with camlocks, so I can mount it on the kettle outlet, or switch it to the kettle return if I think it works better there. Makes it easier for cleaning, too.

IMG_20160208_122848.jpg
 
No kits, just puzzled it out and bought parts. Of course, thanks to a few changes in direction I have some spare stuff, but how bad can it be to have a spare SSR and contactor?
 
Today's wet test went great. No leaks, temps ramped very well after auto tuning.

Ran cleaner through everything afterwards, too. Should be ready to make wort now!

I definitely need a trivet between the kettle and the stand, the heat is taking it's toll on the wood's finish.

alive.jpg
 
I'll post the settings once I actually run a brew session to make sure the auto-tune picked good settings! :) I may still put it back to factory settings to see what happens first, as just water probably behaves much differently than an actual mash.

I saw those trivets. I'm actually considering going with this one:
http://www.amazon.com/gp/product/B002UTG7WY/?tag=skimlinks_replacement-20

Silicone will be easier to clean, I think. The non-slip part of it would be good, too.
 
Last edited by a moderator:
Not handy, no. I'd have to do a little rummaging around in my e-mails to see what I ordered. Not sure I want to see the total cost! :eek:
 
Today was the first brew on the new system. Aside from a slight bobble with mashing temps; Was supposed to be 150 and was stuck at 152 for a few minutes while I scrambled around trying to find out why until I realized I should crack the lid open so some heat could escape. Once I kept the lid cracked open, the PID was all sorted out and kept the temps exactly where they should be. RTD probe measures dead on with my thermoworks thermometer. Everything went incredibly well after I got the mashing issue sorted out. Opened my mill up to .039 (Monster mill 2 roller), conditioned my grain about an hour before milling and was able to recirculate at full flow once I mashed in. Ramped up to mashout with no issues.

No scorching! The grist was 11% rye, 5.5% flaked and 5.5% malted. Element had a faint film on it after everything was done that wiped right off with a sponge.

The boil controller is actually pretty awesome.
The PID manual mode cycle is 2 seconds long, so 50% power is 1 second on, 1 second off. The pulsing boil was visible.

The boil controller works at the same frequency the power is, so 50% power is 1/60th of a second on, 1/60th of a second off. Nice smooth boil, very easy to regulate and control boiloff with.

Hit all my numbers right on the money, with the slight exception of having .1 gallon of wort too much which is a good problem to have, I guess. 81% brewhouse efficiency, right around 88% mash efficiency... I'm more than happy with it! Not too shabby for single vessel brewing.
 
Usually 5.5 gallons into the fermenter, but there's enough room to do a 10-11 gallon batch with a bit of a pour-over sparge.
 
Today's wet test went great. No leaks, temps ramped very well after auto tuning.

Ran cleaner through everything afterwards, too. Should be ready to make wort now!

I definitely need a trivet between the kettle and the stand, the heat is taking it's toll on the wood's finish.

I found some cork tiles at my local dollar store.
 
I ended up stealing this from the kitchen counter for the inaugural brew:
Silicone Mat

It worked very, very well. May have to buy another one.
 
Last edited by a moderator:
Great build!

I had cork and switched to silicone. Far better choice IMHO, especially if there are risks of wort spillage, as cork becomes so sticky and hard to remove.

Out of curiosity, why do you put a 90 degree turn in your sensor instead of having it in-line? That is, the entry in front of the output instead of the elbow you have now.

I would also tend to put the sensor in your lid, as the wort might lose temperature while in the silicone tube - although maybe loses are negligible in this case?

Cheers.
 
Thanks!

There's a two-fold reason for the 90 degree bend. The first is related to the pump mounting; I'd need to transition from straight out of the kettle to sideways into the pump anyway. The second reason is I wanted to keep things lower profile than they would have been if I had gone straight out, all the hardware hanging off the front of the kettle would be in the way and it's more leverage against the fittings soldered into the kettle wall.

The RTD sensor is 1.5" long; with it mounted in the Tee the sensor pickup is directly in the wort flow path out of the kettle.

I opted to have the sensor in the kettle output, as this puts it closer to the element, which, in turn, will keep the wort at the actual mashing temperature I'm looking for. The temperature loss through the pump and hoses is negligible with the recirculaton rates I was achieving, which was full pump flow.
 
The PID was all sorted out and kept the temps exactly where they should be.
Next time you're brewing, if you wouldn't mind noting the PID settings, that would be a huge help. My PID doesn't seem to want to auto-tune efficiently.

-B
 
I will. I do know that I undid the 'auto tune' changes back to factory settings, then dialed them back a little more from there. I was having an issue where the mash was about 2 degrees higher than the set point, and I couldn't get it down, until the light bulb went on and I realized that there's nowhere for the heat to go if the lid's on the mash. I cracked the lid open and used my mash paddle to keep it that way during the mash, and that fixed the temp problem.

I'll see if I can power the panel up this afternoon and get the settings for you.
 
@BeardedBrews - Sorry it took so long, haven't had time to brew until today.

My parameters:

P - 450
I - 800
D - 80

The cycle time (t) is 2.

I undid all the autotune stuff. It made the system overshoot 3-4 degrees and hang there. Never came back down.

Right now, it'll initially overshoot 1-2 degrees, then settle to the set temperature within 3-5 minutes. I'm still tweaking.
 
Awesome, thanks!

I am having the same problem with the auto tune hanging 2-3 above the set point, but seeing your pid values I guess I'm not surprised.

You run with no insulation right?
 
That's right, no insulation. In fact the hanging problem was worse until I started leaving the lid cracked while mashing.
 
I had a similar problem with hanging temp. After searching around I found that it was due to the I setting bring too high, I lowered mine down to 1 and now it works perfectly.
 
Heard back from Auber, they recommended:

P=40
I =350
D=2
t = 2

Next chance I get I'll try it out with some water and see what happens.
 
Heard back from Auber, they recommended:

P=40
I =350
D=2
t = 2

Next chance I get I'll try it out with some water and see what happens.

Those settings did not work for my system very well, fortunately they got me on track for a set that is working very nicely.

P=40
I=1
D=25

In this configuration the controller ramps up to 100% power gradually over about a minute, where it will stay until it is within 5F of the setpoint. When it hits that mark it starts scaling back the power, hitting ~40% when it crosses the setpoint and dropping the rest of the way to 0% by 1F over. It seems to settle in to a ±0.3F cycle at that point.

I found that an I=350 had poor heat onset performance (slow to get to 100) so following other thread advice I just set that back to 1. Once there the system was not cutting the heat off fast enough (causing big overshoots) so I increased the D value to speed that up.

I did a step from 150 to 160 and recorded the timing:

150F at 0:00
100% power at 0:33 (151F)
160F at 3:45 (41.9% power)
0% power at 4:40 (161F)
160F at 5:42

So that gives me about 2 minutes spent above 160, but it never broke 161.


I'll see what a grain test does for me, I will be mostly concerned with the impact of insulation on overshoot. If that turns out to be a problem, I can always run with a bare kettle and no lid.
 
That's awesome, thanks for the tips.

I'll be able to give it a try Tuesday... I'm on a 24 hour shift at work Monday.
 
What did Auberins base its suggestion on? I understand the PID values are very dependent on your specific equipment and procedures.

I used this method to calibrate my PID (from here http://sestosd1s.blogspot.com.es/2015/04/secret-sestos-d1s-manual-after-having.html). Yes, I know, it's Sestos, but the methodology should be the same:

To manually tune, the process is complicated in that different PIDs implement these in different and opposite ways. The P – can be either a proportional, or a proportional band, which are inverses of each other. Depending on this, the start point will change. Accordingly – it is recommended to start in the middle of each range when setting this.

1. Plug the element in directly (bypassing the PID) and time how long it takes to raise the unit by one degree Celsius at the target temperature. Set the ‘t’ – hysteresis value to this in seconds.
2. Set the ctl time period to 10 seconds (this can be extended if you feel this is turning off and on too frequently).
3. Set the m50 value to zero.
4. Set the target temperature.
5. Start at the midpoint of the range for ‘P’ – 5000.
6. Let the system reach equilibrium (temperature above and below the target temperature are consistent).
7. Half the P value.
8. Let the system reach equilibrium.
9. Determine if this range has decreased. If so – halve it again. If worse then double it.
10. Let the system reach equilibrium.
11. Repeat steps 9 and 10 until the range is no longer improving.
12. Set the m50 value to 5000.
13. Let the system reach equilibrium.
14. Determine the range of temperatures.
15. Halve the m50 value.
16. Let the system reach equilibrium.
17. Determine if this range has decreased. If so – halve it again. If worse then double it.
18. Let the system reach equilibrium.
19. Repeat steps 17 and 18 until the range is no longer improving.
20. Complete!

Cheers.
 
Approximately. It's not really 'dead space' as it gets recirculated through the grains.

@BeardedBrews - Ever have a chance to try out your settings in a mash? Brewing today.
 
Approximately. It's not really 'dead space' as it gets recirculated through the grains.

@BeardedBrews - Ever have a chance to try out your settings in a mash? Brewing today.

Hey Bishop,

I tweaked a little bit from those last settings, this is where I'm at now:

P=60 | I=1 | D=30

I have three brews on these settings and each time worked well as long as the re circulation was stable. 2 of the 3 brew days I ended up with mashes that were "sticky" and I had to do more manual stirring than I wanted to keep the bag from flooding or the temperature probe from getting insulated.

I am planning to move the temperature probe into the pump tubing similar to your set-up and I expect that will make the PID much happier.
 
Awesome, thanks. Will give those settings a shot when I brew tomorrow morning.
 
Back
Top