• Please visit and share your knowledge at our sister communities:
  • If you have not, please join our official Homebrewing Facebook Group!

    Homebrewing Facebook Group

How to add permanent volume markings to a kettle (illustrated)

Homebrew Talk

Help Support Homebrew Talk:

This site may earn a commission from merchant affiliate links, including eBay, Amazon, and others.
One my 8 gallon kettle I marked out 2 lines one for 6.5 gallon and one for 5 gallon using a dull punch that I rounded out, tap tap TAP on it worked :) best way not to compromise the integrity of you pot by etching or grinding


Sent from my iPhone using Home Brew
 
One my 8 gallon kettle I marked out 2 lines one for 6.5 gallon and one for 5 gallon using a dull punch that I rounded out, tap tap TAP on it worked :) best way not to compromise the integrity of you pot by etching or grinding


Sent from my iPhone using Home Brew


Yea, but it's not nearly as cool, and nothing lasts forever!

Of course I'm once again the hypocritical parent; as I recently had the same/reverse conversation with my teenage daughter about the long term side affects of sunbathing. :)


Sent from my iPad using Home Brew
 
Don't forget to level the vessel!!!!! Otherwise, you'll be way off!

And, wherever you brew....check your level.

Otherwise, measure from the center with a rod and call it a day.
 
This looks great, I have a plan for my brew pot! Question, could you use a battery charger, I have one to charge the RV 12-volt, seems I could use the two clips off the battery charger and attach leads to them and have all the power I'd need?
 
I etched my kettle last night with litre markings. Here's how I went about it:

http://beerandgarden.com/2014/05/etching-volume-markings-on-brew-kettle/

End result is not as pretty as some I've seen here but it is functional:

P1010636.jpg


I only added 1 litre markings in the 20 to 40 litre range as all the volumes that I'll be measureing will be within that range.
 
I taped this up last night and ran out of time to etch it though. I will finish it tonight hopefully. Not the straightest but it will do.

ImageUploadedByHome Brew1400675781.837686.jpg


Sent from my iPhone using Home Brew
 
I etched my aluminum kettle and at first it looked great. After using it a few times, between the oxide layer, some baked on wort, poor lighting in my garage where I brew, and rising steam, I can't see the etching at all. It's pretty hard to see under the light with nothing in it even. I etched fairly deep and you can feel the numbers and lines, just difficult to see them. I'd love to etch a design on the outside, just not sure what to do yet.
 
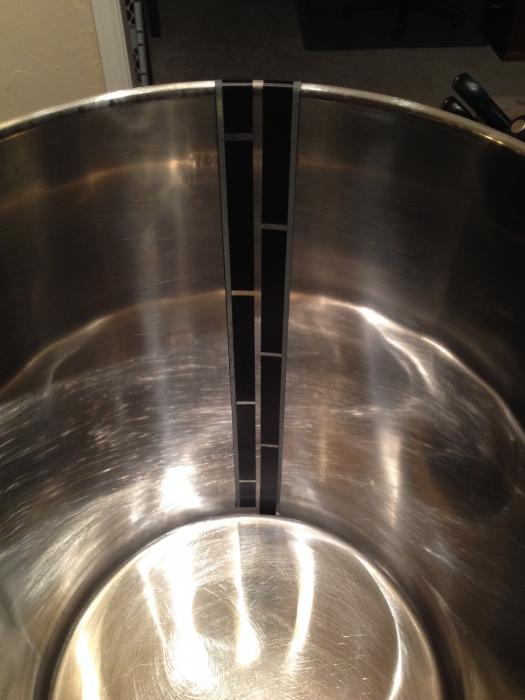
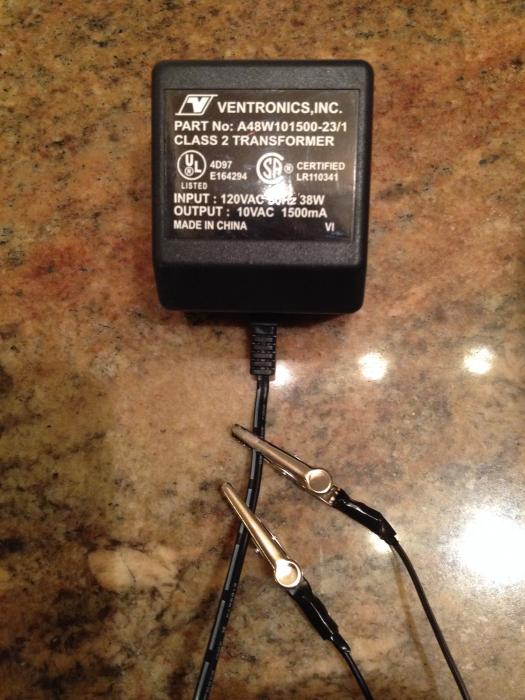
Here's my attempt. I think it turned out ok. I'm curious how long it will last. I used electrical tape and then 3M striping tape to mark off the fine points. A razor blade and a business card helped keep the lines (somewhat) straight. The stencils are reusable glass etching stick on's from Michael's. I used an old ac adapter I had lying around. Striped wire is your negative. I found the solution worked best with twice as much salt as the op's formula. It's going to turn black and splotchy and look inconsistent, but don't get discouraged. Hit the final product with a sponge and some Barkeeper's Friend and it will clean right up.

023.jpg


025.jpg


027.jpg


029.jpg


031.jpg
 
Used mine yesterday on Stubby's Baytown Brown and it worked out very well. Markings held up to boiling, scrubbing, and PBW. I'll definitely do this to the 80qt kettle I've got my eye on.


Sent from my iPhone using Home Brew
 
:off:

How you like Stubby's kits?


Well, I've brewed two. The Palo Pinto Pale Ale, which I haven't tasted yet. It's in the keg carbing now. Then the Baytown Brown just yesterday. I'm sure they will be great.
Before these, I've used him for all of my ingredients for clone kits and tons of hardware and supplies.

The kits are put together well and priced competitively. It also doesn't hurt to support my LHBS. I've met Brenden a few times through a mutual friend before the homebrew shop came along and before I started brewing. He's always been a real down to earth guy and even though he's a very respected member of the fast growing beer scene here in DFW and owner of a rapidly growing LHBS, he's still that same guy. Try a kit sometime and see for yourself. He's also got a couple of YouTube videos out now, as well.


Sent from my iPhone using Home Brew
 
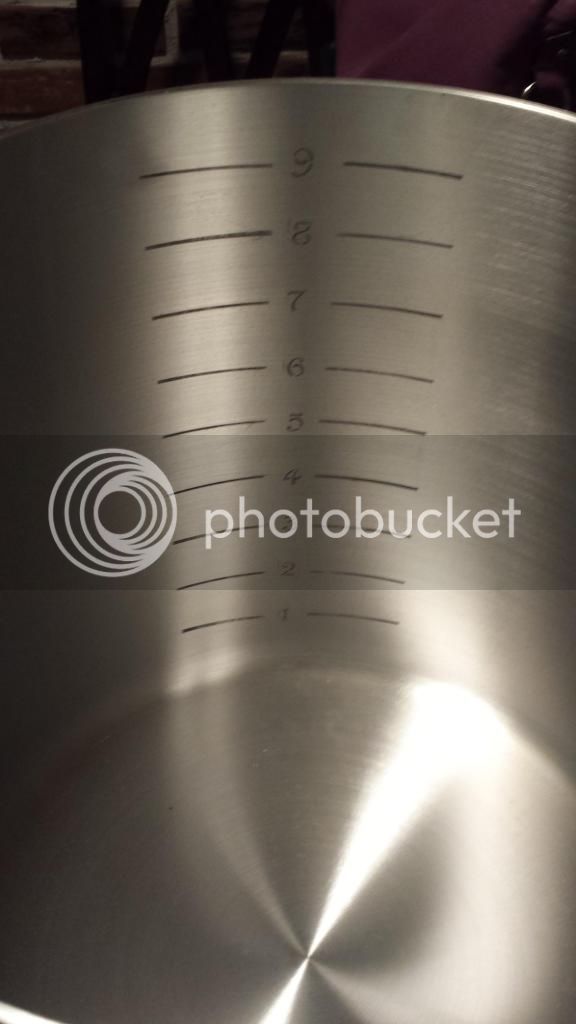
This is how mine turned out on my aluminum kettle. Even with the oxide layer, I can still see the markings very clearly! I am very pleased with how it turned out.
20140525_002941_zps0afc254f.jpg
 
I may have missed it through this entire thread but has anyone used a foam brush instead of a Q-tip type of applicator?


Sent from my iPhone using Home Brew
 
I may have missed it through this entire thread but has anyone used a foam brush instead of a Q-tip type of applicator?


Sent from my iPhone using Home Brew

I don't see why it wouldn't work, as long as the "circuit" is completed. You can search metal etching on google and there will be a lot of information on the subject. Interesting stuff!
 
This is how mine turned out on my aluminum kettle. Even with the oxide layer, I can still see the markings very clearly! I am very pleased with how it turned out.
20140525_002941_zps0afc254f.jpg

That looks great! I'm curious why your etchings came out black when every other pic in this thread is white. Yours looks like electro-marking rather than etching. Did you do anything different than the described process in the OP?
 
That looks great! I'm curious why your etchings came out black when every other pic in this thread is white. Yours looks like electro-marking rather than etching. Did you do anything different than the described process in the OP?

I didn't do much different. My pot is aluminum not stainless steel so that might have an effect. I did have to use a lot more salt than the OP suggested to get it to work and I went over each spot very slowly. It took me forever to finish it, probably like an hour and a half to two hours because I wanted deeper etching. Also, I seemed to get more sizzling action when I moved the positive wire closer to the spot I was working on so I taped the wire right next to each line as I did it. The lighting might have some effect, it looks a little darker in the picture than they actually are but they still aren't white like everyone else's.
 
I didn't do much different. My pot is aluminum not stainless steel so that might have an effect. I did have to use a lot more salt than the OP suggested to get it to work and I went over each spot very slowly. It took me forever to finish it, probably like an hour and a half to two hours because I wanted deeper etching. Also, I seemed to get more sizzling action when I moved the positive wire closer to the spot I was working on so I taped the wire right next to each line as I did it. The lighting might have some effect, it looks a little darker in the picture than they actually are but they still aren't white like everyone else's.

I have an aluminum pot too, and did my etching pretty deep with more salt than recommended as well. My etching doesn't have a color, it looks the same as the surface metal, just deeper. You can feel it, but it doesn't stand out to just look at it.

Your pot looks like it's never even been used yet, doesn't look like there's an oxide layer yet even. Mine has hundreds of batches worth of baked on wort stains.

You are right, my pot had not been used yet. It was brand new at the time. It is now used and even with the oxide layer the markings are still darker. I don't know why it is like that but I like it.
 
Very nice and great idea!! I look forward to some more pics from other folks :D

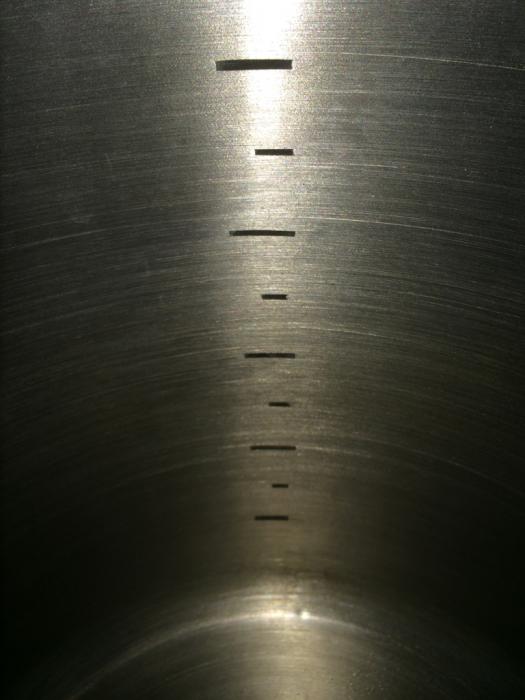
That was awesome! I recently calibrated my glass carboys and knew that I needed to figure out a better way than measuring my delicate glass thermometer every time I wanted to know how my volume was doing. I'm so glad I didn't try to install a sightglass. Just a couple tips though: It's a good idea to use electrical tape as it seems to seal the best and it's plastic and seems to be impervious to the acid solution. I used a variety of tapes and the electrical tape sealed the edges best. Use a lot of tape, and tape up nearby spill-over areas that the vinegar/salt solution might accidentally taint. Don't get all dainty and resourceful, use good tape and use plenty as your job will look much slicker. Also, prepare to go through a lot of q-tips. A foam brush would be inappropriate as it would hold too much solution and get all over the place, not to mention how gunky and corrosive it would quickly become. Lastly, I needed a little more than two t-spoons of salt with my 1/4-cup of white vinegar. And lastly lastly, I had some cheap-o alligator clips that I got on Amazon that were almost free. I used those to connect to my brew to battery to "etching pen." It was great as it was easy to clip and unclip the put between etching/wiping and easy to change the pen quickly. I highly recommend these little clips as wrapping and unwrapping corroded frayed gunky little wires every 30-seconds is just too tedious and messy. Really, you're gonna spend a few hours with this project, don't get all hemmed up on the clumsy "pen" procedure. Spend the $5. Anyhow... Awesome project for the DIYer. It was really fun. Here's some photos:
DSCN6323.jpg


DSCN6320.jpg


DSCN6308.jpg


Use a lot of q-tips! :mug:
 
Last edited by a moderator:

Latest posts

Back
Top