Zeus's rebirth. Non typical, all steam brew stand.

Homebrew Talk - Beer, Wine, Mead, & Cider Brewing Discussion Forum

Help Support Homebrew Talk - Beer, Wine, Mead, & Cider Brewing Discussion Forum:

This site may earn a commission from merchant affiliate links, including eBay, Amazon, and others.

brewman !

Well-Known Member
Joined
Nov 27, 2006
Messages
2,131
Reaction score
236
A little over a year ago I set out to build a very powerful/versatile brew stand.

I diarized my progress here.
https://www.homebrewtalk.com/f51/birth-zeus-non-typical-brewstand-build-368010/

Unfortunately, life intervened. About a year ago we bought a house which required rennovation. We also had a baby 7 months ago. I'm happy to report that the reno is more or less complete and mom and baby are doing well. Its time for me to get back to brewing. Which means its time for me to get working on a brewstand as I sold my old one a few years back and I haven't brewed since.

The move to our new house changed a few things. Whereas our old house didn't have room to set up a brewery in the basement, the new one does. So whereas the Zeus I brewstand was going to be natgas powered, I'm thinking it would be prudent to power the reborn Zeus brewstand with electricity, so that it could potentially be moved into the basement at some point.

I know that many people are builing electric breweries these days. My first brewing efforts used an electric HLT and boil kettle, so I am very familiar with electric brewing. Furthermore, I'm an electrical engineer, so I'm not scared of the stuff.

However, I am not fond of the traditional heating element style brew vessels. I dislike the element being so prominent in the vessels, I want to avoid carmelizing wort on the elements and I desire a faster heating rate than what is available with a straight element style setup.

So with natgas and electric heating elements out of contention, I am going to attempt to power my brewstand with steam from an electric boiler.
 
Welcome back brewman. Congrats on the new house and the new baby. Looking forward to see this come together. Sub'd
 
Nice build....I really dig that sink.

You're most likely aware, but if not.... you should practice tig on some thin stainless sheet so you know what you're dealing with before you wreck a pot....preheating the fittings helps too....the thin stuff can be really frustrating. In fact, for this application there is no shame in soldering fittings...plenty strong and you won't risk losing corrosion resistance.

Also...having used both electric and propane rigs, I discovered that people underestimate how much steam is produced. Sure, you can brew inside with electric, but you need almost as much ventilation. That moisture will wreck your house in a hurry and is almost more unpleasant than brewing in a freezing garage. Bottom, line...ventilation is money well spent!
 
You might look into commercial steam jacketed kettles. I have seen a few on Craigslist out here in Seattle. Even heat and no external heat source. The bad thing is that even used, they can get pricy. But it sounds like it is exactly what you are looking for.

http://seattle.craigslist.org/oly/bfd/4263268270.html


Sent from my ADR6350 using Home Brew mobile app
 
You might look into commercial steam jacketed kettles. I have seen a few on Craigslist out here in Seattle. Even heat and no external heat source. The bad thing is that even used, they can get pricy. But it sounds like it is exactly what you are looking for.

http://seattle.craigslist.org/oly/bfd/4263268270.html

Thanks for the info, but I am going to tackle this a different way. Stay tuned.
 
Also...having used both electric and propane rigs, I discovered that people underestimate how much steam is produced. Sure, you can brew inside with electric, but you need almost as much ventilation. That moisture will wreck your house in a hurry and is almost more unpleasant than brewing in a freezing garage. Bottom, line...ventilation is money well spent!

Our house came with a 36" gas cooktop and a 54" stainless steel fume hood with a 600 CFM variable speed fan. We redid the kitchen and replaced that stuff with a 36" induction cooktop and a different ventilation system. So I have the fume hood and 600 CFM fan to use over my brew pots, should I put them in the basement.

I also prepped the house such that there is plenty of power should I want it for the electric boiler, which I probably will.

For those interested in the steam approach, I suggest you take a good look at Sabco's Nano Magic system here. https://brewmagic.com/nano-magic/ The complete documentation for this system is here: https://www.dropbox.com/sh/kwgrv989w0shxnp/05Dn9HnEgN

I got some of the ideas for Zeus II from the Nano Magic system.
 
FWIW, this isn't my first go at using steam in the brewing process.

https://www.homebrewtalk.com/f11/steam-injected-mash-system-18008/

I've run a bunch of numbers on temperatures, pressures, heat rates, etc. I'm pretty sure its going to work. Rather than bore everyone with a bunch of numbers and theoretical calculations, I'm going to start building and I'll explain the thermodynamics as we go.

I just want everyone to be aware upfront that this isn't some shot in the dark attempt at making steam work. I ran numbers and analyzed things for many hours before I came up with a system configuration that would do what I wanted. And then I coincidently found the Nano-Magic system and ran numbers on their system, which basically verified what I was going to do with my system.

One of the big goals of using steam is to effect really consistent, uniform heating of all the vessels in my system. I also want a system that heats fast without damaging the liquid its heating. I'm tired of waiting 30 minutes for a step change in mash temperature.

I hope to pick up the boiler tomorrow. From Home Depot !
 
You might look into commercial steam jacketed kettles. I have seen a few on Craigslist out here in Seattle. Even heat and no external heat source. The bad thing is that even used, they can get pricy. But it sounds like it is exactly what you are looking for.

http://seattle.craigslist.org/oly/bfd/4263268270.html


Sent from my ADR6350 using Home Brew mobile app


I use one of these at work. Would make brew day so quick. Brings 15 gallons to a boil in no time flat.
 
Safety

Steam is a very dangerous commodity.

A steam leak directly onto skin will burn it immediately. Improperly designed vessels holding pressurzed steam can explode with catastrophic results.

Do not take any shortcuts when working with steam. Make sure all your connections are done competently and correctly.

If you don't know exactly what you are doing, don't do it.

Only use equipment (valves, hose, tubing, pipe and fittings) that are rated for steam's temperatures and pressures.

Never, ever operate a boiler without a relief valve. EVER.

Never, ever work on a live, pressurized steam line. If the line needs work, you must shut down the boiler and wait for it to cool off. Remember, a steam leak will burn skin immediately.

I take no responsibility for any consequences you may suffer if you use steam in your brewing system as a result of reading this thread. I cannot foresee what you might do as a result of reading this thread, nor can I warn you of all possible hazards and outcomes.

You are responsible for your own safety and researching and double checking every thing in your system to ensure its integrity and proper design, regardless of what I do in this thread.

There is no beer that is worth the price of being injured or kill while building or operating equipment to make it. None.

If you do not agree to these terms, STOP READING THIS THREAD NOW.
 
Boiler Safety

I will be using an off the shelf electric hot water heater as the basis of my boiler.

As mentioned above, steam is dangerous. Steam in a pressure vessel is doubly dangerous. I do not want to take any chances with safety building a boiler.

Hot water heaters are rated for a working pressure of 150 PSI. Adam and Jamie on Mythbusters have tested several electric hot water heaters to their destructive failure and found them to have an ultimate failure point of in excess of 300 PSI. I will be operating my boiler at pressures of less than 30 PSI.

Several people including myself have built steam generators from Corny or Sanke kegs.

While we haven't had any problems, its simply not a practice I can condone. Boilers are pressure vessels. Kegs, let alone modified kegs, were never designed to be steam pressure vessels. They should not be used as such without extensive design and testing, something which none of us have the resources to do.

For those that doubt the nature of the forces one is involved with when using a steam pressure vessel, I ask you to view the following video.

A hot water heater tank is a far superior pressure vessel to a keg. It was designed to be heated and its built to last many, many years. It is built of thick, temperature resistant steel. Its designed to be stationary. A typical 40 gallon electric hot water heater weighs over 100 pounds. They are factory tested and UL listed.

Furthermore, a hot water heater tank can be used without any modifications. No welding, drilling or other changes need to be made to the tank itself.

I have specifically chosen to build my boiler from an electric hot water heater, not a gas hot water heater.

Gas hot water heaters have a heat exchanger built into them. They are designed to be operated with the tank full at all times. My steam boiler will NOT be full. The top 20% of my boiler will be steam, not water. Operating a natural gas hot water heater in this manner is likely to expose the heat exhanger to higher than designed temperatures. Most, if not all, steels are greatly reduced in strength at the higher temperatures that a natural gas flame can produce.

Electric hot water heaters have no such issue because they do not have a heat exchanger, only an element (or two).

I DO NOT recommend building a steam boiler from a gas fired hot water heater.
 
Last edited by a moderator:
I am buying a hot water heater like this one for the following reasons.

http://www.homedepot.com/p/GE-40-ga...lt-Electric-Water-Heater-GE40M06AAG/100183332

1) Dual heating elements.

I need all the heating capacity I can get.

2) Tank diameter and screw in style elements.

It appears to be large enough that one can replace the stock 4.5Kw elements with Camco 02612/02613 6000W 240V Screw-In elements. They appear to intrude about 14" into the tank. The tank diameter on smaller hot water heaters is too small to allow their use.

3) Price

Heat output.

1 Kw = 3412 BTU. 9 Kw = 30,708 BTU. 12 Kw = 40,944 BTU. A typical natgas hot water heater of this size has a 26K BTU burner and its not 100% efficient as some of that heat is lost to condensation and flue gas heat.

40,000 BTU for a whole brewing stand doesn't seem like much, especially when your buddies stand has 3 60K propane burners.

However, as we will see, the heat transfer from the hot water tank element to steam to the wort is much, much more efficient than from burner to pot to wort and the 40 gallon boiler size allows us to run the elements continuously and store a lot of heat before the stand is being used and while it is being used at less than full capacity.

All in all, I expect that my steam brewing stand will be significantly faster at brewing 8 and 15 gallon batches than if it was burner fired.

Water heater modifications.

The water heater needs the following modifications.

1) The Temperature/Pressure relief valve needs to be REPLACED.

Never, ever, ever run a boiler without a relief valve !

I'll be replacing the stock relief valve with a Watts 335M2 or 174 brass style boiler pressure relief valve. http://www.watts.com/pages/_products_sub.asp?catId=64&parCat=293

30 PSIG (44.7PSIA) will allow me to run boiler pressures up to 275F, which will be more than high enough to effect the necessary heat transfers we need.

These valves typically cost about $40, depending on the model and who you buy from.

The relief valve outlet needs to be plumbed down to the floor so that if there is a blow off, its not in someone's face.

2) Remove the stand tube from under the outlet nipple.

Its not needed anymore. We now need to draw hot steam from the top of the boiler.

3) Remove the plastic (!) drain valve.

That valve will not withstand the temperatures the boiler will be run at. I'll be filling my boiler from from bottom so I will set up some fill and drain valves will QCs on them for this. The leftover hot water in the boiler at the end of a brew session will be great for washing things up. I'll mix it with some cold water and use it for that.

FYI, all the ports on the hot water heater are 3/4" NPT.

4) Add a water level sensor electrode to the current fill port so that we can sense when the water won't cover the upper element. The elements need to be fully covered at all times or they will burn out. The space above the upper element will have steam in it.

I will be using a Warrick Series 3B sensor for this purpose. They sell for $35. http://www.gemssensors.com/en/Products/Level/Warrick/Fittings-and-Probes/Fittings/Series-3B

One could use a sight glass to gauge the depth of the water in the boiler. However, I think they are fragile and I don't want to take the chance of breaking one and leaking live steam into my brewery.

While we are at it, all the valves on a steam system need to be steam rated. Home Depot sells some steam rated ball valves. I'll provide part numbers when I assemble everything.

5) The existing element temperature controls need to be disabled and removed. I'll also need to add temperature and pressure sensors if I am going to automate the control of the boiler. For now I will control it manually.

Once I've got my system up and running, I'll probably swap the 4.5Kw elements for the 6Kw elements mentioned above.

The boiler also needs to be wired in. It will need a 50A service for the 6KW elements.

The whole boiler set up should cost less than $500. It sounds like a lot, but burners, gas control valves, pilot lights, thermocouples, regulators and propane tanks/ natgas hose for 4 vessels aren't cheap either and the rest of the steam system is pretty simple and inexpensive.

I'm planning to get the boiler up and running and test it by boiling water in a boil kettle before I commit to building a stand for everything. I'll post some pictures of the test setup as I put it together. I'm waiting for parts at the moment.
 
Details

Condensate

This will be a total loss steam system. The condensate will not be returned to the boiler.

The boiler should have enough water capacity to run for an entire brew session without needing to be refilled. However, it should be possible to refill the boiler manually during a brew session should it be necessary.

Operating Cost

With an electricity cost of 10cent/KwHr, the boiler will cost $0.90 or $1.20 per hour with the 9 Kw or 12Kw elements respectively. It will take about 2 hours to bring the boiler up to operating temp and pressure, depending on the starting temp of the water and the operating point selected. I'm guessing that a full 6 gallon brewing session will require about 150,000 BTUs of total heat input. 4 to 5 hours of boiler operation.

Operating Speed

I expect very fast temperature changes with my steam system. Things like heating strike water, heating mash water, doing mash step changes and bringing wort up to boil should happen very quickly, thanks to having a lot of energy stored in the boiler and having a very efficient heat exchange between the steam and the water/mash/wort.

Once the basic system is up and operating, I'll add automation to it to further decrease the amount of baby sitting it needs while brewing.
 
Boil Kettle Details

As I previously alluded to, I won't be purchasing jacketed kettles for my system.

In lieu of the jackets, I'm going to immerse a steam coil into my boil kettles. This should provide an efficient heat transfer from the steam to the wort just as a steam jacket would.

A little math...

The inside of my smaller boil kettle is about 12 inches. The circumference of a coil around the inside it would be about 36". (12 pi) 10 turns of coil would be 30 feet.

Lets say the coil is 1/4" OD. The circumference of the coil itself is pi * Di = pi/4.

The total area of the coil is its length x circumference. 30 feet = 360 inches. 360/4 * pi = 90 pi = 270 in^2/ 1 ft^2 = 144 in^2. So about 2 ft^2 of contact area for the 10 coils.

The heat transfer from steam to water via copper is 205 btu/ft^2 F.

Source: http://m4group10portfolio.wikispaces.com/file/view/heat.ppt/71707287/heat.ppt

Aside: Note how poor the heat transfer is between air/steel/water. This explains why burners aren't that efficient at heating wort. Furthermore, stainless steel is a much less efficent conductor of heat than mild steel is, so its transfer would be even slower.

Assume the steam at the boil kettle is 260F.

Q = (260F - 212F) x 205 x 2 ft^2 = 19,680 btu per hour.

That is heat put directly into the kettle. The heat transfered to a mash or to a HLT would be even greater because of the greater temperature differential.

So how long will it take to heat the wort from mash (170F) out to 212F ?

8 gallons x 8.33 pounds per gallon x 1 btu/lb F x (212-170) = 2798 BTU.

2798 BTU/ 19,680 BTU/hr = 0.142 hours or 8.5 minutes.

Lets say we want to boil off 1.5 gallons (12 pounds) of wort. How long will this take ?

It takes 970 BTU to change 1 pound of water to 1 pound of steam at atmospheric conditions. 12 pounds x 970 = 11,640 BTU.

11,640 BTU / 19,680 BTU per hour = 0.59 hours or roughly 36 minutes.

The total time to heat the wort from sparge out (170) to having it boiled down is 8.5 minutes + 36 minutes = less than an hour in the real world.

Assuming we are running a total loss condensate system, how much condensate have we produced (outside the kettle) ? Our steam is going to go from 260F @ 20 PSI to saturated water at 212F and 1 atm.

The enthalpy for each is 1167 and 180 BTU per pound, respectively, meaning the steam loses nearly 1000 BTU per pound that passes through the coil. This means that we are producing 19.68 pounds of condensate per hour or about 2.5 gallons.

All these calculations ignore heat lost by the boil kettle. But because it isn't direct fired, it can now be insulated. Remember, the coil is right inside the kettle. We can even insulate the kettle bottoms.

So the "jacket" for my 10 gallon boil kettle is going to be 10 turns (3 feet) of 1/4" copper tubing.

Like I said before, I ran a lot of numbers before coming to the conclusion that steam power would work for my system.

My steam table source is http://www.efunda.com/materials/water/steamtable_sat.cfm.
 
You should keep your eye out for a commercial jacketed steam kettle even as you plot and plan your DIY project.

My brewing partner and I got a Vulcan 80 gallon jacketed kettle for $2,000 (yeah, not $20k). We debate selling it (constantly) and buying other equipment but it brings big amounts of liquid to a boil amazingly fast. And it is QUIET as a whisper.

This 30 gallon kettle for $700 would rock your world!
http://www.ebay.com/itm/VULCAN-VDLT...EN-SOUP-POT-COMMERCIAL-JACKETED-/171207316034
 
So if I read this right, you are dipping the copper coil into your boil kettle. Cool. What does the drain of that line look like?

I ask because I work at a power plant, and there's this annoying little thing called water hammer we deal with. Basically, if you have low points in the system that can collect liquid water, and then try to push steam through it, the steam will violently collapse, producing localized pressures in the thousands of PSI. Not good for the pipe.

There are basically 3 ways of dealing with it:
1. Eliminate all low points
2. Install drains at all low points
3. Blast the system clear with air/nitrogen etc.

So if you are planning on just making a coil that looks like a stereotypical immersion wort chiller, I'd make it an operational requirement to blow it clear with pressurized air before EVERY use. In my humble professional opinion :) :p.

Best of luck! It's a cool project.
 
I haven't built the coil yet. It will be a bit like an immersion coil, except that it needs to go through the side of the vessel and one end needs to be open so that the condensed steam (water) can escape.

I'm not anticipating any water hammer, but I guess it could happen if the conditions were right. I'm guessing that the drain end is going to need to be on the low end of the coil so that the condensate runs out and doesn't collect.
 

Yes, I have. The link for it doesn't work.

I shudder at the use of the quick connect on the steam line from the boiler. If you forget to close the valve on the male connector and disconnect it, steam will escape and you will be burnt. Even with the valve closed a bit of steam is going to leak.

The rest of it looks nice, though I don't know what it would have over a hot water heater based boiler.

They are proposing that the steam be injected into all the vessels, including the boil kettle. The problem with that is there will be no volume reduction (wort concentration) during the boil because the volume of the condensing steam is going to roughly equal the volume of wort water that boils off.

He states the unit is 10Kw, ie 2 x 5,000 watt elements. Claims to bring 1 barrel of city water to a boil is 63 minutes. 31 gallons x 8.33 pounds per gallon x (212 - 60) = 39,265 BTU. 10 Kw = 34, 120 BTU. So that makes sense.

However, his boiler isn't storing much heat. My boiler will be storing 40 gallons of water/steam at 260F. When it comes time to boil wort, I can dump that stored energy into the boil kettle very quickly. Their boiler is 30 litres running at 1.5bar (22 PSI). 40A 220VAC.

At the end of their run the boiler pressure was down to nearly 1 bar.
 
This video gives the viewer an idea how fast and even water can be heated by steam injection.


A properly designed injector should allow the steam to enter the tank as condensate. Steam transfers most of its energy when during the transition from vapor to liquid. If you release steam into a liquid and the bubbles break at the surface, most of the heat is being released to the air and not the liquid.

Notice how quiet it is compared to the injector used by brewsteam.

Notice how small the injectors are for the massive amount of heat they are releasing. Each injector is rated for 175KW !!!! (3:20 in the video). The steam pressure in this system is 10 PSI at the inlet. (3:30 in the video) 10PSI = 225F. The small injector size is due to the really high heat transfer rate between steam and most conductive metals.

This system took 150 litres of water from 20C to 60C in less than 4 minutes, while keeping the maximum water temp without stiring at 75C, with a set point of 60C. The system has a mean heat input of 105 Kw ! 150 liters is 330 pounds of water = 40 gallons. 105 Kw = 330,000 BTU directly into the water. Amazing !
It uses a Horne EA1 1/2" proportional steam control valve.

Because these injectors are condensing the steam before it exits the injector, it would be easy to convert them to steam heaters by piping the condensate to exit outside of the vessel. I would like my wort to boil down in the boil kettle thus I will be using steam heat, not steam injection in that vessel.
 
Last edited by a moderator:
Note how the injectors let the condensate drain to the tank...I recommend that you follow this example! Thermodynamically, the worst case scenario is that the steam has fully condensed and exits the coil at 212ºF; but in doing so, it has contributed enough energy to boil off an equivalent amount of water! So there is no detriment to having the coil drain into the tank :).

As long as the coil continuously drains in a downwards direction, water hammer should not be an issue :). Issues only would appear if there is a U shape in the pipe. Hope that helps!
 
Note how the injectors let the condensate drain to the tank...I recommend that you follow this example!
Why ? What do you gain by doing so ?

Thermodynamically, the worst case scenario is that the steam has fully condensed and exits the coil at 212ºF; but in doing so, it has contributed enough energy to boil off an equivalent amount of water!
That is only the case if the water is at 212F to begin with. If its at 180F, the injector dumps the condensate but no water is boiled off. In that case, the condensate thins out the wort !

The wort doesn't gain much heat either in this instance. The enthalpy of saturated water at 180 and 212F is 180 and 212 BTUs respectfully, so the wort is only gaining 32 BTUs for every pound of condensate. Not worth it in my book.

As long as the coil continuously drains in a downwards direction, water hammer should not be an issue :). Issues only would appear if there is a U shape in the pipe.
Agreed !
 
Well, the primary advantage is that you simplify your coil design--just one downwardly spiraling coil, no holes cut in the pot :). But you would also gain a small amount of efficiency and power capacity; instead of excess steam letting off through a drain, it can bubble through the liquid and deposit the energy :).

As for when the water is sub boiling, while I see what you mean, do note that you are still inputting the positive energy from the pressurized steam, so that you are going to introduce enough energy to boil off that water later. In other words, your volume may increase a bit before you hit boil, but you'll hit boil faster and in the end boil off that water regardless :).
 
The steam injection system in the video looks interesting, much improved over the single jet method which creates large steam bubbles and a lot of noise. As to liquid heating for home brewing systems, I have been injecting superheated steam into circulating wort for step mashing going onto 10 years now, as a couple other folks have. As to boiling with steam, a member called Greenmonti has explored that area and only closed coil with external condensate dump was practical. He had went to the additional trouble of building a steam jacket for the bottom of a keg before dropping out of the forum. As you heat the wort with direct steam injection the condensate will dilute the wort as wort is heated to a boil then reach a balance as boil off occurs. Superheating the steam helps a little bit but end result is more wort at finish than you started with.
 
The steam injection system in the video looks interesting, much improved over the single jet method which creates large steam bubbles and a lot of noise. As to liquid heating for home brewing systems, I have been injecting superheated steam into circulating wort for step mashing going onto 10 years now, as a couple other folks have. As to boiling with steam, a member called Greenmonti has explored that area and only closed coil with external condensate dump was practical. He had went to the additional trouble of building a steam jacket for the bottom of a keg before dropping out of the forum. As you heat the wort with direct steam injection the condensate will dilute the wort as wort is heated to a boil then reach a balance as boil off occurs. Superheating the steam helps a little bit but end result is more wort at finish than you started with.

Agreed. The steam coil must drain the condensate outside the boil kettle.

I was injecting steam into wort back in 2007. Search my posts on this site.
 
I'm having a hard time envisioning where I want to set up my brewing area.

The garage is the logical choice in that it keeps the brewing smell out of the house and if there are spills its no big deal. But our house has a detatched garage and I'll be kind of isolated out there. That is both good and bad. I envision lots of running back and forth between the house and the garage.

The basement is another choice. I'd be closer to family when I'm brewing. We have 3 kids aged 7, 3 and 6 moths, so the closer my brewing is to them the easier it will be for me to get a brew day in. But controlling the brewing smells is a bit of a challenge. And the brewery is going to need a fair sized room, which isn't really a problem, but yet the space would be dedicated to just that, so its a bit wasteful.

We also have a really nice, big kitchen. It has a huge island. I could easily pull a 50A/240V and/or steam feed up into the island and hide them. And then I could brew right in the kitchen.

It has really good ventilation, but it also has expensive hardwood floors. A spill could make a big mess. And I'd have to drag everything (pots, chiller, hoses, pumps, controller) out of storage and into the kitchen and then put it all away when I'm done. Which would be a pain. As would moving the fermentor out of the kitchen once its full.

But I have this vision of watching TV with my family while my boil is going on in the kitchen and I'm able to get up and check it and then sit back down versus spending the day alone in the garage. Or having the mash going in the kitchen while we make and eat breakfast.

Pipe dream or practical ? Who brews an 8 or 16 gallon batch in their kitchen ? As far as I know everyone wants to get away from brewing in the kitchen.

Prior to the rebirth, I was going to brew with natgas which meant that I could brew on the deck in nice weather. With steam that isn't so easy, unless I built the boiler into the bottom of my brew stand.
 
I haven't built the coil yet. It will be a bit like an immersion coil, except that it needs to go through the side of the vessel and one end needs to be open so that the condensed steam (water) can escape.

I'm not anticipating any water hammer, but I guess it could happen if the conditions were right. I'm guessing that the drain end is going to need to be on the low end of the coil so that the condensate runs out and doesn't collect.

Does the steam come out of the top of the water heater? Won't you also either have to keep then the water heater lower than the rest of the brewstand? I'm trying to figure out how you are going to account for this. I'm assuming the water heater cannot be placed on its side due to the position of the heating elements.
 
Does the steam come out of the top of the water heater?

As long as the water has a pressure relief or room to expand, one could run the boiler itself completely full of water. Steam would then be created wherever the pressure is lessened in the line. However, that is not the traditional way to do it.

Traditionally the boiler would be run less than totally full with a significant steam volume in the boiler itself.

Won't you also either have to keep then the water heater lower than the rest of the brewstand?
As long as the water level is lower than the top of the boiler then only steam will escape from it and the water will stay put.

I'm trying to figure out how you are going to account for this. I'm assuming the water heater cannot be placed on its side due to the position of the heating elements.
It could be placed on its side, as long as the elements remain submersed. If it was laid such that the elements are horizontal, the water level would have to be just above half full.

I was researching boilers and I think that I might use a different hot water heater than the one I previously indicated.
 
As long as the water has a pressure relief or room to expand, one could run the boiler itself completely full of water. Steam would then be created wherever the pressure is lessened in the line. However, that is not the traditional way to do it.

Traditionally the boiler would be run less than totally full with a significant steam volume in the boiler itself.

As long as the water level is lower than the top of the boiler then only steam will escape from it and the water will stay put.

It could be placed on its side, as long as the elements remain submersed. If it was laid such that the elements are horizontal, the water level would have to be just above half full.

I was researching boilers and I think that I might use a different hot water heater than the one I previously indicated.

I just read through my last post, and it was less than clear what I was asking. I kant rite real good.

What I meant was, with the water hammer problem, wouldn't bringing the steam from the top of the unit and then down to whatever height of the brew stand create the hammer problem in any lower elbow joint as well?

I'm not totally familiar with the hammer thing, but the concept makes sense. I would worry about water pooling in those lower elbows.

This is just a thought. You guys obviously have done a lot more research into this than I. (I'm working on a concept for a steam system, and your threads are showing me I have a lot more to think about than I originally thought).
 
Pipe dream or practical ? Who brews an 8 or 16 gallon batch in their kitchen ? As far as I know everyone wants to get away from brewing in the kitchen.

A fraternity brother of mine does all grain on his kitchens gas stove (commercial stove, awesome apartment). He does 5 gallons now, but wouldn't have an issue with 8th.

Honestly, pulling everything out and putting it away is going to take a max of 1-2 hours AT most. I'd take that and being close to everyone during a 6 hour brew day then out in the garage alone.
 
I was thinking something more along the line of a brewstand on wheels that rolled into the kitchen. Thinking about it more, however, the isles between the counter are only 42 and 48" wide, so there isn't really room between the counter and the island to park a 20-24" brewstand in there.

However, our island is big, 5 feet x 10 feet. I could put steam or elecctric kettles up on it. The thing that bugs me though are the pump and chiller. I don't want to be running wort and water lines all over the kitchen. One always gets leaks and dribbling somewhere and the floor in our kitchen isn't really meant to withstand a bunch of liquid, especially hot liquid.
 
I did a bunch of measuring and planning this weekend.

I am not going to brew in the kitchen. Its too messy, the chance of wrecking the floors is too high, the smell will be an issue and its not safe with the kids around.

I am not going to brew in the garage. I want my brewery set up and ready to use at all times. I cannot dedicate space in the garage for that. There are other issues with garage brewing as well.

I will thus be brewing in the basement. I have a couple ideas for building a dedicated brewing space, but that will require moving walls, etc. so I am not going to start that project right now.

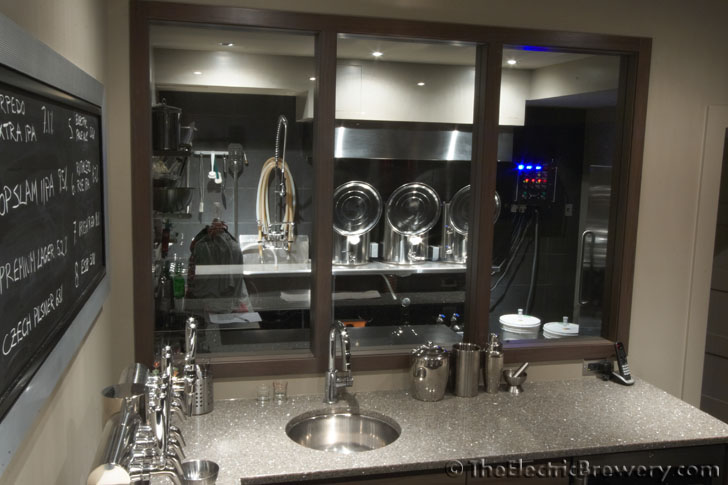
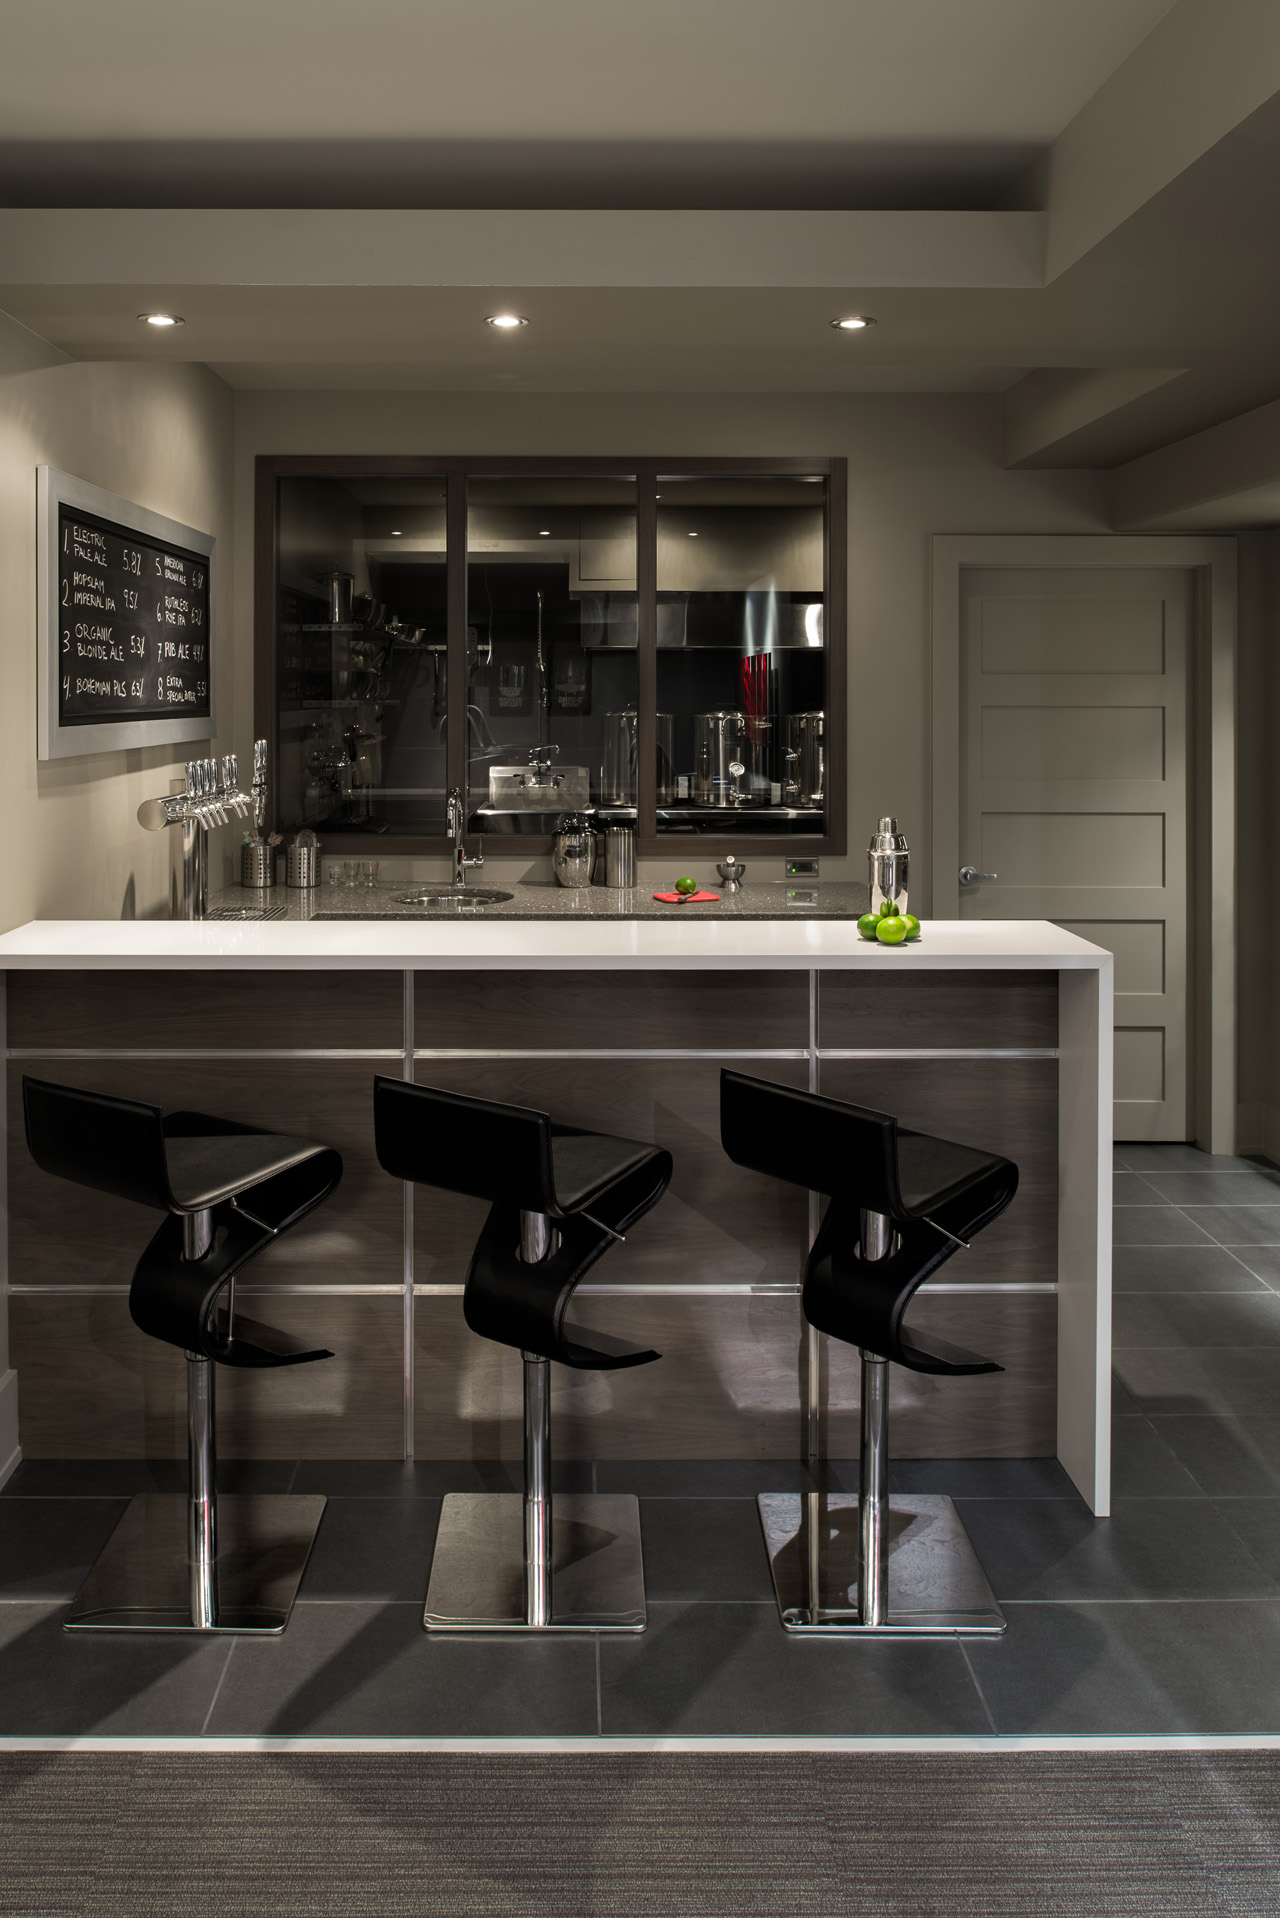
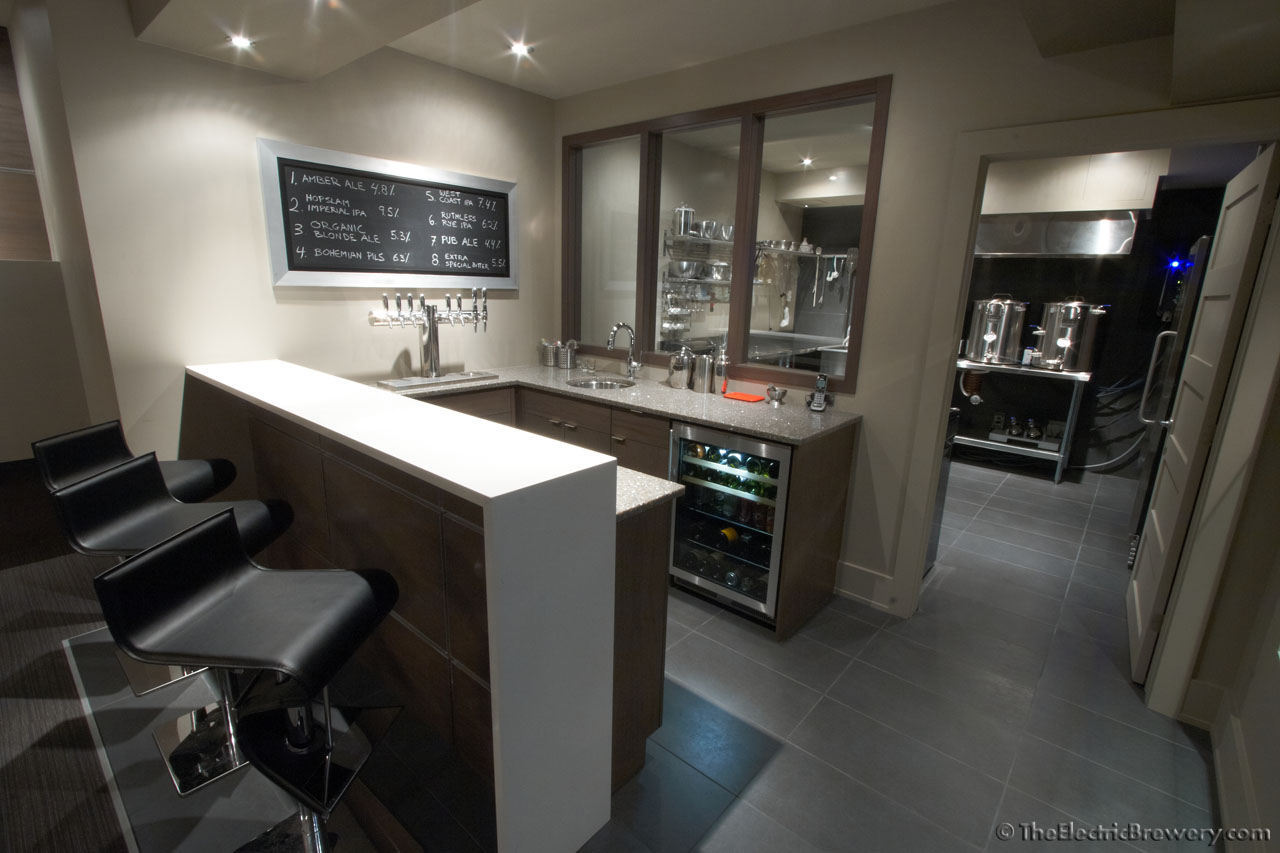
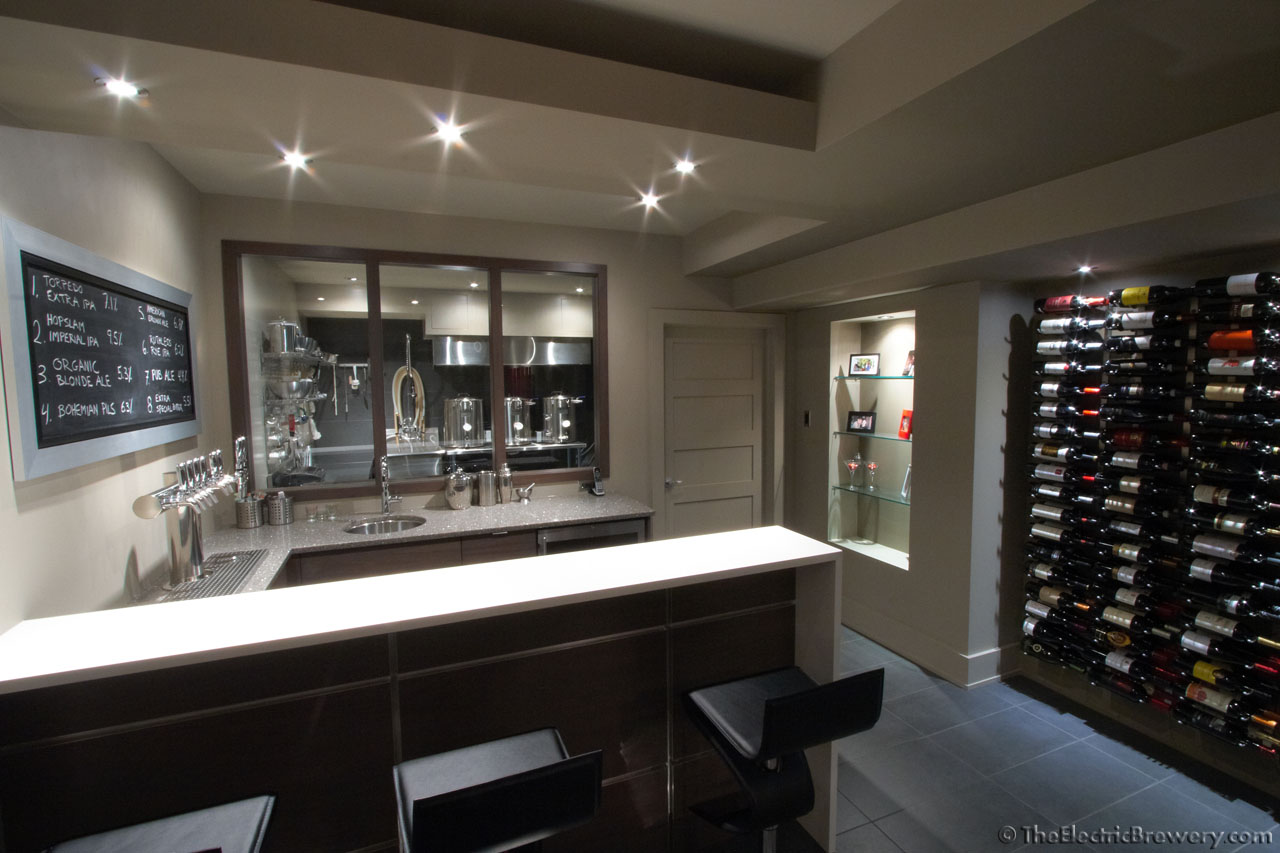
Ultimately I think the brewery is going to sit in a windowed room behind a bar that faces our games and media room, something like this:

IMG_2254.jpg


KalBasement5_1280.jpg


IMG_2922_1280.jpg


IMG_2666_1280.jpg


In the mean time, I want to get brewing ! So I'll start building and using the equipment for this setup immediately.
 
There are a couple people that want to brew with me. I foresee us doing all kinds of beers in a variety of batch setups. Single 1/2 barrel batches, 5 gallon batches, double batches, split boil batches, double batch days, etc.

In order to accomodate all this variety, I am going to set each vessel up on its own stand like this.
111422d1364495548-home-super-brewery-build-hybrid-electric-gas-3bbl-build-image-166380107.jpg


113531d1365206113-home-super-brewery-build-hybrid-electric-gas-3bbl-build-image-1621609154.jpg


I presently have 3 11 gallon vessels and 2 20.5 gallon vessels.

I'm doing this so that the vessels can be strategically arranged during a brew session and so that they can be compactly stored.

By strategically arranged, I mean that we could mash in one of the 20.5 gallon vessels and then boil in 2 11 gallon vessels. Or would could run 2 mashes at a time, side by side while running 2 boils. Or we could mash a big beer in a 20.5 gallon mash tun and boil it in an 11 gallon kettle.

I'm thinking that I'll have one 11 gallon mash tun and one 20.5 gallon mash tun, both on tippies.

That will leave 1 20.5 gallon boil kettle and 2 11 gallon boil kettles. If the need arises, I'll set up a second 11 gallon mash tun so that we could do 2 simultaneous small batches. Right now that seems like overkill.

Everything will be steam fired, of course.

I'm still working out the details of everything.
 
Some FYIs about steam.

ASME has a special designation for "heating boilers" (Section IV). Such boilers operate at pressures less than 15PSI and at temperatures of less than 250F. Boilers above these pressures/temperatures are designated "power boilers" and are subject to more stringent standards.

The copper tubing handbook states that soldered copper tubing is rated for saturated steam at pressures up to 15PSI. At greater pressures, copper tubing needs to be brazed, which is then good for 120 PSI. See table 4 here: http://www.columbiapipe.com/documents/product_info/copper_tube_handbook1.aspx

It appears that compression fittings are not suitable for use on copper in steam service. I'm not 100% sure about that though.

Here is some further discussion.
http://www.copper.org/applications/plumbing/techcorner/cu_tube_steam_systems.html

I don't want to use steel pipe for steam distribution because of the potential to rust. I may be injecting steam condensate directly into the mash tun and it would be nice if it wasn't rusty.
 
Very interesting write-up so far. I appreciate all of the research you're doing and sharing with us!
I'm interested in the steam route, but more from a jacketed approach rather than injection.

I'll be watching this thread closely :)
 
Thanks for the encouragement.

Please enlighten me. I don't understand the desire to use a steam kettle. They are expensive, rarely the right size, the pot itself is usually stainless, which has a much lower conductivity than copper and they are generally full jacket instead of 1/3 or half jacket that the beer steam kettles are.

In the back of my mind I'm wondering if a commercial steam kettle will operate properly with low pressure (15 or 30 PSI) steam. I've looked at a couple and they are generally rated for 50 PSI. The heat transfer is proportional to the temp difference, ie Tsteam - Twort. For a boil kettle, Twort is 212F. 15PSI steam is 250F, only 38 degrees above boiling. That might work with copper, but I'm wondering if it would work with stainless.

And I don't understand how you would modify one to add an output valve, etc, unless it already came with one.

So what is the desire to have one ?

I've known about steam kettles all along, but it wasn't until I realized that I could put a copper coil into a conventional kettle that I got really interested in doing this project.

The next part in my hunt is the solenoid valve, so that we can automate the temperature control. The issue is a) finding one that operates at more than 15PSI that doesn't cost a fortune. The 15PSI models are less expensive because there are lots of home heat boilers that run at 15PSI. They are called steam zone valves.

The other option is to put a servo on a regular steam ball valve. Then it could be proportional. Where does one find a big rotary servo ?
 
Back
Top